Search the Community
Showing results for tags 'export'.
-
 Is there a way in Designer/Photo to export multiple formats of the same layer when using the Export Persona? If not, I think this would be something I'd suggest for a feature request as something nice to have, but not critical.
 -
 I have to save some of my pictures at 2 MB or slightly below. Can't see how to do that.
 -
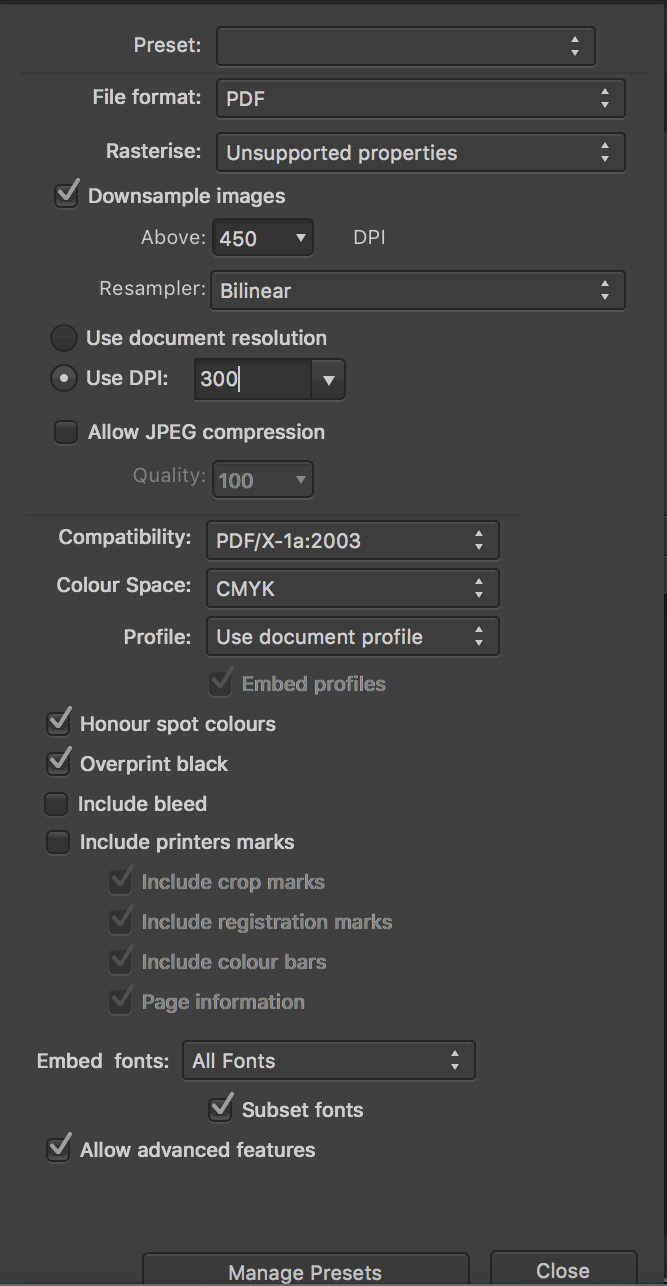
 Hello all, I'm working on Designer to create an advertising banner (to be printed). I'm exporting to CMYK PDF. The printing company requires "all spot colours to be converted to CMYK before creating the PDF". Does this have anything to do with the option "Honour spot colours"? You can find attached the presets I've used. Many thanks for your help. Nic
-
I wrote the report already. Affinity Photo is still exporting to psd incorrect. Just different result exporting to jpg (result is similar to what I see in Photo app) and psd or png (all masks are incorrect, gaps appears where was perfect joints). Similar situation with Designer. I exported in all file formats and png is terrible — opacity gradients like shadows are ugly, eps is terrible — all objects are misplaced a bit, svg is ok). So all your apps has problems with export and I am trying, trying to use it for different operations but I must use Photoshop and Illustrator finally because I am just wasting time. Software is great, I so love it but your terrible export is making me crazy and I can't use it with another software because I can get perfect result only with jpg, even PNG is bad. Do something with it please Here is previously attached screen capture video to explain the problem. Affinity bug.mp4.zip Screenshots: post-18436-0-44075800-1450183254.png post-18436-0-91374300-1450183280.png PS: jpg export was bad too but now it is ok, rasterizing feature (like on video example) and another formats exporting are still terrible. PPS: I am confused. . . When I am exporting to jpg with Export Persona to jpg, JPG file is terrible like on screenshots. When I am exporting to jpg with File-Export, image is ok.
-
 I'm running into an issue in the Export Persona at the save location Finder window where the file type always changes from that specified in the settings. It occurred when exporting a PDF and it forces a PNG. Also, in a totally separate file, it forces a JPG from a PNG export. It occurs in both Designer and Photo. Using the generic File > Export seems to work okay but in the PDF document I'm getting terrible defects on the Outer Glow effect similar to this topic. I thought it may have been a bug on my iMac but I tried the same thing on my MacBook with the same result. So I don't think re-installing the apps will correct it. Am I doing something wrong with the settings? My other thought is my files are buggy.
-
I need to be able to edit the svg's produced by affinity designer. I would like to animate them and to modify the effects. One major problem I'm having is that there is just no sensible way to export svg's through designer. Code Readability I was pretty upset to discover that the exported code was all exported on a single line, with no options to change the number of required decimal places or to format the code. I could cut down the filesize by less than half just by exporting to two decimal places of precision, which is more than enough for web use (in my cases). Lack of SVG Filters Svg filters are a must for export options. When applying an outer glow, I could use Affinity's built in tool and get a 100kb file, or use an svg filter in illustrator and get a 2kb file. On top of that, when you rasterize the filter, I can't animate it anymore on the web, which means that I just have to use illustrator to get anything done. So in summary: 1. Could you please add support for svg filters in your effects panel. I appreciate that you've got a number of very useful effects in there, but if they all get rasterised upon export, their usefulness is significantly reduced. 2. Could you please format the exported svg in a more readable way, or at least have an option to do so. A few line breaks and tabs add almost nothing to the file size, but it makes it far easier to actually read the output file and to make edits to it in code. Also, please allow us to export to a given precision that would be appropriate. in general, the exporting of svg's just needs work before I can use it in my workflow. Best regards; Saivan.
-
 Hi, I have imported a graphic into Affinity designer. on the screen it look perfect, but when trying to export it to PNG or anything else for that matter, the quality suffers greatly. I have attached my 2 file for you to see Could you help please? Thank you Anthony homepage picture 2.afdesign
-
 I wish to copy (or export) the objects including the style as plain Core Craphics Code. Like you can do it in iDraw / Autodesk Graphic. Sample: If you select the star, right click onto and choose "Copy As > Core Craphics Code". You'll get the raw Code of Core Craphics of the object and his style attributes in the pasteboard. So you could directly paste it in Xcode's code editor view. #if TARGET_OS_IPHONE CGContextRef ctx = UIGraphicsGetCurrentContext(); // iOS #else CGContextRef ctx = [[NSGraphicsContext currentContext] graphicsPort]; // OS X #endif // enable the following lines for flipped coordinate systems // CGContextTranslateCTM(ctx, 0, self.bounds.size.height); // CGContextScaleCTM(ctx, 1, -1); CGColorSpaceRef colorSpace = CGColorSpaceCreateDeviceRGB(); CGFloat scaleFactor = 1; // CGContextScaleCTM(ctx, scaleFactor, scaleFactor); /* Shape */ CGMutablePathRef pathRef = CGPathCreateMutable(); CGPathMoveToPoint(pathRef, NULL, 252.668, 378.613); CGPathAddLineToPoint(pathRef, NULL, 276.422, 300.098); CGPathAddLineToPoint(pathRef, NULL, 211.055, 250.54); CGPathAddLineToPoint(pathRef, NULL, 293.067, 248.869); CGPathAddLineToPoint(pathRef, NULL, 320, 171.387); CGPathAddLineToPoint(pathRef, NULL, 346.933, 248.869); CGPathAddLineToPoint(pathRef, NULL, 428.945, 250.54); CGPathAddLineToPoint(pathRef, NULL, 363.578, 300.098); CGPathAddLineToPoint(pathRef, NULL, 387.332, 378.613); CGPathAddLineToPoint(pathRef, NULL, 320, 331.759); CGPathCloseSubpath(pathRef); /* Drop Shadow */ CGFloat shadowColorComps[] = { 0.082, 0.09, 0.086, 0.5 }; CGColorRef shadowColor = CGColorCreate(colorSpace, shadowColorComps); CGMutablePathRef shadowPath = CGPathCreateMutable(); CGPathMoveToPoint(shadowPath, NULL, 83.5, 170.365); CGPathAddLineToPoint(shadowPath, NULL, 83.972, 171.723); CGPathAddLineToPoint(shadowPath, NULL, 110.791, 248.876); CGPathAddLineToPoint(shadowPath, NULL, 192.455, 250.54); CGPathAddLineToPoint(shadowPath, NULL, 193.893, 250.57); CGPathAddLineToPoint(shadowPath, NULL, 192.747, 251.439); CGPathAddLineToPoint(shadowPath, NULL, 127.657, 300.786); CGPathAddLineToPoint(shadowPath, NULL, 151.31, 378.968); CGPathAddLineToPoint(shadowPath, NULL, 151.727, 380.345); CGPathAddLineToPoint(shadowPath, NULL, 150.546, 379.523); CGPathAddLineToPoint(shadowPath, NULL, 83.5, 332.868); CGPathAddLineToPoint(shadowPath, NULL, 16.454, 379.523); CGPathAddLineToPoint(shadowPath, NULL, 15.273, 380.345); CGPathAddLineToPoint(shadowPath, NULL, 15.69, 378.968); CGPathAddLineToPoint(shadowPath, NULL, 39.343, 300.786); CGPathAddLineToPoint(shadowPath, NULL, -25.747, 251.439); CGPathAddLineToPoint(shadowPath, NULL, -26.893, 250.57); CGPathAddLineToPoint(shadowPath, NULL, -25.455, 250.54); CGPathAddLineToPoint(shadowPath, NULL, 56.209, 248.876); CGPathAddLineToPoint(shadowPath, NULL, 83.028, 171.723); CGPathAddLineToPoint(shadowPath, NULL, 83.5, 170.365); CGPathCloseSubpath(shadowPath); CGMutablePathRef clipPath = CGPathCreateMutable(); CGPathMoveToPoint(clipPath, NULL, 202.107, 159.365); CGPathAddLineToPoint(clipPath, NULL, 438.893, 159.365); CGPathAddLineToPoint(clipPath, NULL, 438.893, 391.345); CGPathAddLineToPoint(clipPath, NULL, 202.107, 391.345); CGPathCloseSubpath(clipPath); CGPathMoveToPoint(clipPath, NULL, 320.5, 170.365); CGPathAddLineToPoint(clipPath, NULL, 320.028, 171.723); CGPathAddLineToPoint(clipPath, NULL, 293.209, 248.876); CGPathAddLineToPoint(clipPath, NULL, 211.545, 250.54); CGPathAddLineToPoint(clipPath, NULL, 210.107, 250.57); CGPathAddLineToPoint(clipPath, NULL, 211.253, 251.439); CGPathAddLineToPoint(clipPath, NULL, 276.343, 300.786); CGPathAddLineToPoint(clipPath, NULL, 252.69, 378.968); CGPathAddLineToPoint(clipPath, NULL, 252.273, 380.345); CGPathAddLineToPoint(clipPath, NULL, 253.454, 379.523); CGPathAddLineToPoint(clipPath, NULL, 320.5, 332.868); CGPathAddLineToPoint(clipPath, NULL, 387.546, 379.523); CGPathAddLineToPoint(clipPath, NULL, 388.727, 380.345); CGPathAddLineToPoint(clipPath, NULL, 388.31, 378.968); CGPathAddLineToPoint(clipPath, NULL, 364.657, 300.786); CGPathAddLineToPoint(clipPath, NULL, 429.747, 251.439); CGPathAddLineToPoint(clipPath, NULL, 430.893, 250.57); CGPathAddLineToPoint(clipPath, NULL, 429.455, 250.54); CGPathAddLineToPoint(clipPath, NULL, 347.791, 248.876); CGPathAddLineToPoint(clipPath, NULL, 320.972, 171.723); CGPathAddLineToPoint(clipPath, NULL, 320.5, 170.365); CGPathCloseSubpath(clipPath); CGContextSaveGState(ctx); CGContextAddPath(ctx, clipPath); CGContextClip(ctx); CGContextTranslateCTM(ctx, 2, 5); CGContextSetShadowWithColor(ctx, CGSizeMake((237 * scaleFactor), 0), (5 * scaleFactor), shadowColor); CGContextSetRGBFillColor(ctx, 0, 0, 0, 1); CGContextAddPath(ctx, shadowPath); CGContextFillPath(ctx); CGContextRestoreGState(ctx); CGColorRelease(shadowColor); CGPathRelease(shadowPath); CGPathRelease(clipPath); CGContextSetRGBFillColor(ctx, 0.816, 0.82, 0.816, 1); CGContextAddPath(ctx, pathRef); CGContextFillPath(ctx); CGContextSetLineWidth(ctx, 1); CGContextSetRGBStrokeColor(ctx, 0.325, 0.306, 0.314, 1); CGContextAddPath(ctx, pathRef); CGContextStrokePath(ctx); CGPathRelease(pathRef); CGColorSpaceRelease(colorSpace);
 -
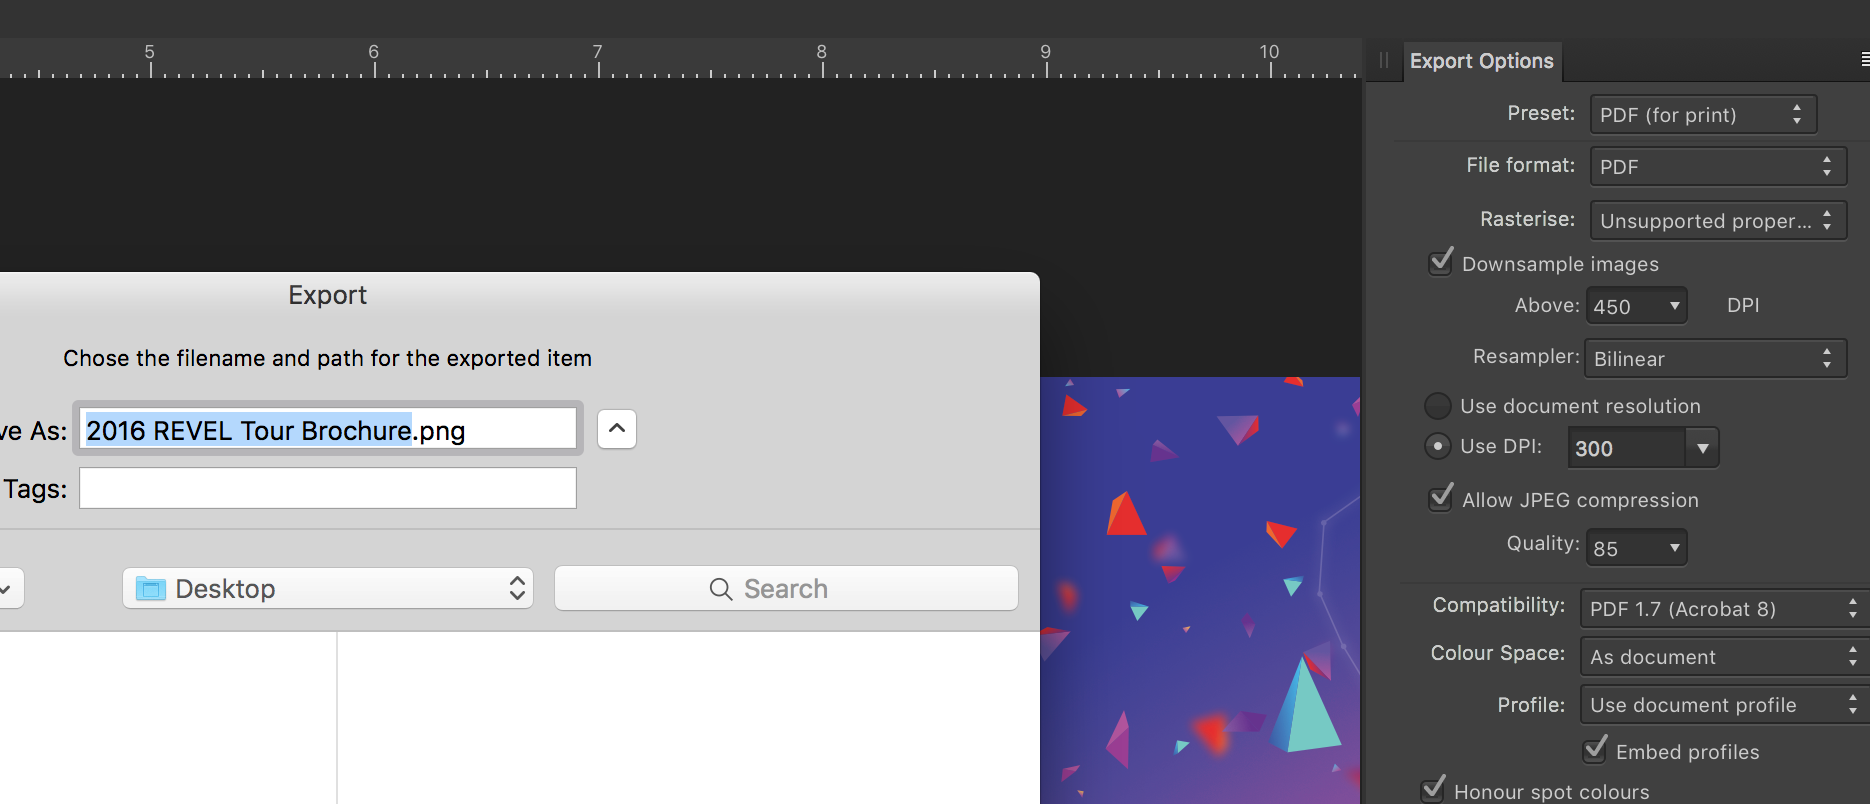
 Hi, I'm desperately trying to export to a PDF with embedded ICC profile (CMYK in some flavour). My document color space is CMYK/8, I have checked all the options similar to "PDF for export" in the export persona or the export menu, see first screenshot. Still, the PDFs which are created do not contain an ICC profile when I import them into inDesign (second screenshot) or when I open them in Preview. Designer 1.4.1 I got the feeling that I'm missing something very obvious. Any help is highly appreciated. Cheers, Jens
-
 I am trying to export this file: https://www.dropbox.com/s/ai7jj8zmawo9i12/Poster%203.afdesign?dl=0 (111MB) as a pdf document. I have tried different settings and color profiles but the result is always the same and the colours are more saturated in the pdf document. I have attached two rasterised version you can compare, one exported directly from Affinity Design and the other is the pdf rasterised by Preview. I have checked that the exported pdf file looks the same in Adobe Acrobat Reader. How can I export to pdf and preserve the colours?
-
Hi All! Exporting to .DXF would be really useful to use drawings in CAD programs later on. This is regularly used for laser cutting and cnc milling. Cheers! Mathijs
-
 Maybe a side effect of what I was used to before AD (let's call it Anno Designer -AD- :P), but I greatly appreciate the automatic selection of "Export Selection" mode (as opposed to "Export whole document") in packages such as Pixelmator or OmniGraffle when you choose Export with something highlighted, and I miss it in AD. Is there a way I can achieve that in AD? At the moment, everything is driven from the document size but if you're experimenting you just set up a large canvas and try out ideas, and to then have to hammer everything back into a specific document size is quite an enterprise - ironically losing the whole benefit of vectorisation to pixel related issues. So far, the only way way I have found to exercise some control is by using an Export Persona Slice, but here too, you must start with first mapping the elements you want to export into one group, as the slice creation tool will otherwise create a slice for each component. Maybe a modifier to the "Create Slice" button would help. If you could alt-click or shift-click to create one SINGLE slice of all the selected layers instead of a herd of individual slices of each selected layer it would already be a big step forward. Anything I missed?
 -
 Hello! I don't normally work in creating graphics for print, but one of my clients has requested a print ad. The information from the newspaper says: All ads MUST be submitted in Adobe PDF (Portable Document Format). All fonts and graphics must be embedded. Can I do this with Affinity Designer? Are fonts and graphics embedded by default or is there something I must do to make this happen?
 -
 Dear all, I have set up an artboard in Designer, that I now want to export as a PDF, as it will be printed as a poster. Unfortunately the PDF export crashed the program every time and after a reboot, the status bar runs to about 20% and wont move any further. I have already converted all my text sections to curves, but that won't help either. The complete Affinity file is 175 MB, so it would be a problem to upload, I'm afraid. :( Any idea someone?
 -
 More or less a newbie in photo editing I decided to give Affinity a try. I am quite enthusiastic; it works comfortably and remarkably fast, even with RAW files. Problem: I tried to export a jpg file as pdf. It did not work, neither on my iMac, nor on my Macbook. No idea what went wrong: I tried a workaround, inserting the same jpg file into a Writer document, and received a perfectly normal printable file. Should I wait patiently until the next update?
 -
 Hi! I'm trying to export to a PDF for print and am having some issues. When ever I export from Designer to a PDF, the program only exports the bottom half of the project. I have tried this multiple times and to no avail it happens the same everytime. I have even deleted the old file, changed the name, etc. Nothing seems to work. Any help is appreciated! Thanks!
 -
 Hey. I just downloaded Affinity Photo Trial to test if this software have export support for devices with iOS. I am happy that it have but how i can downscale image? I have icon 26x26 px and i want downscale this image. This export option with chechboxed is upscaling it. How i can do that? Thx
 -
 Elements of my design are being lost on export: background shapes that I've applied gaussian blur or transparency to are completely GONE in the exported image. I've tried just about every one of the export presets to no avail, including those that claim to flatten. Export to png worked just fine the first time I tried it as a proof, but subsequent exports have the problem I've described above. Any idea what I might have done to cause this to happen?
-
 Hello. I love Affinity Photo. I was happy to move from Adobe PhotoShop to Affinity Photo when I first discovered it. That said, there are a number of features that were very useful to me in Adobe PhotoShop that appear to be missing from AP. If some of the following features are in fact missing, is somebody able to tell me when/if they will be included? Full-screen preview shortcut Preview the whole document in full-screen without the borders of the UI with a shortcut command. Just the one shortcut command - not a series of shortcuts. Also, I don't wish to use the 'toggle full screen' option as the transition needs to be instantaneous. Compare to the original photo (prior to modification) shortcut Sometimes it is very useful to see how far you've come - to check how the original looked, with one shortcut. On/off preview button when making adjustments/adding filters Currently, mirror view and split view exist as ways to compare the modification to the original. But why not a simple on/off button? I would prefer that to the existing options. Export image preview quality During the export stage as you are deciding how to compress your image, it would be beneficial to have a preview showing what the image will look like under those compression settings. It would better allow to manage how to export an image in reduced file size but maintain good quality. Edit image EXIF data When uploading an image to the Internet, I want to first be able to strip private information such as GPS coordinates. Apart from what, I would to append additional information to an image in the EXIF information. Merge colour tones from another image. I remember PhotoShop had a feature that allowed you to adjust the colour of an image based upon the palette of another image. This was very useful if you had one image where the colours were all wrong in a collection where the colours were fine. So you could tell the editor to take the yellow from the better image and tell the worse photo "that's what yellow is meant to look like", and it would correct the whole photo based upon that adjustment. Merge exposure from another image Same principal as above. You tell the editor that you want the exposure levels of one image to translate to another image.
 -
Recently I've needed to quickly export identical images in various formats, including .pdf, .png, .svg, .jpg, and so on—and also with varying file sizes. Since the image doesn't need to be any different in any way other than file format and resolution, it is unnecessarily time-consuming to always have to readjust the settings every time I edit the file and have to re-export the many versions of the image or to try and manually make a load of identical slices. It would be much easier if I could duplicate a slice and then adjust the duplicate slice's export options. That would mean I could quickly create five-or-so slices of the same dimensions and position—just with differing export options, and then make edits to the image and just export simultaneously in different formats, but with the same area of the image being exported.
-
- 4
-

-
- Export Persona
- Slices
- (and 1 more)
-
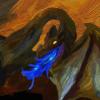
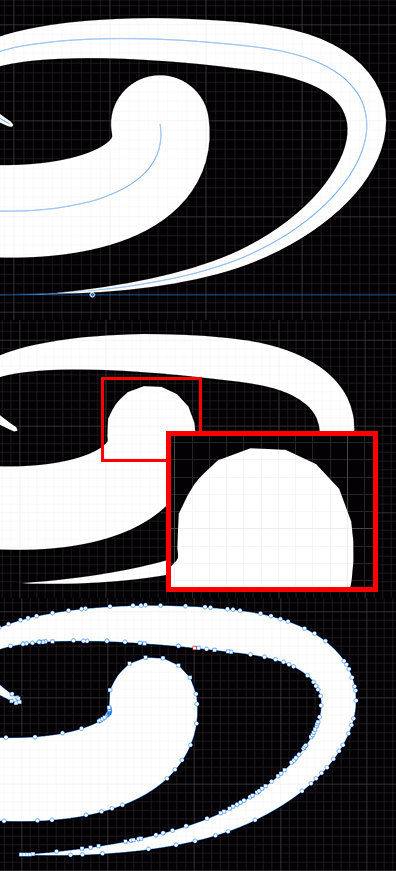
 Hi, I draw some strokes for a logo (look at the attached picture). I used strokes and changed the pressure to have different width along the line. The end of the stroke is round. I wanted to export my work in eps format to be able to print it ou use it with Illustrator... I saw in the eps file in illustrator that the round of my stokes became broken lines. Come back in AD, I decide to vectorise the stroke (layer menu). In french it's called "vectoriser le contour". And I obtain the same result : broken lines... Is it a normal behavior ? I also wonder why there are so many nodes (and no tools to simplify all those nodes). It's very difficult to change/adjust quickly the curve with so many useless nodes !! I hope my explanation is clear. Thank you.
-
would be very useful if program can import and export 2D CAD.
-
 The issue is simple, the solution IMHO even simpler (it should just work) 1. Create a new DOC in AD with the highest possible settings - Either a QFHD Web Doc with 74 DPI or a Custom DOC with 400 DPI 2. Draw a Circle with 1000px * 1000PX 3. Switch to Pixel View (to see how it will look once exported as a PNG) 4. Zoom up and see the border of the Circle as in my screenshot "Bad" 5. Switch off Pixel View and see the border of the Circle as in my Screenshot "Good" I want to be able to create a simple thing in AD, and export it as seen in "Good" Instead, if I export as PNG, I get "Bad" I also want to be able to create this as a 1000*1000 Circle, and freely resize smaller with the h/w settings, export. Instead results are worse. I am used to AI and there you just do this without even thinking of bad results. Please elaborate how you can export a object created with AD, to a PNG, without having borders/details/etc pixeled instead of a "neat line" That is simply a must. I understand that AD is way cheaper then AI but if a simple thing like the above is not possible with AD, I do not see the sense in buying a license. Thank you
-
 Im trying to export a file in PDF and on my clients computer it keeps saying the file Im sending him is corrupt. Any information is helpful thankyou. -Chris
 -
 How to export .png file with centimetres and not only pixel. Hope someone can help. Best Regards Søren