Search the Community
Showing results for tags 'effect'.
-
 I'm not sure if this a bug or if I'm doing something wrong. When I export Group 2 as png from "Selection without background" the png has a height of 53px when the inner glow effect on a descendant of Group 2 is on. I get a height of 47px when exporting when the inner glow effect is off. This makes it very hard to create exact icons. I'd understand if the problem would only occur when the effect is bigger than the shape but the inner glow doesn't exceed the boundaries of the circle. I'm using version 1.5.0.12 Selection_Export_Height_Diff.afdesign
 -
 Hello - I need some help I attached some photo's to better explain the problem I am having. I am printing a Art Board with my finished work - it looks just fine on screen - but when I print it, the finished result is very different. One problem is text is much larger then what is seen on Art Board. The Text has a Bevel/Emboss Effect, but when printed it's all strange and cut off. Under the text is a shadow which was done by copy/paste/flip and then converted into curves to align, grouped and then given a Linear Gradient Fill. The image of the car was given the same Bevel/Emboss Effect and the shadow is the same as the Text. I've never had a problem when I print - this is the first time since the latest update. Am I doing something wrong? Any help would be greatly appreciated. Thanks
 -
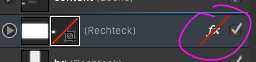
Hi, I was missing an obvious option to remove a layer fx, for example by: 1. context menu (RMB) 2. an entry in menu layers (plus shortcut) 3. via drag 'n drop (like in Adobe Phoooooop) Up to now, I had seen me forced to click on the fx icon and then deselect all used fx (in worst case all 10) to get rid of the fx. Together with all the mouse movements too much clicks and precise mouse work. WORKAROUND (I just found today): w1. CMD+C on an element with no layer fx (and no style) w2. CTRL+CMD+V to paste the fx So now this feature request can be seen as low-prio/cosmetic :) Keep continue working on this great piece of software, Stefan. see also: https://forum.affinity.serif.com/index.php?/topic/24663-toggle-layer-fx-onoff/
-
Hi, it would be great to have the same functionality for show/hide layer effect by using the modifier SHIFT as it is already implemented for layer masks Thanks in advance, :) Stefan.

-
 Hi, in diesem Affinity Photo Tutorial zeige ich wie man den Metall Text Effekt erstellt. Da man dazu einen Metallverlauf braucht, der nicht standardmäßig in Affinity Photo enthalten ist, habe ich bereits ein weiteres Video, wie man einen Metall Verlauf erstellt, gemacht: YouTube Tutorial: Metall Verlauf erstellen und speichern Wenn Ihr bereits wisst wie man einen Verlauf erstellt, so zeige ich ihn hier kurz mit den Farbcodes. Hi, In this Affinity Photo Tutorial, I show you how to create the metal text effect. Because you need a metal gradient, which is not included in Affinity Photo, I provided already a video, where I show how to create a metal gradient: YouTube Tutorial: create, save & export a metal gradient If you already know to handle the gradient tool, I show here the metal gradient including the color codes. Farbcodes Metall Verlauf (von links nach rechts) / color codes gradient (from left to right): #656C72 #F1FAF9 #848587 #595959 #919B9D #66686C Have fun with the video. Ciao Jack YouTube Video: Metall Text Effekt
- 3 replies
-
- 2
-

-
- Affinity Photo
- Metall
- (and 4 more)
-
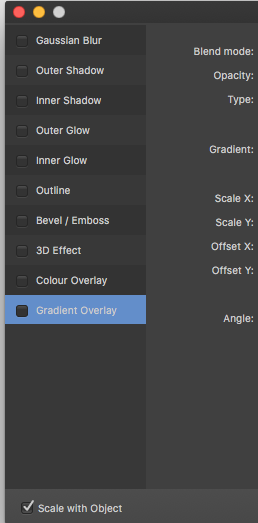
 Hello everyone! I want to start by saying that I am by no means a designer, I just started learning about vector graphics and design last week, so sorry if my question is basic. I started using iDraw then I switched to Affinity Designer. My question is: can I use more than one effect of the same type? For example, for the same shape, have two or three drop shadows? I don't see any "+" signs to add a new effect or to duplicate an existing one. Also, can I select and copy the settings for an effect to apply them to another shape? Thank you.
 -
 I've tried the "Scale with Object" option, but it can work only grouped elements. Can It work with Artboard? Please help.
-
 Is noise a vector or raster effect? I would like to create vector images, but will adding noise compromise this?
 -
Hi all, i'm Gabriele and i'm new of this software. I've start to use and try to find a way to get the best of my photo. I've a first question. When i had use CS6 i used often the oil painting filter to give a "Van Gogh" sensation to my photo. There's something for Affinity? Thanks a lot for your answer :)
-
Somebody please help me. I've made different boxes designs and I need to copy only shadow effect to other boxes. :wacko: Somethings like 'Paste Layer Style' in Photoshop
-
 Is there a way to apply the "scale with object" globally, like a preference after the fact? I have a bunch of objects that I should have had the "scale with object" turned on for as I created them. Just wondering if there is a way to apply it now or do I have to individually select each and every object and apply it manually? Thanks.
 -
 This was done in Gimp How would you do it in Affinity Photo?
-
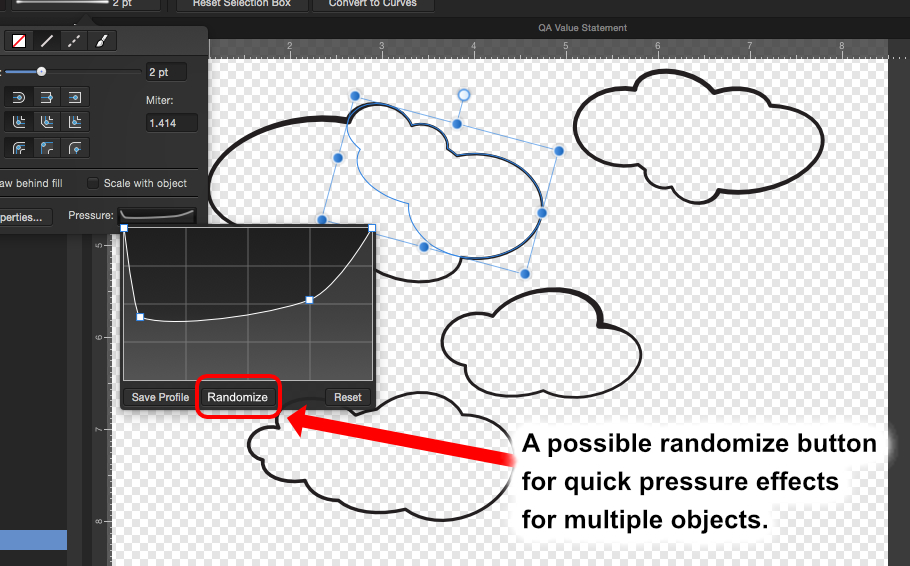
 Hello, I was creating of set of cartoon clouds in Designer using the non-destructive object merge feature (awesome! and a huge time saver), however after a number of them were produced, I wanted to keep the "pressure" outline effect on them, however I did not want all of them to look the same to maintain the freehand look. With all the time-saving features in Designer, I hit a speedbump when it came to adding the pressure with the curves adding nodes in the palette as I had to select every cloud individually to "randomize" them manually. I would guess 99% of the time manual tweak is preferable but in cases like my cloud drawing task, a "dice-like" randomize curves feature could be very cool. Hopefully my screenshot better explains what I am describing. Would this be difficult to implement? Thank you
-
.thumb.png.1182385d428e0ead61b38b83605a4298.png) If I create a text block and give it a drop shadow that text block will get rasterized if I export the file to PDF. That reduces the quality of the PDF significantly (no sharp edges, text not selectable). Is that normal or will that change in a later version of Affinity Designer? Also shapes with certain gradients (elliptical, conical) get rasterized without a vector clipping path. That means the shape no longer has a sharp edge. Will that change? Thank you! :) Rasterization.afdesign Rasterization.pdf
If I create a text block and give it a drop shadow that text block will get rasterized if I export the file to PDF. That reduces the quality of the PDF significantly (no sharp edges, text not selectable). Is that normal or will that change in a later version of Affinity Designer? Also shapes with certain gradients (elliptical, conical) get rasterized without a vector clipping path. That means the shape no longer has a sharp edge. Will that change? Thank you! :) Rasterization.afdesign Rasterization.pdf -
Hi, I have worked during one day to test or to evaluate the possibilities of Affinity Designer. First : no crash during this (very long) session : Good job ! But, I have some difficulties : - I don't found the posiibility to copy/paste a color (and only the color) or to copy/paste an effect. It's... laborious. :-) - Some bahavior are strange : when I resize on object, I use the Shift key to respect the ratio. When I resize a text, I use the Shift key NOT TO respect the ratio. - I don't find the possibility to align an object to an other one without moving the second one. I don't success what I want to do. - when I type a precise value in an input field (for sizing an object for example), if touch the top of my mouse : the value is changed !!! It's very very boring ;-) Well done, it's sorme ergonomic details. Of course, I appreciate that coulod be solve... yesterday ;-) Thank you for this very powerful product. Thank's for your help Fabrice - From Bordeaux (France) PS : An other suggestion : translate it in french !!!! PS 2 : http://www.plannning-medical.com ( The logo was created with Affinity Designer, the previous version and the other graphics elements was created with Illustrator).
-
 Hi, I have just started using this great piece of software today and I want to apply a different grunge effect to two different layers. However when I use the mask it masks out all my layers. Is there any way to make the mask apply only to chosen layers? Thanks for any help :)