Search the Community
Showing results for tags 'effect'.
-
 Layer Blending Modes and Blur Effect Hi, …I just have a question regarding Layer Blending Modes and a Blur Effect. Is there a trick for applying a Blur, delimited by a vector object (Object A) located in the foreground, on a background (Background B) located behind?… The idea is to be able to move Object A over the entire surface of Background B, always with this quality of Blur which then applies to Background B. The solution, one-off and much less flexible, is to create a new Group (Group C), duplicate Background B in this group, apply a mask to it with Object A and a “Gaussian Blur” layer effect. But, if we move this Group C, it will no longer be aligned with Background B!…
 -
 Welcome to our channel! In this tutorial, we'll show you how to effortlessly achieve a mesmerizing glossy text effect in just a matter of seconds using the powerful 'Macro' feature in Affinity Photo. Whether you're a beginner or an experienced user, this step-by-step guide will take you through the process of creating a professional-looking glossy text effect that will add a touch of elegance to your designs. No need for complex editing - let the 'Macro' feature do the work for you! Join us as we explore the wonders of Affinity Photo and unlock the potential of this time-saving tool. Watch now and take your text designs to a whole new level! Don't forget to like, subscribe, and hit the bell icon to never miss an update. Let's get creative together!
- 4 replies
-
- 4
-

-
- affinity photo
- text effect
- (and 6 more)
-
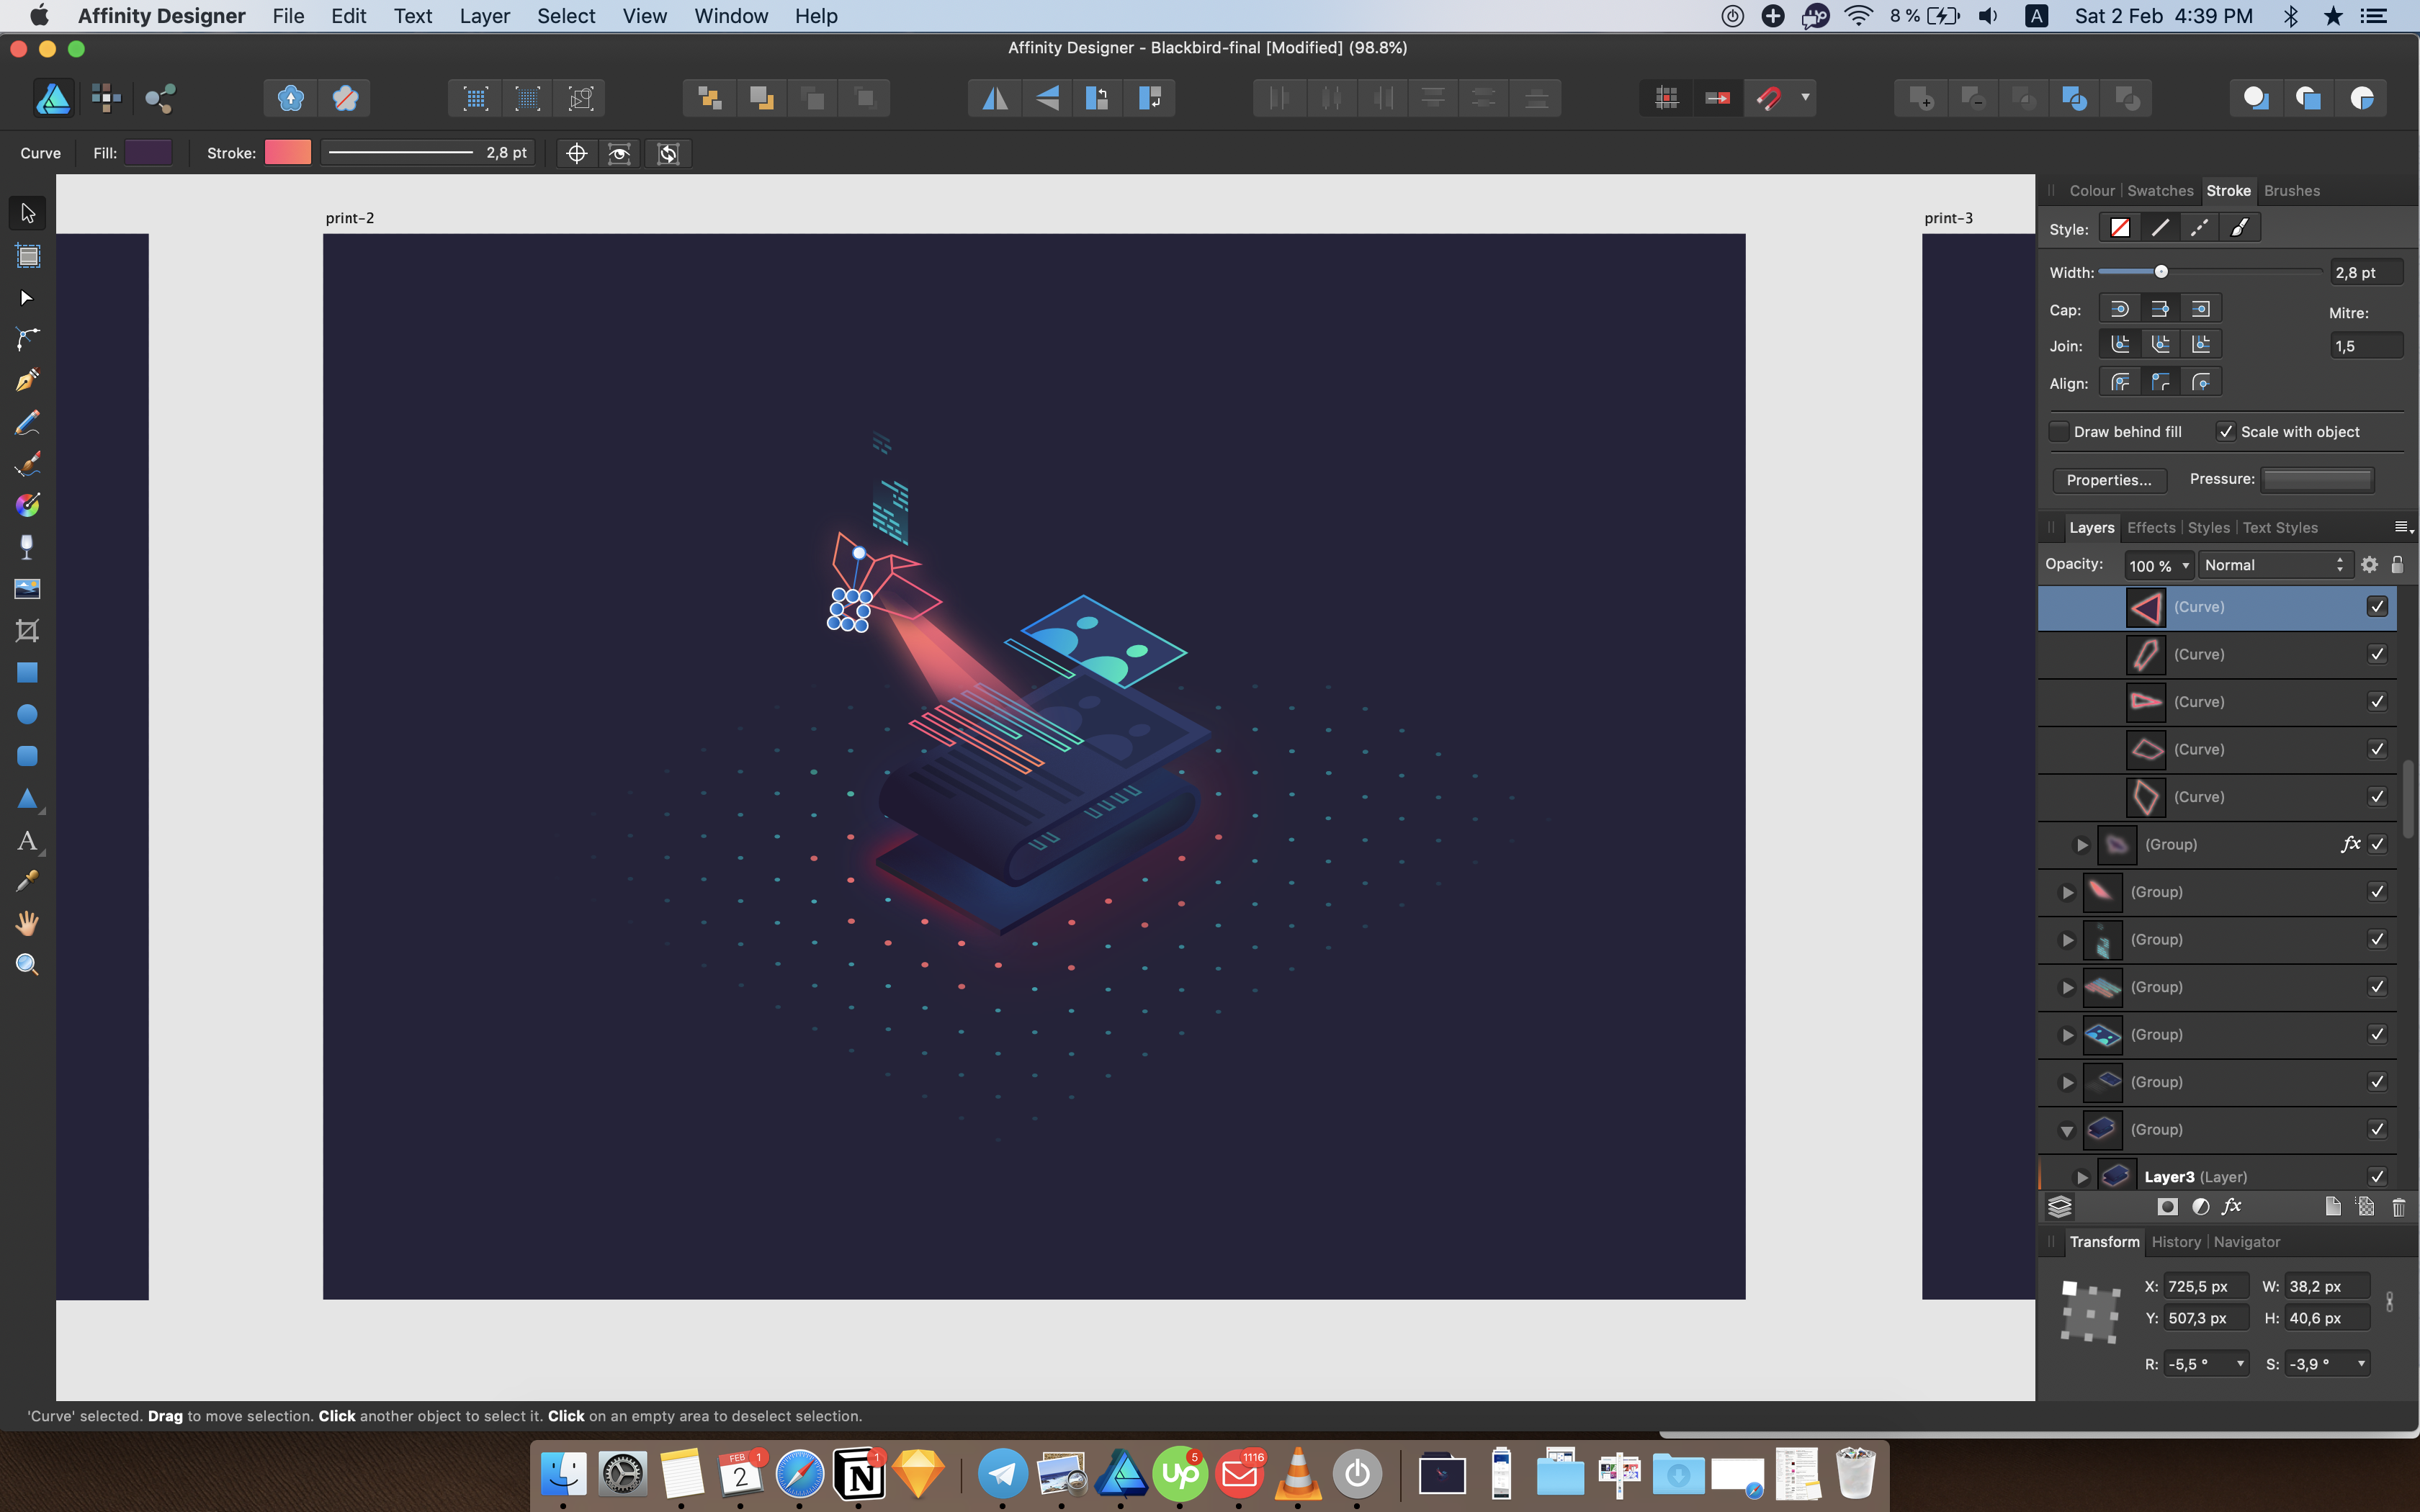
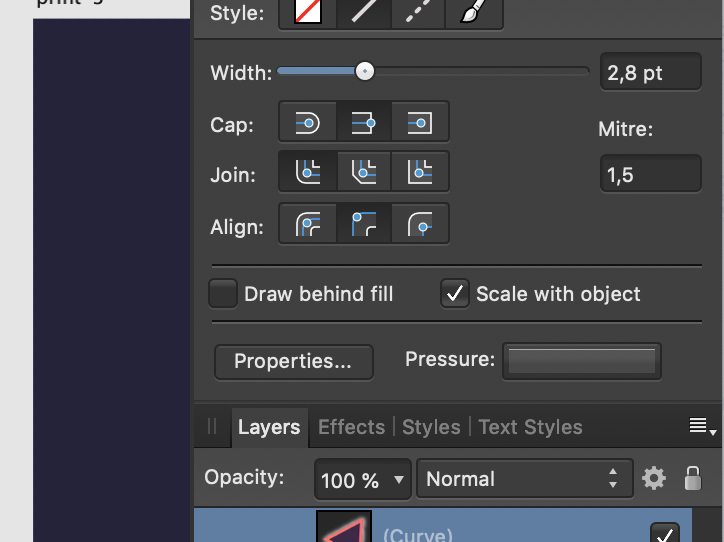
 I ran into an issue where, if you duplicate symbols after applying an effect from another layer/ symbol/ group, the symbol is no longer duplicated as a symbol. Instead, it becomes a group. The bug is displayed towards the end, in the screencast, I also show that this wouldn't happen otherwise and that it is caused by the layer effect, not by the disabled symbol syncing. The bug part starts at 1:10. 2023-01-12 12-55-34.mp4 Steps to reproduce 1. Create a symbol 2. Duplicate the symbol 3. Disable syncing symbols 4. Add an effect to either a copy of the symbol or to an altogether different object 5. Drag the effect from to another copy of the symbol 6. Duplicate the symbol (from step 5) in the layers panel 7. Notice how the copy of the symbol becomes a group Also note that at 1:10 in the video, you'll see me dragging an effect of the symbol to the other symbol. Designer for some reason sometimes won't accept this. That's another bug, which since the two are related, I also report it in the same bug report. Workflow in which this occurs I have outlines applied to my symbols and to align them over other objects, I sometimes turn off the effect. It is then easier to re-enable the effect by dragging it from another symbol. I also tend to copy symbols if they are rotated, so I can preserve their rotation.
 -
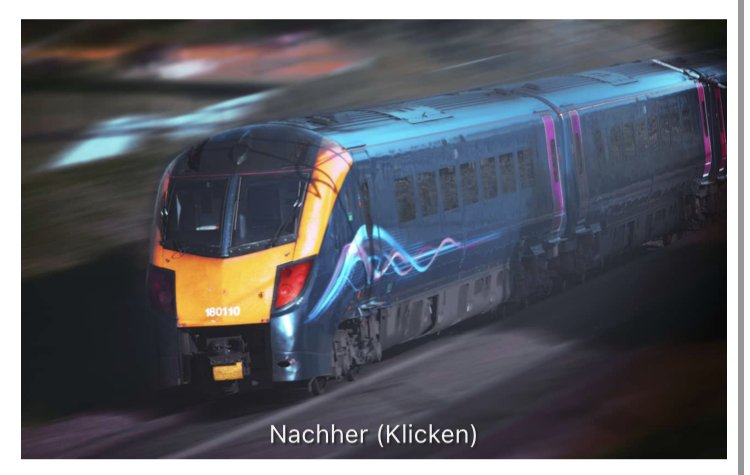
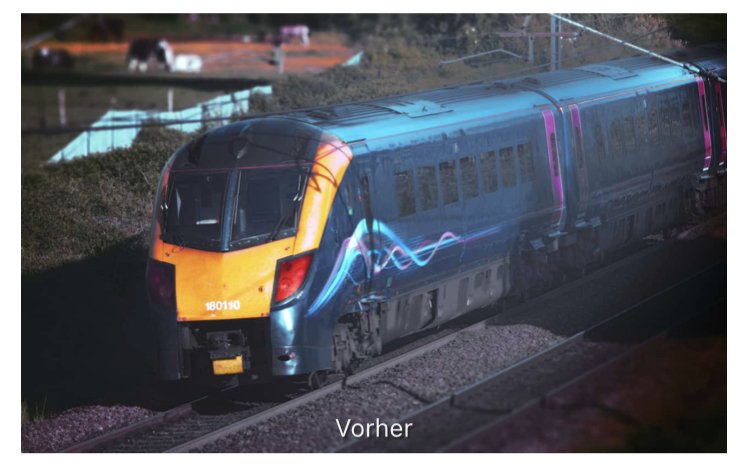
 hello, can you tell me how to get a partial motion blur effect on my pictures (like on the picture)? Does Affinity have something similar to the photoship „path blur“ tool? thanks alot greetings patrick
-
-
This is something that I feel is kind of missing from the effects board. While having both overlay color and the fringe option - one still feels like its missing. The "Fill-Effect". Having a Fill-Effect would be a huge improvement when thinking of a more non destructive workflow. This would be especially helpful for artists that work with outlines and want to reduce the layer count while still maintaining a non destructive workflow. This fx could come with modes like these: - Símple Fill-In which searches the outlines of and object/lines inside of the outest outline and fills the spaces that do not yet have any pixels in them. - Fill the whole image (fills the whole layer with all the outlines similar to overlay color but also fills any gaps inside the main outline of the layer) -> This could help creating black versions of objects for more simplified artstyles, masks or sillouettes) (- Fill the whole background behind an object - including outlines) An export fill option would be super helpful here btw - so you are able to just click a few buttons and fill out the whole object without having to fill out each single space on your own. This would give artists the option to create a backlayer quickly while keeping the outline layer separate if they want to. Also, if the artist would change an outline the object would still be filled perfectly which would safe a lot lot of time not having to erase background of add new background to the outline. Please consider adding this. It would make so much so much easier. Greetings, Chris
-
 Hi guys, here's a new video about how to create a dotted text effect in Affinity Photo. I hope you enjoy this video, thank you!
-
- 1
-
-
- affinity photo
- tutorials
- (and 5 more)
-
 Hello All! I have a old scan of an image, nice details, but the colour is distinctly stronger towards the right hand side than the left, and it appears to change very smoothly. So, what I want to do is adjust the colour saturation, so that the left edge gets a strong colour boost, with the effect fading left to right, so the right edge is not affected. Is this possible please? All clues gratefully received! Thank You, Nick
 -
Below is a snap to help explain what I'm saying. I want to change the green fade to a blue fade. In order to do this I must type in the four CYMK or the three RGB numbers since I cannot drag a color or use the swatches panel to change a color in an effect. One day I hope this can be worked out, I would really be happy if I could use the eye dropper tool to click on the blue adjoining the green fade and have that happen as I work in the color area of the effect panels. That would be a huge help rather than looking up the colors numbers and typing them in.
-
When using Gaussian Blur on objects in Affinity Designer (Mac version), I am always seeing an undesired color banding side effect, as you can see on the attached screen shot. I'm not encountering this issue with other graphical applications. As far as I can see it, the root cause seems to be that Designer does not use dithering for Gaussian Blur effects, even though it does dithering for gradients. Are there plans to address this? Or are there plans to support Photoshop filter effects in Designer, like it is already supported on Photo side? Because then we could use some Photoshop plugin as a workaround instead of using Designer's integrated blur effect. I find this an important issue to be addressed, since blur effects are some very fundamental technique for vector based illustrations. Using: Affinity Designer 1.8.4 on Mac.
-
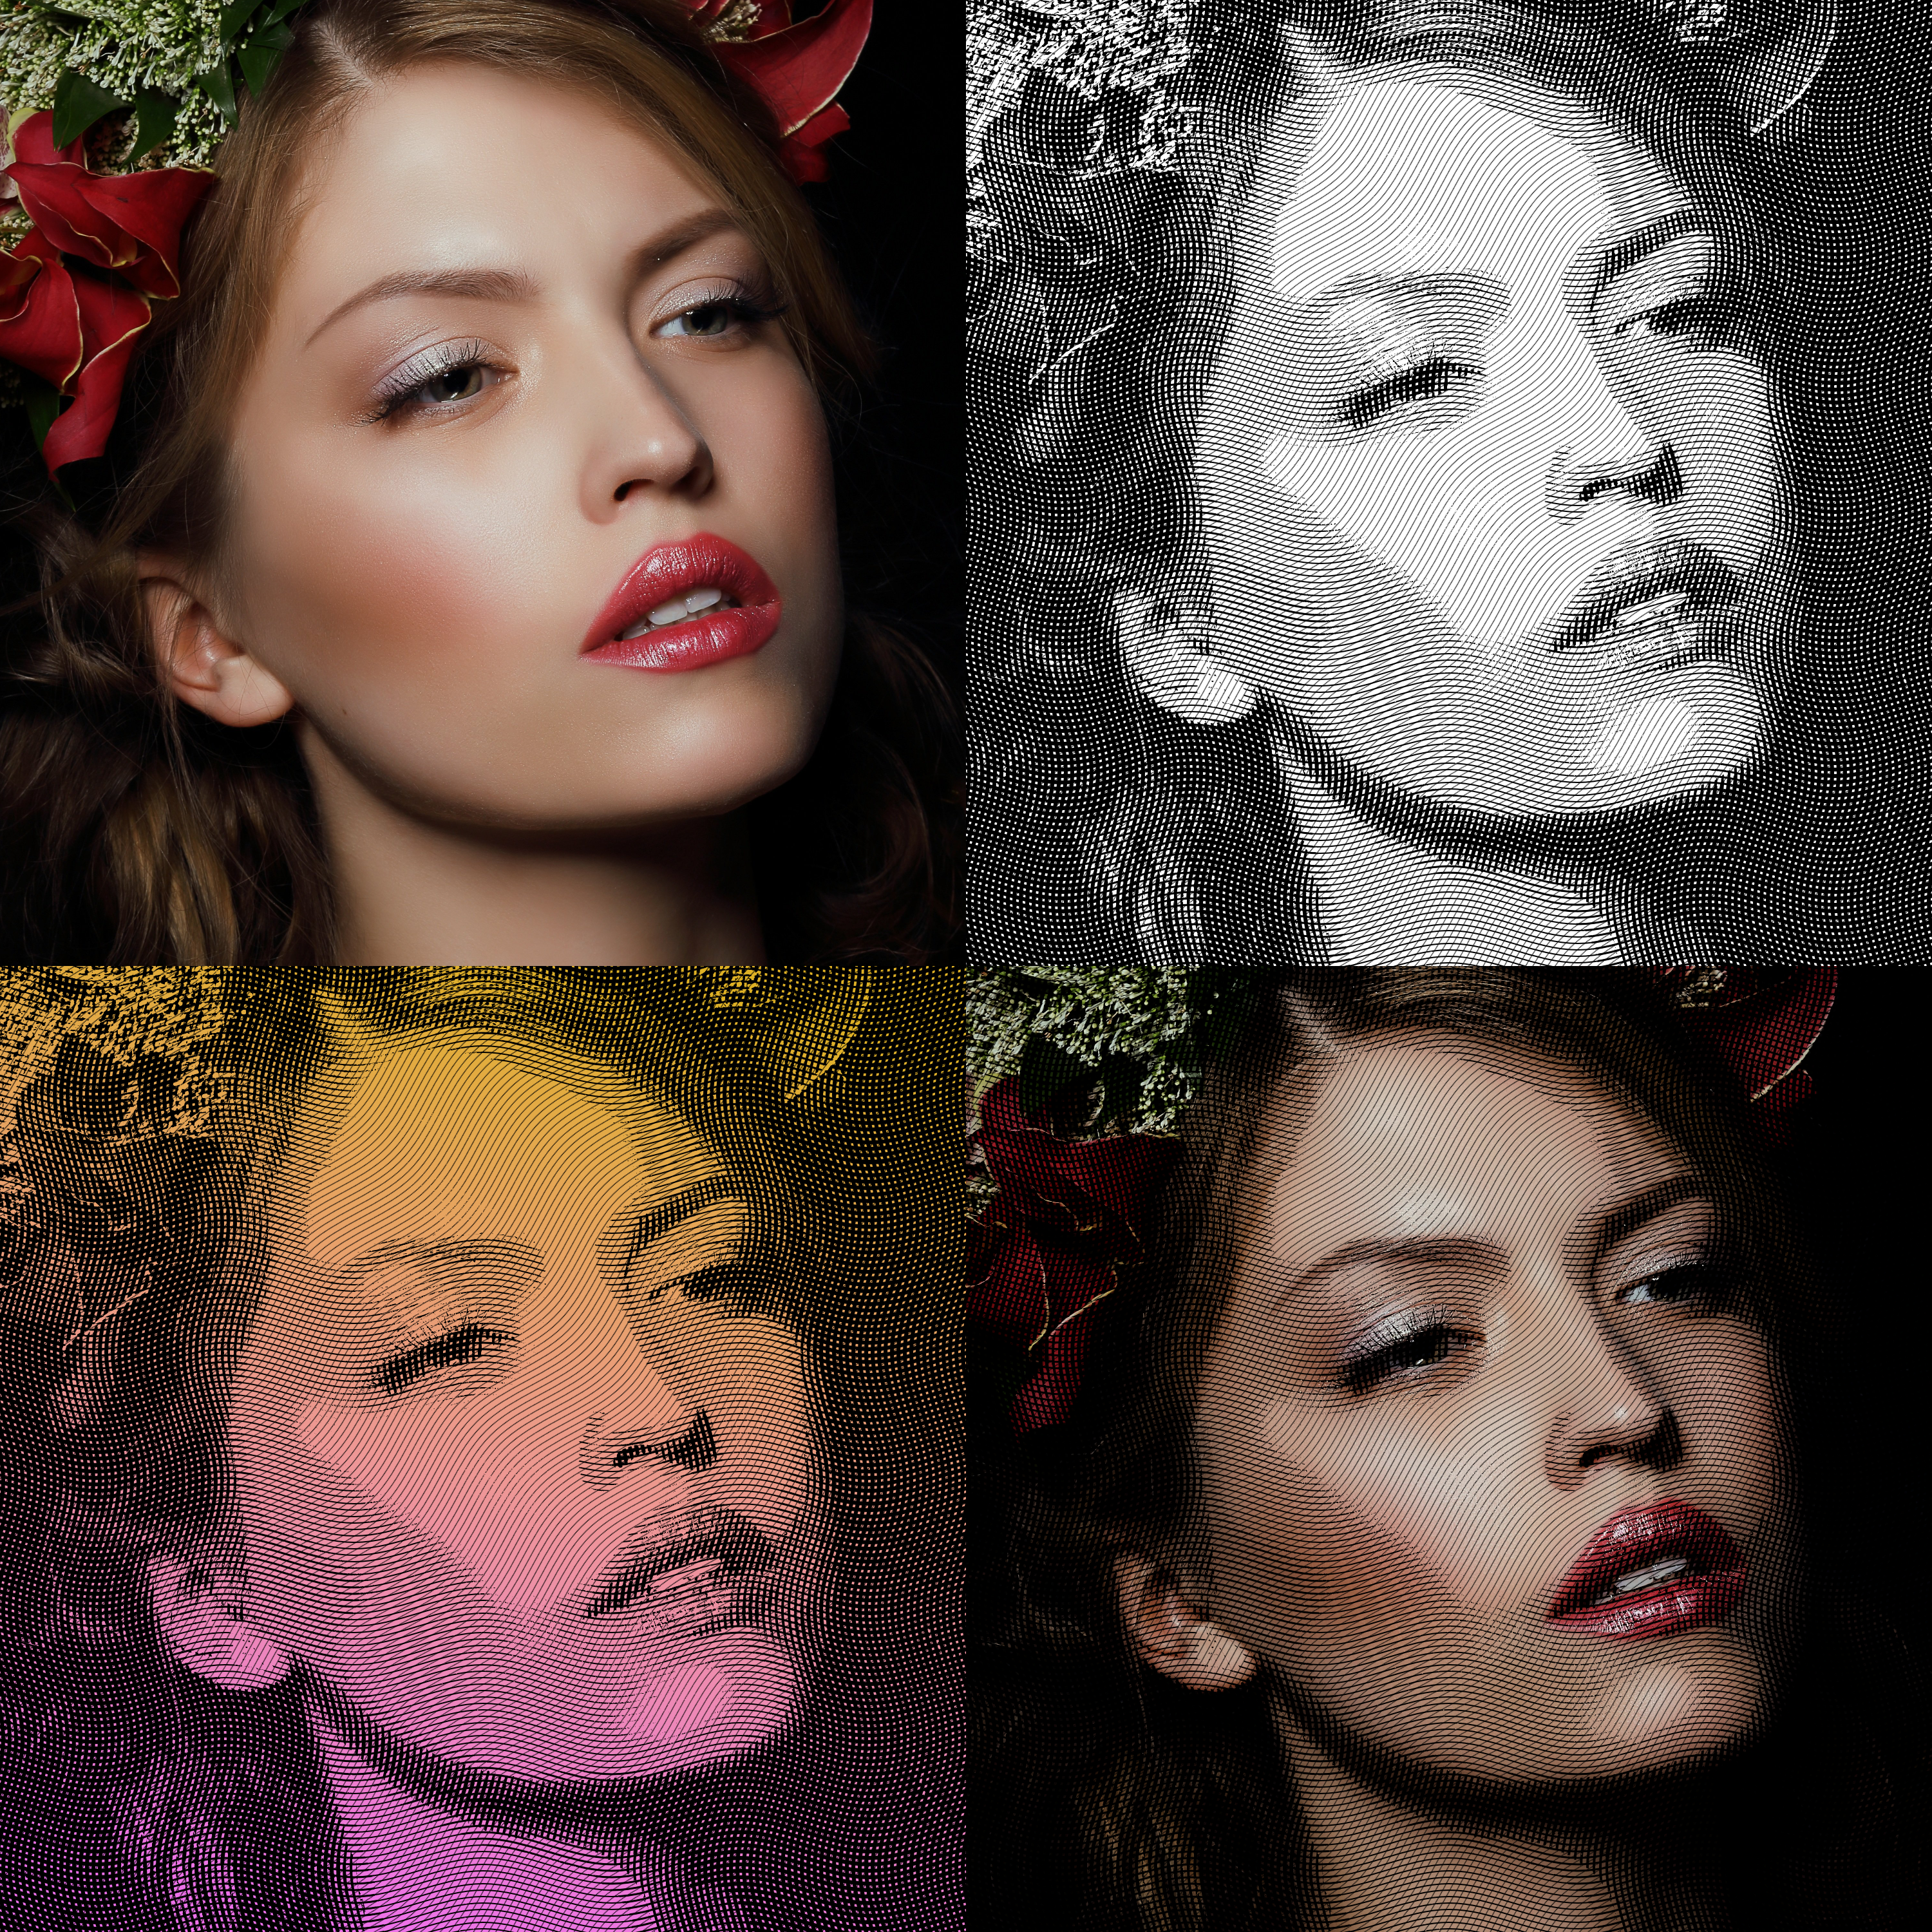
 I had to edit some images for a client, who wanted to embed them into some kind of bank notes. The motives on them used to be classic copperplate engravings. So I created some macros for AP, some of which I want to share with the community. Requirements: The image needs to be square format (it will get resized to 3000 x 3000 px) The image needs to be flat (only 1 layer) The styles provided in this post need to be added prior to starting the macro I got an error message when trying to upload the files (probably due to their size, hence some google cloud links: Engraving Styles (2.2 MB) - https://drive.google.com/file/d/1aHP4golVVLoidsw_aLs_EcMltfsM3oIu/view?usp=sharing Engraving Macros (1.8 MB) - https://drive.google.com/file/d/1mMbZFTd-fLDuACyRCa7bne7cd0wksYUu/view?usp=sharing The macros and assets have been moved to Gumroad. (https://thargoran.gumroad.com/l/engraving_effect) t's still for free—just enter the code APforum2023 (I'd appreciate some stars rating nonetheless). Sorry, but the free period expired.
- 14 replies
-
- 23
-

-
-
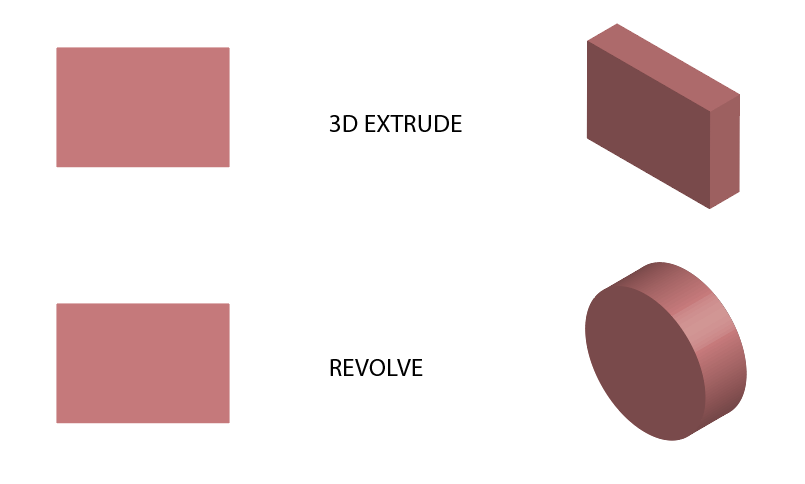
 Good day, I would like to propose some 3d effects I use on other software. Specifically, it'll be: 3D extrude 3D revolve This would greatly speed up the production especially on Isometric design (I love how Affinity Designer approach isometric design) I read on a thread here that you're not planning to create it as it is an 3D effect but kindly reconsider as this would greatly improve our workflow up to 120%. Kudos to team!
-
- 4
-
-
- 3d
- affinity designer
- (and 4 more)
-
 In the vector based image manipulation software I currently try to replace with Affinity Designer, there is an effect called "Scribble" which lets one easily style fills and strokes in a scribbled look. Length, width and all that are customizable and they allow to create elements like the one in the image attached. I couldn't find such an effect in Designer so far, so did I miss it, or is there a way to recreate this effect with different methods?
-
 Hi, I am new to all this really. I am looking to recreate the pattern on the logo within his image, to make my image look like a woven patch. I have seen a few tuts online but all for Photoshop using some scripts but not for Designer (or Photo) https://images.app.goo.gl/5bAUjyGQJx1FqmSc7 Or https://images.app.goo.gl/ms9Pe9xXYHiWcLq67
 -
 Hi folks. I'm loosing fx (Outer Shadow) after exporting as a PDF. This is a Publisher related issue. Seeking help
 -
Affinity Photo Tutorial | In this video, We will learn, How to apply a blur effect on any photo background like the Expensive DSLR Camera effect. #affinitytuts #affinityphoto #blureffect
-
- 1
-
-
- background
- blur
- (and 4 more)
-
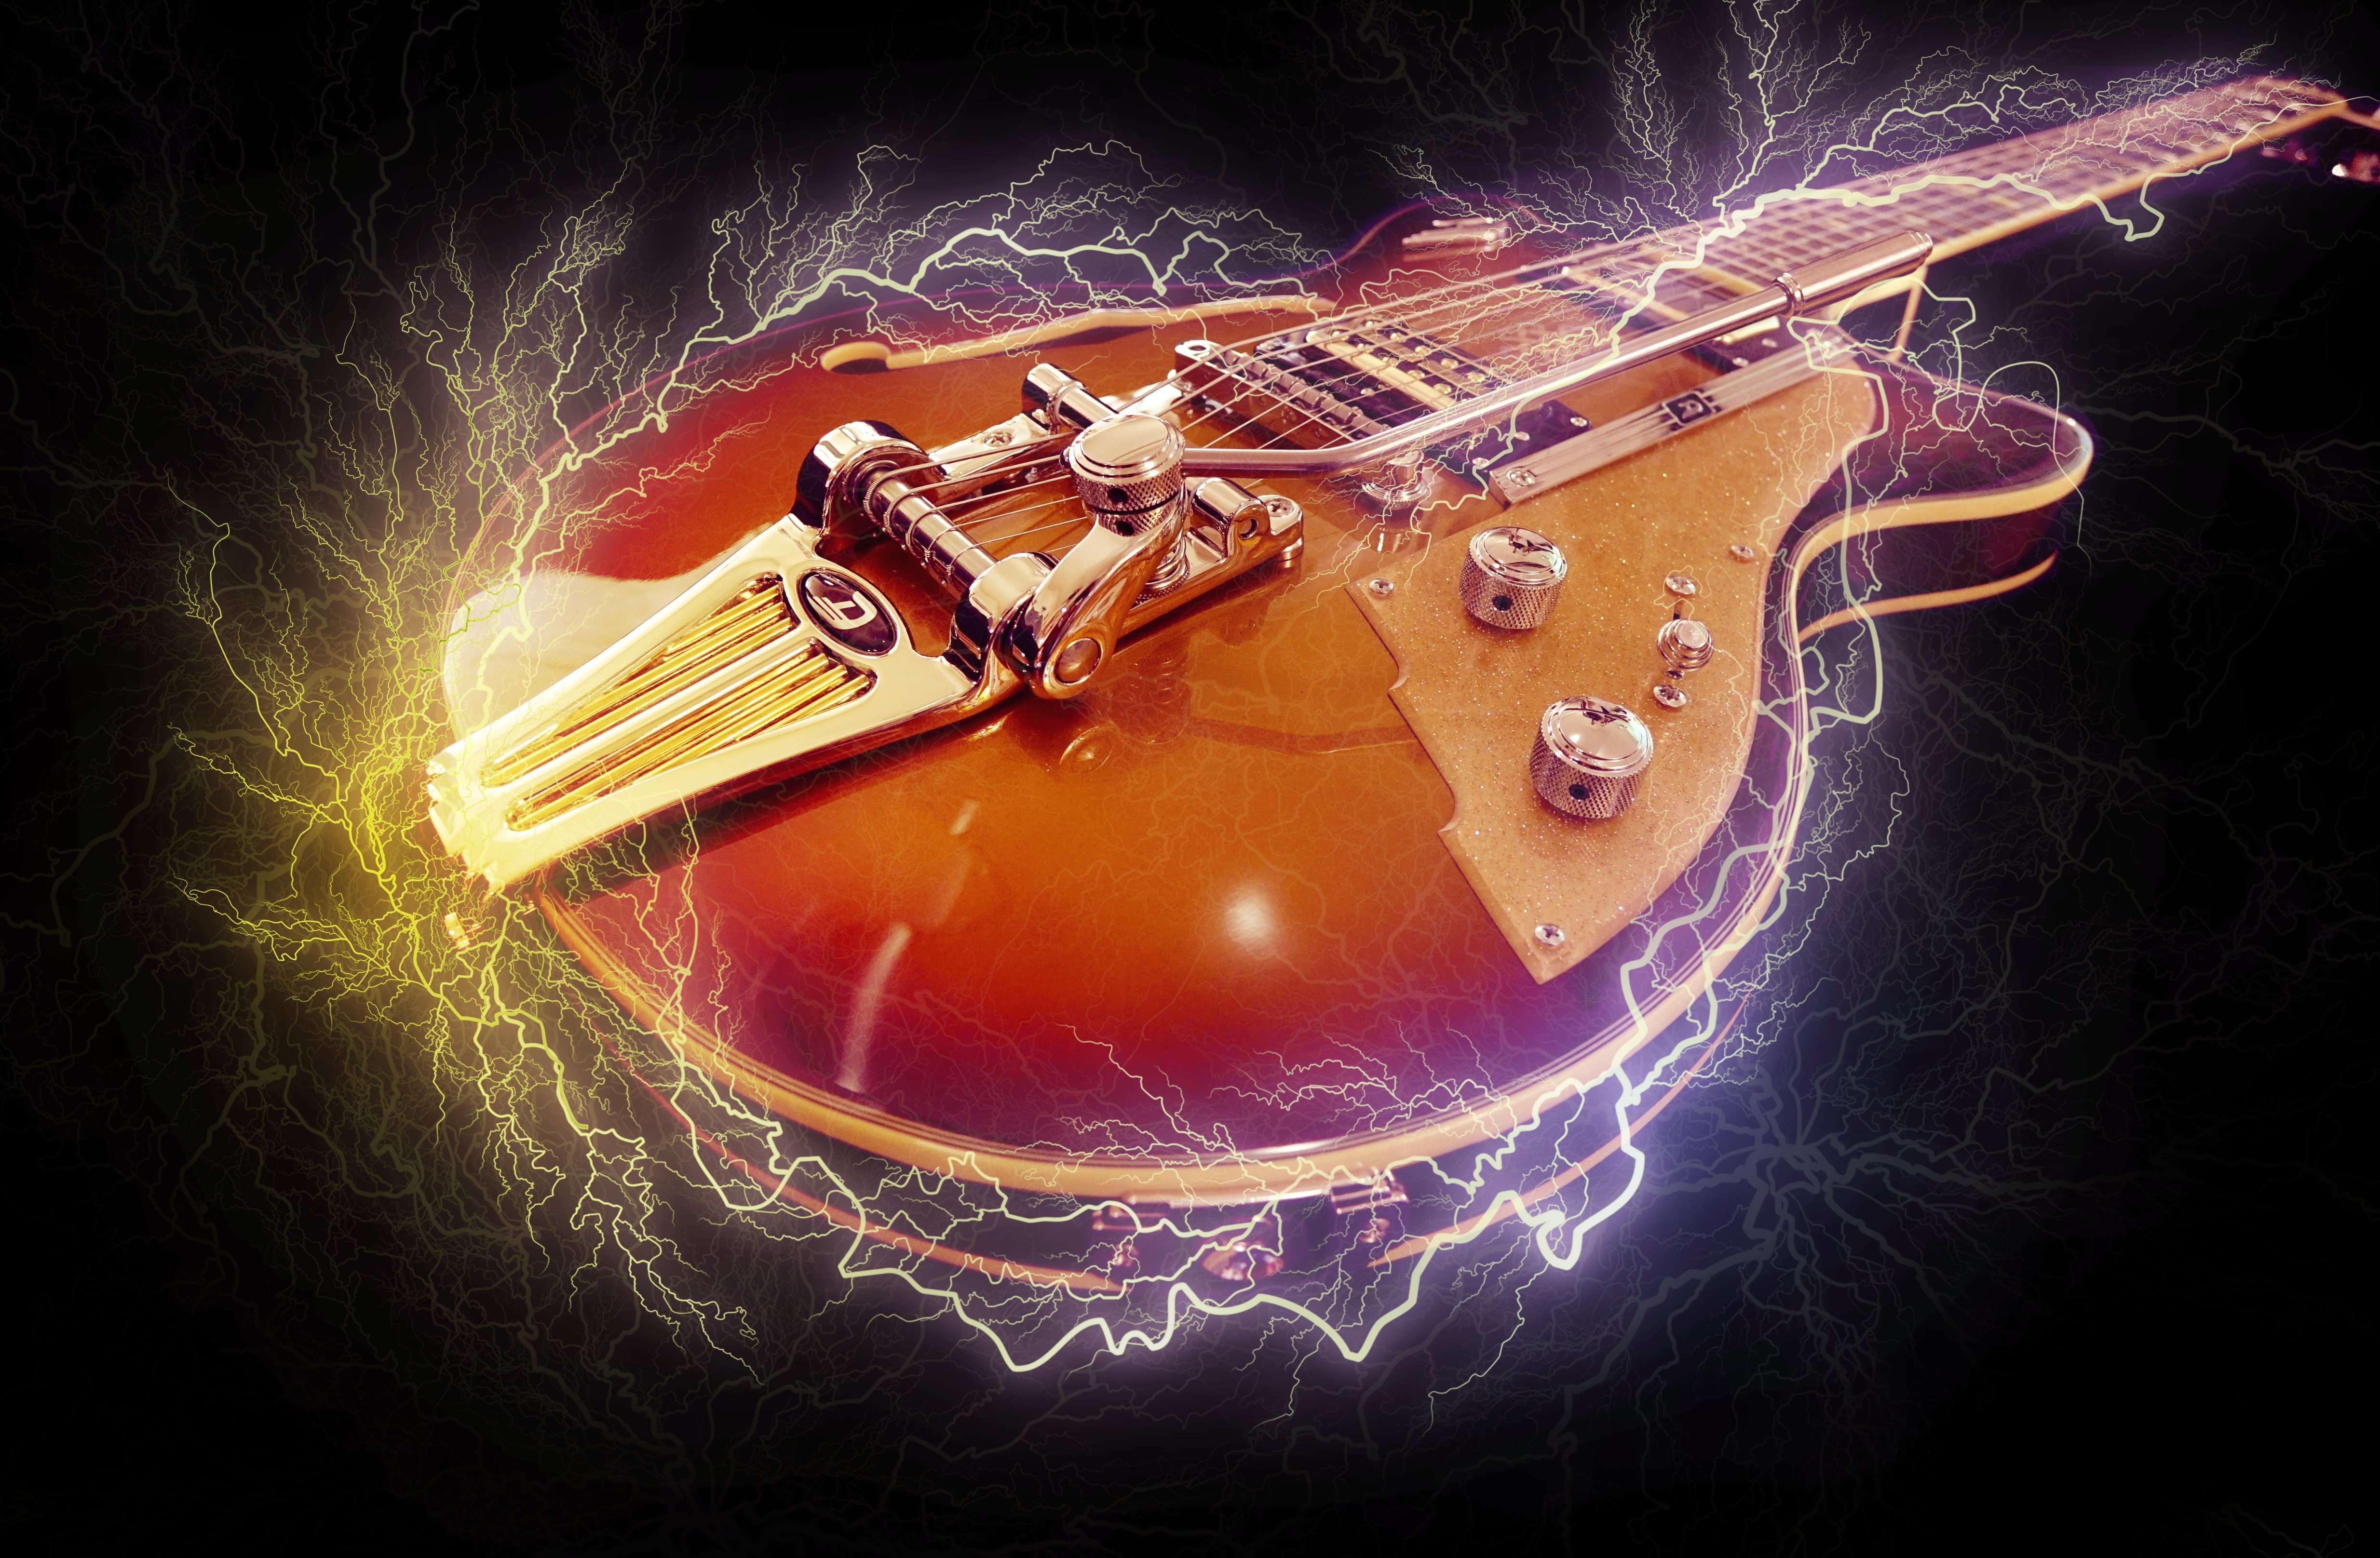
 Created a new tutorial to show you how to use the new lightning brushes you can find in the affinity store: Brushes >> https://affinity.serif.com/de/store/product/102-lightning-brushes/ Tutorial >> https://www.xresch.com/tutorial-create-electricity-and-lightning-effect-908/
-
- 1
-
-
- affinity photo
- tutorial
- (and 8 more)
-
In this Affinity Photo Tutorial, You will see, How to create Neon Glow Line around persons in Affinity Photo. In this tutorial, I used the Pen Tool and Node Tool for creating the line. I hope you like the video. Thanks #affinitytuts, #neongloweffect, #affinityphoto
- 2 replies
-
- 2
-
-
- affinity photo
- neon
- (and 3 more)
-
Hi everyone, I just created a tutorial that was requested by several people who bought my 180 Smoke and Cloud Brushes from the Affinity store. In the following tutorial you learn how you can use the smoke brushes to create a fire effect on regular images. Hope you enjoy it! :-) https://www.xresch.com/tutorial-fire-effect-on-images-876/
-
 This relates to Designer and Publisher, and possibly Photo too (I haven’t looked). Sometimes, when I’m experimenting, I play around with a lot of the different values pertaining to a Layer Effect. For example, with the 3D Layer Effect I might change the: Radius; Softness; Shininess; Opacity; Ambient % and Direction. Most of the time - because I’m just experimenting - I get into a mess and just want to put the values all back to what they were before I started playing around. However, I can’t find a way of resetting the values in the Layer Effect to their defaults without resetting the whole layer formatting back to its defaults (“Revert Defaults”), which means I lose all of my other formatting: Colour; Stroke; other Layer Effects; etc. Is there a way of resetting the values for a Layer Effect to the defaults without affecting anything else? If not, can we have one please? This was mentioned a few years ago.. ...but, as far as I can tell, nothing has changed since then, but I could easily be missing something in the UI. P.S. Gaussian Blur doesn’t really need a reset function because it’s so simple but it wouldn’t hurt to have one to make the UI more consistent.
 -

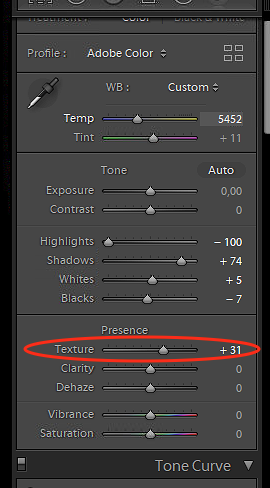
How to simulate Lightroom's “texture” effect
Guest posted a topic in Feedback for Affinity Photo V1 on Desktop
Adobe came with a relatively new "Texture" Effect in Lightroom. Is there an equivalent in Affinity Photo and if not, could you add this slider? https://petapixel.com/2019/05/14/adobe-adds-texture-control-slider-to-lightroom-and-camera-raw/
-
 Here are is a screen shot of what I want to figure out how to accomplish in an Affinity program. In Photoshop these are premade styles. Is there a way to build premade styles in an Affinity product?
-
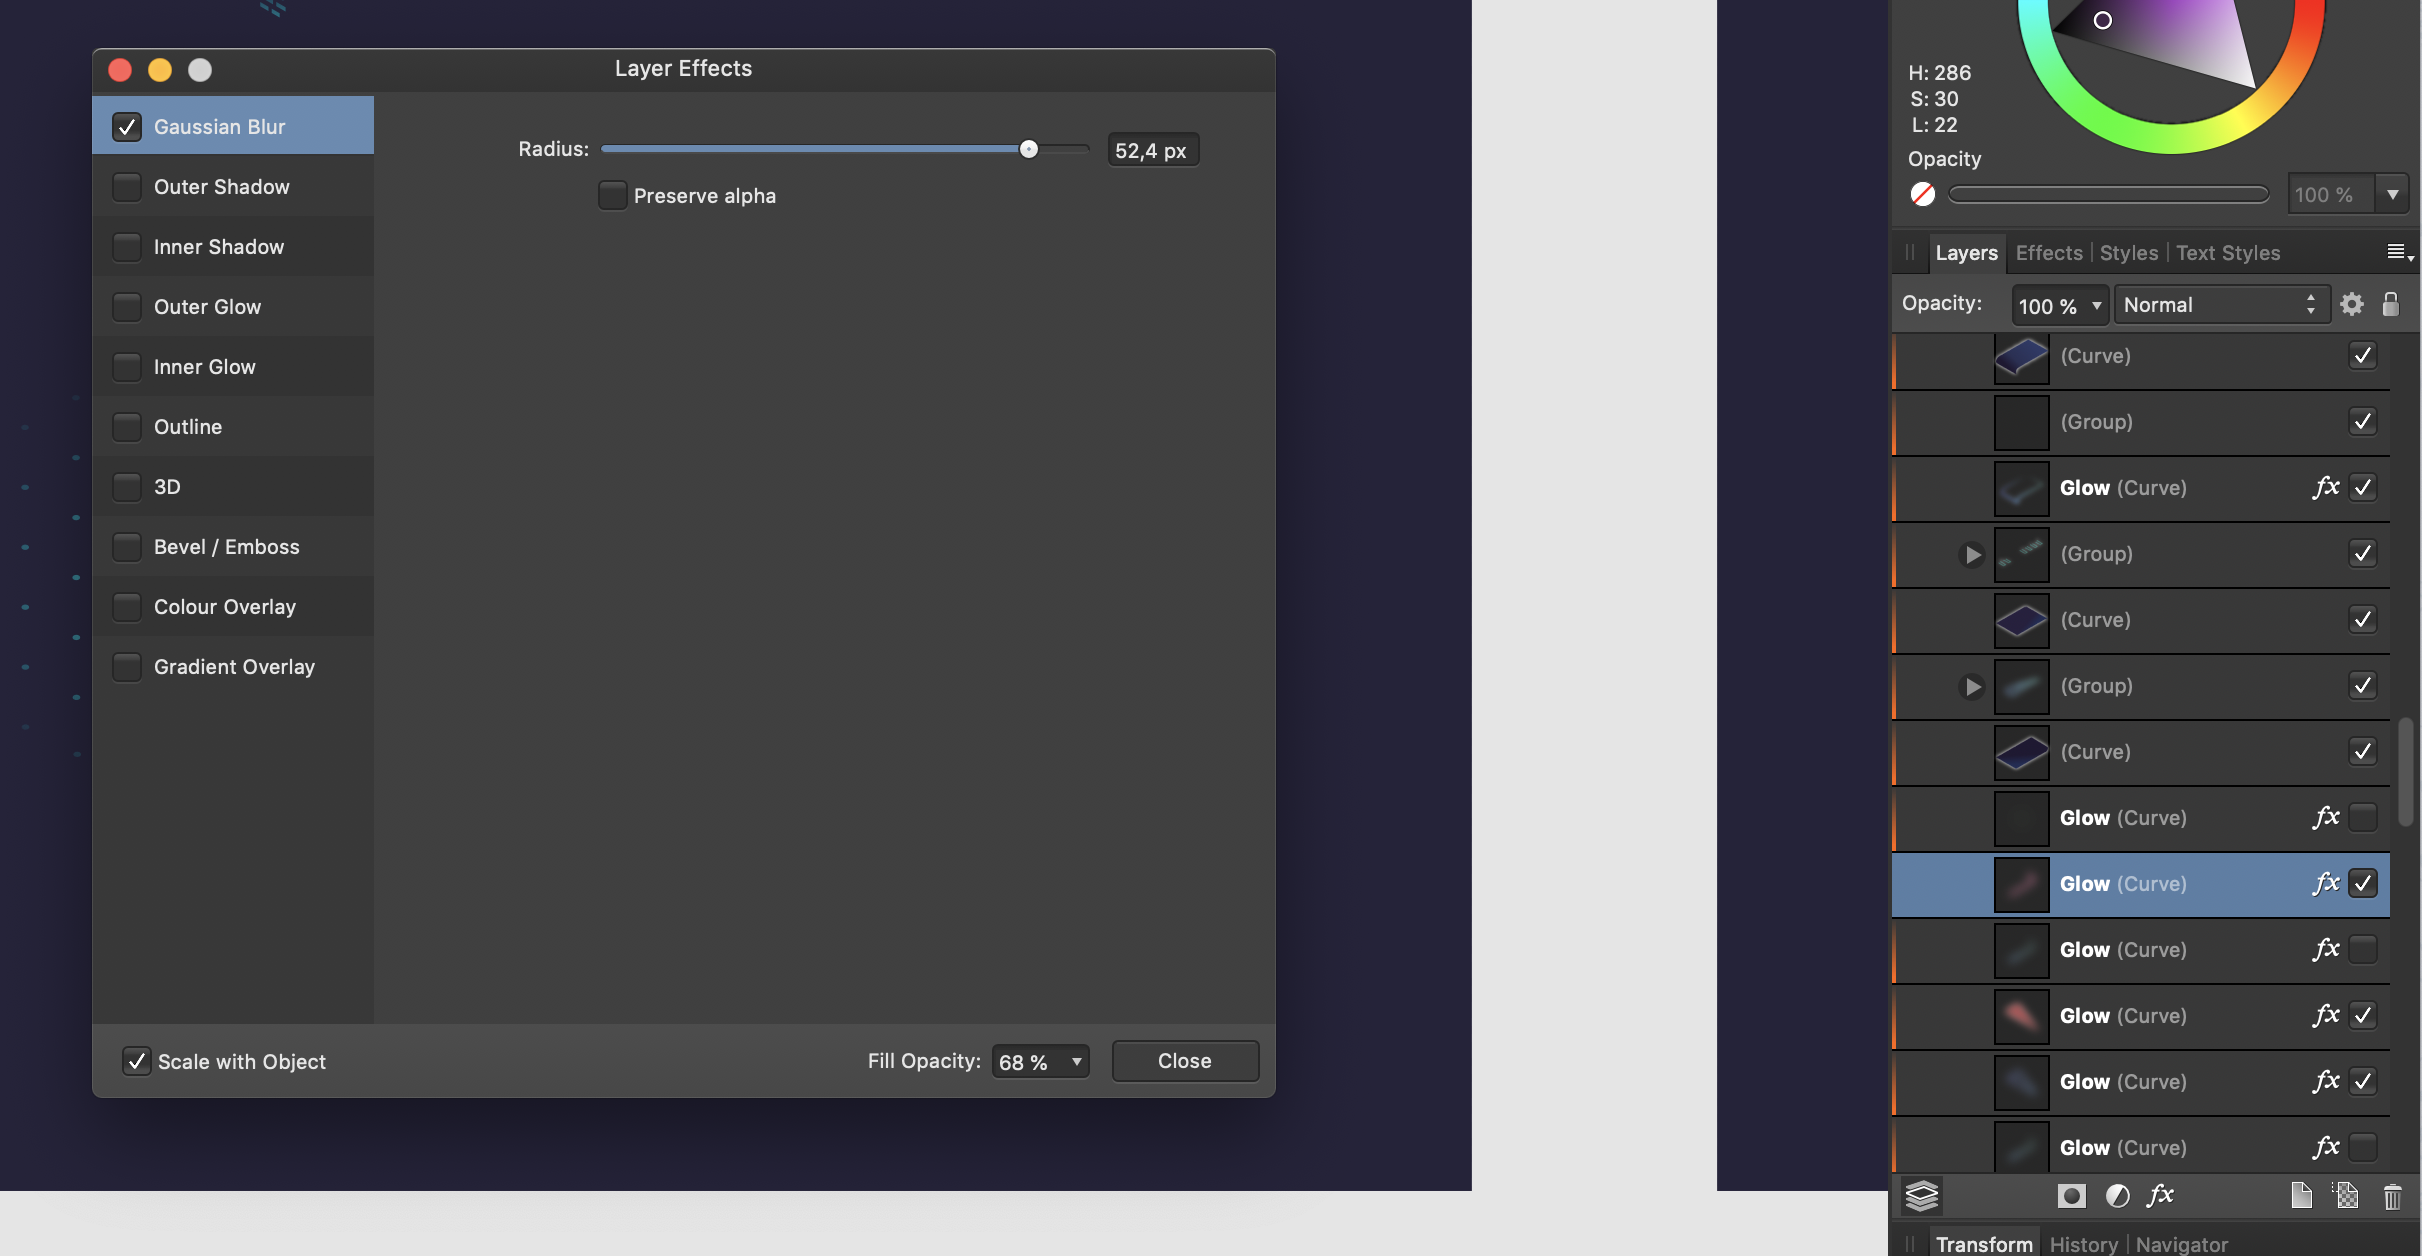
Some times it is very convinient to have multiple layer effects of same times. For example i want to have 2 inner shadow effects applied to same level one for highlights and one for shade. It is on actually on roadmap.
-
 You’re propose your app as a tool for work in vector. This is not true. You can add a lot of elements easily, work with color, blur etc. But once you need to scale the vector object you’ve created YOU SHOULD MANNUALLY GO TO EACH OBJECT AND SET “SCALE WITH OBJECT” Could you please set as priority ticket for your developers add a SCALE FUNCTION when you can just click on the object, click in Edit Menu “scale”, set ratio or percentage and you will get scaled option of your image. In addition your export feature need so much power from my Macbook that comparing it to the Illustrator. I’d better avoid all of those coll things you’re proposing just to get scalable and adopted vector file.
-
 Hello, I am a newbie with the Affinity Designer... I check different Video Tutorials, but I didn't find exactly what I need... I would like to make my normal png like the Glow effect couch.png. What is the best and easiest way to do that....? I would really appreciate each help... with kind regards from Germany AD_Rookie49


.thumb.png.c1e412a4e3384d171b58a9b378322141.png)