Search the Community
Showing results for tags 'display'.
-
 I Use all three Affinity apps on a 2019 15" MacBook Pro. Sometimes I just use the laptop screen, other times I plug into a larger display monitor through HDMI and move everything out to utilize the larger screen area. If I resize any of the apps to the larger monitor and then unplug and go back to just my laptop the screens remain where they were placed and sized in relation to the external monitor. Super annoying as sometimes the app is completely out of the viewing area on my laptop. If I was using it on the right side of the monitor (default placement is upper left corner), or it's been left expanded to the larger monitor you end up seeing just a fraction of the app on the laptop, which then you're stuck fiddling around trying to grab edges just so you shrink or move things around to fit back into the 15" screen area. Restart app or MacBook does not fix or reset. Using layout profiles doesn't make anything any better either. I haven't used Adobe apps for awhile, but if I recall they auto resized if you unplugged from a larger monitor. Would be nice to see if Dev could fix this or is there an easy work around I'm missing? –Cheers
 -
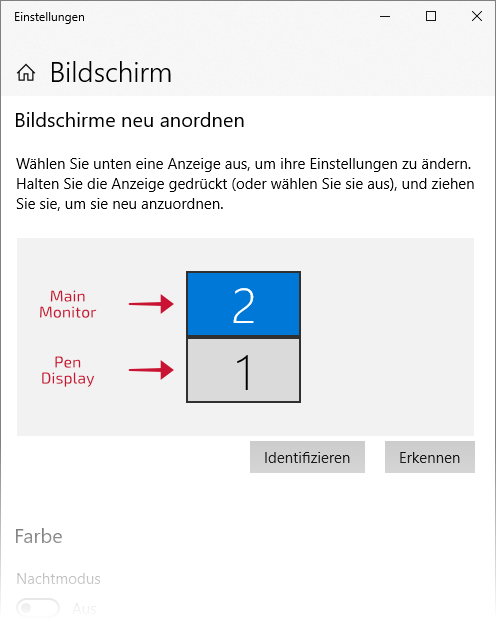
 Hey there, very similar to another much older thread, I have a problem with filter/adjustment windows opening on a different display, a pen display to be precise, instead of the expected main screen. Most of the time, especially when precision is needed, the pen display is turned off but remains connected to the computer. Resetting Studio, as suggested in the mentioned thread, only works if done via Master Reset (holding a specific key while launching the application), and even then only the first time a filter/adjustment is clicked. After the first time it behaves as above. It's incredibly frustrating because, you have to switch focus to another screen and turn it on (because it doesn't matter whether it's on or off!) while you're working on the main one every single time and leave it running just to move the properties window over to the main screen. Some information about hardware: OS: Windows 10 Home, Version 21H2 Pen Tablet Modell: HUION Kamvas 13 GT-133 Pen Tablet Driver: Driver_15.7.4.183 The expected main screen is connected via DVI, the pen display is connected via HDMI + USB for input. Something I noticed: The expected main screen is shown as »2«, the pen display as »1« in the system's monitor settings – but I can't reassign these numbers, and I'm not sure they actually reflect the primary and secondary monitors. I assume that the taskbar would actually act as an indicator of what the primary and secondary monitors are, and since it's on my regular monitor, I assume it was the primary monitor. If anyone could help me solve this problem it would be greatly appreciated as it is slowly but steadily draining my creative juices. 🪫 Cheers! Edit: This affects the whole suite, not just Photo!
-
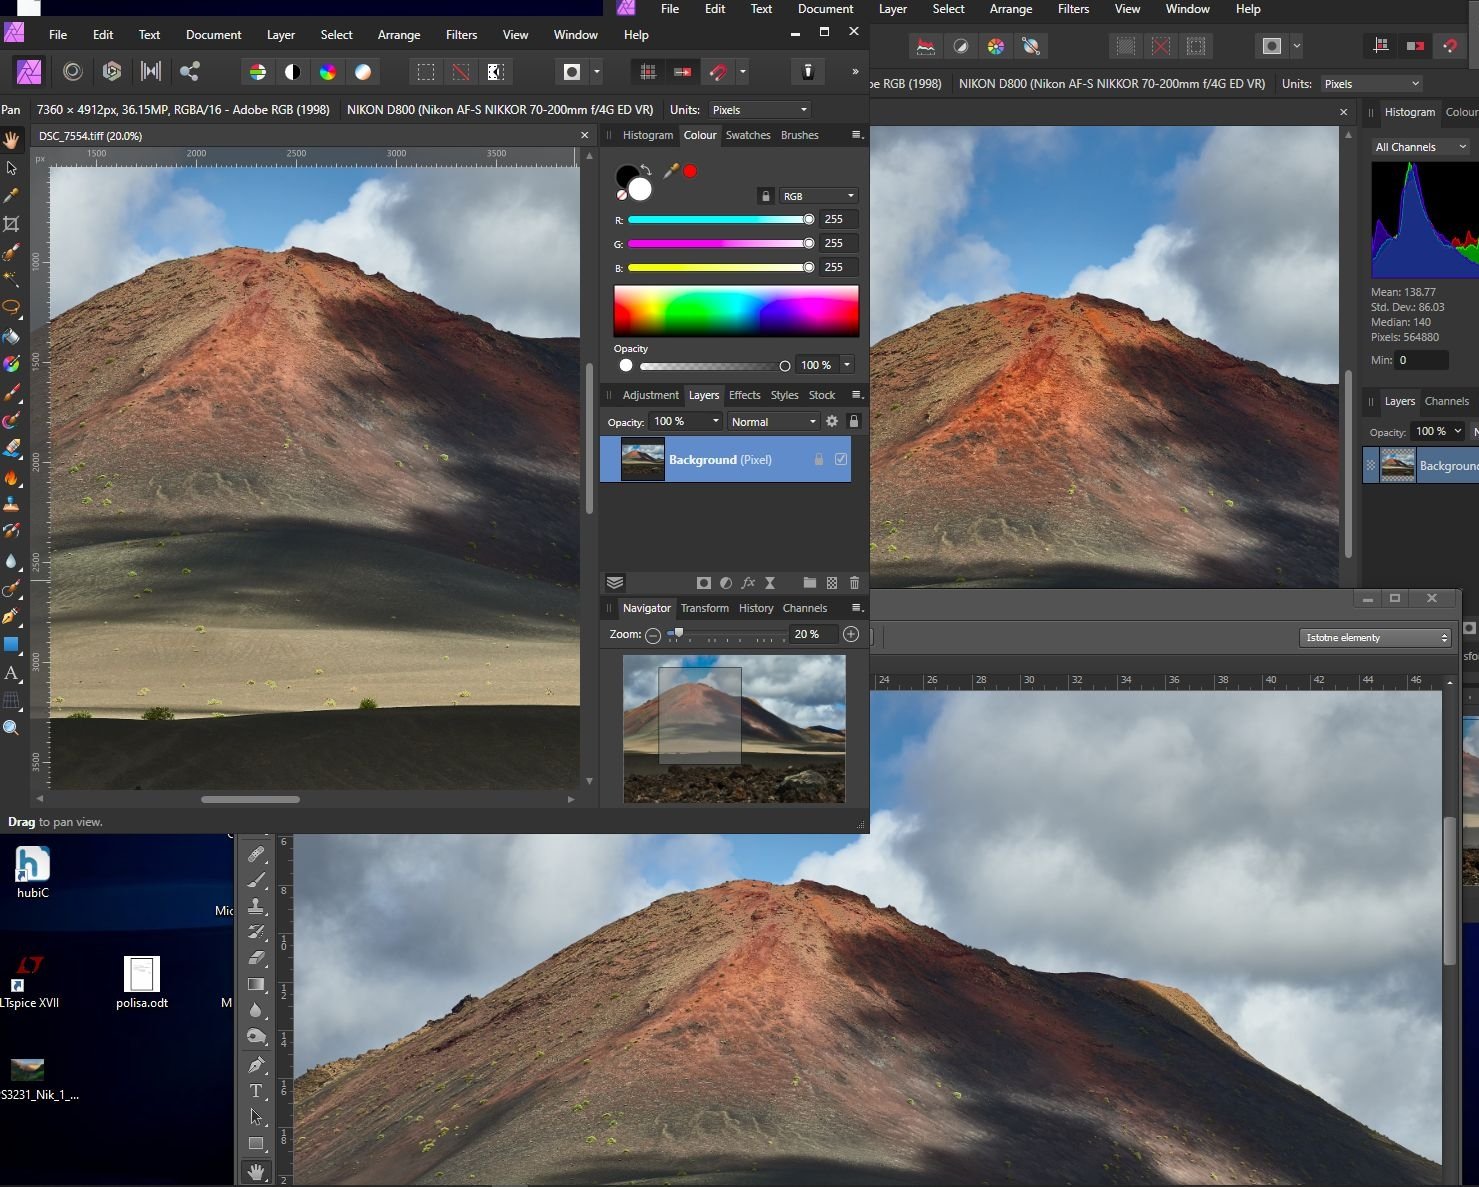
Hello. I have 2 monitor setup (laptop with external monitor), and I've noticed that Affinity 2 displays more vivid colours than Affinity 1 and Photoshop CS6 (I think other apps are works like A1/Ps. Both displays were calibrated and has custom color profiles. System is Windows 10. Affinity 2 was downloaded today (don't have exact version number). Both versions of Affinity are with exactly the same color settings. Image shown has aRGB profile. Any suggestions?
-
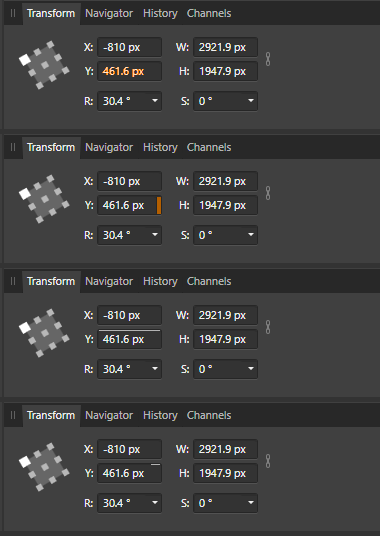
 I was going to post this as a Feature Request but I thought I see what people thought about it first. We often get questions about problems that are eventually grounded in the fact that the numerical input fields don’t always show a totally accurate value, sometimes because the Preferences have been set to show too few decimal places. For example, a rotation field may show 10 degrees when the actual value is 10.3. What I suggest is that the numerical input fields have some kind of indication to show that the value displayed in the field is not the same as the (internal) actual value. There are probably a few ways to do this and some are more obtrusive than others. * One way could be to display values that were not shown accurately in a different colour, but that might not be good for people who want an uncoloured UI. * Another way could be to have an extra coloured ‘flag’ at the end of the field to show where the full value was not being shown but, again, that’s probably not good for an uncoloured UI. * My personal favourite, at the moment, is having a line at the top or bottom of the field (maybe all the way along, or just part-way) that shows whether the value in the field is actually higher (line at top) or lower (line at bottom) than the actual value. My attached image shows these three options, all showing that the Y value is actually higher than the displayed value. What does anyone think?
-
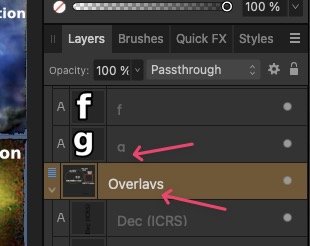
 First of all, congrats on the release of the new version. I got excellent value from Designer v1, so was happy to pay again. I am looking forward to playing with the new features. I noticed a minor glitch in text display in the Layers pane. Descenders get chopped off at the baseline. See the "g" and the "y" in this screenshot: Hopefully it won't be too hard to fix Best wishes Will
-
I define a collection of 8 gradients in SVG and refer to the last four of them in rectangular forms. Rather than displaying the last four when I load the SVG, Designer V2 fills the rectangles with the first four declared, even though none of them are selected as fill in the rect specs. (See foo2.svg). If I move the latter four definitions to the front of the others in the SVG file, the correct gradients appear. (See foo.svg) If I rotate the fifth declared gradient to the first in the declaration order (still referring to it by its gradient5 name), it is the one displayed for fill gradient5, but the second, third, and fourth (gradient2, gradient3, gradient4) are displayed rather than the specified (gradient6, gradient7, gradient8) (See foo3.svg). Neither Microsoft Edge nor GIMP exhibit this bizarre behavior. Obviously a bug. Running Windows 10 Pro on AMD Phenom(tm) II X4 975 Processor As usual, I'm unable to upload screenshots to this form (using Chrome) and have to start over with the report if I try. Larry foo2.svg foo3.svg foo.svg
-
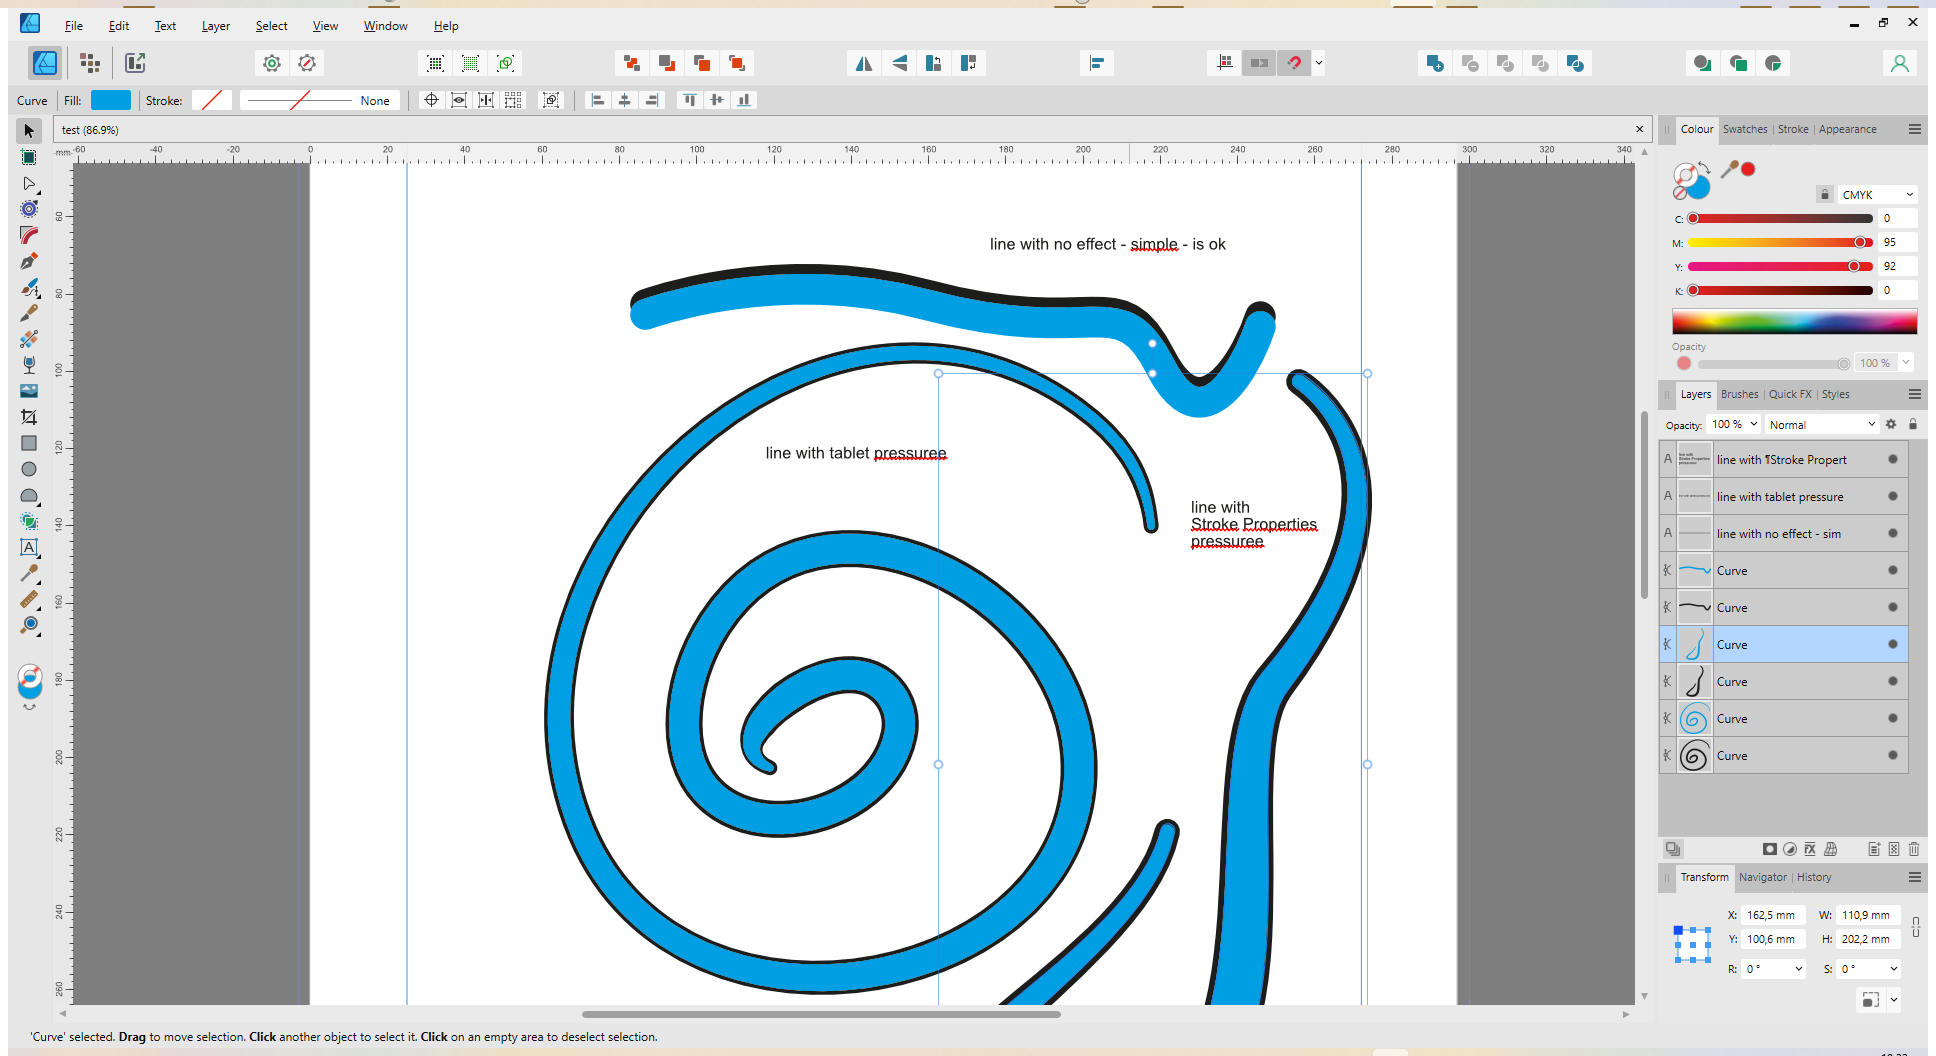
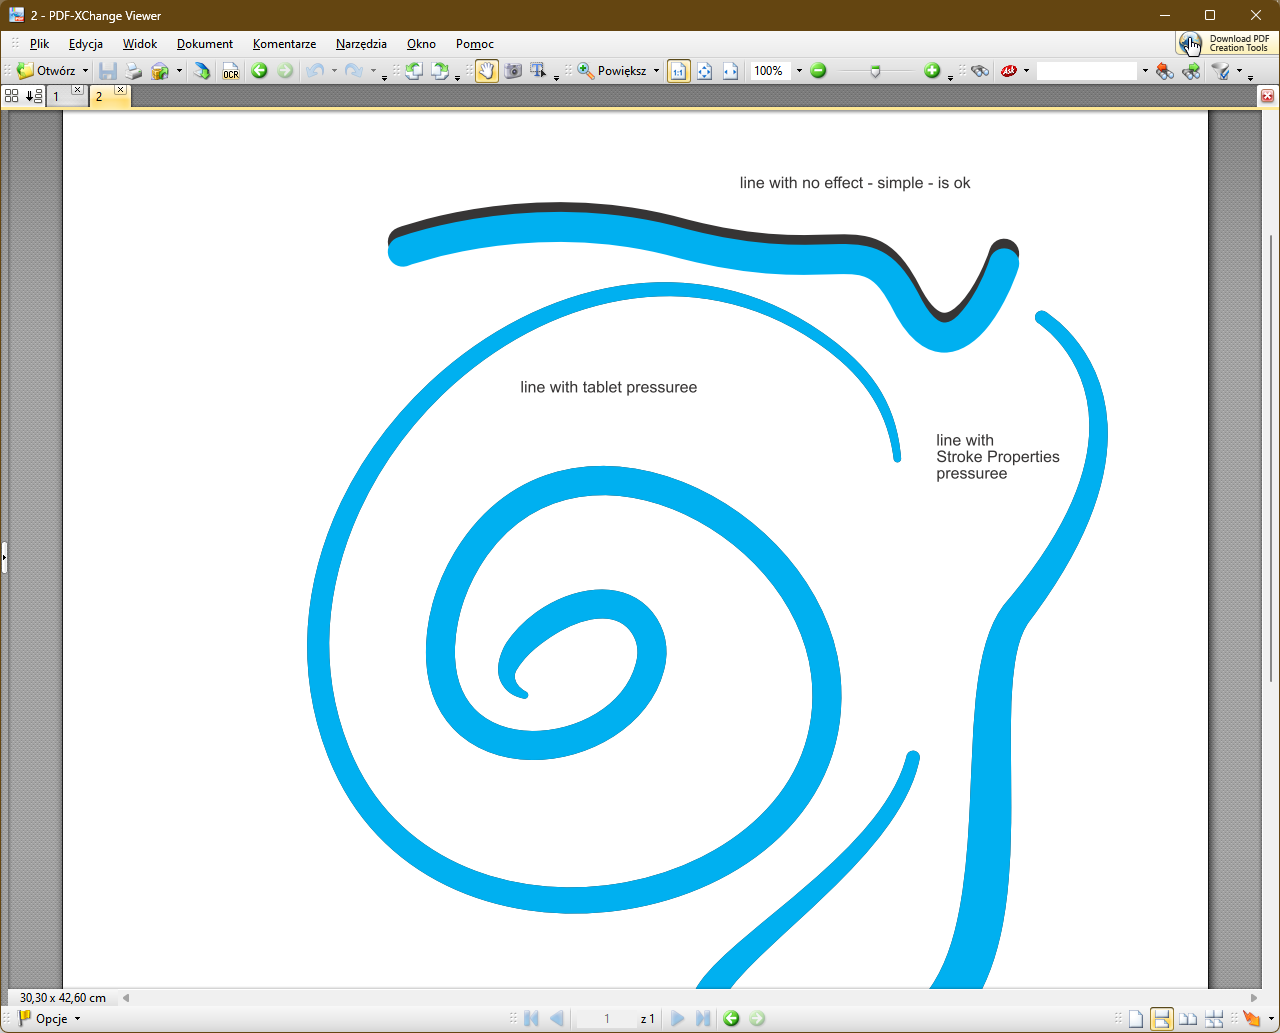
 Sorry for my English. The problem occurs when I apply the Expand Outline command. The lines with the dynamic brush after pulling Expand are smaller (blue) than the original unconverted lines (black). When I export to pdf, there are no differences - so the problem is somewhere in the image display. I am using Nvidia Studio drivers (version 527.56) on GeForce RTX 2060. Unfortunately, switching in Settings>Renderer from "Default (Nvidia GeForce RTX 2060)" to "WARP" and trying different settings (Retina, View Quality...) - there or no difference.... I do not know if the problem affects only me (Affinity version 1 is also the same)? Windows 11 Pro, 22H2, compilation 22621.963 EDIT: attached test file test.afdesign
- 5 replies
-
- 1
-

-
- expand stroke
- display
- (and 1 more)
-
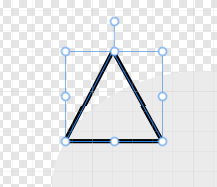
 Hello, I am using Affinity Designer V2, and this problem is existed since Affintiy Designer V1. When I draw a line by Pen Tool, the line display doesn't look straight sometimes for 1 pixel broken Like this. (Seems depend on Zoom size, Some scale look normal, some scale look wrong) Zoom Out (The line broken) This one is the line after Zoom In display Zoom In (The line normal) Did anyone know how to solve this problem? To make the display correctly?
-
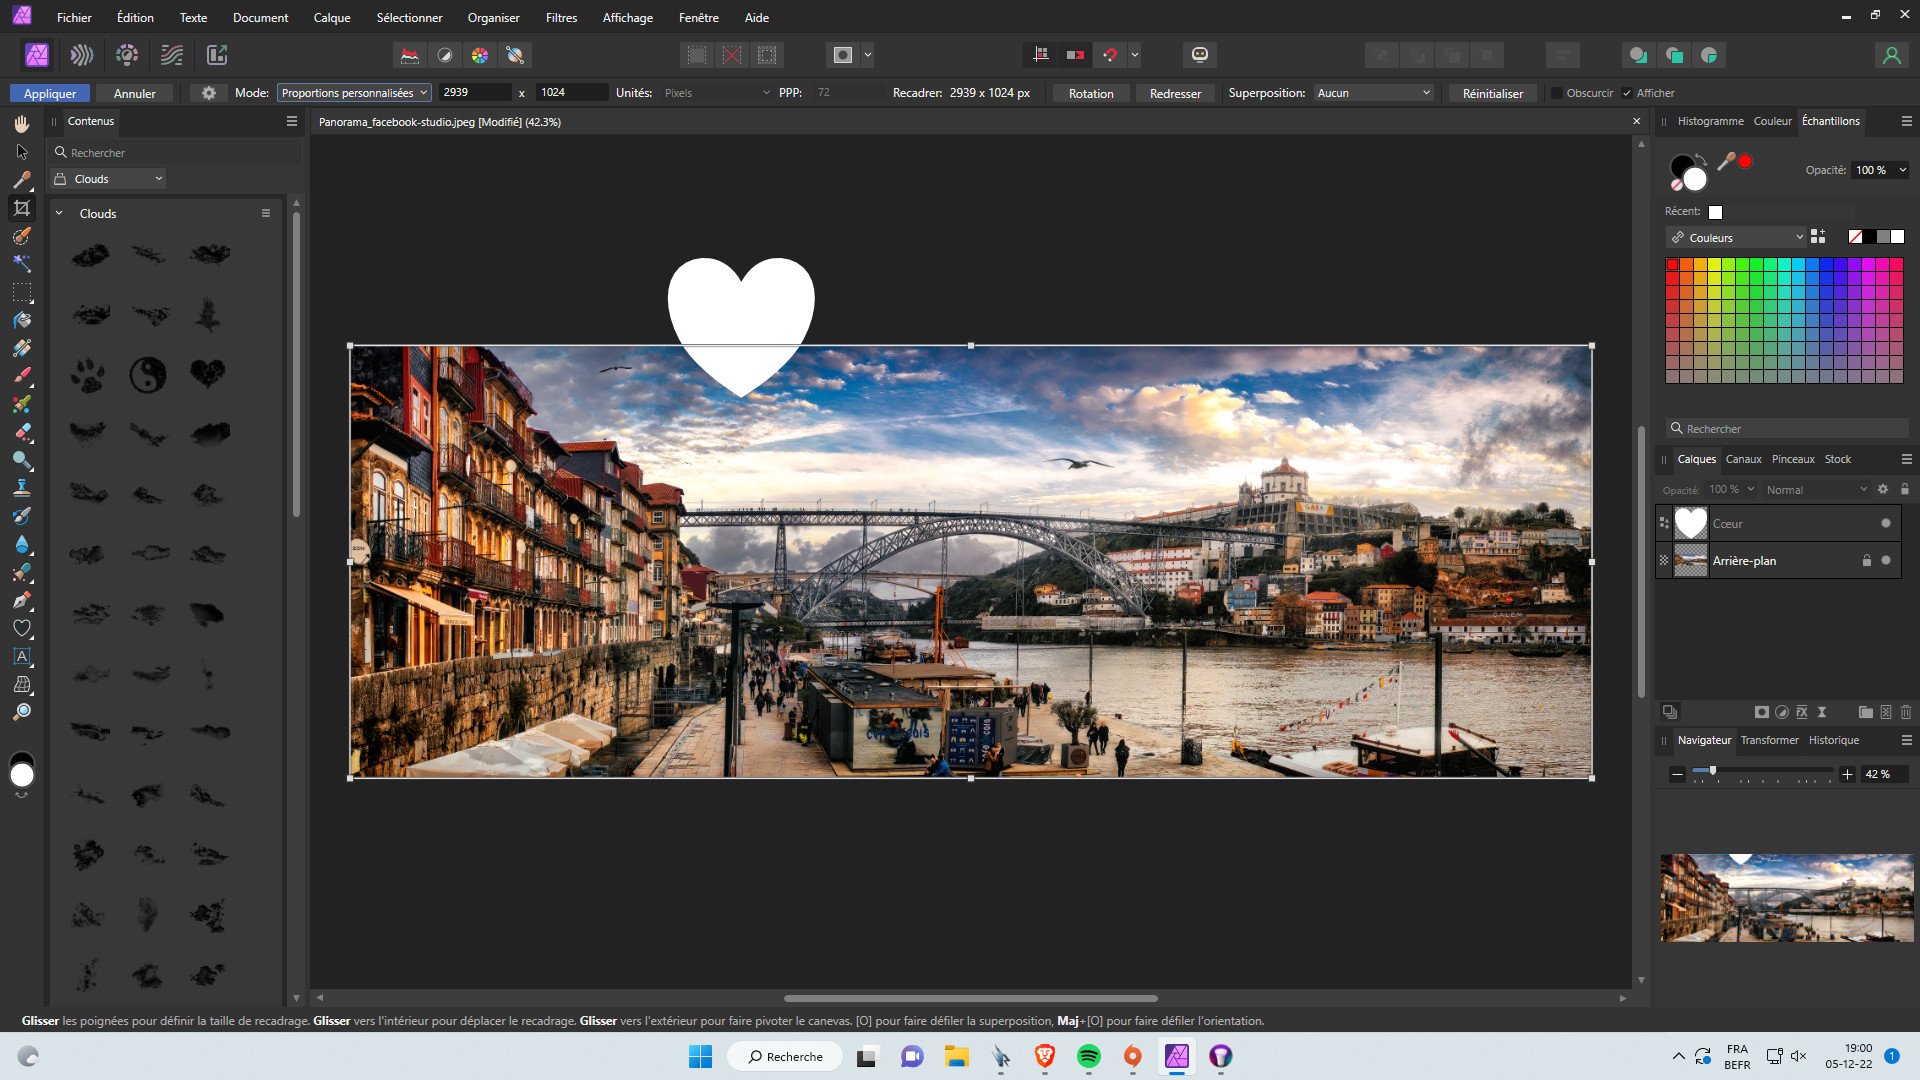
 Hello Serif Team ! This message to submit a suggestion : The ability to work with out of canvas elements displayed. Right now, we are able to see out of canvas elements by clicking on the "crop" tool and, next, by enabling the display option. That's good, but you can't continue to work in this mode, it's just a "preview". The ideal implementation would be to add an option in the preferences under the "user interface" section to allow to realy work with every element displayed. In this mode, the canvas wouldn't crop anything anymore. This option exists in Gimp. Best regards, Sébastien
-
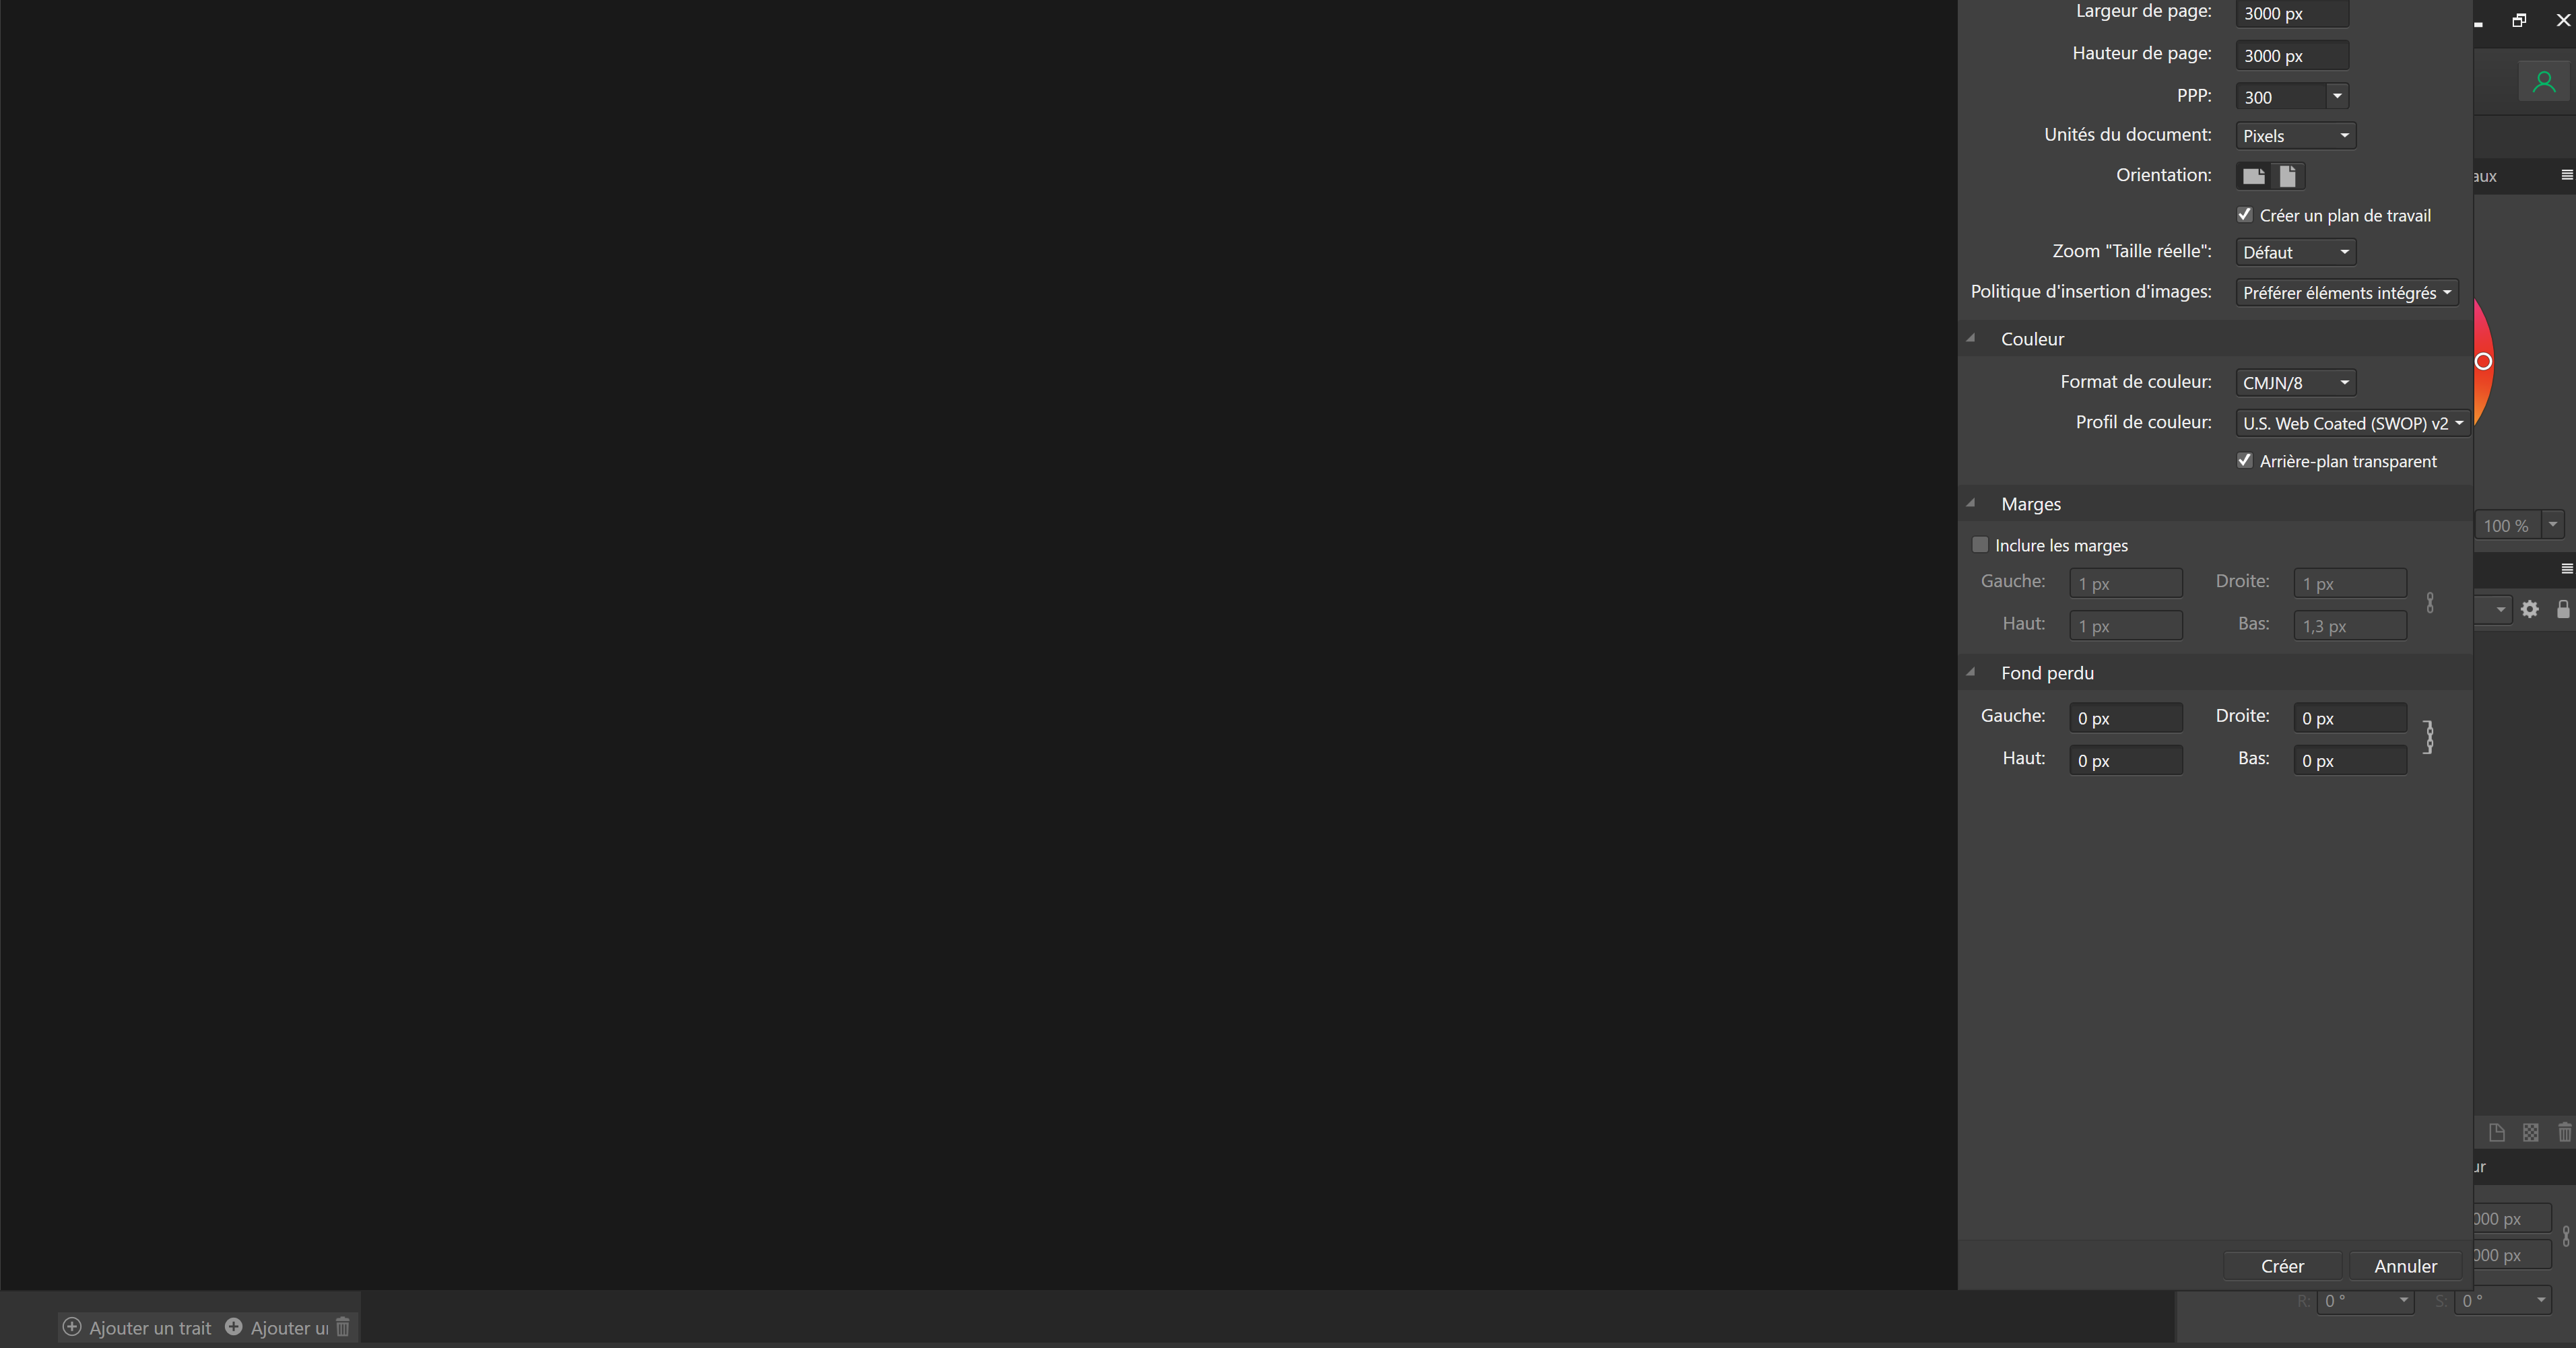
 I change my old HD Windows 10 PC for a new 4K Windows 11 PC. I downloaded and installed Affinity Designer and now I have two problems (see the screenshot) : 1. When I click to create a new document ("Nouveau" in French), I get a black screen with only the right tool bar. I have no preset template and it is impossible to get to my personnal templates (and they are on my new computer). 2. Also, note that the "New Document" window do not show entirely. The only thing I see figures in the screenshot. Can you help me to solve this issu? Thanks!
-
 Hi there, I had this issue a while ago and now it really stops me from working: As in the image attached I get this weird display error when working within Affinity. Sometimes it helps to zoom out, but when zooming in to a specific point, it happens again. Currently, also zooming out does not help. There seems to be something broken now. I noticed that it most often happens when I use maximum/minimum filter. However, even when flattened, the error persists. Does anyone have a similar problem? Mac OS Monterey 12.4 Affinity Photo 1.10.5 Moreover, Affinity Photo consumes enormeous amounts of disk space. Sometimes more than 30GB of storage are not enough... Regards
-
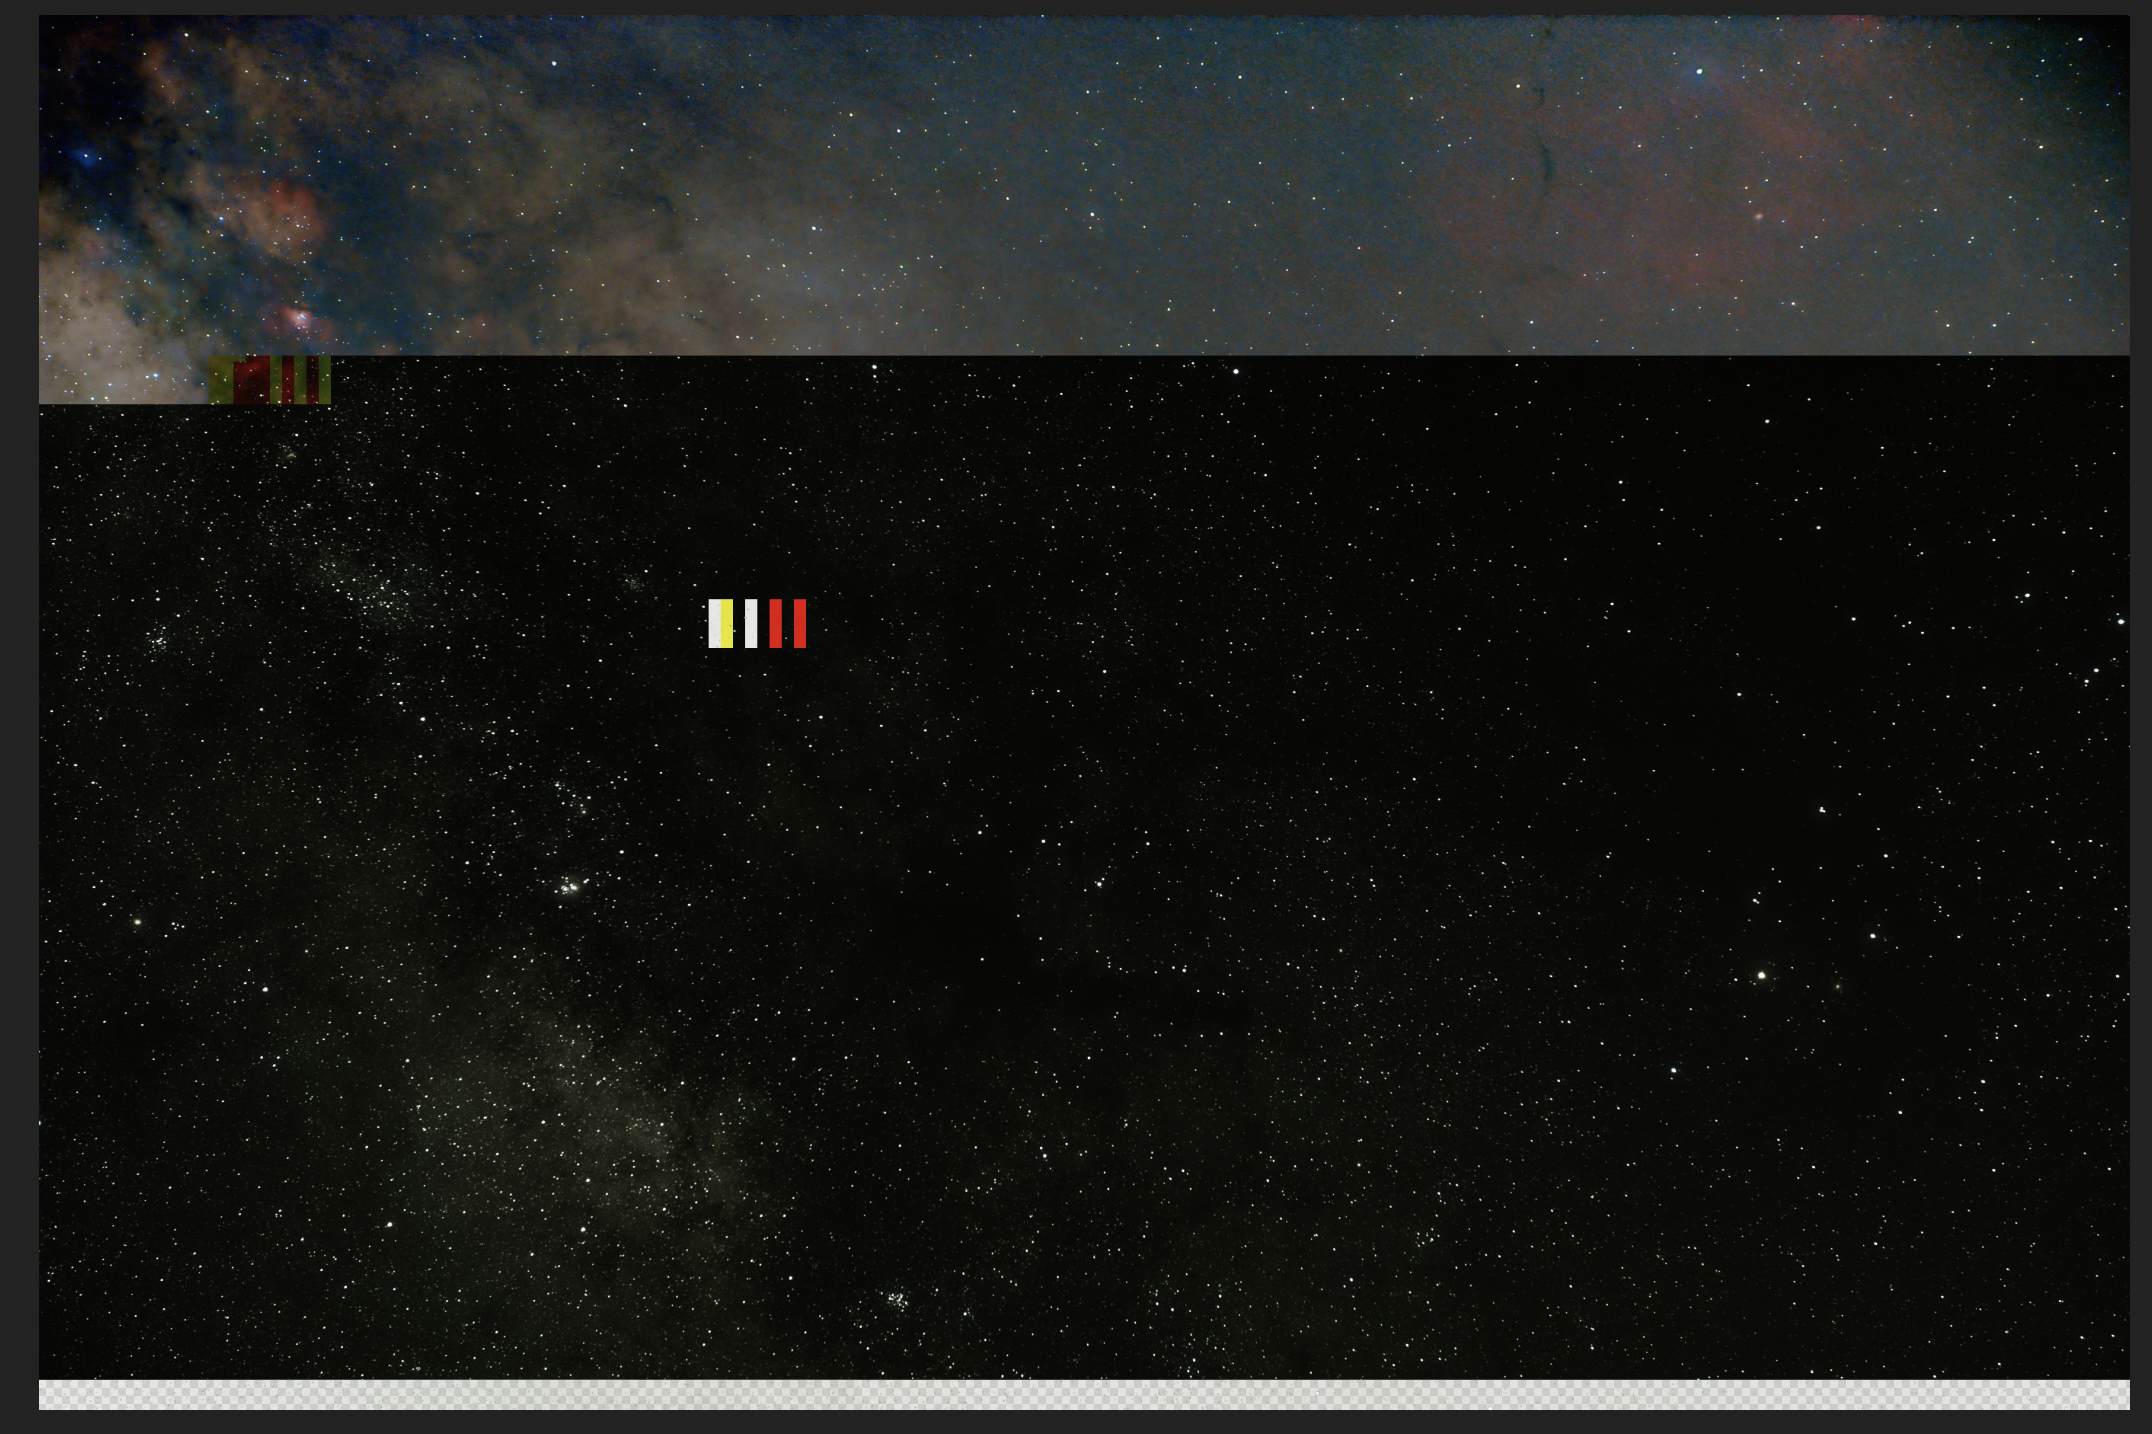
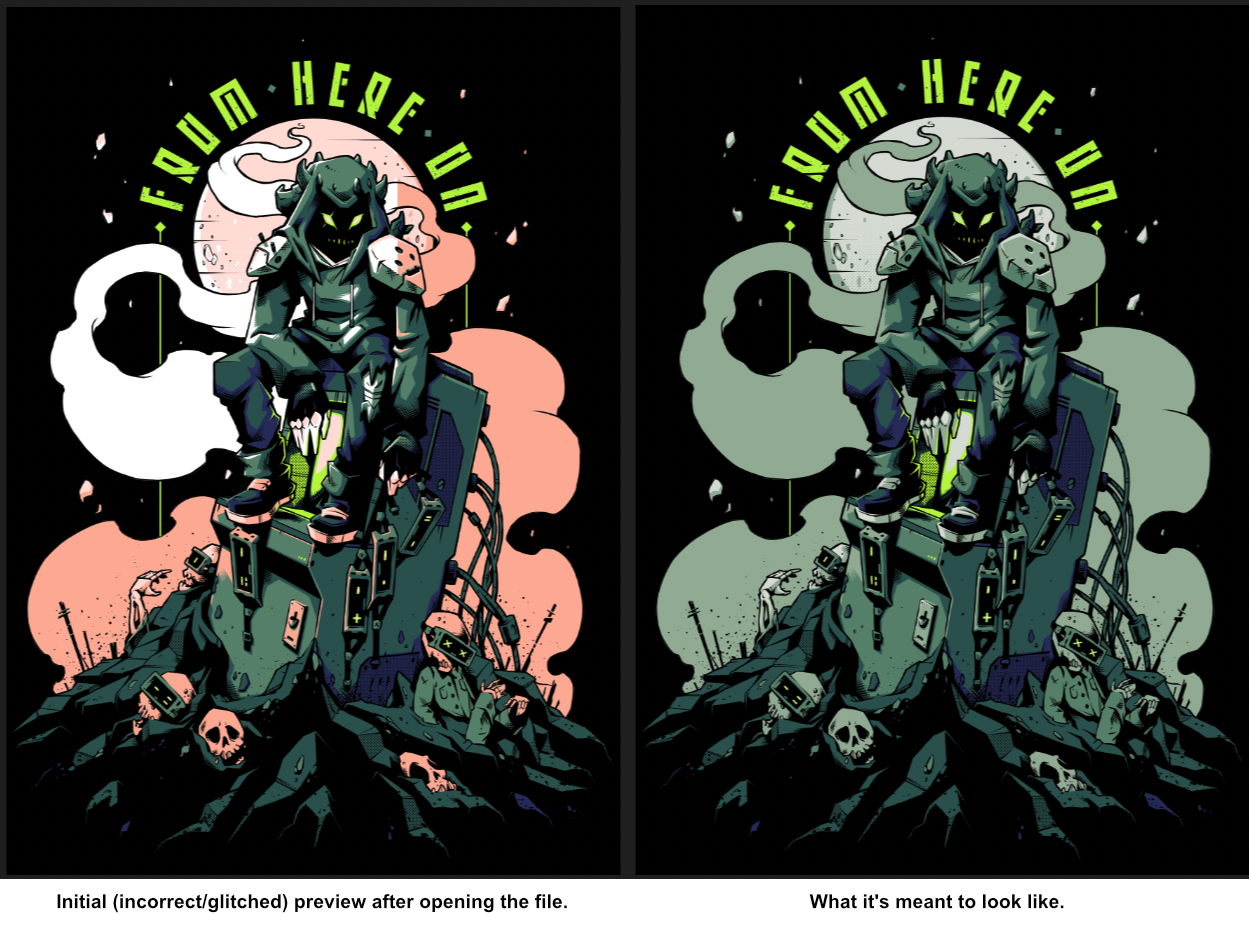
I've been experiencing some strange display issues with Affinity Photo recently, where initially the files appear glitched after opening them. This preview goes back to normal (the way it should be) once I zoom in and out a bit, but that initial preview usually gives me major anxiety, as if the file became corrupt or glitched somehow. The pinkish red colour is not present anywhere in the illustration, so it's just been a very odd glitch. I haven't noticed this anywhere else, so I presume it's not a display issue and rather just a bug in the app, and it doesn't happen with every file every time (seems to happen at random with various files). I managed to capture a screenshot of this - below.
-
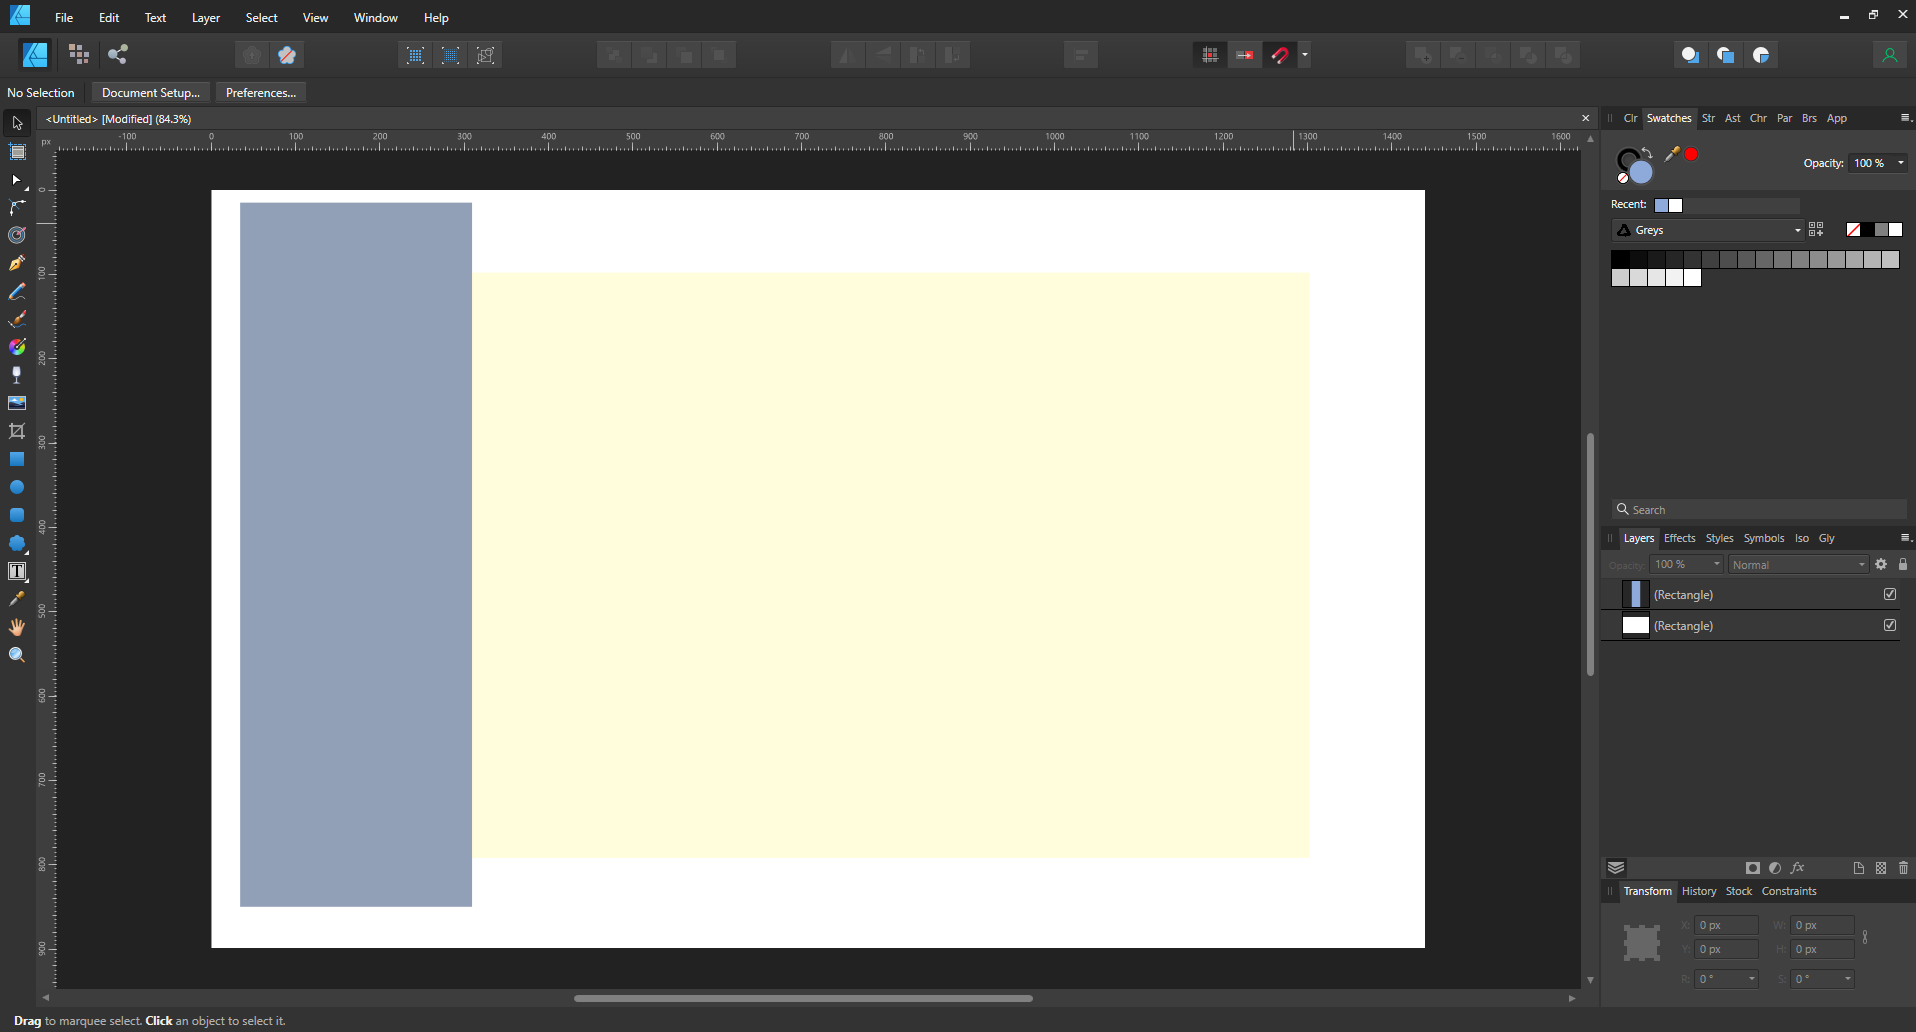
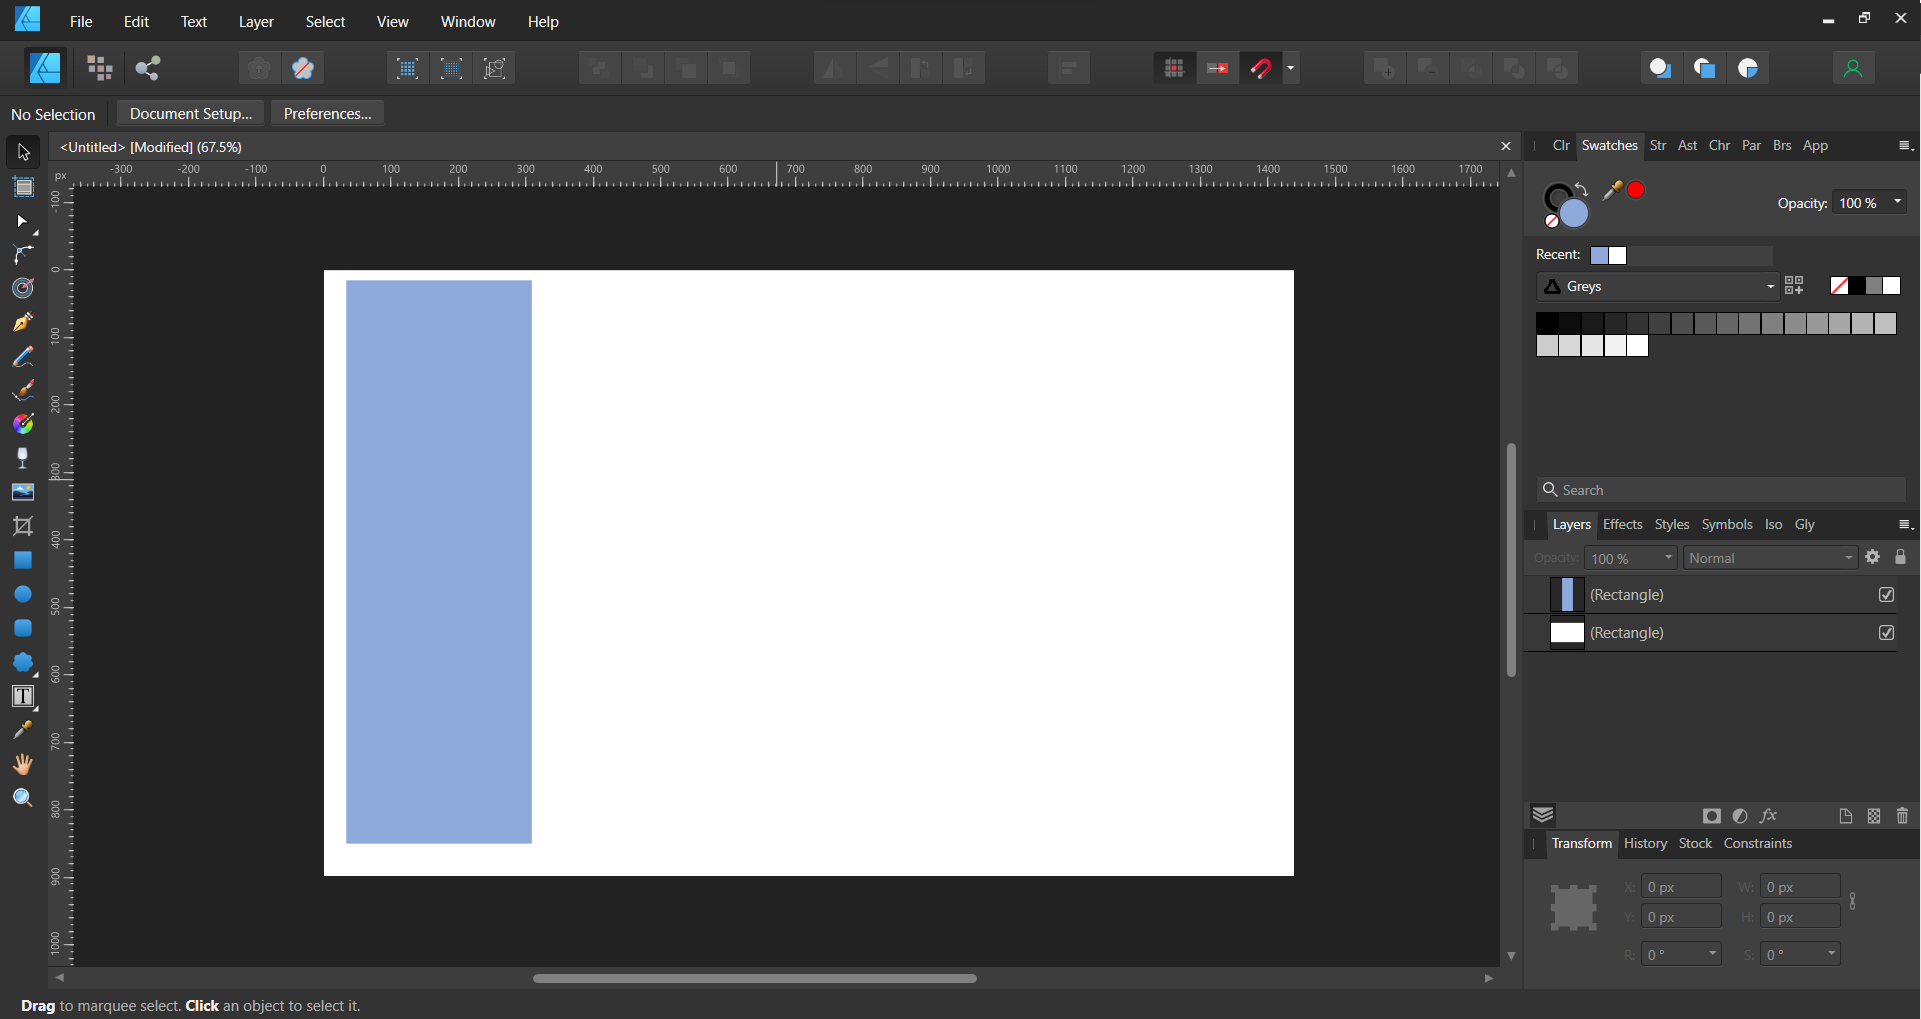
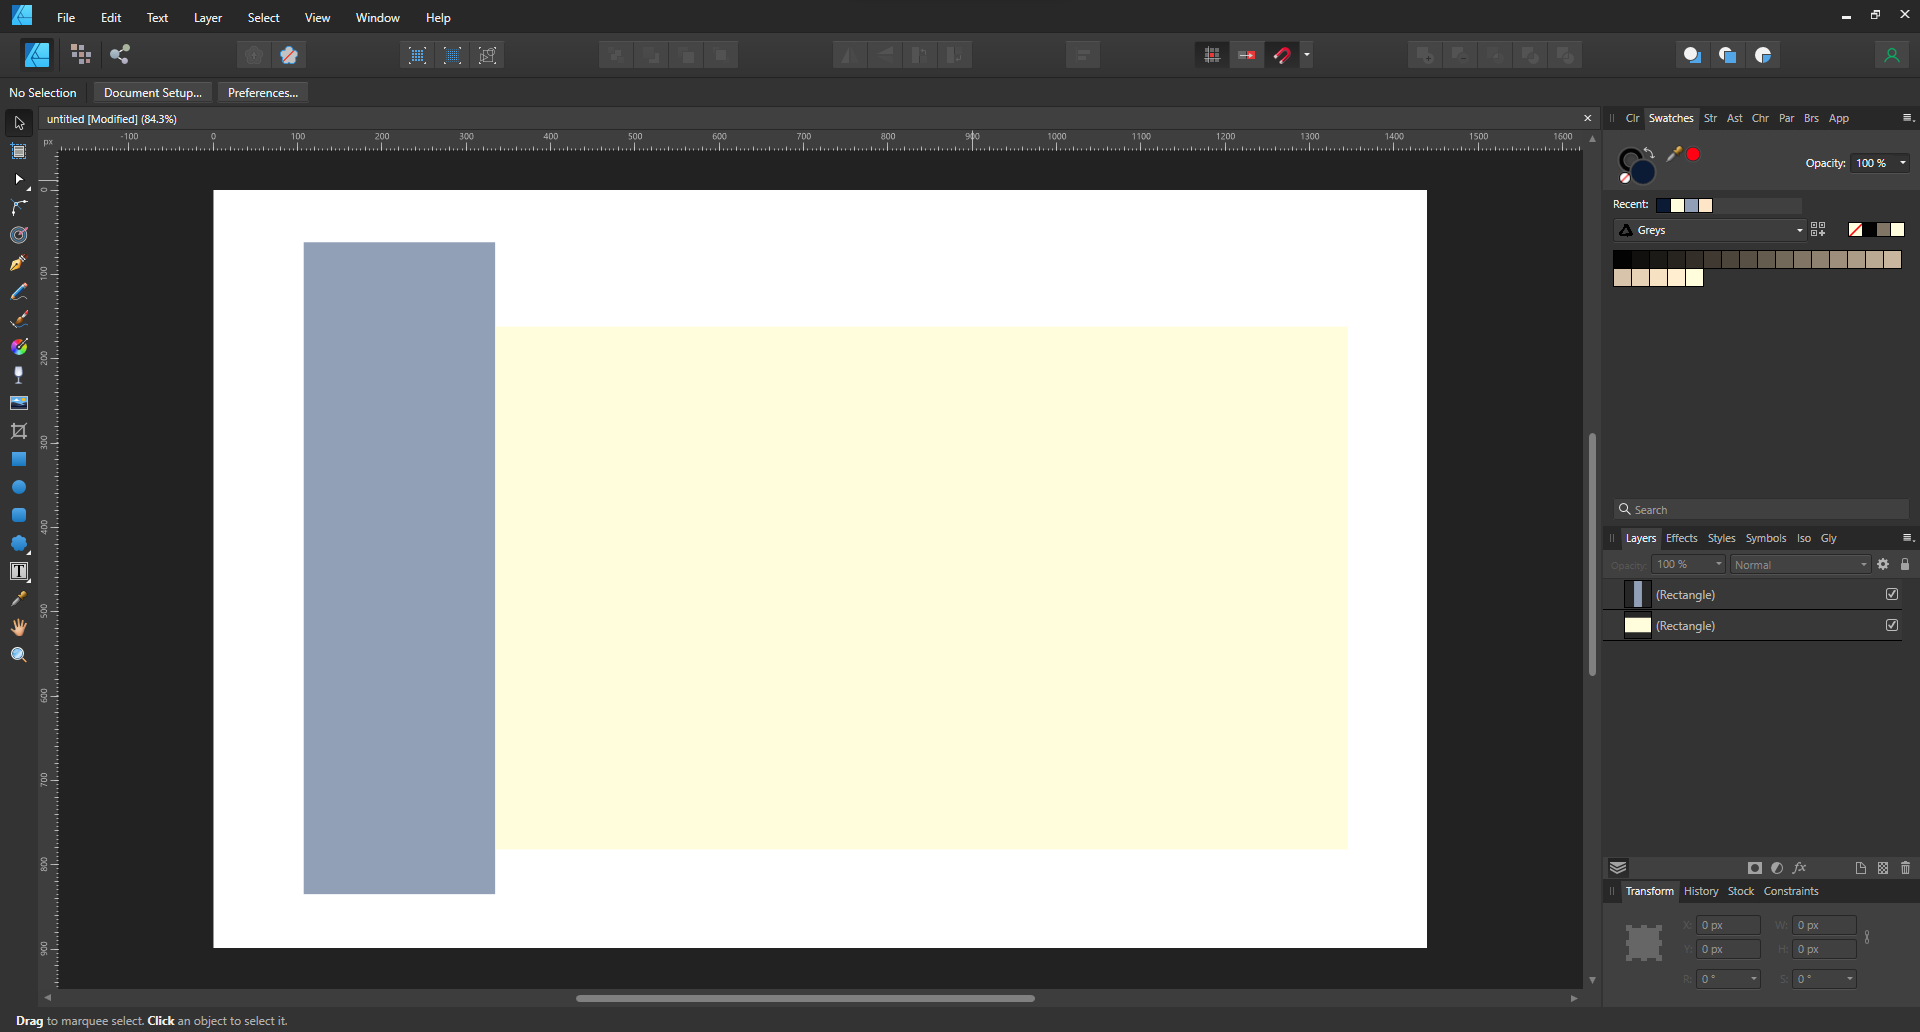
 Hello there! I found out that whites look off in my secondary monitor which is Benq VZ2250. My device specs are: Windows 11 version 21H2 build 22000.318, Intel i7 - 10510U, NVIDIA GeForce MX350 (with updated drivers) My Monitor: Benq VZ2250 as I mentioned earlier. Here is the issue: The yellow colored rectangle is actually a pure white rectangle. The blue-grey rectangle is actually only blue without any black component. The weird part is. if I move this to my primary display which is my laptop screen, the above magically turns into: If I switch from extend display to secondary display only, this happens: Where even the original whites in color palette also become yellowish. I've tried the same with another laptop and I remember the same happening with it as well. I don't understand the problem here. Is it my secondary monitor? Is it my laptop? or is it because of affinity? It is worthy to note that this wasn't happening in 1.10.x (until the recent release) and 1.9.x I remember this issue happening in my previous laptop until 1.8.x/1.7.x or something, I don't exactly remember. Also, the same happens in all affinity apps but doesn't happen in Adobe suite. How could I solve this? I would appreciate if someone could help me out here . Thanks in advance!
-
Hi, I'm running Affinity Photo 1.10.1 on Windows 10 x64, with 64GB RAM and nVidia GTX 1080 video card (with the latest nVidia Studio drivers) on a 4K monitor. And I've noticed recently an odd problem that occurs only in specific images with repeating patterns in them. When hovering (just hovering, not clicking or doing anything) with the Brush tool (although this may occur with other tools too, but I didn't tests these) causes the image underneath to change momentarily, then revert back. This happens with every movement of the mouse over these regions of the image. See attached video for an example. I have also attached the image I used in the video. These artifacts are distracting & annoying - and don't occur on "natural" images, only such that exhibit some repeating patterns. I'd really appreciate it if this can be fixed in a future release. Thanks! -- TR affinity-photo-issue.mov
-
 I purchased Designer and Photo years ago but I just couldn't replace Illustrator & Photoshop because of a few missing features that are just workflow basics. I've moved to the Windows platform and just downloaded new trial versions of them to give them another chance, and these problems persist. Most of them relate to features that prevent the user from making critical, unprofessional mistakes like inconsistent color use across multiple documents. If you are deigning a flyer, a business card and a name badge, you can't have variations between them. These are a few [very] minor omissions that I am missing that risks me making amateurish mistakes: - Global swatches don't carry to another document when copy-n-pasting a logo from one document to another (same as in Publisher) - Swatches not carrying over to the new document also means that overprint setting are lost because overprint is defined in the swatch, not in the object. - I can't tell what color mode I'm working in. If my mode is RGB for a flyer, I need something to shout out at me, or at least give me a clue that my print job is going to be disaster. A simple RGB/CMYK icon would suffice. Even Photo displays its color mode in the document's header, but Designer [where it's more important] doesn't. - The colour picker only picks up RGB/CMYK values, not a global swatch. Even if I've pasted a logo into a new document and it's displaying a global color, the eyedropper doesn't read it as a global color so I can't even reliably copy colors from my source logo. - To duplicate an object by dragging it, I have to press the Alt key before I select the object, not during the drag. Most of the time, I need to be certain I have selected the correct object before I duplicate it, however, now I have to duplicate something and then find out if I selected correctly. I don't know how many times I have moved items I want to duplicate and duplicated items I didn't want to duplicate because of this. An application is not fast to work in if I'm constantly undoing my actions. - Changing the colors of margins & guides. If I design a blue brochure, my margins and guides disappear. I need to make them red or yellow or anything. I don't expect to be able to mix my own colors, but a dozen pre-mixed swatches to choose from would solve this problem. (apart from working in wireframe mode) - Connecting the selected transform corner in the transform palette to the free transform with the move tool. It's very strange that I can select a corner in the transform palette, but then I always rotate around the center. I have to manually type rotation values in degrees to get the rotation around a corner. Why the disconnect? This disconnect is similar to the disconnect I experience between the swatches, color mixer and eye dropper. - Previewing at export. Even in Photo, I can't see the effect of the level of JPEG compression being applied to my exported files (neither in Designer nor Photo). I have to export a file half a dozen times until I hit upon that sweet spot of small file size to barely noticable quality loss. Even the open source GIMP does this with a live preview at export. I can do awesome professional work, and then break it all with a poor export... and not even realise it. - Proofing colors. I really need to be able to see how my colors will separate before I save my PDF. If I've accidentally worked in RGB, this will reveal my mistake as I go to repro. Overprinting and knockout will also be a disaster if not picked up in time. (Who here hasn't experienced the dreaded white text set to overprint and wondered where all your text went?). This feature alone forces me to keep a professional, licensed copy of Adobe Acrobat around to preview color separations. In my final repro file, I have to know if my spot colors are still spots and if I'm printing fine black text as 100% black, or a full color breakdown that will turn my single color print job into a full color one. Previewing the separations (or channels in your photo editor) points out my potential errors. - Overprinting settings. The previous point leads straight into this one. Why is over printing set in the swatch and not the object? If I want some small paragraph text to over print, but large display text to knockout, I have to make 2 identical black swatches to do this. Why can't I specify this on an object-by-object basis? I guess "Multiply" does the same thing and works as a work-around, but you're targeting print designers, and use the term overprint yourselves so why the strange and risky implementation. - Snapping to "round" values. When manually selecting a color in CMYK, we are inevitably creating a color using round number values from a color chart. It's slow and frustrating trying to select exactly 50% in a slider as it hops from 49 to 51 and back again while we search for that perfect pixel placement. How about snapping to increments of 5% by holding down the shift key? Your snapping features are awesomely powerful, but only in the document. Why not extend this into the sliders and the rest of the application? (Admittedly, I don't know any other application that does this, but it makes sense and would be welcome.) Basic features that are even in open source software seem to be missing. We waited for years to get arrow heads. You claimed it was because you wanted to get it awesome, but they are no more powerful/different to anything else out there on the market. I suspect we only got them when Publisher was released. Did we have to wait for a whole new app to be leased to get arrow heads? Now we sit with other missing basic, common features like: - Blend/Interpolate - Stroke drawing tools like a grid tool and a straight line tool. These are enormous time savers. - Tabs. (I understand you want to protect Publisher by keeping high end text features like hyphenation, drop-caps and text wrap out of Designer, but this feels like a very basic feature compared to your range of kerning, alignment and Opentype features already here from day one) I understand that everyone's needs are different and you can't satisfy everyone, but you are targeting print designers as well and illustrators and web designers, and these are all features every professional expects and is surprising that they're not here. You give us features that most professionals just leave on the defaults because few of us even understand them (like color profiles and LUTs), but then drop the ball by not pasting a global swatch from one document to another. It's confusing and just doesn't make me feel confident in the files I send to print. Please can you look at these issues before adding new features. I understand that new features are needed to sell products, but a lot of us early adopters are just wondering where the small tweaks and refinements are. It seems that your development team needs to consult with an old school designer or printer to get these fundamentals right. It feels like you've only got young designers who have grown up with an RGB workflow and have never had to bang out 6 flyers in an afternoon and send them to print with the job being rejected.
- 32 replies
-
- 34
-
-

-

-
- separations
- proofing
- (and 8 more)
-
I have two screens. My main screen is my laptop runningWindows 10. I use Adobe Bridge as my photo manager and it is set to open a photo for editing in Affinity. Affinity photo displays correctly when launched from Adobe Bridge. However, when I try and launch Affinity Photo directly it fails to display correctly on my larger secondary monitor - it starts to launch and then immediately switches to an incomplete welcome screen with no means of minimising or closing (not visible). I have to close the the program from the task bar on my laptop. The only way I can launch Affinity Photo to display correctly on my secondary larger monitor is to launch it on my laptop - minimise it and then drag it to the larger monitor and then maximise it. Any ideas? Many thanks.
-
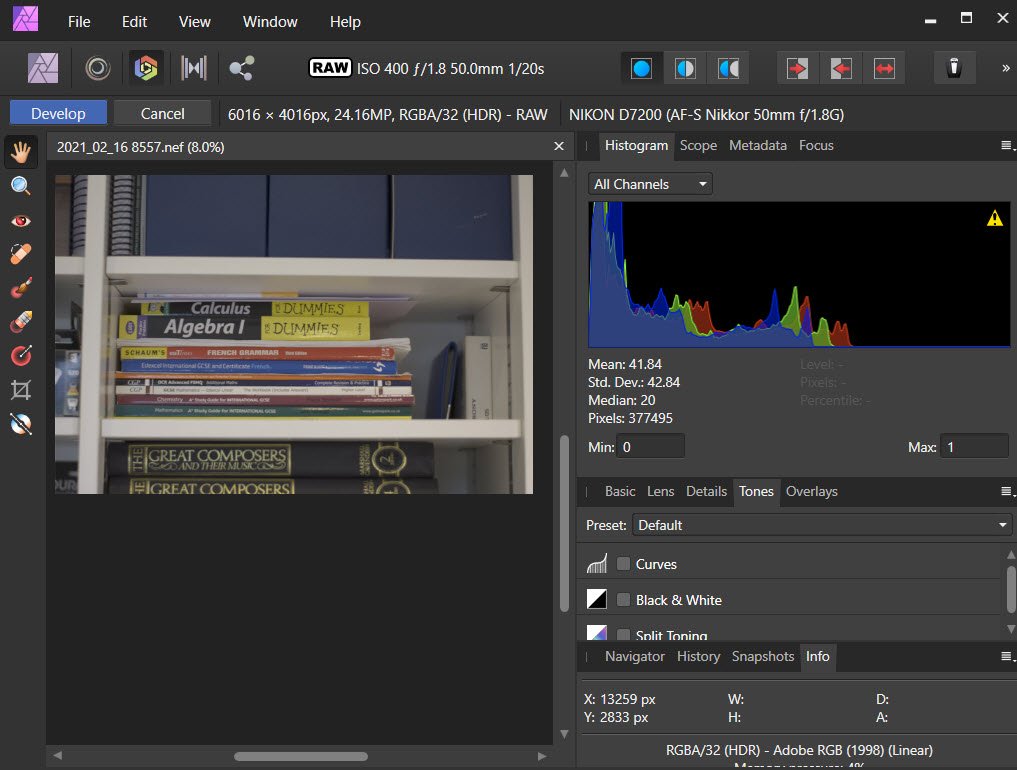
Using Affinity Photo 1.9.1.979; camera Nikon D7200; shooting NEF+JPG; working with well-exposed images that display normally in AP 1.7 and AP 1.8.5 (They also behave normally in ACDSee Ultimate, DxO Photolab 4, and Nikon NX Studio). When these same .NEF files are opened in AP 1.9.1 the image appears washed out and the histogram is skewed to the left. The .JPGs of the same images display correctly. The screenshots of test images below are "as opened" with no adjustments, and clearly show the difference between for example ACDSee (top) vs Affinity Photo (bottom). The same problem affects older .NEFs from Nikon D60 and D80, so it does not appear to be camera-specific. I've checked the AP options and settings but nothing there makes a difference. I also see that similar issues were reported with AP 1.6, and apparently resolved in 1.7. This makes AP 1.9.1 unusable for RAW processing.
-
Hi, I would like to be able to see intensity waveform, RGB parade, and Vectorscope chart simultaneously in my studio. This way, when I make an adjustment, I can see the impact on all three of them at the same time then having to toggle back and forth between each chart on scope panel.
-
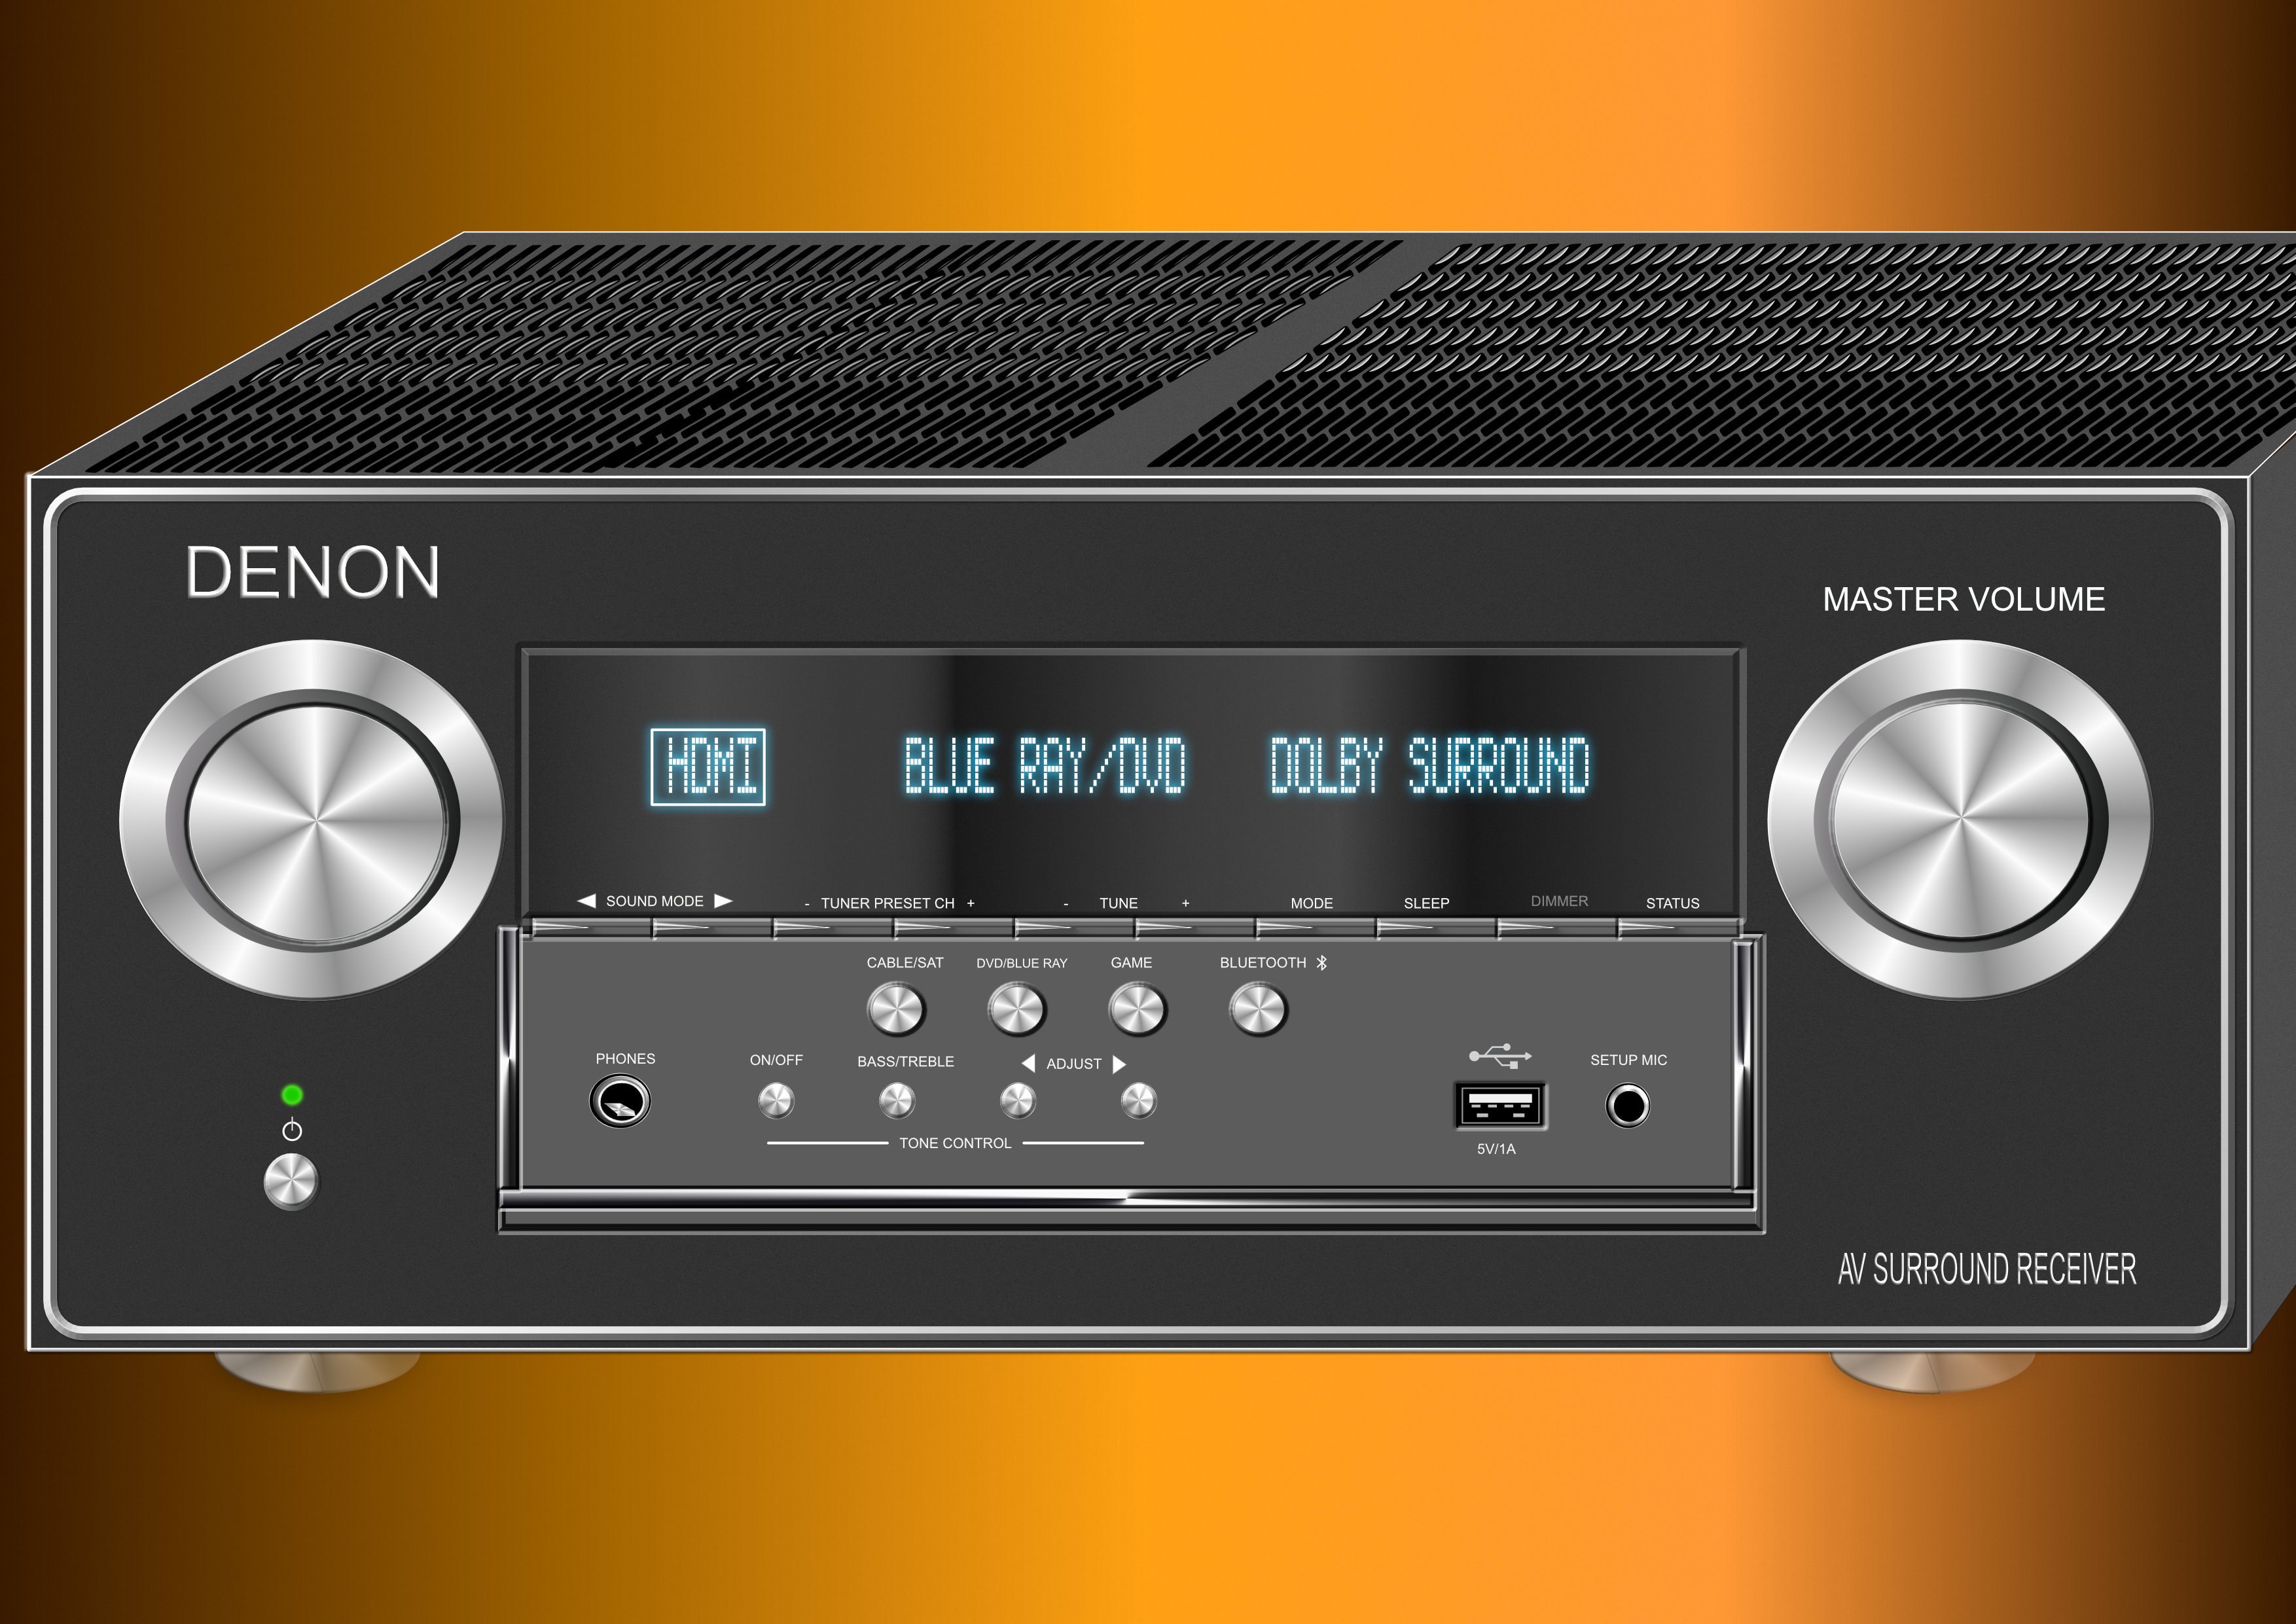
I took my stereo Denon and recreated its amplifier with knobs, displays, legs, ports, LEDs, grills (that was the hardest) in Affinity Designer.
-
 About a week ago a magenta stroke began appearing on everything once it had been selected, beit text or objects. It then remains whether selected or not. It appears on older and newly made projects. I've tried searching all pertinent topics and resources to learn how to remove this. Can anyone tell me why this is happening and how to remove it? Thank you.
 -
 Hi there, I have a question and I am hoping to put this together well for you to understand my point because I'm not sure how to explain it. I used both Af. Designer and Af. Photo interchangeably to draw and I have come to notice there is some display discrepancy between two applications. It doesn't affect when I export my projects, but it affects me when I'm working on them. When I draw in pixel persona on Af. Designer, it displays the lines very smoothly (see the first attached screenshot); however when I open the exact same file on Af. Photo, it looks a bit pixelated (see the second attached screenshot). Again, this doesn't affect the result of projects when I export, but it's makes me hard to imagine how they will turn out when I'm drawing on Af. Photo... I wonder if there's a setting to display them less pixelated on Af. Photo. I hope my question makes sense.
-
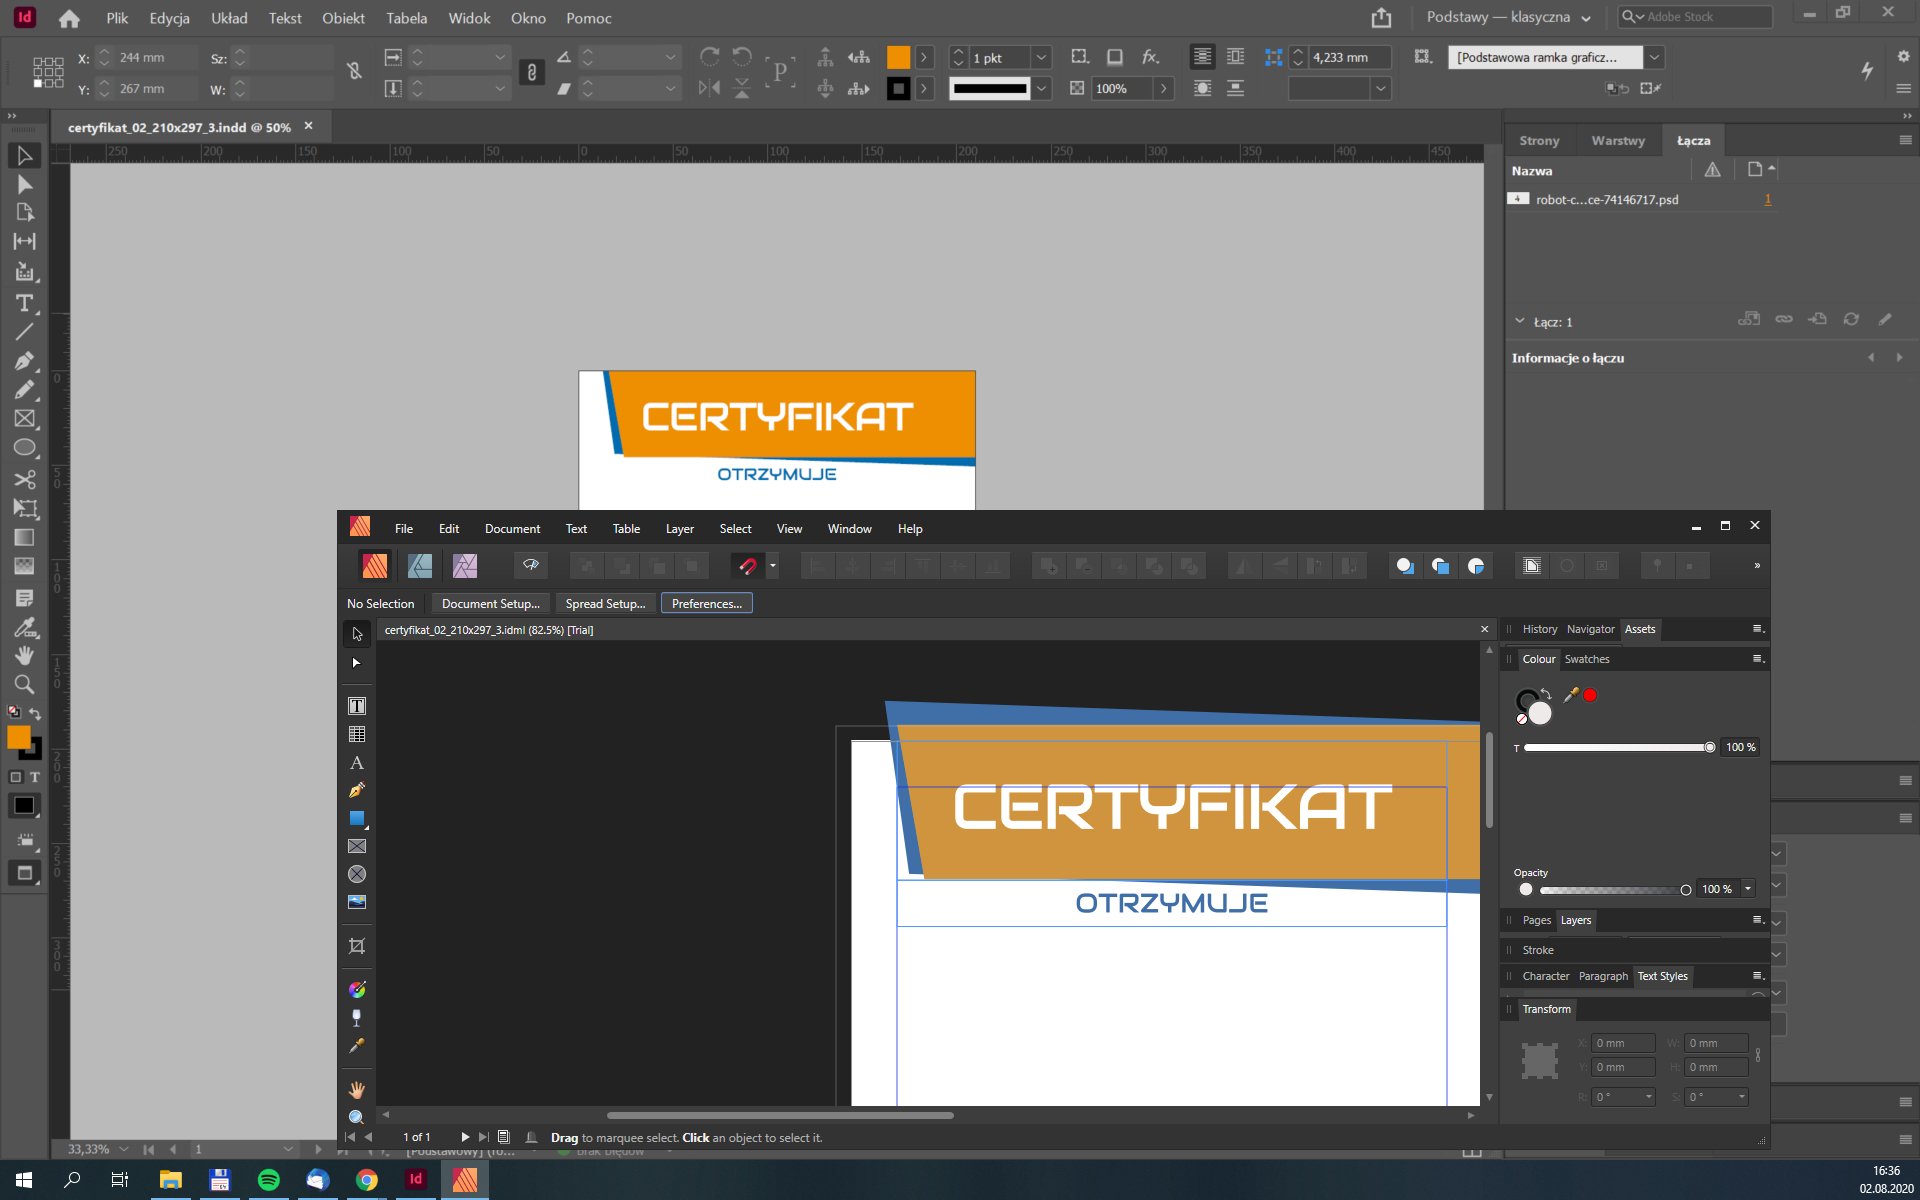
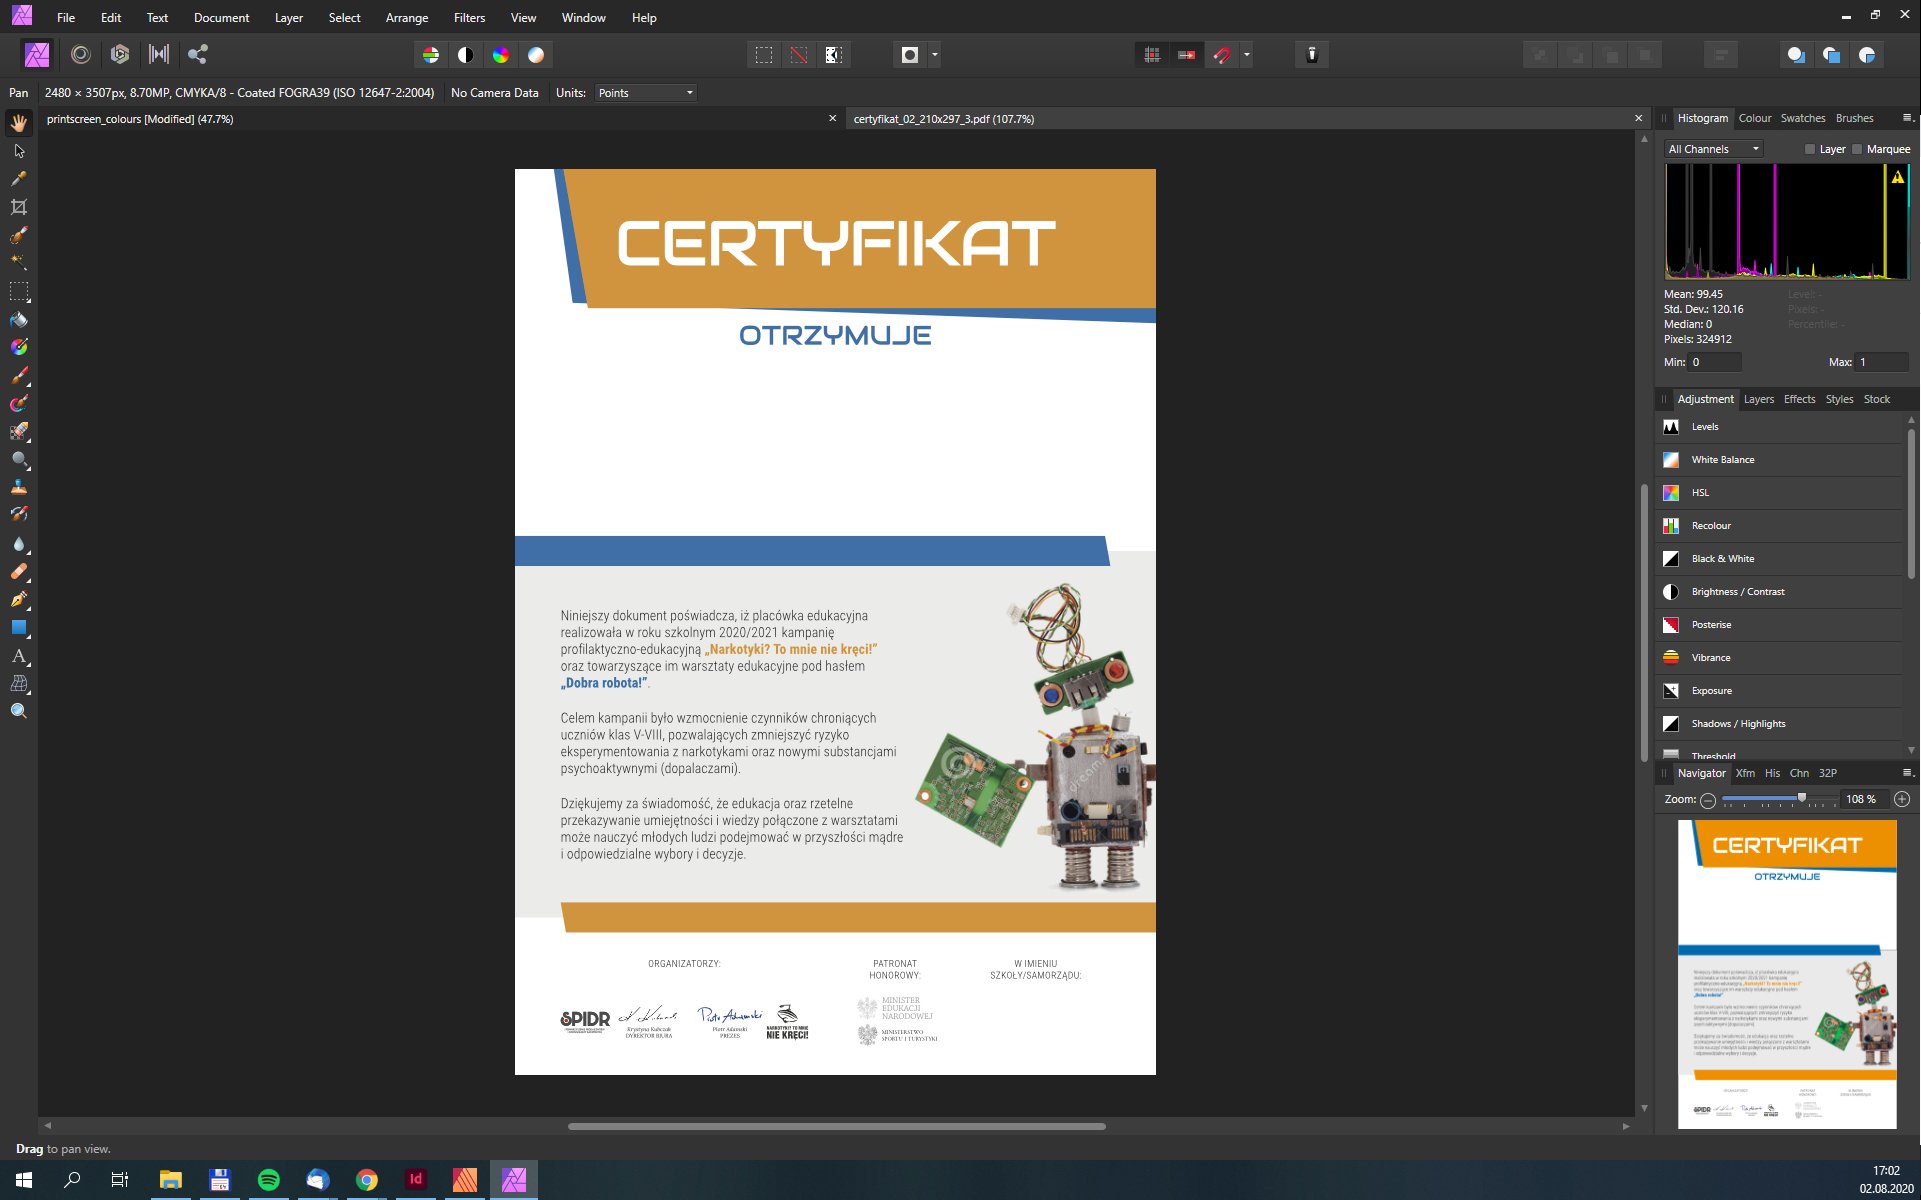
 Hei, I wanted to start working in Affinity apps (all three), but encountered a serious problem right from the start: colours don't match. The ones on the working space in Affinity are clearly desaturated while after exporting they visibly gain saturation. Adobe, previously used by me, also displays nice saturated colours. I have everywhere set the sRGB profile, except my Eizo monitor (from which screenshots), which has been calibrated with Spyder and has it's own profile. Surprisingly though, when I switch the monitor to sRGB, the colour difference is even bigger. Can you please help? Or at least tell me if/where I can switch of display colour conversion in Affinity programs. Regards, Kati
-
 Hello, With a custom OCIO config, with 32-bit Linear document in ACEScg color space, with a display management set to OCIO Display Transform and custom display LUT, with several documents open at the same time (all 32-bits ACEScg), we found that the 32-bit display is deactivated when swithing from a document to an other. We have to click on 'Unmanaged' or 'ICC Display Transform' then on 'OCIO Display Transform' to finally see the correct display. Whereas this is not critical, we are always able to bring back the correct display with a few clicks, this is really annoying and perturbing for the artists. This is with Affinity 1.8.3.641 Windows 10. Thanks.
 -
Hello, I started to have font issues recently. I'm currently using Design build 1.7.3 Impossible to display my Chalet™, FF Cocon™ and different other fonts that easily show up in Photoshop. They are also unaccessible in Publisher and Affinity Photo. Thx for your help, this is really uncomfortable to work with... N.
-
 Unfortunately the following bug was not fixed in version 1.7 (1.7.0.367): https://forum.affinity.serif.com/index.php?/topic/38289-dual-monitor-with-different-scaling-tool-cursor-image-huge/ The same problem still exists with Affinity Photo 1.7 under Windows 10 1903 with Surface Book 2 (200%) and external monitor (100%). I'm really disappointed that this bug still hasn't been fixed after over 2 years. Please solve the problem, so Affinity Photo is not usable with dual monitors.