Search the Community
Showing results for tags 'develop persona'.
-
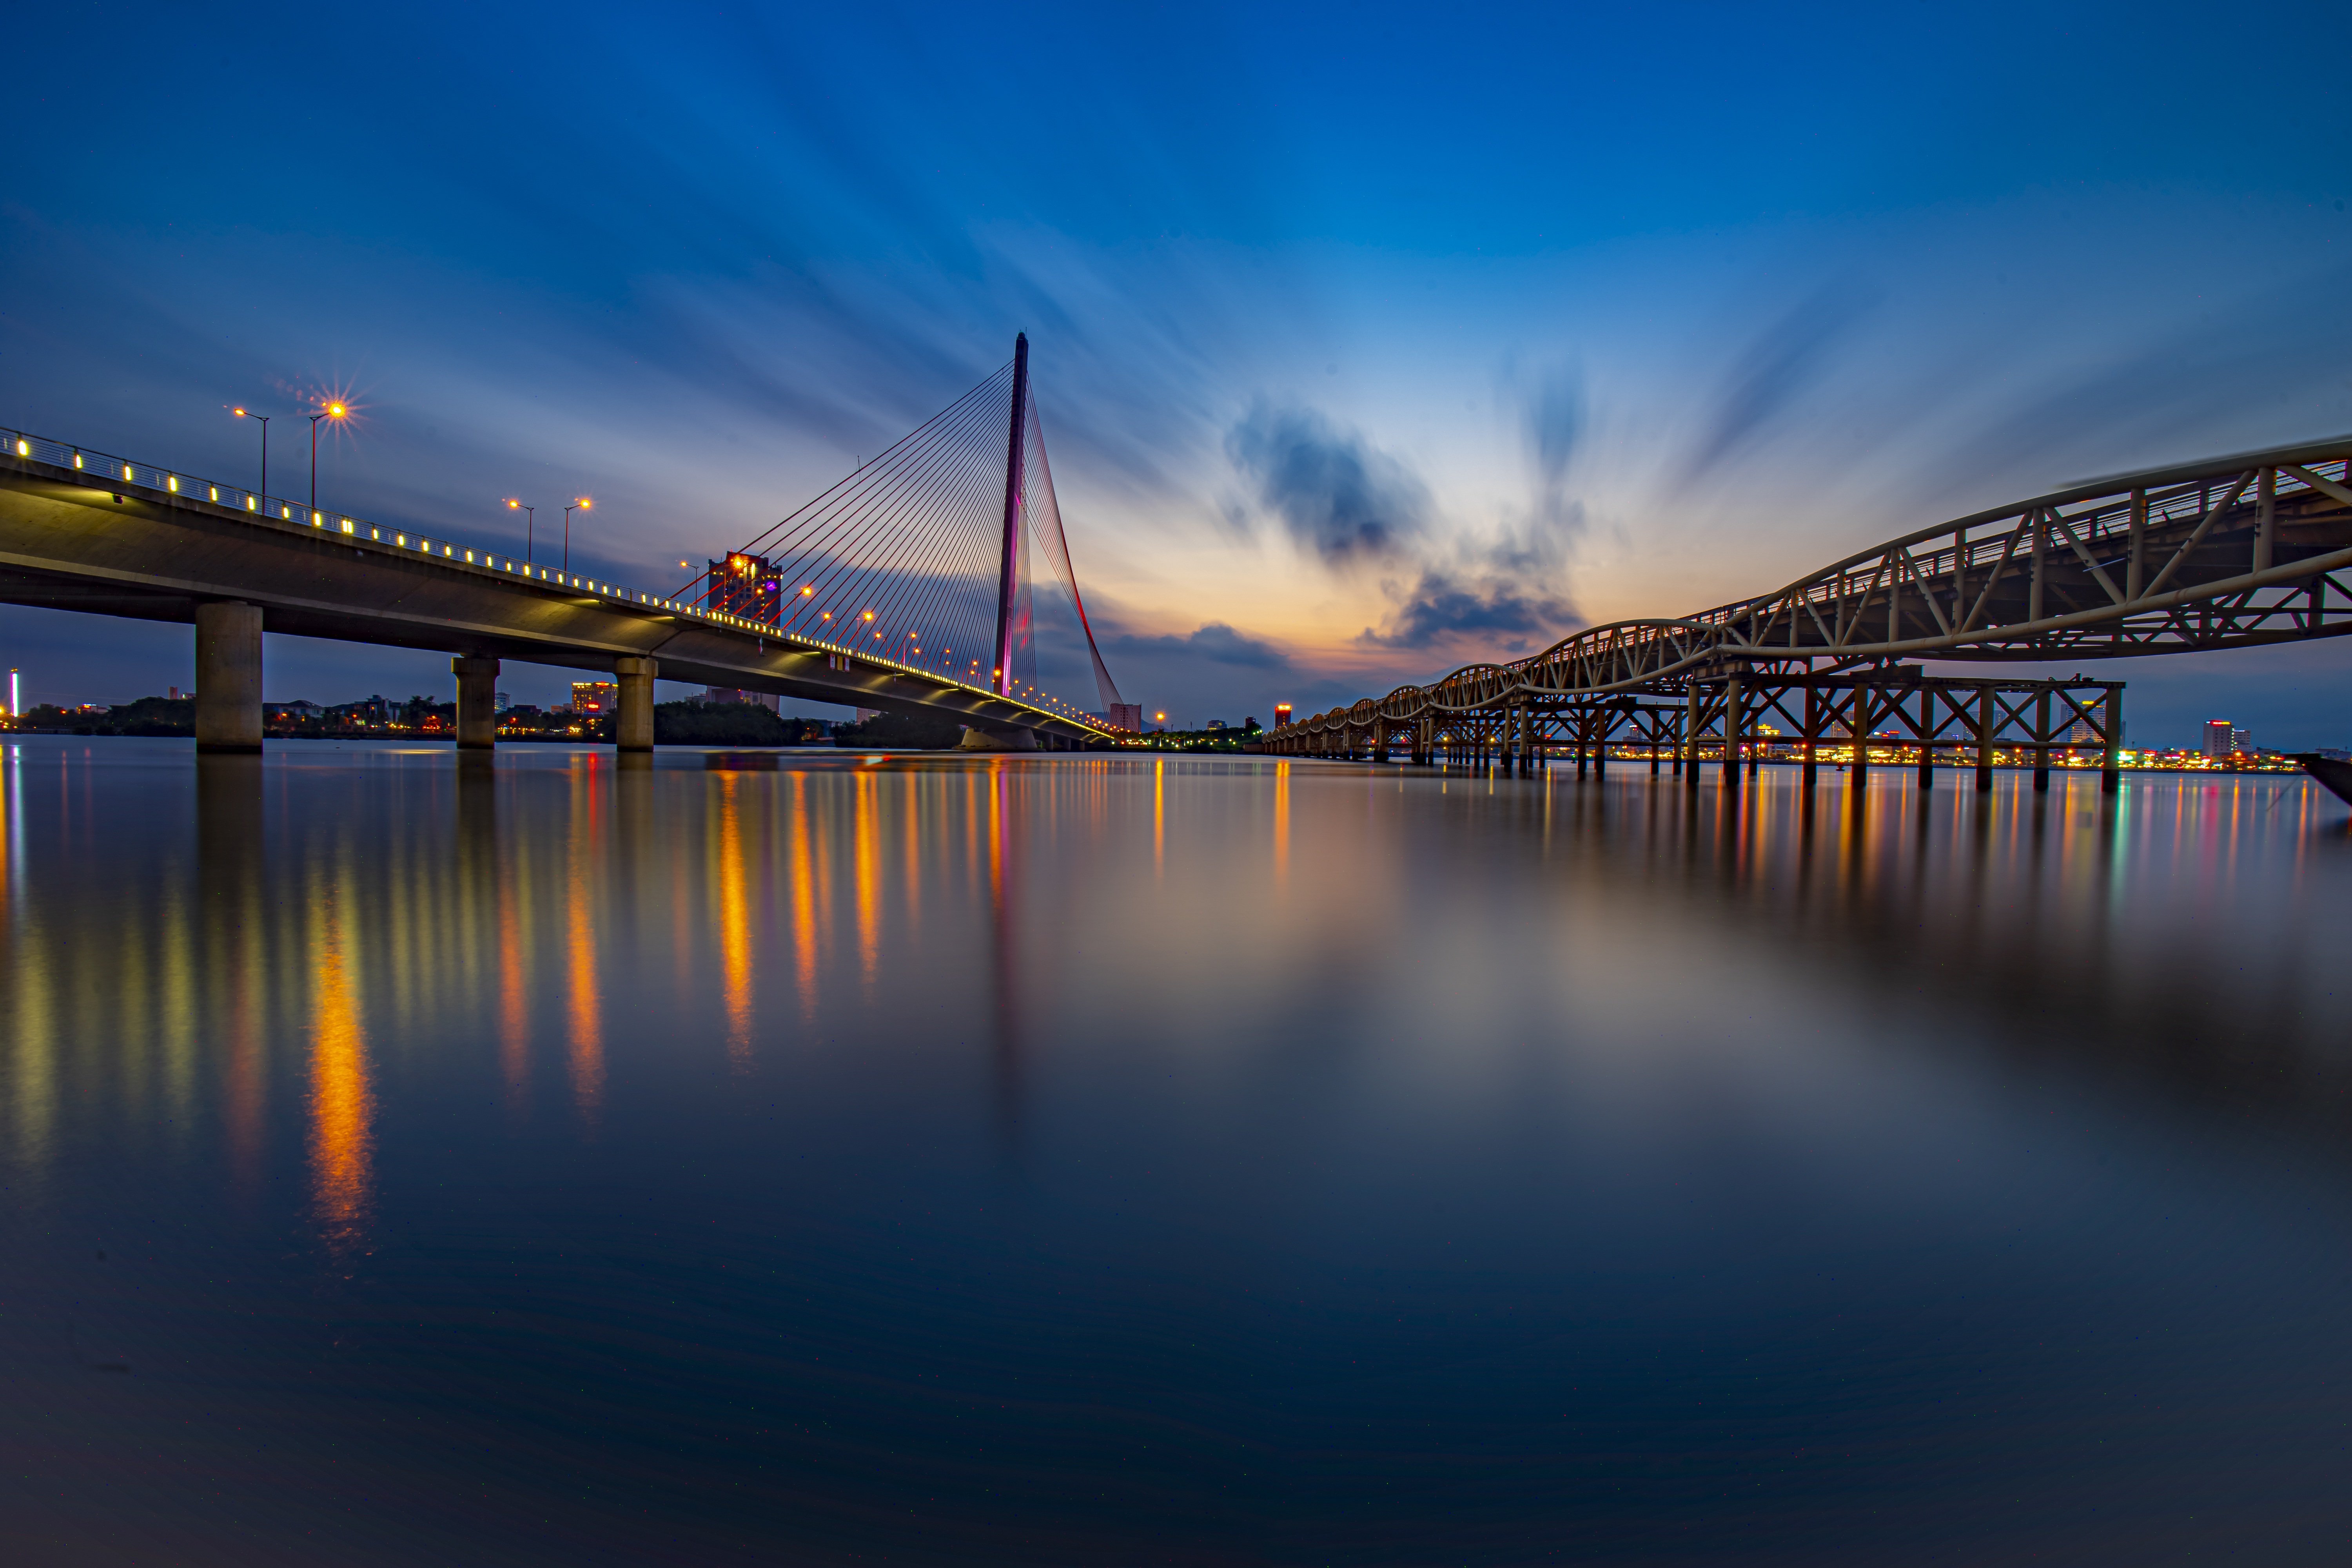
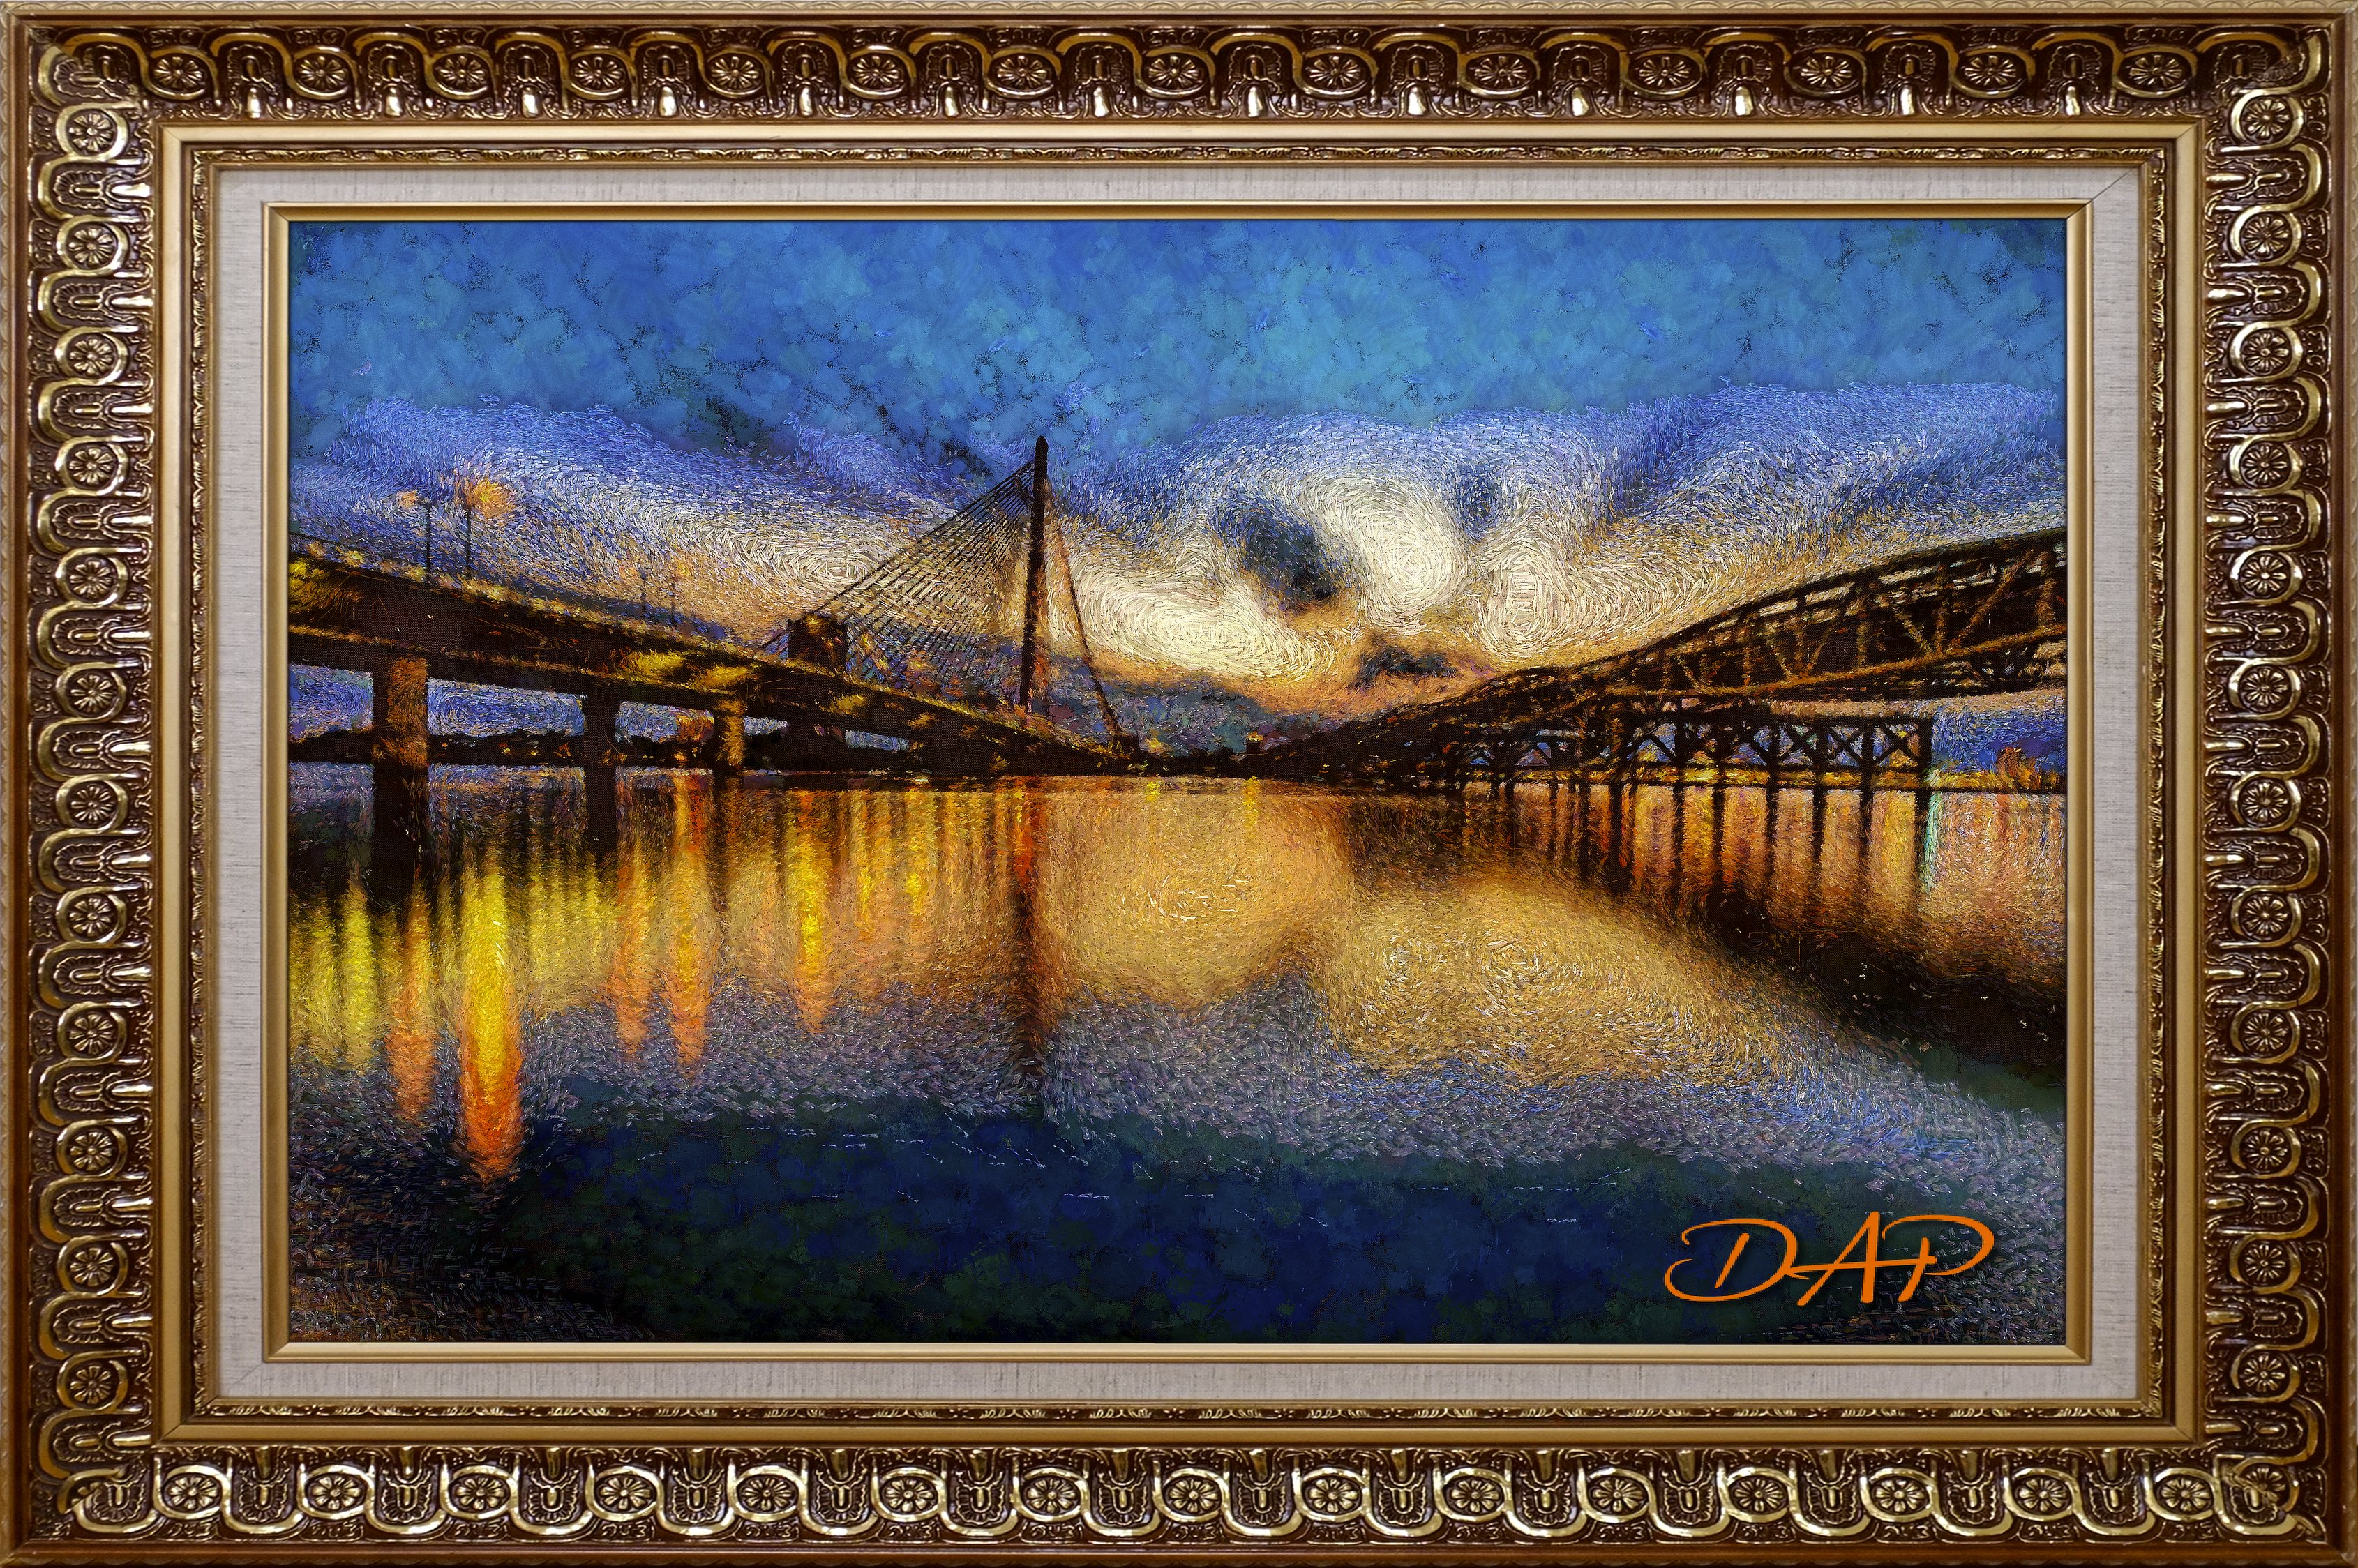
 Having just upgraded to the latest DAP Pro v 8, I thought I'd try out the new features and create a painting based on a picture from Unsplash. I also added a picture frame and the DAP signature in one of its new Rusty styles. I tweaked the image in the Affinity develop persona boosting contrast and vibrancy. Below is the original photo and the resulting painting (reduced size) done in Affinity Photo using the export persona. Both are JPEGs.
-
- 1
-

-
- develop persona
- dap pro 8
- (and 2 more)
-
Continuing my work with Affinity Photo and DAP Pro 7 I created this portrait version of a photograph that came with DrawPlus X8. The painting effect was enhanced by the use of Tone Mapping and the development persona to give it an authentic painted look. The small JPG was exported from Affinity Photo. I hope you can see the paintbrush textures.
- 4 replies
-
- 2
-
-
- dap pro
- portraitist
- (and 2 more)
-
 The problem has been present since the release of the V2 version. MacBook Air M1 macOS Sonoma (also happened on Ventura). Only happens if I close the window before developing the photo. If I develop a photo and after developing I go back to Develop Persona and close the window the app does not crash. This happens every time with both hardware acceleration enabled and disabled. I recorded a short video. Nagranie z ekranu 2023-12-2 o 11.27.57.mov
 -
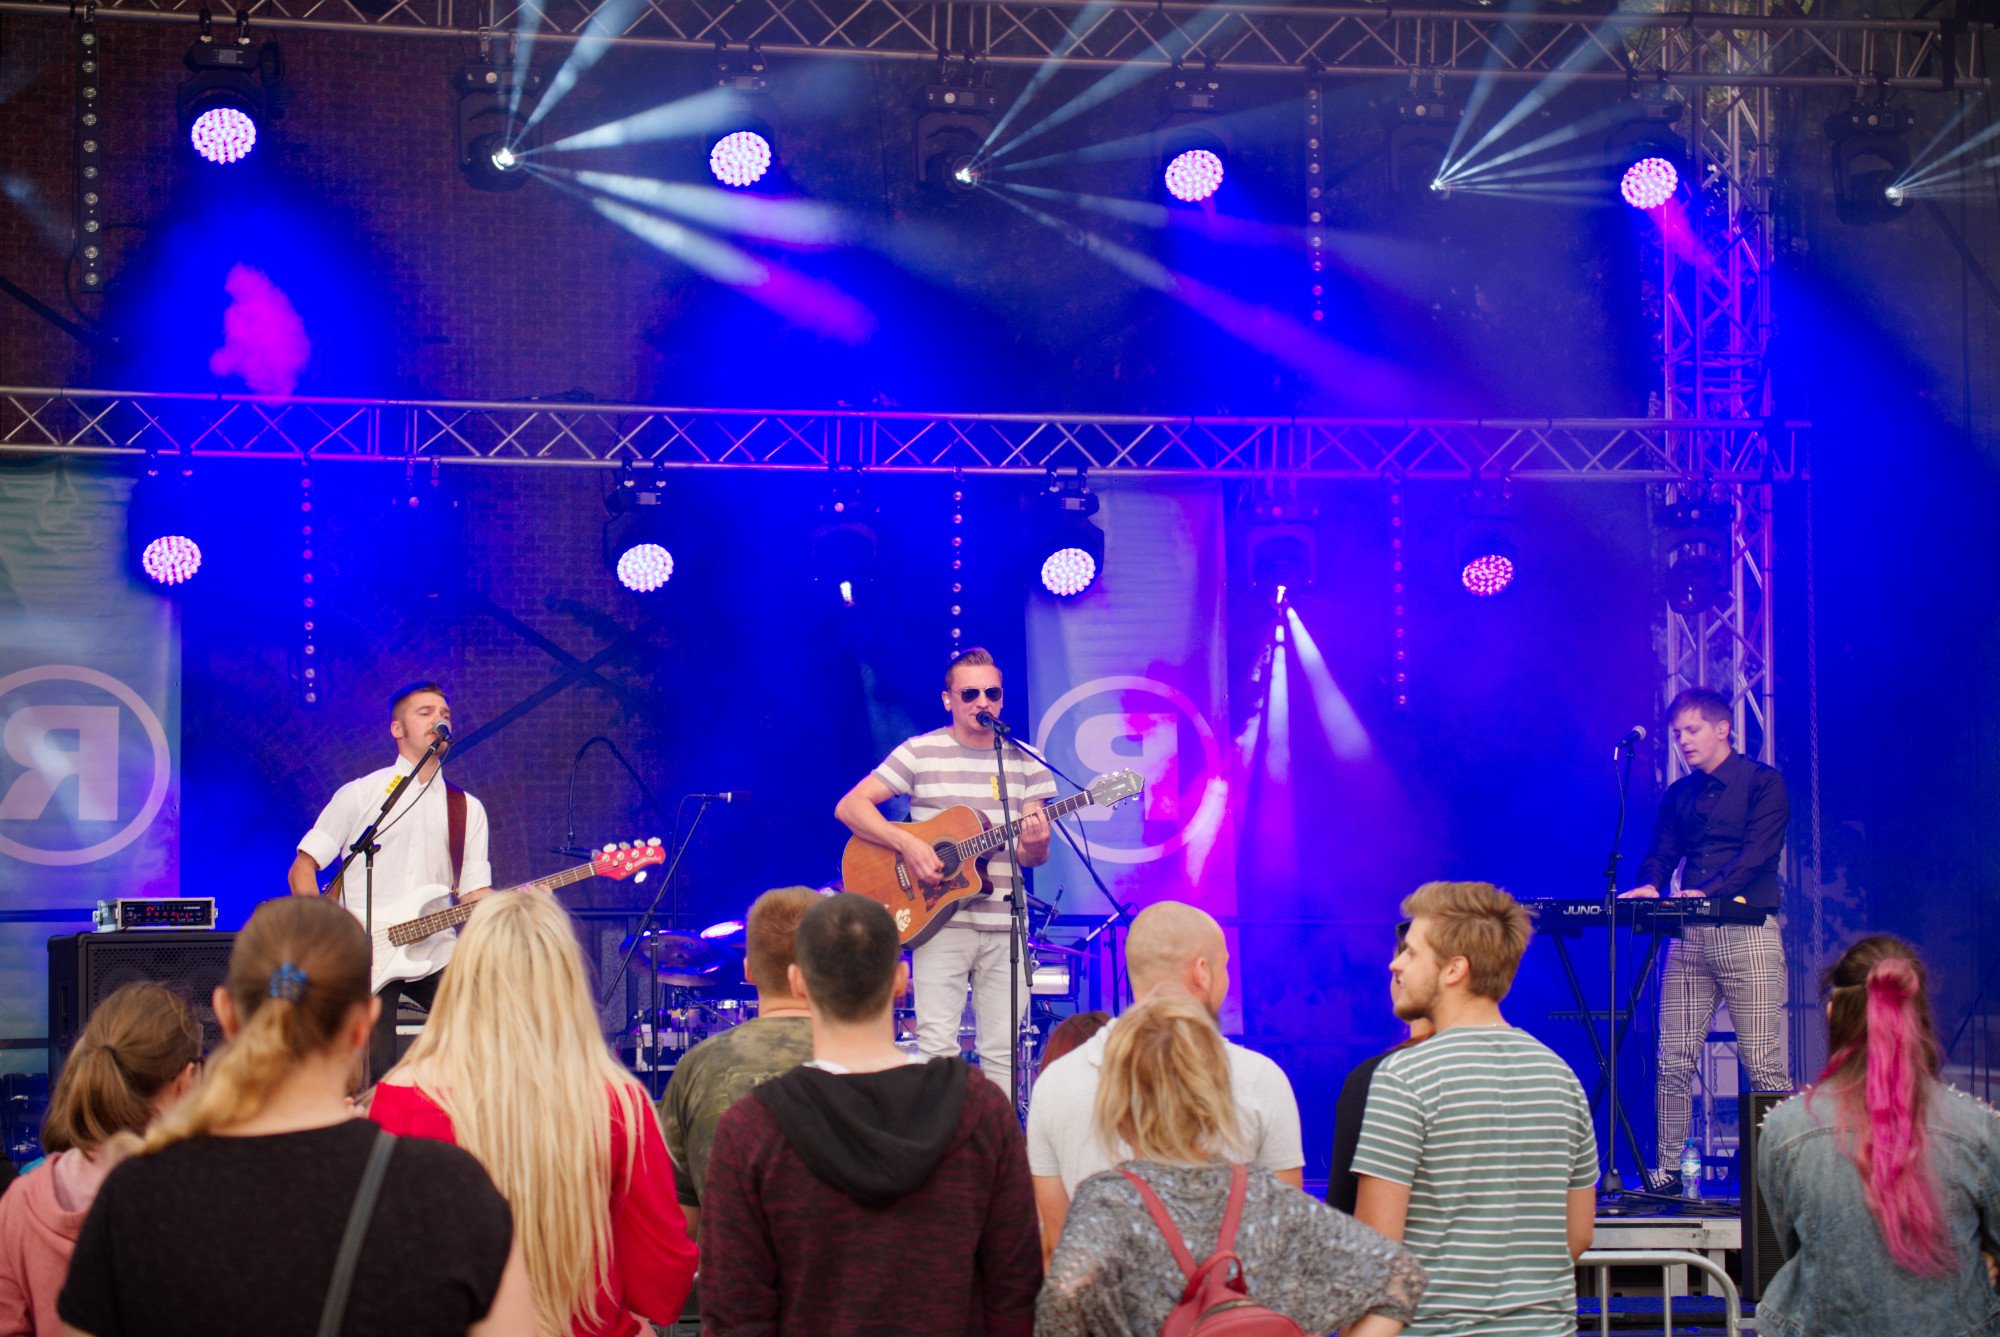
 Hi! I noticed some problems with RAW processing (Fuji X-T20) when intense blue stage light appears on the photo. There are no details in it. In addition, during basic processing, this light changes its shade to purple. RAW file download: https://we.tl/t-KoS6tF7RyZ SOOC JPG: RAW from C1: RAW from Develop Persona: My settings:
-
 Dear Community! Shooting RAW files in cropped format (e.g. 4:3 instead of the default 3:2) can be very helpful for framing (knowing that one needs a ration of 4:3 later on anyway). Even though a non-standard aspect ratio (i.e. other than 3:2) has been set, the raw files will always be stored in full resolution of 6000x4000px, ratio 3:2. Opening DNG-files in Adobe Bridge will show the images as expected in the cropped ratio, the way I framed it and the way I want to export my edits as well. (The standard aspect ratio and image resolution, of course, do depend on one's camera model.) --> Question: Is it possible to apply the cropped aspect ratio according to the file's metadata in the "Develop Persona"? When opening Affinity Photo and loading the DNG file into the Develop Persona, the full RAW image of 3:2 with 6000x4000px will be shown, instead of the desired 4:3 with 5328x4000px. So far I was not able to find this option somewhere in the "Crop Tool [C]" or else where! Thanks in advance for any tips/links/hints/help!
 -
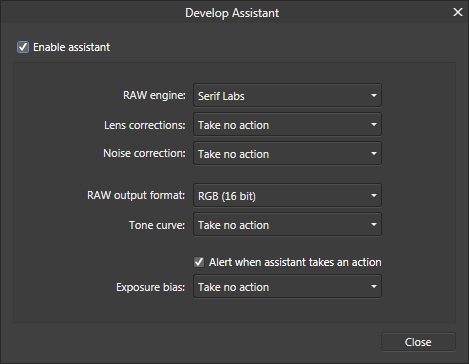
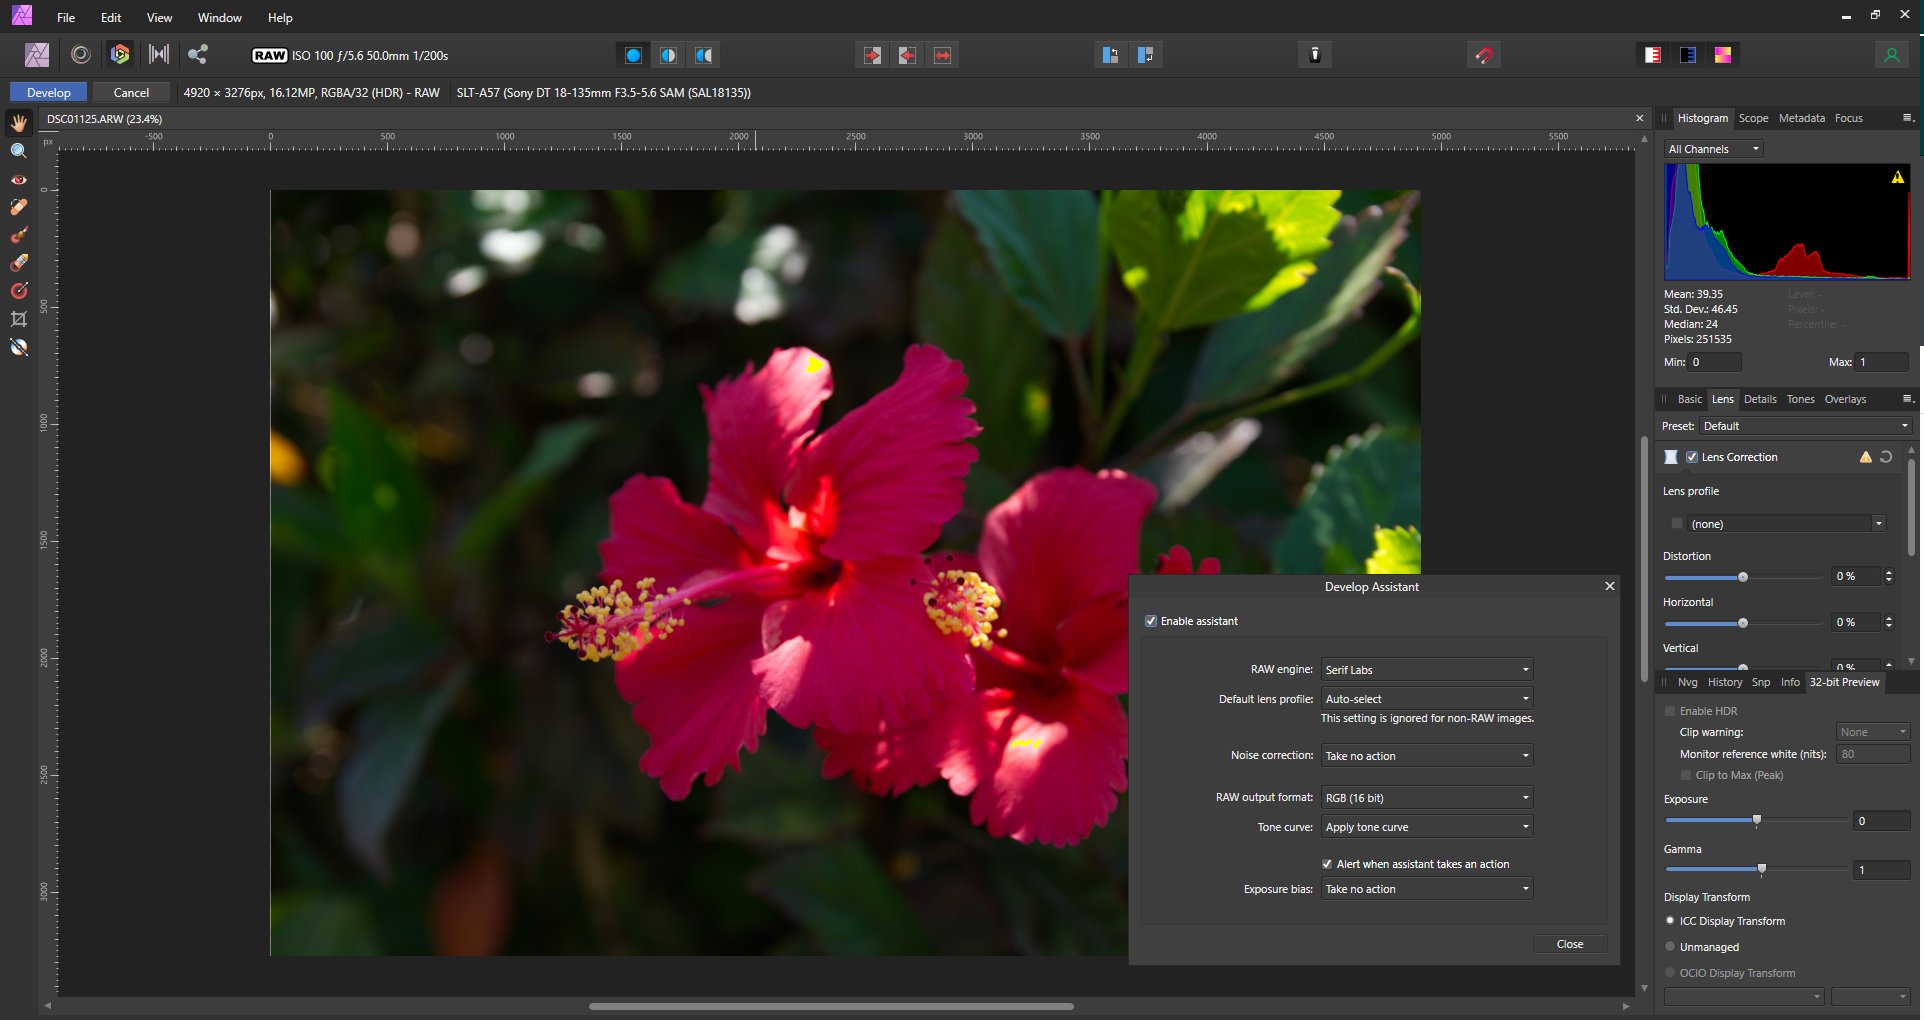
 I thought I would raise the question here in case it is something I'm doing, or not doing that is causing the issue, rather than it being a bug in the software. When I open a RAW file in the Develop Persona, it is not automatically selecting the lens profile, even though (a) Develop lens profile is set to Auto-select in Develop Assistant (b) the camera and lens model are correctly identified in the line near the top of the screen (just to the right of the Cancel button) (c) the exact lens model can be manually located in the pull down profile listing The screen shot below shows the issue for a Sony .ARW raw file, and it is not just one individual image, but all I have tried from that particular camera. It is also occurring with RAW images from Canon as well. Any thoughts please. Edit: Affinity Photo 1.9.2.1035
-
 White balance temperature in develop persona only shows as percentage, rather than K. Am I missing a setting to switch the slider to K?
-
 Attached is a PDF explaining how the key tonal correction tools in Affinity Photo work. I previously had some confusion about exactly what each tool or adjustment did, both in the Photo and Develop Personas of Affinity Photo. My searches made it clear I wasn't alone. For example, what is the difference between Exposure and Brightness in the Develop Persona? I've answered that question and more in the attached PDF. I spent a full day playing with the main tonal correction tools in the Photo and Develop personas of Photo v 2.0.4. I now understand what each tool does. More importantly, I know which tools I plan to use in each persona and why. This exercise cleared up a lot of confusion for me, so I thought I'd write up my findings and share it. I hope it is clear and helpful. Happy editing! Tonal Controls in AP.pdf
- 10 replies
-
- 7
-

-
-
- affinity photo
- photo persona
- (and 2 more)
-
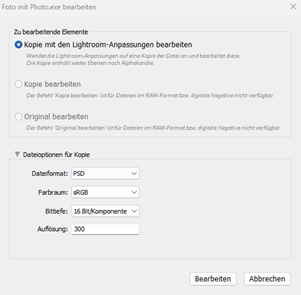
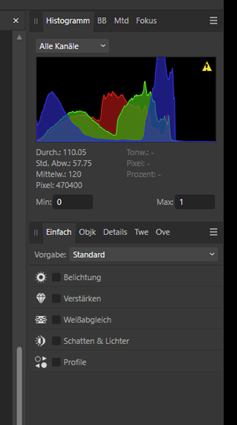
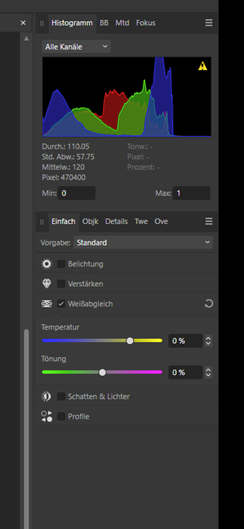
 Hi, I recently transferred a file as psd from Lightroom 6.14 into Affinity Photo and opend it in the Develop Persona. First I ticked off all sections. Then I enabled White Balance (Weißabgleich ) Moving the Slider shows no change in the picture (the numberfield stays at 0%) After disabling and enabling the White Balance the change is visible, but the numberfield still has 0%. Resetting the White Balance causes a crash of Affinity Photo. Viele Grüße roland
-
 For me one of the key missing features to help me replace Lightroom would be a filmstrip feature. Basically, I would want to select an bunch of photos, load them into the Develop persona to give me a side-by-side comparison of the Photo's that I have edited. Ideally, it would allow for adding ratings to photos so I can filter them by quality. And it would also be nice to add labels to photos to indicate whether or not they were fully developed or marked to be developed/ discarded. This would then also allow me to copy paste all (or a selection of) the Develop parameters and paste them to a selected photos as an easy means to batch process them (with immediate visual feedback on the result).
- 5 replies
-
- 1
-
-
- affinity photo 2
- film strip
- (and 8 more)
-
 Hello! When working with the “Develop Persona” section, I was very surprised by the lack of elementary tools for working with mask layers! Namely, what is missing so far: There is no way to show, turn off, hide or fix a layer with a mask. I can't invert the layer mask. I can't copy the mask of one layer to another layer. There is no way to adjust the mask to select dark or light parts of the image for processing the RAW file. All data about layers and masks is deleted after I return back from the "Photo Persona" section to edit the raw file in the "Develop Persona" section. A huge request to developers is to implement in the next updates these elementary tools and functions that are available today in almost every raw editor and converter. Thanks! 😗👍
-
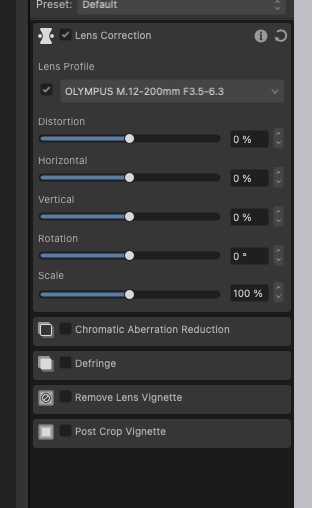
 Doing some tests with the Raw development in V2 - works well Created a version with a linked File option. Going back from the Photo Persona to Develop Persona when first editing or when saved and reopened (Linked file not moved) remembers all settings I had set. One of the settings is that have to manual choose the Olympus 12-200 lens as it does not autodetect it. If it move the linked file to another folder and then reattached the Raw File all the settings I set in the Develop Persona are remembered and still there except the lens profile have to reset that. On a MacBook Air with the M1 chip Thanks Dave
-
 I like what was done in the Develop Persona in Affinity Photo. I use Affinity Photo in the last step of my processing. Today I had plenty of time to really test the output I could get from binging my RAW files into Affinity Photo after my first two steps of culling and adding IPTC and keyword data. So, instead of developing the RAW file in my regular editing software and sending a tiff to Affinity Photo I took the RAW file directly to Affinity Photo. What I found throughout the day was I was getting as good or much better final product with Affinity Photo, the result file size for the .afphoto was much smaller because it held the linked RAW file instead of a tiff file, and it had read and loaded the key words from the Xmp sidecar. I think if had a way to create presets that would let me populate several of the Metadata fields I could simply paste in the keywords for a photo and go straight to Affinity Photo from my culling of photos. I intend to keep working like this until I hit a snag that I didn’t encounter today. What I would like to see is: A way to click and have a larger area for the metadata fields so it would be easier to type in the data and paste in keywords. Something like an option button on the Metadata Panel. The current area and print is too small to work with for a long period. Anything to make entering that data would be good. Not having this now is not a problem that would prevent me from going from culling, to meta data entry in another app and all development. In short, the changes in the Develop Persona are going to give me a better or equal final product, save file storage space because of smaller afphoto sizes, and save me from having to maintain multiple RAW converters. Nice job by the folks who worked on this rewrite in any capacity. Thanks. Peace Marvin
 -
 Hello. I would like to ask why affinity photo's develop persona is still has very limited features? I hope they would at least add color correction features that would allow you to change hue by hue, hue by luminosity, hue by saturation, saturation by hue and etc. A lot of useful color editing tool are only available outside develop persona, making it harder to edit the image without degrading it easily. The masking in develop mode is also still very limited. I hope affinity will soon add it to their updates. Thanks.
 -
 Is it possible to make use of macros developing RAW photos in Develop Persona? "Macro" appears in studio only in Photo Persona.
 -
 ’Allo again, mes amis … today the Big Question is: ‘How Come It Don't Do It Like Dis?’ … You've heard of and seen the excellent series of tutes produced by Olivio Sarikas, yes? He does an excellent job. In this particular tute, he examines Affinity Photo's built-in quirk that automatically applies a series of pre-sets to the RAW image(-s) opened in Developer persona. Note that, in his vid, he selects the ‘Exposure’ tab and clicks the ‘Undo’ Swirly Arrow to remove the presets and display the image in its as-shot state. I have tried and tried and tried yet again to have Affinity Photo duplicate on my Mac this same behavior. Nuh-unh, Charlie. It don't be playin' dat. The picture brought remains as unchanged after clicking the Reset circular arrow as if it had never been clicked. The same applies to every other ‘undo’ arrow for the rest of the settings in that panel. Here’s the link to the tute if you want to see it for yourself … undoing the preset(-s) is the very first thing he covers, so it's not a long wait. All feedback as to how to make this work outside of the vid is appreciated. Please advise if this ‘sauce’ works for you on your machine, too. Thanks.
 -
 When I import a RAW file to develop persona the orientation is ignored. I found out that the crop tool is able to rotate the image but it also crops the image to the canvas size - I guess this is not the intended way to simply rotate an image. But how can I rotate an image in develop persona? Thanks for your help, Frank
- 34 replies
-
- 1
-
-
- rotate
- develop persona
- (and 1 more)
-
 This is not a consistent problem, but one that happens a great deal and is very annoying. When trying to use the Overlay Paint Tool in the Develop Persona of my Mac version of Affinity Photo version 1.10.4, if I select an area with either my mouse or my Wacom Tablet, there will be an added straight line of selection shoot up from the selection. I then have to use the Overlay erase tool to remove the excess before applying basic editing. I figure this is just a glitch in the version, but I'm wondering if it has been noticed by others so that Affinity can fix it in updates. Again, it doesn't always do this and I can't figure out a pattern on why it happens.
 -
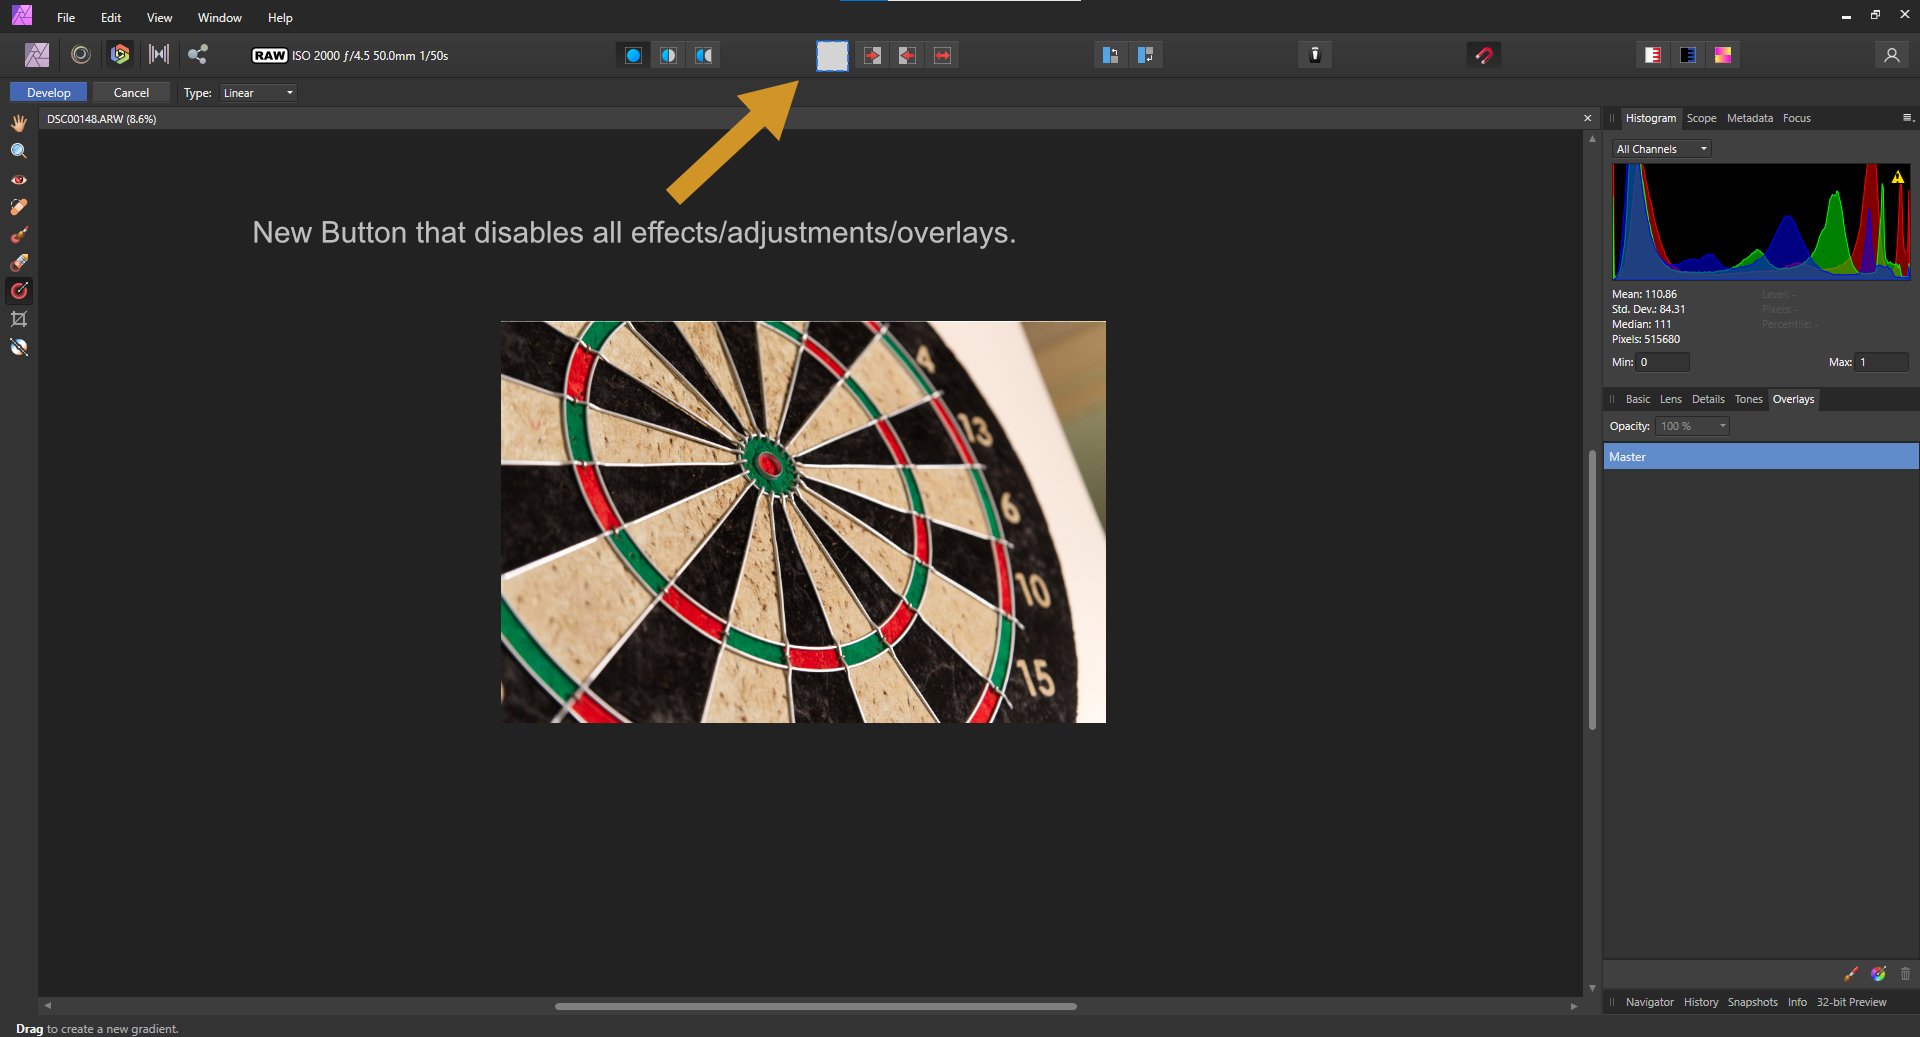
Hello I would like to propose a feature that would allow the user to switch between the orginal and the current adjustment of raw image in a faster way. I am aware of the syncing feature but there are times when it just takes a lot of steps to just view the orginal especially if you accidentaly synced the wrong adjustment. This new toggle button feature would just allow a quick way to switch from orginal. In a simple way, this is like a toggle button that disables all the effects/adjustments including the overlays.
-
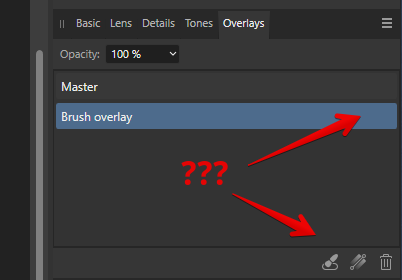
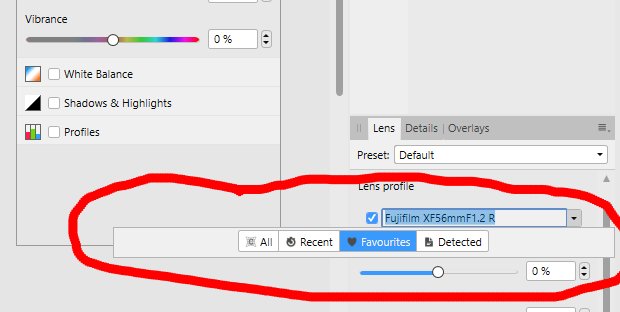
 If this is intended or looks like a feature request, feel free to move or hide the post. When I am in the Develop Persona and select a lens profile the window stays open, even after I selected a profile, which means another click. I would expect that the window closes after my selection. And is it correct, that it looks that way (screenshot), when I clicked Favourites or Detected before and there are no Favourites / Detected? When I hit the arrow on the pulldown only this tiny window appears. lensselection.mp4
-
In Develop Persona, Overlay: 1. Click on Brush Overlay icon. 2. Set brush size to 307.1, Hardness 50%, Checked Edge Aware. 3. Using the brush made a stroke on the image moving left to right on the area I wanted to affect. Result: Stroke appeared in another part of the image as a vertical stroke. Once I saw this happened I tried again to make a vertical stroke and sure enough the stroke appeared on another part of the image as a horizontal stroke. Did further test and sometimes the stroke does not appear at all. It all depends on where you are in the image as to whether the stroke appears or not. In any case the area actually painted over is no where near the area of your brush stroke. Windows 10 Version 2004 OS Build 19041.450
-
 I recently updated Affinity photo to version 1.7.2. After updating, the lens correction for my Olympus 8mm f/1.8 fisheye does not appear to be doing anything. Prior to updating, the automatic lens correction would straighten out the distortion from the fisheye lens, and the image in the develop persona appeared quite different depending on whether the automatic lens correction was enabled or not. Now, the image appears almost unchanged, whether the automatic lens correction is enabled or disabled. Affinity correctly identifies the lens, but it seems like the information on how to remove the distortion has been lost from the lens profile. I have tried changing the setting in the Develop Assistant from "Apply Lens Correction" to "Take no action". After that I've tried checking the box under Lens Correction, and it changes the image almost imperceptibly. Previously, it was a quite noticeable change when I did this. Has anyone else experienced this or know what should be done to fix it? Or, alternatively, what am I doing wrong? Thanks!
 -
 Help please! When I open raw files in AP 1.8.3 on my MacBook (2008) they appear way darker and way less sharp than the Jpgs. In order to fix sharpness I have to apply a radius of over 40, which creates noise...The same raws though appear even sharper than the Jpgs when opened in PS. My camera is Fujifilm XT20. Does anyone have any suggestions on what I should do? Thank you!
 -
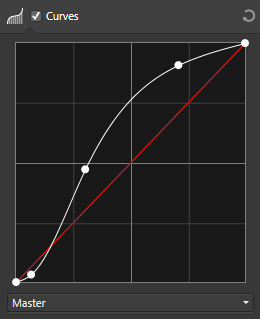
 Hi, I am working in the Develop persona on my raw file. When I apply a tone curve I don't see any changes to the histogram, should I? The image is clearly very different, so I would expect to see some movement in the histogram I have tried selecting and unselecting the exposure bias but nothing changes. Help
 -
 Issues/situation: When I rotate a photo in the Develop Persona it does not 'translate' correctly into Photo Person - but gives me a very strange set of coordinates and once I then export it from there it's back to the original rotation. Here's the specs for my computer: Mac Pro (Late 2013) Processor 3,5 GHz 6-Core Intel Xeon E5 Memory 16 GB 1866 MHz DDR3 Graphics AMD FirePro D700 6 GB Question: Is this just me or does anyone else have this issue? Also is it possible to set the rotation in Develop Persona to 90 degrees and/or have a hotkey for it? Screenshots: See attached screencast of the issue. ( Notice the coordinate system showing negative numbers ) Operating system: OSX Catalina 10.15.6 Affinity Photo: Version 1.9.0 Unusual hardware: Wacom tablet Intuos pro Any help or input on this matter is much appreciated. Thank you in advance. PS: if this post is in the wrong forum, then please let me know, and I will submit it in another. affinity_photo_rotate.mp4