Search the Community
Showing results for tags 'designer'.
-
 If I have a curve and want to edit a node that has two handles, how can I adjust one and have the other handle mirror that adjustment? For instance, let's say I have a semi-circular curve and I want to move the center node's handle away from the node by 20 points. I want the other handle to move 20 points in the opposite direction so that the curve adjusts equally on both sides. I tried dragging the handle using modifier keys to accomplish this, but nothing seemed to work. Maybe not possible?
 -
Good morning everybody, I am finding another thing that seems to be missing from Designer which I use an awful lot in CorelDRAW and which is kind worrying to me unless maybe I'm missing something. In Corel I have a blend tool. I believe Illustrator has the same thing though I don't use Illustrator. It allows me to create two objects and blend them together. This is particularly useful for creating interesting drop shadows and so on. Is there really no way to do this in Designer? I'm attaching a screenshot to show you what I mean. Corel allows me to choose which aspects of each object interact with one another. Hopefully there is some way of doing this or it will be added as it seems like a very important tool to me. Thanks very much and let me know! Phil

- 109 replies
-
- 23
-

-
 Hi! I am new to Affinity Designer and already have searched the internet to find an answer. The Info I found is that the measurement tool was planned years ago, but nothing to measurements in the newest release. Is there any way to measure the length of a (curved) line in the newest version? I am interested in an exact measurement in physical units (mm). Thanks!
- 73 replies
-
- 4
-
-
- designer
- measurement
- (and 3 more)
-
I'm sharing this template for golden ratio, original tutorial I followed was for Inkscape which I was previously using before falling in love with Affinity Designer. Original work is from Nick Saporito on youtube. Basically you use the set of "Golden Circles" to create an illustration by intersecting the different sizes of circles. Hope you guys enjoy using it for your own designs! golden-ratio.afdesign
-
 Hi all. I searched the Designer help for "kerning" and got zero hits. So that's the first major problem. I selected a line of text, and examined the Character properties panel. In the kerning drop-down, everything except "Auto" and 0 was greyed out. I also noticed the "Character" and "Paragraph" buttons in the toolbar. Clicking on them didn't appear to change the type of text I was defining. So why are they there? In other vector programs, selecting text with the node-selection tool lets you adjust kerning by dragging a control point on each character. Not in Designer. So is this functionality just missing? Thanks for any insight.
 -
 Hello, I have a situation where I have ~650 layers, all well named that I need to search through quickly to hide/show for different permutations of an image. Is there a way I can either sort the layers alphabetically to find them more easily or search for them. Thanks.
 -
 Is this a bug introduced in 2.4.0? I have regularly used the auto continuous output of slices and artboards via export persona in the past to allow collaborators to see where a job is at, or instantly update email components for use elsewhere for example. I cannot however manage to get this to work at all today. Export slice - yes. Continuously - no. I have tried app and mac restart, recreated wanted slices (as duplicated file so sometimes they fail), checked, unchecked and rechecked "continuous" and cannot think of anything else to make function. Is this just me? Frustrated at having to manually export via Export or revisit Export persona to select and export.
 -
I was was warping a object with a raster image in side. The vector warps fine, but the raster doesn't warp. Gary
-
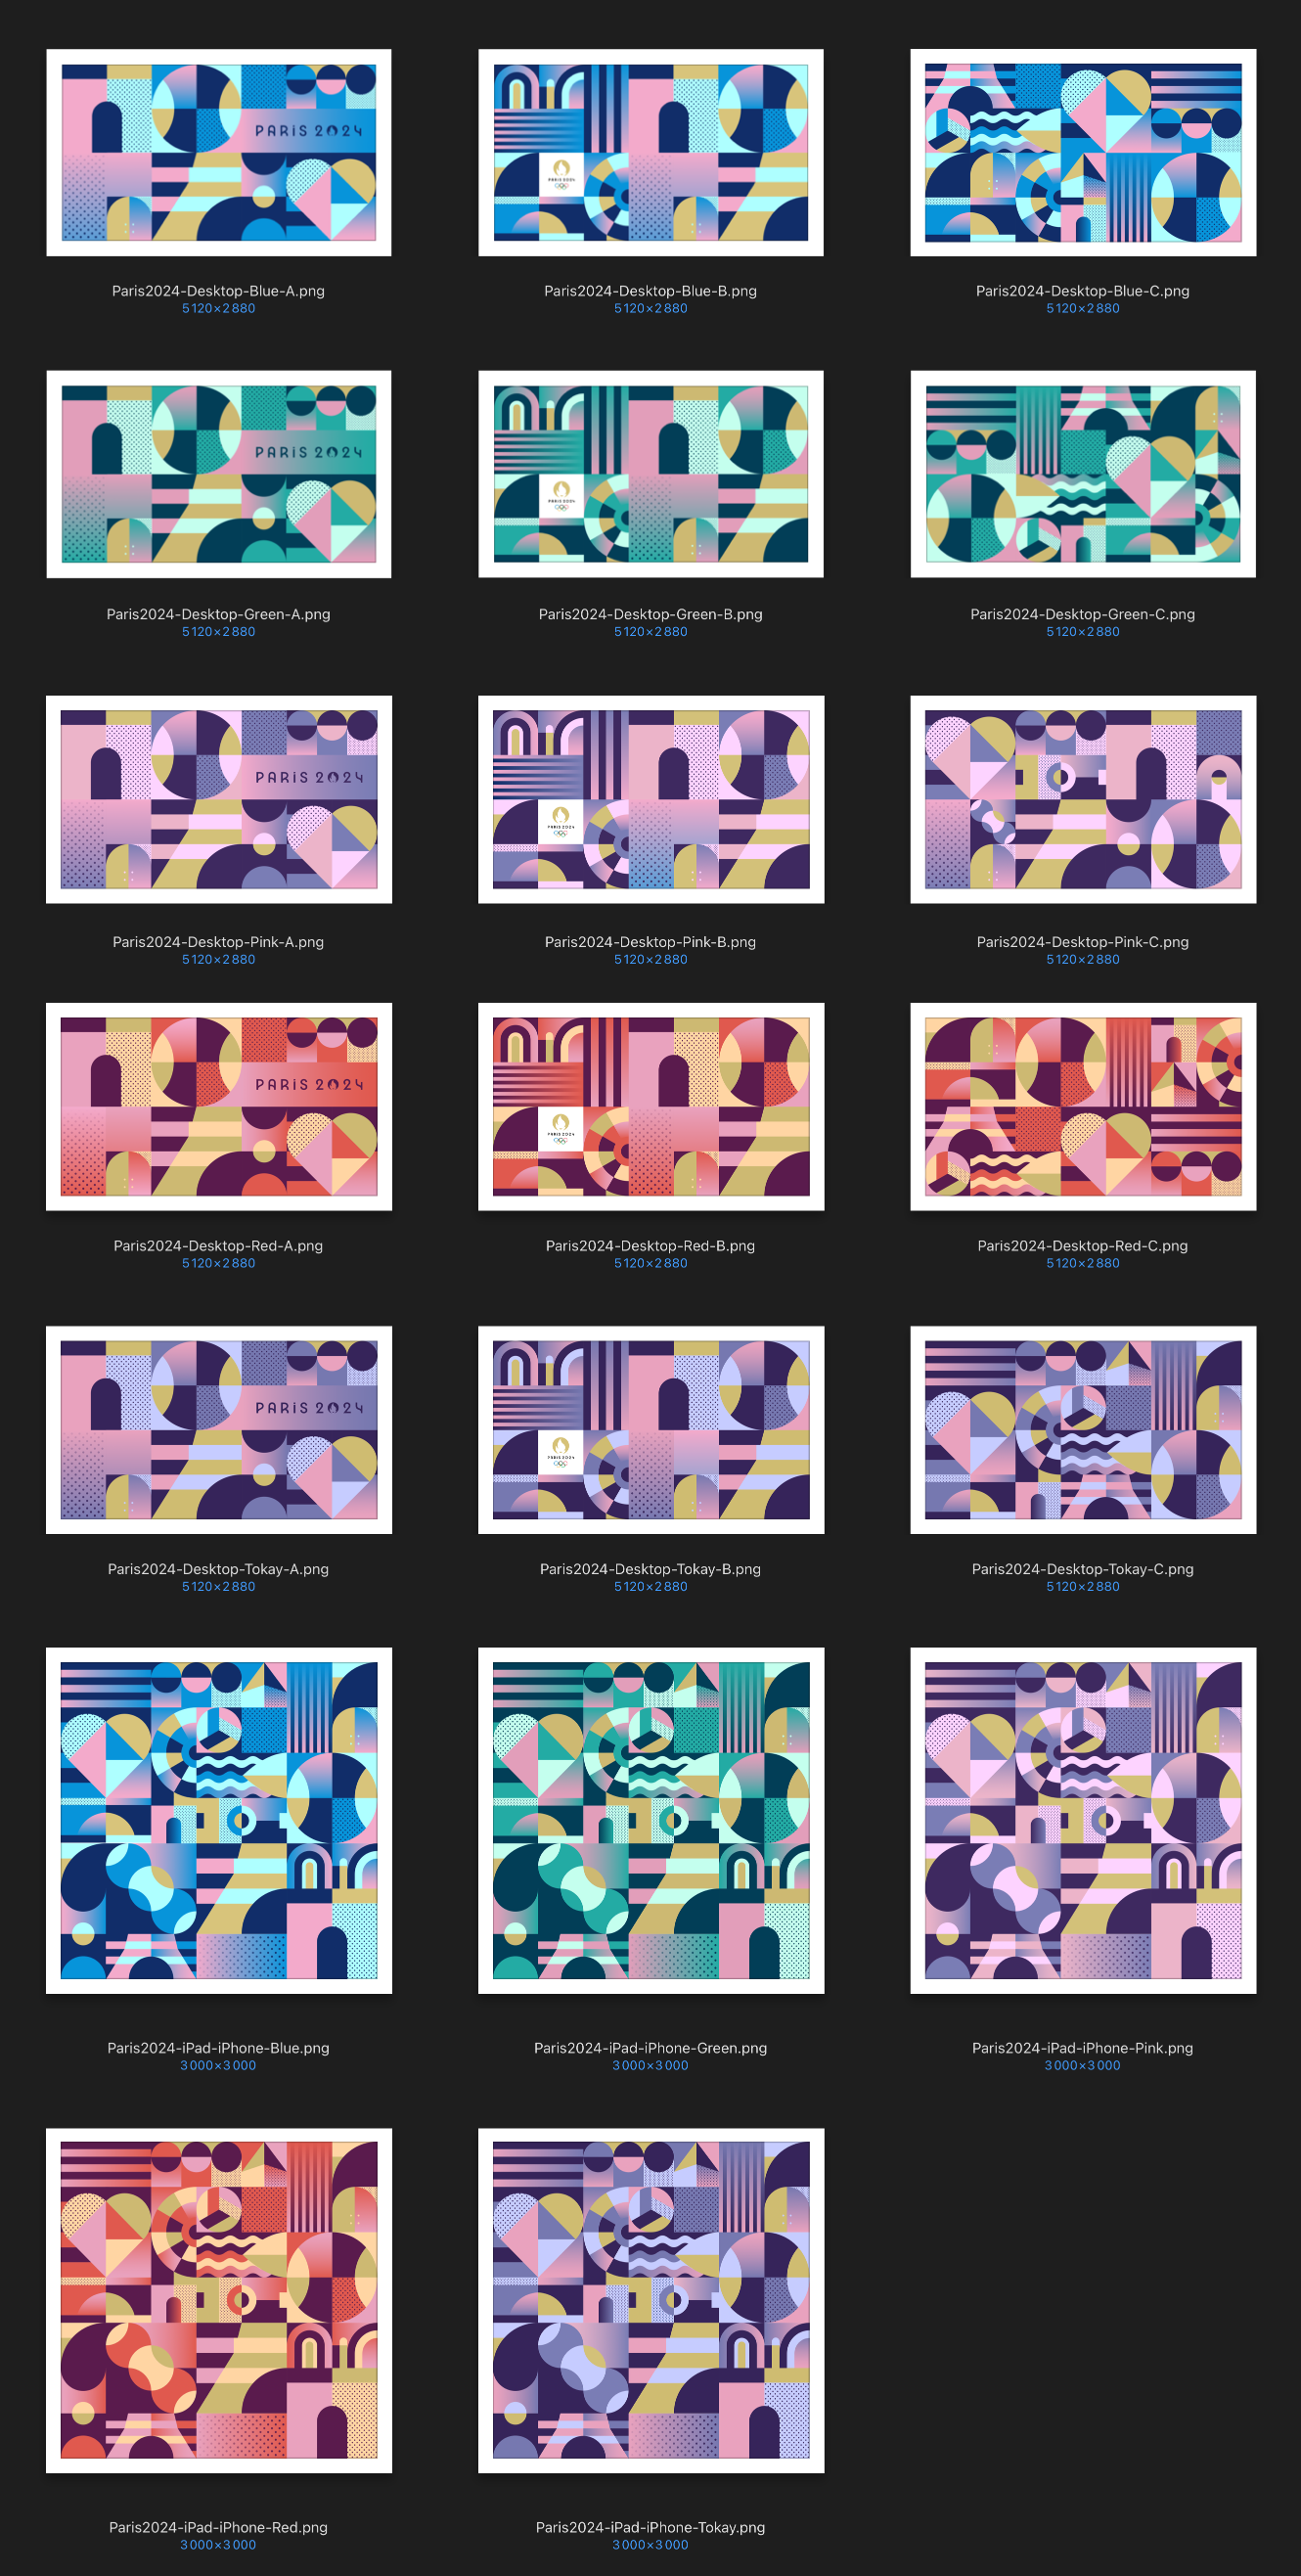
🇬🇧 Here is a series of wallpapers (desktop, iPad and iPhone), in HD, on the theme of the Olympic Games. 🇫🇷 Voici une série de fonds d'écran (desktop, iPad et iPhone), en HD, sur le thème des Sports Olympiques. Paris2024 Desktop Blue A Paris2024 Desktop Blue B Paris2024 Desktop Blue C Paris2024 Desktop Green A Paris2024 Desktop Green B Paris2024 Desktop Green C Paris2024 Desktop Pink A Paris2024 Desktop Pink B Paris2024 Desktop Pink C Paris2024 Desktop Red A Paris2024 Desktop Red B Paris2024 Desktop Red C Paris2024 Desktop Tokay A Paris2024 Desktop Tokay B Paris2024 Desktop Tokay C Paris2024 iPad iPhone Blue Paris2024 iPad iPhone Green Paris2024 iPad iPhone Pink Paris2024 iPad iPhone Red Paris2024 iPad iPhone Tokay
-

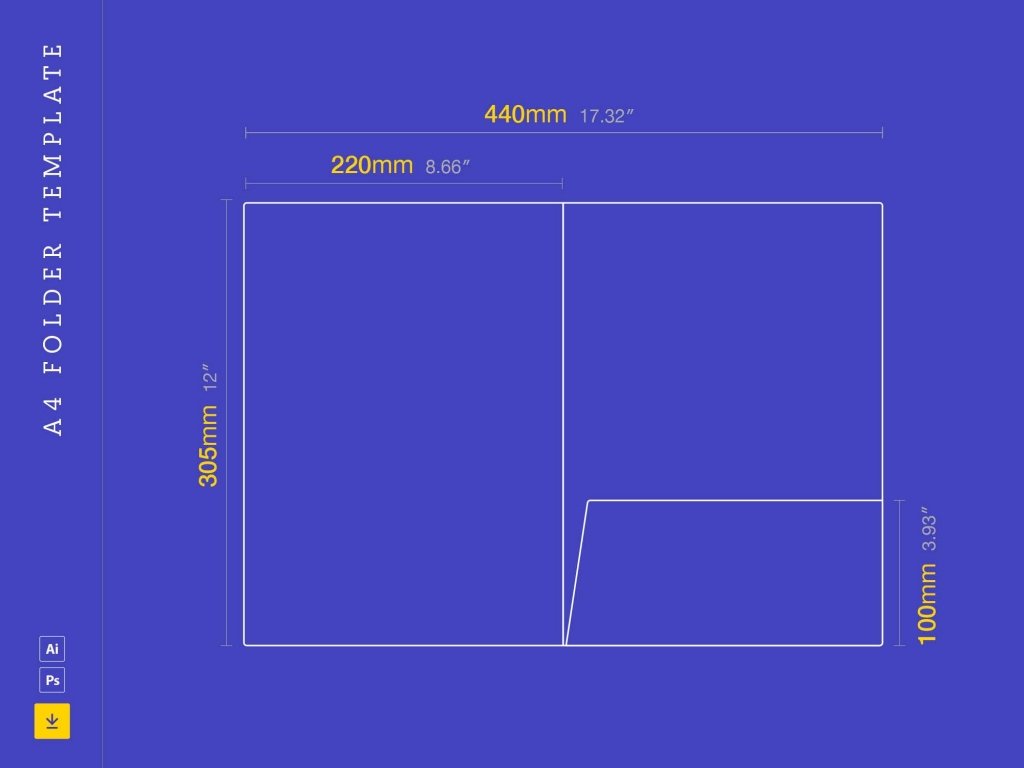
RE: A4 Document Folder
GunnerJnr posted a topic in Affinity on Desktop Questions (macOS and Windows)
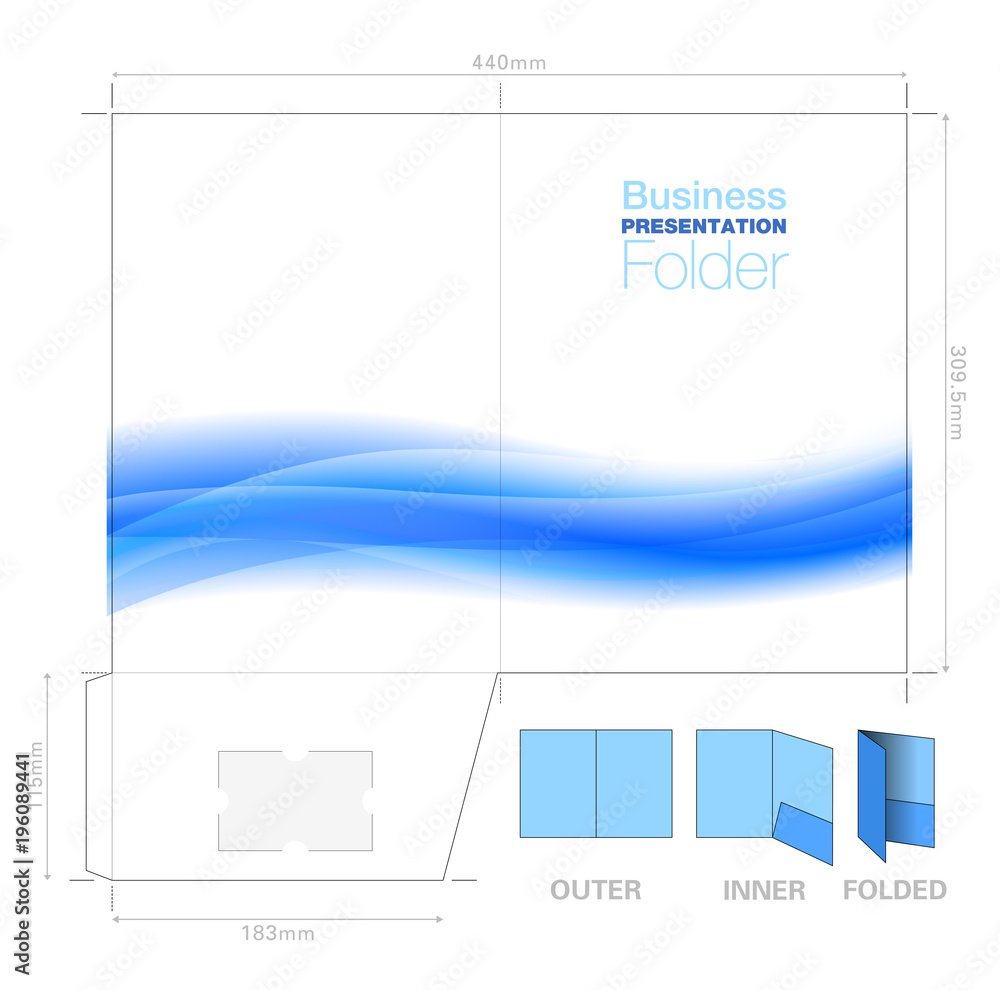
Hi all, I am pretty new to Affinity altogether. I would like to know if it is possible to replicate the attached design template for an A4 folder concept. Or, if at all possible, if I can import the template itself to use? Also, would Publisher or Designer be best? (or does it not really matter?) I did try importing it, but it only imported it as a whole image, which I am guessing isn't quite what I want, as I need to separate it into the following pages: Front Cover Left Inner Right Inner Back Cover Obviously, the inners will be the reverse side of the front and back. I gather that I could have likely just created the pages at the same dimensions as stated on the template. Still, I can see when creating a new file, I can choose A4 and set the 'x' number of pages, which I assume I could use as a front, a back, and the two inner pages. I am able to select between starting from left or right, but the part I am unsure about is the fold-up piece at the bottom of the right-inner/back cover page. Is there a way I can create this? Would I create a smaller page using distorted dimensions for one edge? The idea behind it is to provide a folder that can hold some documents as a sort of leave-behind after a company meeting; the extra fold-out part on the inner in question will have a cut-out of sorts to attach a business card and provide some additional contact information, so its imperative that it has it. You can see the design of the business card cut-out concept in the AdobeStock Preview image (which is essentially the same folder design but in the reverse view of how I want to achieve it). Sorry if this seems dumb, but as stated, I am brand new to this software, so any advice, tips, tricks and hints would be greatly appreciated. Note: The images for the A4 folder template are available for download from Unblast (free) - https://unblast.com/a4-folder-template/ Adobe (paid) - https://stock.adobe.com/uk/images/presentation-folder-a4-template-with-flow-background-graphic-cutter-guide-with-standard-business-card-slot-prints-from-a-sra2-sheet/196089441? Kind regards, GunnerJnr
-
 Locked objects can be selected and deleted through the command Select Same, meanwhile, they have to be locked and kept. Designer 2.31 Windows 11
 -
Please helpfull tooltip/hint. For example tooltips on Brush-Editing buttons has the same as button label:
-
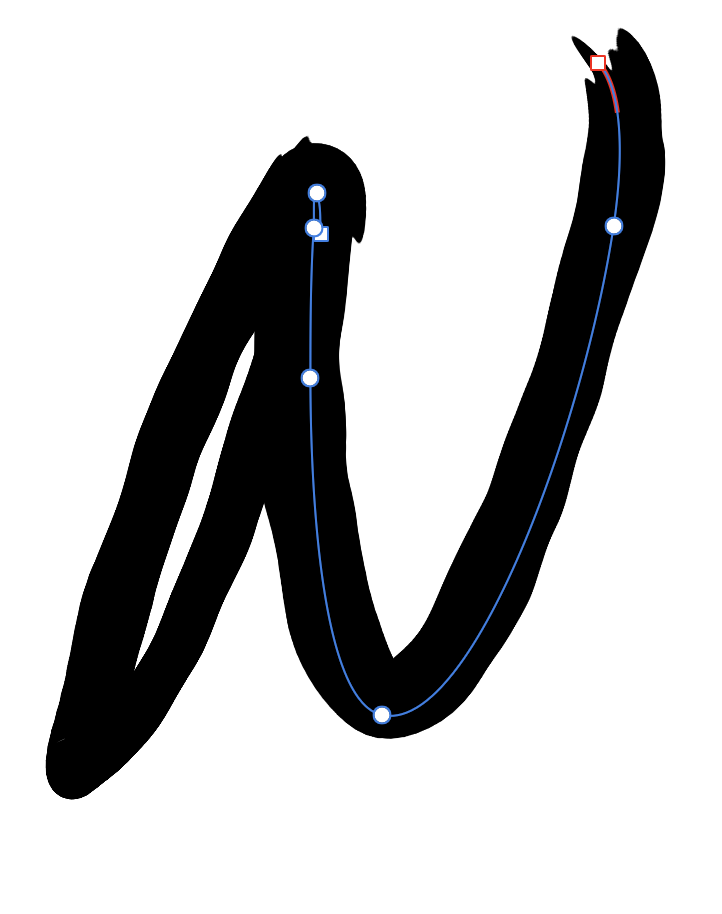
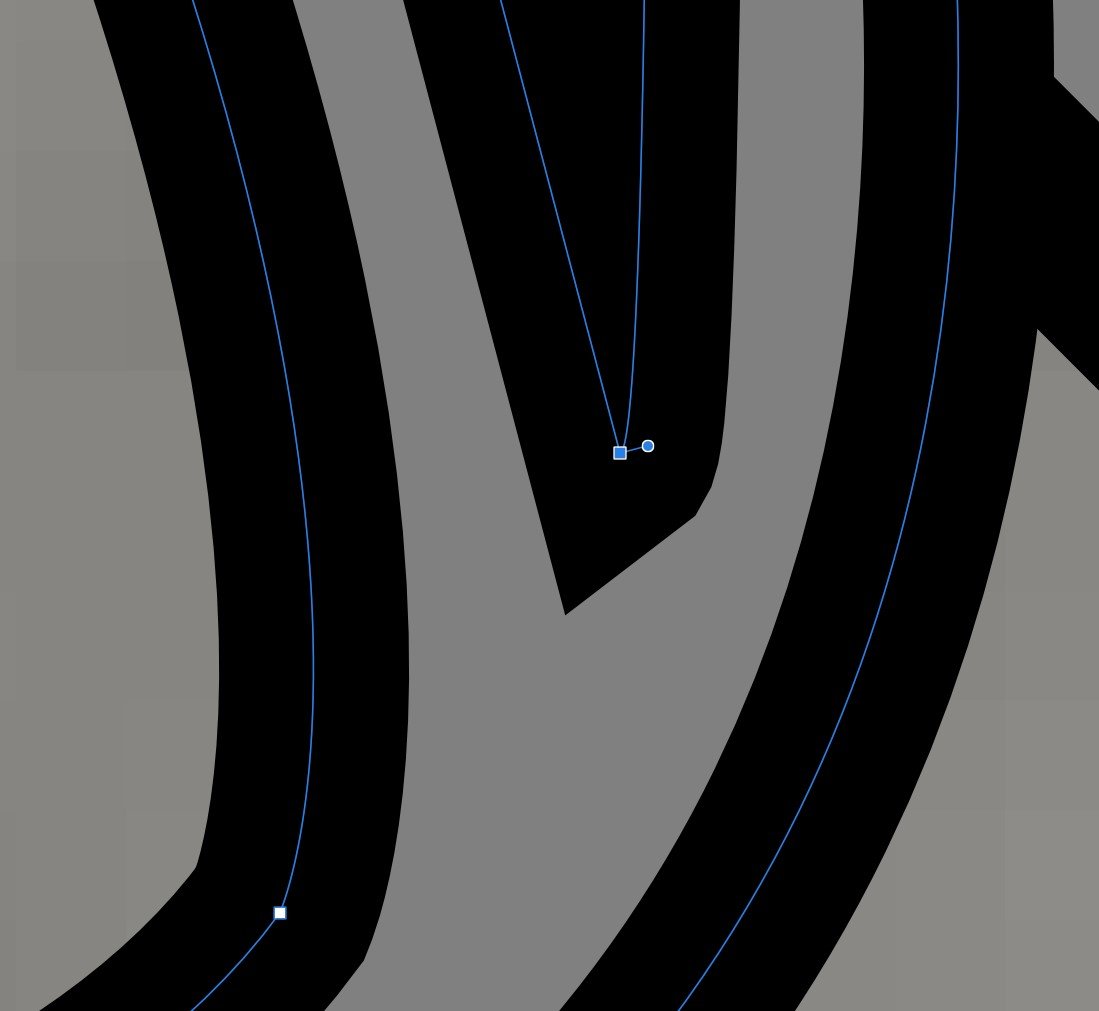
 Apologies if this isn't the right place to post this. I'm new to the forum and playing with some letters in order to learn Designer 2 more. In Designer (currently 2.3.1) I have a couple strokes made in two separate layers, and I've noticed the strokes in this layer aren't smooth like the other strokes. In the highlighted nodes on the stroke for example, the stroke seems 'wobbly'. However my other letters are smoother. All my strokes are using the Brush Pen 03. Any tips?
-
... or one of those typical forum discussions. 🤔 😉
-
 I'm working on web design a lot and I love Affinity Designer. This week I had to create an icon (favicon to be precise), which I obviously designed in Designer. So far so good, but there seem to be no way of exporting an image as *.ico. Are there any plans for adding support for ico files?
- 118 replies
-
- 19
-
-

-
I would like to have the option to add tables to designer.
-
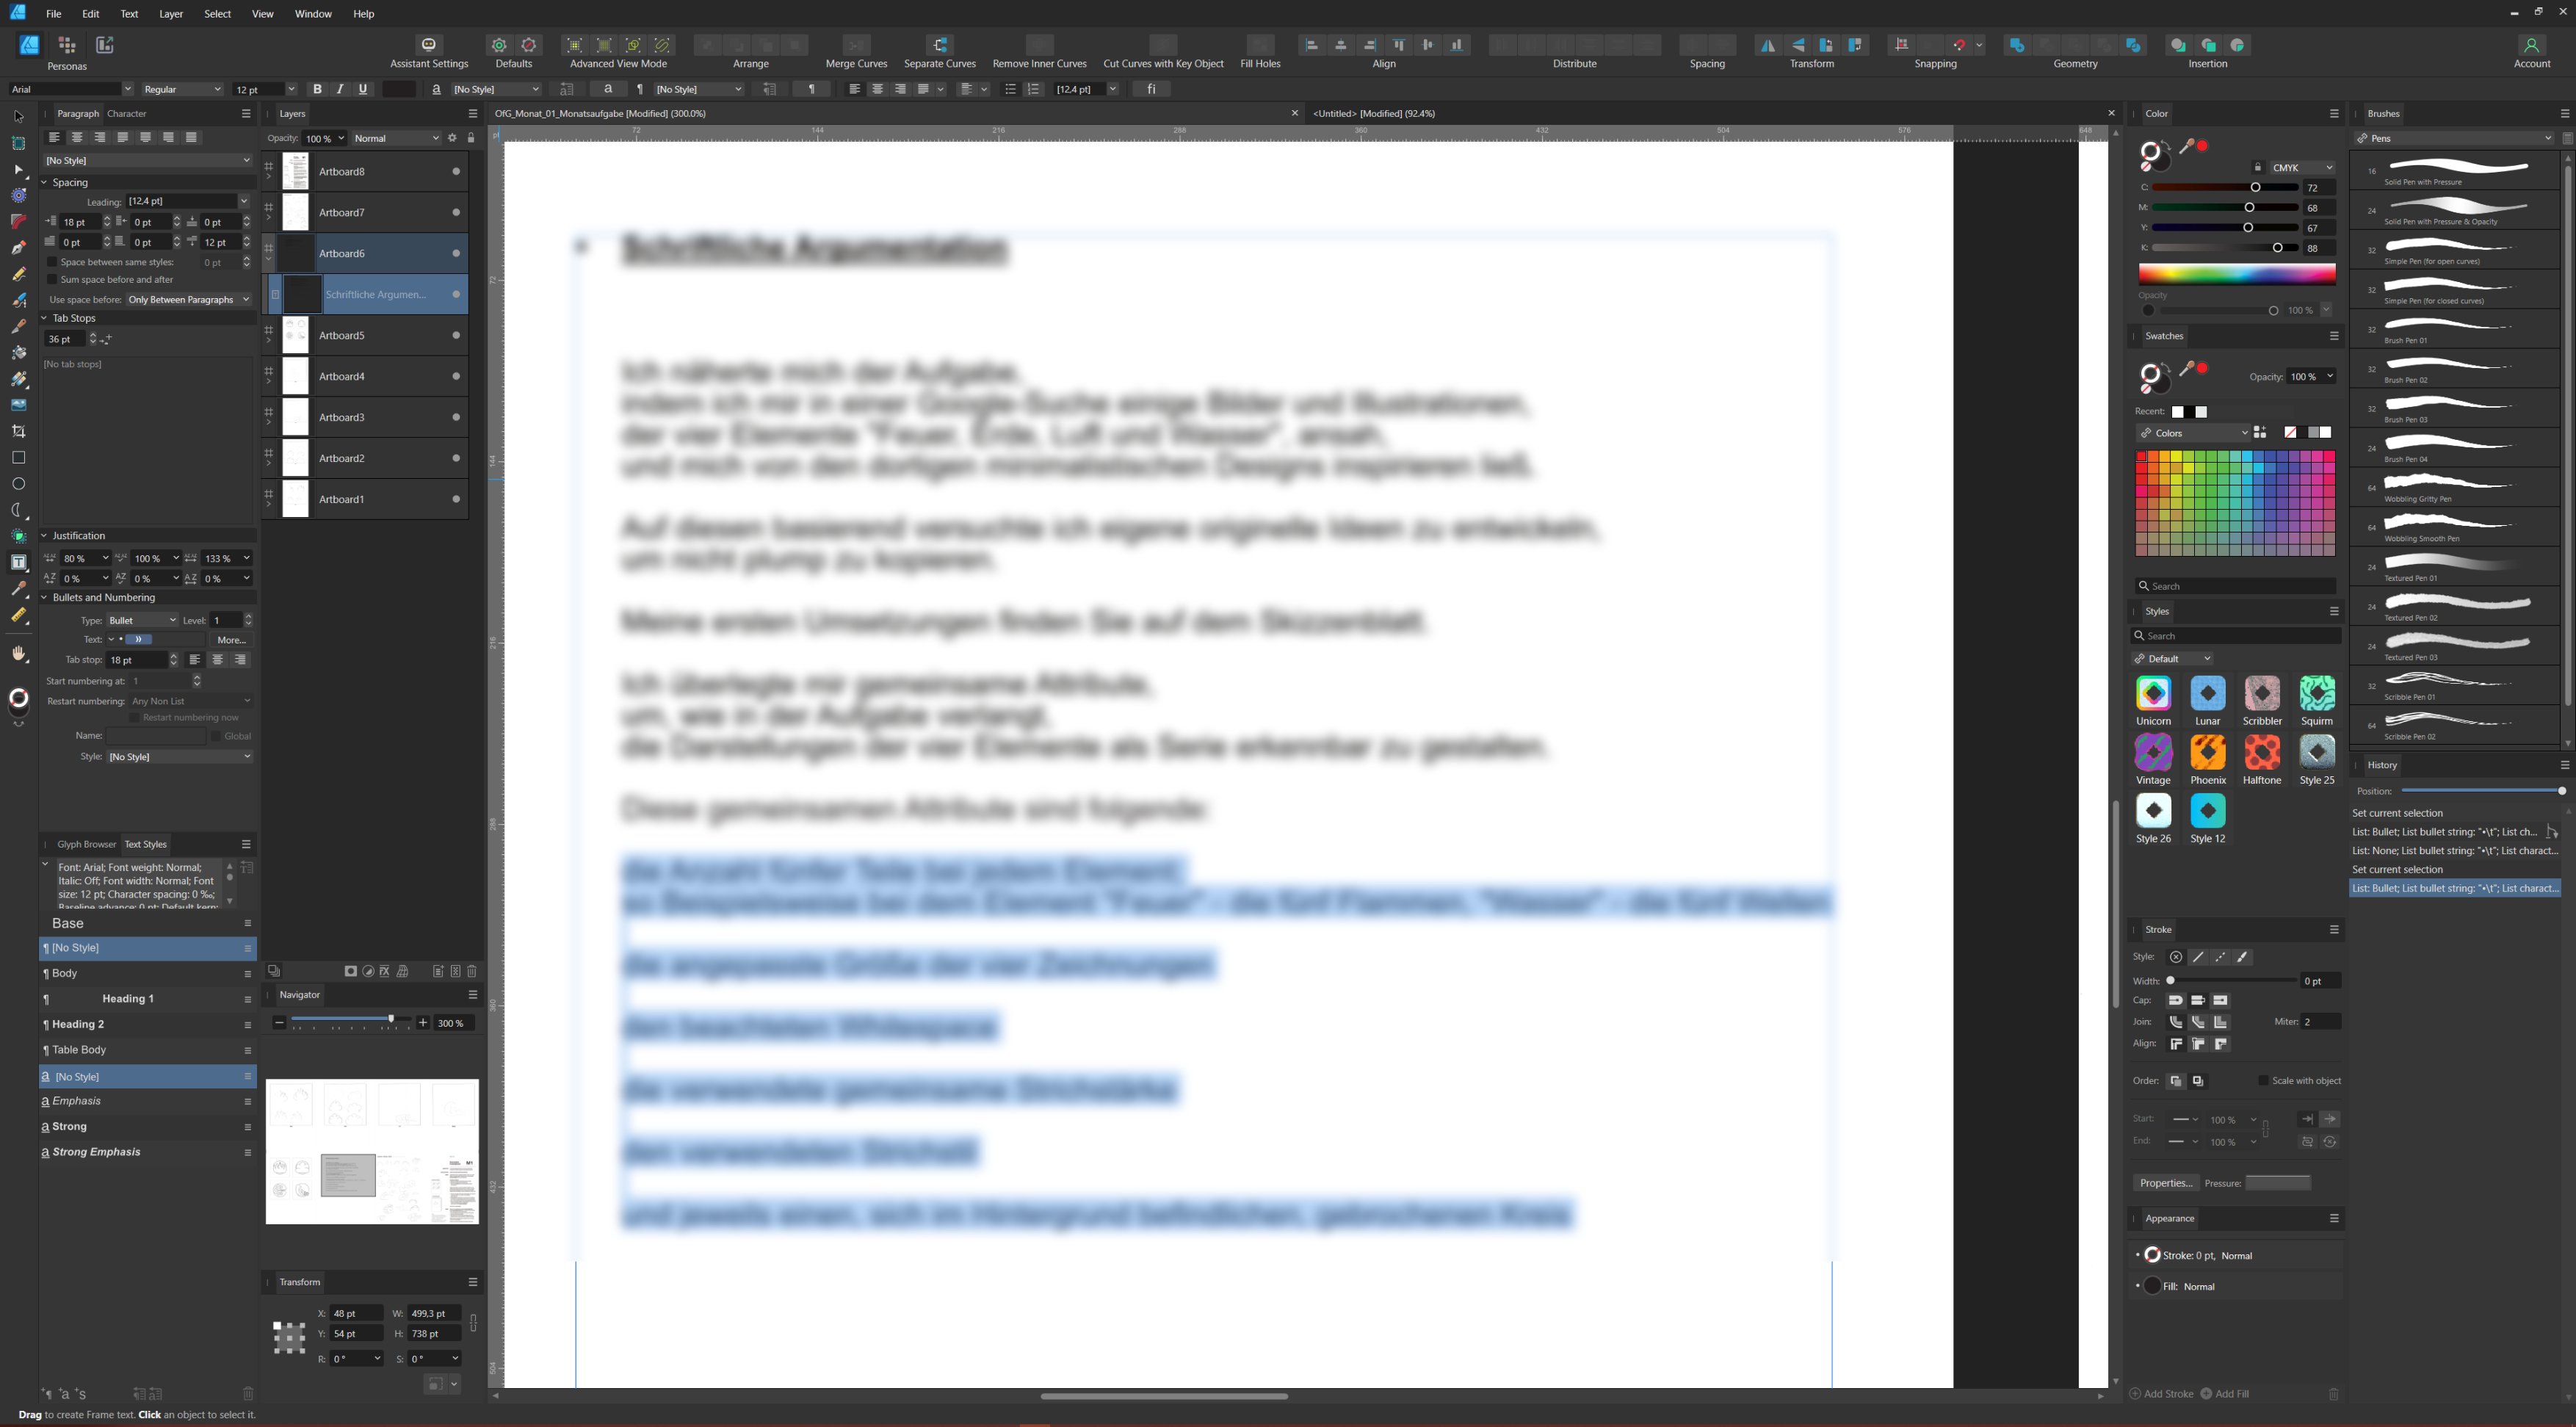
 Hi, I got problems, when I want to add bullet points to a text. For example in the middle of the text I want to add bullet points to some lines and when I place the curso beside the text, or even wehen I mark all lines, the Bulletpoint will appear on top of the text. I added a screenshot below, I hope it helps for diagnosing the issue by throwing an eye on the settings. I had to blur the text out of privacy reasons. Win10, AD version 2.3.1.2217 Thank you very much in advance, I hope someone can help, because I dont found a solution since days in youtube, so I ask here. thank you, Hamza
-
 Some sharp corners are rendering at a different "pointy-ness" depending on how close I zoom. The difference is quite dramatic, and can change how the design looks significantly. I have build 1.10.6.1665
-
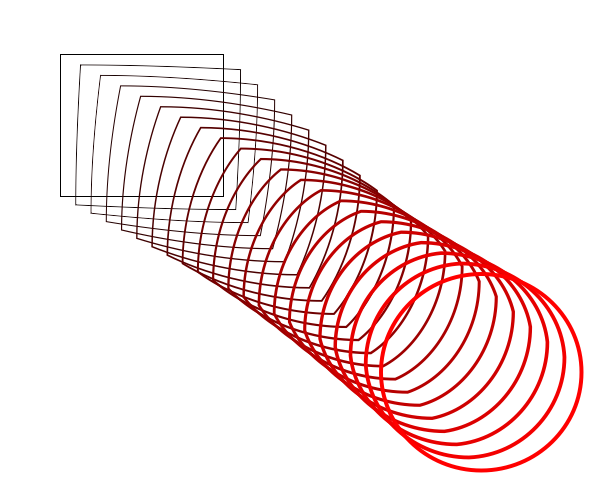
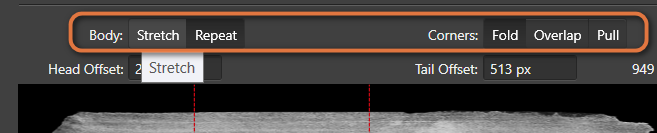
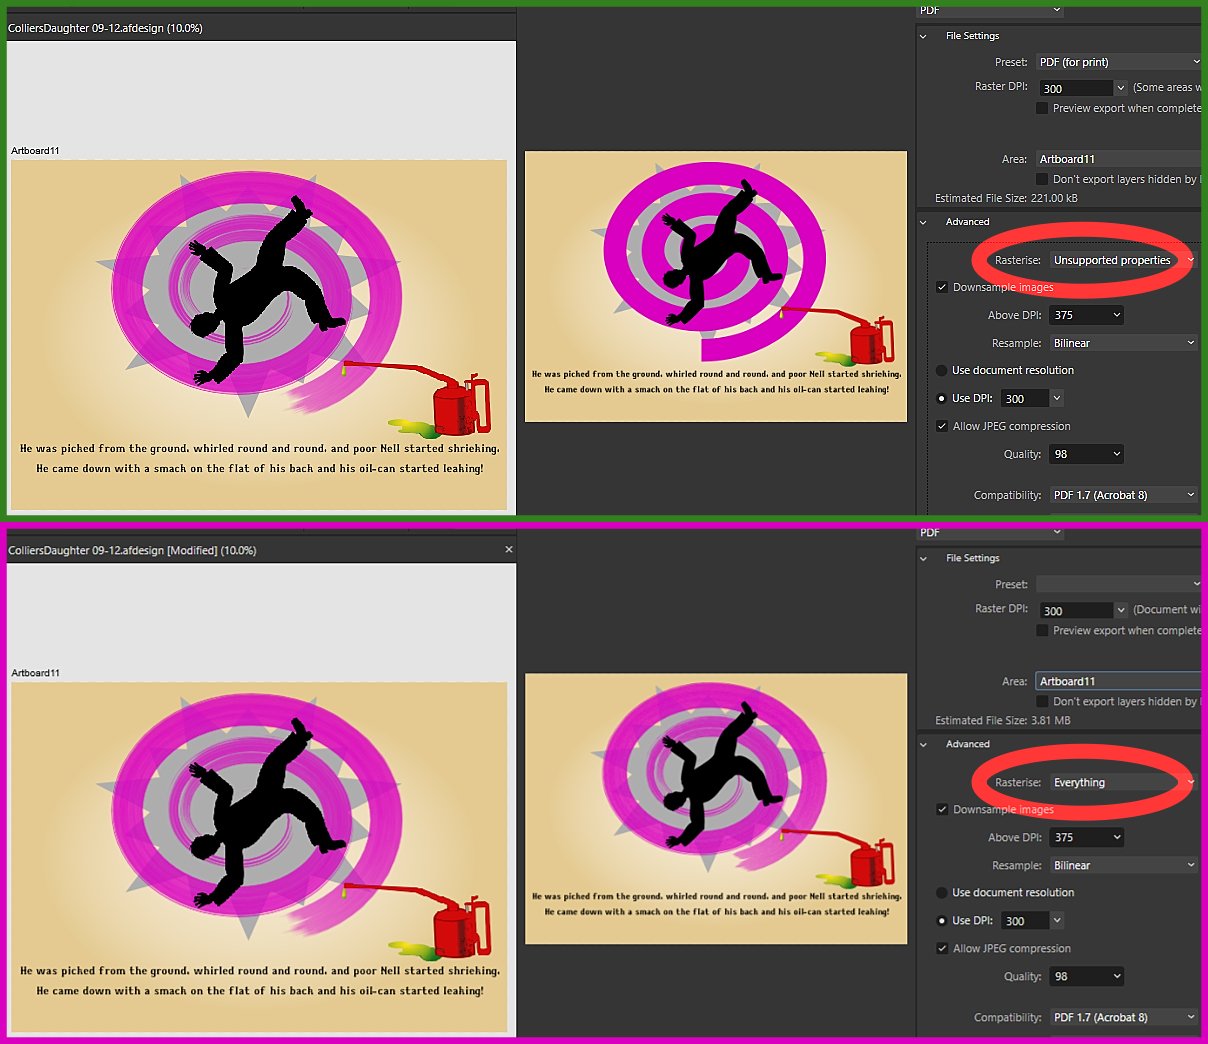
 A page from a project I've been working on. The violet curve is a spiral with a vector brush applied. Is it possible to keep the appearance when exporting as a PDF without having to rasterise either the whole artboard or just the curve? (If you're wondering, it's from a comic monologue by Billy Bennett, called The Collier's Daughter; you can find it on YouTube and other websites.)
-
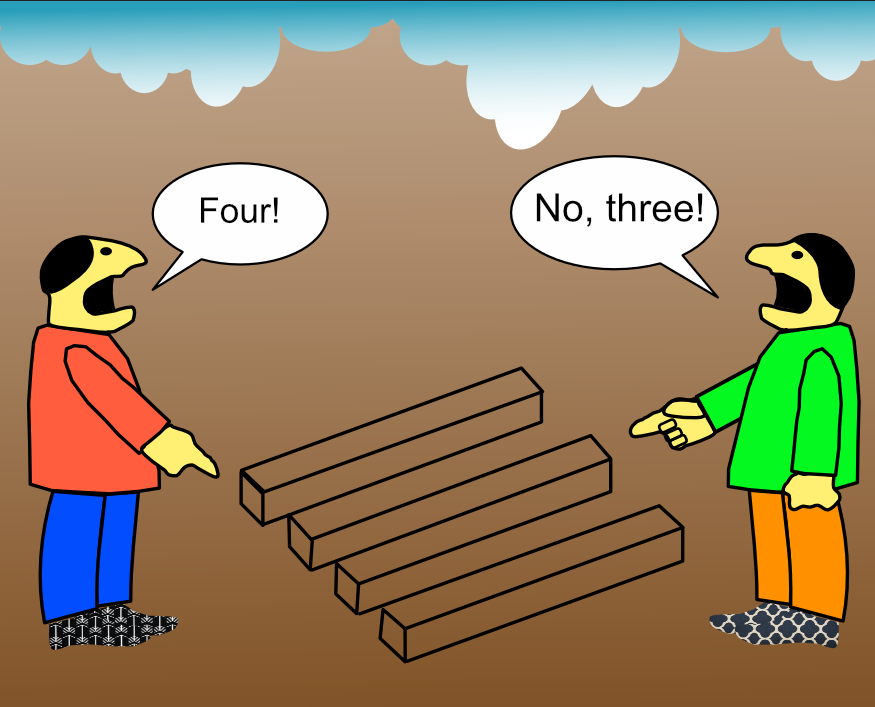
I could have called this Many hands (and feet) make light work. We're all getting browned off with Artificial Intelligence stealing copyright works. I thought it was time I made a stand and made my own AI image. In this case, it probably means Astonishing Inaccuracies.
- 16 replies
-
- 18
-
-

-

-
 maybe I'm missing it, but is there an option to open a JPEG, or bitmap image and trace,or convert it to a vector file for further editing? If not there should be one, it would be a great option. even if it had only a few modes like black and white, and 5 color it would make me convince me to convert from adobe illustrator
- 473 replies
-
- 73
-
-
-
-
- designer
- vector conversion
- (and 1 more)
-
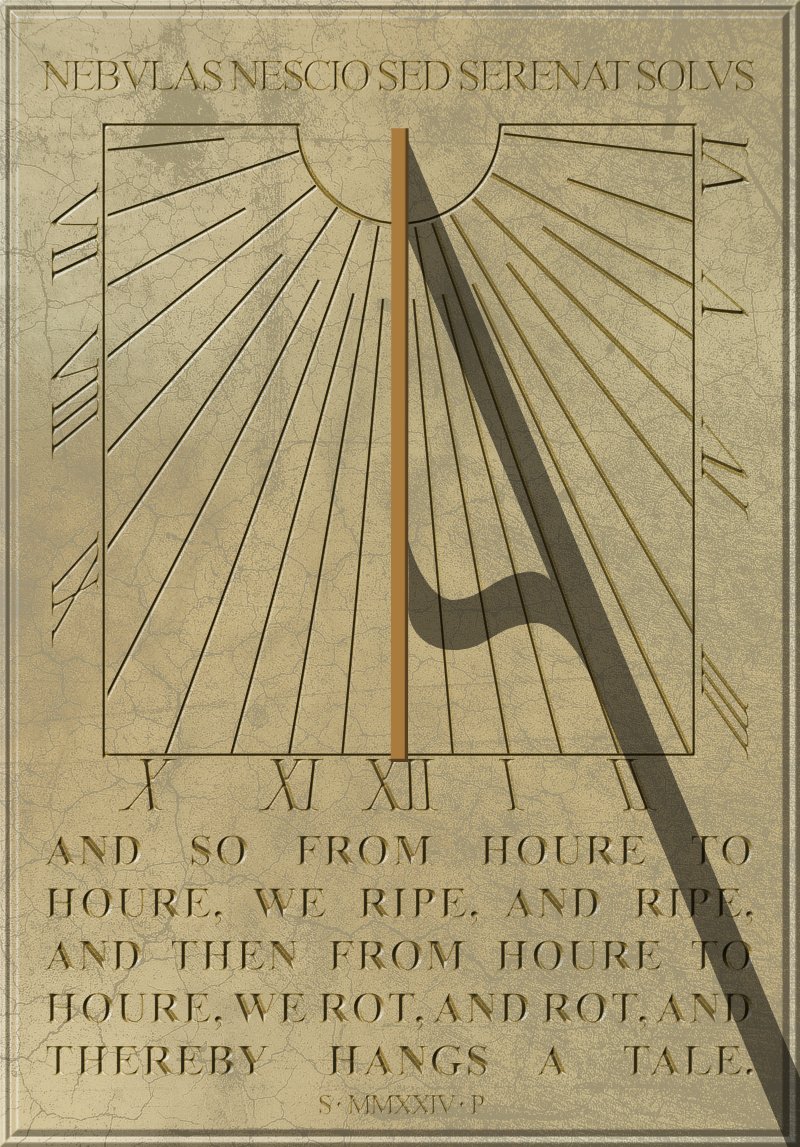
I found a pic of a wall-mounted sundial at Norbury Manor in Derbyshire in my old photos. (It's a National Trust property, and open to visitors from time to time.) It was erected as a memorial to (I think) the former owner, who died in 1987. I've changed all the inscriptions in the foolish hope of looking clever. The base colour is 45/38/71 in HSL . . . and I found a grungy texture in my collection (this is a reduced copy) . . . and after some playing about, I found an opacity or 25% and a blend mode Colour Burn gave me a pleasing marble-like effect. For the incised text, I darkened the fill slightly and applied an Inner Bevel/Emboss FX using the first (triangular) profile, inverted. I adjusted the radius till the bevels met in the middle, making the letters look as though they'd been carved.
-
 You guys did great with the measuring tool. Please make it so we can keep the DIMENSION as a separate layer/group. In my industry when we send out signage/decals etc out for print, its great to have the measurement off to the side for the PRINT SHOP to see. Hot Door CADTOOL does this for Illustrator. It's a massive time saver than drawing them out each time. Gary
 -
 This is a feature request to add an option to the right-click transform menu when right-clicking on an artistic text element or a textbox element to convert between one and the other. Currently, one must cut the text, delete the element, create a new element of the other type, then paste the text.
 -
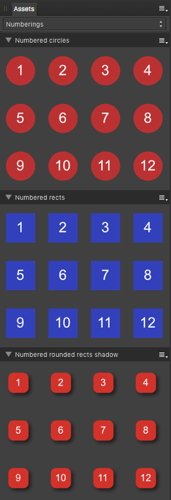
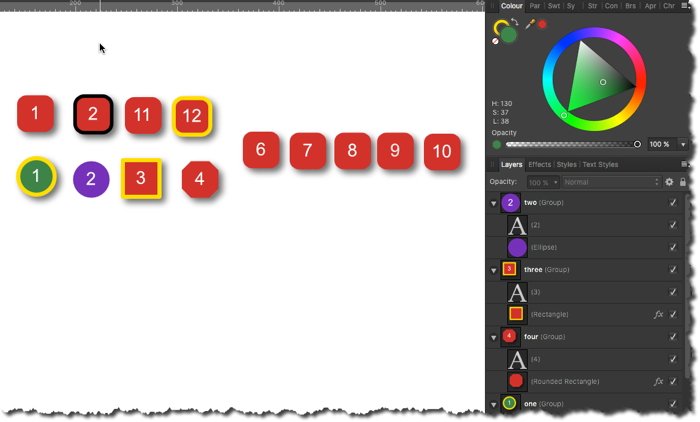
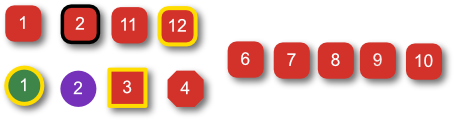
Here are some reusable common numbering items as assets to share. I often use such numberings for screenshots & documentation purposes etc., in order to show specific usability flows or step for step procedures and the like. The dragged over numbering assets are groups, which do contain a numering text and a background shape. They can be easily manipulated to custom needs, like for example changing the text and shape colors, applying some stroke colors, or FX shadows and the like. You can even change the number text & shape type on demand. When dragging one such numbering assets over into your document and manipulating it the way you like (or need), the easiest way to assign the made changes then over to another numbering assets is via a Copy and then a Paste Style or Paste FX, dependent on what portion of a numbering group was changed. You may freely use/reuse these numbering assets for whatever work you've to do. - Have fun! Here's the corresponding numberings assets file: numberings.afassets