Search the Community
Showing results for tags 'designer'.
-
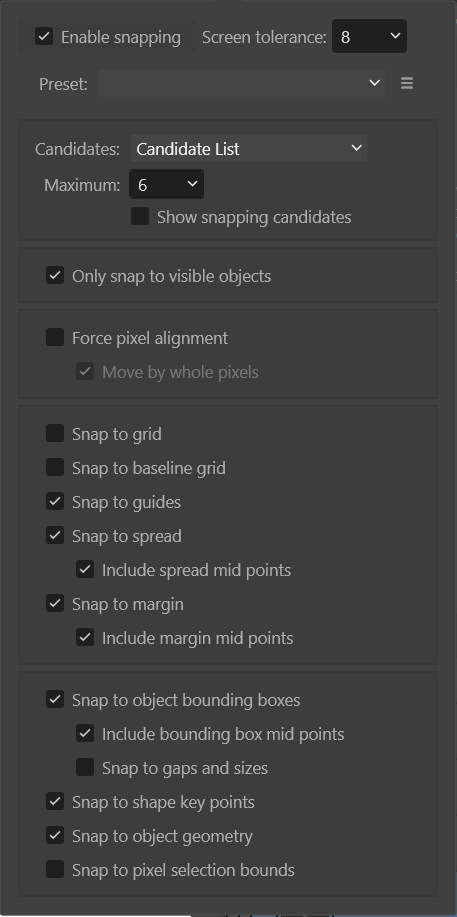
 Hello forum! I have a weird question that has eluded me for years, so I figured I would ask here. In Ill*strat*r 😉 you can snap any shape to pretty much any line by just holding the ctrl key. I have watched the snapping videos from affinity, and looked around on here, but am unable to replicate this in Designer. Hopefully I'm just missing something simple here. I am trying to snap the left-most edge of the selected box (See screenshot) to the edge highlighted in red. It doesn't snap for me. I've also included my current snapping settings.
-
 Is this a bug introduced in 2.4.0? I have regularly used the auto continuous output of slices and artboards via export persona in the past to allow collaborators to see where a job is at, or instantly update email components for use elsewhere for example. I cannot however manage to get this to work at all today. Export slice - yes. Continuously - no. I have tried app and mac restart, recreated wanted slices (as duplicated file so sometimes they fail), checked, unchecked and rechecked "continuous" and cannot think of anything else to make function. Is this just me? Frustrated at having to manually export via Export or revisit Export persona to select and export.
 -
I was was warping a object with a raster image in side. The vector warps fine, but the raster doesn't warp. Gary
-

RE: A4 Document Folder
GunnerJnr posted a topic in Affinity on Desktop Questions (macOS and Windows)
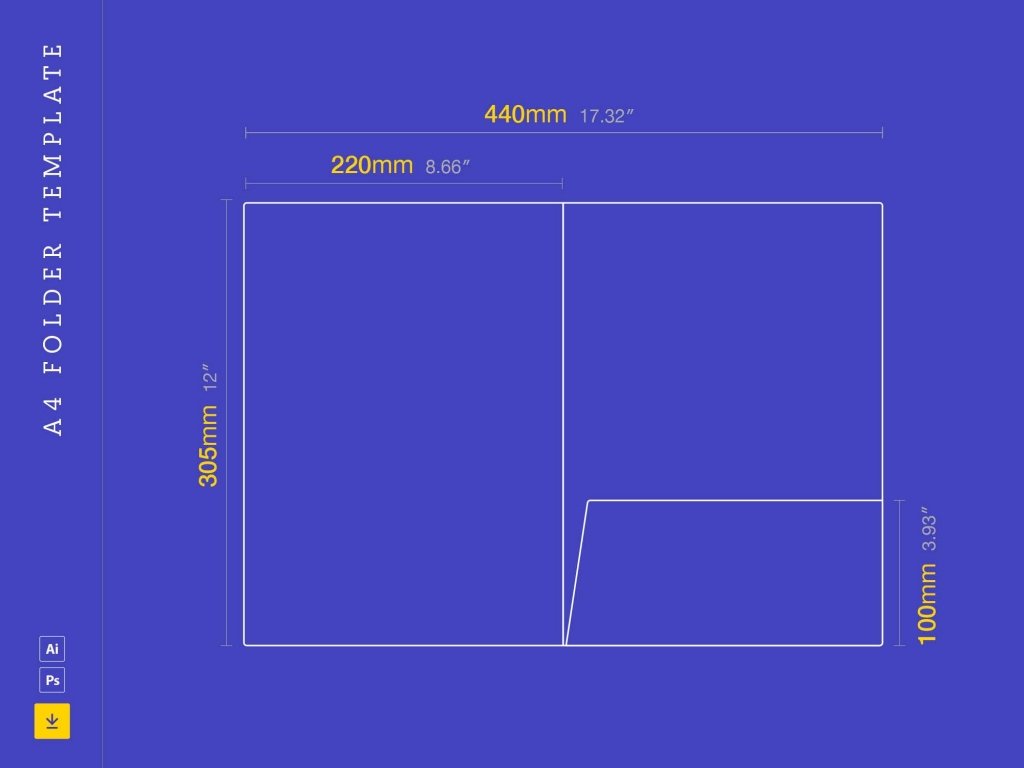
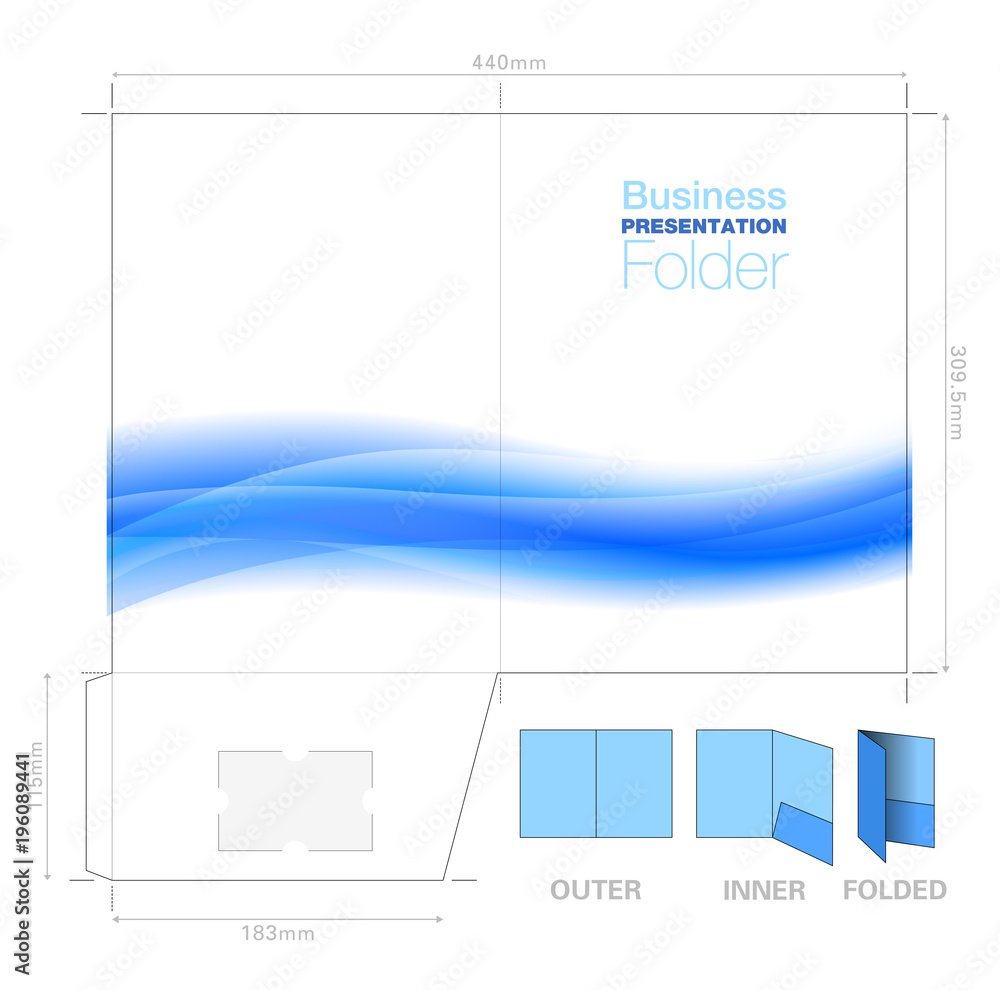
Hi all, I am pretty new to Affinity altogether. I would like to know if it is possible to replicate the attached design template for an A4 folder concept. Or, if at all possible, if I can import the template itself to use? Also, would Publisher or Designer be best? (or does it not really matter?) I did try importing it, but it only imported it as a whole image, which I am guessing isn't quite what I want, as I need to separate it into the following pages: Front Cover Left Inner Right Inner Back Cover Obviously, the inners will be the reverse side of the front and back. I gather that I could have likely just created the pages at the same dimensions as stated on the template. Still, I can see when creating a new file, I can choose A4 and set the 'x' number of pages, which I assume I could use as a front, a back, and the two inner pages. I am able to select between starting from left or right, but the part I am unsure about is the fold-up piece at the bottom of the right-inner/back cover page. Is there a way I can create this? Would I create a smaller page using distorted dimensions for one edge? The idea behind it is to provide a folder that can hold some documents as a sort of leave-behind after a company meeting; the extra fold-out part on the inner in question will have a cut-out of sorts to attach a business card and provide some additional contact information, so its imperative that it has it. You can see the design of the business card cut-out concept in the AdobeStock Preview image (which is essentially the same folder design but in the reverse view of how I want to achieve it). Sorry if this seems dumb, but as stated, I am brand new to this software, so any advice, tips, tricks and hints would be greatly appreciated. Note: The images for the A4 folder template are available for download from Unblast (free) - https://unblast.com/a4-folder-template/ Adobe (paid) - https://stock.adobe.com/uk/images/presentation-folder-a4-template-with-flow-background-graphic-cutter-guide-with-standard-business-card-slot-prints-from-a-sra2-sheet/196089441? Kind regards, GunnerJnr
-
 Locked objects can be selected and deleted through the command Select Same, meanwhile, they have to be locked and kept. Designer 2.31 Windows 11
 -
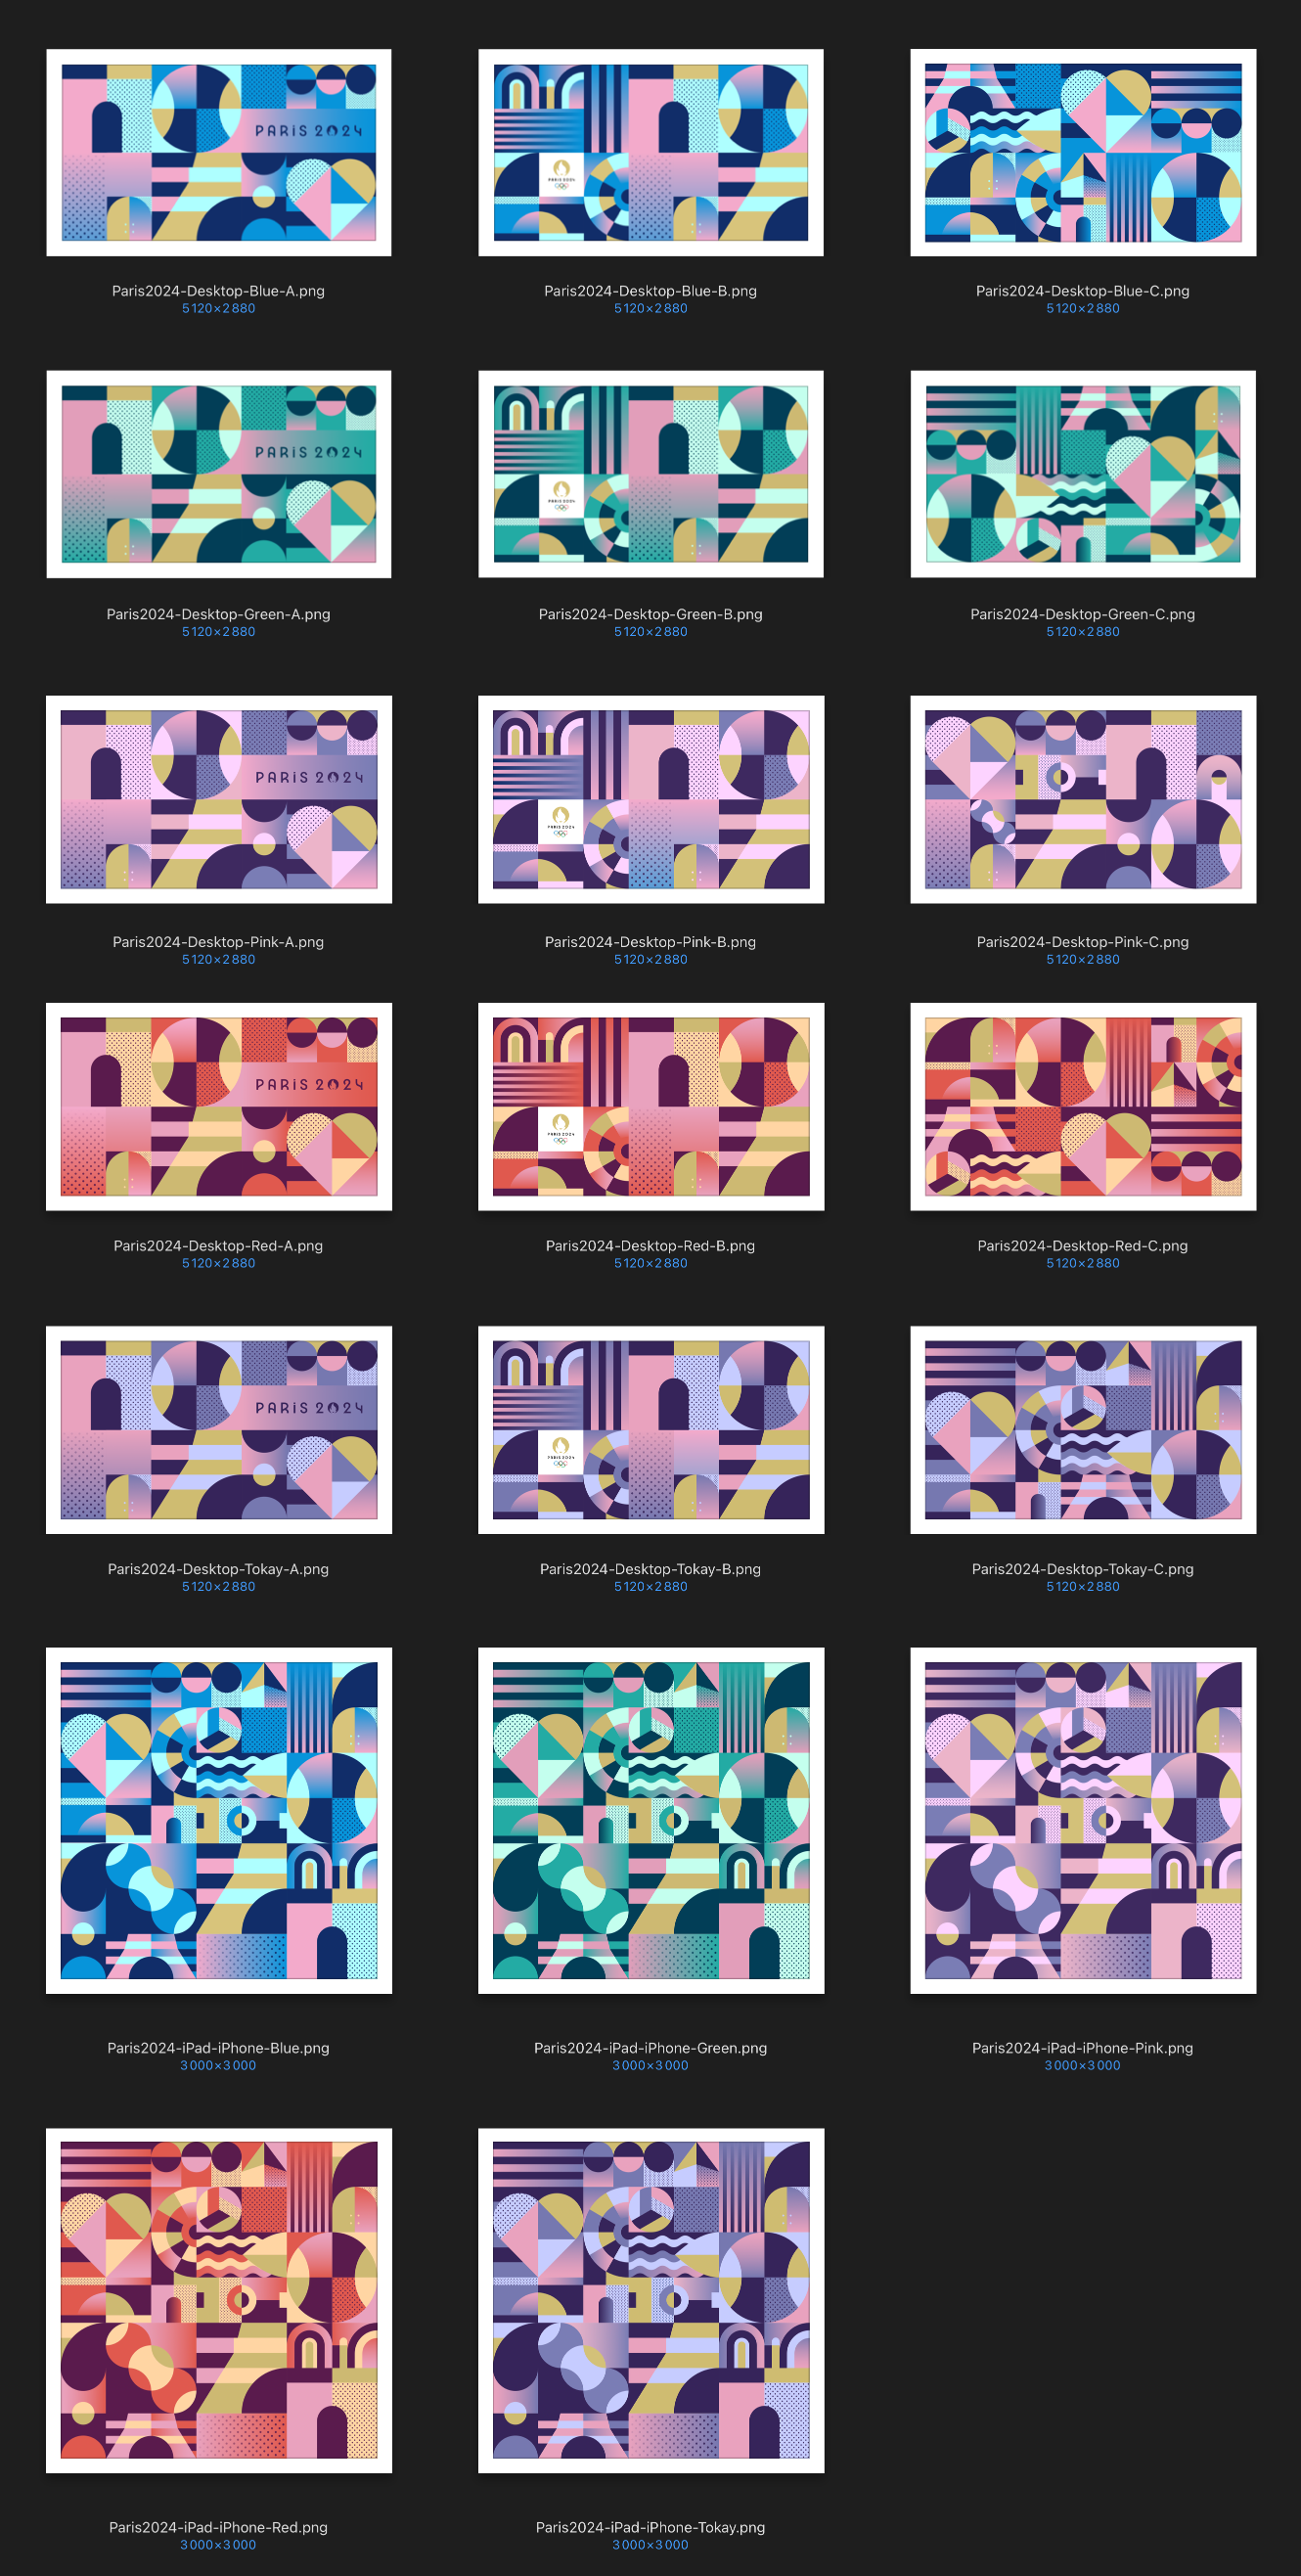
🇬🇧 Here is a series of wallpapers (desktop, iPad and iPhone), in HD, on the theme of the Olympic Games. 🇫🇷 Voici une série de fonds d'écran (desktop, iPad et iPhone), en HD, sur le thème des Sports Olympiques. Paris2024 Desktop Blue A Paris2024 Desktop Blue B Paris2024 Desktop Blue C Paris2024 Desktop Green A Paris2024 Desktop Green B Paris2024 Desktop Green C Paris2024 Desktop Pink A Paris2024 Desktop Pink B Paris2024 Desktop Pink C Paris2024 Desktop Red A Paris2024 Desktop Red B Paris2024 Desktop Red C Paris2024 Desktop Tokay A Paris2024 Desktop Tokay B Paris2024 Desktop Tokay C Paris2024 iPad iPhone Blue Paris2024 iPad iPhone Green Paris2024 iPad iPhone Pink Paris2024 iPad iPhone Red Paris2024 iPad iPhone Tokay
-
... or one of those typical forum discussions. 🤔 😉
-
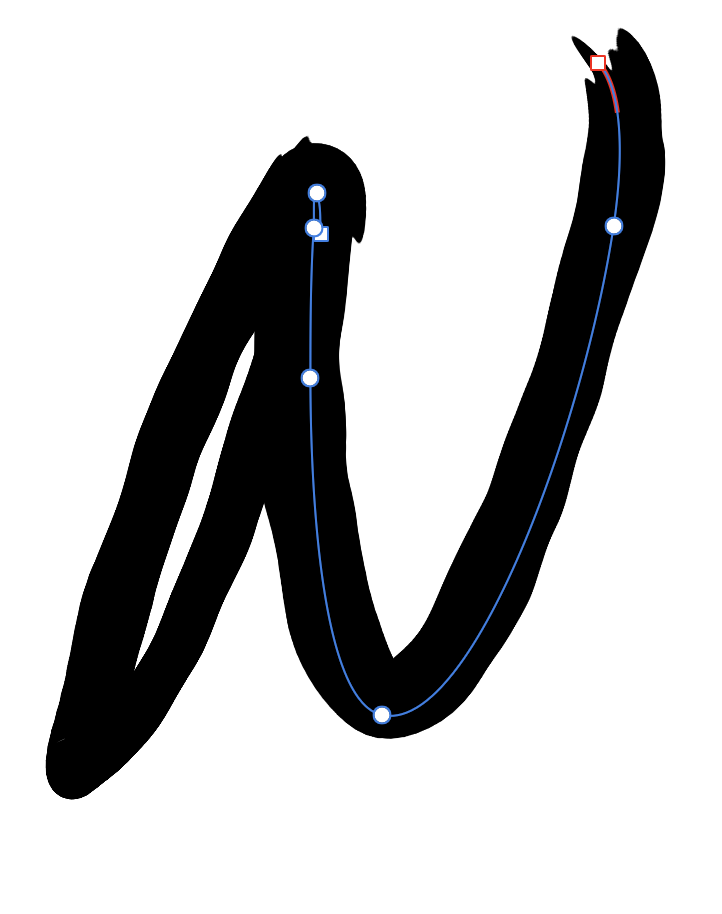
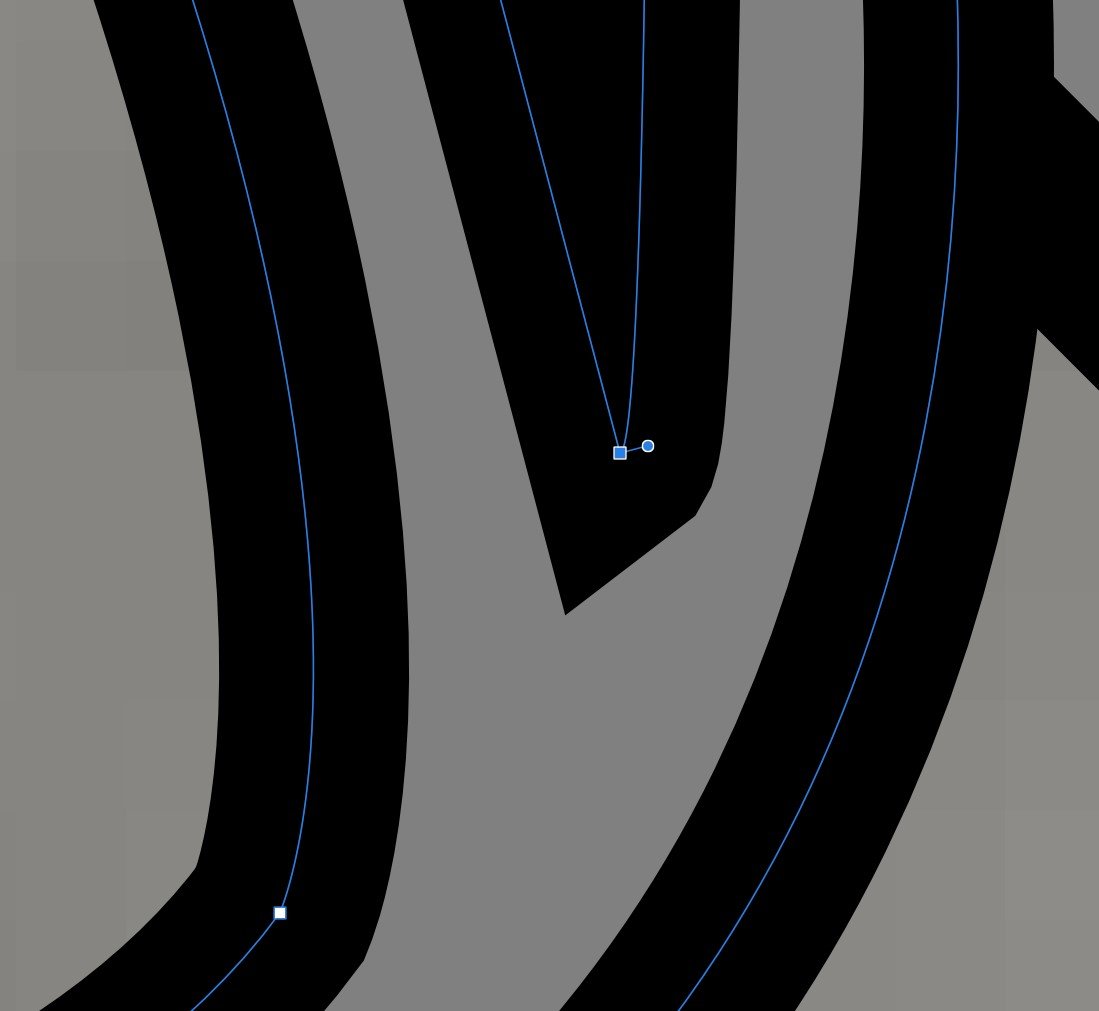
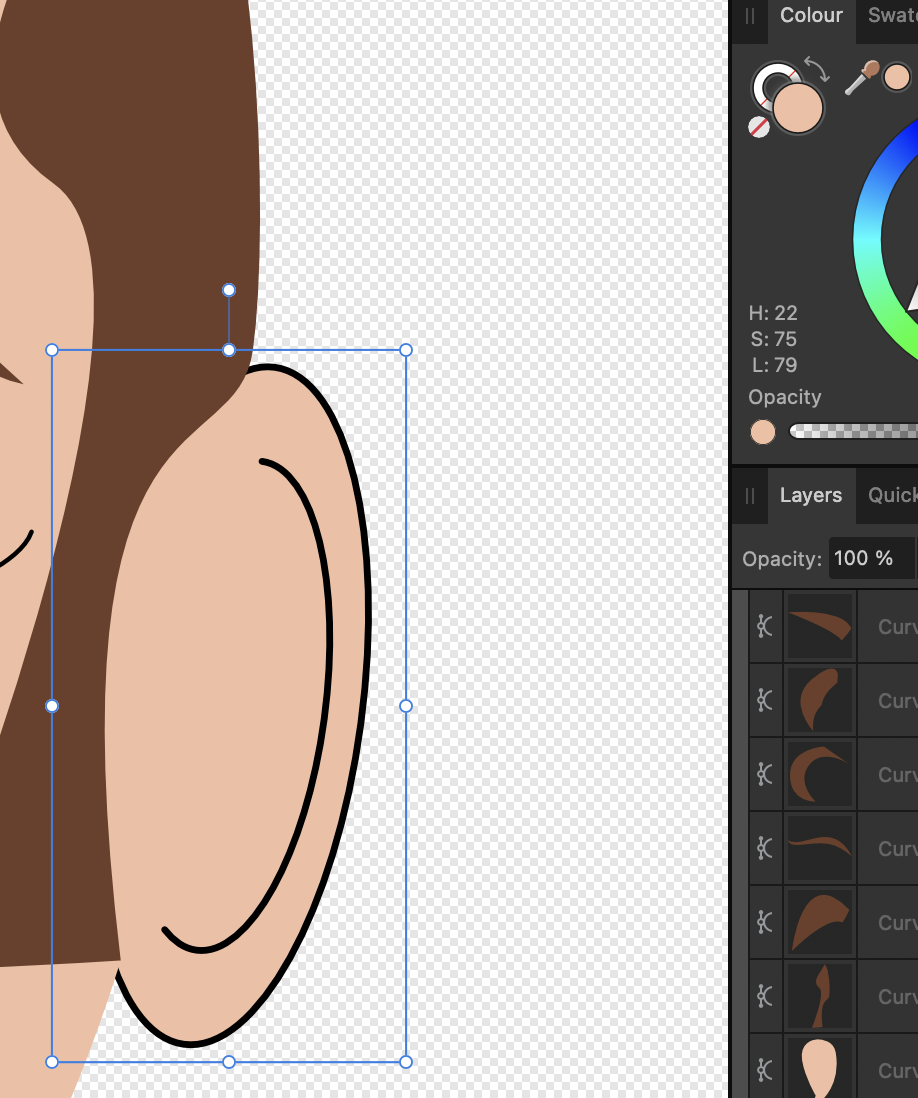
 Apologies if this isn't the right place to post this. I'm new to the forum and playing with some letters in order to learn Designer 2 more. In Designer (currently 2.3.1) I have a couple strokes made in two separate layers, and I've noticed the strokes in this layer aren't smooth like the other strokes. In the highlighted nodes on the stroke for example, the stroke seems 'wobbly'. However my other letters are smoother. All my strokes are using the Brush Pen 03. Any tips?
-
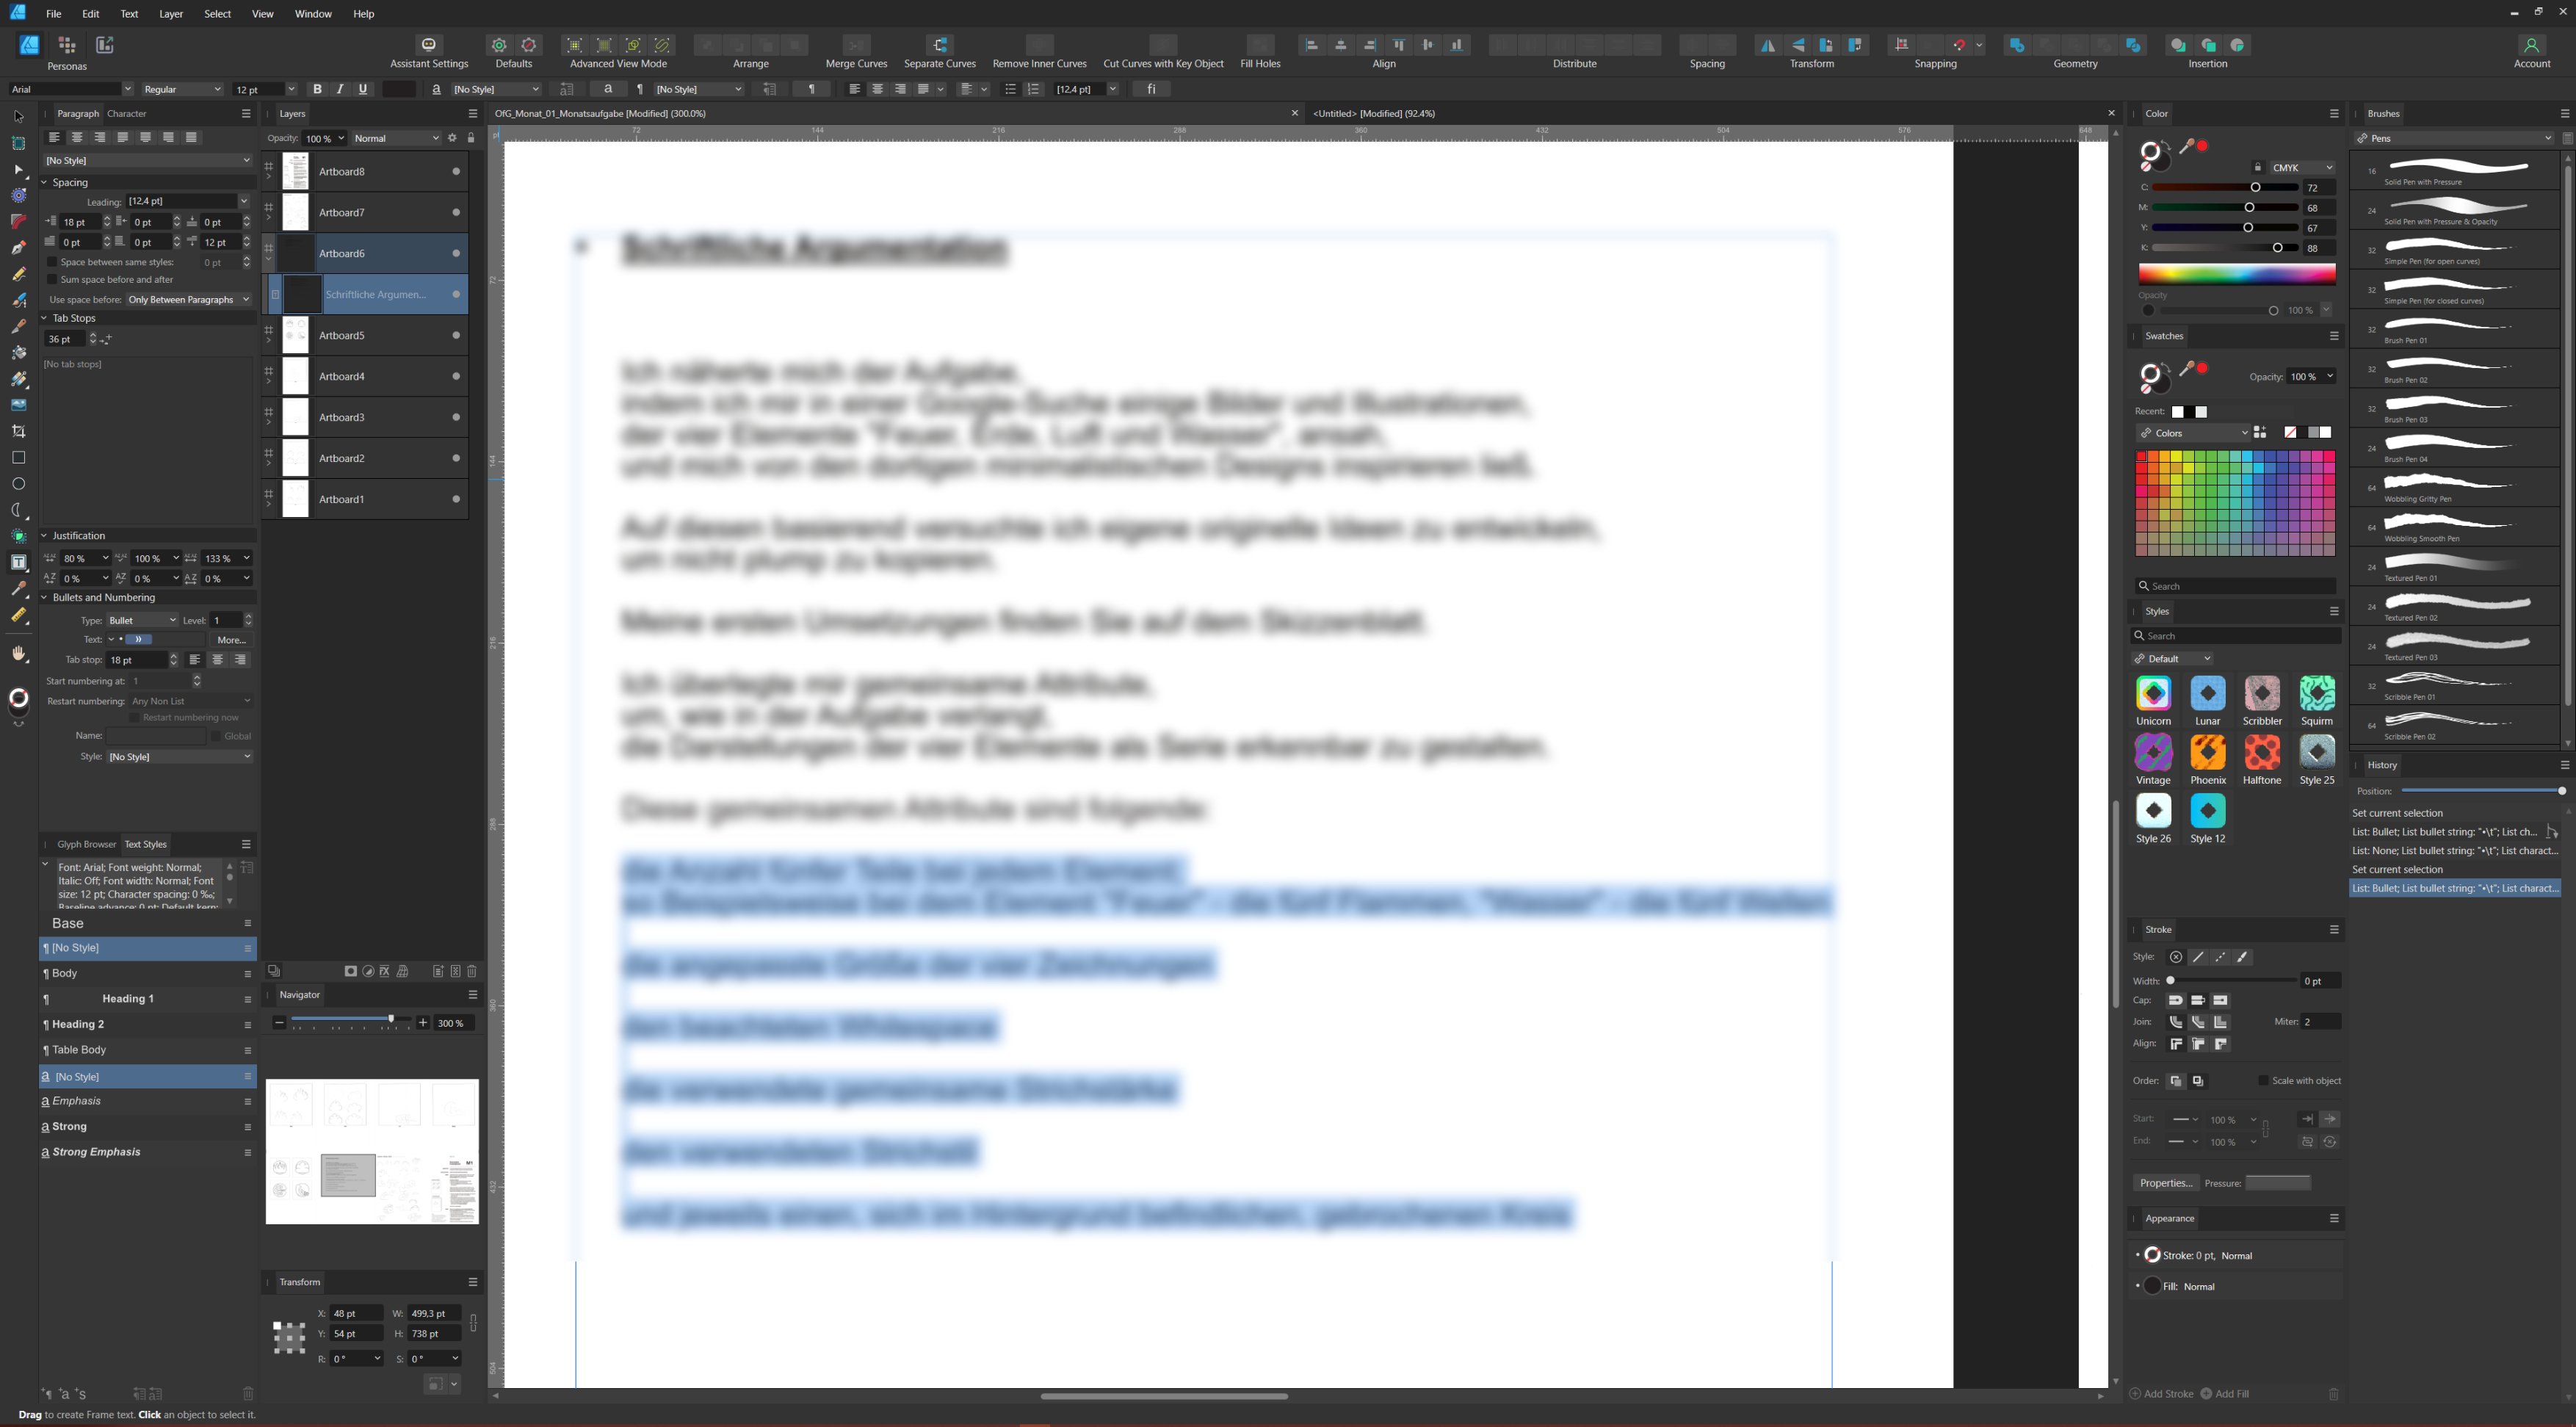
 Hi, I got problems, when I want to add bullet points to a text. For example in the middle of the text I want to add bullet points to some lines and when I place the curso beside the text, or even wehen I mark all lines, the Bulletpoint will appear on top of the text. I added a screenshot below, I hope it helps for diagnosing the issue by throwing an eye on the settings. I had to blur the text out of privacy reasons. Win10, AD version 2.3.1.2217 Thank you very much in advance, I hope someone can help, because I dont found a solution since days in youtube, so I ask here. thank you, Hamza
-
 Some sharp corners are rendering at a different "pointy-ness" depending on how close I zoom. The difference is quite dramatic, and can change how the design looks significantly. I have build 1.10.6.1665
-
I would like to have the option to add tables to designer.
-
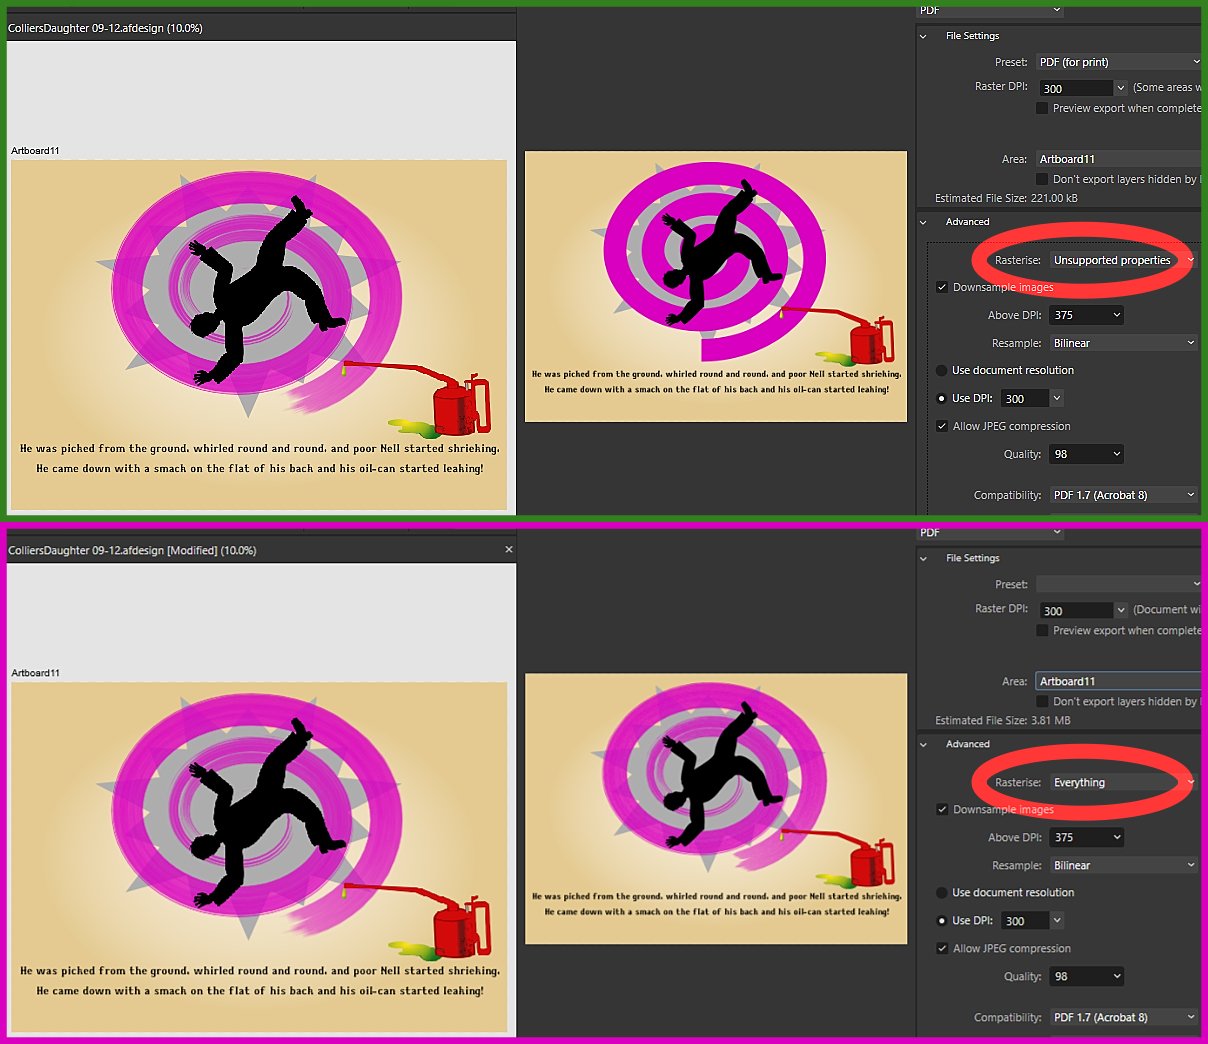
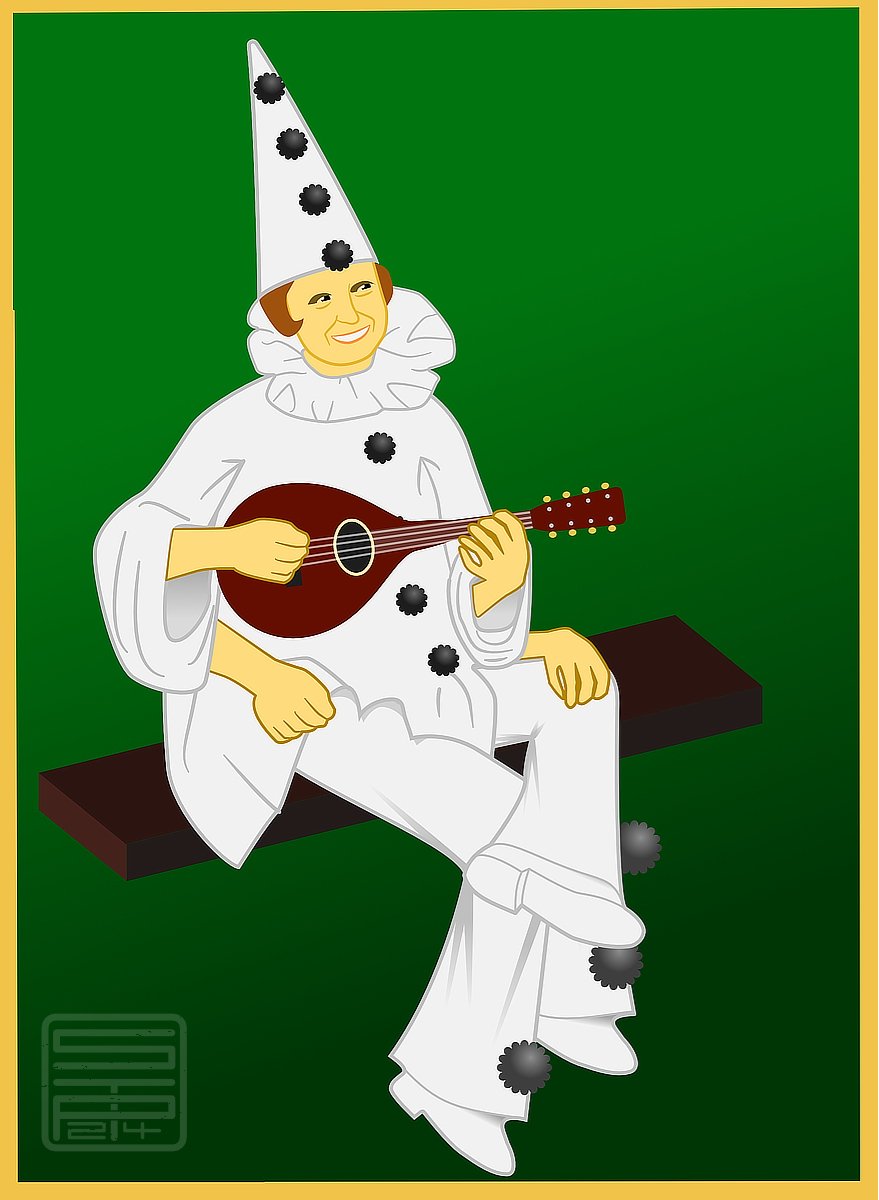
 A page from a project I've been working on. The violet curve is a spiral with a vector brush applied. Is it possible to keep the appearance when exporting as a PDF without having to rasterise either the whole artboard or just the curve? (If you're wondering, it's from a comic monologue by Billy Bennett, called The Collier's Daughter; you can find it on YouTube and other websites.)
-
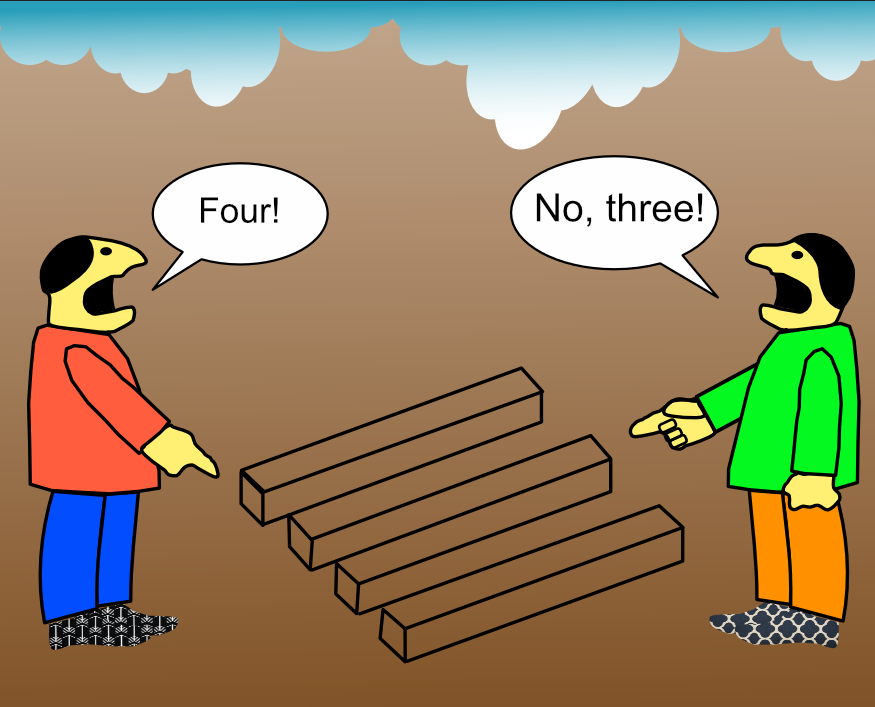
I could have called this Many hands (and feet) make light work. We're all getting browned off with Artificial Intelligence stealing copyright works. I thought it was time I made a stand and made my own AI image. In this case, it probably means Astonishing Inaccuracies.
- 16 replies
-
- 18
-

-

-

-
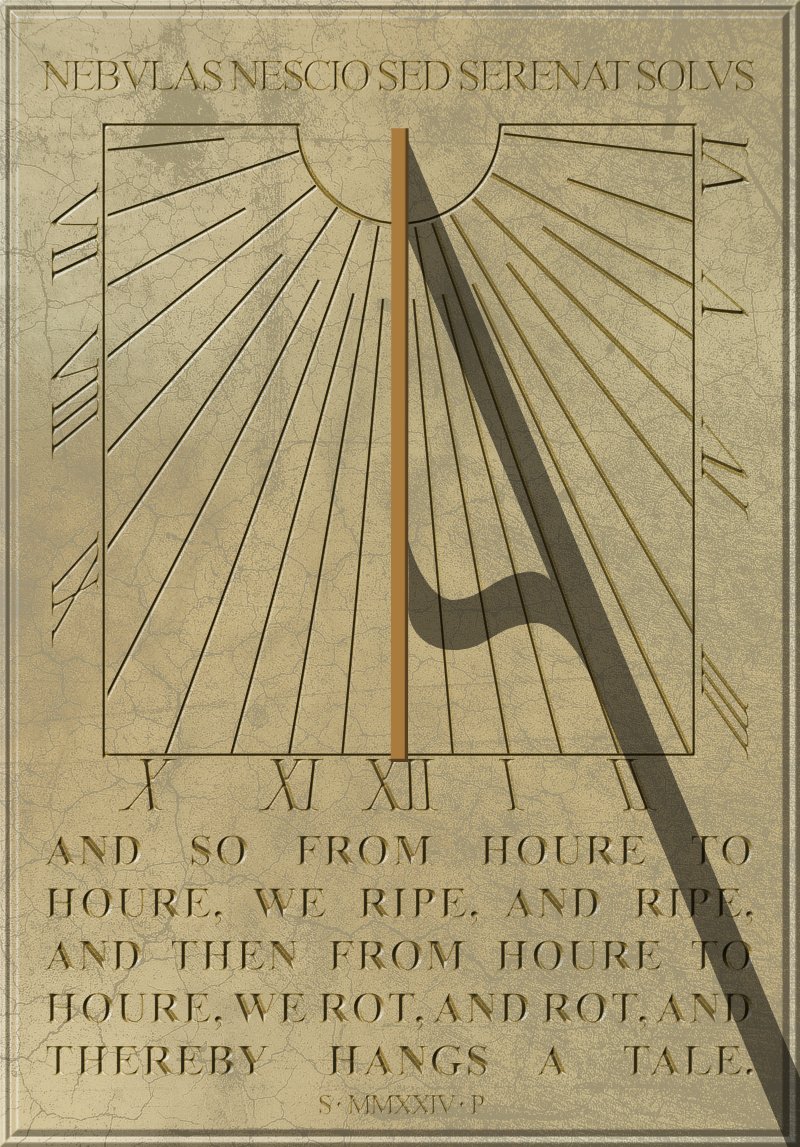
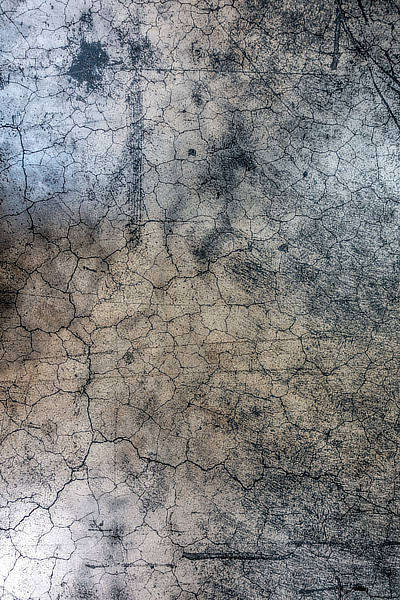
I found a pic of a wall-mounted sundial at Norbury Manor in Derbyshire in my old photos. (It's a National Trust property, and open to visitors from time to time.) It was erected as a memorial to (I think) the former owner, who died in 1987. I've changed all the inscriptions in the foolish hope of looking clever. The base colour is 45/38/71 in HSL . . . and I found a grungy texture in my collection (this is a reduced copy) . . . and after some playing about, I found an opacity or 25% and a blend mode Colour Burn gave me a pleasing marble-like effect. For the incised text, I darkened the fill slightly and applied an Inner Bevel/Emboss FX using the first (triangular) profile, inverted. I adjusted the radius till the bevels met in the middle, making the letters look as though they'd been carved.
-
 You guys did great with the measuring tool. Please make it so we can keep the DIMENSION as a separate layer/group. In my industry when we send out signage/decals etc out for print, its great to have the measurement off to the side for the PRINT SHOP to see. Hot Door CADTOOL does this for Illustrator. It's a massive time saver than drawing them out each time. Gary
 -
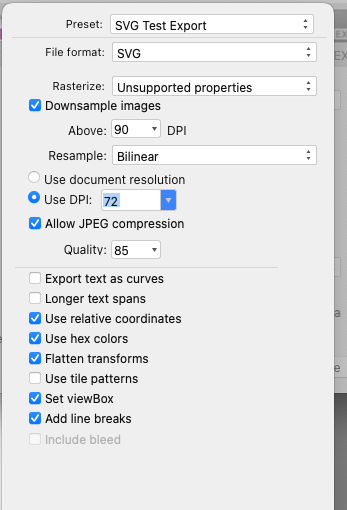
 I have designer project file that I created under v1 (1.10.8), that I export as SVG and import into another program (FWIW Ignition HMI). I upgraded to V2 (2.3.0) of Designer and this week I went to make some changes to the file, and then export as SVG. The problem is that using (what I believe are) exactly the same options under V2 as I used under V1 I get a different SVG file with additional transform tags (as well as other changes). My main questions are: Is it possible to export from V2 to produce the same file as was exported from V1? Are the differences between the versions a real issue? The V1 exported SVG is <?xml version="1.0" encoding="UTF-8" standalone="no"?> <!DOCTYPE svg PUBLIC "-//W3C//DTD SVG 1.1//EN" "http://www.w3.org/Graphics/SVG/1.1/DTD/svg11.dtd"> <svg width="100%" height="100%" viewBox="0 0 284 511" version="1.1" xmlns="http://www.w3.org/2000/svg" xmlns:xlink="http://www.w3.org/1999/xlink" xml:space="preserve" xmlns:serif="http://www.serif.com/" style="fill-rule:evenodd;clip-rule:evenodd;stroke-linejoin:round;stroke-miterlimit:2;"> <g id="BasePlateTest"> <path d="M283.549,309.677l0.084,0.085l0,117.484l-83.074,83.075l-117.485,-0l-83.074,-83.075l0,-117.484l0.084,-0.085l0,-309.677l283.465,0l-0,309.677Z"/> <circle id="Ring" cx="141.817" cy="368.504" r="130.394" style="fill:#b7b7b7;"/> <rect id="Inset" x="14.258" y="14.173" width="255.118" height="192.756" style="fill:#fff;"/> </g> <g id="Text"> <text id="Text1" x="53.608px" y="51.69px" style="font-family:'ArialMT', 'Arial', sans-serif;font-size:36px;">T<tspan x="71.608px 91.629px " y="51.69px 51.69px ">ex</tspan>t Line 1</text> <text id="Text2" x="53.608px" y="85.29px" style="font-family:'ArialMT', 'Arial', sans-serif;font-size:36px;">T<tspan x="71.608px 91.629px " y="85.29px 85.29px ">ex</tspan>t Line 2</text> <text id="Text3" x="53.608px" y="119.13px" style="font-family:'ArialMT', 'Arial', sans-serif;font-size:36px;">T<tspan x="71.608px 91.629px " y="119.13px 119.13px ">ex</tspan>t Line 3</text> <text id="Text4" x="53.608px" y="152.73px" style="font-family:'ArialMT', 'Arial', sans-serif;font-size:36px;">T<tspan x="71.608px 91.629px " y="152.73px 152.73px ">ex</tspan>t Line 4</text> <text id="Text5" x="53.608px" y="186.33px" style="font-family:'ArialMT', 'Arial', sans-serif;font-size:36px;">T<tspan x="71.608px 91.629px " y="186.33px 186.33px ">ex</tspan>t Line 5</text> </g> </svg> But the V2 exported SVG is <?xml version="1.0" encoding="UTF-8" standalone="no"?> <!DOCTYPE svg PUBLIC "-//W3C//DTD SVG 1.1//EN" "http://www.w3.org/Graphics/SVG/1.1/DTD/svg11.dtd"> <svg width="100%" height="100%" viewBox="0 0 284 511" version="1.1" xmlns="http://www.w3.org/2000/svg" xmlns:xlink="http://www.w3.org/1999/xlink" xml:space="preserve" xmlns:serif="http://www.serif.com/" style="fill-rule:evenodd;clip-rule:evenodd;stroke-linejoin:round;stroke-miterlimit:2;"> <g id="BasePlateTest"> <path d="M283.549,309.677l0.084,0.085l0,117.484l-83.074,83.075l-117.485,-0l-83.074,-83.075l0,-117.484l0.084,-0.085l0,-309.677l283.465,0l-0,309.677Z"/> <circle id="Ring" cx="141.817" cy="368.504" r="130.394" style="fill:#b7b7b7;"/> <rect id="Inset" x="14.258" y="14.173" width="255.118" height="192.756" style="fill:#fff;"/> </g> <g id="Text"> <g id="Text1" transform="matrix(36,0,0,36,227.719,51.6895)"> </g> <text x="53.608px" y="51.69px" style="font-family:'ArialMT', 'Arial', sans-serif;font-size:36px;">T<tspan x="71.608px 91.629px " y="51.69px 51.69px ">ex</tspan>t Line 1</text> <g id="Text2" transform="matrix(36,0,0,36,227.719,85.2895)"> </g> <text x="53.608px" y="85.29px" style="font-family:'ArialMT', 'Arial', sans-serif;font-size:36px;">T<tspan x="71.608px 91.629px " y="85.29px 85.29px ">ex</tspan>t Line 2</text> <g id="Text3" transform="matrix(36,0,0,36,227.719,119.13)"> </g> <text x="53.608px" y="119.13px" style="font-family:'ArialMT', 'Arial', sans-serif;font-size:36px;">T<tspan x="71.608px 91.629px " y="119.13px 119.13px ">ex</tspan>t Line 3</text> <g id="Text4" transform="matrix(36,0,0,36,227.719,152.73)"> </g> <text x="53.608px" y="152.73px" style="font-family:'ArialMT', 'Arial', sans-serif;font-size:36px;">T<tspan x="71.608px 91.629px " y="152.73px 152.73px ">ex</tspan>t Line 4</text> <g id="Text5" transform="matrix(36,0,0,36,227.719,186.33)"> </g> <text x="53.608px" y="186.33px" style="font-family:'ArialMT', 'Arial', sans-serif;font-size:36px;">T<tspan x="71.608px 91.629px " y="186.33px 186.33px ">ex</tspan>t Line 5</text> </g> </svg> Thus the V2 export has the additional <g> tags with a transform in them, and the ID has been moved from the <text> to the <g> tags. But I don't know enough about SVG to know if this is an issue or not. I still have the original SVG exported from V1, and loading up the original project file in V1 still results in the original SVG export. Note that even though I loaded the V1 project into V2, I never saved it from V2, so it remains as a V1 project. I've attached the V1 project file These are the V1 SVG preset options that I am using, and which I also set in V2 when doing the export: And finally, in the project file there are 3 layers. I was only exporting the first 2 layers, and ignoring the 3rd layer (which is hidden by the second layer). Ideally I should delete that layer before uploading here, but I want to use exactly the same file that I created in 2022. Light-Plate.afdesign
-
Since upgrading to the newest version. There is a file in user prefs ( think it was backuprestore) keeps getting bigger and bigger. Ate up a 112 GB of my C drive. Found it and deleted it. But its starting to grow again. Gary
-
In V2 Designer I'm getting errors with colour display and what object actually is. Attached screenshot show where object has black outline but tool (top right) shows it to have no colour? I'm also (occasionally) find I pick a colour from this tool/swatches and object doesn't change, this seems to be when changing to white, I have to change to another colour then change to it to white for it to work? Hope this info is useful. I'm use Designer v2.2.1 on MACOS Sonoma 14.1.1
-
 Hello there, Find here my palettes that I have been using for 4 years for Affinity Designer and others. 😊 3M Film (PRO) 3M Film (PRO).afpalette : 223 colors (Art Design / Texture / Fabric) 3M Scothcal (PRO) 3M Scotchcal Series (PRO).afpalette : 578 colors (Art Design / Texture / Fabric) Blueprint Blueprint.afpalette : 10 colors, 1 gradients (Industrial Design) Bootstrap 4 Bootstrap 4.afpalette : 16 colors (WebDesign / UI Design) Brands Brands.afpalette : 75 colors from brands like Affinity, Apple, Google, Microsoft... (WebDesign / Logo Design) British Standard (PRO) British Standard (PRO).afpalette : 363 colors (Art Design / Texture / Fabric) Bulma.IO Bulma.io.afpalette : 18 colors (WebDesign / UI Design) Camo BME FR Camo BME FR.afpalette : 10 colors, 4 gradients (Map Design / Camo / Texture) FlatUI default FlatUI default.afpalette : 20 colors (WebDesign / UI Design) FlatUI 2 Japan FlatUI 2 Japan.afpalette : 19 colors (WebDesign / UI Design) Foundation Foundation.afpalette : 10 colors (WebDesign / UI Design) French Army (PRO) French Army.afpalette : 123 colors (Art Design / Texture / Fabric) GroundworkCss.IO Groundworkcss.io.afpalette : 22 colors (WebDesign / UI Design) Human body Bones Human Body Bones.afpalette : 6 colors (Art Design / Texture) Human body Hairs Human Body Hairs.afpalette : 75 colors (Art Design / Texture) Human body Intimity Human Body Intimity.afpalette : 25 colors (Art Design / Texture) Human body Skins Human Body Skins.afpalette : 26 colors (Art Design / Texture) Kube Kube.afpalette : 21 colors (WebDesign / UI Design) L'Oreal Skins L'Oreal Skins.afpalette : 66 colors (Art Design / Texture) Maps Elements - Fills Maps Elements - Fills.afpalette : 19 colors (Map Design / WebDesign / UI Design) Maps Elements - Gradients Maps Elements - Gradients.afpalette : 26 gradients (Map Design / WebDesign / UI Design) MaterialUI Material-ui.afpalette : 19 colors (WebDesign / UI Design) Old Colors (PRO) Old Colors.afpalette : 71 colors (Art Design / Texture / Fabric) RAL Colors Classic (PRO) RAL Colors.afpalette : 216 colors from RAL Classic (Art Design / Texture / Fabric) RAL Effect (PRO) RAL Effect (PRO).afpalette : 490 colors (Art Design / Texture / Fabric) RAL Plastic P1 (PRO) RAL Plastic P1.afpalette : 98 colors (Art Design / Texture / Fabric) RAL Plastic P2 (PRO) RAL Plastic P2.afpalette : 200 colors (Art Design / Texture / Fabric) SemanticUI Semantic-UI.afpalette : 15 colors (WebDesign / UI Design) SpectreCSS Spectre.css.afpalette : 7 colors (WebDesign / UI Design) UIKit Uikit.com.afpalette : 12 colors (WebDesign / UI Design) UPDATE 2023-11-21 03:00 : Blueprint Blueprint.afpalette : 10 colors, 1 gradients (Industrial Design) FlatUI default FlatUI default.afpalette : 20 colors (WebDesign / UI Design) French Army (PRO) French Army.afpalette : 123 colors (Art Design / Texture / Fabric) Camo BME FR Camo BME FR.afpalette : 10 colors, 4 gradients (Map Design / Camo / Texture) L'Oreal Skins L'Oreal Skins.afpalette : 66 colors (Art Design / Texture) RAL Plastic P1 (PRO) RAL Plastic P1.afpalette : 98 colors (Art Design / Texture / Fabric) RAL Plastic P2 (PRO) RAL Plastic P2.afpalette : 200 colors (Art Design / Texture / Fabric) UPDATE 2023-11-21 13:45 : 3M Film (PRO) 3M Film (PRO).afpalette : 223 colors (Art Design / Texture / Fabric) 3M Scothcal (PRO) 3M Scotchcal Series (PRO).afpalette : 578 colors (Art Design / Texture / Fabric) British Standard (PRO) British Standard (PRO).afpalette : 363 colors (Art Design / Texture / Fabric) RAL Effect (PRO) RAL Effect (PRO).afpalette : 490 colors (Art Design / Texture / Fabric) Bootstrap 4.afpalette Brands.afpalette Bulma.io.afpalette Foundation.afpalette Groundworkcss.io.afpalette Human Body Hairs.afpalette Human Body Intimity.afpalette Human Body Skins.afpalette Human Body Bones.afpalette Kube.afpalette Material-ui.afpalette Semantic-UI.afpalette Spectre.css.afpalette Uikit.com.afpalette Maps Elements - Fills.afpalette Maps Elements - Gradients.afpalette
 -
A few days ago I made a rather silly picture I titled The perils of poorly-maintained Gents' lavatories (that's men's public restrooms in American). And then I thought I could animate this! There's nothing on view that actually requires censoring, I should point out. The moving parts are all on separate layers, so each one transfers to a layer in MoviePlus X6. (MoviePlus: still doing the business, and more intuitive to use than a lot of other video editors 🙂) I recorded the sound effects in the kitchen on my iPhone; the little bit of speech will be recognisable to Goon Show fans.
- 2 replies
-
- 4
-
-
-
- designer
- serif movieplus x6
- (and 1 more)
-
 Hi, I'm trying to draw an old style map with slope indicated by hatching. I'm using a vector layer with the "2B pencil hatch" brush and would like to taper the thickness at the start/end of each line. I just cant figure how to make it's width either with a Wacom pad or pressure map. I can get pressure sensitivity working on pixel brushes, but not on vectors. Pressure settings appear on the Brush edit panel so I assume its supposed to be possible? Can you confirm if it should be possible and any likely issues. Windows 10 Home/Latest. Designer 2.2.1
 -
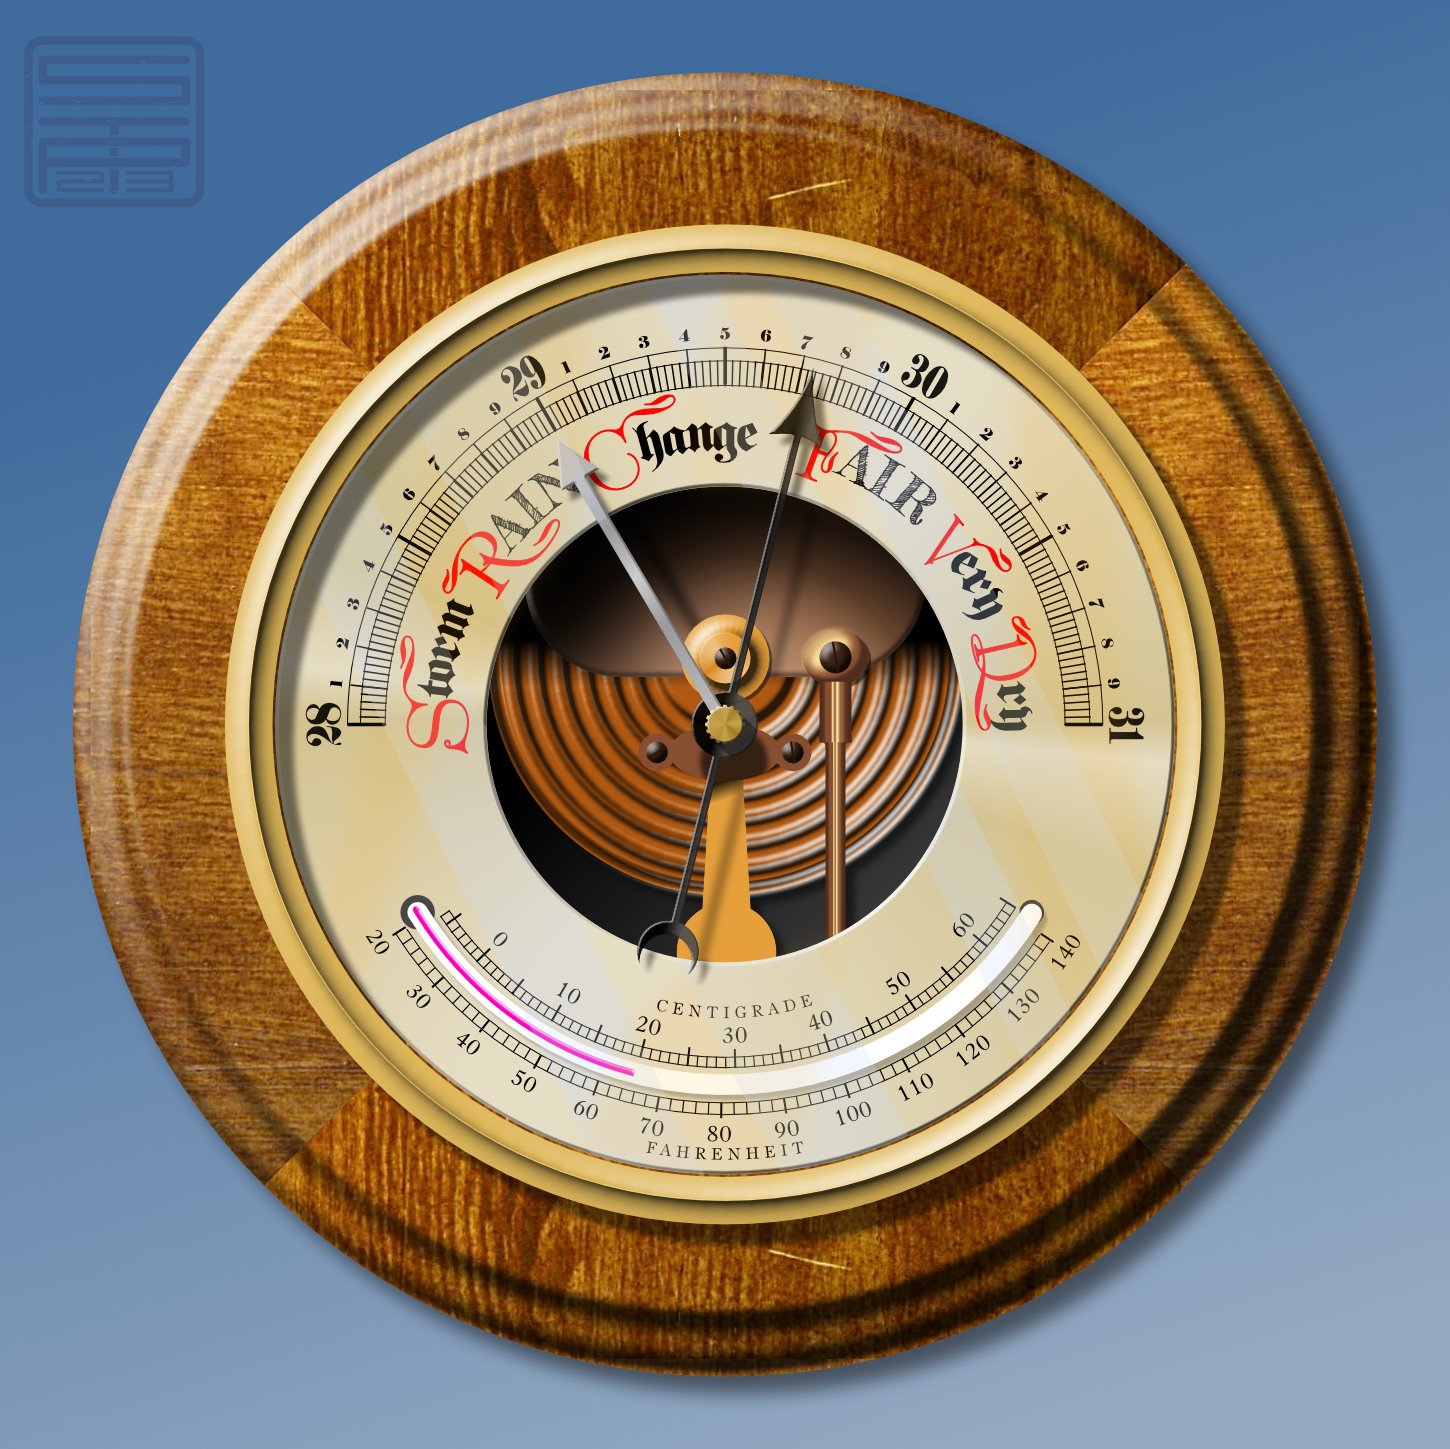
I made a picture of an old-fashioned barometer because . . . well, because I can! Who needs an excuse? I discovered quite a while ago that I enjoy making things with scales and pointers, for some reason; and the Version 2 Duplicate dialogue makes it so much easier to make circular scales. The woodwork is created from a stock photo of a piece of wood, which I sawed into quarters and turned a profile edge (digitally, that is ). All the rest is made from vectors, using three photos for reference and picking out the best features. (There were some curlicues on the thermometer scales, but I forgot to do them! ) The red letters are from a freebie font called Great Victorian, which has plain and swashed cap forms.
-
 hi there, finally, with sweat and blood, i understand how the constraint group works, but i nothice 1 issue here, after i'm happy with my "CGroup" . i adjusted it and do stuff. and then i need just the background of this CGroup, so i went to layers panel, and i select the bg object, i copied, then pasted it . weird thing it didn't appear nearby, but after zoomed out a bit, the object become so big it covered the whole 2 artboard i made. thankyou
-
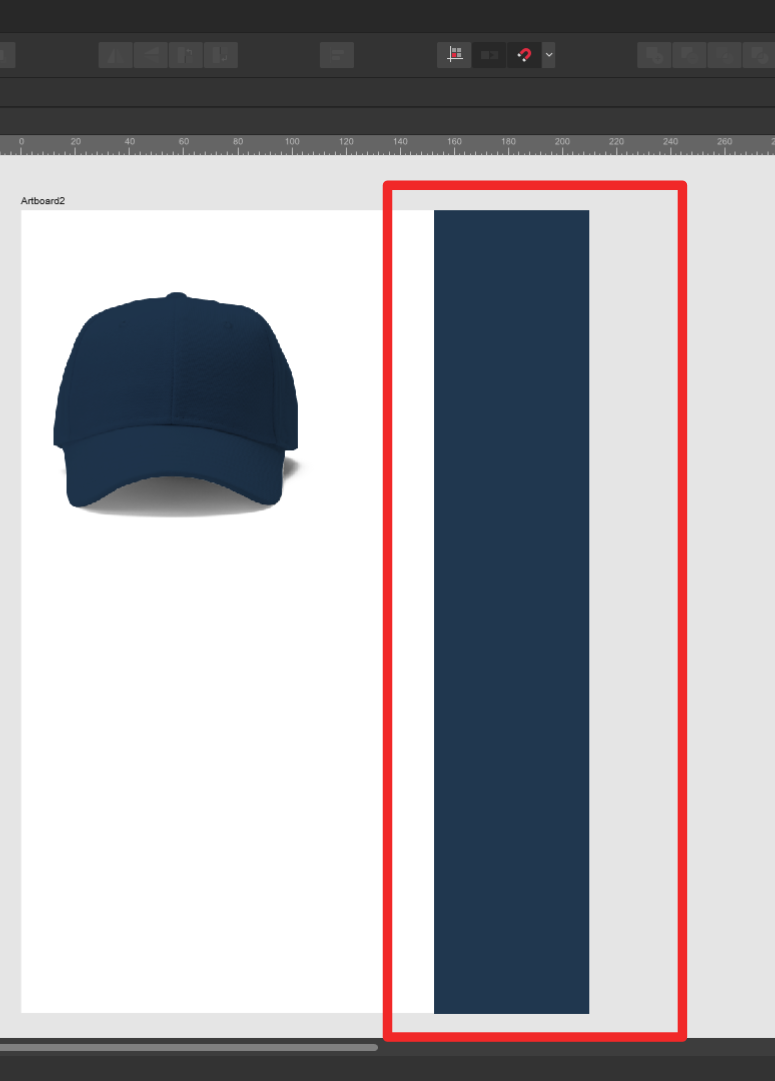
 Hi, I get som strange colour behaviour when I copy an object with a colour layer to a new artboard; the colour layer stay on part of the artboard, depending on how I move the object. See enclosed image and screen recording (the Screen recording didn't properly record the sidebar; at the end I was hiding each layer). Is it a bug or do I do something wrong? Designer version 2.2.0 OS: Windows 10 Pro Affinity Designer 2 2023-10-23 21-38-13.mp4
-
 The Actual Size zoom on my monitor does not line up with the actual paper size when I hold it up against the monitor so I want to adjust the scale to make it match. In other software such as Clip Studio, there is a setting to adjust it so it lines up with a ruler held against your monitor. Where is this option in Affinity Designer?