Search the Community
Showing results for tags 'designer 2'.
-
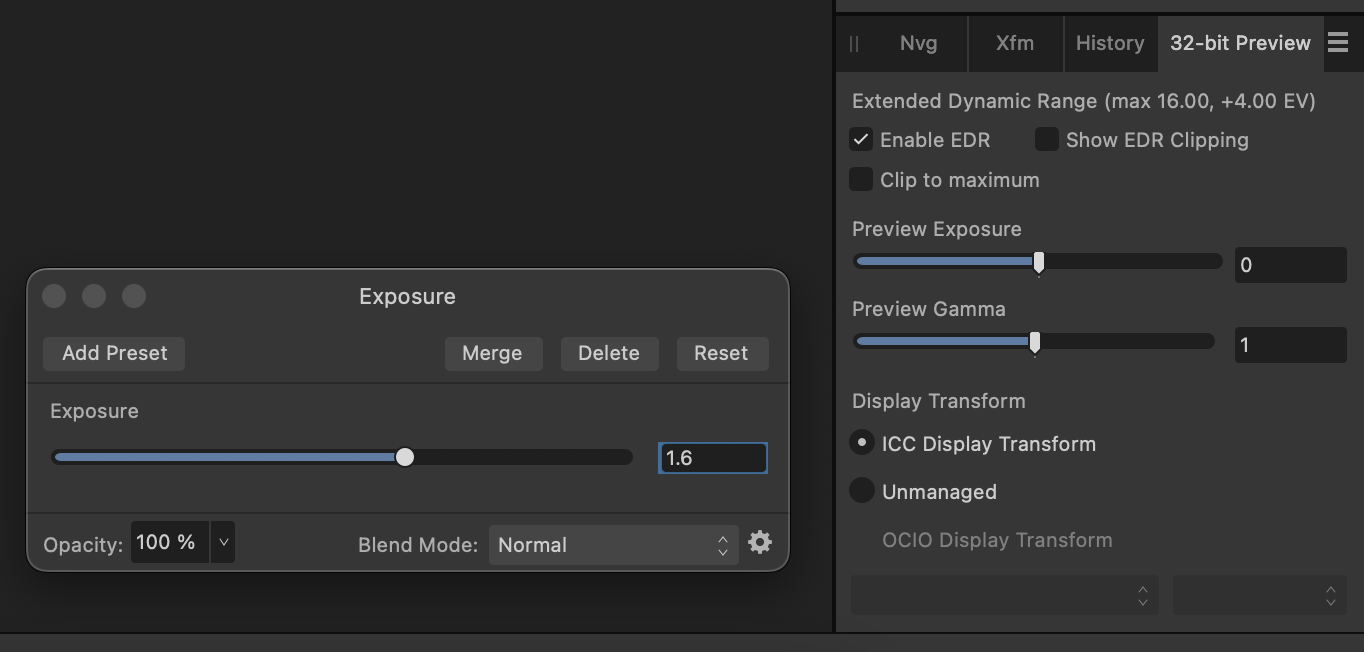
 I'm trying to do some HDR mockups in Designer 2 but haven't gotten it to show extended brightness inside the app (on MacBook Pro internal XDR display). I created an RGB/32 document and applied an exposure adjustment greater than 1 to the layer I'm trying to brighten beyond "normal" display levels. I've tried applying the exposure adjustment to both vector and pixel layers. The 32-bit Preview panel doesn't allow me to click `Enable EDR` and instead of seeing extended brightness it's just desaturating the colors. I've repeated these steps in Photo 2 and the 32-bit Preview panel allowed `Enable EDR` and triggered the display's extended brightness as expected. Is there a different workflow I need to follow to see EDR/HDR in Designer?
-
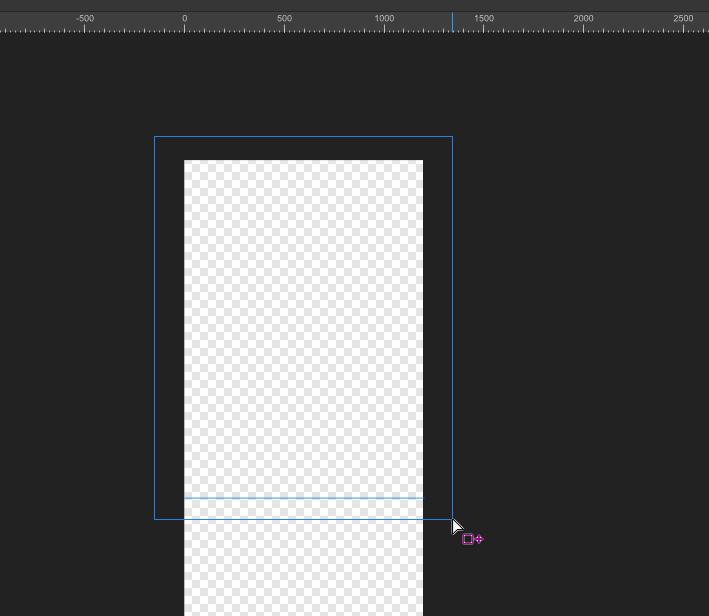
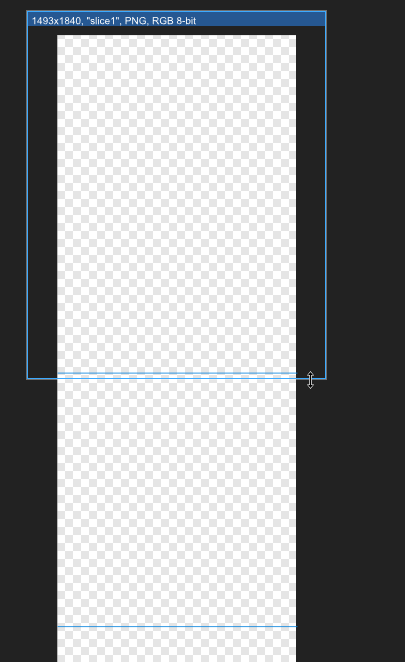
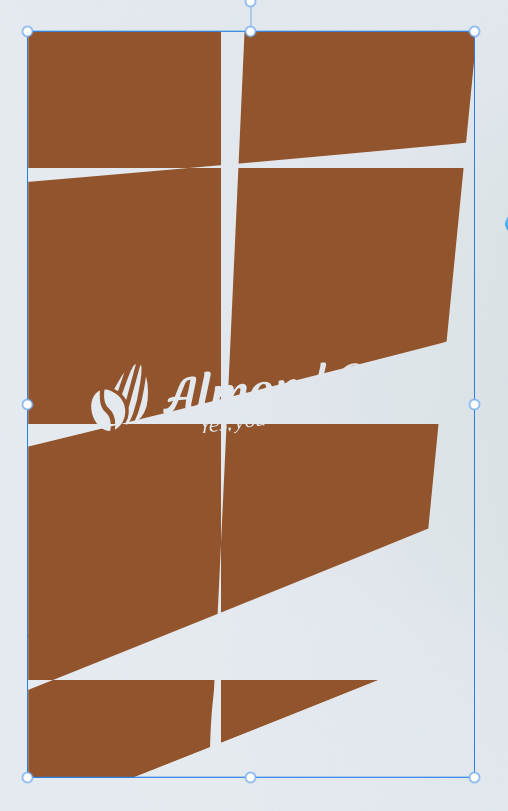
 Problem description I'm using Affinity Designer 2 Export Persona feature. I want to crop a long screenshot and export it. I divided them using guide lines and then went into the Export Persona panel. However, it failed to automatically capture my guides. This is very inconvenient. Expected result I hope that Export Persona can refer like Photoshop slicing tool, automatically identify my guide lines, and provide a quick cutting and export method without requiring me to manually cut the image. Thank.
-
 Hi, I have recently experienced files becoming corrupted when using Photo V2 and Designer V2. I have had a look through the various posts on the forum and can't seem to find a solution to the problem. I am using a laptop with windows 11, my files are stored on an external hard-drive but this has been working find. I have other files created at the same time via Designer that are still opening OK (so far!). I have tried moving the files to my internal hard drive but that hasn't helped. The files do contain a number of layers and png photo's (I am making xmas cards for a local animal charity). The pictures being used are my own and have been adjusted and exported as png's from Photo v2. I am assuming that it must be something to do with the pictures but can't be sure. The pictures look fine separately and I have recreated one of the files and readded the pics and so far so good. There doesn't seem to be any reason for the corruption, the files were fine yesterday when I saved and closed them but corrupted today when I tried to open them. Can anyone advise how I can resolve this? Recreating one file, whilst a pain, is doable but if this is going to happen randomly to complicated files insanity will soon follow ! I have uploaded one of the designer files that has corrupted. Any help would be gratefully received. Thanks frame_xmascards_blue.afdesign
 -
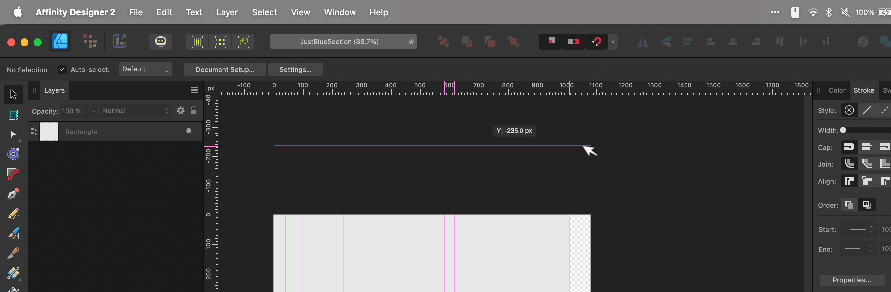
 I can *not* get Guide lines to show up outside of the document workspace/canvas no matter how many ways I try. This is the case with all of my files, even new ones. Is there a setting I accidentally changed? See attached image for how the horizontal Guide pulled from the ruler is only as wide as the work-area & the vertical guides don't extend to the top. Yes I have "View > Show Guides" checked Yes I have "View > View Mode > Clip To Canvas" unchecked. No, I am not using any Artboards. I am running Affinity Designer 2.3.0 on Mac Sonoma 14.2.1 (Somewhat related because I can't see: I can change the color of Guides, but Is it possible to make the Guide lines thicker than 1px on the screen?)
-
I've tried to choose exporting with a transparent background (PNG) for this Designer 2 file. The matte is set to nothing but I still get a white background. I've made a quick video to detail all of this: https://d.pr/v/48SVS7 Hope it's a bug and that I don't have to switch the document background every time I want to export a transparent png or gif. Also, exporting to the size of the canvas/artboard is the only option. Being able to simply export selected and/or the entire piece (not the artboard) would be a great way to get exactly what you want and none of what you don't.
-
 If this topic is in the forums for v2, I couldn't find it. When I open a Designer file that is missing fonts, I get the popup window telling me what those fonts are. But before I can get to my actual font manager to load the fonts, it disappears. I can't find anywhere in Designer 2 to open the font manager. What am I missing?
 -
 On the iPad version of Designer, since update version 2.2.0.2005 when I go to Save or Save as a document, Designer forgets the previous file name and changes it to "Untitled".
 -
Hi, I am experiencing extreme levels of brush lag in Designer 2. Any ideas what could be going on? I have tried changing the performance/acceleration options, but nothing seems to help. What Application are you using? Designer 2 Are you using the latest release version? Yes Can you reproduce it? Yes Does it happen for a new document? If not can you upload a document that shows the problem? Yes What is your operating system and version Windows 10 v22H2 Build: 19045.3448 Is hardware acceleration (in Preferences > Performance) ON or OFF ? (and have you tried the other setting?) Have tried both What happened for you (and what you expected to happen) Extreme brush lag - unusable performance Video attached: Affinity Designer Brush Lag.mp4 Thanks, Jack
-
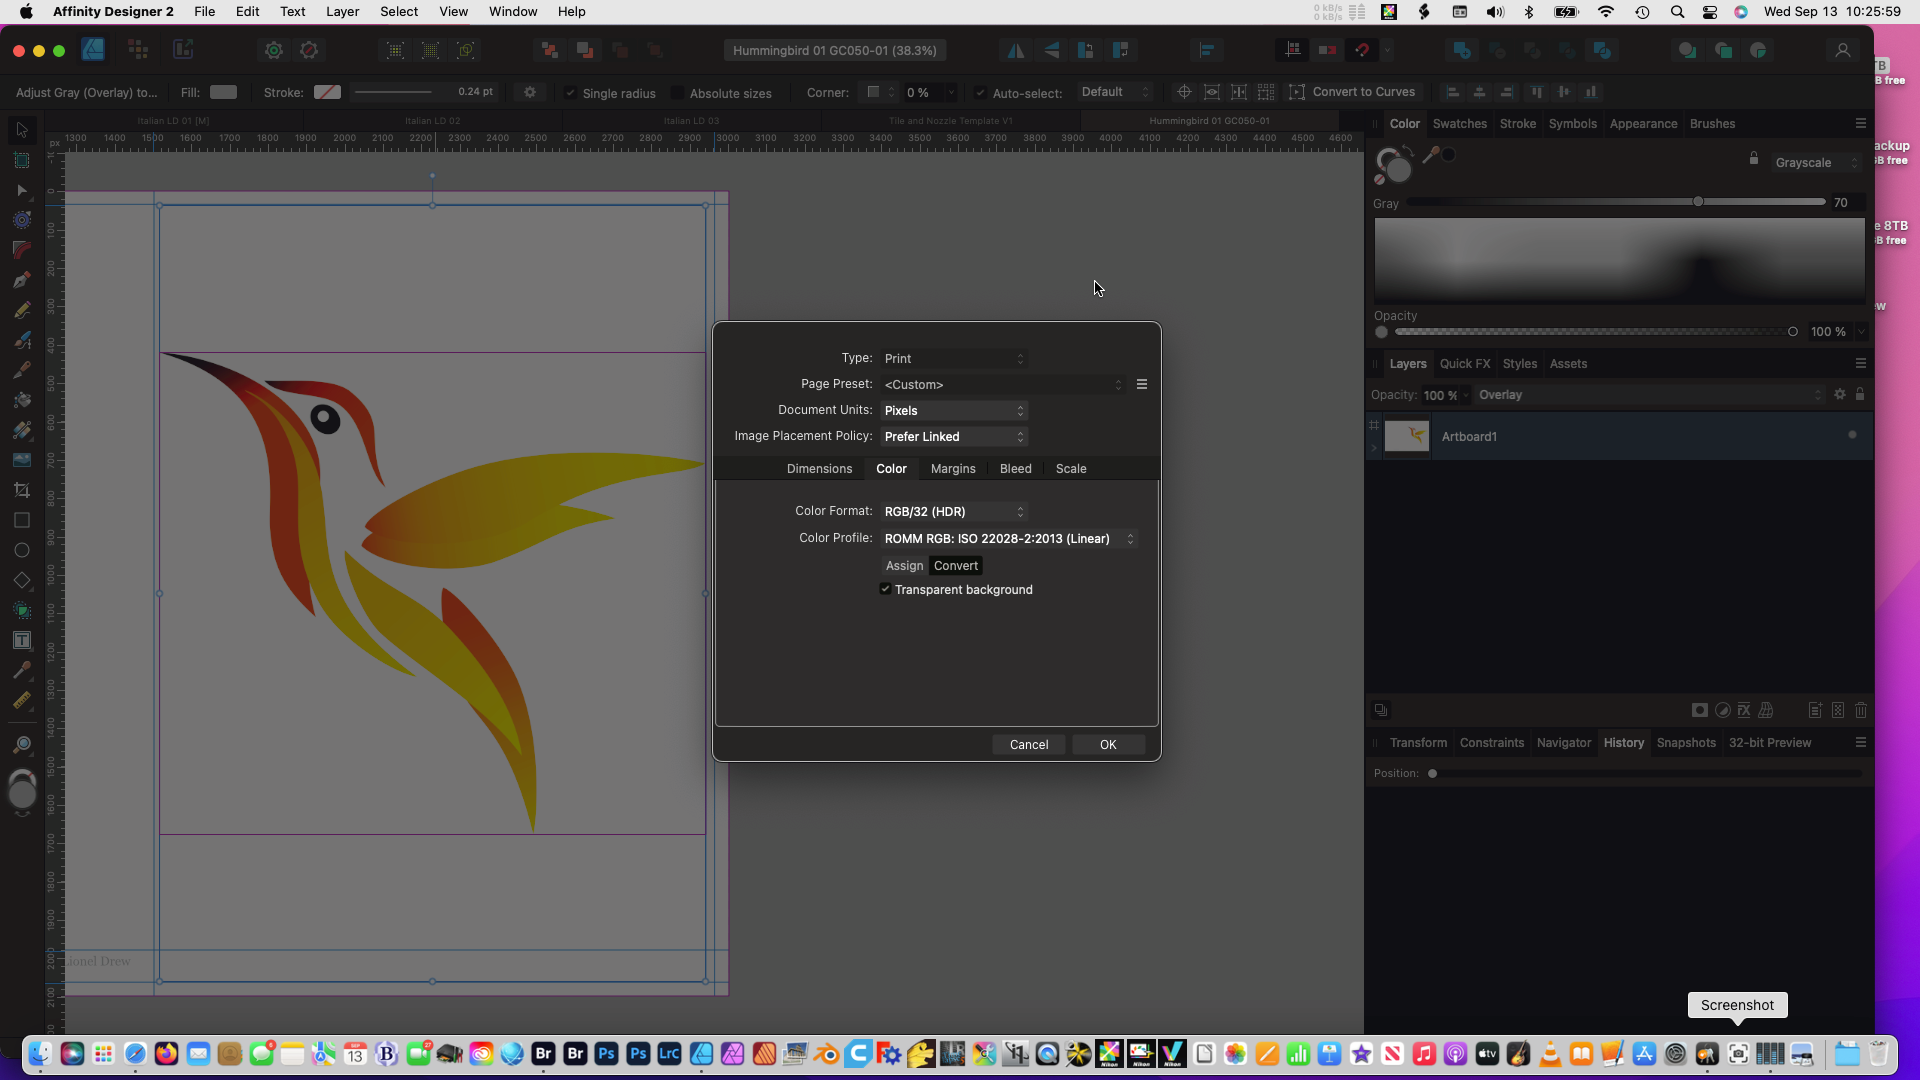
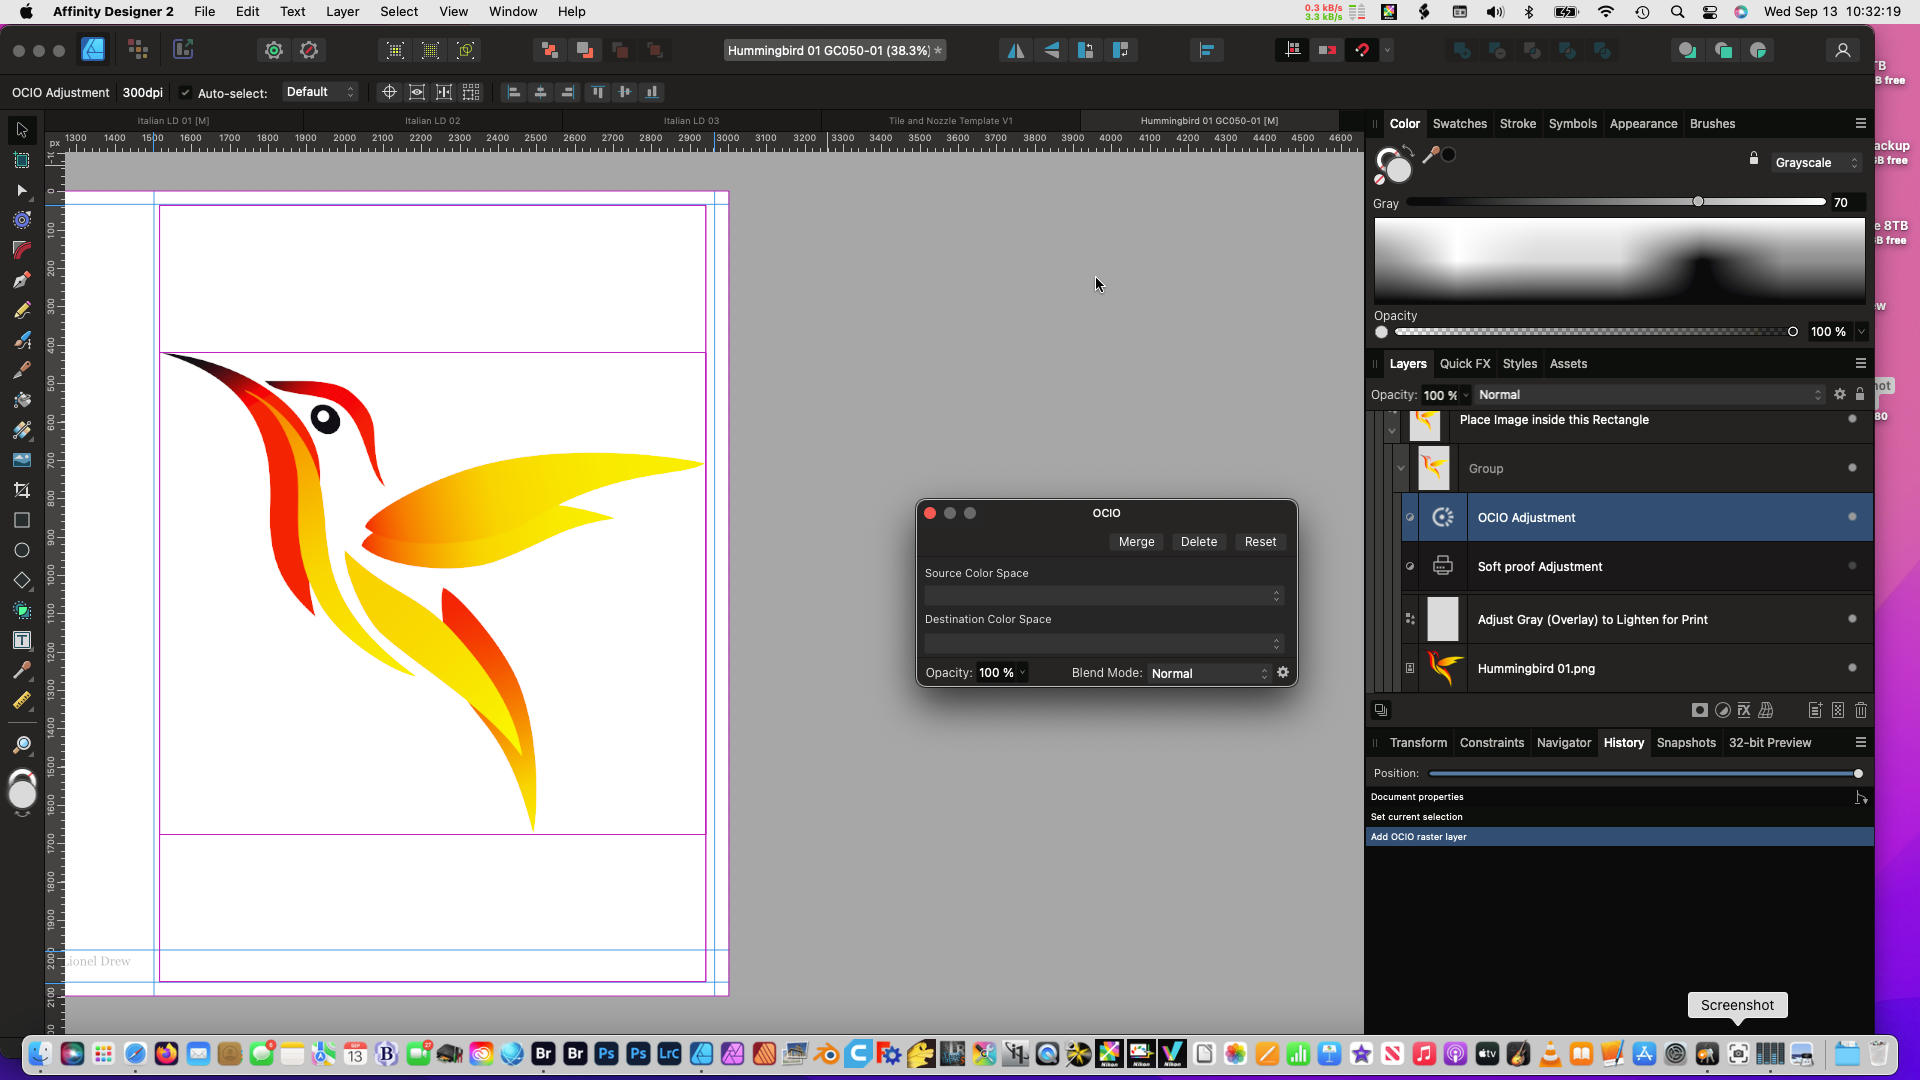
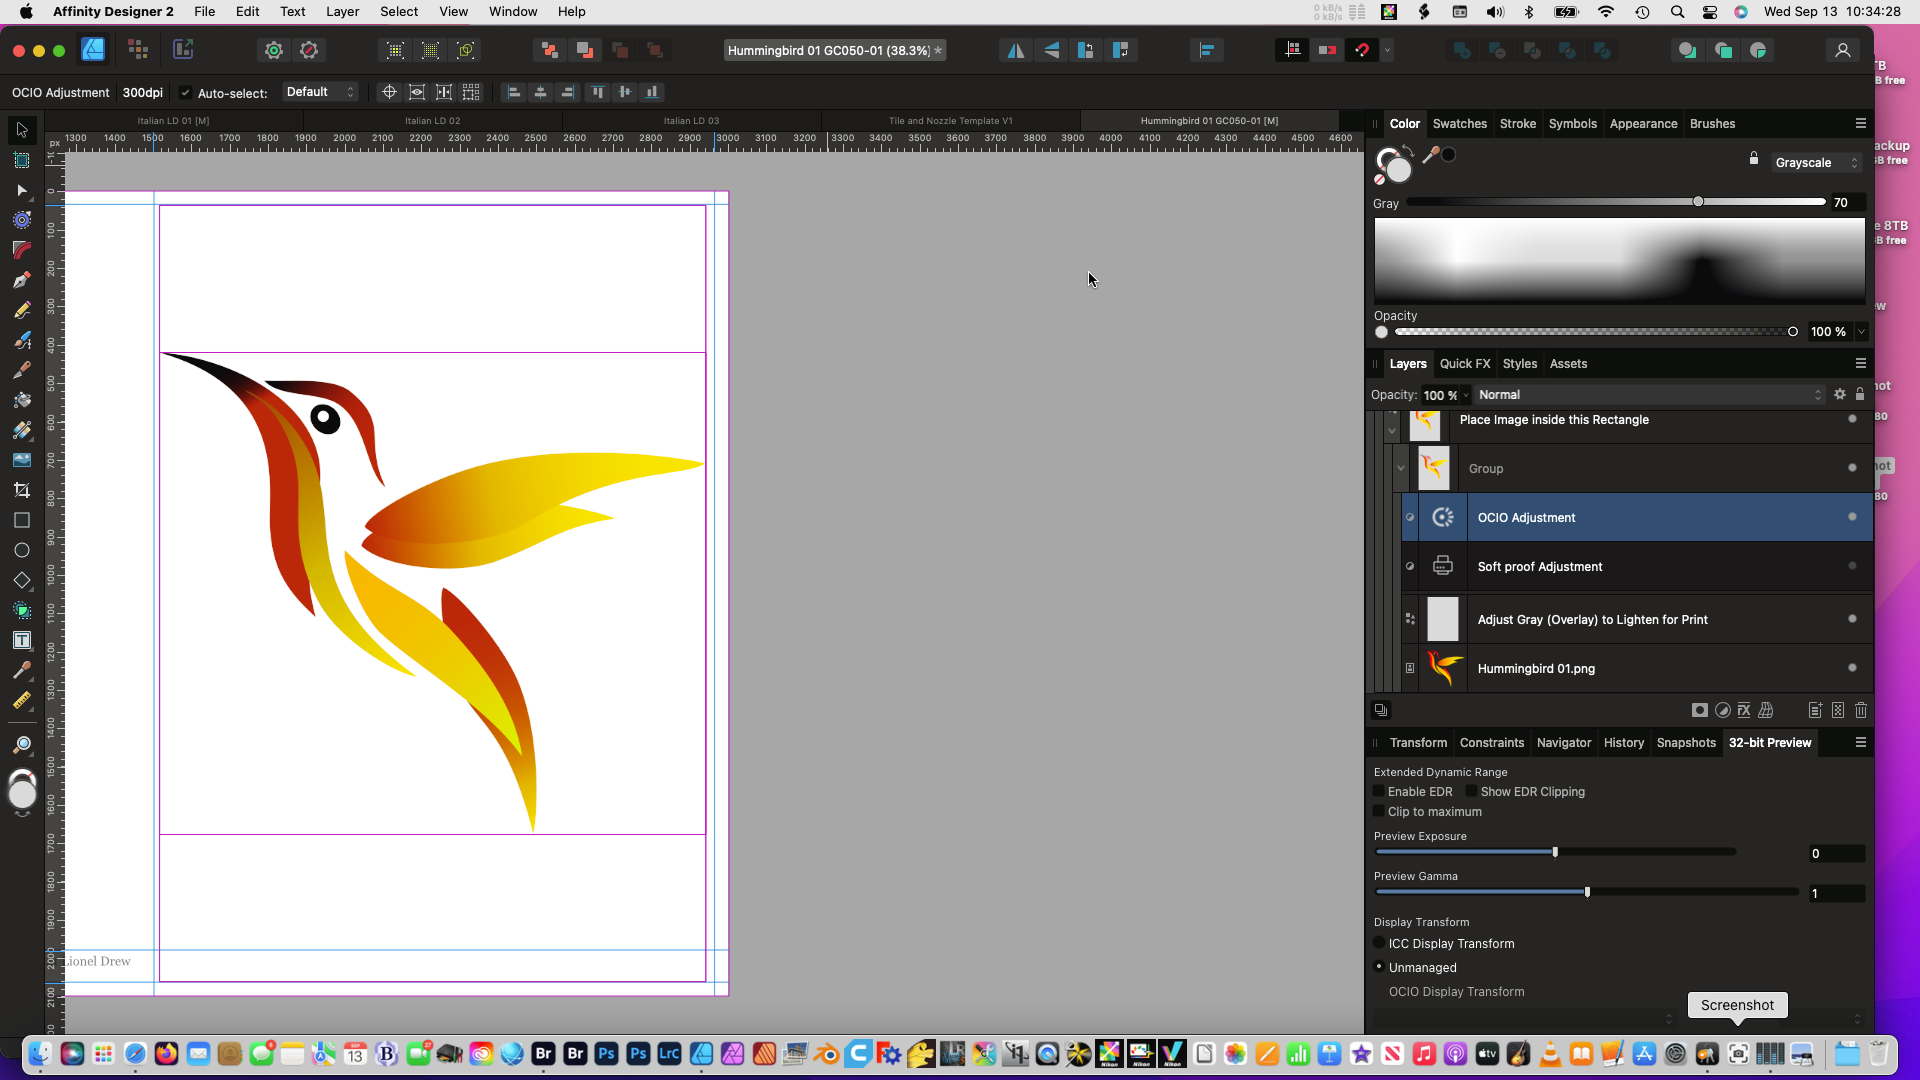
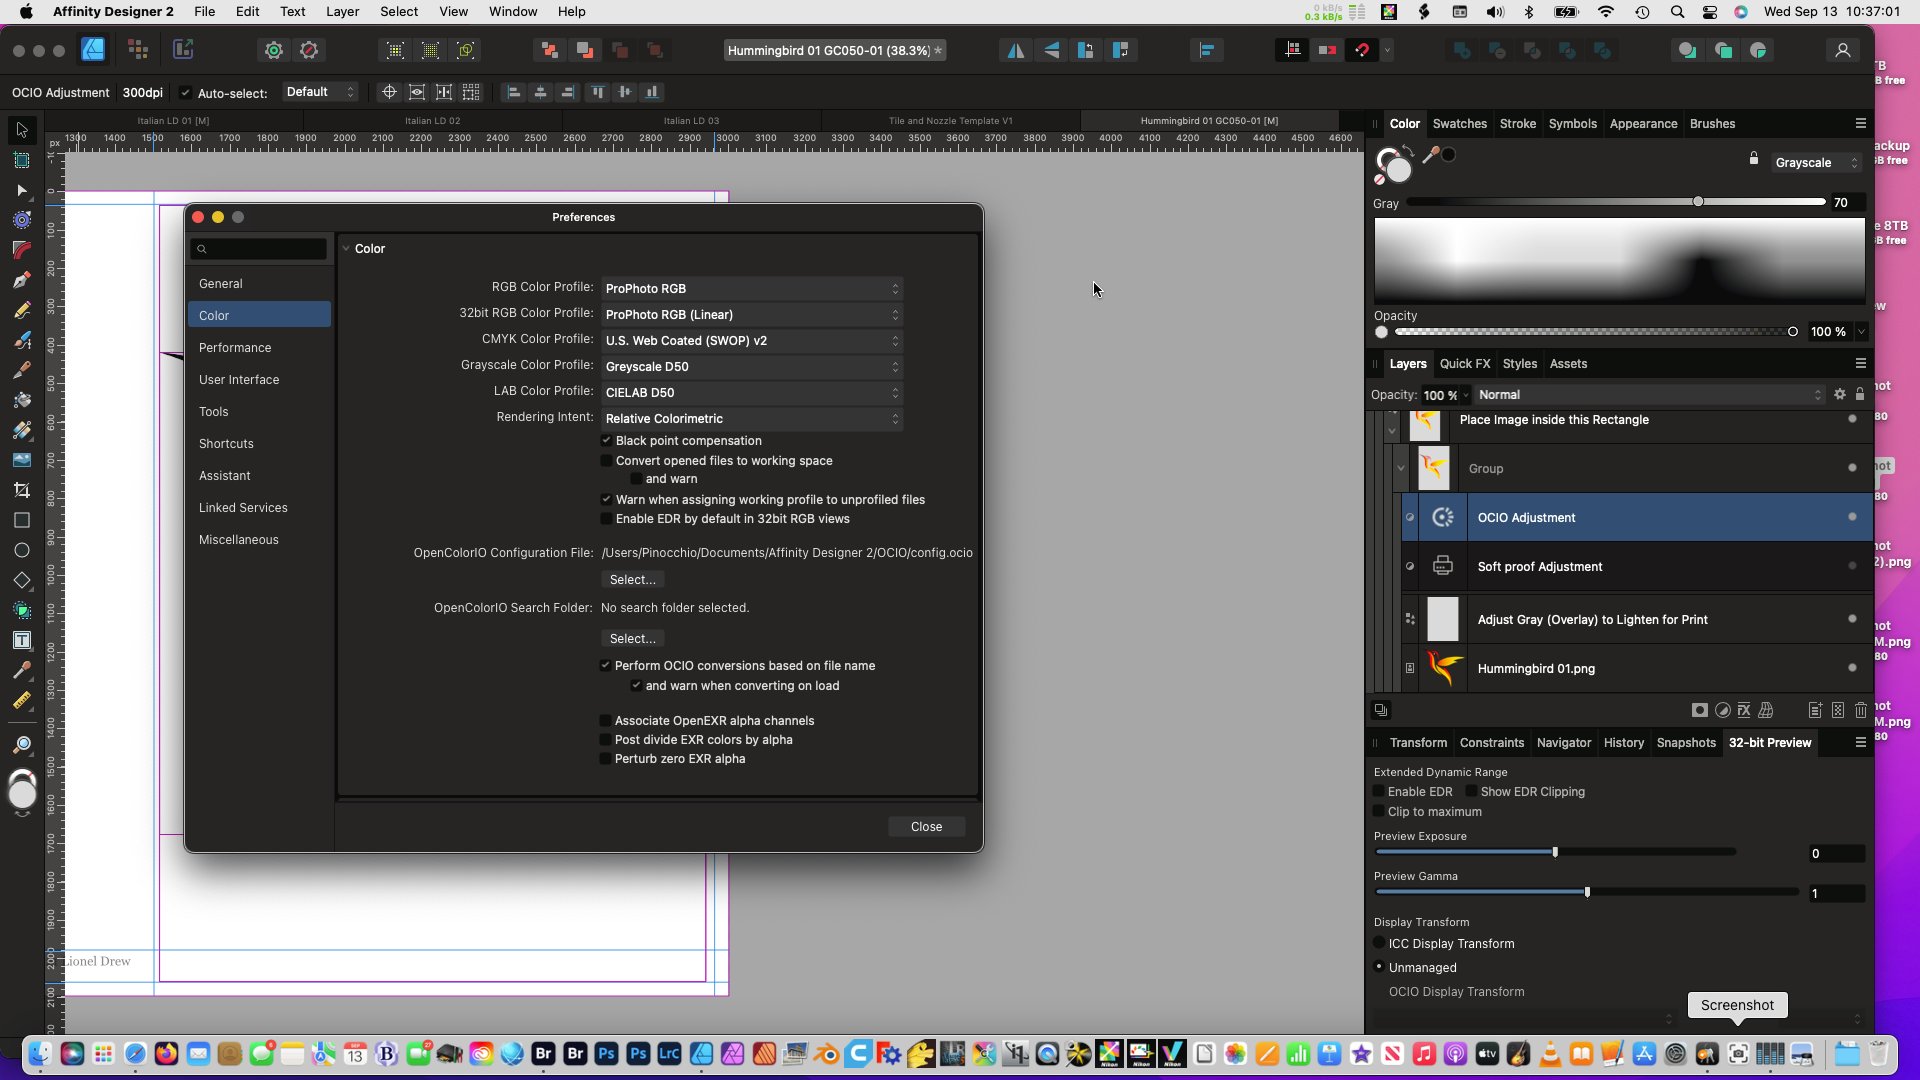
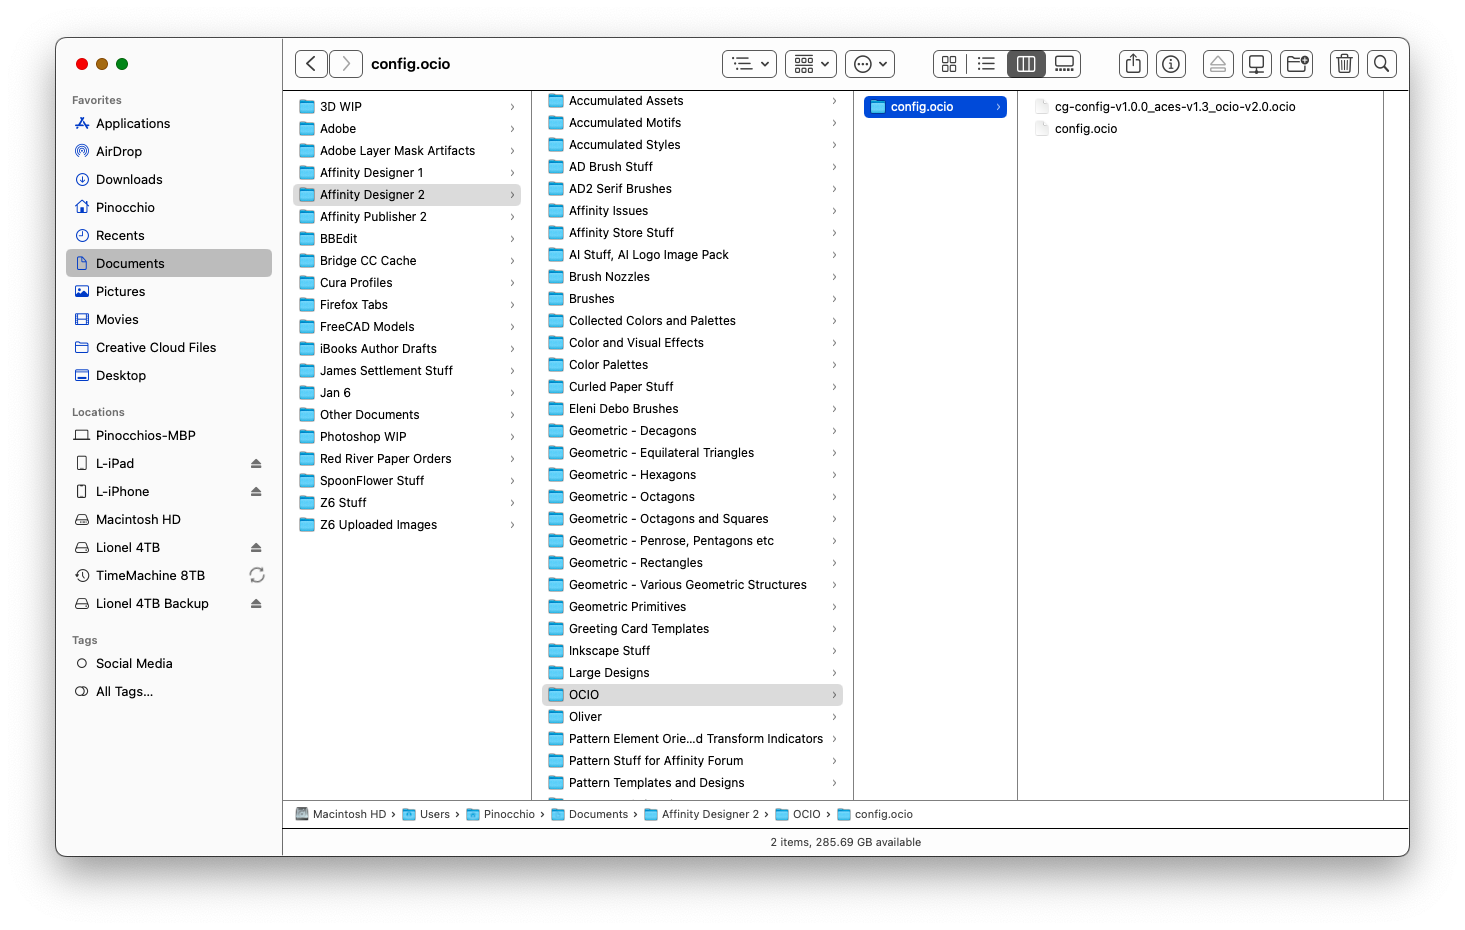
 Hi, this question refers to latest published Designer 2 on MacBook with lates MacOS for my 2016 machine I tried to implement ocio by following the guidance at I almost got there, but now need some help to finalize, please I believe I got the config file downloaded and installed properly because I now have an OCIO adjustment available in the Layers menu, and the 32-bit Preview panel. I tried to test for a successful installation using an existing 16-bit ProPhoto document (I use ProPhoto for all master documents, heritage from photography background) I opened the test document, used Document Setup in Files menu to convert to 32-bit ProPhoto (screenshot 01) I experimented by adding an OCIO adjustment, I get a new layer for the adjustment, the OCIO adjustment panel is completely unresponsive (Screenshot 02). I tried to examine the changes in the 32-Bit Review panel, but the only clickable items are the first 2 in the Display Transform section (ICC Display Transform and Unmanaged - Screenshot 03). The bird changes quite dramatically in response to clicking. Designer Preferences shows the correct path for where I installed the OCIO config (Screenshot 04) Screenshot 05 shows Finder window with ocio config. The config.ocio folder contains 2 copies of the same file - I renamed one, then added a copy with the original name so I have a clue as to what is there... This is my first significant exposure to OCIO, so I'm less than a novice, and I'm sure I have something wrong. Any suggestions will be welcome... Regards
-
This is latest published AD2 on iPadOS 16.6.1 (yesterday). I have a document that I use as a template even though it’s not saved as a template, with 16 slices created from distinct layers. Initially these slices take the name of the source layer. I have noticed that changing a layer name in Designer Persona does not always propagate to the derivative slice - sometimes does, and sometimes does not, and its inconsistent within a single document. I guess that’s a bug? I have this behaviour on both iPad and MBP. Regards
-
This is latest published Designer 2 on MacBook with most current OS for my 2016 MBP. The Issue My problem is that slices created from layers in Export Persona do not have same width (in Export Persona) as the source layers, as reported by Transform tool in Designer Persona. Slices are 2662px but layers are 2661px wide. Background I have a document that I use as a template even though it’s not saved as one. It includes 16 slices that were created from layers (these are all groups that represent a small section of the host artboard). I sometimes have to edit the constituent layers in these groups, specifically to change their width to a very specific value using Transform (Designer Persona). After getting ambushed a few times I now check individual layers one at a time to make sure they are the correct size, and at the correct location on the artBoard. Each export group is renamed following my naming convention. Groups are completely distinct, with no shared layers. To make sure the derivative slices have the desired name, the first thing I do after switching to Export Persona is to delete the previous slices. I then select all the source layers, and create new slices. My problem is that the 16 slices created this way (from different source groups) are ALL the wrong size - by which I mean that the size of a newly created slice differs from what Transform reports in the Designer Persona - by 1 pixel. Export Persona reports 2662px, Designer Persona claims 2661px - the value I specified when doing the Transform. I’ve checked sizes in Designer Persona before and after creating the slices, and the outcome is always the same: Export wants to give me 2662px from a 2661px-wide group. The 2661px target width is specific to this document, and is based on document-specific content created very early in the edit process. I had another one yesterday with different width requirements, and that worked perfectly. I believe I have the same behaviour on my iPad running latest published AD2 with iPadOS 16.6.1. I’m open to suggestions, can make a document available to Affinity if they provide a link, please. I will provide a document for the forum if it survives sanitizing.
-
This concerns defining new Textured Intensity brushes on iPad and MBP. Both are running latest AD2; iPad is latest published iPadOS, MBP (early 2016) is running Monterey 12.6.8, latest for that hardware. I am building experimental TI brushes. My goal is to make them in widths that double from one nozzle to the next. The nozzle widths I’m using are more accident/experiment than insight. The Issue The issue is that I have a TI nozzle I can turn into a brush on the iPad, but the MBP changes the entered width on the MBP. This is the same PNG Nozzle file on both machines. Same brush settings; iPad accepts brush width of 1424px, MBP makes a brush, but reduces that width to 1024px - silently, no alerts for the bug at the keyboard. Surely the upper limit to Nozzle Width should be the same on both iPad and MBP? Making this Mischief On iPad: I made the nozzles using the attached AD2 document, and exported the Nozzles with Export Persona. After making the brushes using the exported PNG files, I used the X8 and X4 variants in the associated Butterfly Wings. My brushes are somewhat crazy, but AD2 did everything as expected. Moving to MBP: I airdropped the iPad AD2 document and PNG Nozzles to my MBP, and set about making the brushes in AD2 for MBP. That’s when I noticed that AD2 was putting the fattest Nozzle on a diet - no 1424px width for the MBP, just 1024px. The Cargo AD2 source document created on iPad, X4 and X8 nozzles. I will add at least a screenshot from my MBP to this bug report shortly. Note Document is 300DPI, reflecting my photographic background, just makes things simpler for my head. These are wide brushes, but I’m very pleased to report that I’ve not seen any hint of performance issues on either of my machines. I’ve played with both Repeat and Stretch setting, no perceptible difference. Brush strokes inside the Butterfly wings deliberately have very acute angles, causing mitre issues/artifacts, which is why some got split into 3 separate segments each. Nozzle Construction and Samples.afdesign
-
EDIT: Latest version of AD2 on iPad. iPad running most current iPadOS. EDIT: Forgot to mention that changing the Blur Radius on any one of the single-layer Symbols updates all instances. This behaviour surprised me. I use Symbols a LOT, so I expect edits applied to a layer inside a Symbol to affect all instances, whereas edits applied at the Symbol level affect just that instance. After all, that’s how we get to have multiple instances of a Symbol in different positions, sizes and/or orientations. The Issue I made a Symbol with multiple layers and applied a Gaussian Blur to the upper 3 layers in the Symbol. Radius for the blur is specific to the layer. Great. Then I made a Symbol with just one layer, and multiple instances of the Symbol. When I applied a Gaussian Blur to just one instance, at the Symbol level, all the instances of that Symbol got the same Gaussian Blur. Removing the blur from one instance removed it from all of them. The instances of the Symbol present as Symbols throughout. Not what I expected; can this be right? So I’m calling it a bug, rightly or wrongly. The cargo I’ve attached an AD2 document with it’s very short history, and a video screen capture. Possibly related thread @Lee D I found this, and although it’s not exactly the same, I think it might be related. Regards RPReplay_Final1692712691.mp4 Effects and Symbols.afdesign
-
A while back there was a discussion about vector brushes becoming deformed when a curve curved too sharply. Someone pointed out that the brush has to be deformed, at least somewhat, to get around the corner. I believe this thread by @AnnieW started the discussion off. I hadn’t thought about it, but it does seem completely correct that vector brushes have to behave that way. I have since found a way to control or limit that deformation, which obviously becomes worse the sharper the bend is. The trick is to add two nodes to the vector curve, one on either side of the deformation that’s problematic. The closer the new nodes are to the point of deformation, the shorter the deformed section will become. I’ve attached a small document you can use to try it out, as well as a video of this technique in action. The document was saved with history (which is very short) so you can step through the way I added nodes and moved them. Regards RPReplay_Final1692286961.mp4 Vector Brush Deformation.afdesign
-
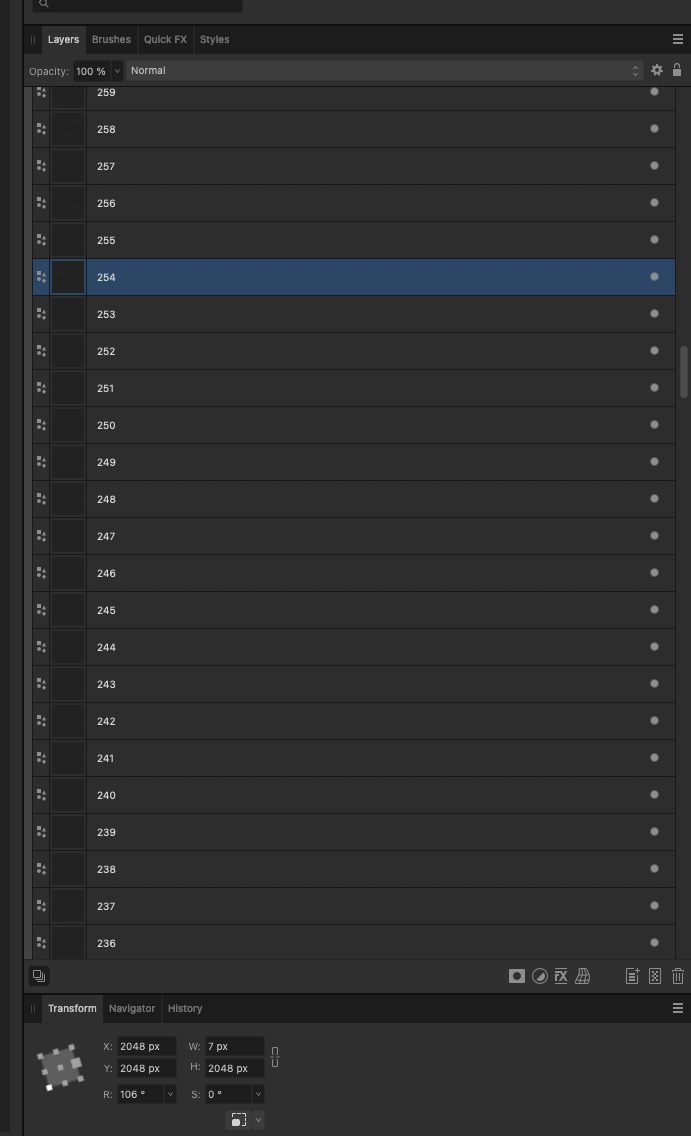
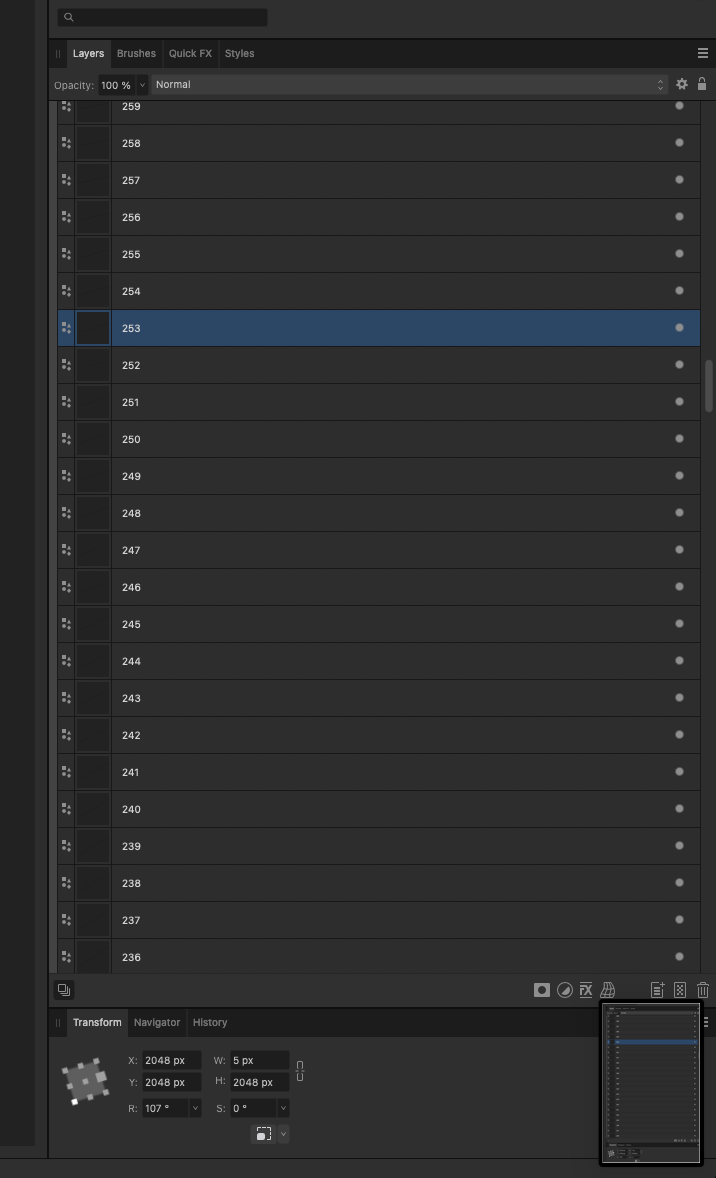
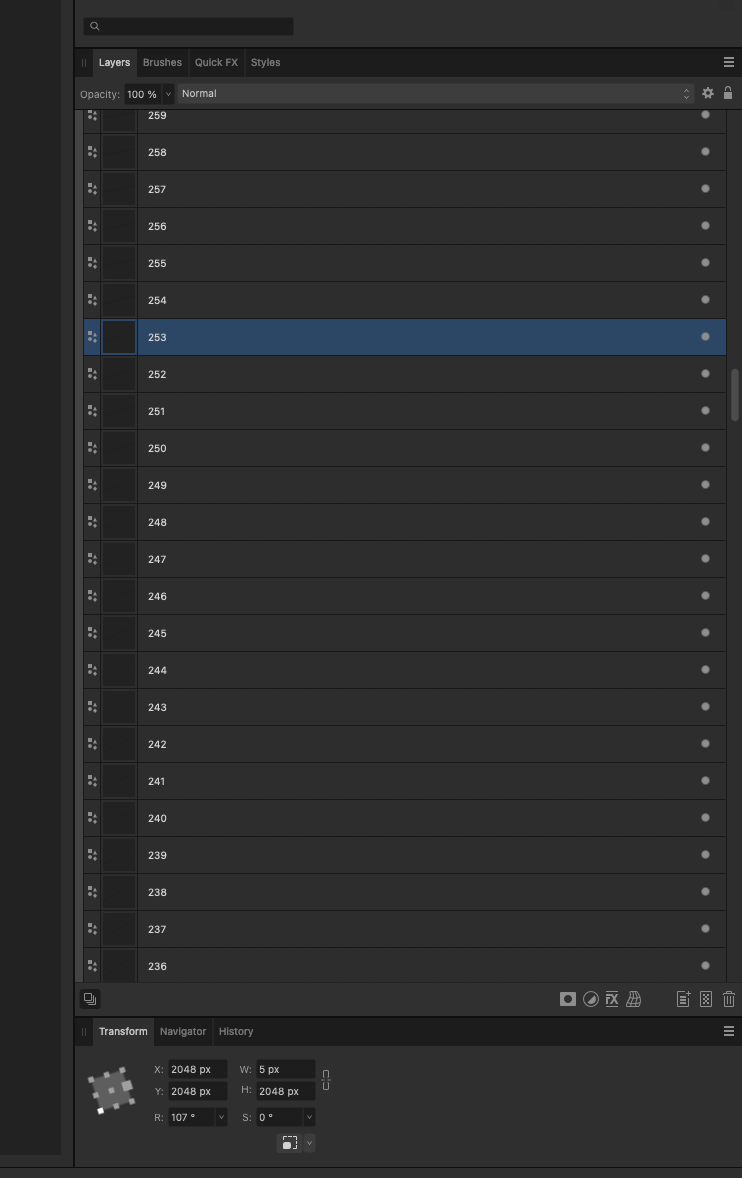
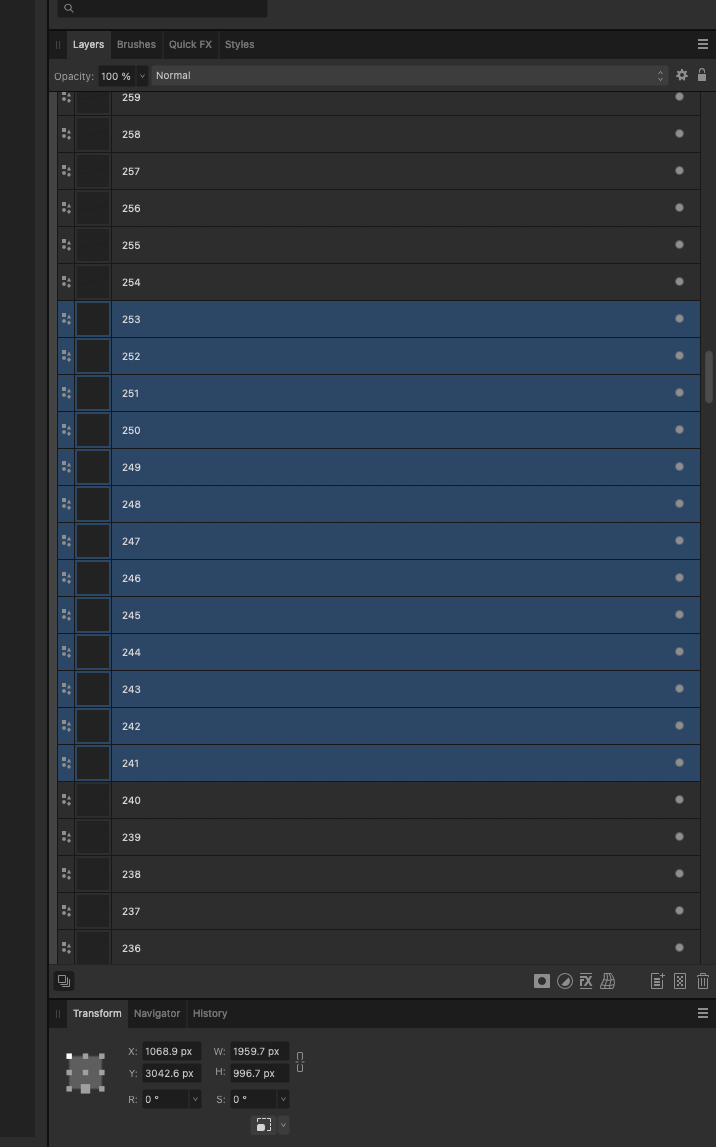
 I think this is a bug... So I'm using Designer 2. I've created 360 'tick' marks to make a compass. I've created them such that they have a width of 5px and a length of 2048px regardless of it's angle (this was done using the CMD-J) I've also named all the layers for the degree mark each of these lines represents. However, I want to duplicate this group (of 360 lines) but increase the width of them from 5px to 7px. But when I do the 'width' in the inspector is the combined with of all the marks as a rectangle, rather than the 5px of each line. My Question: Is there a quick way to change all 360 of these from 5px x 2048px to 7px x 2048px rather they manually editing these boxes 360 times? I also need to do this for 9px and 3px too... so that's another 720 text edits to come. Manually changed to 7px This is the next one to edit - it's 5px When I group select them all to change at once the W: parameter - instead of showing '5px' it's not the combined 'rectangle' of the selected items - this is a huge bug IMHO
-
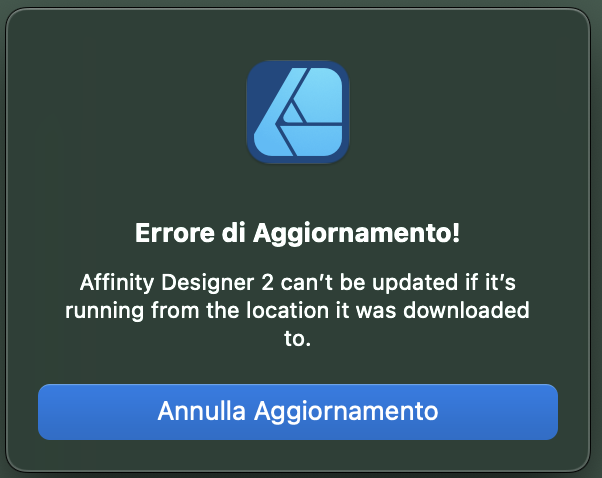
 Good morning. I can't update Designer 2 and Publisher 2 to version 2.1 on my MAC OS. I updated correctly Affinity Photo 2 2.0 to 2.1. I bought Affinity Universal License V2 from Affinity shop, so I tried to update Designer and Publisher from the option "check the updates" but the notice (also in attach) appears: "update error! Affinity Designer 2 can’t be updated if it’s running from the location it was downloaded to". How can I do? Thank you. mauro
-
 Similar request has been made for Designer1, but got ignored forever. So basically the request is to be able to insert artboard with a manually defined size (currently just a list of phone screen size). It would be great if there are also commonly used size like A4 / US letter. Better if one can user define it (like 4''x6'').
 -
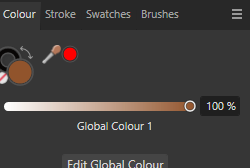
 Hello. When I want to change something's color that uses one of my Global Colors it automatically changes color tool to Tint. It annoys me because there is only one slider and nothing else and I must switch it manually to Wheel every time when I want to change color of certain object without changing the Global Color. Can I somehow change it to use automatically Wheel for example? If not - it would be a nice, user friendly function.
-
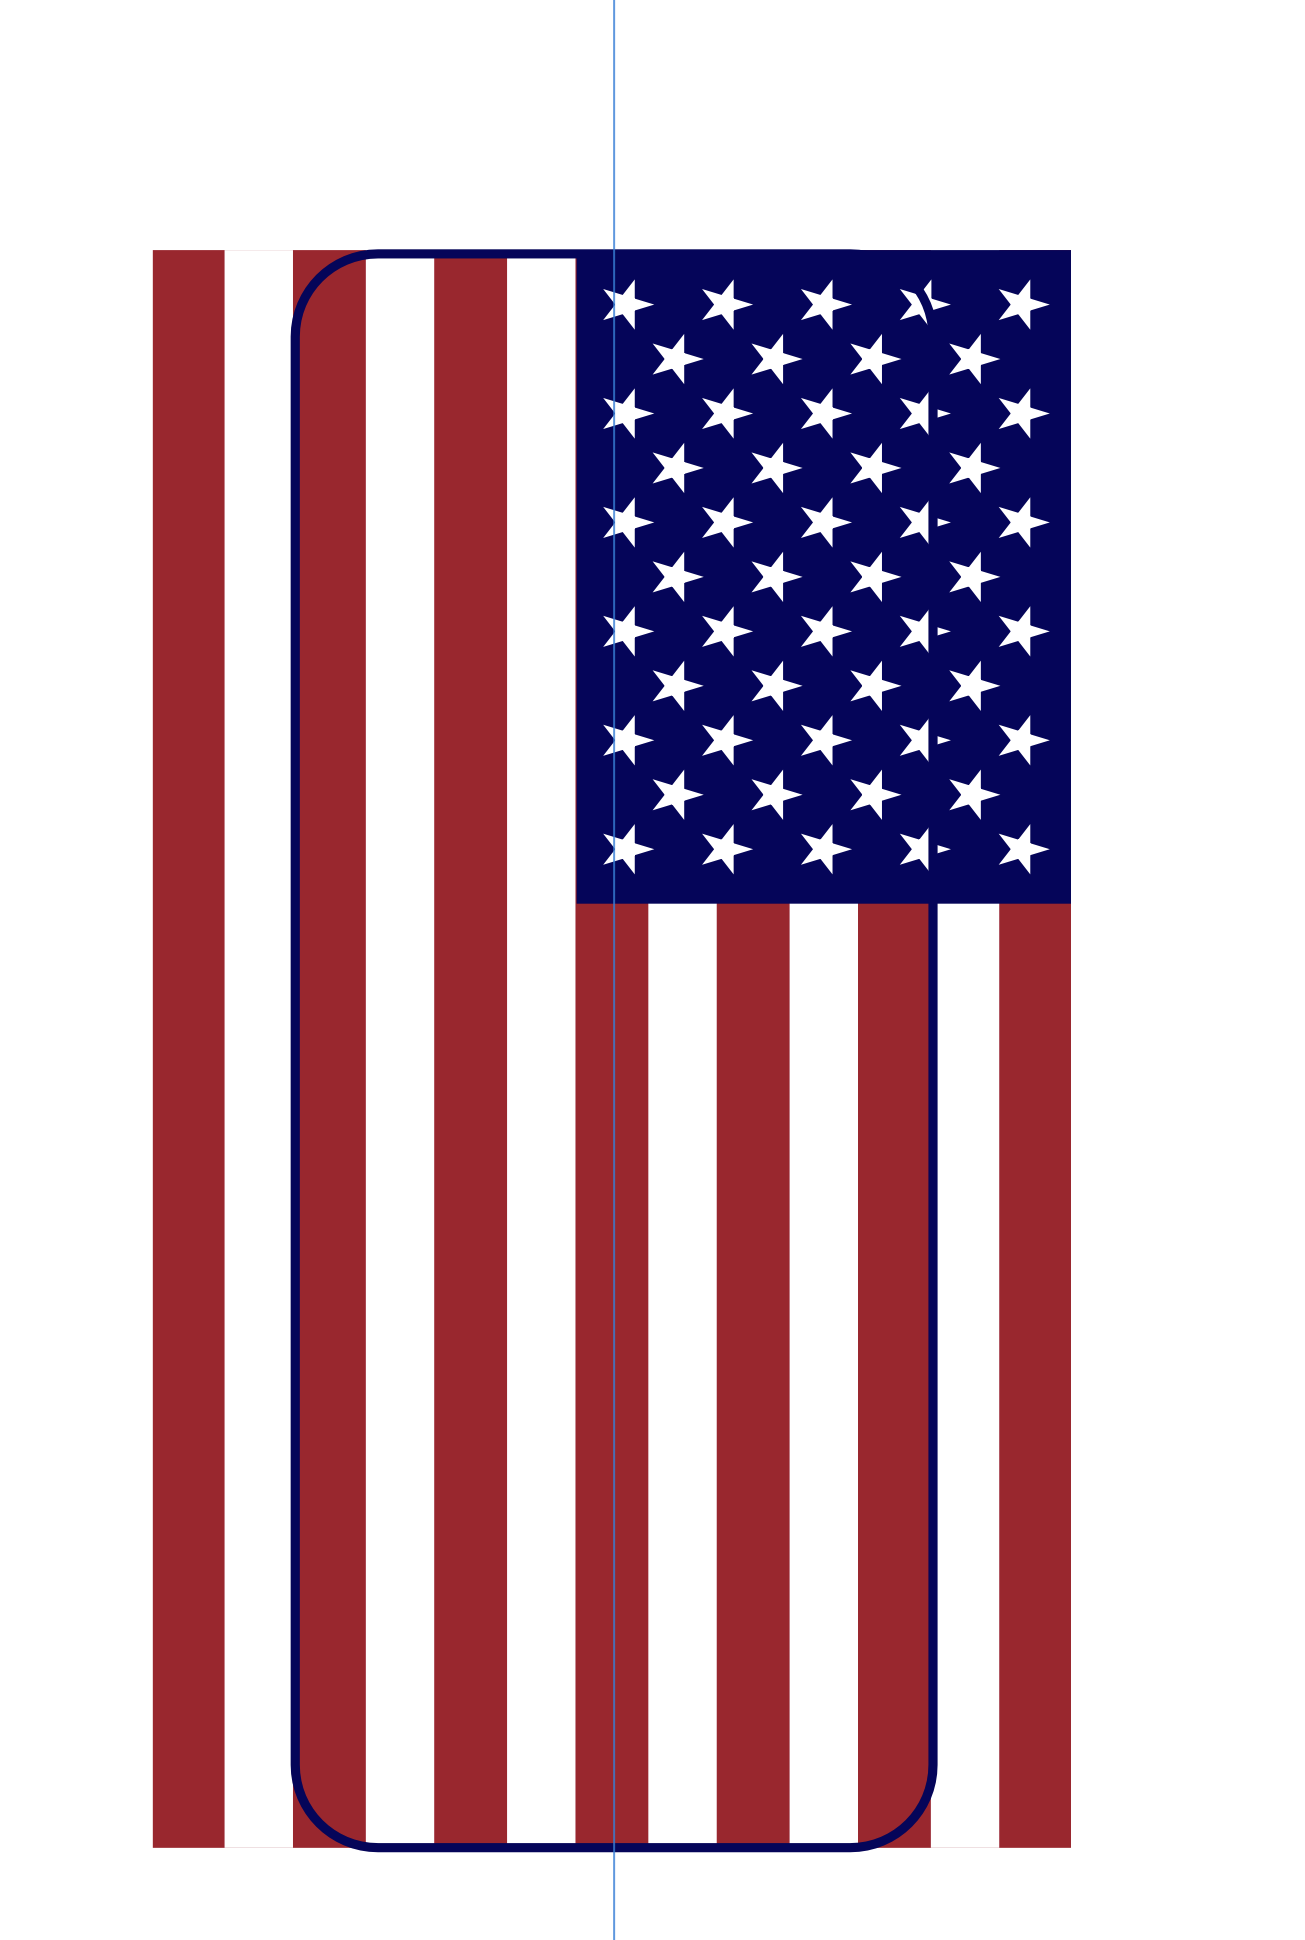
 I'm making a casket icon and I don't really don't know how to approach this unless I use the coffin outline repeatedly to remove every individual stripe, field, and star. Is there a way to unite all the elements of the flag so that I can use the subtract tool to remove all the excess at once? . . . TIA. I have attached the file as well. iconCasketFlag.afdesign
-
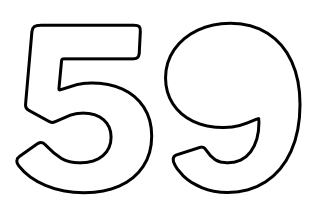
I have tried multiple things to no avail (expand, convert to curves, etc). What do I have to do to get the interior outlines of a typeface to stroke properly when I export to an .eps file? This is for Keynote so I can't use an svg. Funny . . . Apple abandons eps files for svg in the macOS but Keynote still uses eps files. TIA I would hope that the file could remain as an editable typeface so that it could be duplicated easily without have to do redo all the steps for each number I create
-
Even in v2.1 Wrap Group Tool still freaks out when wrapping imported svg. I've reported it already for previous version. After exporting it is even worse.
-
Hi, A strange thing happened today. I couldn't find a post about this in the forum. While going back to the Home screen, I notice the preview image of one of my latest project (document) had changed. Upon opening it to make sure everything's fine, I see that the entire document has indeed been replaced and overwritten by another document from my home screen library, even though its name is still the correct one. Since it had been saved in iCloud I tried reopening it from the cloud but, again, the "wrong" document showed up. Eventually, I tried closing both on the Home screen and I was able to recover a former version of the document before it was overwritten. Working on iPad pro 5th 12,9 256 ios 16.4.1
-
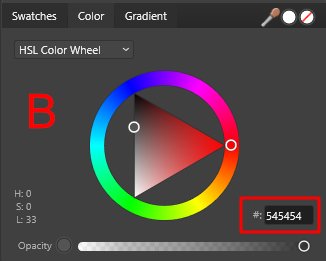
 Hi there, I'm not sure if this is a bug or perhaps I'm missing something but anyways. With an object or curve selected when I bring up the color wheel by clicking the fill or stroke buttons and then drag across the colors the color HEX field is changing in real-time to represent that color (See A image). Now I understand that if I want to apply that same color to something else I can simply copy the HEX code from that field, select a different object or curve bring bring up the color wheel again and paste the code within its HEX field. This works sort of (See B image) as the color becomes grey except the hue value is different from original - the value of 86 for some reason becomes 0 even though the HEX code is the same. Furthermore, after the code has been pasted the HEX field and HSL become stuck, when I drag my mouse across colors it only shows the last pasted code within the HEX field and corresponding HSL (See C image). Is this a bug or normal behavior and I'm missing something? As a final note the color wheel under the "Color" tab, its HEX field works no problem. Additionally, by dragging my mouse across the colors and then bringing back the fill/stroke wheel and doing the same unsticks the HEX field until I paste another code.
-
How can I move projects over from Affinity Designer on the iPad to Affinity Designer 2 on the iPad? Is there an easy way? Thanks!
-
 Hey, is it possible to select a brush without it resetting the brush size? Every time I change the brush it gets reset to the default size the brush comes with (Designer 2). And yes, I don't want to duplicate the brush and set it.