Search the Community
Showing results for tags 'delineate'.
Found 1 result
-
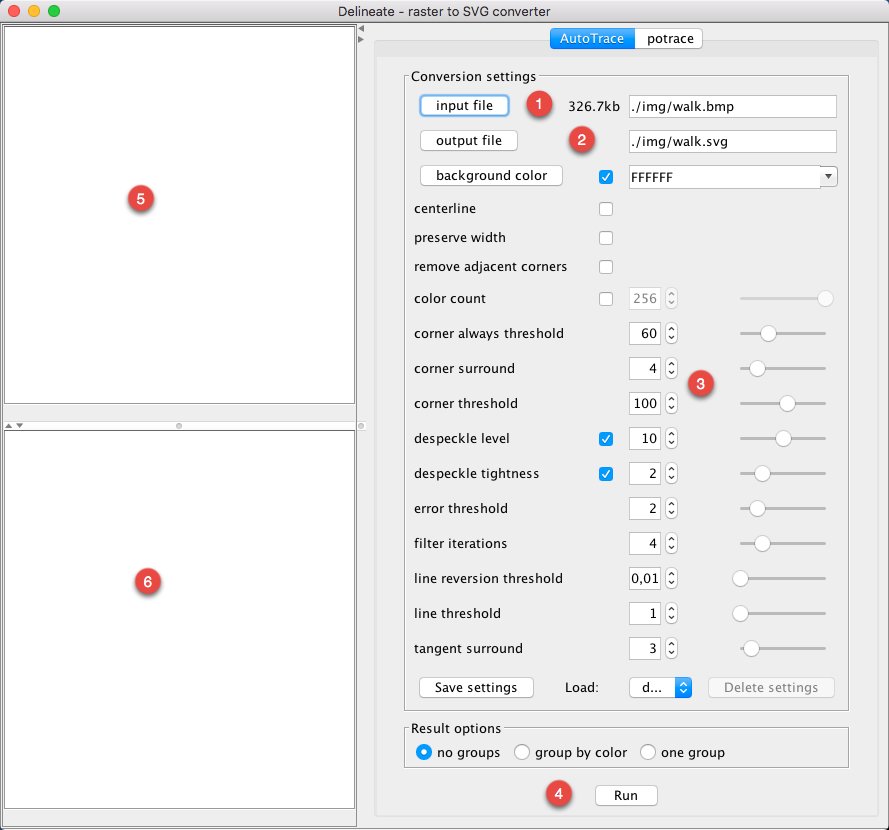
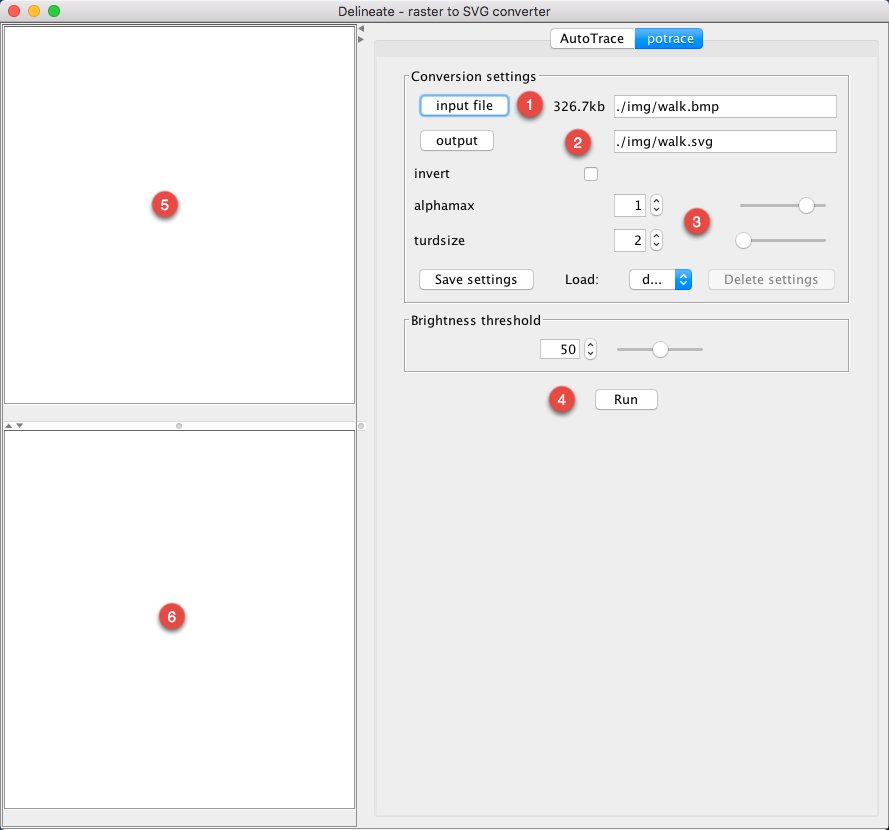
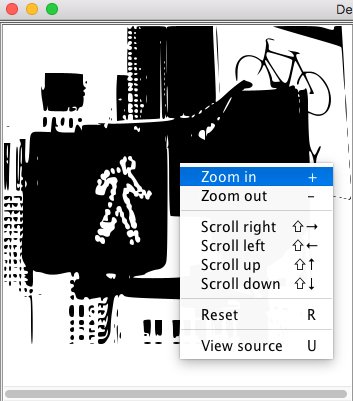
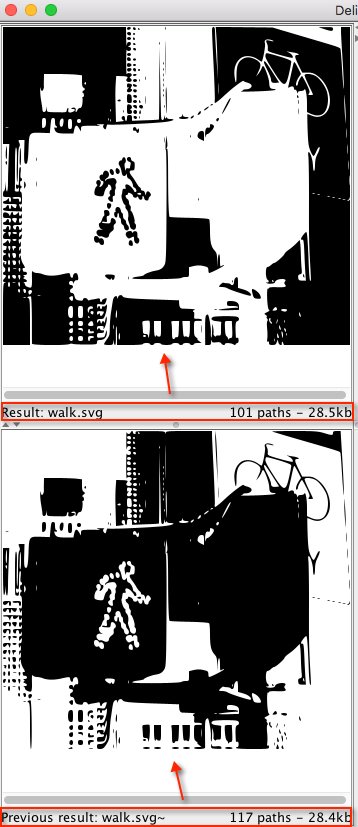
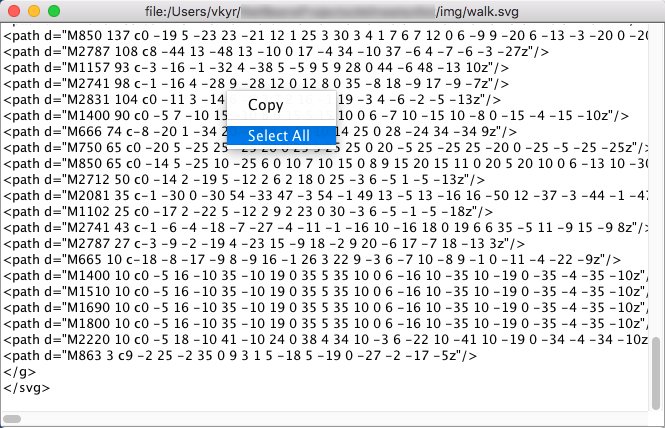
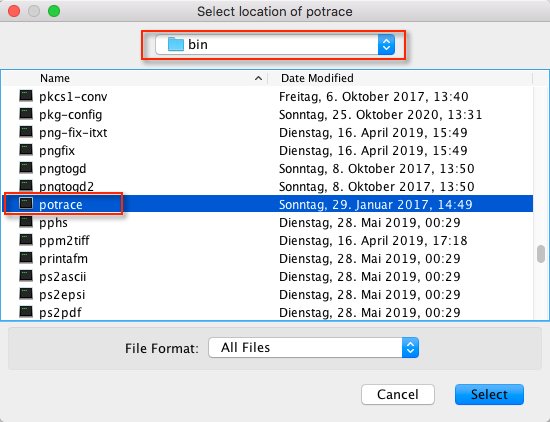
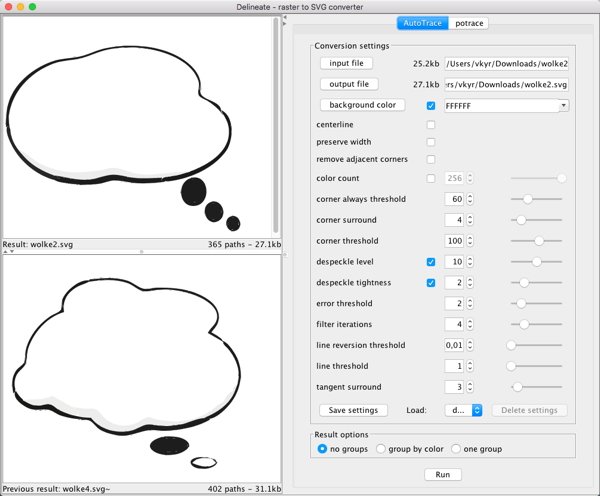
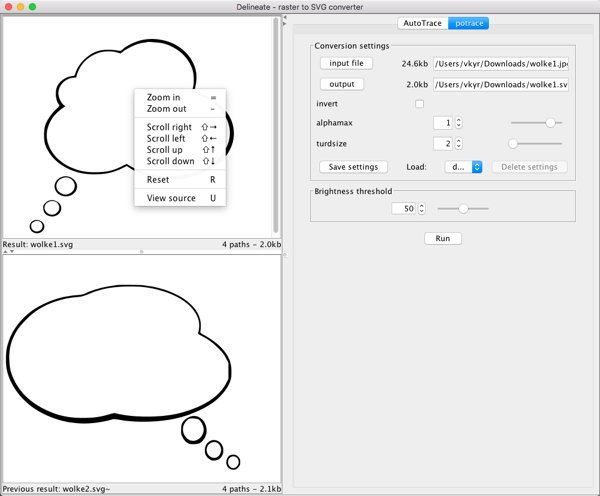
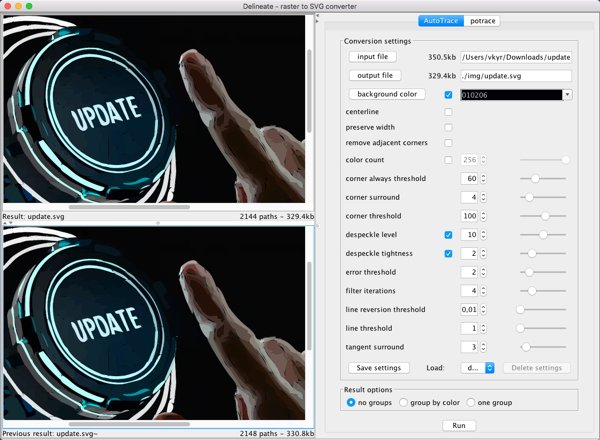
D E L I N E A T E - A R A S T E R T 0 S V G C O N V E R T E R What is it? Delineate is a tool for converting bitmap raster images to SVG (Scalable Vector Graphics) using AutoTrace or potrace. It displays SVG results using Apache Batik. Input formats are JPEG, PNG, GIF, BMP, TIFF, PNM, PBM, PGM, PPM, IFF, PCD, PSD, RAS. - Output format is SVG. Delineate is distributed under the GNU General Public License, see the in the ZIP-archive included LICENSE.txt file. For more information about Delineate, see http://delineate.sourceforge.net NOTE: that the old original Delineate 0.5 version might not run anymore nowadays with actual Java runtime environments. Thus you should use delineate-0.6.zip, which is my refactored, slightly enhanced and adapted over Delineate 0.6 version here (see also below under Installing for it's distribution archive). Also note that my port of Autotrace 0.40.0 for MacOS (autotrace-0.40.0-MacOS-vkyr.zip) is different and more clean than the version found on GitHub. My version is compiled against El Capitan (MacOS 10.11.6) with all library dependencies, which the GitHub version isn't, the later (the GitHub version) needs probably at least High Sierra (MacOS 10.13), or Mojave (MacOS 10.14) and uses GraphicsMagick instead of the original ImageMagick, which I used and compiled against. Installing Installing - GNU/Linux & Mac OS X 1) To run Delineate, you will need to install the following software: AutoTrace 0.31.1 or AutoTrace 0.40.0 (needs MacOS >= 10.13) or autotrace-0.40.0-MacOS-vkyr.zip (MacOS >= 10.11) NOTE: that the above MacOS AutoTrace 0.40.0 versions are just CLI apps (command line programs) inside an app wrapper (AutoTrace.app) thus you can't start those as common OSX apps via double clicking. - You need always to access and run the autotrace CLI binary inside the app wrapper: --> ...autotrace.app/Contents/MacOS/autotrace I suggest a user best makes a symbolic link from the binary inside the app wrapper to the Desktop or /usr/local/bin etc., thus like ... --> ln -s /Users/<your-username>/Applications/autotrace.app/Contents/MacOS/autotrace /Users/<your-username>/Desktop ... or ... --> ln -s /Users/<your-username>/Applications/autotrace.app/Contents/MacOS/autotrace /usr/local/bin ... so that you can point from inside of Delineate to the needed autotrace CLI binary then! potrace 1.16 Java J2SE 13 2) Set your JAVA_HOME variable to the location where you have Java installed. 3) Extract delineate-0.6.zip on to your machine. 4) To run: cd <install dir>/delineate chmod a+x delineate.sh ./delineate.sh ... or alternatively in a shell/terminal ... > cd <install dir>/delineate > java -jar delineate.jar 5) When you run a conversion for the first time, you'll be prompted to select the location of the autotrace or potrace application file. You must have these applications installed (see step 1). In the file chooser dialog window select the appropriate file: <autotrace install dir>/autotrace or <potrace install dir>/potrace Installing - Windows 1) To run Delineate, you will need to install the following software: AutoTrace 0.31.1 or AutoTrace 0.40.0 potrace 1.16 Java J2SE 13 2) Set your JAVA_HOME environment variable to the location where you have Java installed. In Windows you can add this environment variable by going to: Start -> Settings -> Control Panel -> System -> Advanced -> Environment Variables Click the New button: - enter the variable name as JAVA_HOME, and - enter the variable value as the location where Java is installed, for example: C:\Program Files\J2SDK_13 3) Extract delineate-0.6.zip on to your machine 4) To run: Go to the directory: <install dir>\delineate double click on or run the file: delineate.bat ... or alternatively in a Powershell ... > cd <install dir>\delineate > java -jar delineate.jar 5) When you run a conversion for the first time, you'll be prompted to select the location of the autotrace or potrace application files. You must have these applications installed (see step 1). In the file chooser dialog window select the appropriate file: <autotrace install dir>\autotrace.exe or <potrace install dir>\potrace.exe Quick Delineate usage overview: When Delineate starts it's main window should appear, where you first can on top select and switch which tracing tool, the Autotrace or Potrace tracer, to use for vectorization ... (1) The input file setting area (2) The output file setting area (3) The trace option settings area (there are always slightly more descriptive tooltip popup help strings shown when you hover over certain areas with the mouse) (4) The run button, which when first time used will ask after where to find the path to the autotrace or potrace binary, which it needs to use ... (5)+(6) The traced SVG result preview areas, the top area shows the actual trace result, the bottom area the previous traced result ... There is a right click popup menu with command entries (which also show the keyboard shortcuts) you can use on both SVG preview areas ... ... in order to zoom in/out and scroll around the view. Further you can inspect the generated SVG code (via View source) in an text view popup window ... ... where you can select all (the keyboard shortcut is Cmd-/Ctrl-A) SVG code, or SVG code portions and copy (the keyboard shortcut is Cmd-/Ctrl-C) these to the system clipboard. Some common usage screenshots: Final words I hope this raster to SVG converter GUI tool is useful for the one or other Affinity community member here then, regards v_kyr!