Search the Community
Showing results for tags 'curves'.
-
 Hi there I want to match the color of a subjet to background using curves adjustment layer. I wanna know if it is possible to sample three pixels (darkness pixel, midd tone pixel and lightess pixel) and apply those exactly values to subject layer so I can fix the colors, but using curves adjustment layer
 -
 Here's another thing that's keeping me stuck using PS for the near future, as I haven't found a suitable replacement in another application... I require precise adjustments of curves for when I create calibrated contrast correction for alt process photo printing. I regularly print using gum pigment (aka, gum bichromate), kallitype, gumoil and cyanotype techniques. The overwhelming majority of my fine art prints are done this way. To get the best results, it is necessary create compensation curves to correct for the deficiencies of the print process. They are all different, and ideally one would create individual curves for each kind of paper used, as well as for the different processes. I feel confident saying this is the common practice amongst alt process photo printers these days, so I'm certainly not the only one who would benefit. A full description of the process I use can be found here: https://www.freestylephoto.biz/alternative-process/making-digital-negatives Please take special note of Figures H and I in the article because these illustrate exactly what I'm needing to do with curves. What I need is the ability to precisely input the required I/O numbers into the curves dialog. Not only do I not see any way to do this in AP's curves, I don't even see any sort of scale that would clue me in to where I am on the curve. I am able to read gray values the way I need with the eyedropper, but without being able accurately translate those numbers to a curve, I'm stuck with only half the tools I need to do this.
- 7 replies
-
- 4
-

-
- curves
- digital negatives
- (and 1 more)
-
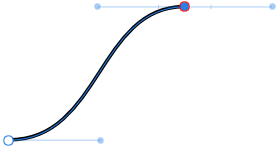
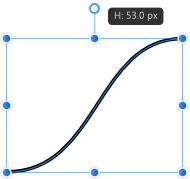
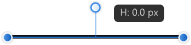
 Hello ! @Patrick Connor, @AdamW, @MEB and other team member, i just hope you are really taking it and resting and enjoying staying with your friends, family etc... and not touching your laptops for this week-end. i'm dropping something here for Affinity Publisher (and also the whole product line) but not expecting you to answer or contribute during the week-end, you deserve good rest. Well, this is a proposition i've been continually forgetting to log here. Using Publisher (but also Designer and Photo) in our workflow (for those who integrated it already before stable version) we often and even make massive use of stroke and tweaking it is part of our every day thing; i see there is possibility to set a stroke profile after playing with the curve thing to make its aspect fit our need; after doing that curve thing we can save the profile ... but i noticed this, the saved stroke curving profile disappears after saving closing the project (case 1) and we have to remember how it looked like and redo it my request is this, would it be possible to save stroke curve profile as application wide usable thing, like we continually do with colors/gradient palette so we can simply reuse it with old projects or when starting a fresh project ? i often watch the brothers from Design Art Studio, Olivio Sarikas and even @Bri-Toon tutorial on youtube and for each new projects they have to redo the line stroke profile tweaking over and over for that project, which you must admit is really time consuming. i would rather, setup a stroke curve profile, save it and know it's application wide (like color some palette) and not document based only and then simply select it in the stroke tab before i draw a new line, then draw my line using pen/pencil tool with that selected profile and see if it fits my desire, this will be helpful for those still using mouse technology and even for those using pen/graphic tablets lacking pressure sensitivity functionality to feel home but also to feel and work with less stress or see their head overheated trying to think or remember how this used to work or to be but just focus on their design and produce great things. Please make the curved stroke profile saving applicable application wide in Publisher and if it has the success it should have, then replicate/expand it to Designer and Photo. @firstdefence, @Petar Petrenko, and all others ... your inputs to round the corners of this idea/proposition is expected and will be of great help ! Blessings !
 -
 Hi. Is there a way to edit imported sag files? I made some sine curves in "Grapher" and exportet to PDF. I tried to convert them to curves, which did nothing. Same with SVG files. I want to edit them, so that the sine curves do not overlap the whole graphic. I want to crop it. The vector crop tool is just a rectangle, which does not work for me. You can see in the Screenshot, the yellow curves overlap. I want them to be just inside the speech bubble. Anyone knows how to do this? A just can't use boolean operations like substract, ect. They are greyed out.
 -
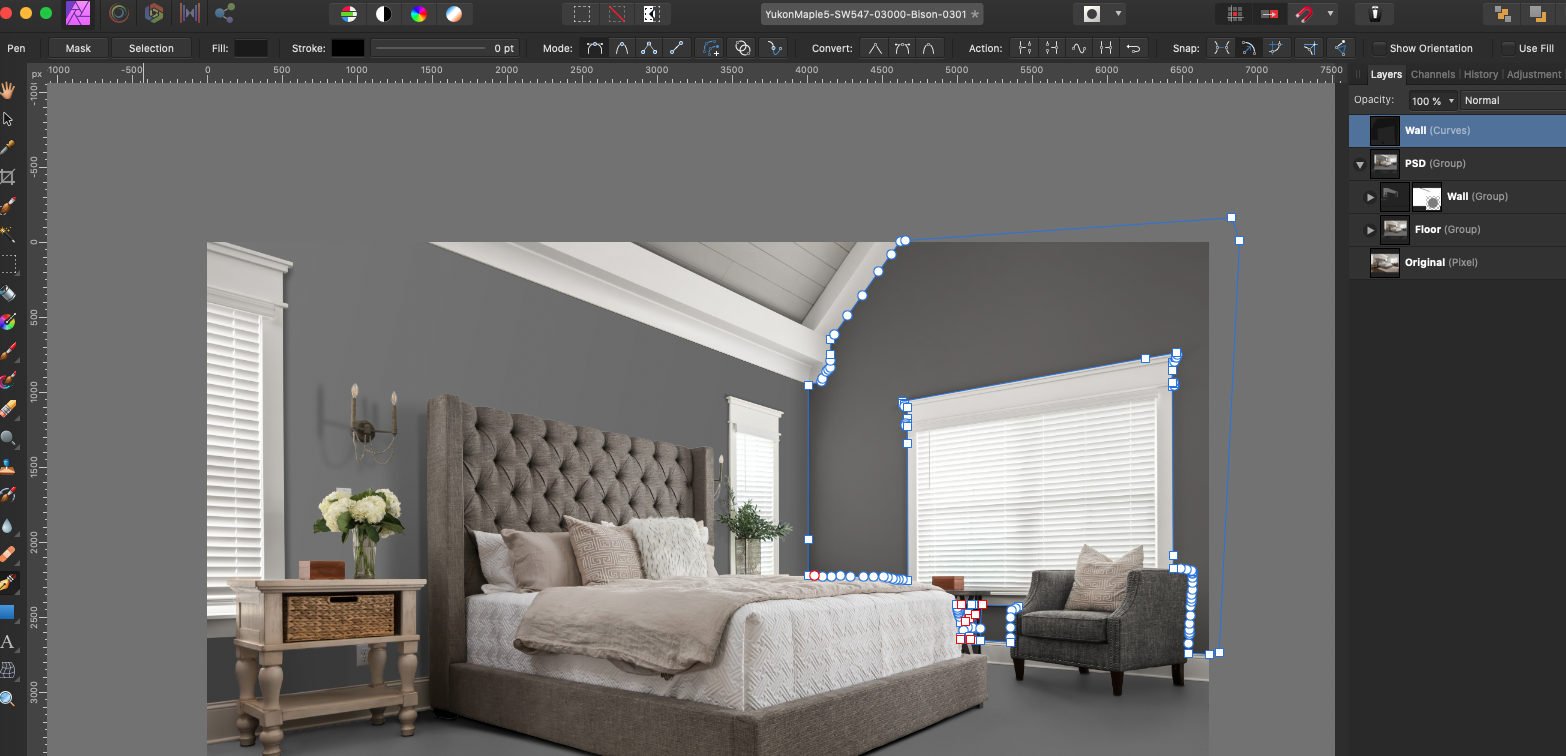
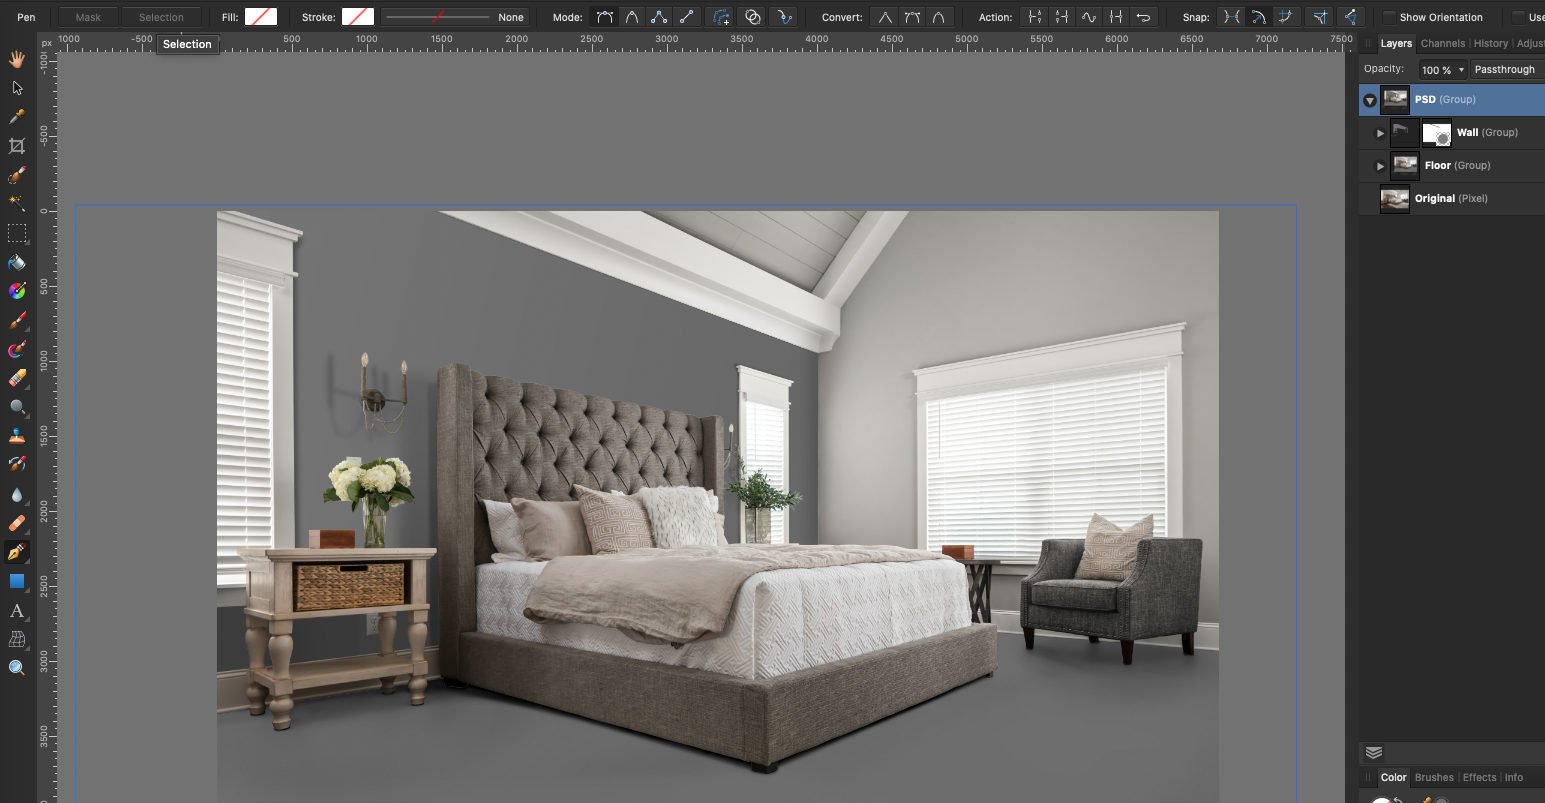
 Hi, I have a curves layer, I click the select button and my layer disappears? What am I doing wrong?
-
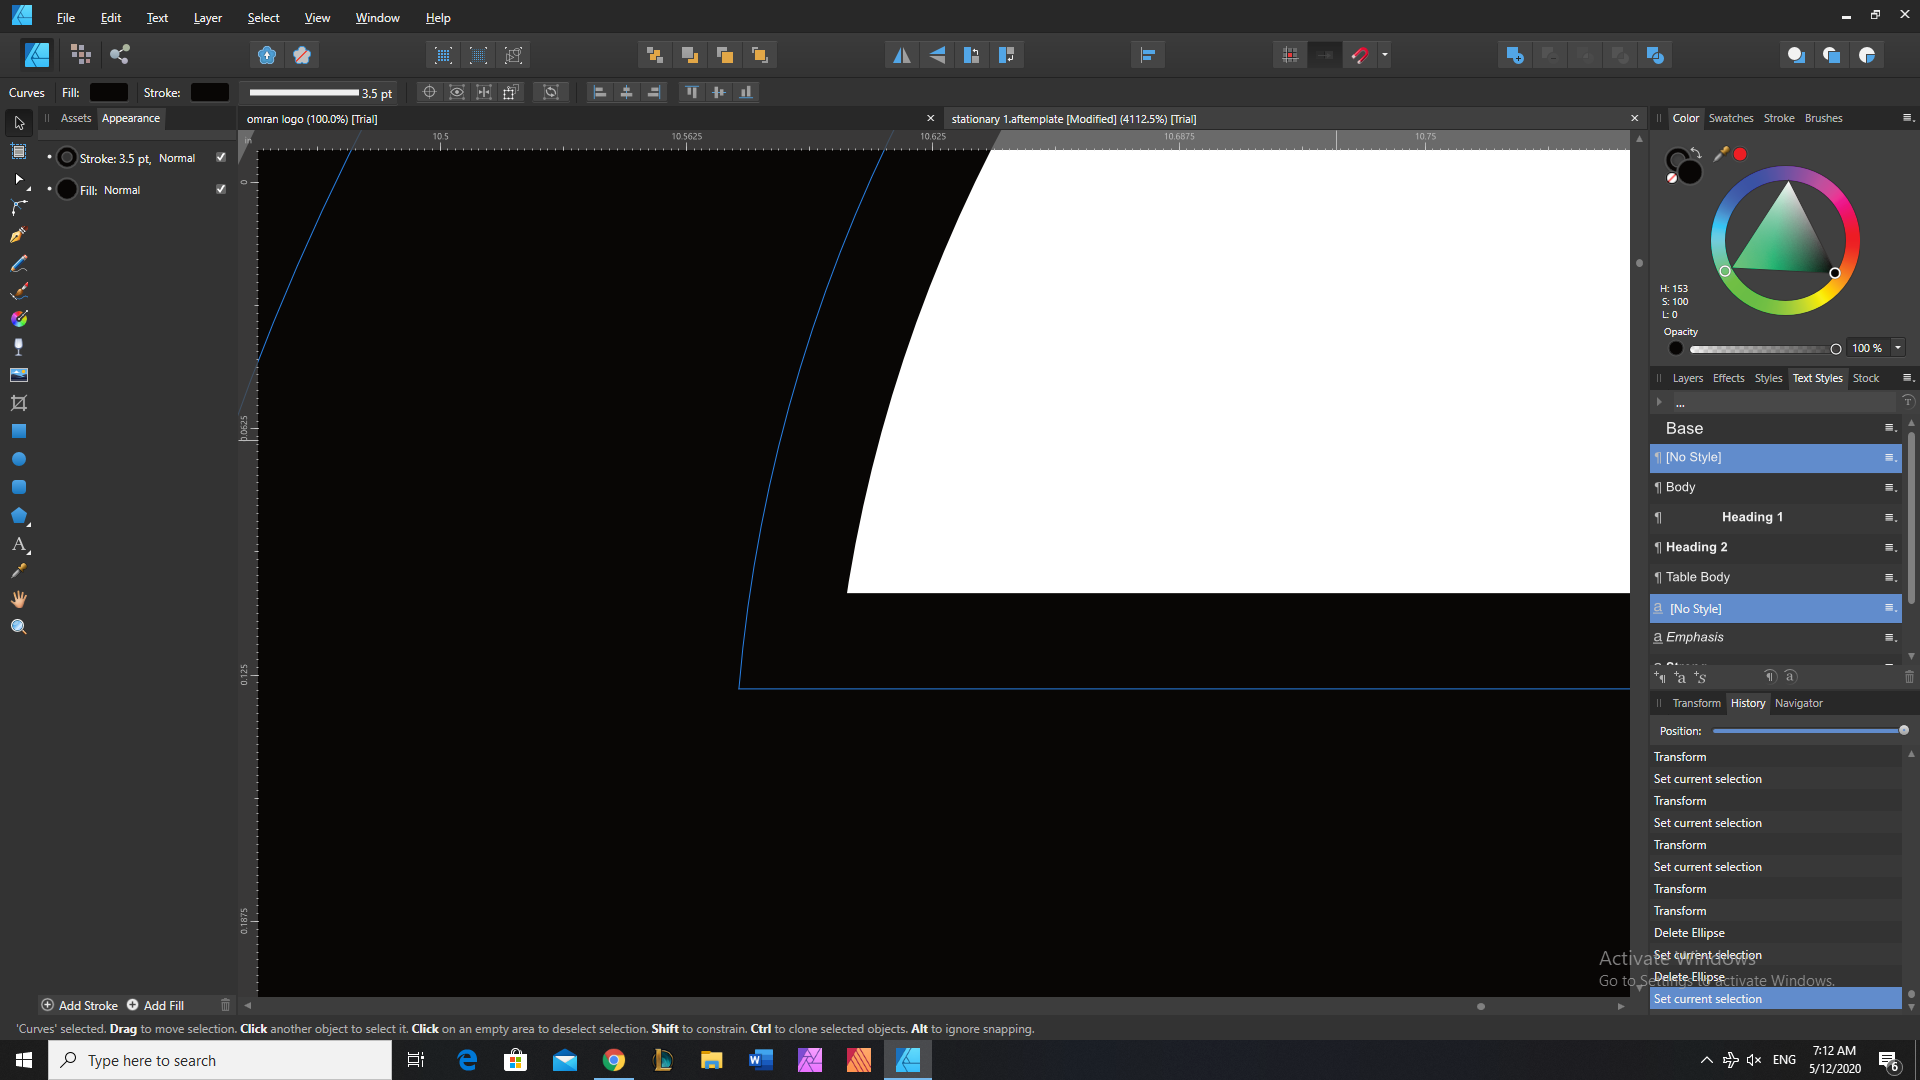
 hello designers , anyone knows how to curve angle (from inside ) like the picture ? thanks
-
 Ok, I get it, each line or curve drawn gets it's own layer. Sometimes this is more of a pain when I am trying to edit. I know you can group the layers, however it still isn't convenient when going from one curve to another. Is there any way at all to put these lines or curves on one layer to make it easier to edit them, like other apps do? I am working in vector here.Forgive me if this question is in FAQs, but I do not have time to go through them all.
 -
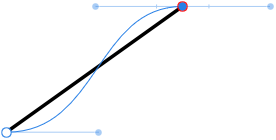
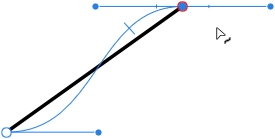
Windows 10, Affinity Designer 1.8.0.585 I tried editing the nodes of a curve that I had previously scaled to 0 on the y-axis using the move tool. instead of smoothly following the bezier curve, the stroke jumped between seemingly random points on it instead and the pointer position for editing was only evaluated on the y-axis. Steps to reproduce: Draw a curve Use the Move Tool to scale it to 0 height Pull one of the nodes back into two dimensions using the Pen Tool. The stroke doesn't follow the curve and the cursor is being projected along the x-axis (holding Ctrl in the second screenshot). Edit the curve further. Multiple points may actually match the curve. The same thing happens when scaling to 0 width; the cursor position is then projected along the y-axis.
-
 Hey folks! Here's the case: I am currently working on a logo in Affinity Designer. It is the second iteration and I would like to present him the first vectorized draft of the logo in an appealing layout and with written documentation. I have created the layout in Affinity Publisher and linked the Affinity Designer file in it, so that any changes to the logo are directly reflected in the Publisher document. Thereby I encounter the following problem/s: The Designer file contains text that uses a licensed font that should remain editable until the final version of the logo – but in the Designer file ONLY. If I now export the Publisher document as a PDF for web to keep hyperlinks to references and good readability for example, the text of the linked logo gets exported editable/selectable via Adobe Acrobat – which I don't want at all! If I export the document as flattened and all elements are rasterized, it becomes (even if only slightly) blurred and consequently pixelated – which I don't want either. A possible solution for a feature could be the option to convert any text ONLY in linked/embedded files instead of converting all text to curves during export. I'd be happy to learn if there's another, more convenient way to do this, since it's a bite impractical while the logo's not final. 😀 However, I' m not quite sure if I described the problem in an easy to understand way. 😅 Greetings MrDoodlezz
 -
 would it be possible to allow a smaller grid on curves? I am creating new curves for Cyanotypes, Van Dykes, and Platinum prints and need a more concise points on the curve. also the ability to import existing curves would be very helpful.
 -
edited - I'm using ver. 1.7.3.481 -open image (tried 4 or 5 different images), or create new document (created a blank document then paint bucket fill) -add curves adjustment - crash, every time, tried many (10+) times I opened an image and added a curves adjustment and it crashed. It looks like I can't make a curves adjustment layer at all without crashing Photo. Created a blank image and got the same result. I tried every type of adjustment layer and only the curves adj. failed. specs Win 7 Home Premium x64 MSI B540 Tomahawk Ryzen 7 2700x Radeon RX 590 (software version 19.8.2)
-
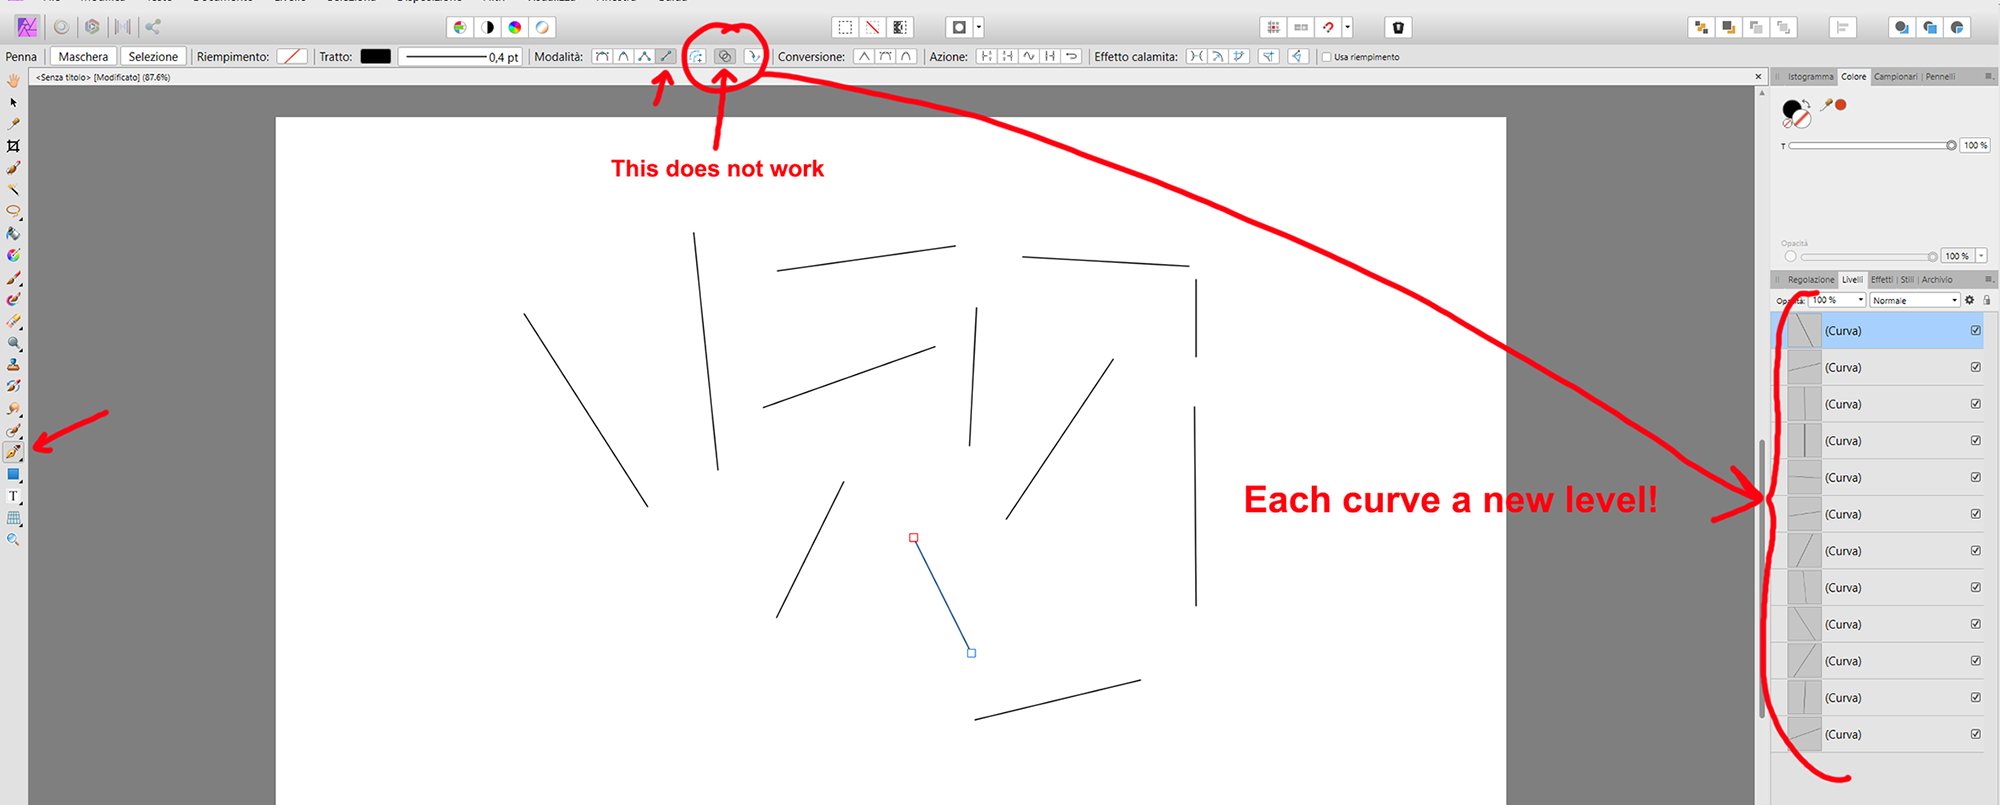
 Affinity Photo. Windows 10 - 64 bit I have to draw many lines to make a drawing. I selected the "pen" tool with the "lines" modality and the "Add new curve to the selected object" option, which should cause all curves drawn after to end on one level. Does not work. Each curve I draw creates a new level, and I find myself having to manually "compact" all the layers one by one. Any suggestions? Thanks! I enclose an example screen.
-
Try the attached. On the face of it, it looks like a simple image with Curves adjustment. But when you play with the Curves it doesn't behave as it should (I've tried it with beta and 1.7 release). For example pulling Curves up to the top left does not result in a whiteout (as happens when the original jpg is used). History: I'd just been playing with masks via the spare channel. Duplicate, Threshold to create b/w. In Channels, right-click and create spare channel. Then load to curves. Then load from blank channel to remove mask. I've tried repeating this to no avail. The bug however seems captured in the .afphoto. Maybe you can figure it... before.afphoto
-
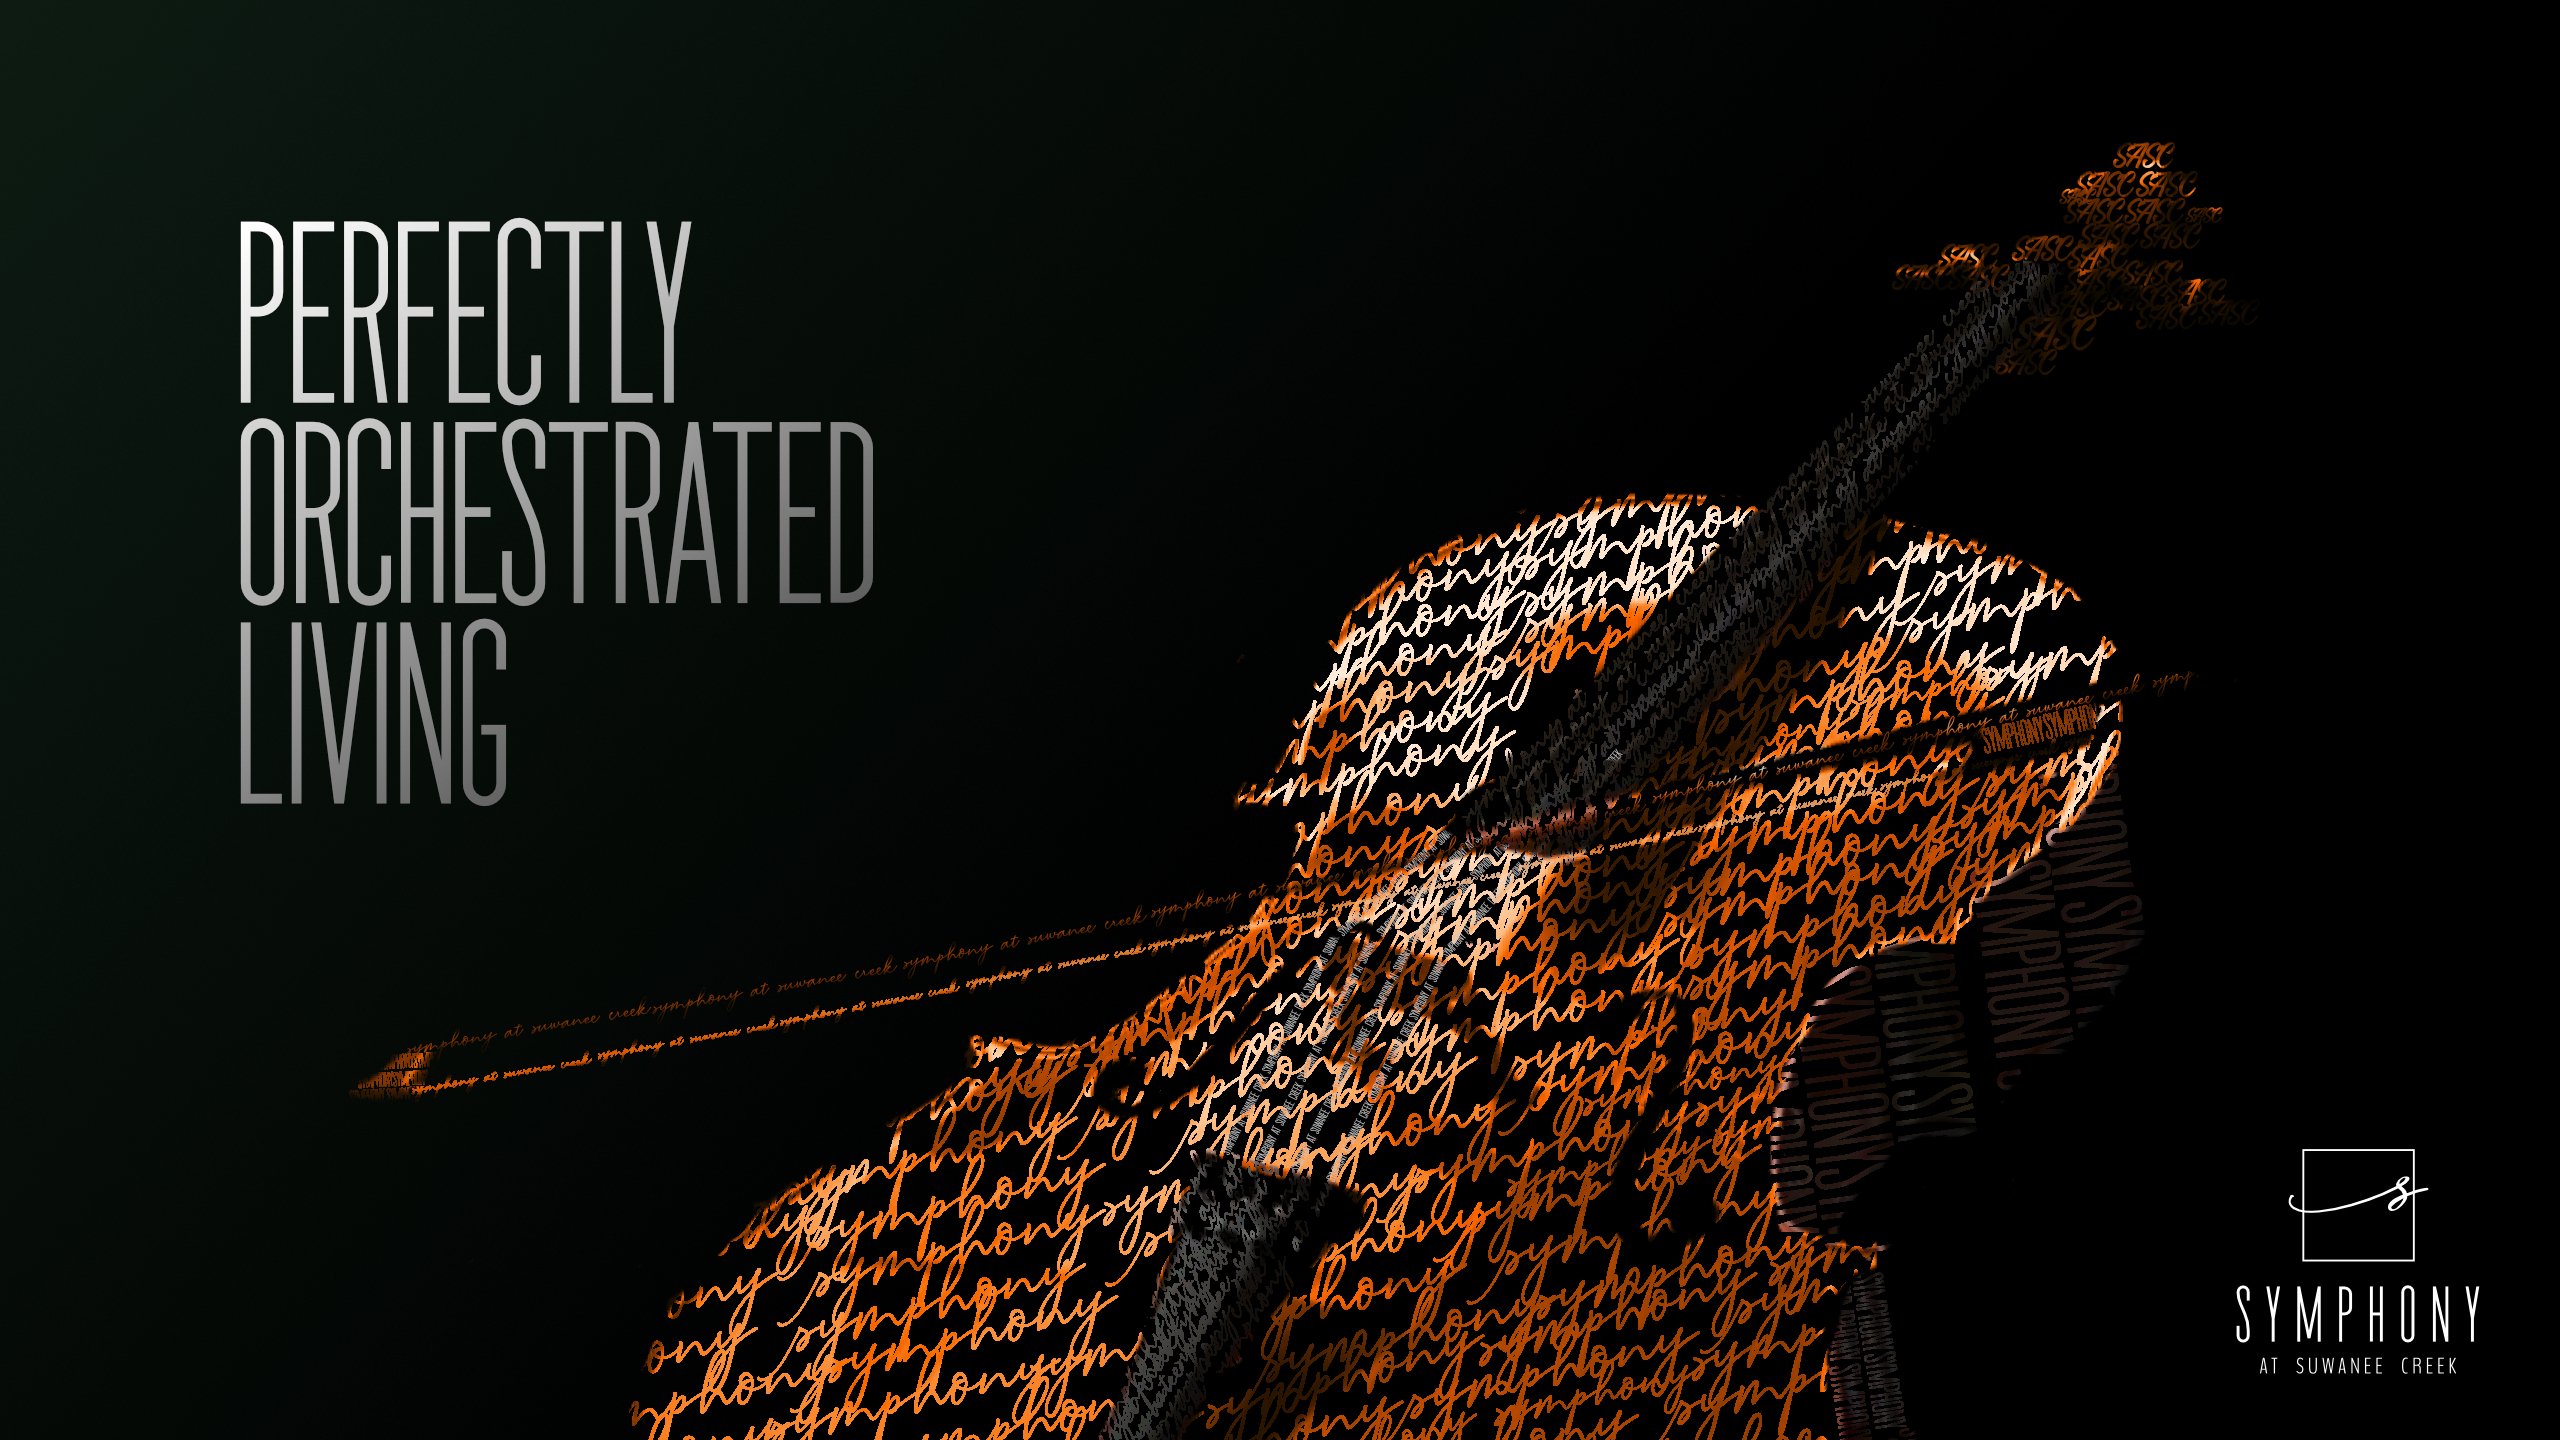
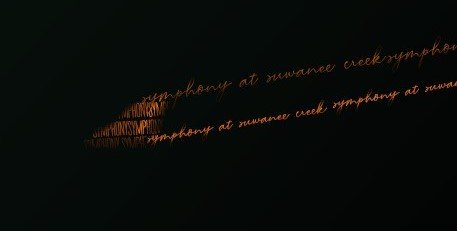
 Hello, can someone take a look at these files and let me know what would be the best way to export the file. The exported image detail is not as crisp when exporting and I'm not sure if there are any other settings that I can use to export. When viewing through Affinity Designer, it is showing the detail without any issues (see the bow in the .jpg file and compare to the screenshot directly from my screen). The curves are not showing crisp lines and blow out when exporting. Any ideas? Symphony_Campaign4b.afdesign
-
 I've been playing around with affinity designer and I was trying to make some font corrections when I spotted this problem; I found no way to convert layer effects to vectors, more specifically, the layer's stroke. Is there a way to do this? To expand curves to layer effects and include them in so that they are regarded when I i.e. use geometry functions using them?
 -
 I am a beginner in LAB attempting to apply the writings of Dan Margulis, who uses only Photoshop, to Affinity Photo. The LAB underlying functionality is mostly OK, but I have found that the AP user interface could be improved in several places. More experienced users, please comment. 1) In the Curves adjustment layer with LAB selected, the A channel curve is colored green and the B curve magenta. The appropriate colors are green left and magenta right for A; blue left and yellow right for B (with light or high luminosity on the right). 2) Creating a check box on the A and B curve windows for Intersect Midpoint would make it easier to construct color-intensifying curves. This is probably the most important basic move in LAB, and even Photoshop does not have this feature. 3) The Input Minimum and Maximum default to 0 and 1. Though I have not found a use for these, shouldn’t they be -1 to 1 or -100 to 100 or -127 to 127? 4) The Curves/LAB window’s second drop-down menu offers Master, L, A, B, and alpha. Is there a known use for ‘Master’ as in RGB? Nothing I have read about LAB indicates that there is. For that matter, is there any use for Master in CMYK? And how about ‘All’ as an alternative to Master in RGB? Furthermore, the histogram curves displayed for the LAB components here are not positioned the same as when one transforms the document to LAB and displays its histograms. May relate to previous point (3). 5) Photoshop can display the graphs of the various color space curves with the light (high-luminosity) side on the right or left (one-click toggle). This option would be useful to people learning from Margulis’s books, which show dark on the right. 6) Other Affinity users have called for improvements in the Curves window in general, not just for LAB: more precision and ways of placing nodes, a larger or scalable window, saving curves. Because of the sensitivity of the A and B curves to small movements, a fine control on node dragging would be handy, e.g., option-drag would reduce the motion by 1/5 or 1/10. Perhaps it already exists. 7) A LAB curves user on this forum called for a keyboard shortcut to move among the channels. Why not? He needs efficiency in a much-used workflow application. In the same vein, having selected the color space, instead of a second drop-down, radio buttons for the three or four channels would slightly simplify choosing one. 8) In the Channel Mixer adjustment layer, the LAB window A and B sliders need appropriate coloring like the RGB and CMYK. Just for consistency. 9) The Levels adjustment layer makes sense in RGB, but I am not so sure about LAB and CMYK. Does this lead to a useful correction? (Please help me, advanced users.) If you push the existing RGB colors to the AB limits of +/-127 won’t you just create out-of-gamut colors that will have to be distorted back in RGB space? And is gamma defined for this color space? Also, in the LAB window, shouldn’t the correct labels for the sliders be, for the A channel, green and magenta, and for the B, blue and yellow. Similar questions for CMYK. 10) The Apply Image filter and Channel Mixer adjustment layer seem as if they should have similar functionality, but their capabilities and interfaces are rather different. My understanding of Apply Image in Photoshop from Margulis is to blend or replace channels one at a time, sometimes across color spaces, but to do that in AP one has to create a gray scale image of a channel in a layer and make that the source. The destination seems to be all channels of a selected layer, or does one have to separate out those channels as well? The Channel Mixer is designed to specify a single channel as destination, but it appears the source must be in the same color space. Shouldn’t these two processes allow individual choice of source and destination channels in all color spaces? Are equations (Apply Image) and sliders (Channel Mixer) of equal value in practical applications? I don’t think this exhausts these issues, but this post has already exhausted me. My compliments if you have read this far. If you want to know more about Margulis, use a search engine or post here and I will try to summarize what I have earned from a large corpus of writing.
- 2 replies
-
- 5
-
-
- margulis
- channel mixing
- (and 1 more)
-
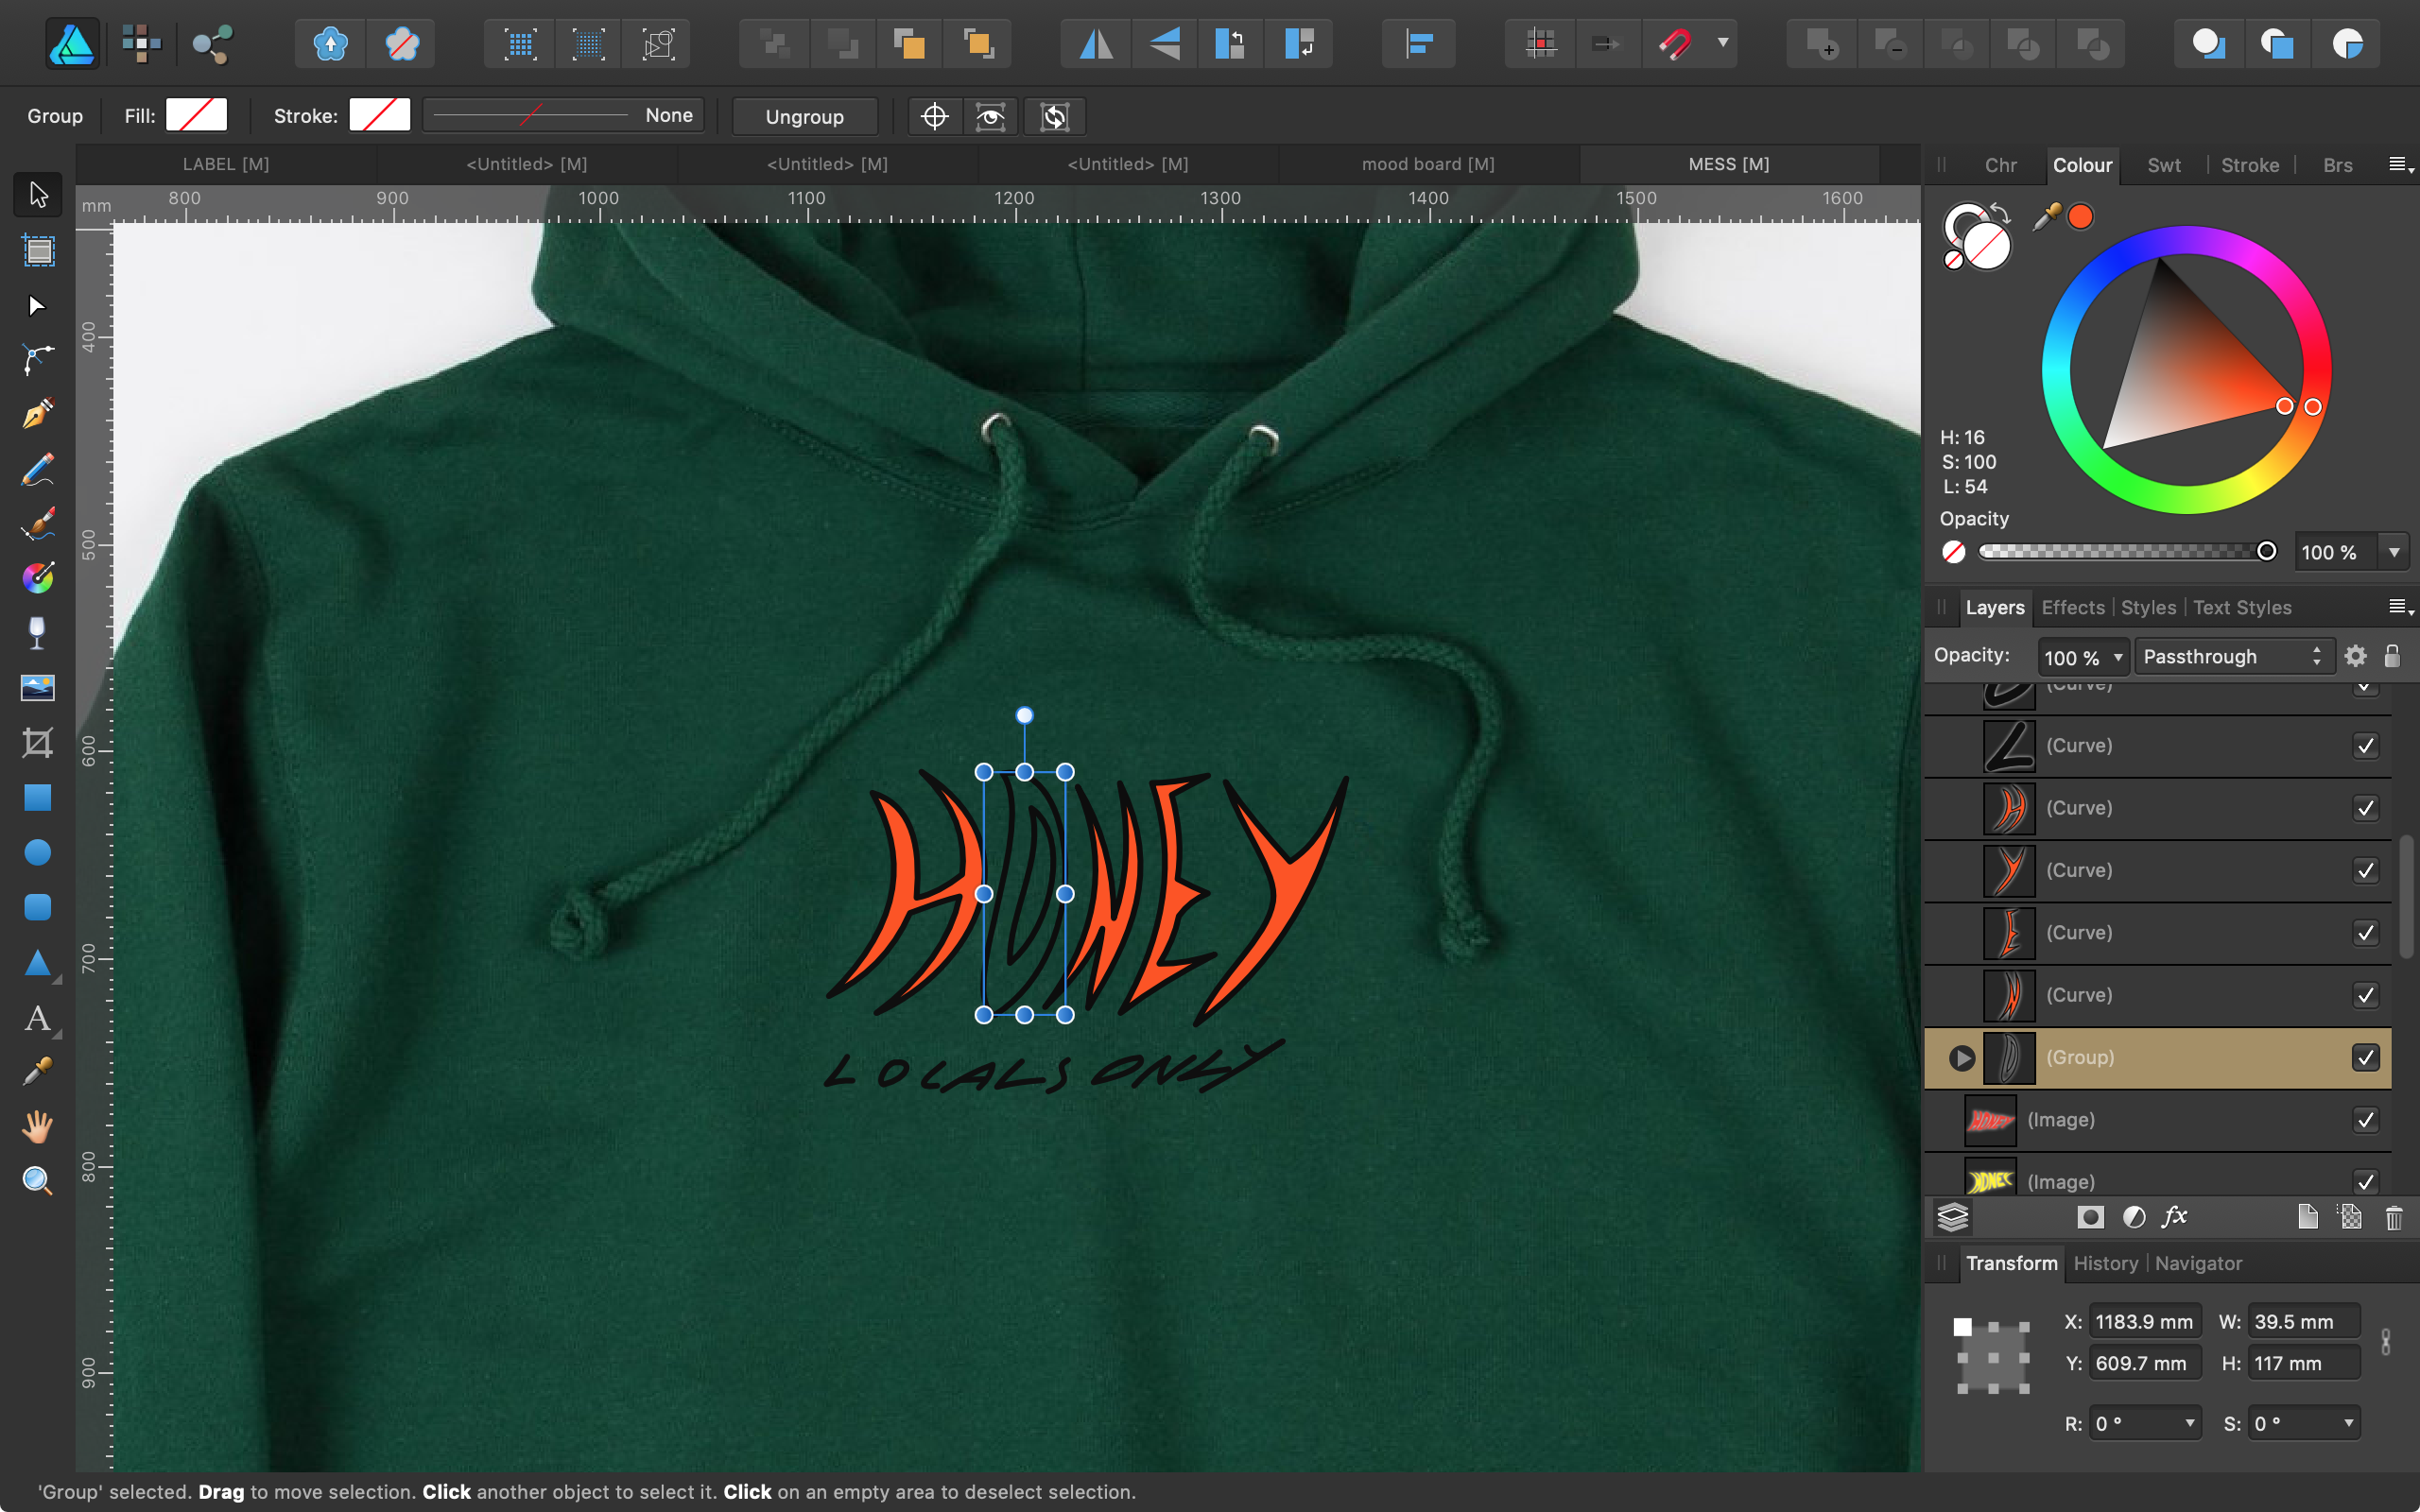
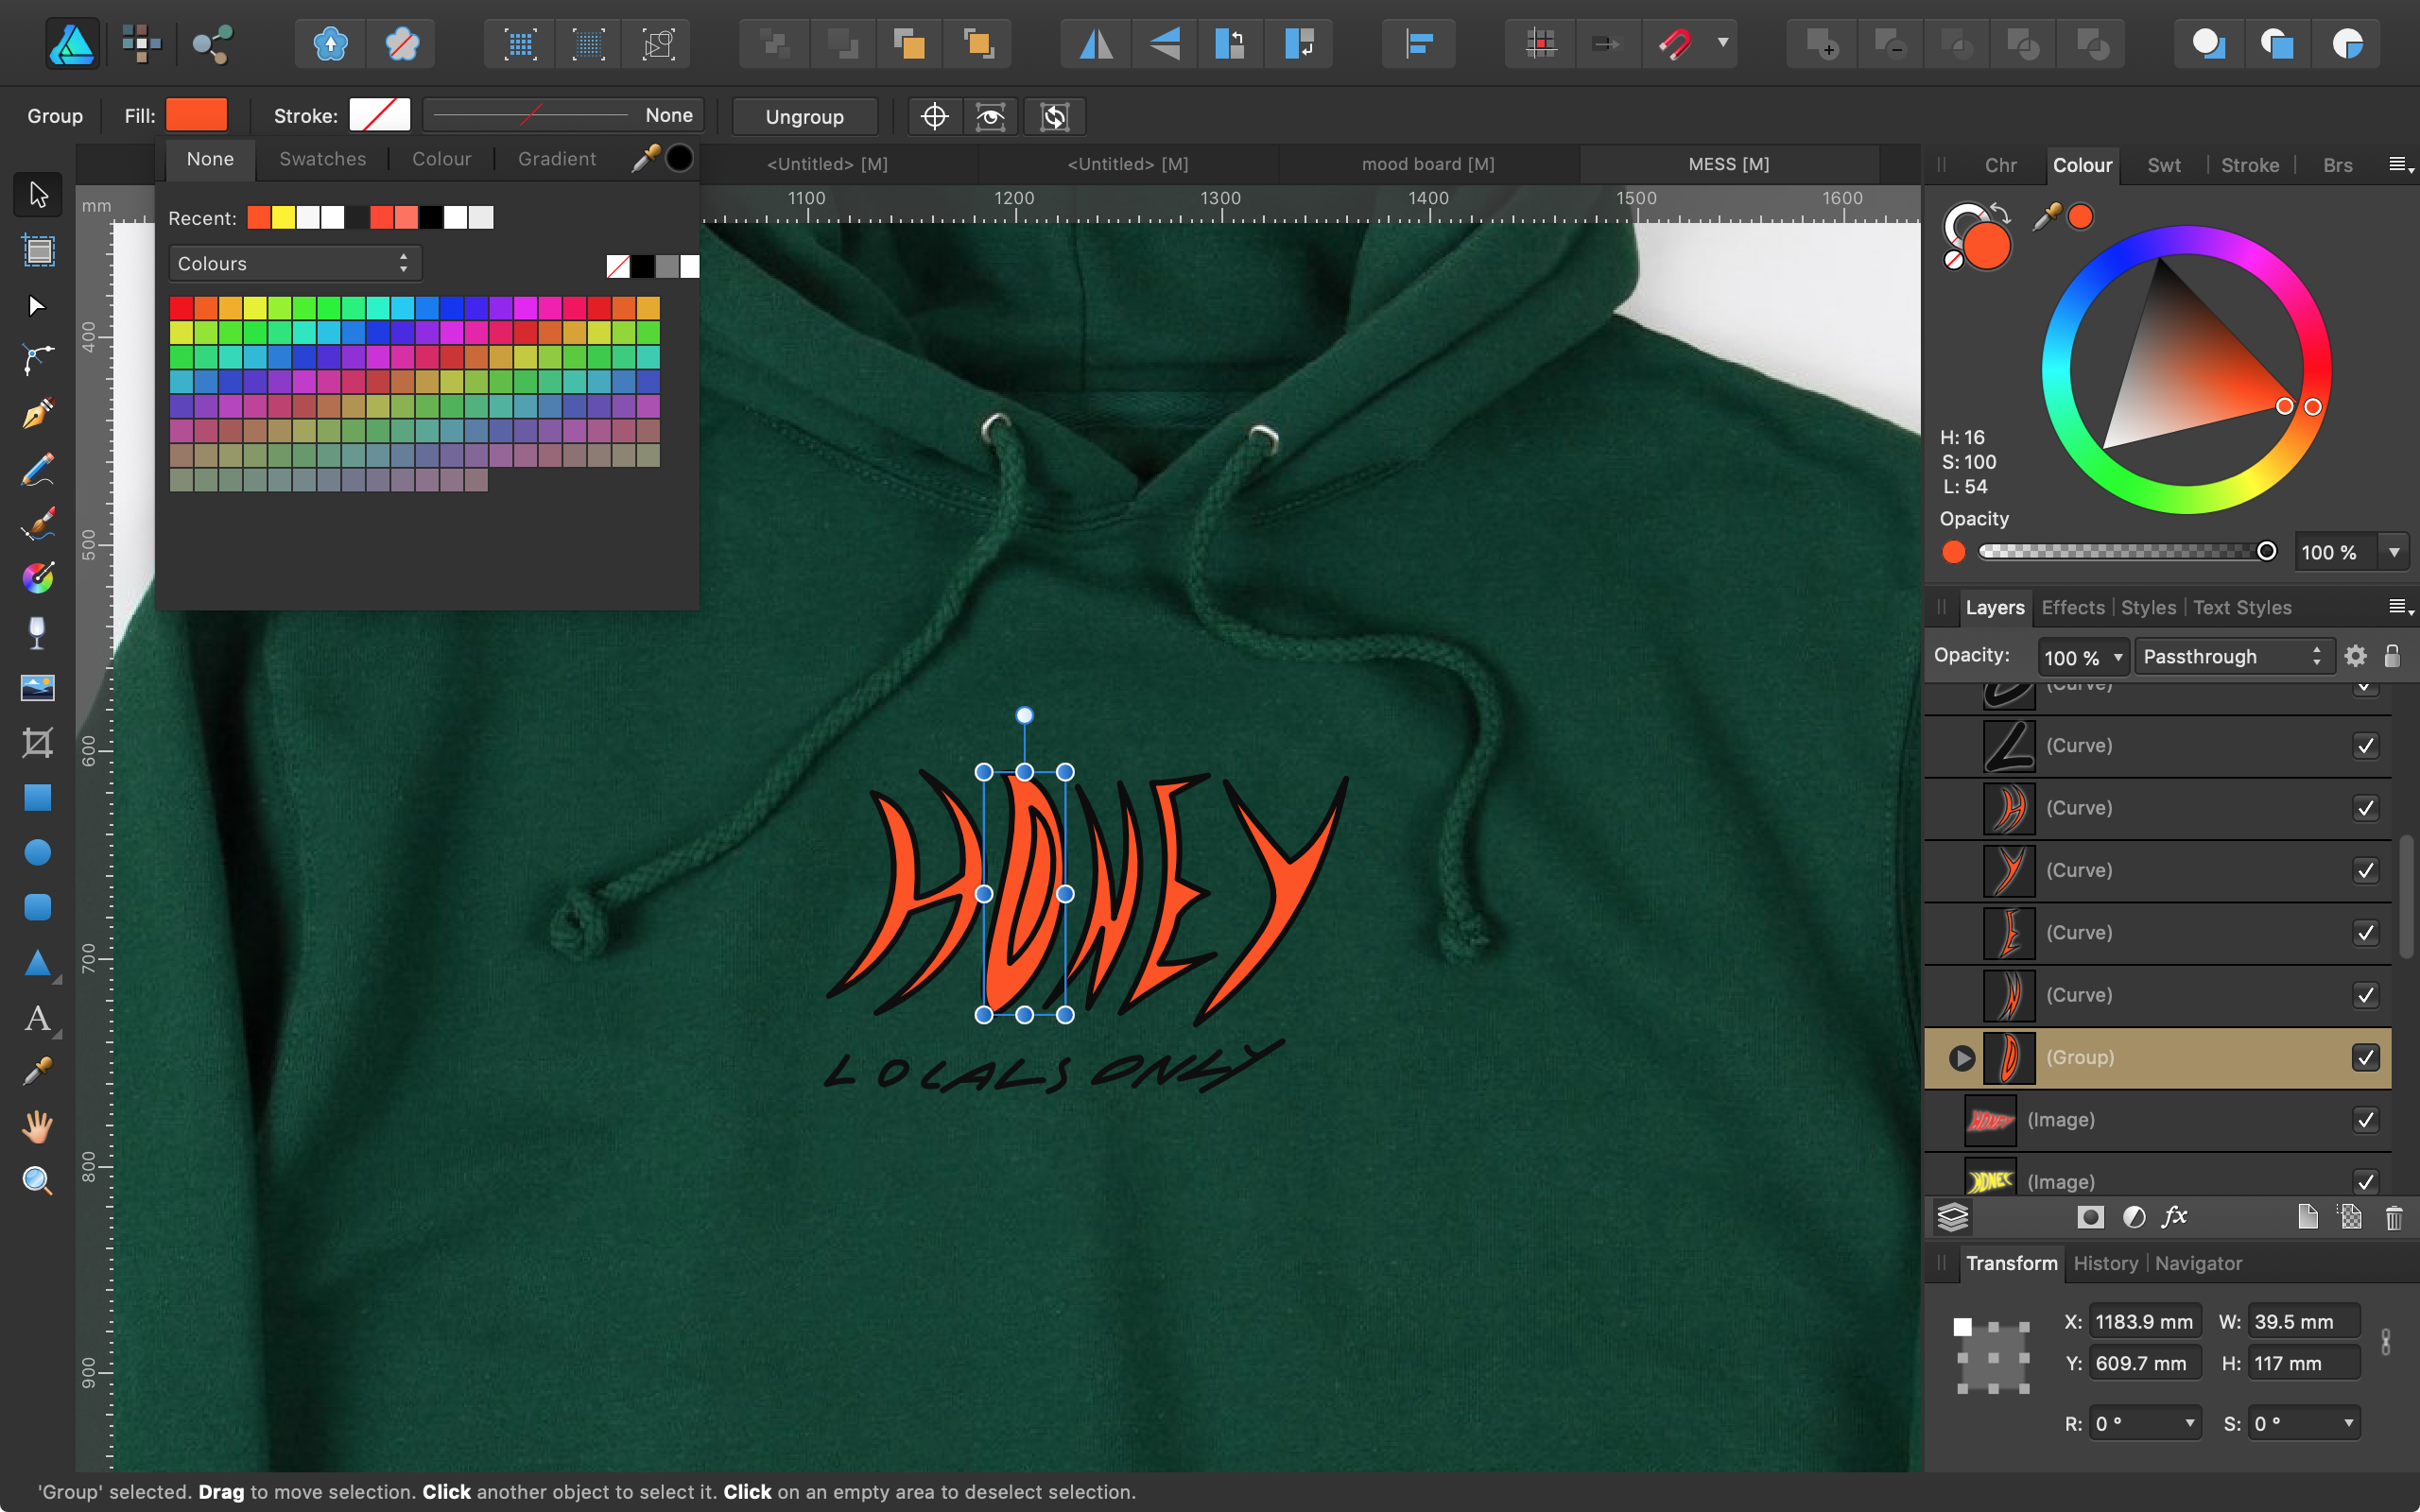
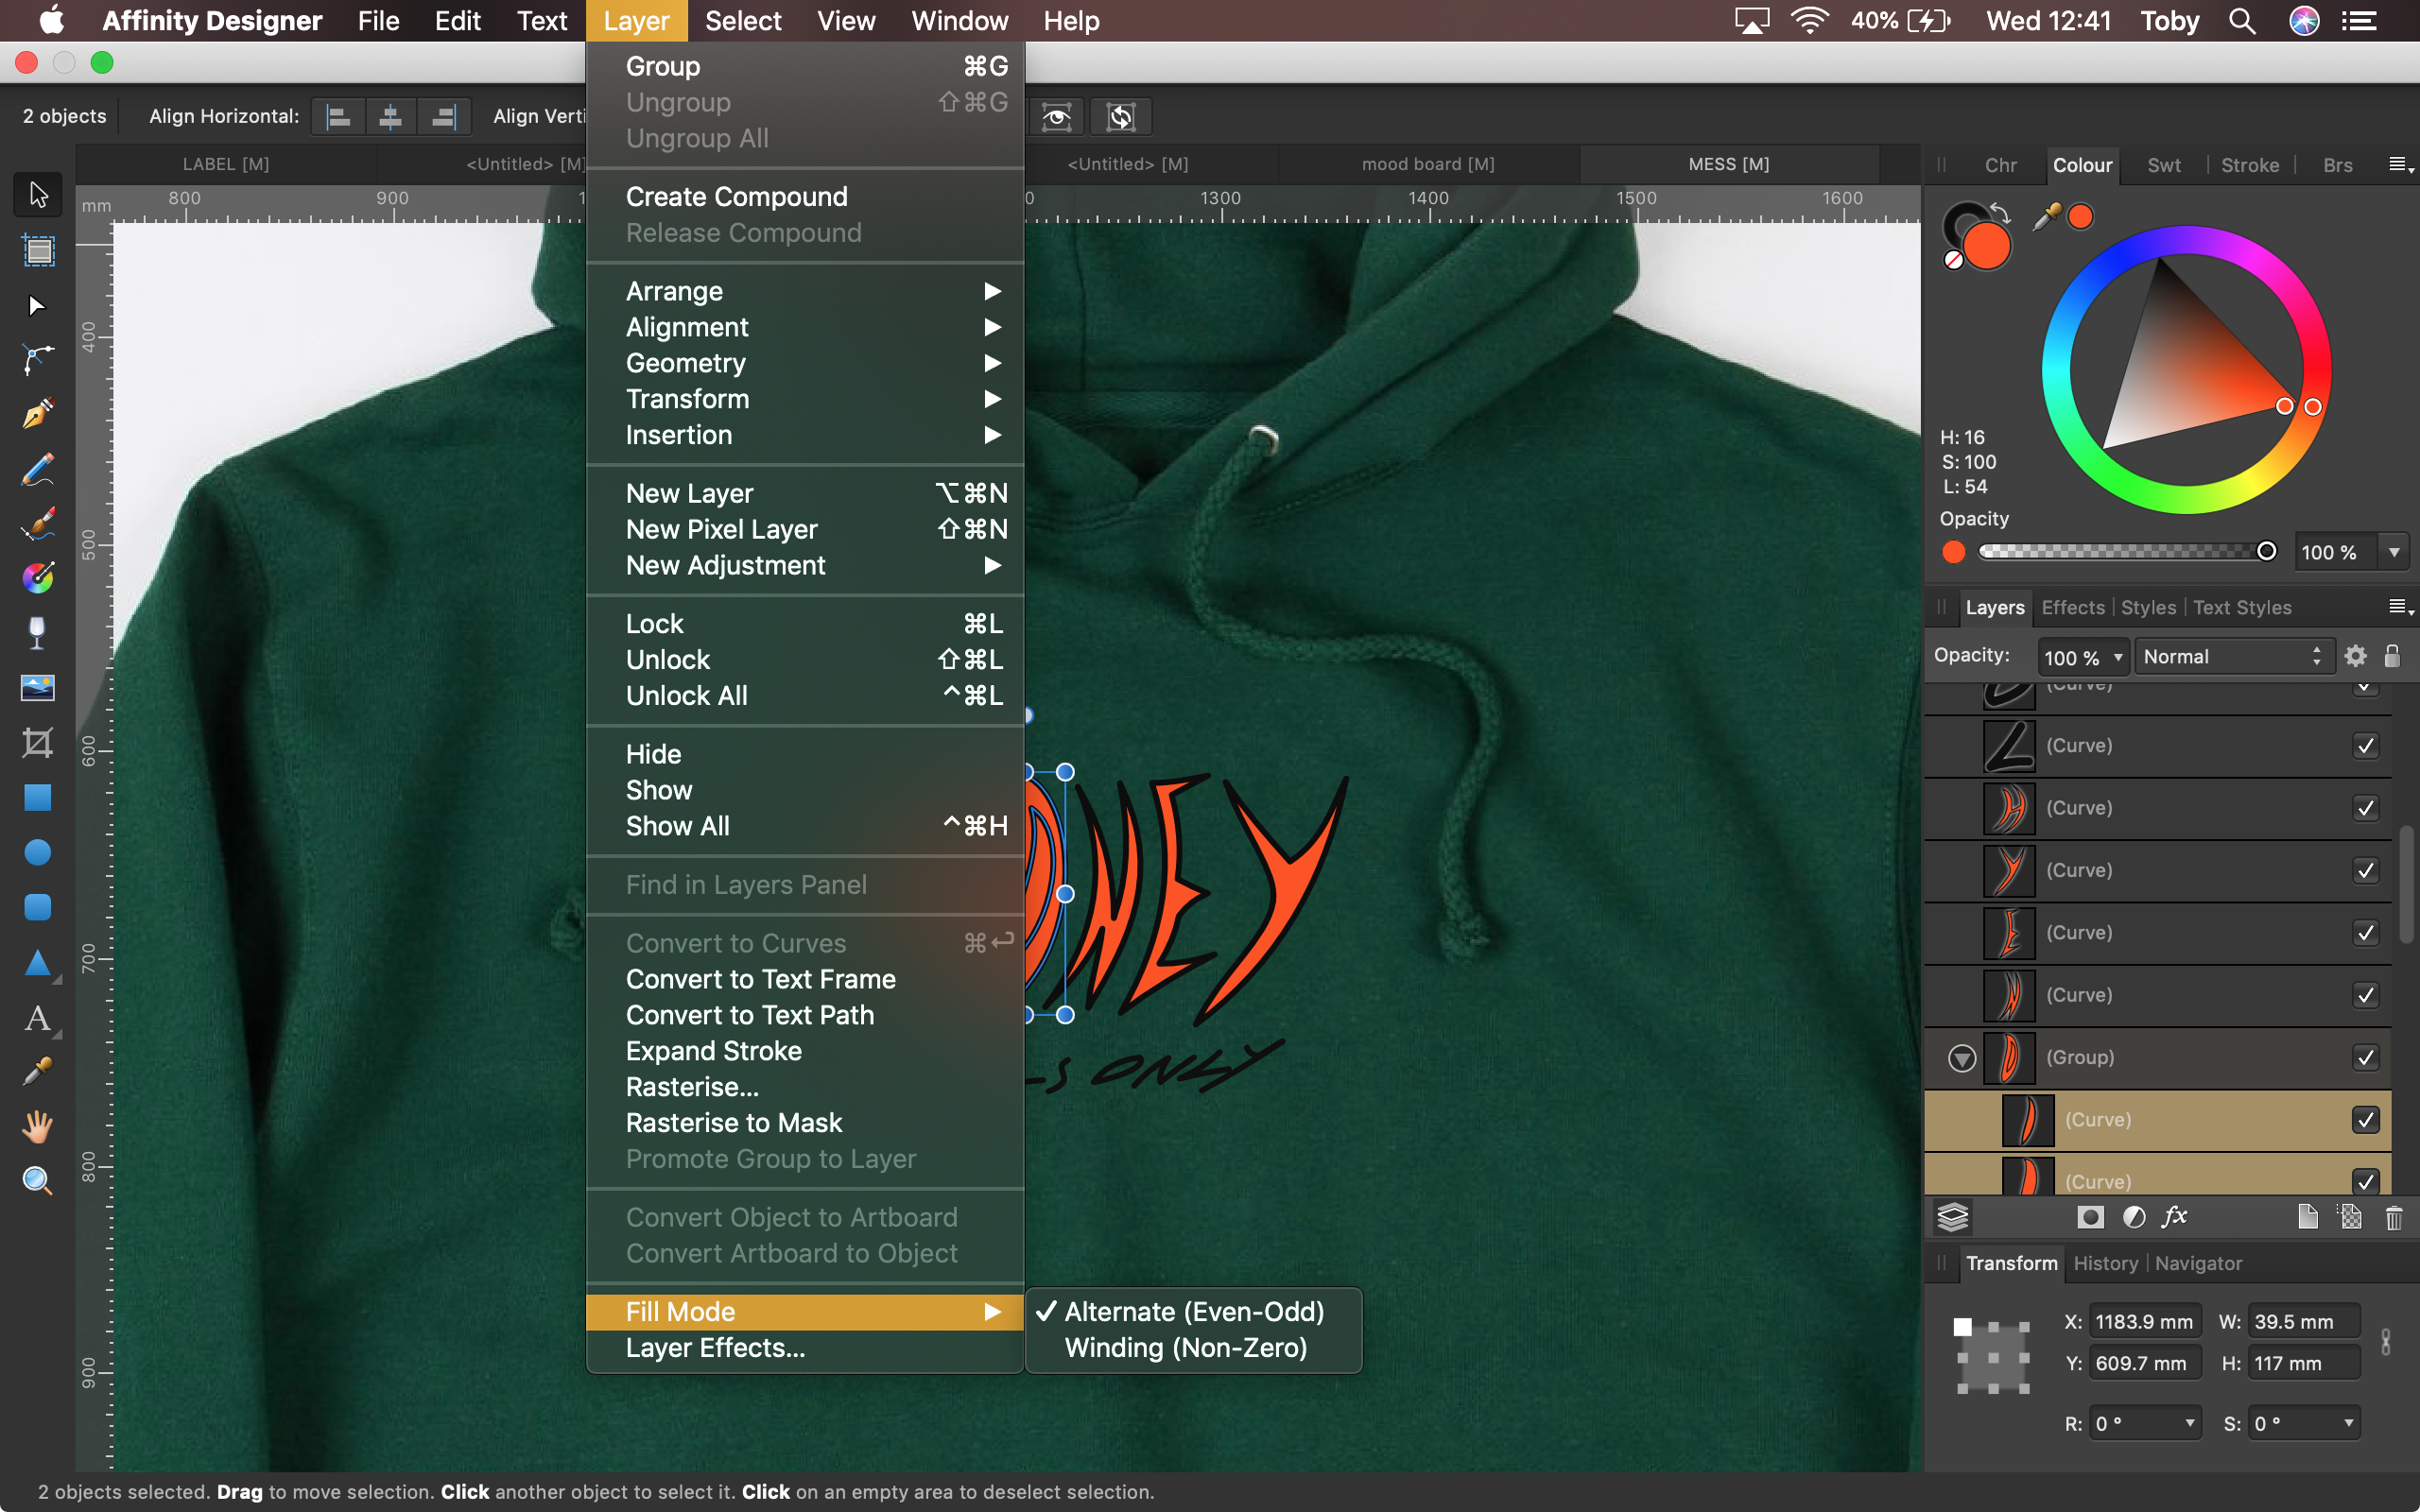
 Hi, I'm trying to fill a capital 'O' without filling in the middle of it. As seen in the attached screenshots. I found a post with the same issue, there they were told to select the individual curve layers rather than the group, and then change the fill mode in the layers menu to "Alternative (Even-Odd)". However, I tried this and it didn't seem to work. Is there something I'm doing wrong or something else that might work? Cheers
-
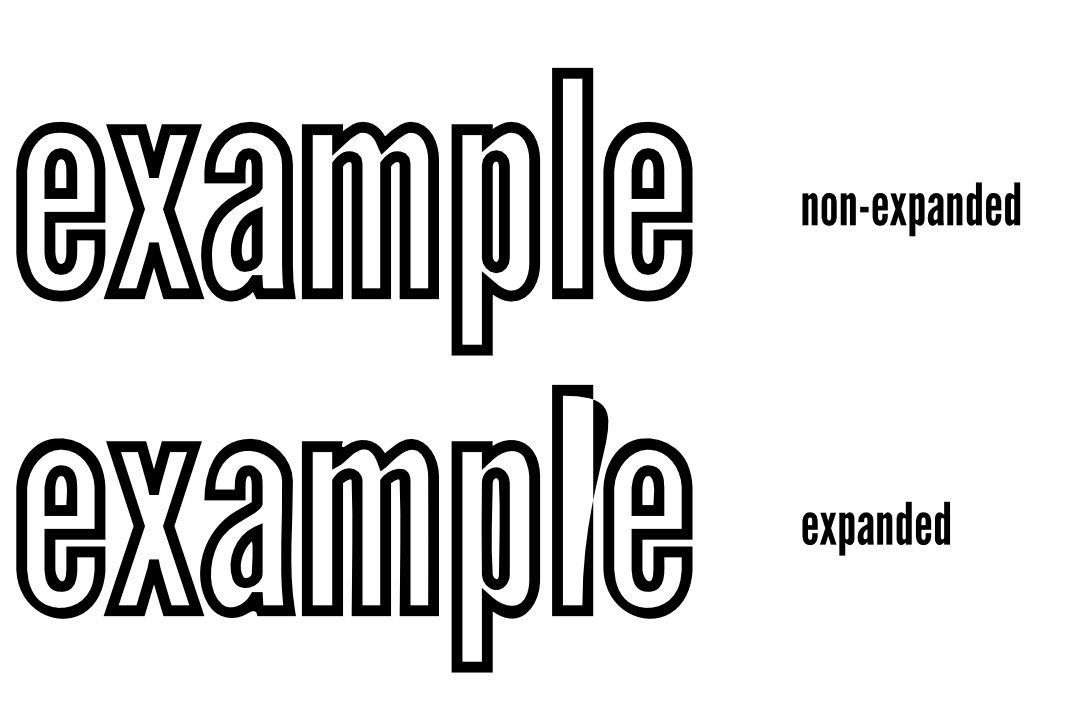
 In the attached image, the top 'example' word is Artistic Text. the bottom 'example' word is text that has been converted to curves and then had the strokes expanded with the menu item under 'Layer.' The L is very off, but other letters are also visibly (although slightly) distorted as well. If there is a setting that bumps up the accuracy of this, then please let me know. Otherwise, the one trick I know to reduce this is to expand the stroke when the shape/text is really, really big (multiply the size by a huge factor) and then size it back down by the same factor afterwards. I do not remember this happening back when I was using Illustrator. Note: This is as of v. 1.7.1 and haven't tried this in 1.7.2 yet. If this has been fixed in 1.7.2, then great.
-
 Don’t know if it’s just me, or if it’s just this file, or if I’ve had the app open too long, or what. All I know is that whenever I try to select the “Curves” adjustment on its own in the Adjustments studio, I get nothing. The only way I actually get the option to adjust anything is by swimming through the long version of the menu. Take a look... F03DE051-AAFC-44D4-8807-021EFC2BF928.MOV
 -
Hi folks, I’m new to AF for iPad having used AF desktop for a while now. I'm having some issues with certain adjustments. I wanted to make a curves adjustment on an image today but when I went to the adjustments menu and selected curves it didn’t give me any further options. There is no context menu or anything ?! Cheers Mark
-
Moving Curve onto the image layer is a 100% repeatable crash. I've tried different files and different documents with the same result. PubCrash.mp4
-

Open or close curve tool
andmocychmen posted a topic in Pre-V2 Archive of Affinity on iPad Questions
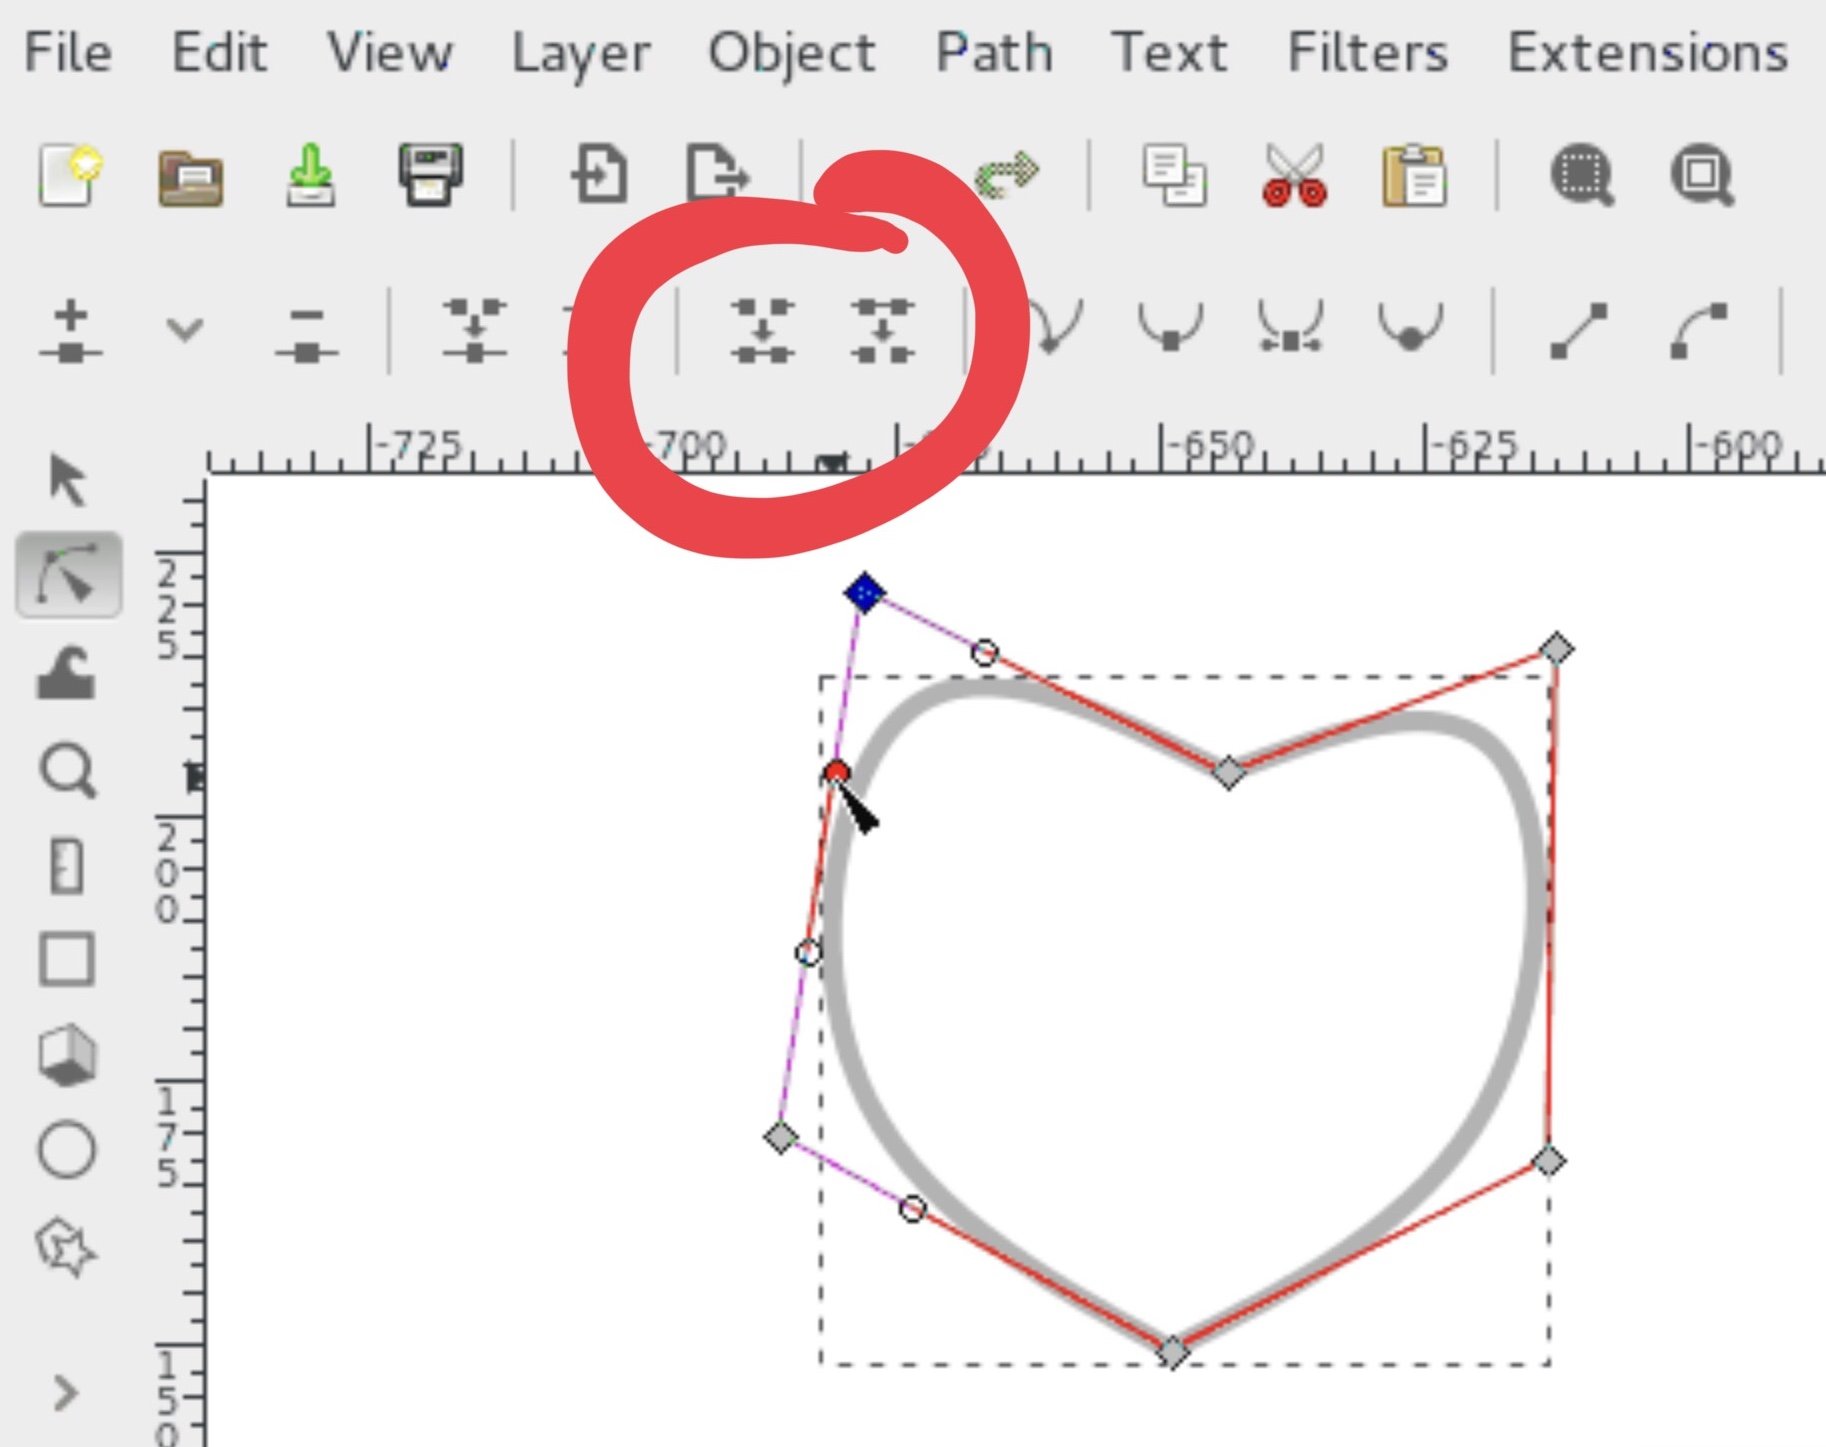
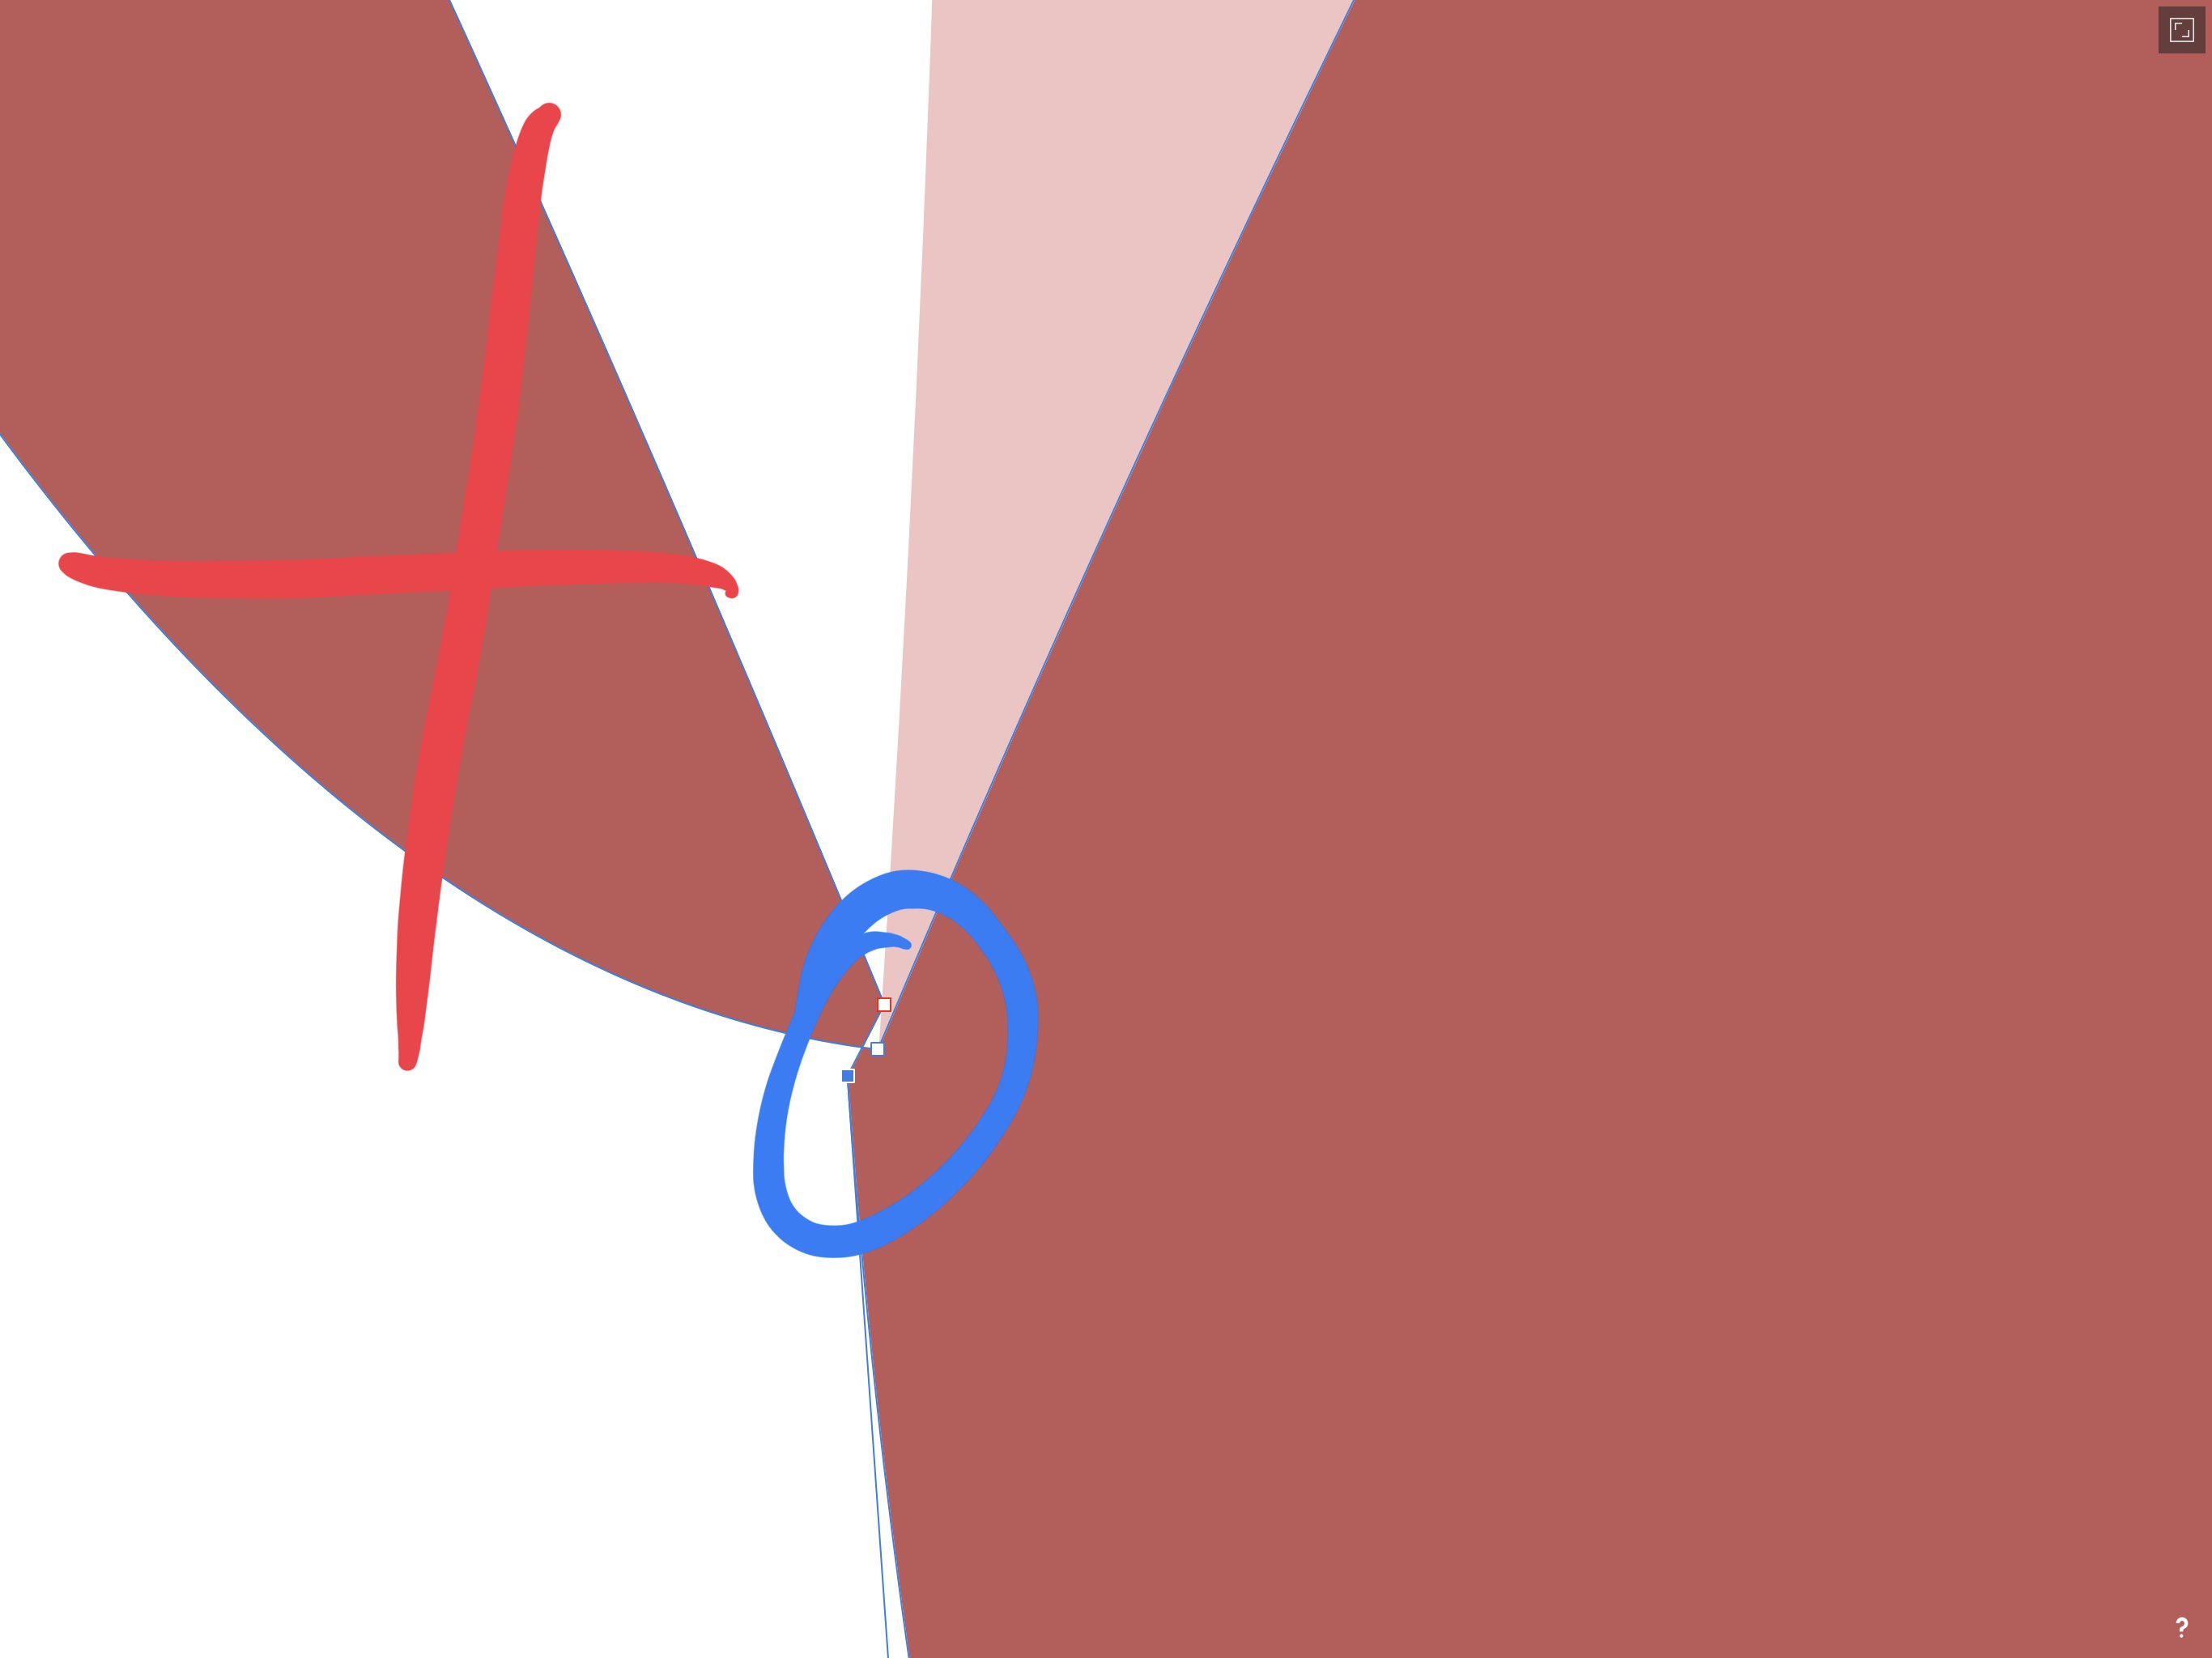
I’m new to Affinity Designer and used to working with Inkscape. Concerning notes and curves, there is a tool in Inkscape to open or close a curve which I cannot find on Affinity Designer. Where can I find it? Or are there different ways of achieving the same result? Specifically I’m trying to merge the three nodes highlighted in blue here and get rid of the loop that I crossed out in red:
-
Hello I am used to being able to check the black point and the white point per color in the diagram when I change the tonal value per color channel in RGB mode. Is this also possible in the iPad? On the desktop this is perfectly possible with the tonal value correction! Thanks for a tip
-
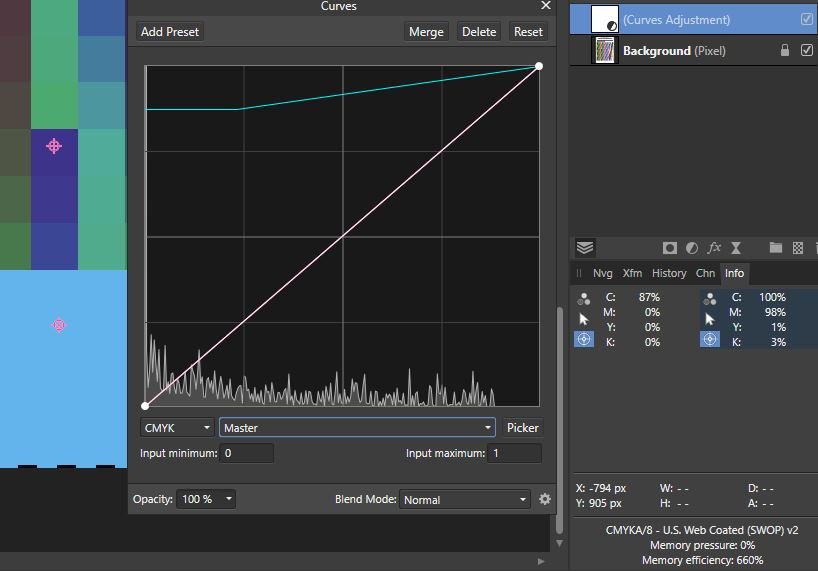
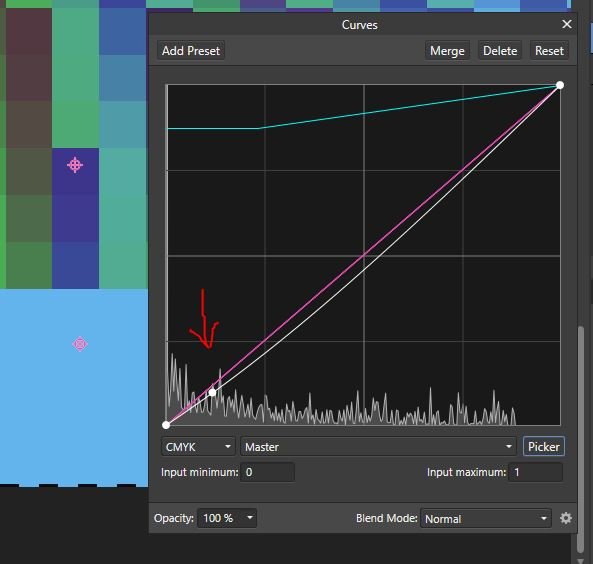
Bug: The pickers do not pick the correct point in the Curves dialogue The graphs in the Affinity Curves dialogues input at the bottom and output at the left Input (bottom) has zero left and 100 right Output (left) has zero bottom and 100 top This can be seen in the following: On a CMYK version of a colour chart I have set two Samplers on the Info panel - the left sampler in the white paper, showing 0,0,0,0; and the right sampler in the pure cyan square showing 100,98,1,3 The curve in diagram 1 shows: a huge spike on the left at zero, from the white of the paper zero transformed to 87 (from the flat of the line on the left 100 being unchanged by the point top right of the graph These are confirmed by the new sampler values, the blue tinge to the white paper, and the unchanged solid cyan square If I now use the picker and place it in the cyan square, the node created on the graph is bottom left, somewhere around (12,12) in coordinates (second screenshot). First it should clearly be at one end of the line (as the blue square is 100% cyan) and it should be at the right-hand end of the line. Similarly if I reset and use the picker to choose from the white area (with zero cyan) it gives me a node top-right, rather than bottom left. This error can go unnoticed when selecting a single node because the curve will be symmetrical, so, if, say, the point chosen was 80, then the node would be 20, and the resulting curve when dragged down would be down equally at 80 and 20. However when trying to create an S curve, it falls apart (and wastes a lot of time!) Software version: Affinity Photo 1.7.0.367, Win 10 Home version 1803 OS build 17134.829, 64bit, Intel Core i7-7700HQ installed RAM 16Gb
-
 I'm new to Affinity. Apologize if this has already been covered but I couldn't find with a search. My .tiff files do not retrain the curves saved on the file when opening in Affinity. When opening the file in Photoshop, works like a champ--i.e. there's the appropriate curve. When opening in Affinity, there's the curve layer but no curve--seems like all the other layer elements like masks, vibrance, yadayaday are perfect. When opening with Affinity the exact same image saved as a .psd, opens perfectly--i.e. there's the appropriate curve. Any thoughts? Tom