Search the Community
Showing results for tags 'curves'.
-
 Affinity Photo Are Levels and Curves The Same? – A Beginners Look PC-Mac version This tutorial looks at the Levels and Curves adjustments in the PC-Mac version of Affinity Photo. Are they the same? Which is better to use? https://youtu.be/AKN4XltrnlY
 -
Affinity Photo iPad version Are Levels and Curves The Same? Beginners Guide pt 16 This tutorial looks at the Levels and Curves adjustments in the iPad version of Affinity Photo. Are they the same? Which is better to use? https://youtu.be/qf8ywvP5o-A
-
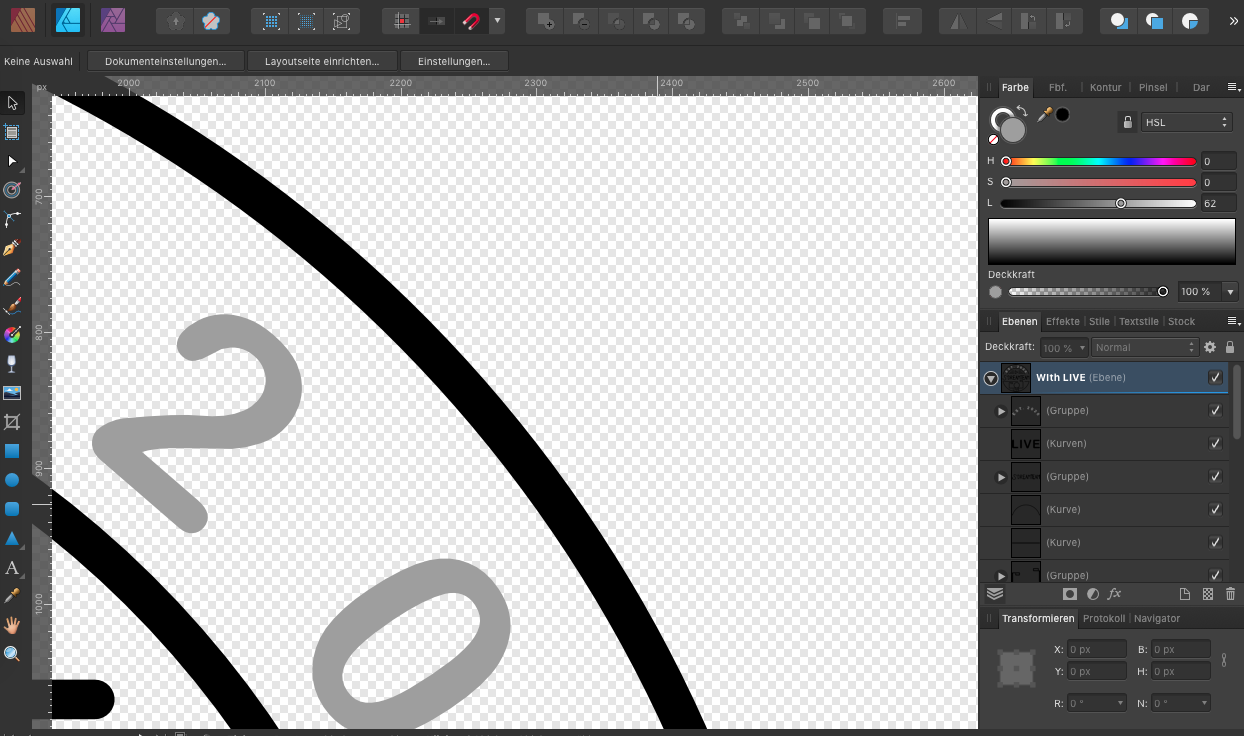
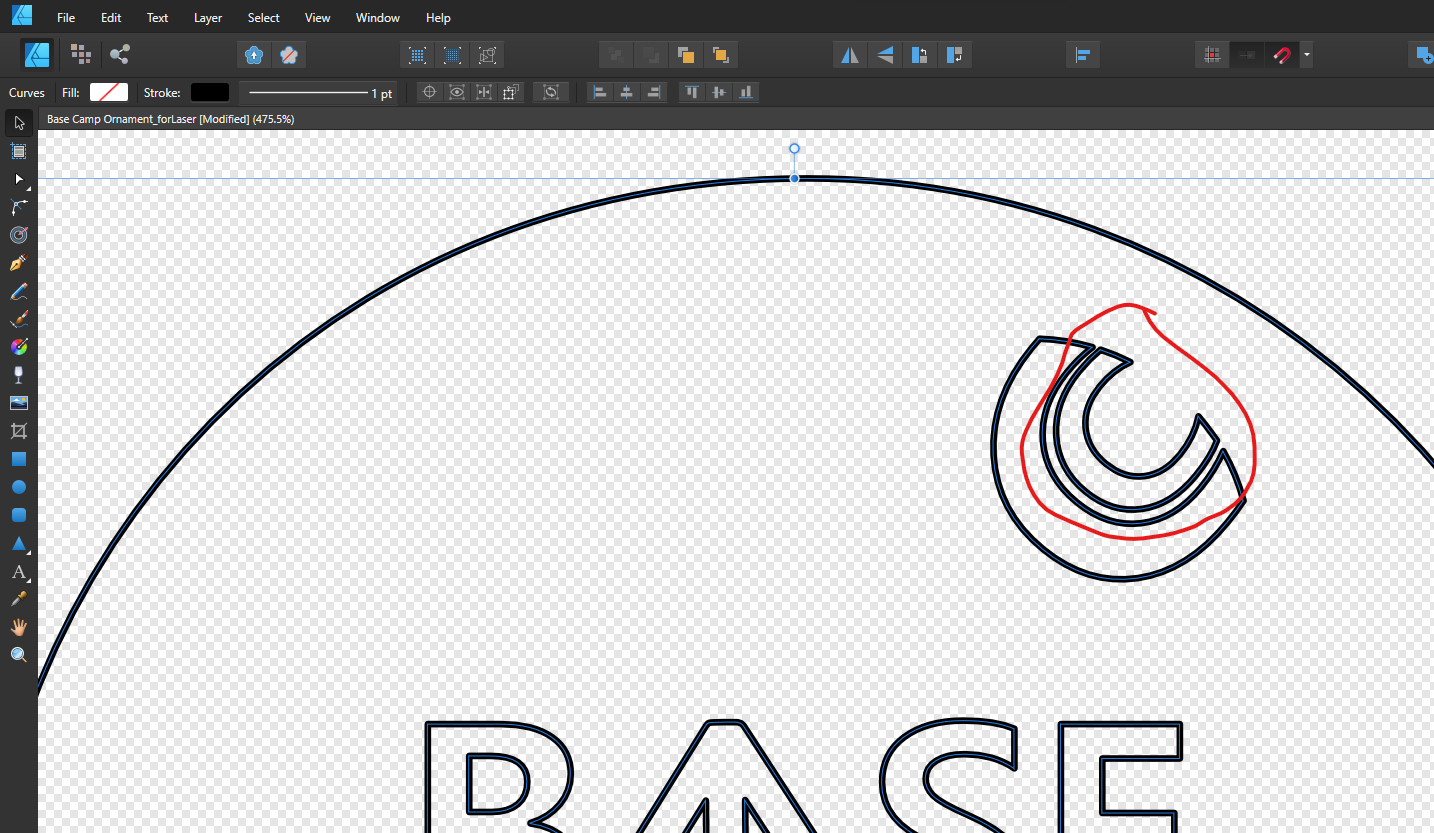
 In Adobe Illustrator you can select all of the points on a curve by Alt-clicking with the point selection tool. How do you do the same in AD. Need when you build complex objects with Booleans and want to select a part which is difficult to select with marquee without selecting the all of the parts - like the smaller C in the red circled area.
-
I know I've suggested a similar feature, but all this talk of smoothing curves brought this up in my mind; in addition to a tool to smooth a curve, Affinity Designer should also have the opposite. I am of course referring to Midpoint Displacement, which would allow illustrators to make non-uniform curves more easily than having to draw each node individually. Being able to smooth curves is indeed important, but as it is, it's really hard to produce a line that doesn't look uniform, and a roughening tool to add pseudorandom midpoint displacement would make illustrating much less time-consuming.
- 41 replies
-
- 22
-

-
 Hello! I'm currently designing a logo for my friend using AD for iPad but I'm still quite new to the program. Basically, I'm trying to merge the curves together but when I select "merge curves", it merges the curves in such a weird manner. Can anyone please advise me on this? How should I merge it such that it doesn't create those weird fills within the curves? (Please take a look at the video I've attached) FullSizeRender.mov
 -
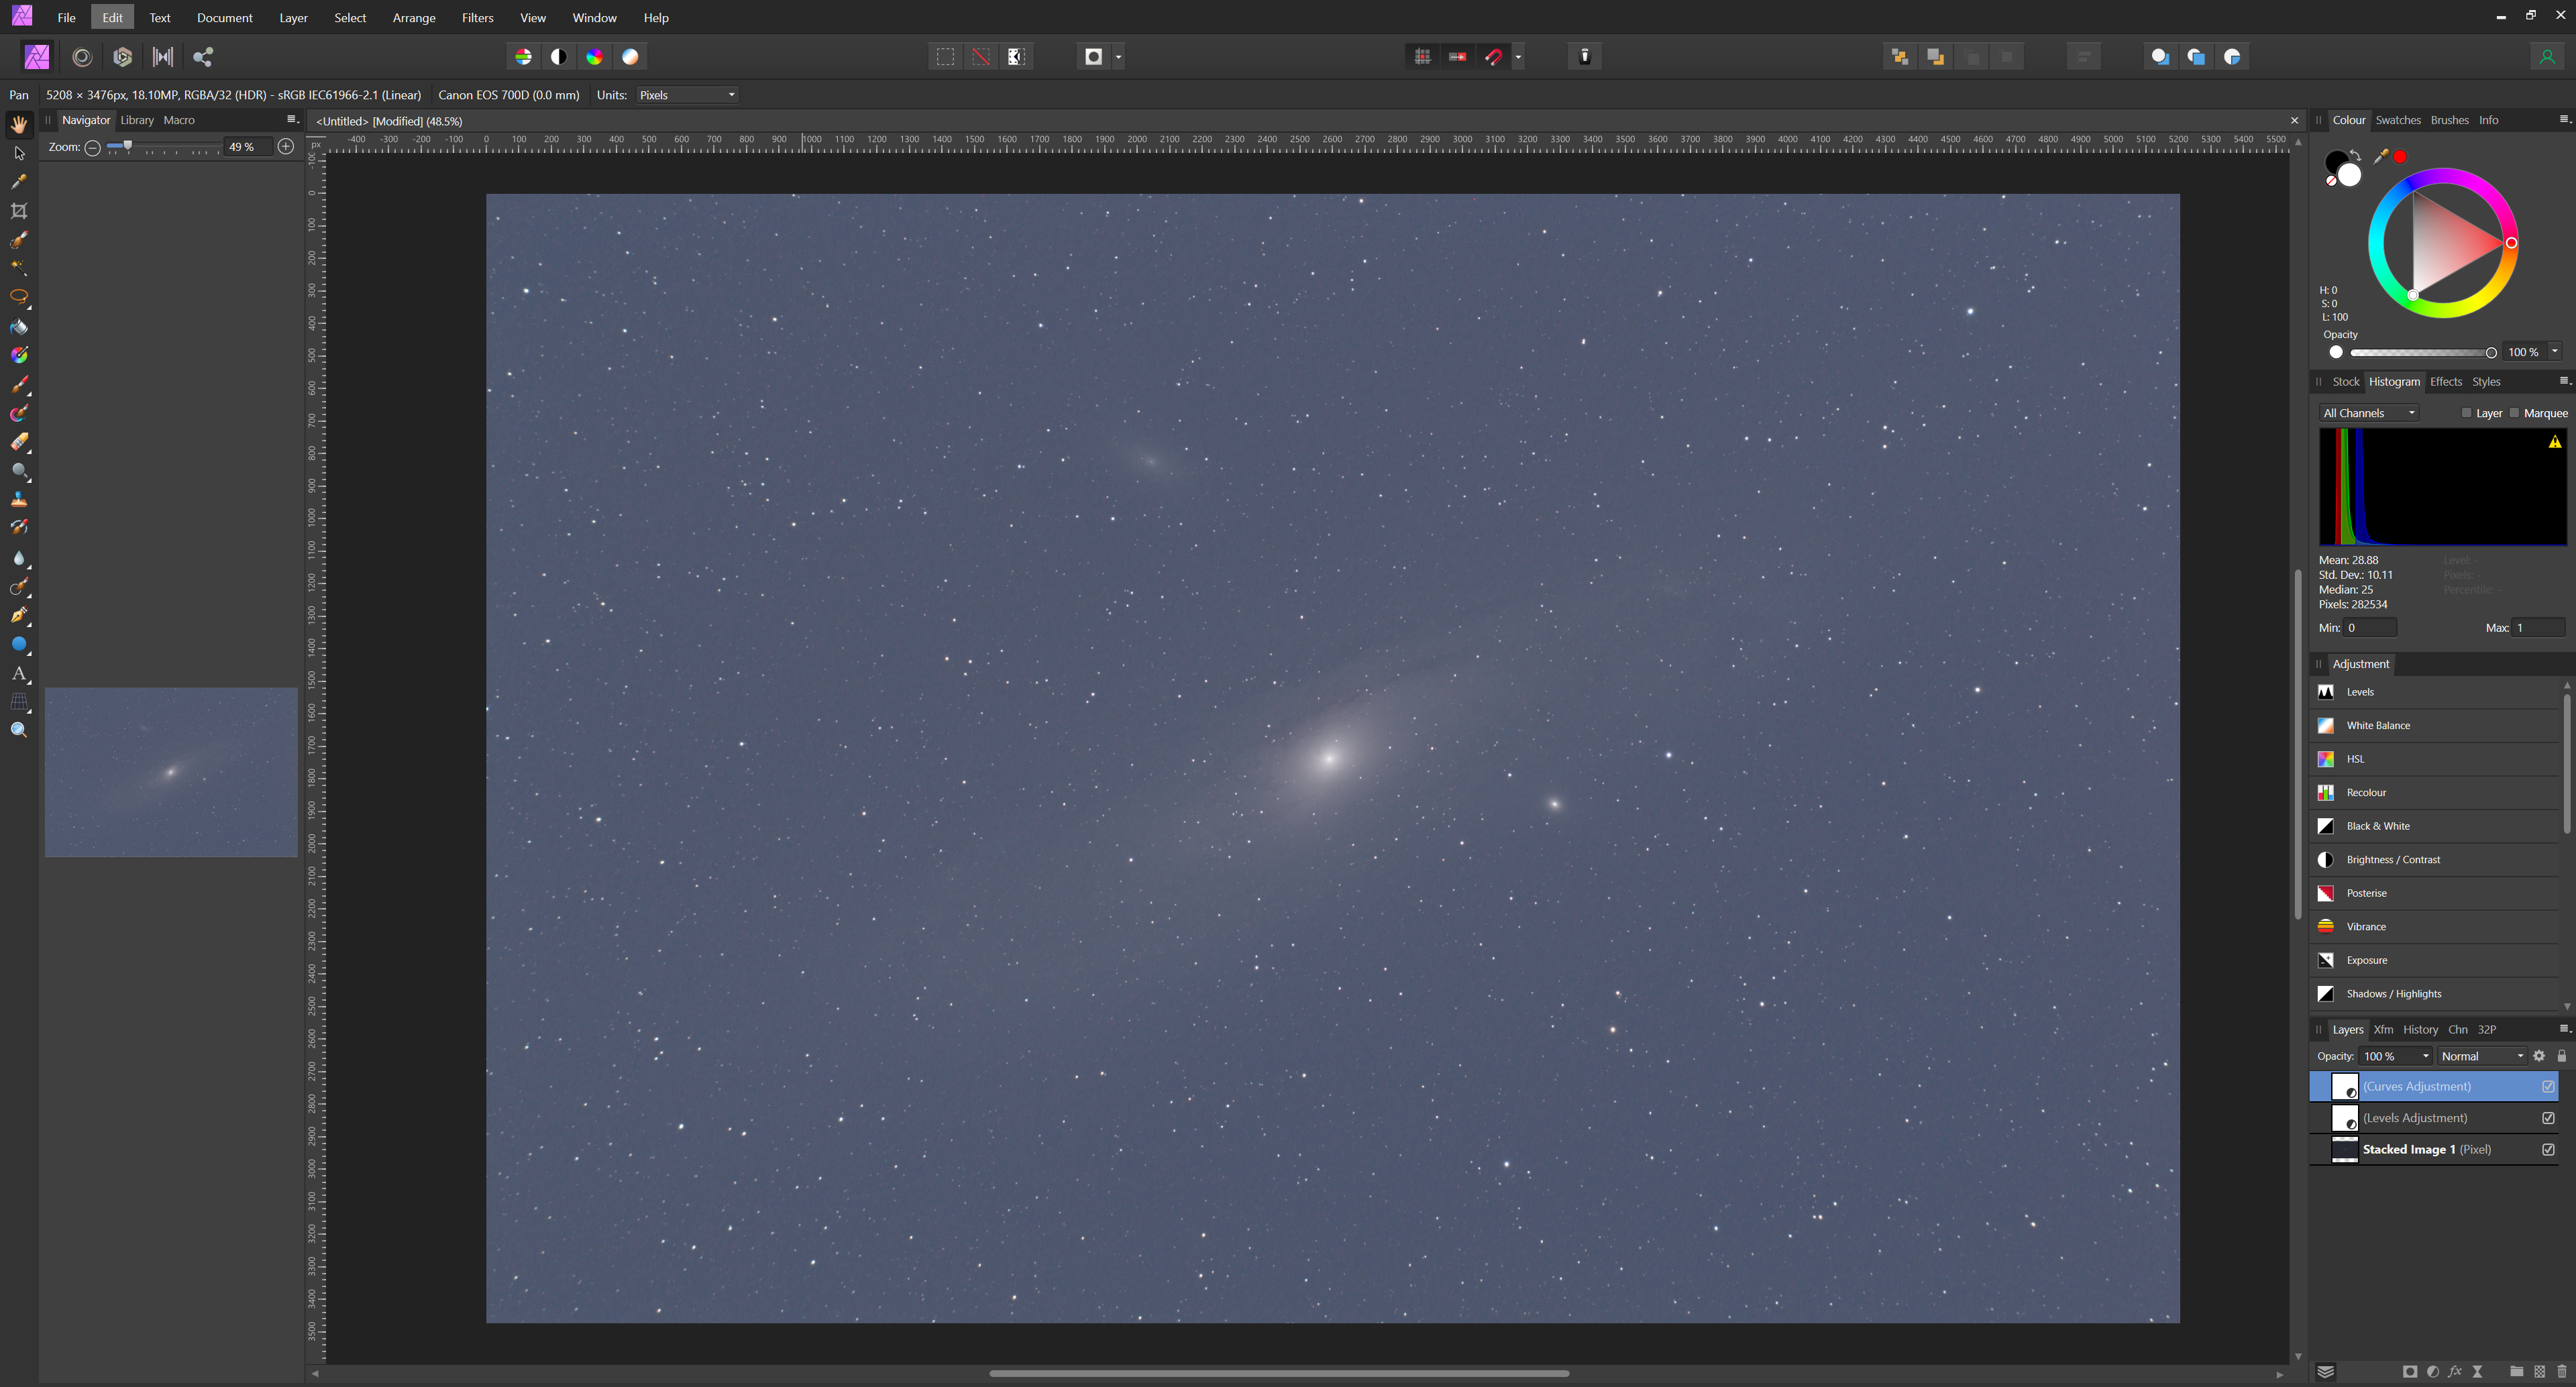
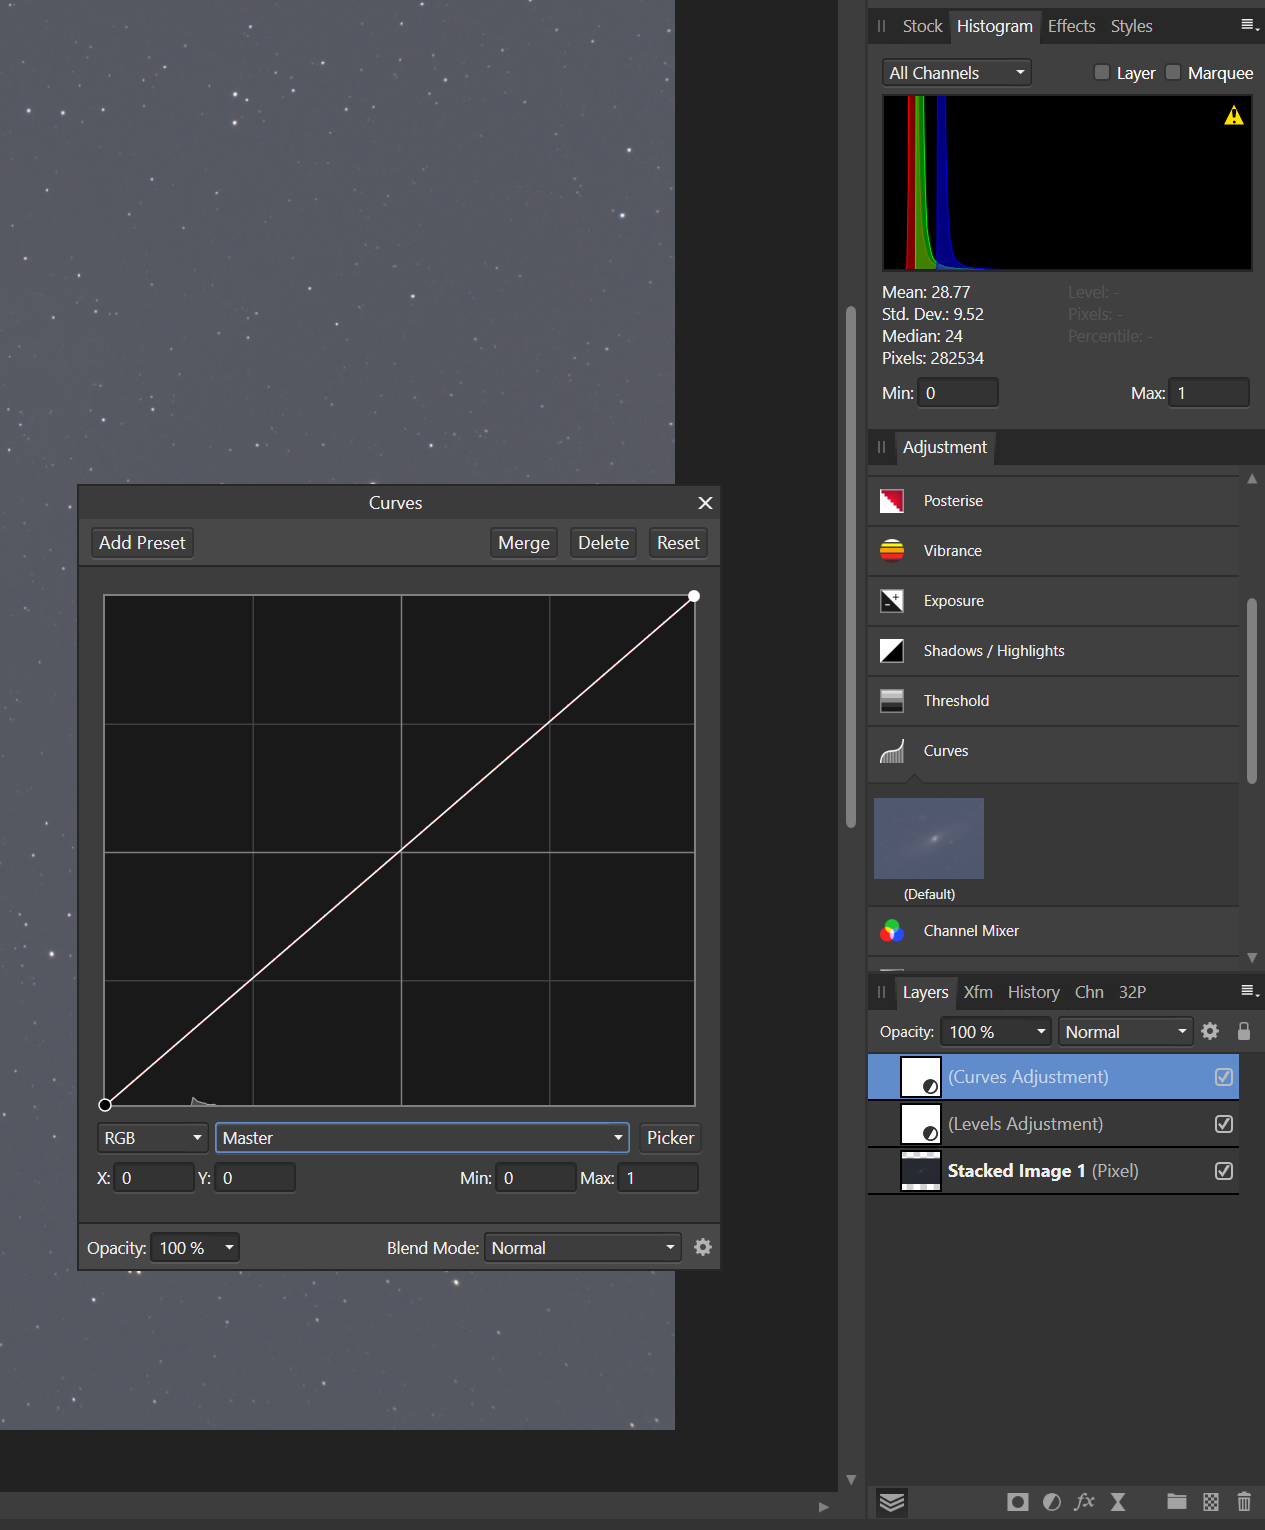
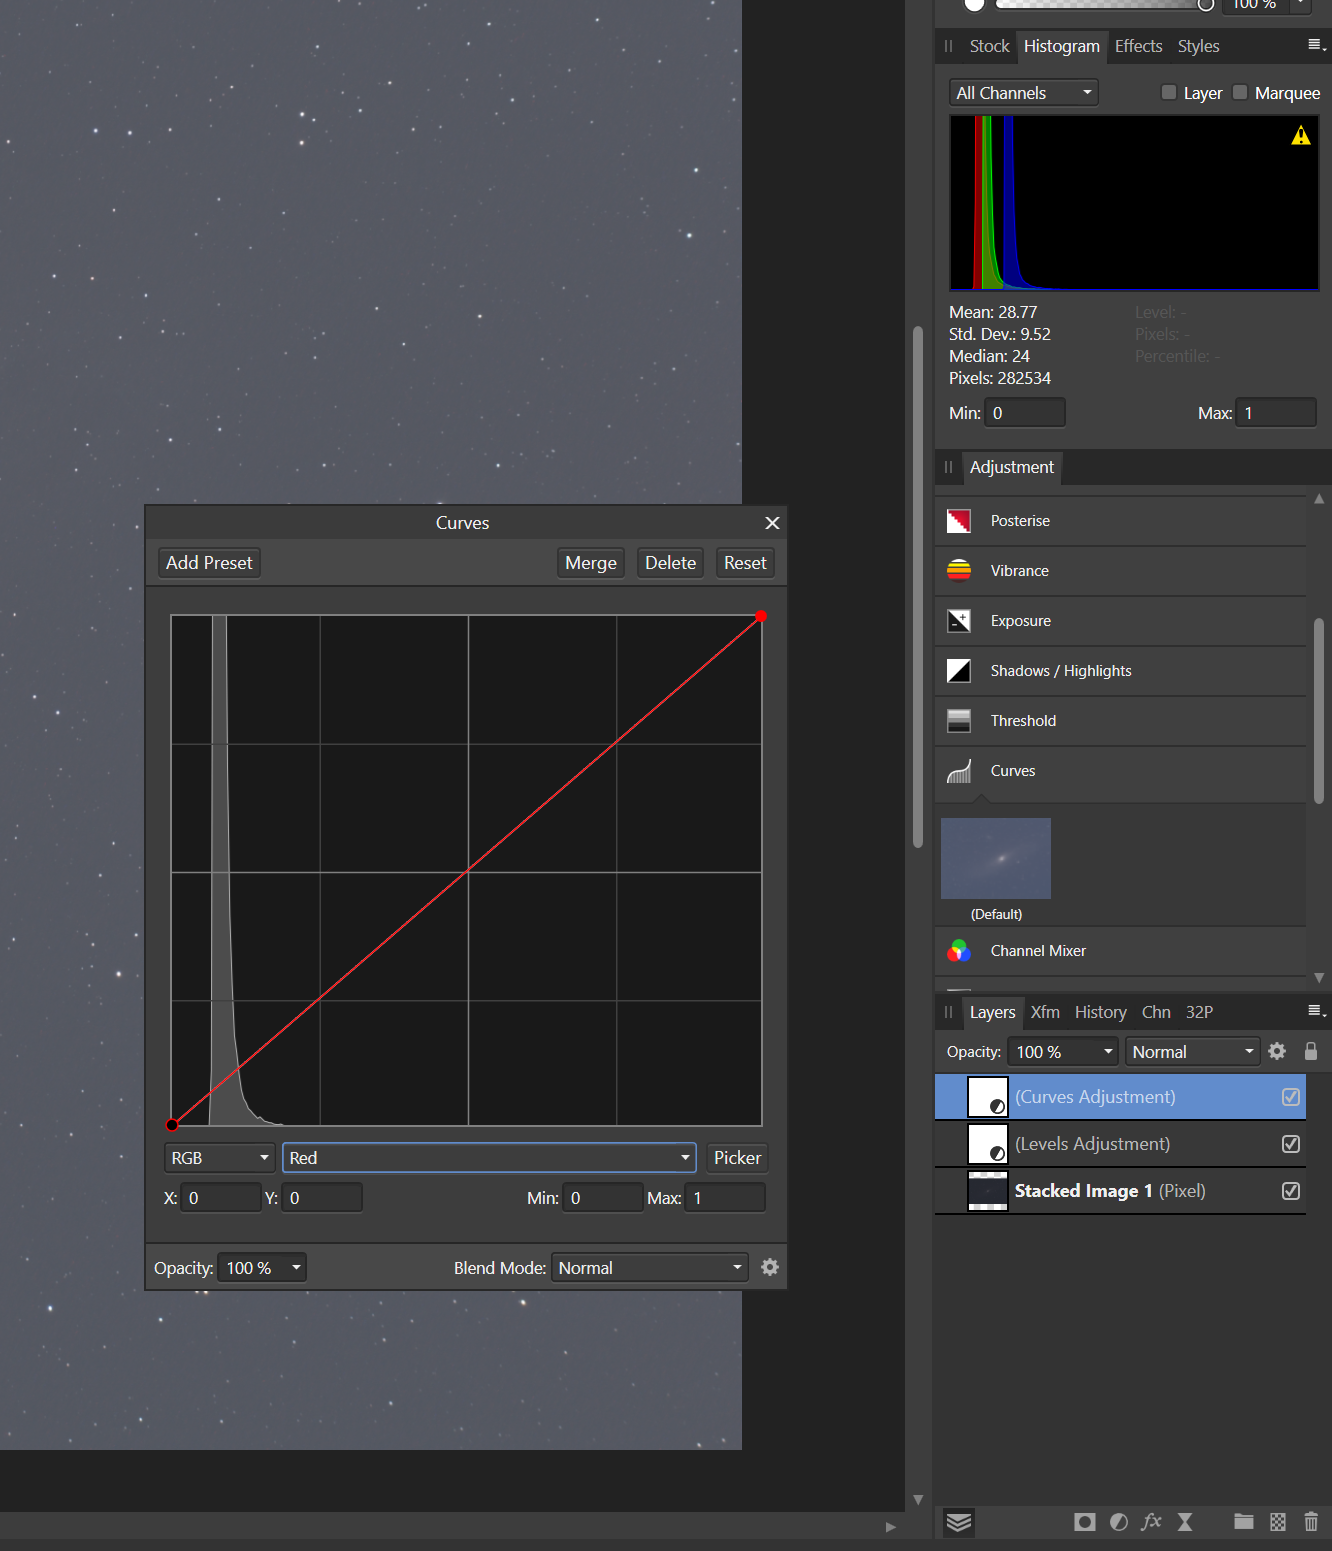
 Hello, I'm hoping somebody can shed some light on this. I'm trying to edit an astro stack, however when I apply a curves adjustment, (manually or adjusting the automatically applied one during the stack) there is either no or very little histrogram data, despite the standard histogram working as normal, and other adjustments such as levels working fine too. While the master selection in curves isn't working, the red green and blue are, as well as grey and so on. I have a pretty decent Windows machine so performance isn't an issue. I thought it may take a short while for the histogram to render in but it never does. Funnily enough, I downloaded a sample stack online of the same subject, same document settings (32 bit etc), and it seemed to work on that image, so I'm at a loss. Any help would be appreciated. I've attached screenshots and my project file for reference. Thanks 452161177_TestStack.afphoto
-
Hello, my proposition is, we have an option to export curves to DXF or DWG. Im sure there are more people who not only use Affinity Designer for 2D graphics, but also for using its curves for cutting with laser or others. Sometimes i need DXF file for that, and PDF with curves is not supported by CNC. Obviously i can export it to svg and export by other programs, but its a way around this problem and not really a proper solution.
-
 Hi ! Designer and Publisher Crashs when trying to convert a Table to curves. The table in question (a nutrimental table for a product) was made on Publisher and pasted on Designer, I tried to convert in curves cause a client want all the archive like that and that's when I saw the issue. Affinity Publisher 1.10.0 Affinity Designer 1.10.0 on a M1 Mac
-
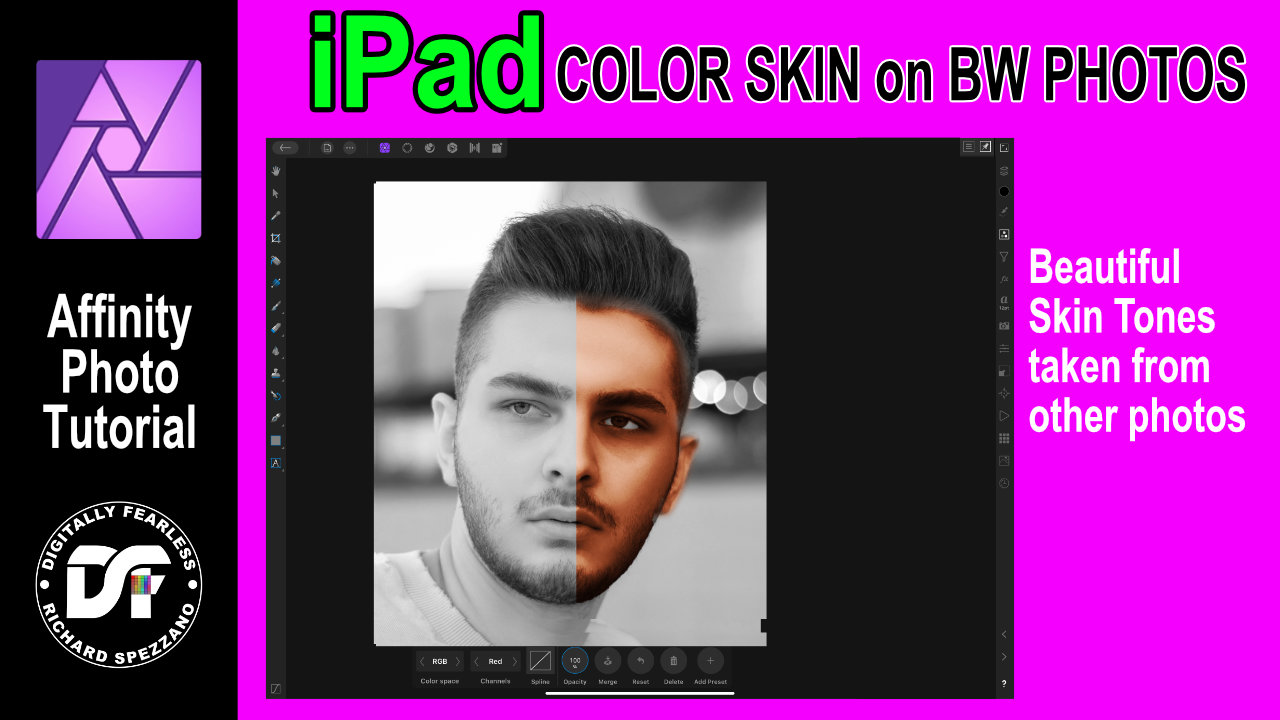
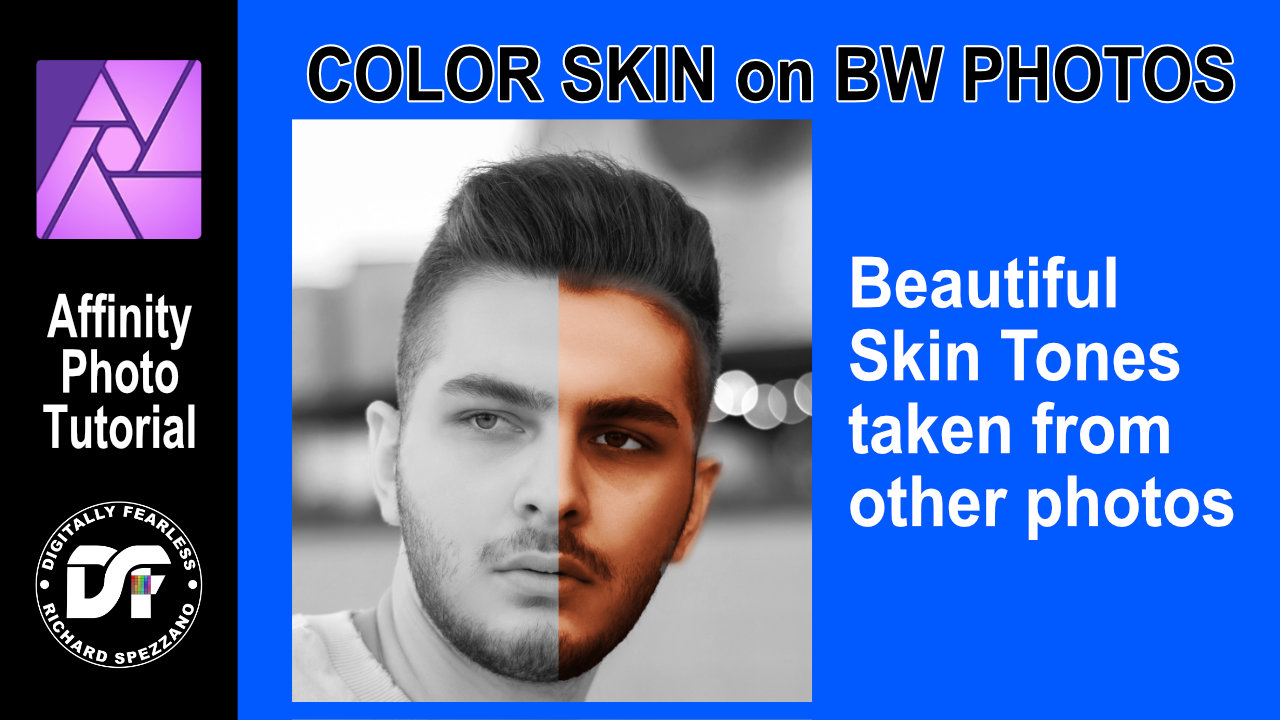
 Add skin tones to black and white photos Affinity Photo tutorial (iPad version) I steal skin tones from other photos to colorize the skin on a black and white photo using gradient map levels and curves. You can also view the desktop version of this tutorial on my channel. #iPad #affinityphoto https://youtu.be/Z6wHBdZU7Pc
-
Add skin tones to black and white photos. Desktop version.Affinity Photo tutorial. Steal skin tones from other photos to colorize the skin on a black and white photo using gradient map levels and curves. https://youtu.be/vWynJ6YG1Do
-
New image. New pixel layer. Soft brush. Blob. Curves layer above image layer. RGB. Select Alpha. Adjust curve. Works just fine. Drag curves to child layer position (mask or clipping). Doesn't work. Standard RGB curves work fine above and as child positions. I tried it also with Channel Mixer and this also only works for alpha adjustment in the in-line position.
-
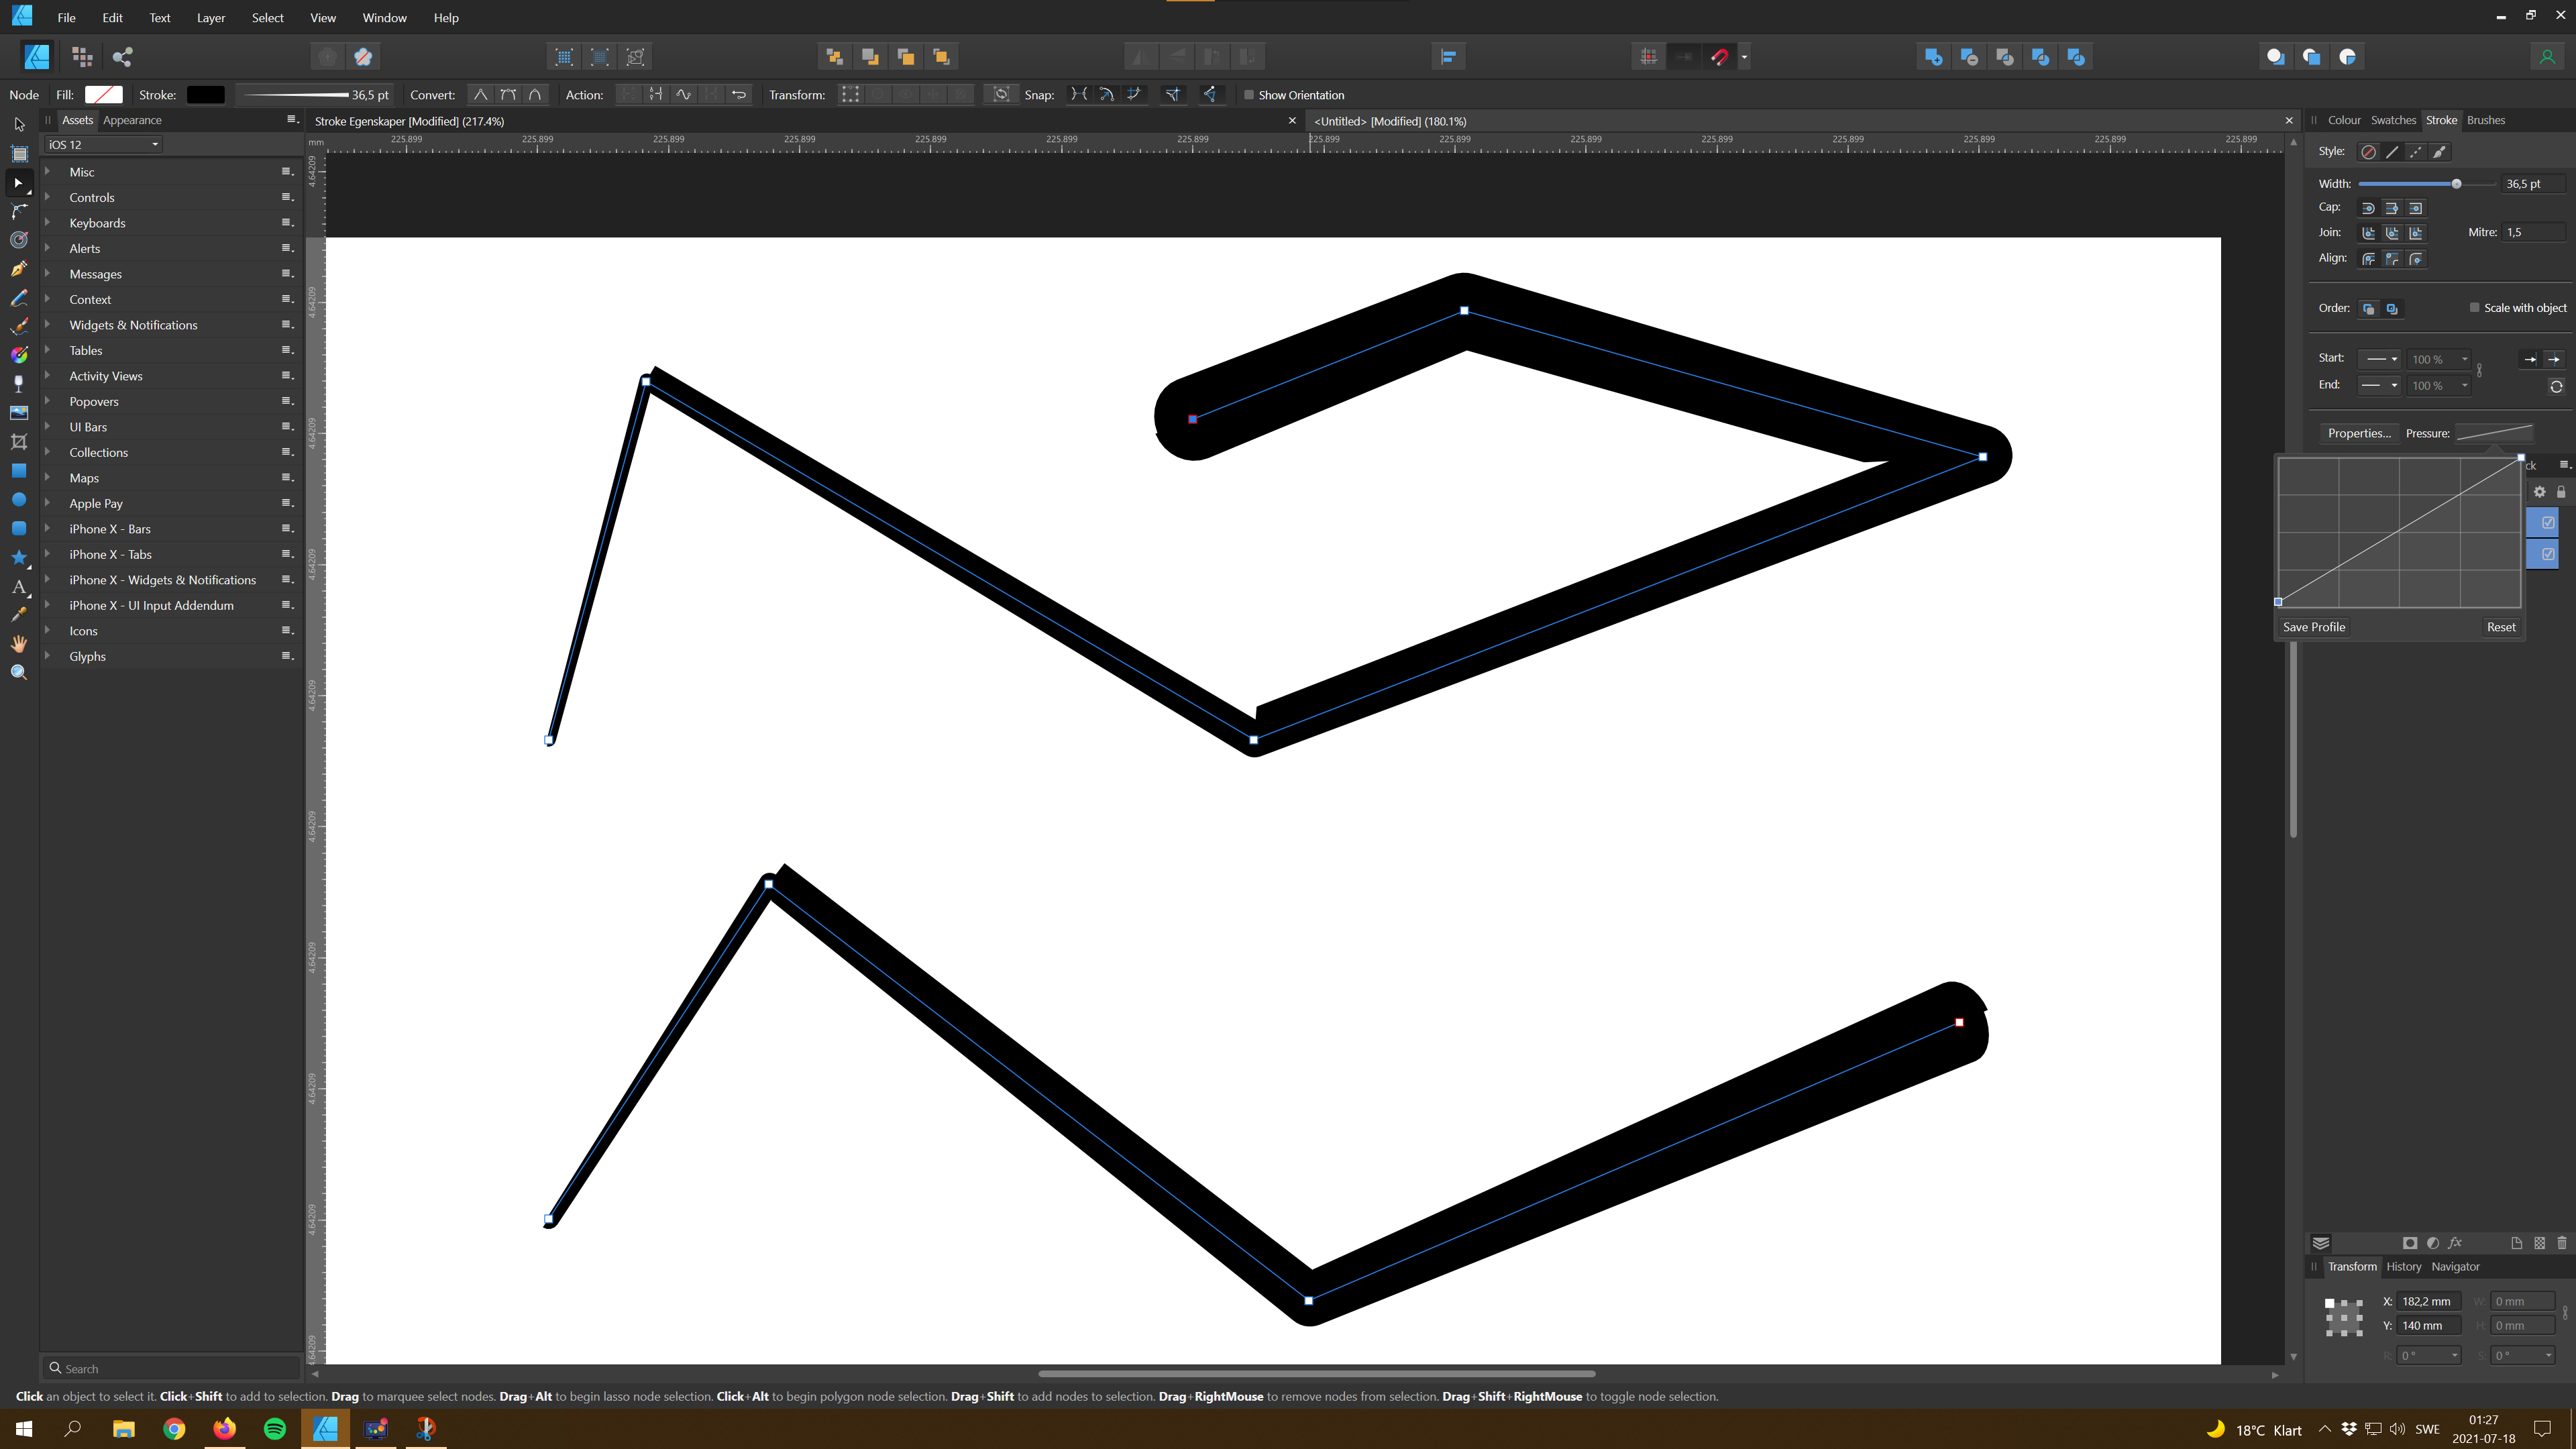
 I don't know if this has been reported already, but thought I'd report my first bug 🙂 I discovered that if you set any kind of pressure profile on a path that has rounded sharp corners; it breaks the stroke of that path. Both lines have round caps and joins. Interestingly enough you get a correct result when you expand the stroke. I'm currently using Windows version 1.9.2.1035 Thank you Serif for such an awesome program!
-
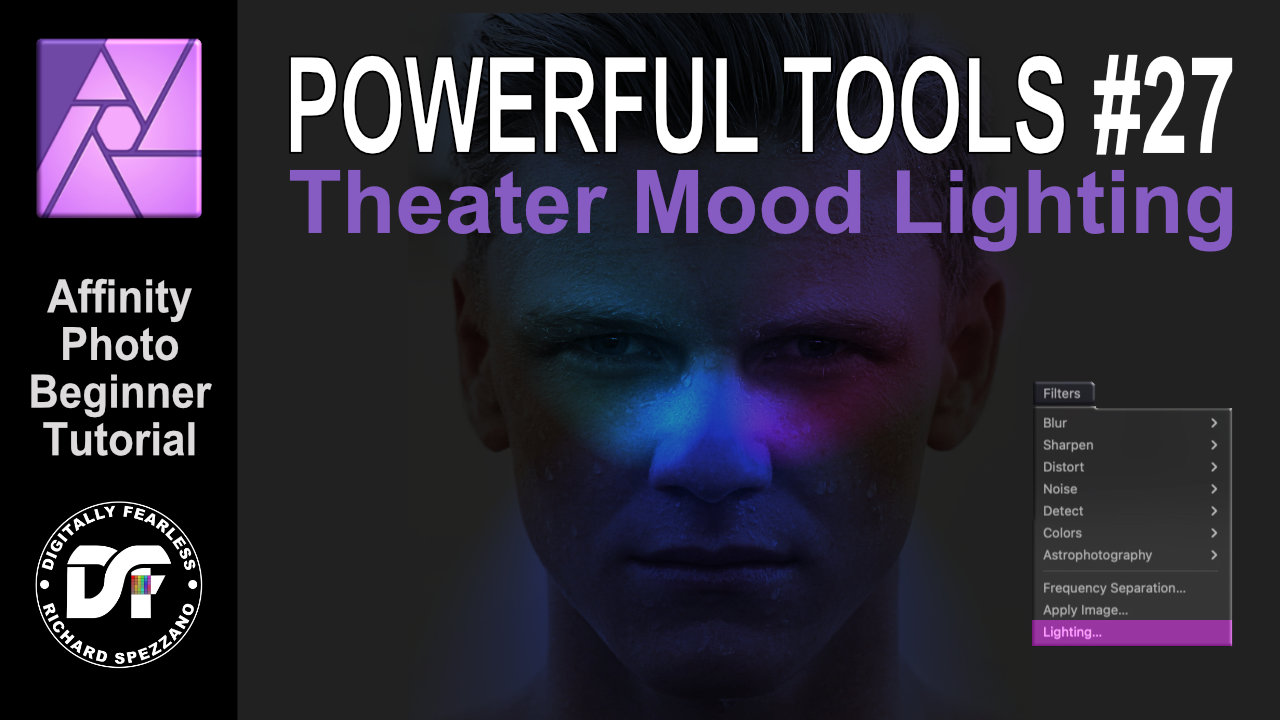
Theatrical lighting using the lighting filter - Affinity Photo beginner tutorial Power Tools 27
-
 After making a selection, I lose all graphical histogram representation in the curves tool. To recreate issue: Open file Make adjustment using Curves (histogram is shown) Create a selection (histogram disappears in Curves adjustment tool. Delete selection and problem still exists Delete previous Curves adjustment and problem still exists. Nothing I do, will bring back the original graphical representation on the Curves tool. This is happening on the current release (1.9.2.1035) as well as the beta (1.9.4.1065) OS Name Microsoft Windows 10 Home Version 10.0.19042 Build 19042 System Manufacturer LENOVO System Model 81Y6 System Type x64-based PC System SKU LENOVO_MT_81Y6_BU_idea_FM_Legion 5 15IMH05H Processor Intel(R) Core(TM) i7-10750H CPU @ 2.60GHz, 2592 Mhz, 6 Core(s), 12 Logical Processor(s) BIOS Version/Date LENOVO EFCN46WW, 12/4/2020 Installed Physical Memory (RAM) 16.0 GB Total Physical Memory 15.9 GB Available Physical Memory 9.47 GB Total Virtual Memory 21.4 GB DirectX version: 12.0 GPU processor: NVIDIA GeForce GTX 1660 Ti Driver version: 466.11 Driver Type: DCH Direct3D feature level: 12_1 CUDA Cores: 1536 Core clock: 1590 MHz Memory data rate: 12.00 Gbps Memory interface: 192-bit Memory bandwidth: 288.05 GB/s Total available graphics memory: 14269 MB Dedicated video memory: 6144 MB GDDR6 System video memory: 0 MB Shared system memory: 8125 MB Video BIOS version: 90.16.4A.00.78 Affinity Photo - Curves Bug.mp4
 -
 It was brought up in this topic: https://forum.affinity.serif.com/index.php?/topic/16297-any-way-to-force-everything-to-paths-when-exporting-to-svg/ Essentially, when I export to svg I want everything exported as <path>'s but I get some <rect>'s even though they are displayed as (Curve)'s. Is there a solution for this?
 -
 Hello, I really need to see adjustment input/output values (percentages) in the curves adjustment layer palet as in Photoshop This is the only reason why I can't switch to Affinity Photo and still use Photoshop I need to see values so I can correct to colors to certain minimal % to prevent breackoff by flexo printing Please .. I really want to use Affinity Photo and asking already 2 years for this feature
-
 I photograph and retouch rings and other jewellery. I've bought AP with the intention of getting rid of 12€/month Photoshop. However, while there are (more or less annoying and slow) workarounds for some of the missing features, there are a few things that AP simply can't do, which is rather infuriating because it means that I still have to keep paying Adobe to get them in PS. So here's a list: 1. A way to stroke a curve or at least to use it as a guide for a brush. Every now and then I end up with a photo that looks a bit too flat. To make the edges a bit more visible I create a path (curve) and then stroke it with a soft brush (20-30 % hardness) and then play with the opacity until it looks somewhat decent. AFAIK AP can render a curve but it does not have the ability to do that usng a custom brush. 2. Adding nodes to a path/curve without switching tools. I find AP's Pen tool to be more user-friendly than PS's version. but I'm missing the ability to add a node to an existing curve/path just by clicking on it without switching to a different tool. PS can detect when the cursor is hovering over a path to then create a node without connecting it to the end of the path. I'd therefore like to see the same feature in AP. 3. Double-click on a node to switch it from Sharp to Smooth and vice versa (like PS's Curvature Pen does). Yes, I know there's a keyboard shortcut for it, but it gets annoying when you have to do it every couple of nodes, and double-clicking on a node currently doesn't seem to do anything anyway, so why not use it for that? 4. Crop to selection, i.e. if the Crop tool is selected and a selection active, snap the crop box to it automatically. It's already possible to do this manually (by checking "snap to selection bounding box" and manually dragging the handles until they snap into place), so I don't see a reason why it wouldn't be possible to make this happen automatically. It would save people like myself who need to drop every photo like this a significant amount of time. 5. Fix saving tool settings. Even with synchronization enabled I still find myself having to switch the Inpainting Brush to sample from the layer below it every time I open a new photo. And before doing that I also need to Shift + J to get said Inpainting Brush instead of the Healing Brush. Why? 6. Limit the Exposure Adjustment layer's range. Nobody needs +/- 20 EV, especially when the minimum step on the slider is 1 EV. Make that +/- 5 EV or even less to get more resolution and make the slider actually usable. 7. Make the Noise Reduction more powerful. This is the exact opposite of the problem above. If I have a wristband or something like that with a lot of dust/scratches/fingerprints/etc., I use NR at maximum strength and minimum details to blur everything together on a new layer, then mask the edges and any details I want to keep to uncover the still-sharp layer below. Photoshop can get a decent amount of blur in one go, with AP I have to re-develop the layer 5 or 6 times to get the same result. All but 2 and 7 have been posted before (even 5+ years ago), and at least 4, 5 and 6 seem like they should be fairly easy to do, yet they're still missing. Why?
 -
 I've been trying to work on mastering skin tones and removing colour casts. I've followed this tutorial but have had no success with my results. I can do all the steps but it seems I not able to nail down the right colour from the skin tone palette to match? I would love to be able to trust the numbers instead of my eyes as at some point my eyes start to deceive me. I love how you can just match the numbers with this method, I'm just need help figuring out which numbers to match. Someone else suggested using the vector scope and curves to keep an eye on my skin tone. I love how they explain that skin is really just grey and the blood under the skin is what gives colour and of course everyone's blood is the same colour. I've had better success with this, except it is still not getting me the right results. A lot of the time the colours do not light up just right on the skin tone line on vector scope. And when working with a very small area of skin, the vector scope window is super small with no option to enlarge that area for more precise viewing. I'd love to be able to see someone edit and colour correct skin tone using the vector scope, or just explain how to pick the correct colour for the skin tone palette method. Thank you
 -
 Hello :) Not quite sure how to explain my problem, but here goes: I am working on a logo design and I used some curves and some type to make it. I would like to make it different colors, so I can present it to my client. The problem is, that I have to select all the curves and change the outline color for them, and then select the type (which I already converted to curves) and change the fill-colour. Is there any way that I can make the logo into a cohesive vector-file, so that I can select the whole thing and change the colour? This would also be helpful for exporting it, so the client doesn't have to deal with this issue, but can just change the color of it as needed? Thanks in advance! I'd really appreciate the help!
-
I've suggested this before and some staff members have said they plan to add this feature, but looking at 1.7's features I thought this would be a good time to bring it up again. Smooth curves are great most of the time, but when you want something to look hand-drawn, you usually need it to be a bit rough. I think many illustrators would benefit from a roughening tool; it would allow illustrators to make non-uniform curves more easily than having to draw each node individually. As it is, it's really hard to produce a line that doesn't look uniform, and a roughening tool to add pseudorandom midpoint displacement would make illustrating much less time-consuming. Last I heard, the plan was to have a brush-type tool that would allow the roughening effect to be "rubbed over" a curve. I think that's is a great idea, but even something as simple as Inkscape's Fractalize feature would be sufficient for many illustrators' purposes.
-
 After dividing the multiple ellipses, instead of required shapes, it caused 100’s of extra curves
-
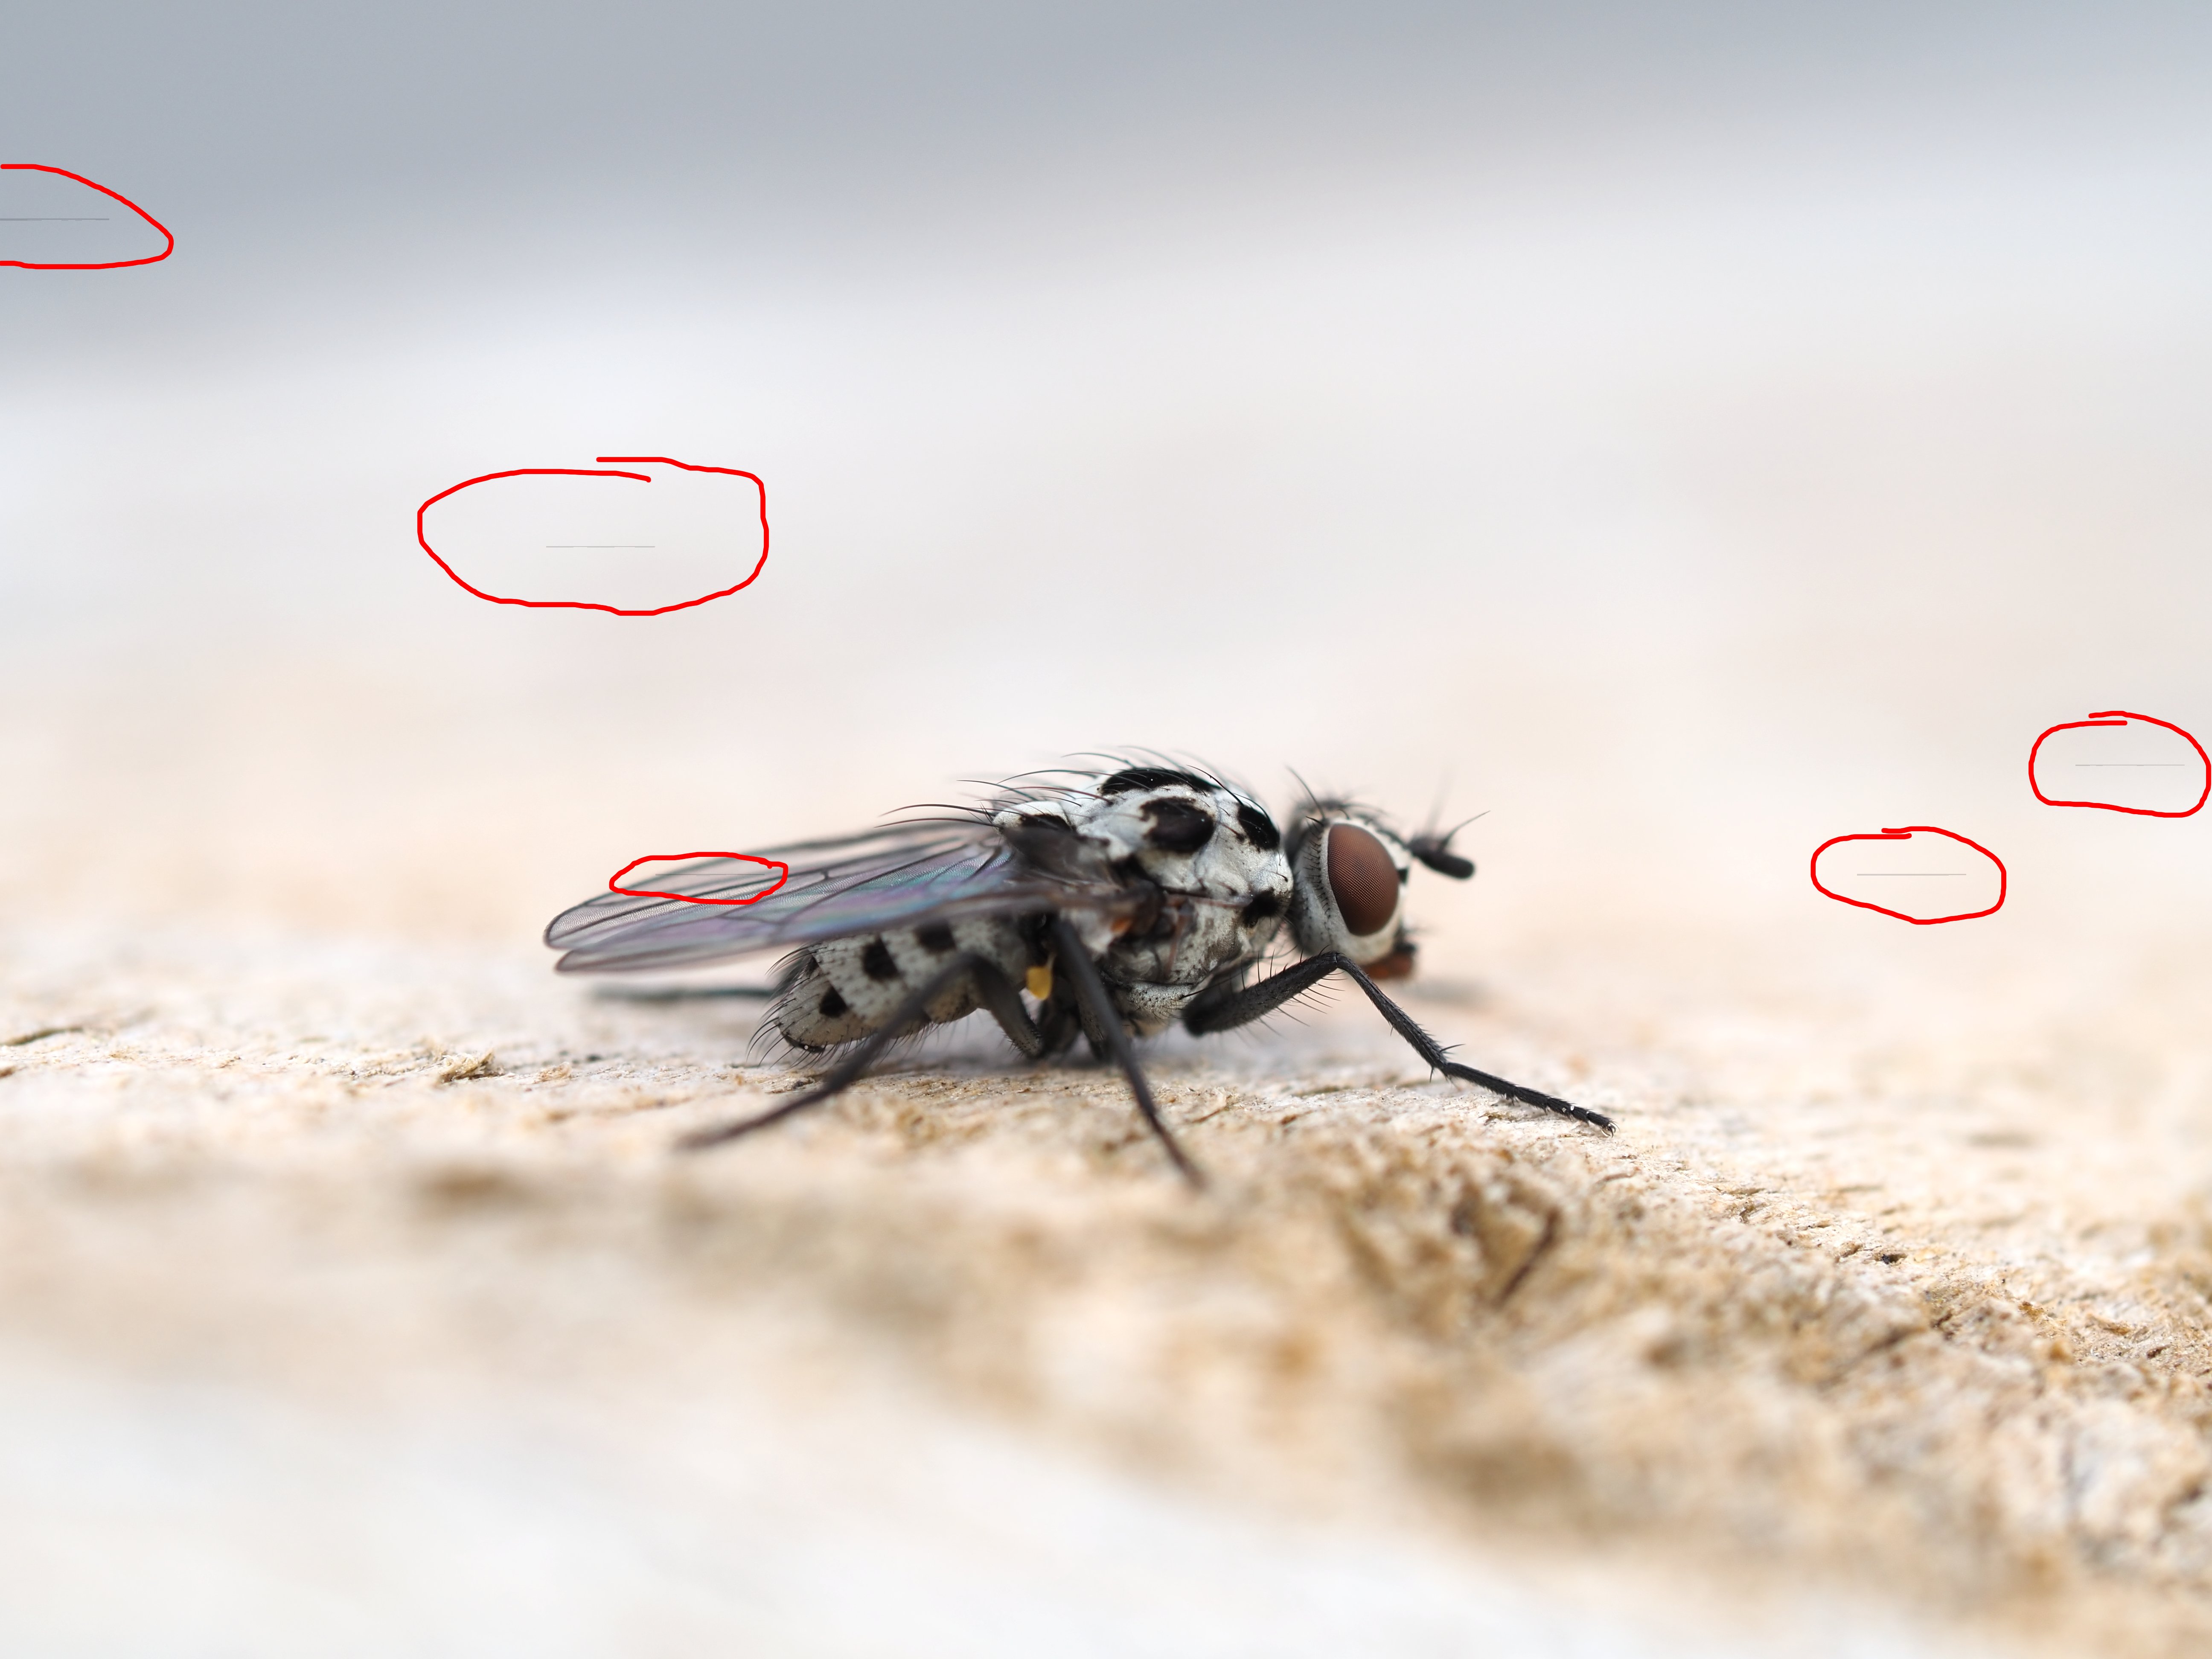
 After making adjustments using levels or curves strange artifacts appear as lines on random parts of the image. I have tried this on various different images and the same problem occurs. The problem occurs after merging adjustments. Below I show a sample of what is happening. I have circled the artifacts in red. This is incredibly annoying and makes the software virtually unusable. I am using windows 10 and latest version of Affinity.
-
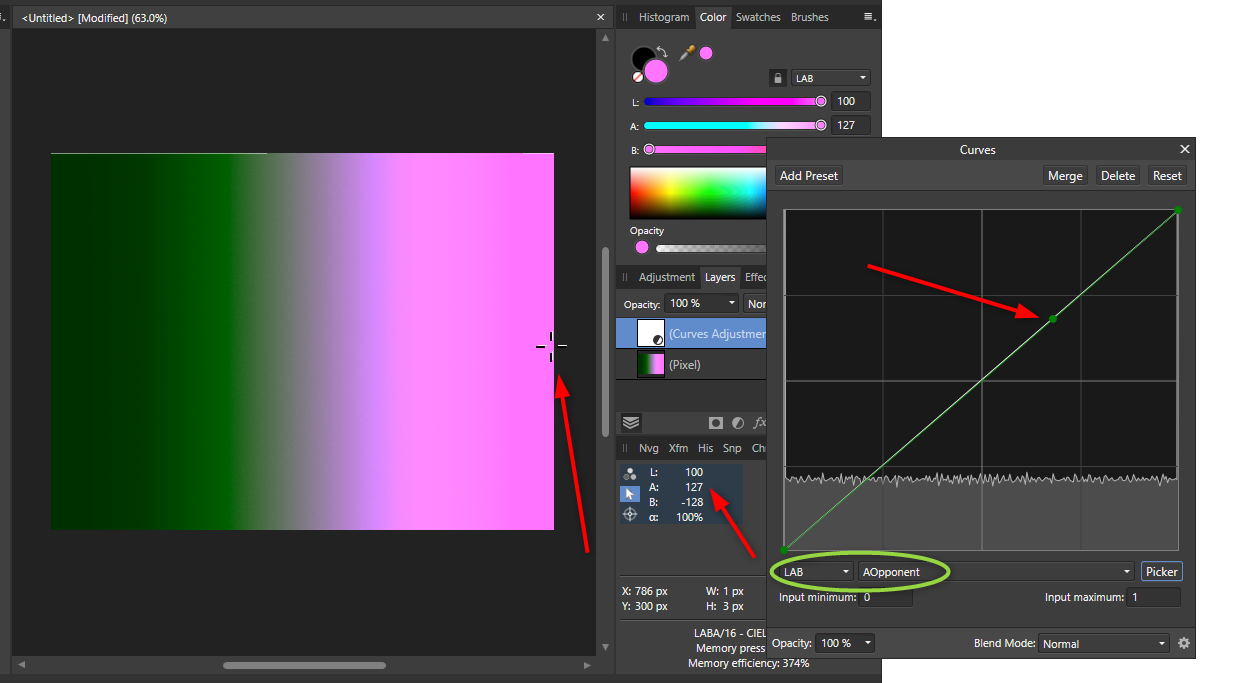
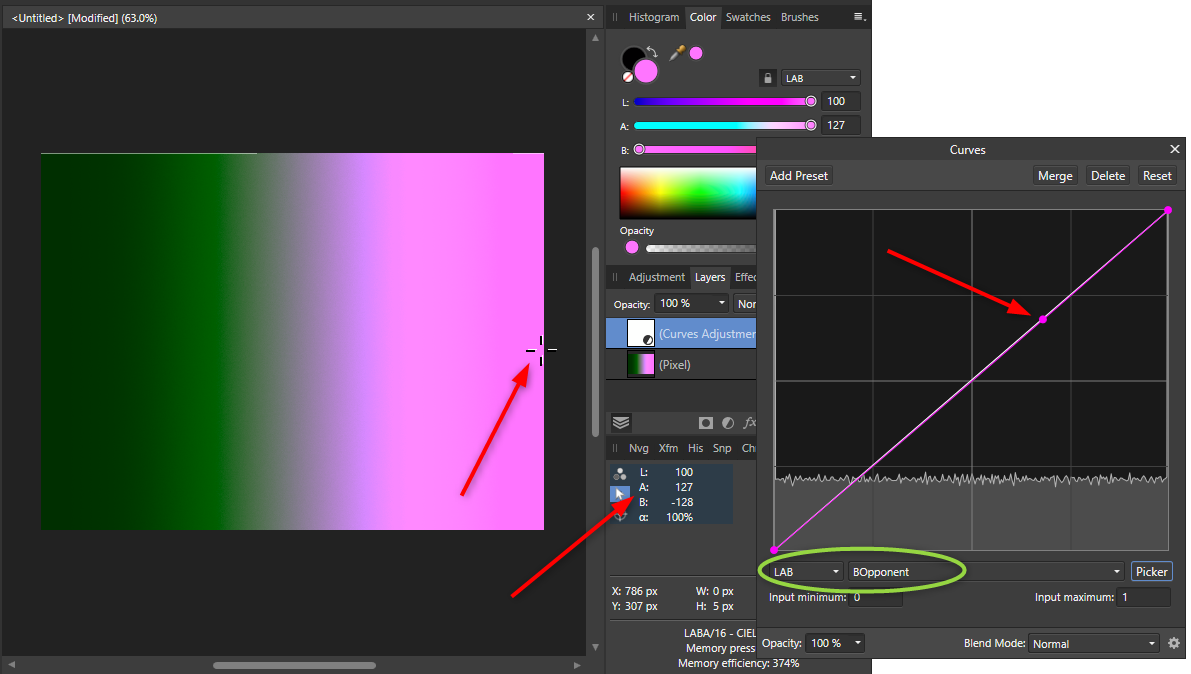
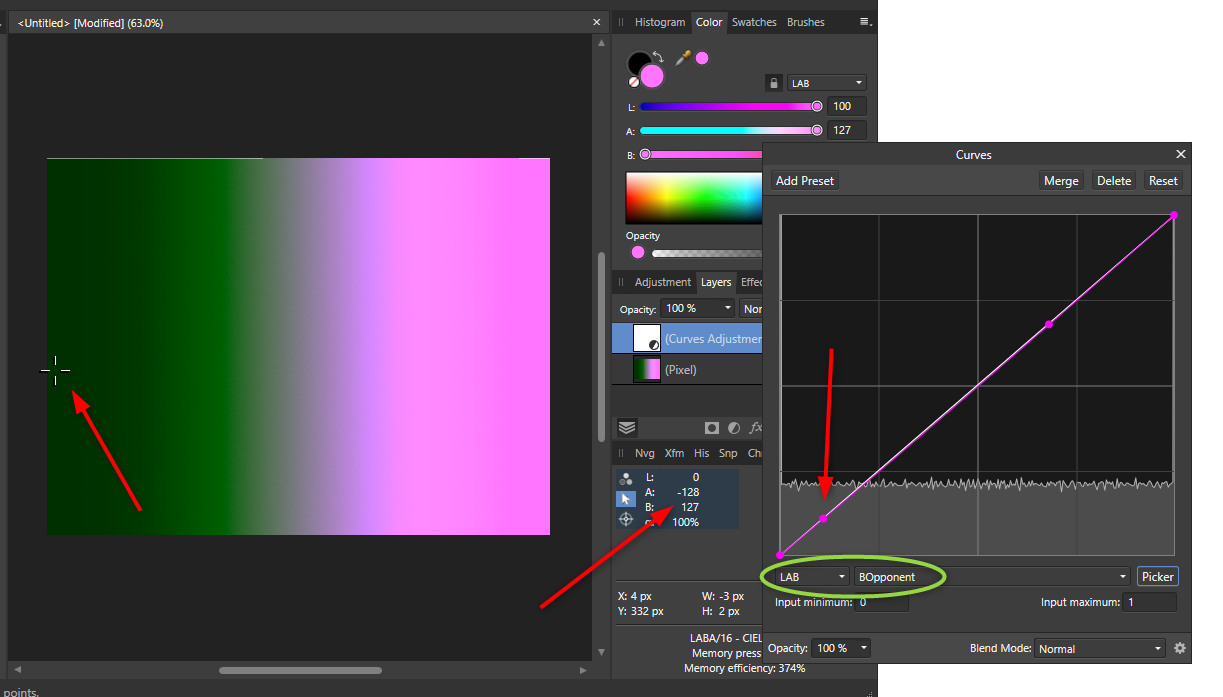
 Hello, I think this is a bug but not 100% sure. In a nutshell, using the picker to create a curves node in a specific color channel (within the curves tool) does not place the node according to the color, but rather according to the overall luminosity. I'm using Affinity Photo 1.8.5.703 on Windows 10. I first noticed it with a photo I was editing in Lab Color mode, but I can repro with a fresh document with a simple color gradient. I've also reproduced it in RGB mode, but let me outline the steps in Lab mode: Create a new document. Convert to LAB Color mode. (I'm not sure if this matters.) Add a pixel layer, and fill it with a linear gradient going from {L=0 A=-128 B=127} on the left, to {L=100 A=127 B=-127} on the right (note the negative symbols). Add a Curves adjustment layer, and choose LAB from the first curves dropdown. Choose AOpponent from the second curves dropdown, and click Picker. Now, notice from my screenshots that if you use the Picker and drag from a point on the far right of the image, it adds a node to the curve. Note the LAB values of that pixel from the Info panel, and see that the A and B are complete opposites of each other. However, if you then do the same thing with the BOpponent selected, it adds the node to the same point in the curve. What I would expect here is that the node is added far to the right in the BOpponent curve, when the B is high for that pixel (and to the left when low).... and similarly for A. However, what appears to be happening is that it places the node based on the brightness (maybe the L value?) of the pixel, no matter what channel is selected in that second dropdown. I have attached my file so you can try yourself. Please let me know if I'm doing something wrong, or... if it's a bug, that would be great to know too! Thank you! :-) curvesGradientTest.afphoto
-
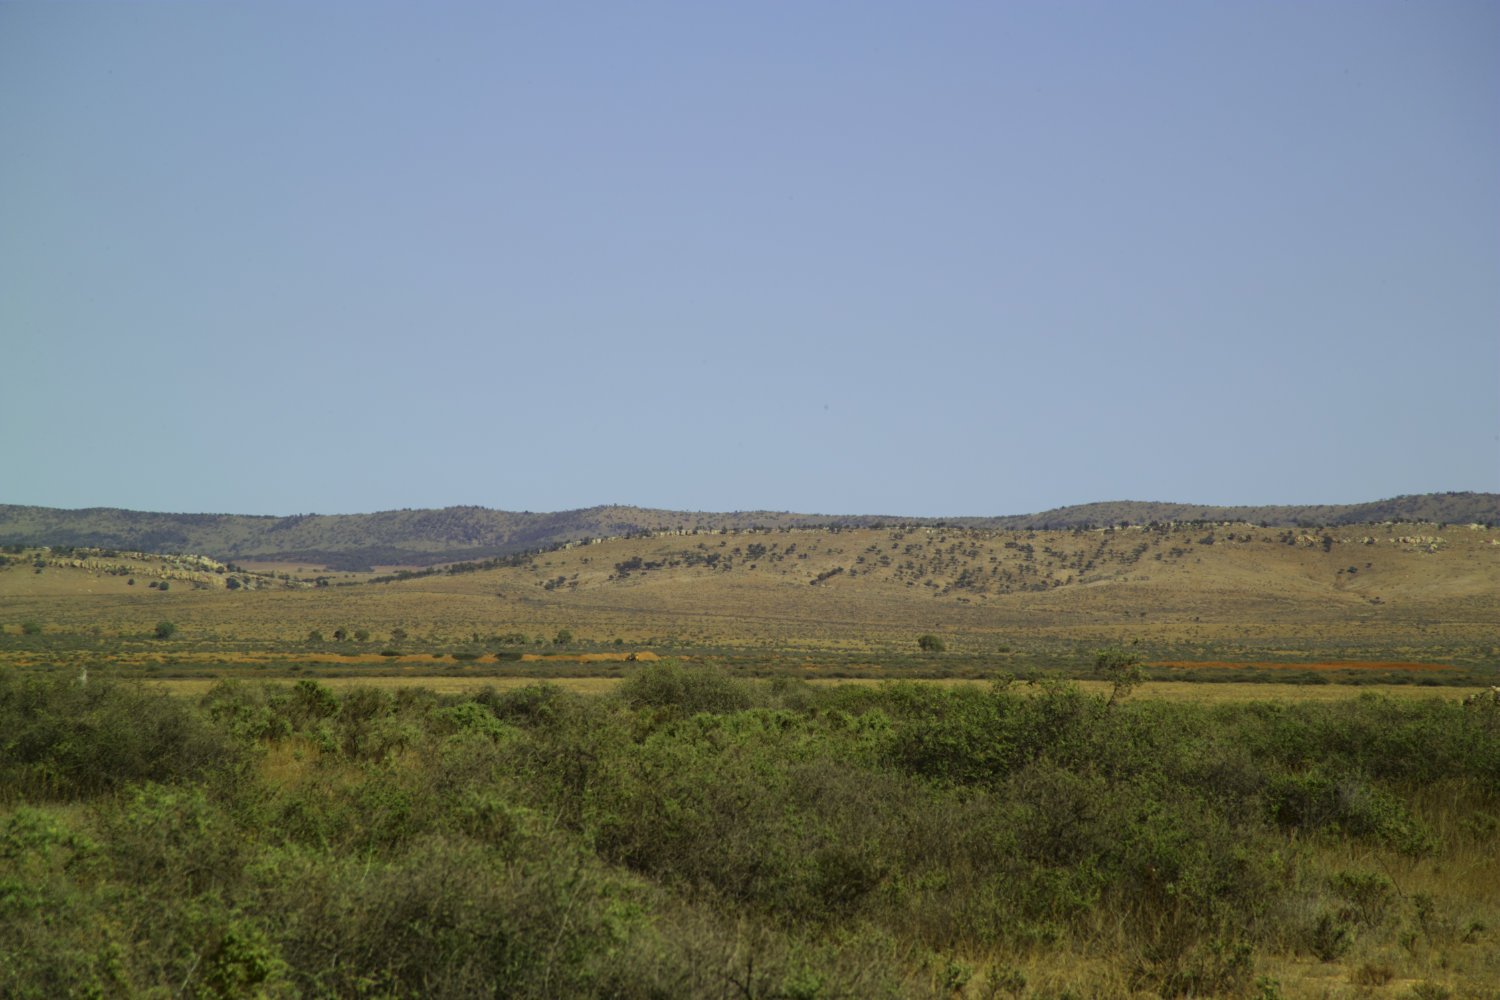
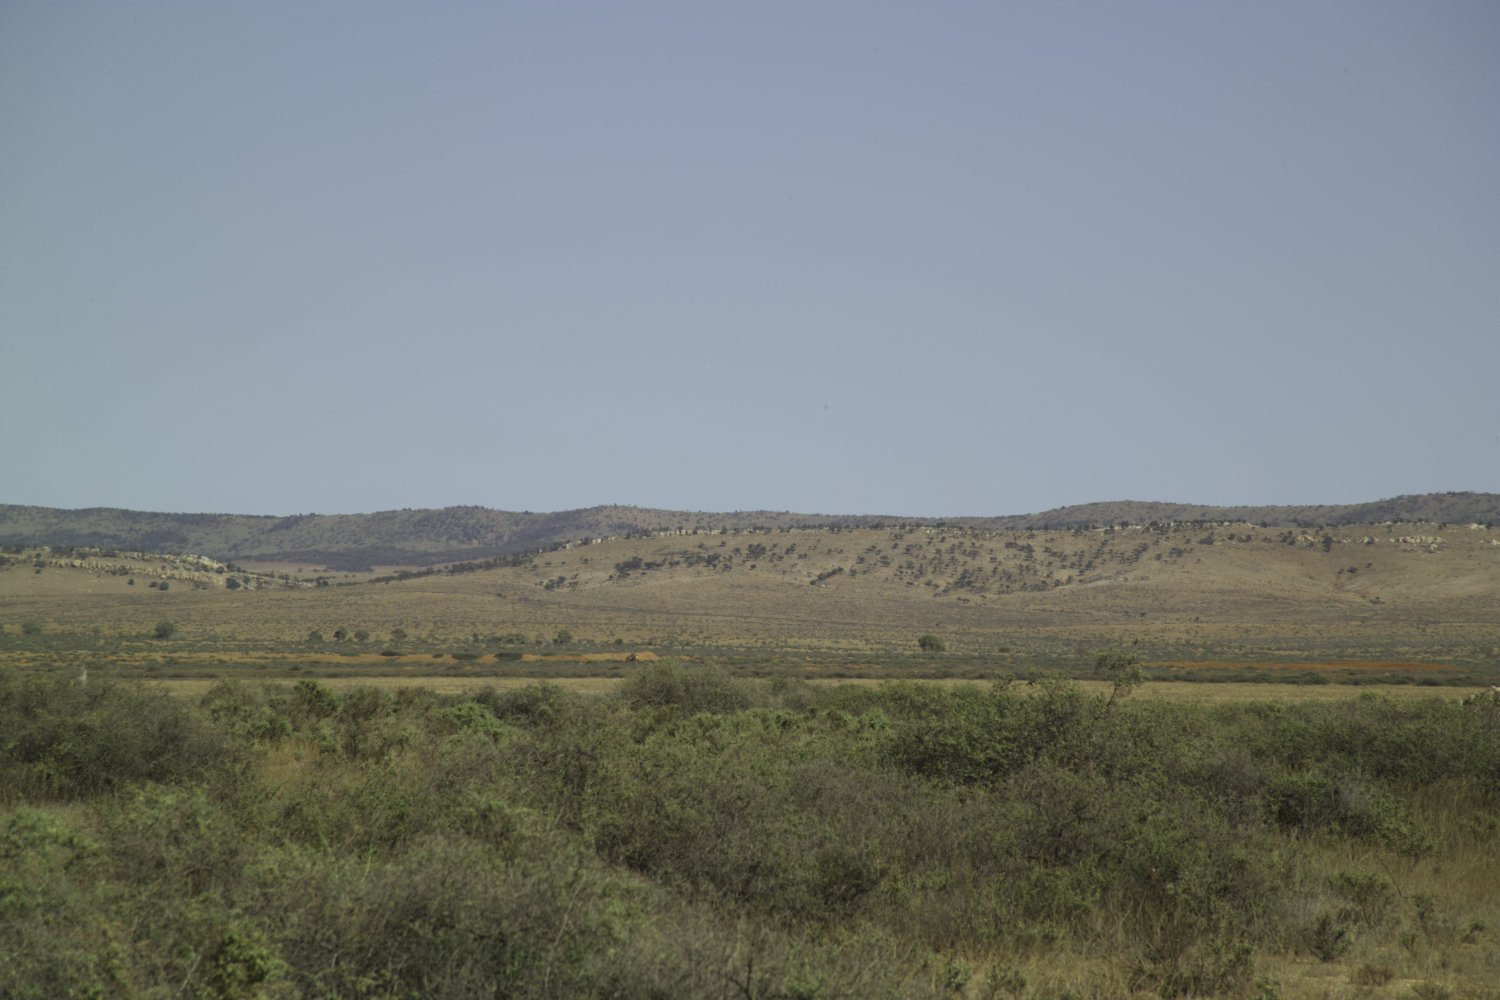
I think that there should be a video showing how to use L.a.b. colour to rescue flat files. I used Photoshop for years for this purpose now I am getting to grips with the different process in Affinity. The present videos do not do justice to this powerful tool. I have attached a before and after edit which only took a couple of minutes using Curves in L.a.b. For your info they are in the South Australian outback. There is much more to L.a.b. and it is the main reason that I chose Affinity when I gave up Photoshop Eric
-
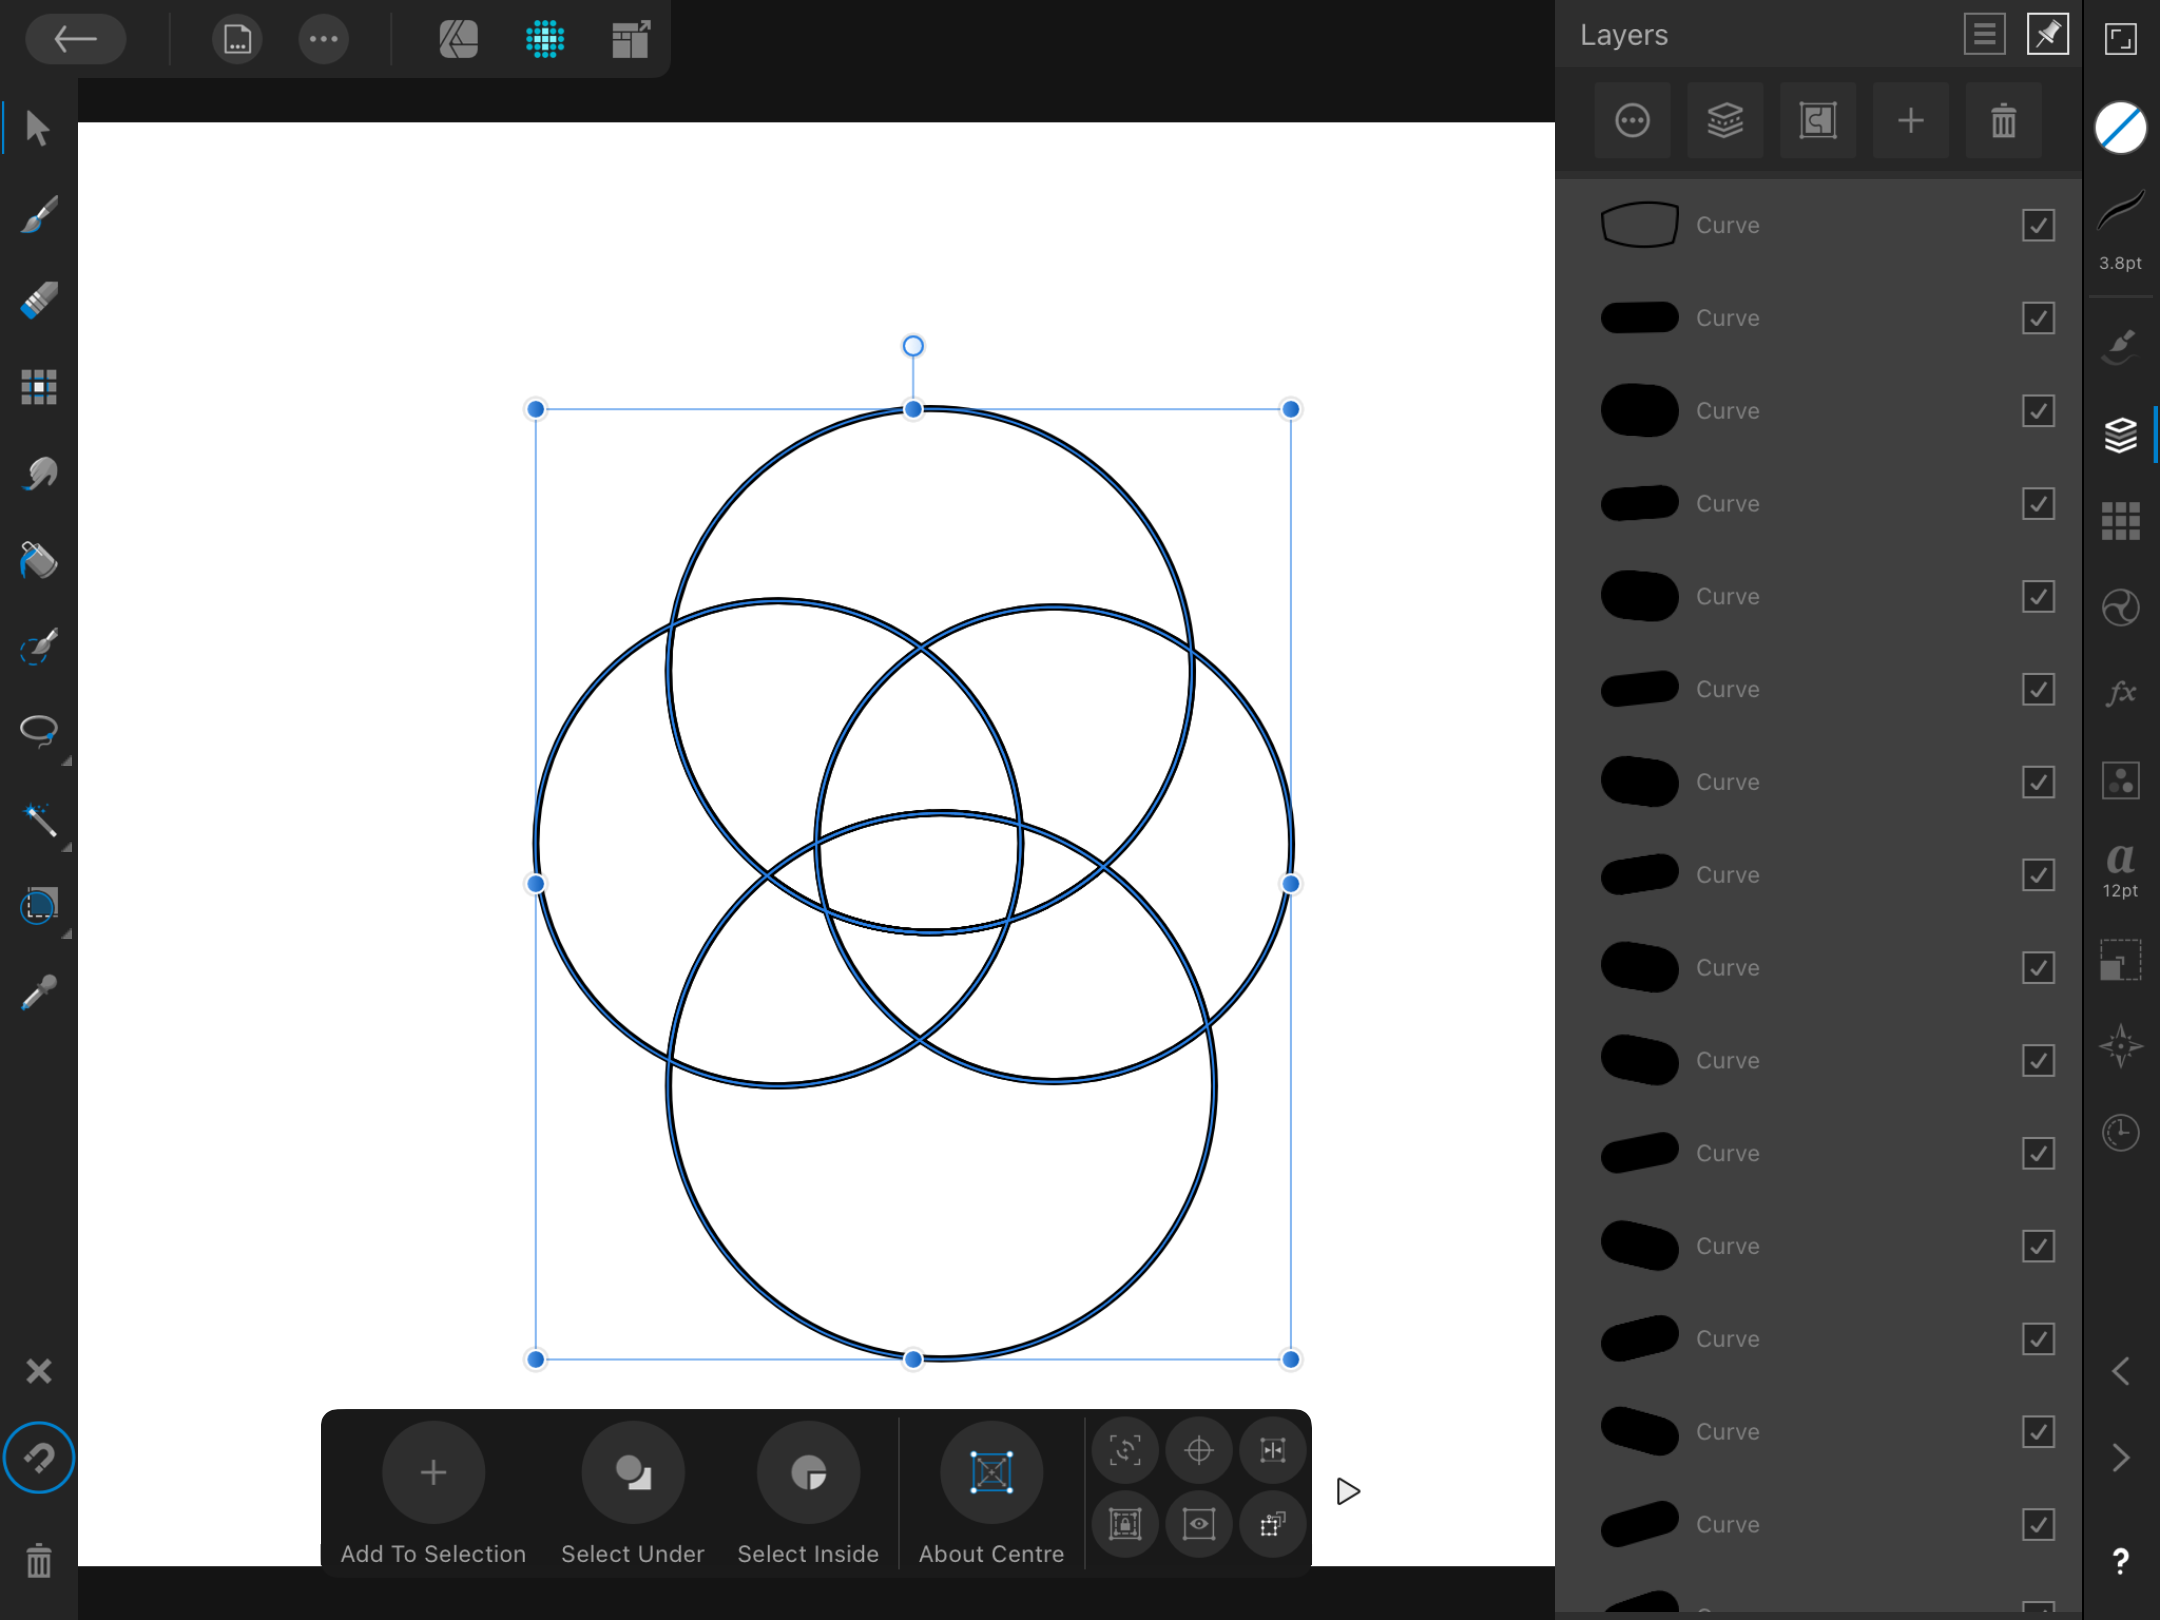
 ## What I Want & The Problem I want to create a large circle with smaller circles following the inner-line of the larger circle at differing positions on the inner-line; yet every time I rotate the smaller circles within the larger one they begin to either clip the larger circle (going over its edge) or become pulled away from the edge (going off of the path) at certain points. (Both circles are perfect circles) ## Approach I've setup ruler guides at the center points on the horizontal and vertical nodes of the larger circle and I snap the center-edge of the smaller circle to the larger circle's right-side node (without clipping) after that I take the smaller circle's "Transform Origin" and place it in the center of the larger circle; then I duplicate the smaller circle and begin rotating them individually around the larger circle by selecting a single small circle and the larger circle and then choosing the rotate handle. Whilst doing this multiple times around the larger circle there begins to be points around the circle where the smaller circles are no longer attached to the edge of the larger circle. Any help will be appreciated. Thank you, EC71PZ


14_54_43.png.d2ae6ea171dfc3e7d705d6d1f623da3f.png)