Search the Community
Showing results for tags 'clone'.
-
 Title.
 -
new windows feature request to use a right mouse button click to select clone source
-
 Any help is very appreciated. I am new to Affinity and I can not seem to find the "clone tool" or the "inpainting" deal. Thanks for the help. That's a big reason of why I bought this software.
-
In the liquefy persona the clone brush is not working. It does nothing. I keep getting the little assistant box telling me I must press ALT to select a clone ounce. I have of course done that. thanks
-
 As soon as I press the Alt Gr-Button for increasing or decreasing the tool size with "[" or "]", the tool tip changes to the cross because of the fact, that Alt Gr is used to set the copy offset position. To see the current size of the tool tip, you have to release the keys. I suggest to use a circle in tool tip size with small cross lines to indicate the action of setting the copy offset position.
-
 I'm a graphic artist who has worked with PS in its various iterations for years. Unhappy about paying thirty bucks a month for a professional subscription with a lot more bells and whistles than I actually wind up using, and seeing a lot of buzz about Affinity as a genuine alternative. (No, thank you, Gimp and Corel, I'm too old a dog to learn your new tricks...) So, I'm checking out Affinity on the ten-day trial right now. At first glance I'm impressed. At second, actually loading and playing inside the program, it seems to have a simple workflow with all the shortcuts and quickbuttons I'm used to, enhancing the learning curve... BUT immediately upon importing a project and trying to work with it as I would normally, I notice some aspects missing that I'd consider absolute essentials for a minimum standard of design and editing, and some peculiar responses that feel like glitches. a) There is no easy way to merge or delete layers en masse - ridiculous. The 'merge visible' or 'delete hidden' control is crucial for getting through blends quickly and efficiently.b) Where is my clone brush? One hard-edge, one soft-edge: so vital for making basic repairs to any pixel-based image. c) copying over multiple layers from one project to another seems to produce uneven results, edges misaligned or showing up in strange ways. C&P should be exact, not approximate.d) Switching from one tool to another should not also switch you into a different layer. You can really foul up your project by drawing or erasing on the wrong layer, especially if it already contains pixels which you are 'painting over' or images you are enhancing. At the very minimum, you lose the work you've done if you've, say, traced directly on your reference image rather than the layer above it, as a simple example.e) This might be me missing something, but the 'flood fill' doesn't seem to have an opacity control with it, just a boundary sensitivity. I tried adjusting it in the colour panel on the right with no results, and then tried 'fill opacity' under the Effects tab, which made my entire original image opaquing, but had no effect on the actual level of fill. Sometime you just want a subtle blush of colour added to an object, not the crude spraycan of MS Paint. (The 'smudge' also has a very different feel, like trying to use my fist instead of my finger to blend. Maybe I just need to fiddle with settings and get used to it.) If I could get a clone brush and a layer merge, I'd pay the fifty bucks for this program so fast Adobe wouldn't see my dust. Can someone give me some workarounds, or are there pro solutions coming to these issues? With appreciation - Bard Judith (http://graphictional.weebly.com)
 -
 I'm not sure if this is a bug or a glitch in my AirPad 2 but the Clone tool remains aligned even when I got to the context bar and UN-select Alignment and with <None> as the controller.
 -
Good afternoon, I want to clean some spots on an old photo with the clone tool brush. In the past I selected an area near the spot with Alt/Click and filled in the spot with Click/Drag. But since the update 1.5 it doesn't work anymore, no matter what combination I try. I use a Macbook Pro with the latest version OSX. Regards, Maarten
-
 Maybe i'm missing it? I need to make copy some pixels i now have to select, copy and place pixels as new layer, move, then merge. Seems like a standard feature for modifying pixels in any bitmap editor.
 -
 Hi to all. Newbie to this program and studying in depth on many tutorials. Still hard work getting familiar.! Main question right now is to do with cloning -- when I have set my target spot, that moves with the clone destination brush. However, in an old program I used a lot (Picture Publisher) I was able to lock the target point so that clone brush could move anywhere using that target content. Is this possible in photo? I couldn't find an answer to this anywhere so far - sorry if it's been covered before.
 -
 What's the best way to clone/heal on an image that isn't fully opaque? For example, if I wanted to remove the splat from the attached file. I can use the Inpainting Brush tool as it preserves transparency, however depending on the image the inpainting tool doesn't always work, so I'm looking for a way to manually choose the clone source (for example with the Clone Brush tool, the Healing Brush tool or the Patch tool). However, those tools multiply the transparency making the cloned area darker.
-
 I've purchased Photo and Designer both, although my preference is to use Designer. I've spent many hours learning from the Affinity tutorials (good job making those too!) I'm not a graphic designer by trade, but love creating my own business graphics. To this end I'm working on a project that I started in Designer, but all of a sudden I could not find the clone tool. Nor did I find it in the help section. So I go over to Photo and sure enough, there is a clone tool. However, when I go to bring up my saved file from Designer (afdesign), Photo says it can't open that file type? Do I have to 'export' the file from Designer simply to work on this one small area of the project in Photo? Honestly, this may be enough to drive me back to Photoshop. I already have tons of actions and styles I can't use in Affinity products - at least as far as I can tell. I understand having different versions of a product, but there are some things that seem universal - including not just copying an area, but needing to clone a particular layer in another area. This is a file I'd created in Photoshop many moons ago. Thanks for any assistance! Debbie
 -
 AD is always very 'generous' in creating extra elements when I never asked for them. This is without option dragging or duplicating as a command. Result is I go to move something there are 3 copies underneath. Or because of the same... apparent transparency get's thickened up when i don't want. I've been getting this since the earliest version (I'm an early AD adopter), just put up with it but now we're 1.5 - really this shouldn't be happening Not sure where bugs get posted, can't believe others haven't had this issue. Can this be fixed soon please, or is there something I may be doing to create it? (Running on El Capitan.)
 -
 I'm trying to clone on area, and use it to paint another part of the image. But when I start to drag the clone brush, it begins picking up other parts of the image, tied to a small cursor. How do I get rid of the cursor and just use the area I have selected?
 -
 What is the key stroke for clone that looks like a z- on mac
 -
 I'm new to AD and have only limited experience with vector graphics programs in general, so please bear with me. I'm trying to use AD to create a watch face. I have done this using GIMP in the past with few problems, but am hitting some frustrating issues with AD. I want to have the following markers displayed along the outer edge of the watch face: sub-minute markers 5 per minute. Rotation = 1.2 degrees. Minute markers = 6 degrees Hour markers = 30 degrees I create my 1st marker as a vertical line at the 12 o'clock position, then cmd-J to duplicate, move the rotation center to guides at the vertical and horizontal center of the face, rotate it (painfully) by zooming in and dragging to the desired 1.2 degree rotation, then use cmd-J to make duplicates. I've been able to use Power Duplicate to create small numbers of duplicates, but find it "drifts" when trying to do larger numbers. I have tried clicking the outside center, inside center and center buttons in the transform box with little success. I have tried entering 1.200000 as the R value in the Transform box. By the time I generate enough sub-minute markers to get to the 90 degree position (75 duplications), I see 2 common problems: The rotation value has drifted by +.3 degrees. At 90 degrees, the final marker is at 90.3 or worse. The rotation center drifts, resulting in a spiral effect. This "drift" is so bad that my hour and minute markers don't even align properly. This is all compounded by having to rotate using the mouse, as entering values directly into the Transform R box changes the rotation center. The only workaround I've found is carefully creating a small number of markers, duplicating these as a group and rotating those. I'm finding this much slower than I expected. In GIMP, I'd create the 1st marker, duplicate and rotate 5 markers, merge those layers, duplicate and rotate 6 degrees for the next minute and successively merge, duplicate and rotate until I could produce a dial in a few minutes. I have also purchased Affinity Photo, but don't see a better solution there, and I'd prefer to stick to vectors. I don't think there's anything much simpler than a watch face, yet I'm finding this very difficult to achieve. Am I missing a fundamental trick?
 -
 Hello, Just started vectoring my first big piece of artwork with Affinity and hit upon a snag... I cant find the eye drop tool? Within my work process I create a shape, add outline colour, point thickness, apply internal colours and style - then when creating a new shape that requires the same treatment click cmd + i, bringing up the eye drop tool which clones styles onto the new object. Is this possible in Affinity? its a bit of a pain to manually do each shape and item.
 -
 Hey, Just wanted to share the latest tutorial with you all. This week we take look at a practical use of the new artboards feature in Affinity Designer. In this episode we create four album artwork covers for use in iTunes or Soundcloud. Click the link below, enjoy and subscribe to stay up to date. Allan How to create album artwork
- 2 replies
-
- 3
-

-
- tutorial
- album cover
- (and 7 more)
-
 Hi, I just downloaded the trial version today [25/09/2015] and installed it on my 2 week old iMac with Yosemite. Presently I use Photoshop Elements 9 and didn't want to spend a lot on more software for my new computer. I like the initial look and feel of the program and the fact that command-L brings up the much used levels option that I am used to. Another aspect of Photoshop that I sometimes use is the clone stamp tool and I tried this next, It works the same way as Elements in that alt-click selects the starting point and shows a little "+" as the source point. But when I start trying to clone the way I do in Photoshop nothing happens. Opacity and flow are both at their default 100% and hardness at 80%. Am I doing something wrong?
 -
 In addition to the current sampling settings in the Healing Brush etc., a "Current Layer and Below in Group" option would be very useful. One frequent use case would be frequency separation. I like to use two groups, one for the low frequency and one for the high pass image. I can then create additional layers in each one. For the low pass group, that's pretty simple since "Current Layer & Below" will work fine. To work with layers inside the high frequency group, however, I need to manually hide all layers below until I can clone/heal from the high frequency image only onto a new layer. That means I currently get no live preview of my results, and checking what I am doing involves manually selecting and toggling all layers below all the time. Being able to restrict sampling to the current group would solve these issues. Also, a checkbox inside the Frequency Separation command to create groups with layers in them instead of single layers would save the trouble of creating the groups, setting the high frequency layer's blend mode to normal and setting the high frequency group's blend mode to Linear Light every time, and it could even create empty layers above each base layer as well. While I am at it, it would be very nice if the Blemish Removal Tool could also get sampling options since that is really the only way one could work non-destructively with that particular tool.
 -
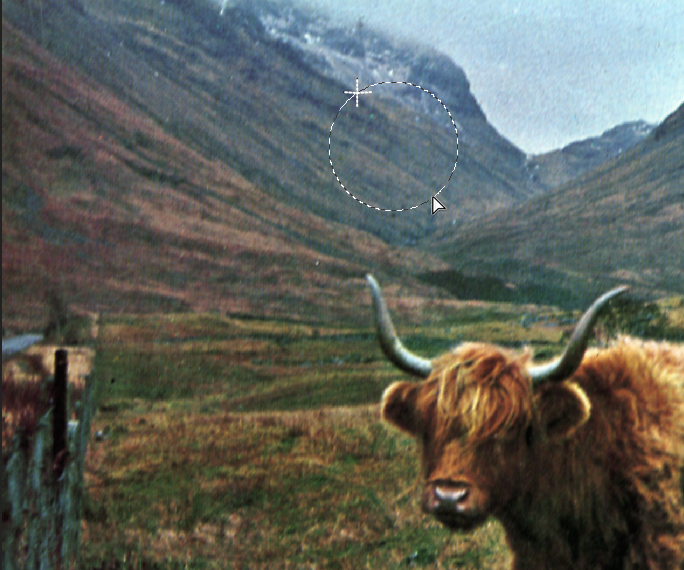
 I wish there is a possibility to adjust the width of a brush by pushing maybe alt-cmd +klick. A virtual circle shows the new diameter of width ... you are done. No fine tuning on the width tool again and again!
-
As a portrait photographer, I use editing software for retouching and portrait editing. I'm also a big stickler for nondestructive editing. I've only been working in AP for a few days, and I'm still struggling to figure out how to create a nondestructive workflow similar to the one I use in Ps. Is there a way to use the clone/blemish/patch tools on a blank pixel layer to leave the background layer as is? If not, I would like to request that feature. It's a deal breaker for me. I'd also love to hear how other retouchers are adopting AP and about your workflow. Thanks!
-
How does one get the Clone source to remain stationary? With Aligned Off, the source should not move with the cursor, but the source follows the cursor whether Aligned is On or Off. Never mind. That was wishful thinking on my part.
-
Hi there, thank you so much for replying every single post i've made that's insane in the good way of course. So in the past i've used one GIMP where you find a tool called Clone brush, and with the brush you can clone in one determined point the objects that you're brushing. Is that the same than symbols? I think that's a cool feature.
-
Hi Guys, Going from Inkscape to Affinity designer was been an awesome experience. One of the things I really liked in Inkscape is a tool called clone. When you change the original the clones all change as well. This makes it easy to make symmetrical icons and logos. not sure if its already in here or not, but It'd be nice to have. Cheers,