Search the Community
Showing results for tags 'blend'.
-
 Layer Blending Modes and Blur Effect Hi, …I just have a question regarding Layer Blending Modes and a Blur Effect. Is there a trick for applying a Blur, delimited by a vector object (Object A) located in the foreground, on a background (Background B) located behind?… The idea is to be able to move Object A over the entire surface of Background B, always with this quality of Blur which then applies to Background B. The solution, one-off and much less flexible, is to create a new Group (Group C), duplicate Background B in this group, apply a mask to it with Object A and a “Gaussian Blur” layer effect. But, if we move this Group C, it will no longer be aligned with Background B!…
 -
 Blend tool (object blending) has been requested since 2015. It's a crucial part of doing parametric / creative work. Any chance to put in onto priority / pipe? Thanks
- 122 replies
-
- 38
-

-

-
- blend tool
- blend
- (and 1 more)
-
 Please increase the number of attributes recognized by Power Duplicate, and let it use them all at the same time. E.g. Imagine you could start with a square, round its corners a bit, add some color, change the transparency and line thickness, and only now would you apply the power duplicate. You would end up with a chain of objects resembling more and more circles instead of squares, having more and more of the added color, being more and more transparent, and, and, and... That would make life a little easier. Alternatively: a blend/morphing tool as in some other applications. We would choose a start and end object, and Designer would allow us to transform them into each other, producing an adjustable number of intermediate objects.
 -
 Double Up! In this beginner Affinity Photo tutorial I double the photo and double the blend mode to produce some interesting photo manipulations. This is number 37 of my Powerful tools of Affinity playlist.This tutorial is shown in iPad and Desktop. https://youtu.be/0fE7Du_-4-M
-
- 1
-
-
- affinityguides
- tutorial
- (and 4 more)
-
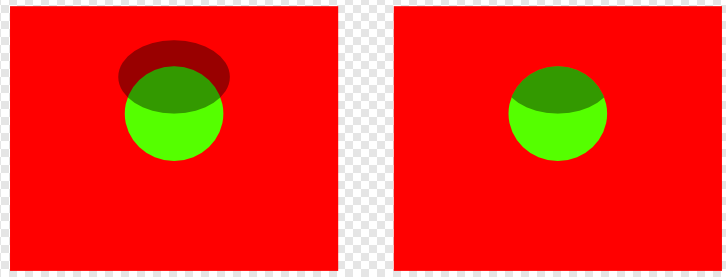
 I know that it's possible to do some tricks with using a copy of the layer one wants to apply a blend mode shape's effect to (optionally kept synchronized with the symbol feature) as a mask for the blend mode shape, but that's circuitous (and somewhat lag-inducing when that means copying complex layers) and is a lot of effort for something that workflow-wise should probably be fairly simple, so it makes me feel that I'm probably missing something when it comes to the correct way of doing this. To clarify, let's say I have a shape A that I want to apply a shadow to using shape B (which has its blend mode set to Multiply), but I don't want shape B's darkening effect to apply to any part of shape C, which is beneath A. Do I need to make shape B match shape A's, well, shape perfectly (either via use of a copy of shape A as a mask, or via manual editing), or is there a trick to get Affinity Designer to ignore the effects of shape B on shape C, which is outside of the A-B group? Below is a picture showing the situation, with shape A being the green circle, shape B being the darkened circle above it, and shape C being the red rectangle; left is what happens if I don't edit the shape down (regardless of use of groups), right is what I would like to have happen.
-
A simple glow - photo manipulation for beginners. Affinity Photo tutorial. This is for those just starting out in Affinity Photo. I kept the video short and there is so much more to improve the look of the photo, but I just wanted to give you a start. It uses layer fill, HSL, masks and blending modes. https://youtu.be/lsX9UW_rMps
-
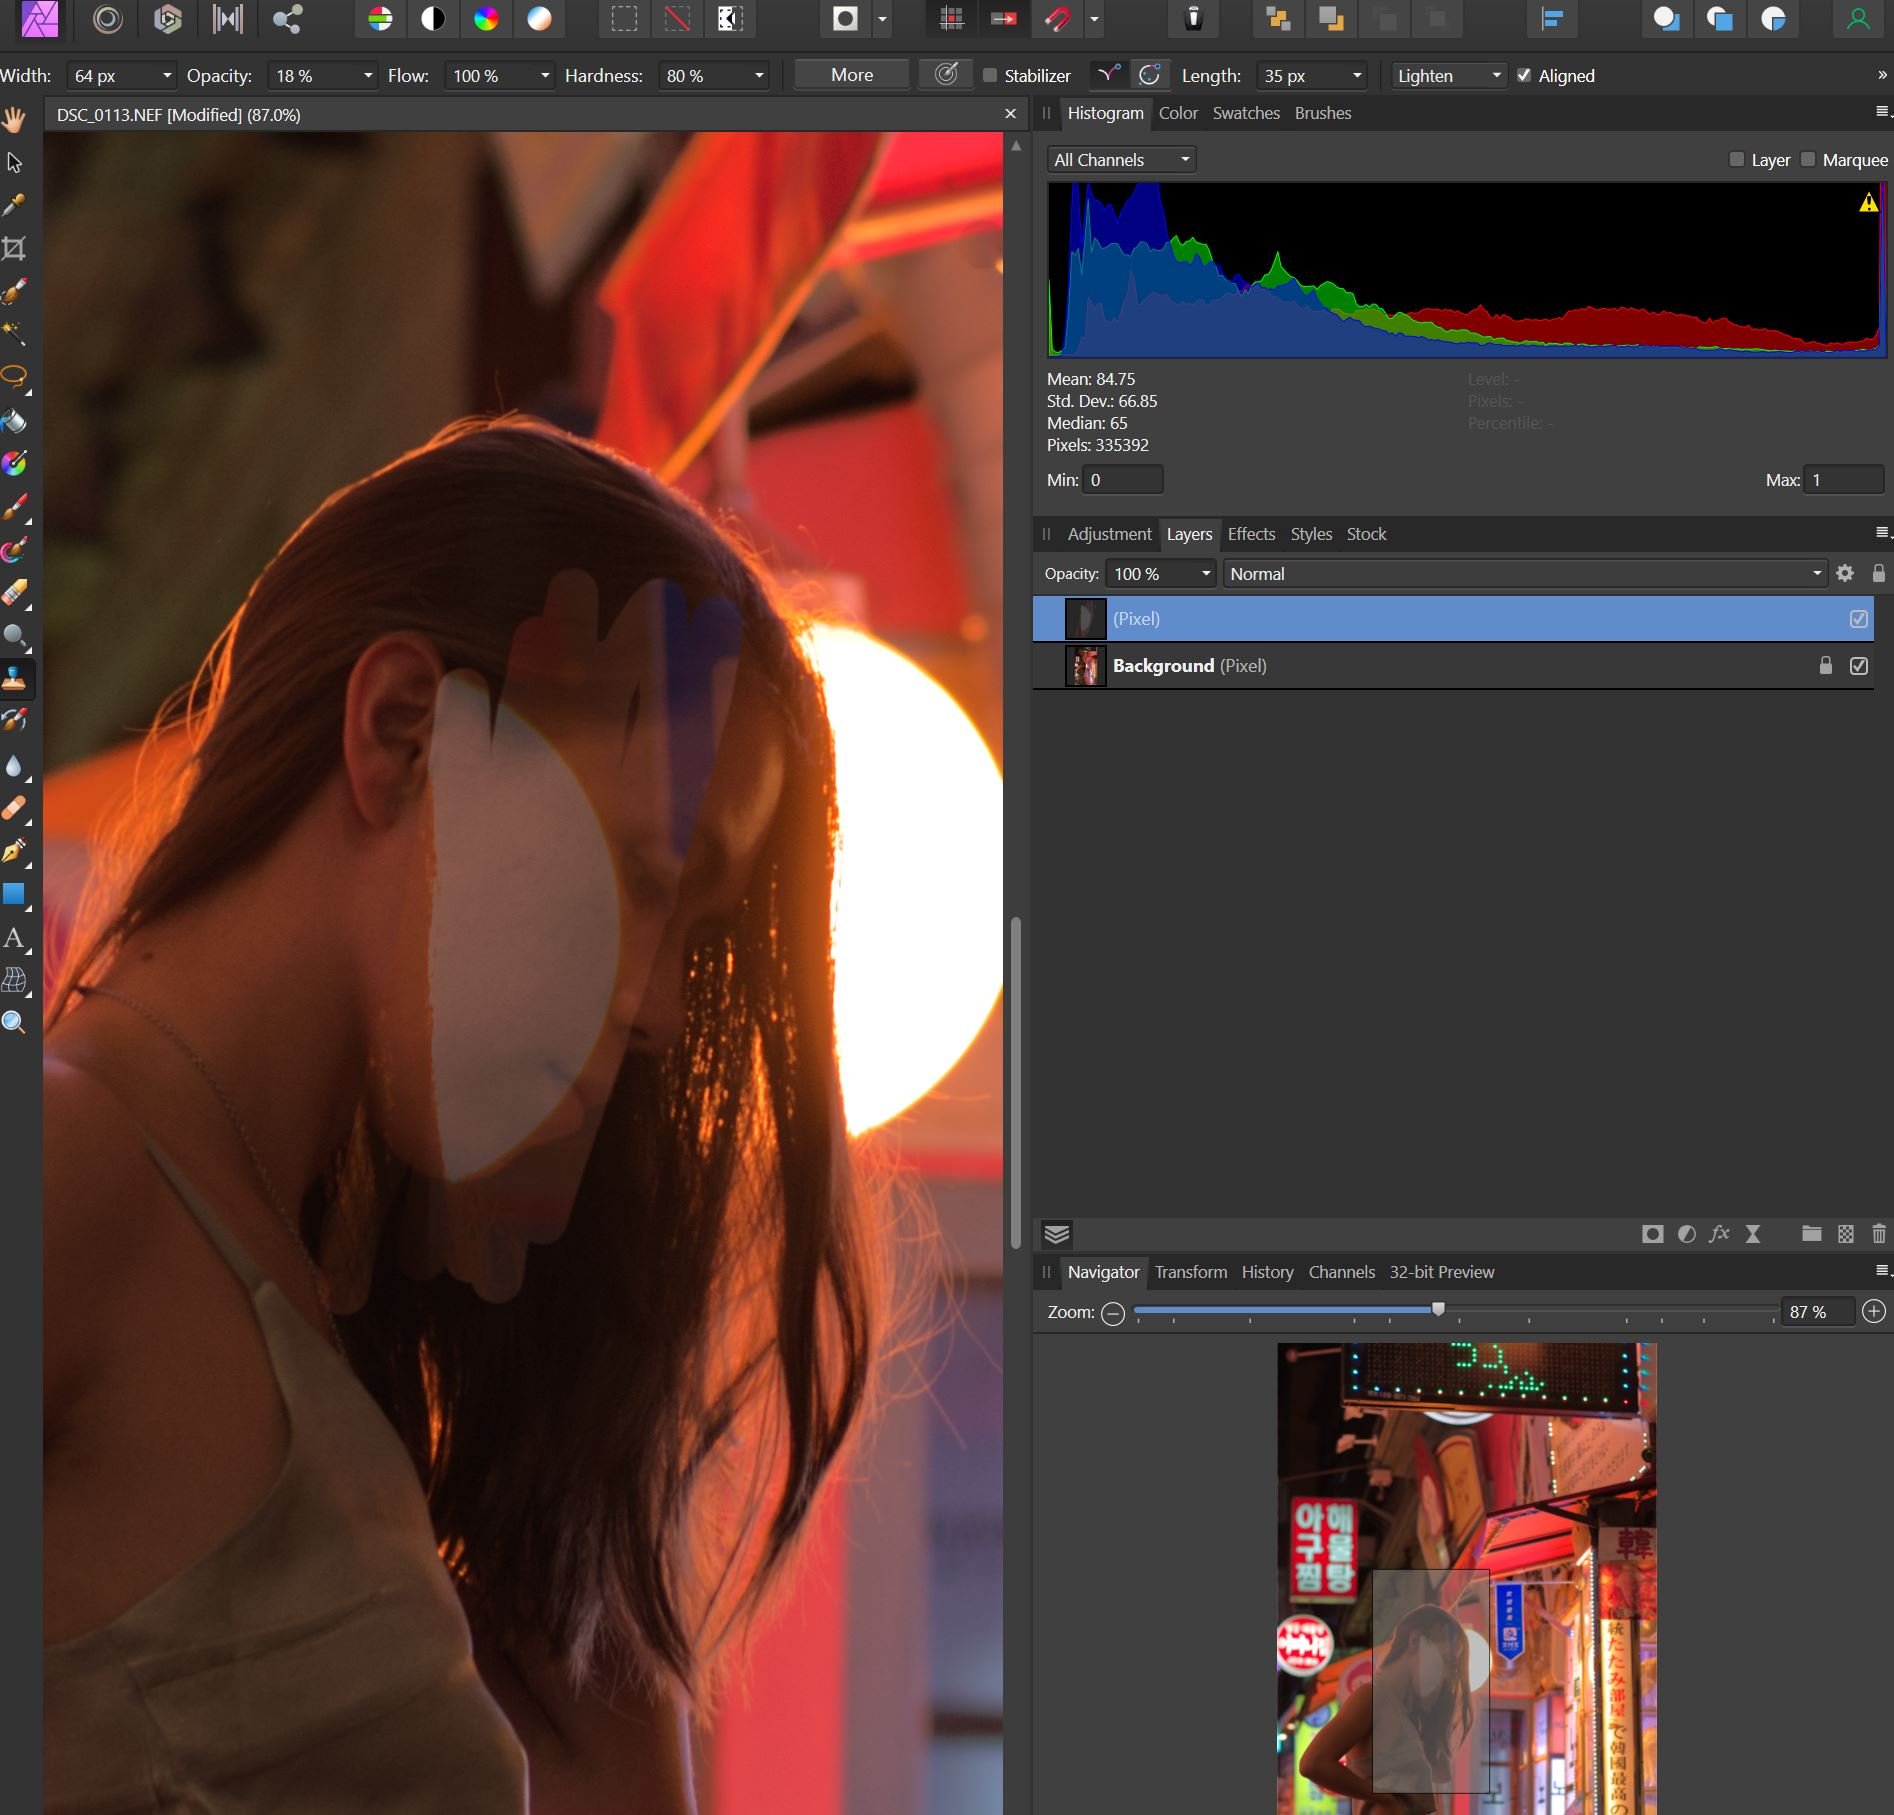
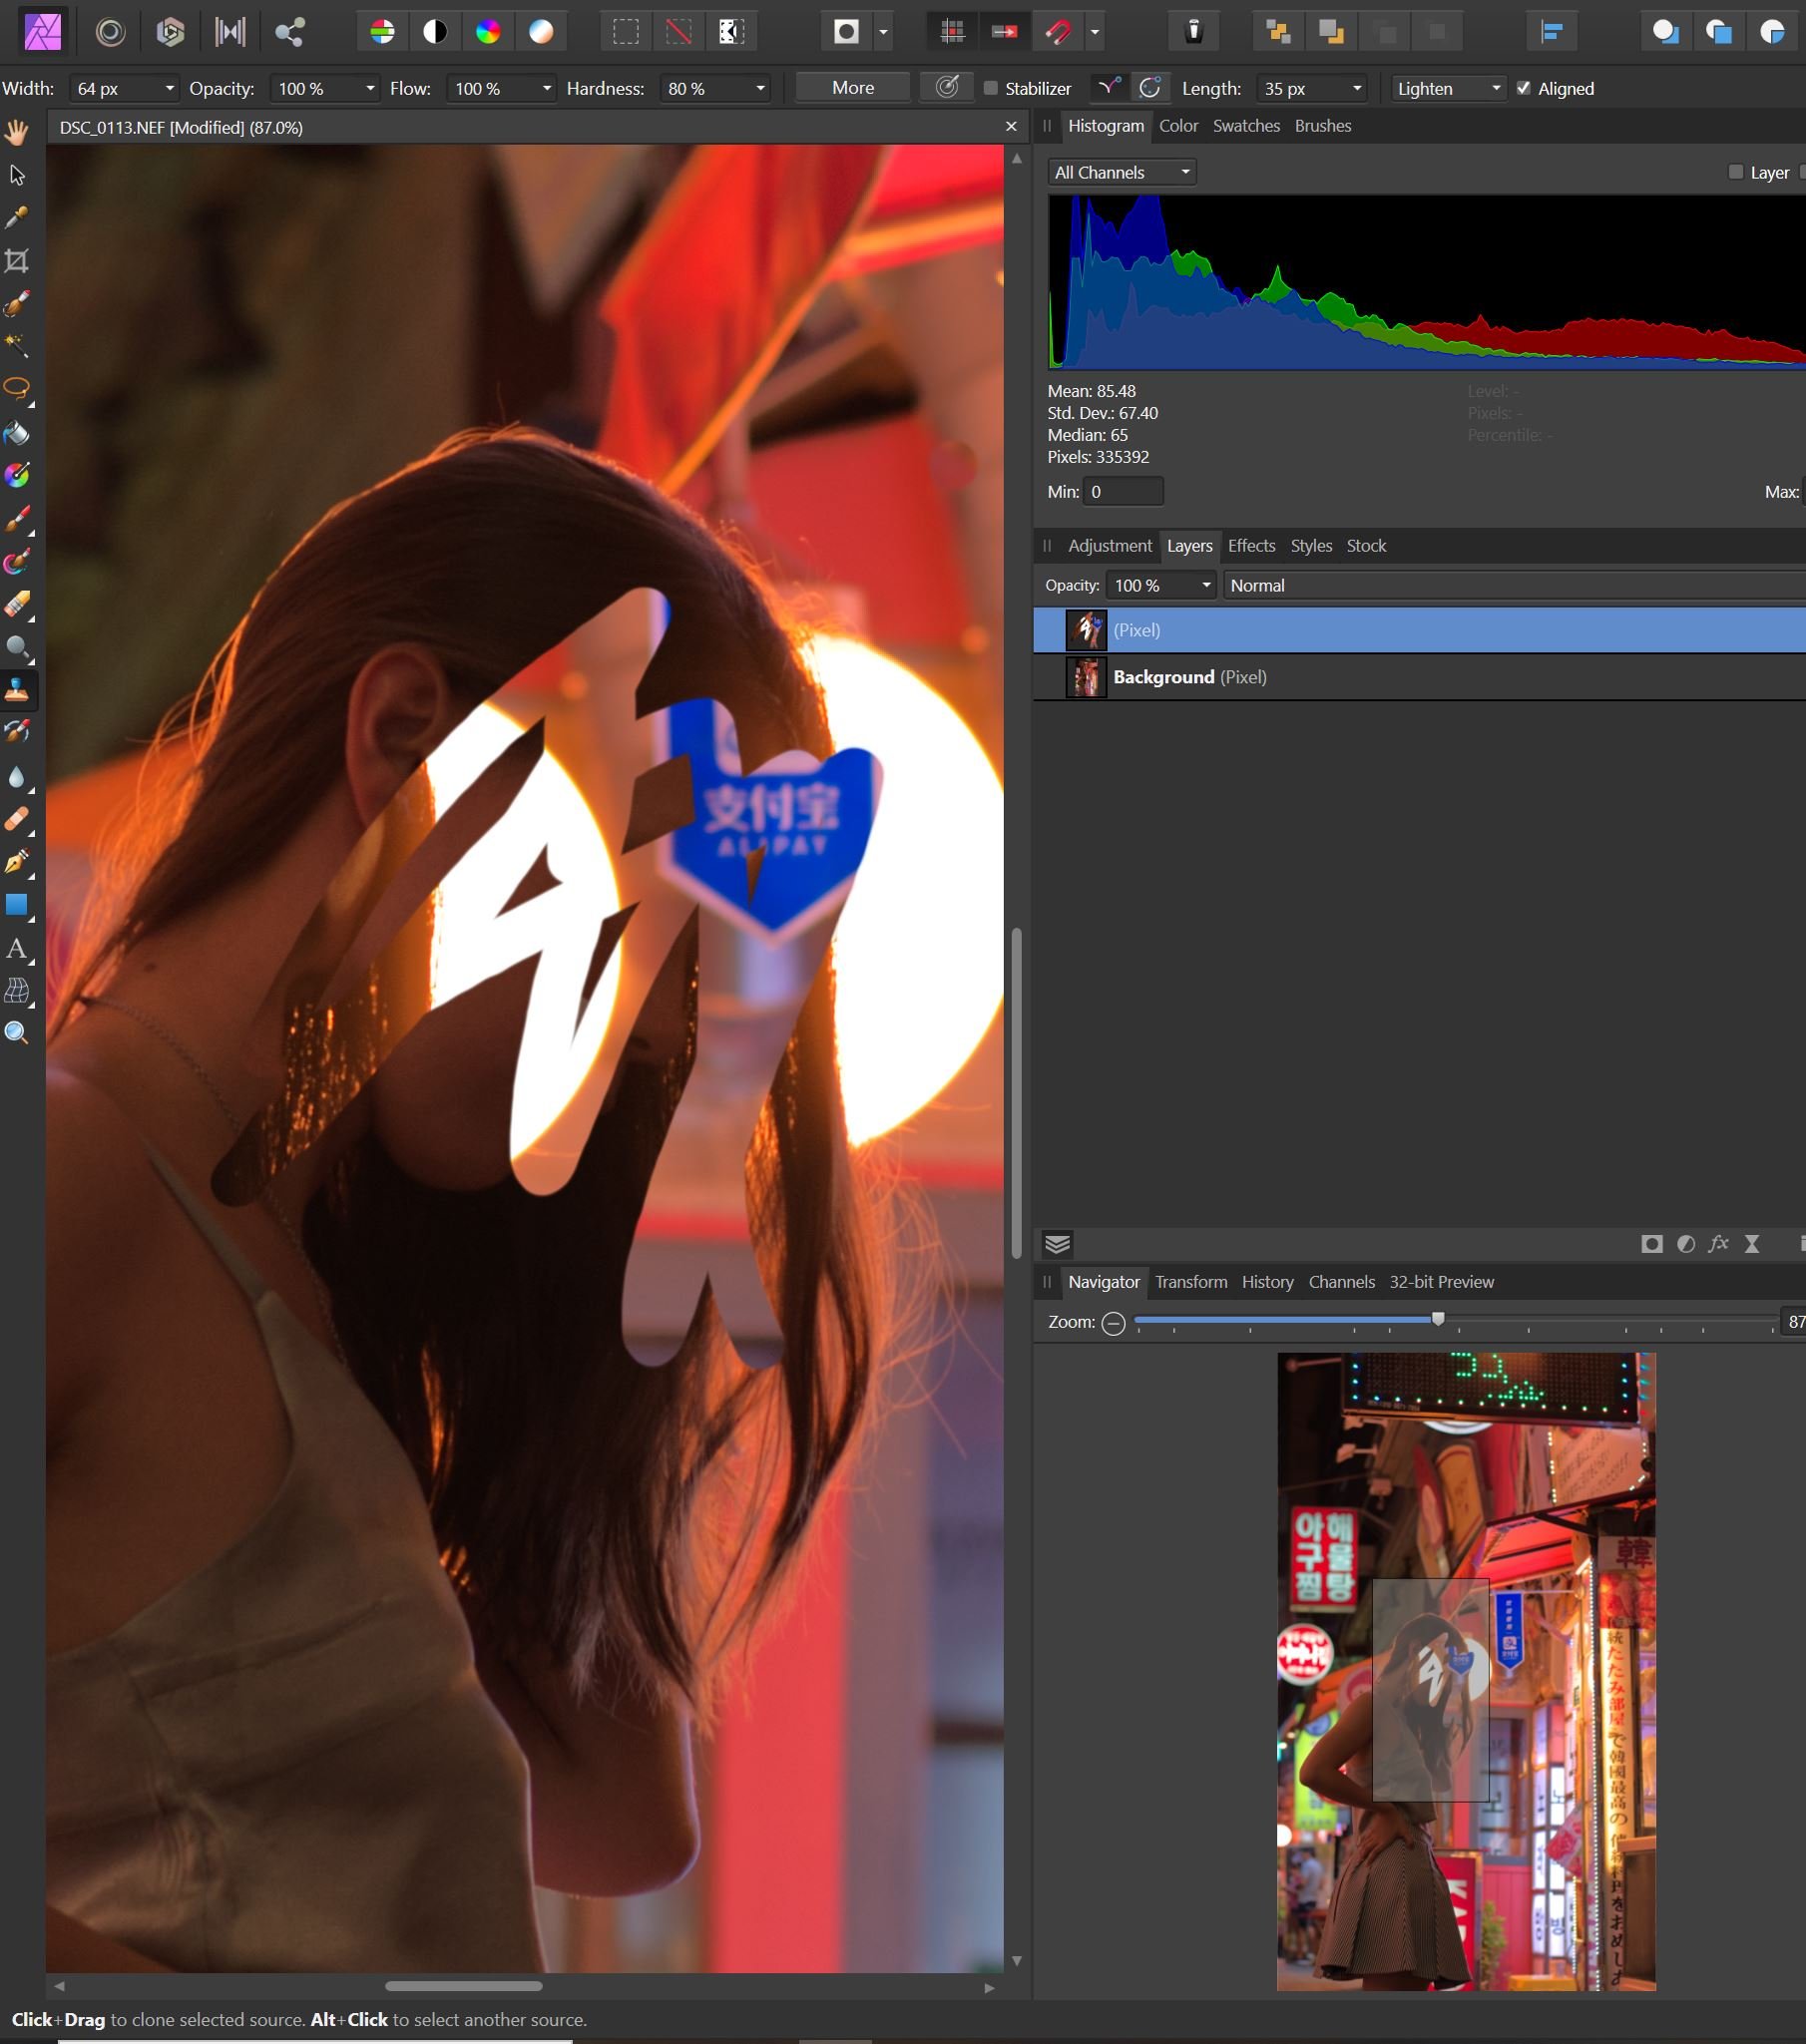
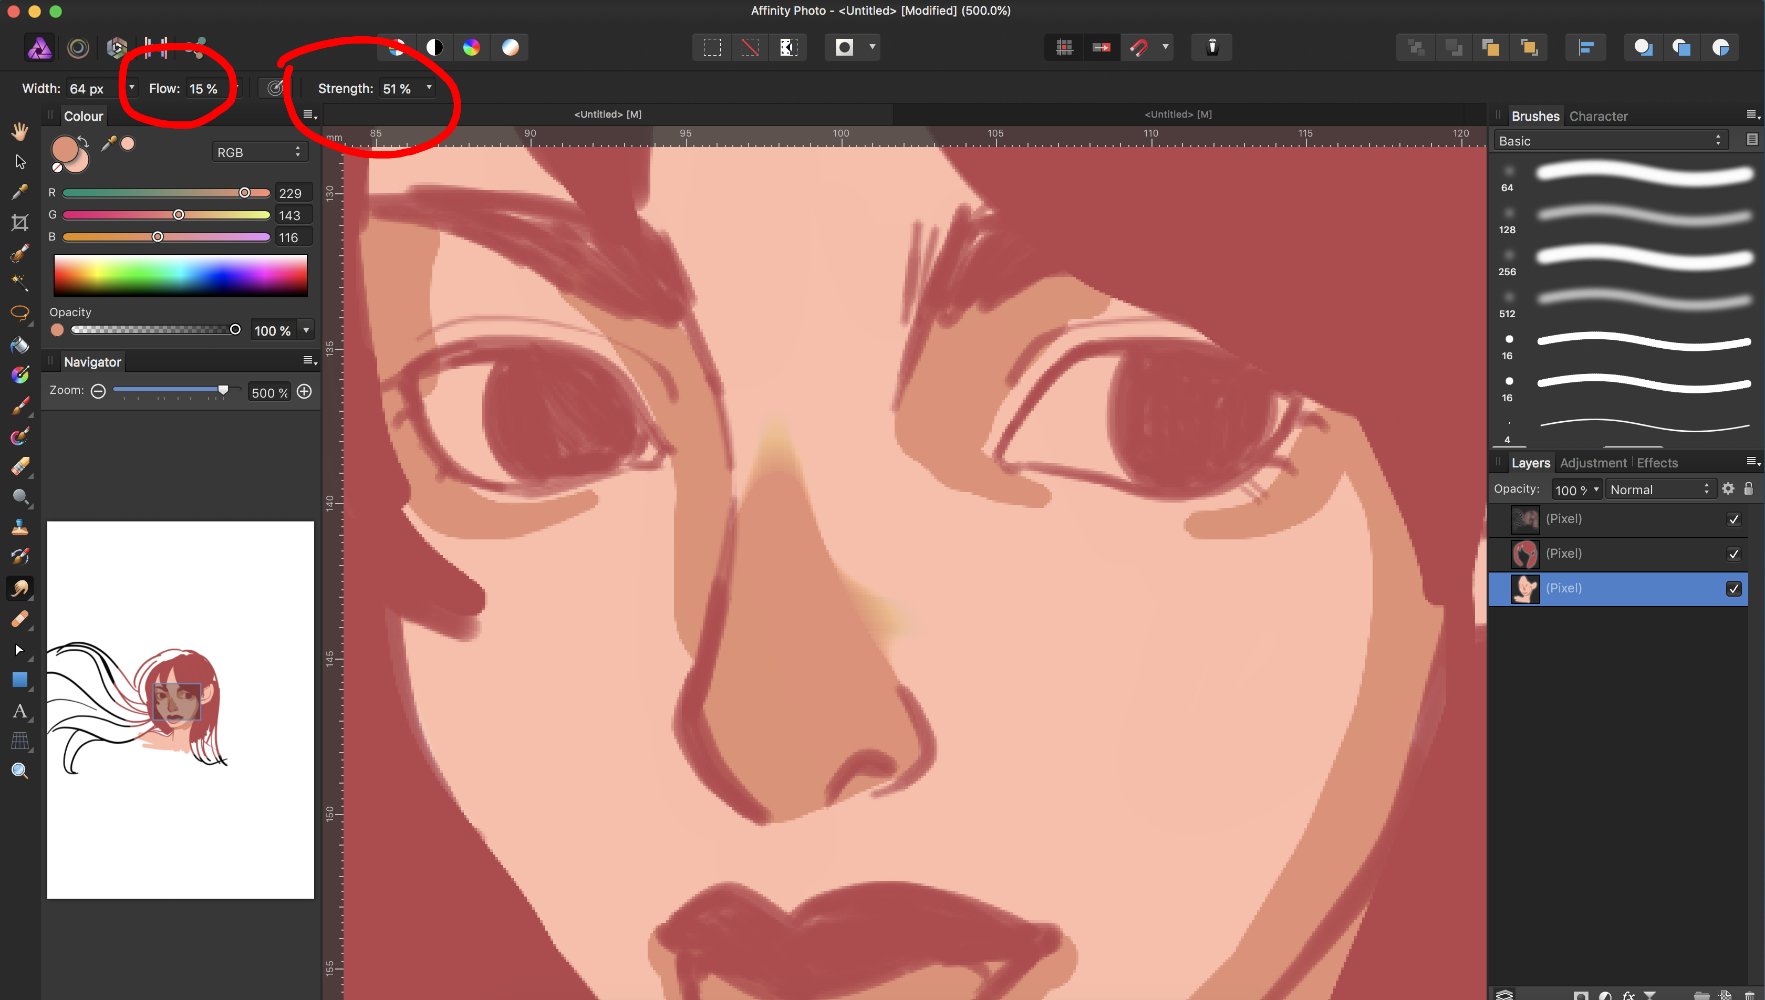
 Hello I am running Version 1.9.1 of Affinity Photo on Windows Desktop I wanted to lighten up the color of the face a bit but ended up basically cloning the light and a blue flag over the sections where I was painting with the clone tool - in the tutorials the Lighten-Clone Tool only picked the brightness level of the source target and applied that to where they painted - so I would not expect it to pick the color and apply it, too, I hope I am not mistaken here? I was following along basic tutorials as I am transitioning to this Editor currently, so I believe I followed the instructions closely: - select clone brush tool - select Lighten (as shown in the picture) - select Source as Current and below I only also reduced the opacity of the tool, which is why you can see the face under the applied color. Basically the Lighten selection doesn't do anything and just clones the target onto the face... For comparison, I upped the opacity to 100% and left all other settings as before in the second picture. Did I forget any other selection?
-
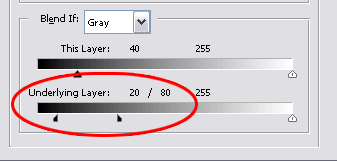
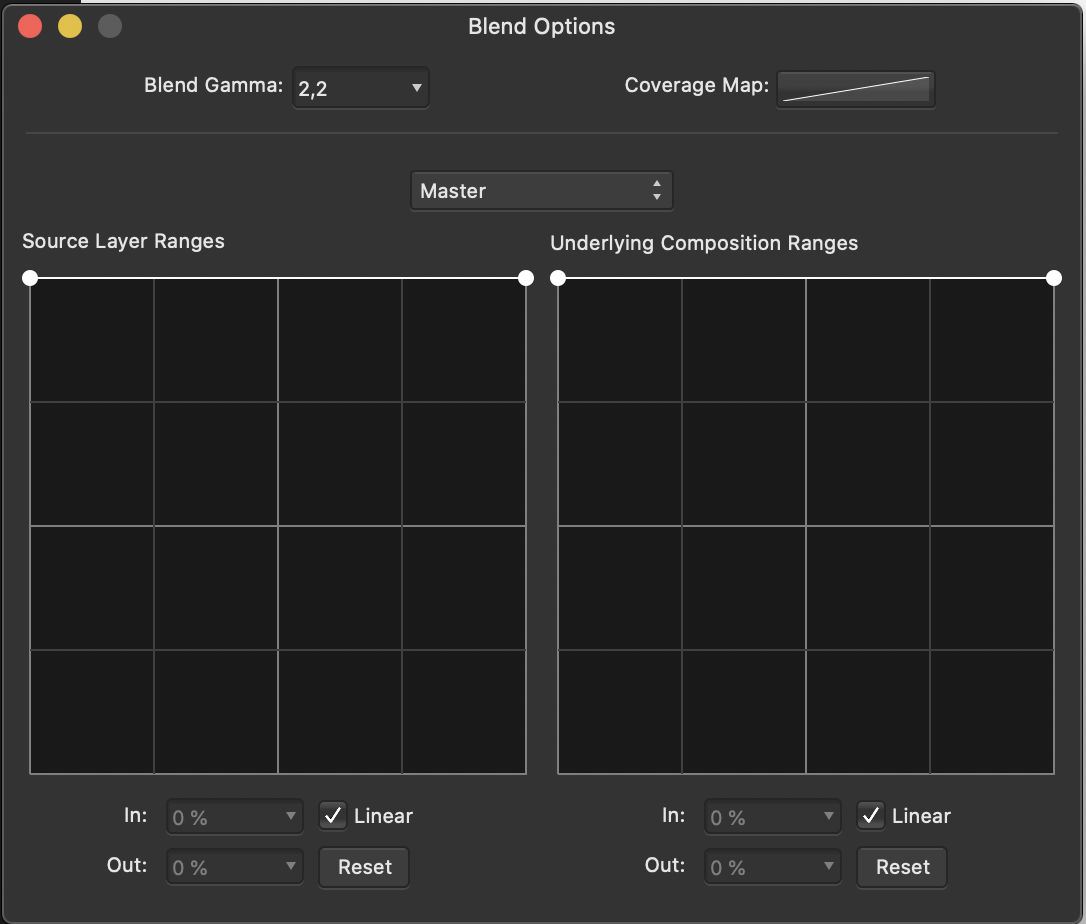
 Hello, I have a doubt, how to give the same effect as the "underlying layer" of photoshop? I know where the setting is in AF, but I don't know how to configure it to give the same effect. For you to understand the context, I have a "recolor" setting, a background image and a character, each in its own layer. I want to apply the "recolor" adjustment only to the character, but I want to apply the effect of the "underlying layer" of photoshop, as in the image I attached in this post. Thank you
-
 Hi, is there still chance to have equivalents to illustrator effects like rough, blend, warp, zigzag, etc...? I've found that this has been addressed here for years. These are important things for me that force me back☹️ Thanks.
 -
 I have 2 separate curve layers that overlap. At a certain point for these two curves(between the two black arrows) I want the gradients to merge or blend together more. Is there a way to do this without converting these layers to pixel layers or doing something destructive?
-
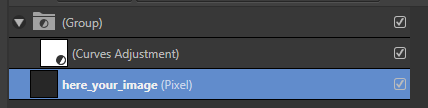
 In the tutorial link to my post we can see pass through behave differently. "passtrough"'s blend mode let the group affect the below layer, "normal"'s blend mode prevent this behavior. In my configuration displayed in the linked image, I see that both behave the same. I am wondering if it is a bugg or intended.
-
Hello world, I have created this simple typography logo. You can watch the timelapse on YouTube with this link Logo Timelapse
-
 Hi there I´am trying to erase part of a mask using the brush in overlay blend mode. It suposse that if the mask is un black and white and the brush in overlay mode, when the brush pass over a white part of the mask, it should not affect whites, but it does. How can I fix this?
-
 Hello, I often use "blend if" in photoshop. I use it to convert a draw to coloring page or blend two images based on color. Does Affinity Photo have this feature ? Thanks !
-
 Hello, ...yes, i’m just another guy asking for features… But i’m just trying to help to make AD better. Please consider to implement asap this tools in Designer because: - Knife tool: It’s not possible to cut groups in a fast way. (yes we can perform compound operations but only on one object at a time...) - Links: It’s a must for all the designers since most of the time we work with images in low resolution (to be fast and light) and for the final work we replace the pictures in the link folder for Hi resolution ones. - Roughen effect on a VECTORIAL line (Smith, hard, regular, irregular). this is soo needed!!! (Also, if possible, (like in old FreeHand: Fisheye, fractalize…) - Blend tool……. (Waited and promissed for so long) - 3D perspective. (Yes we have now the isometric grid, but as it says, it’s isometric, doesn’t have perspective). And related: - VECTORIAL “envelop” distortions. (at least, if we already had this tool, we could import a 3D grid (from a 3D software, blender for example) and adjust the perspective... - Option to remove one guide directly hitting the delete key because: We designers like to use big artboards and lots of sketches inside the artboard. It’s not practical to zoom out every time we want to remove a guide!… And, if not asking too much, the possibility to create a guide after a vectorial object (Like FreeHand used to do). And, the possibility to lean the guides (like in corel). Thanks! Please, let's make this software a really alternative to illustrator! Because at the moment it’s not. I still need illustrator to perform this tasks above. Thank you for your time, Best regards, Jorge
-
- 2
-
-
- knife tool
- links
- (and 6 more)
-
@MEB This is not only about using gradients. It's about dropping a long flat shadow. Regardless of the gradient. It would be great if Affinity Designer can generate such a shadow shape from another shape (or group or text). Or a FX. Maybe an option for Outer Shadow or a complete new entry to cast such long shadow.
-
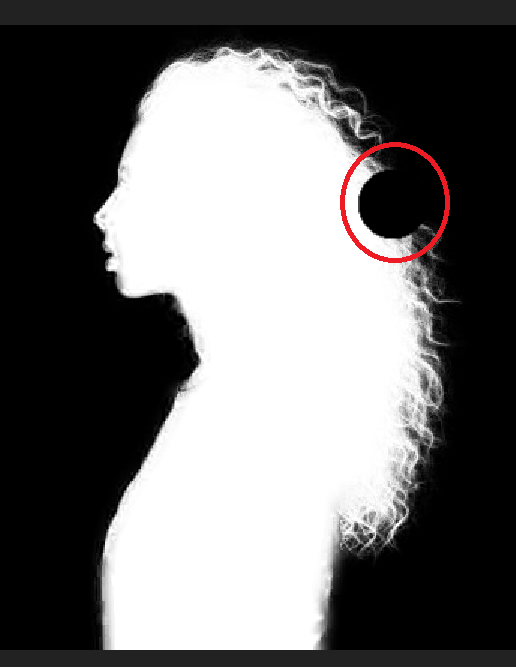
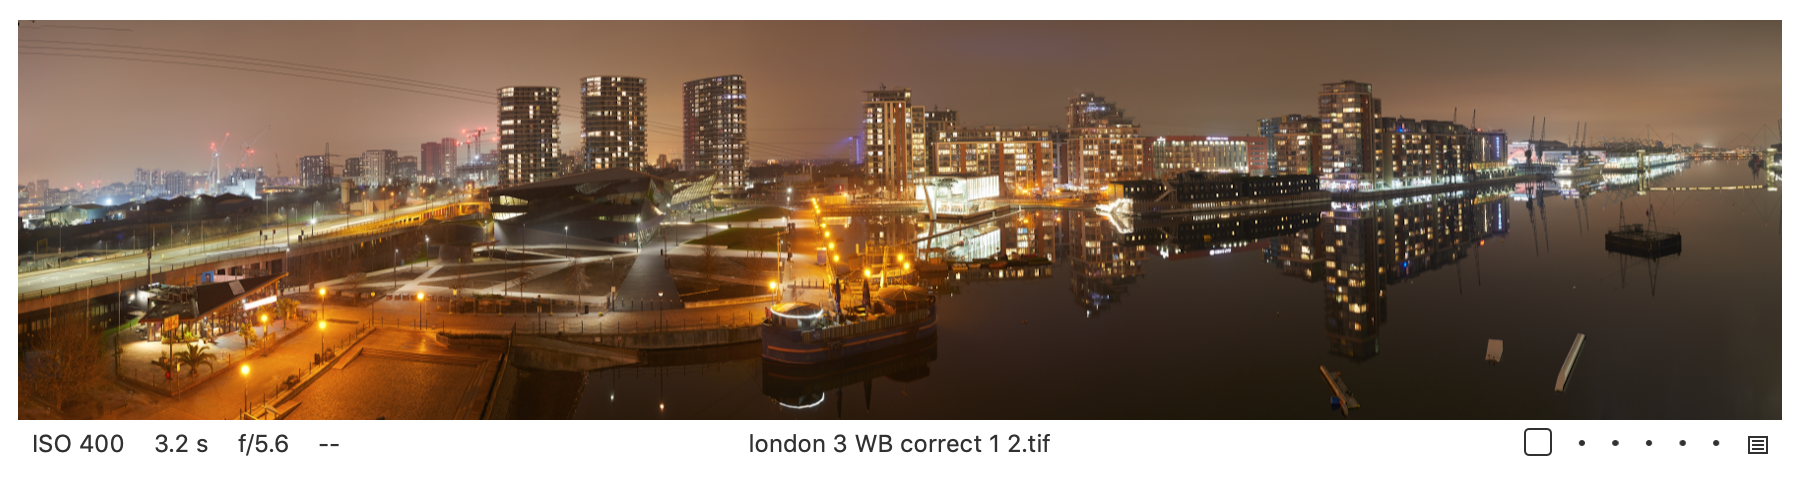
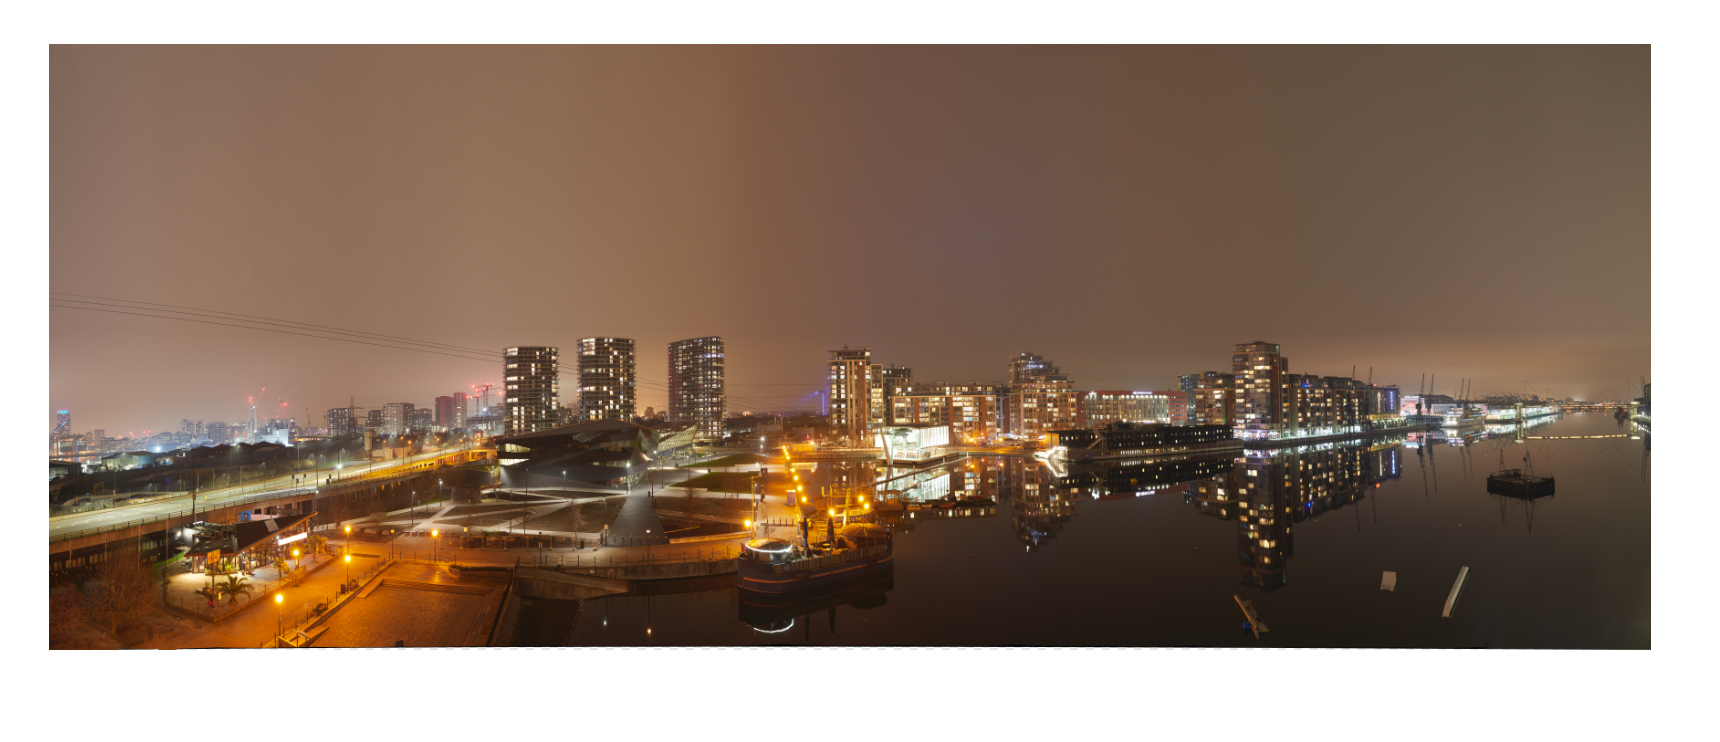
 Hi all, Hopefully I have posted this in the correct place, although I'm not convinced I have, apologies if so. I have a problem with a panorama I have made. I didn't think to take a second row of photos for the sky, but didn't like the balance of the picture once I had blended the pano. As such I extended the sky vertically in affinity, however this has created an odd looking sky. The real solution would be to get it right first time; I will make sure to take more than one row next time, even if it is just blank sky. Out of interest though, is there anything I can do to homogenise the sky so it's not separated into the vertical zones as below? I believe the zones have been created by the colour/intensity of the lights from the buildings. Origional pano, screenshot from capture one: Pano with sky extended, screenshot from Affinity: Workflow: the pano is comprised of 17 images, all shot in RAW (3.2 secs ISO 100, F5.6) and WB corrected to same value in capture one 20, then files exported as 16 bit TIFFs to PTGui where the pano was stitched, then opened in Affinity to use Mesh Warp to adjust perspective and in-painting to accommodate the warp. The sky was then extended, as described above. Thanks in advance, Freddie
-
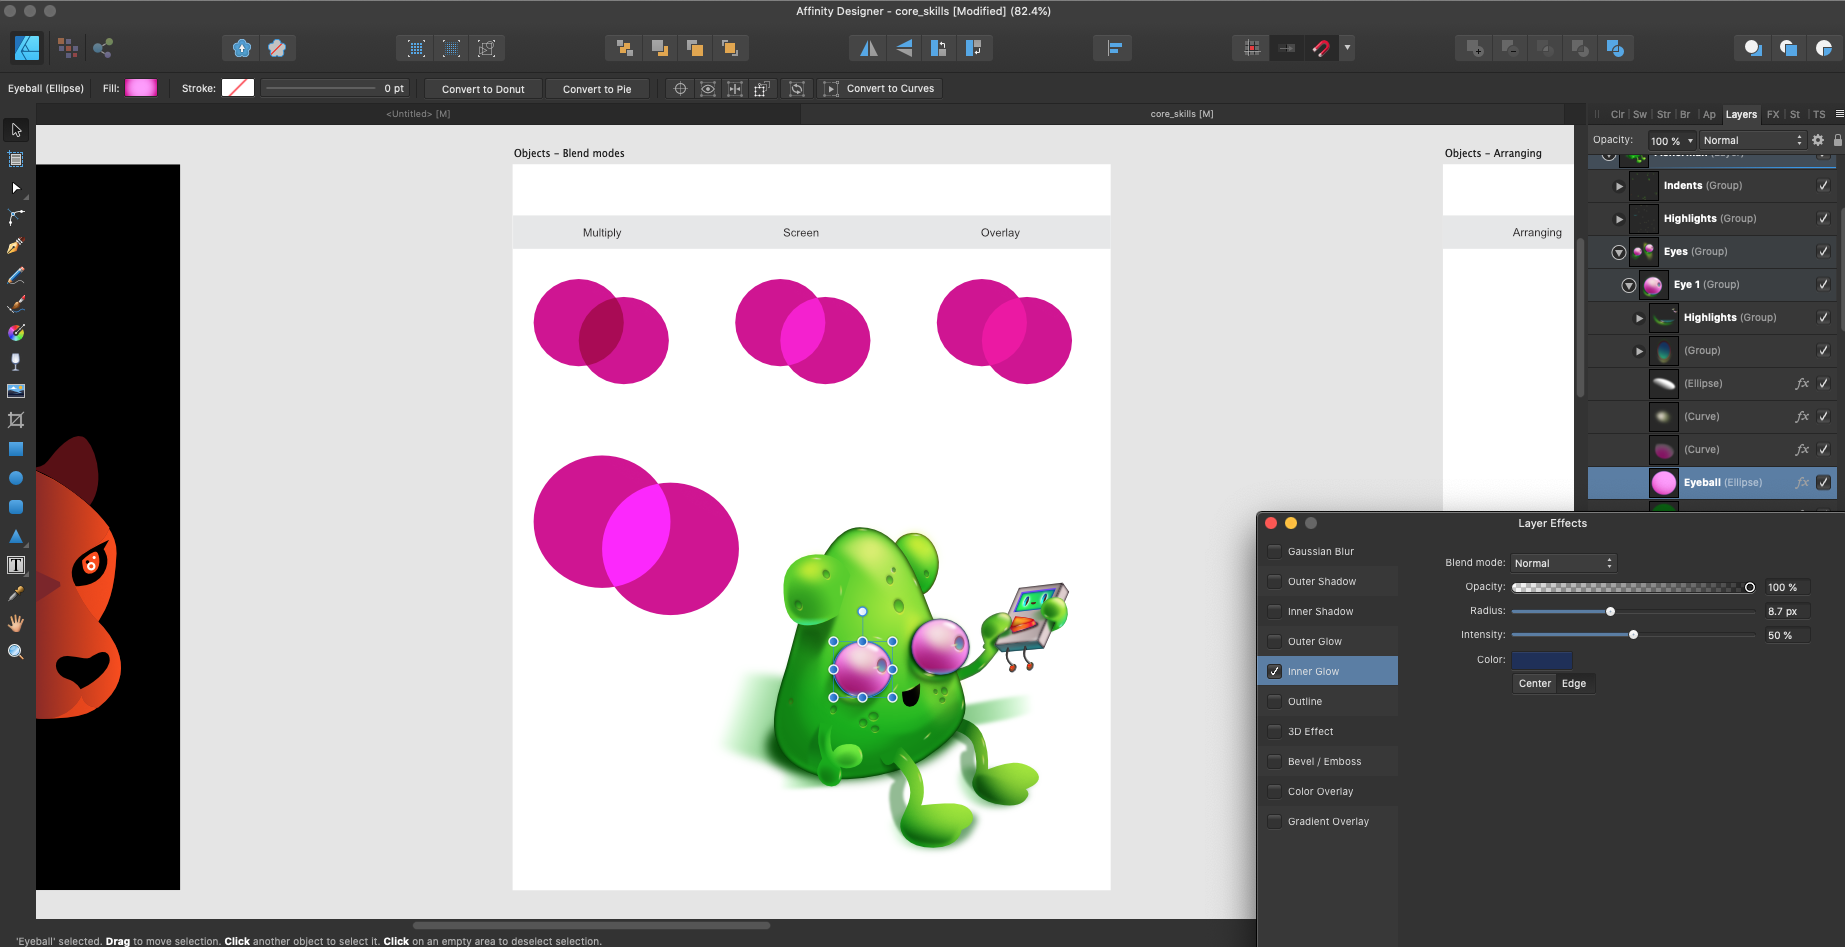
 I am at Page 82 of the Affinity Designer Workbook and followed the instructions to change the Inner Glow layer effect from Normal to Multiply, Screen, etc... but I don't see any change happening. I have a couple of questions: 1) Where can I see the 2 colors that should take part in the blending effect? I only see one gradient color in the Eyeball layer. 2) What should I see by changing the Blend mode in the Workbook example?
-
I've brought this up a few times on the forums, but (and I'm getting desperate here) pleeeease add Dissolve to the Blend Modes list for layers and brushes - pretty pretty please! The tedious workarounds to achieve this effect simply aren't the same, and not nearly as effective. Dissolve is the easiest way to turn any, otherwise normal, brush into an amazing textural experience, and was one of the most used features for me in Photoshop. Dissolve played such a big role in my work that I've had to adapt my style completely after switching to Affinity, and I miss it dearly. I even took the time to record this little screen recording I'm working on to show why it works so well in Photoshop (just watch at 2x speed to save time): https://youtu.be/pywfxxuXaCc All I used in the video was a plain old, run-of-the-mill soft/feathered brush, but with Dissolve set as the blend mode. As you can see, it instantly becomes a magnificent texturing machine which has SO many practical applications, especially in creating digital illustrations. I've also seen it used excessively by some really big names in the creative industry, such as Matt Taylor (http://www.matttaylor.co.uk) and Studio Muti (https://studiomuti.co.za), just to name two heavy-hitters. I can't imagine it being very difficult to add another blend mode to the list, and I've been checking for new beta's daily hoping that dissolve made the list of added features. Please add it, for me, for others, and even for this poor, misunderstood zombie dude who would have been lacking a lot of gritty shading if I had painted him in Affinity without dissolve.
- 1 reply
-
- 5
-
-
-
- blend mode
- affinity
- (and 6 more)
-
 When using a raster brush that has 'wet edges' enabled, it often automatically disables the wet edges when you switch to another tool (like the eraser) and then back to the brush again. It's not a big issue, but it would be really great if the brushes retained the wet edges setting to save the hassle of manually checking it again after using another tool. For some reason this doesn't always happen, but I thought it might be worth mentioning as a lot of the more 'intricate' custom brushes use wet edges for textures and effects. Similarly, and I appologise as I've mentioned this before, it would be awesome to have a dissolve blend mode for brushes and layers as it's incredibly useful for creating gritty textures and bitmap effects - it's also especially useful for setting work up for screen printing as the dissolve blend mode removes all anti-aliasing. I know there are workarounds for this, but the dissolve blend mode is a small addition to the blend modes list that would completely remove the need to spend time finding different ways of achieving a similar effect. I've seen it mentioned a few times in the forums, so hopefully it will be considered.
 -
Blend Tool is a must have!!!
-
 Hello everyone, I have a huge issue with the Smudge brush tool in Affinity Photo (Mac). When I use it to blend between two colours, it messes them up completely. I tried a lot of settings, even tried the smudge pre-set from DAUB brushes library but they all do the same. Please see below screenshots of the setting used and some tweaks with flow and strength. Can anyone help me out??
-
 At my current job we use Corel Draw in our graphic design department. I have switched to Affinity Designer and Photo for my personal work and these are my 5 features I use very often in Corel that I would love to see added. 1. Boundary Tool - Have a print/cut Roland printer and this tool is essential when creating a cut line around multiple objects. 2. Envelope Tool - Use this quite often for text effects. Converting to curves and manipulating from there works alright but Corel leaves the enveloped object still as text and can be still edited. 3. Flood Fill Tool - I'm able to replicate this using boolean operations but involves way more steps and occasionally will end up with odd quirks and unwanted results. 4. Blend Tool - I believe I have seen this is coming on the roadmap so hopefully soon 5. Raster to Vector Tracing - Also seen this is coming. Currently using Inkscape for this feature and then exporting/importing into Designer All this being said Designer is still one of the best applications I have used. How great this application already is has me very excited for future updates and enhancements.
 -
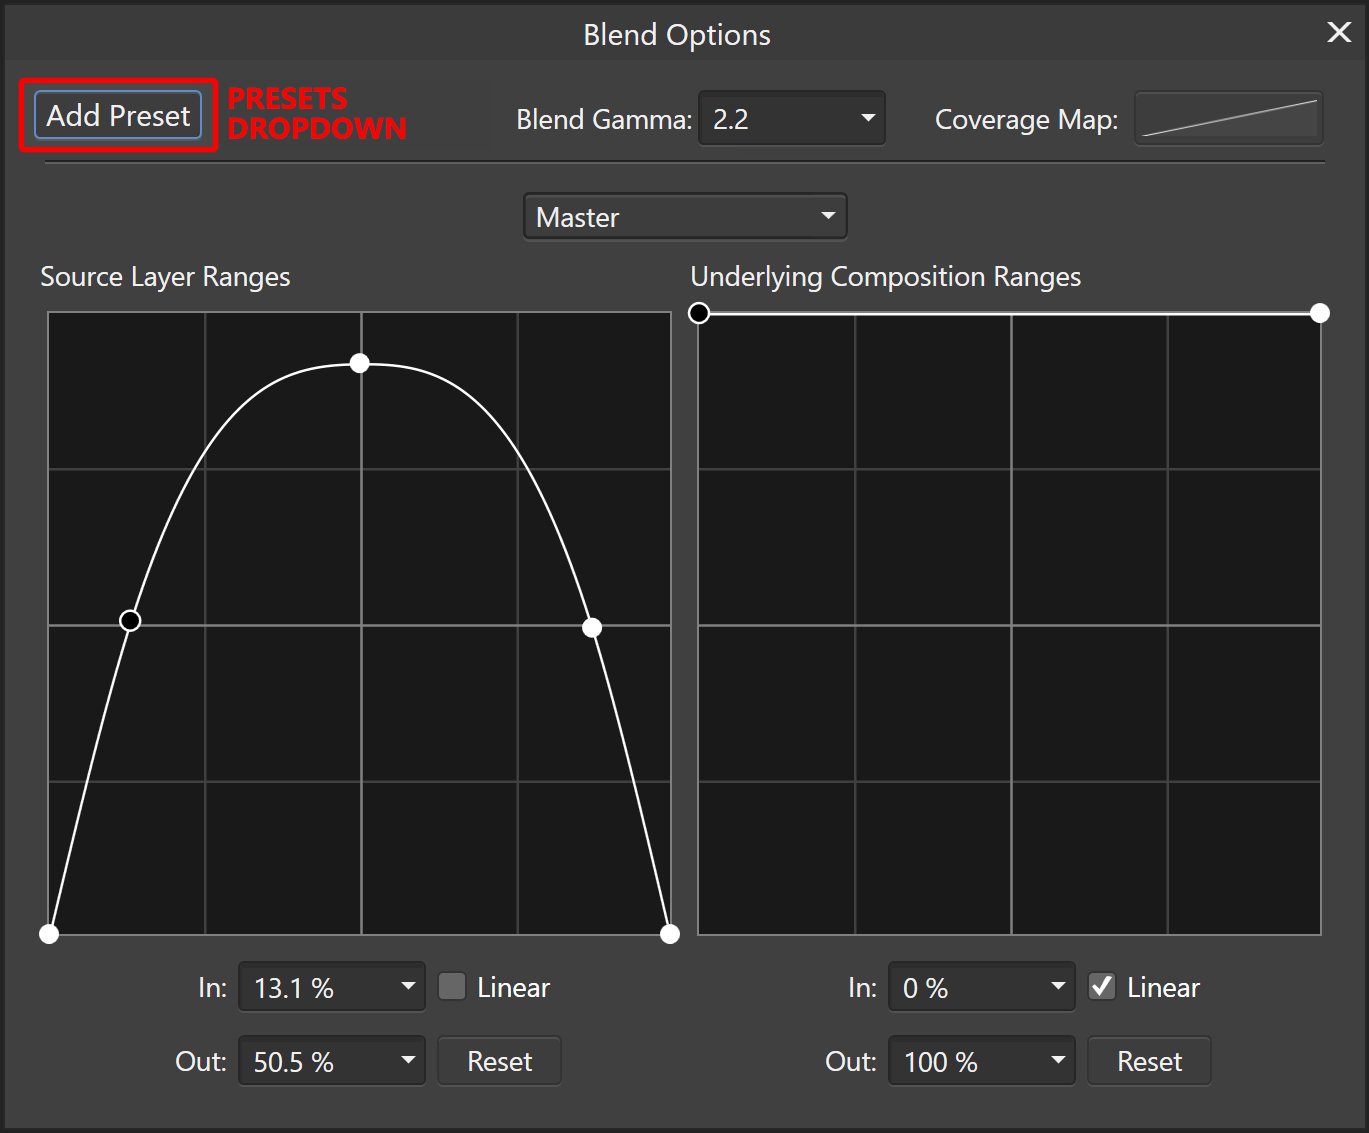
Presets are available in many tools but Blend Options also needs a way to save presets because here sometimes we create complex curves. I wold also make a dropdown list with all the presets to be available in the tool window or replace that button with a dropdown that has an option to save a preset. I would integrate this dropdown style to presets in all the tools (black and white, gradient map, curves.........)
-
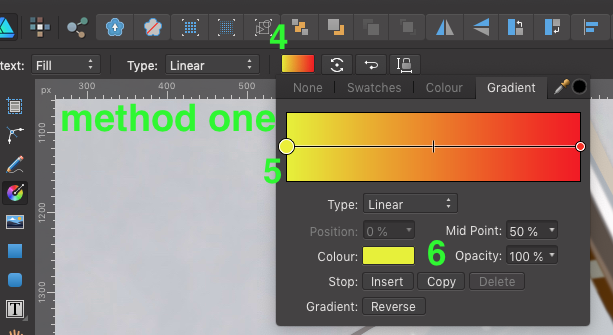
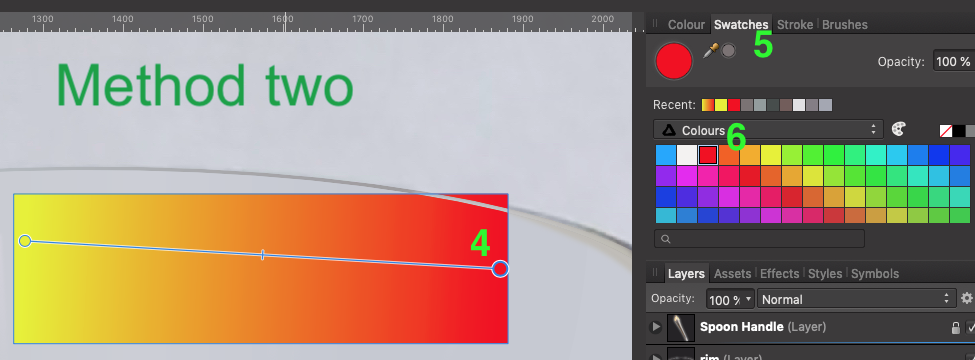
 I struggle to create gradient fills easily and efficiently. Here are the two methods that I use, and perhaps the only way. I'd be curious if someone out there has another method. Method one: Create object select "G" on the keyboard draw gradient Select the Gradient color box at the top toolbar make active a node on the gradient line select color from colour box Repeat steps 6 -7 for each node in the gradient line. Method two: Create object select "G" on the keyboard draw gradient Select the node in gradient bar Select Swatches tab in the docker on the right Select color in the Swatches pallet. Repeat steps 5 -6 for each node in the gradient line. Suggested Improvements: A) What I would like to see is the ability to double click on the color node on the object itself, not the node from the methods above, and by double click the node a swatches pallet opens for you to make your color selection. B) Another option would be to select color node, select the eyedropper in the tool bar and while holding the Shift key down select the color you want applied to that node. This method is great for sampling color from other drawings or reference images. I appoligize if there is another method alreay in place, I just haven't come across it yet. Thanks in advance. -Bill