Search the Community
Showing results for tags 'black'.
-
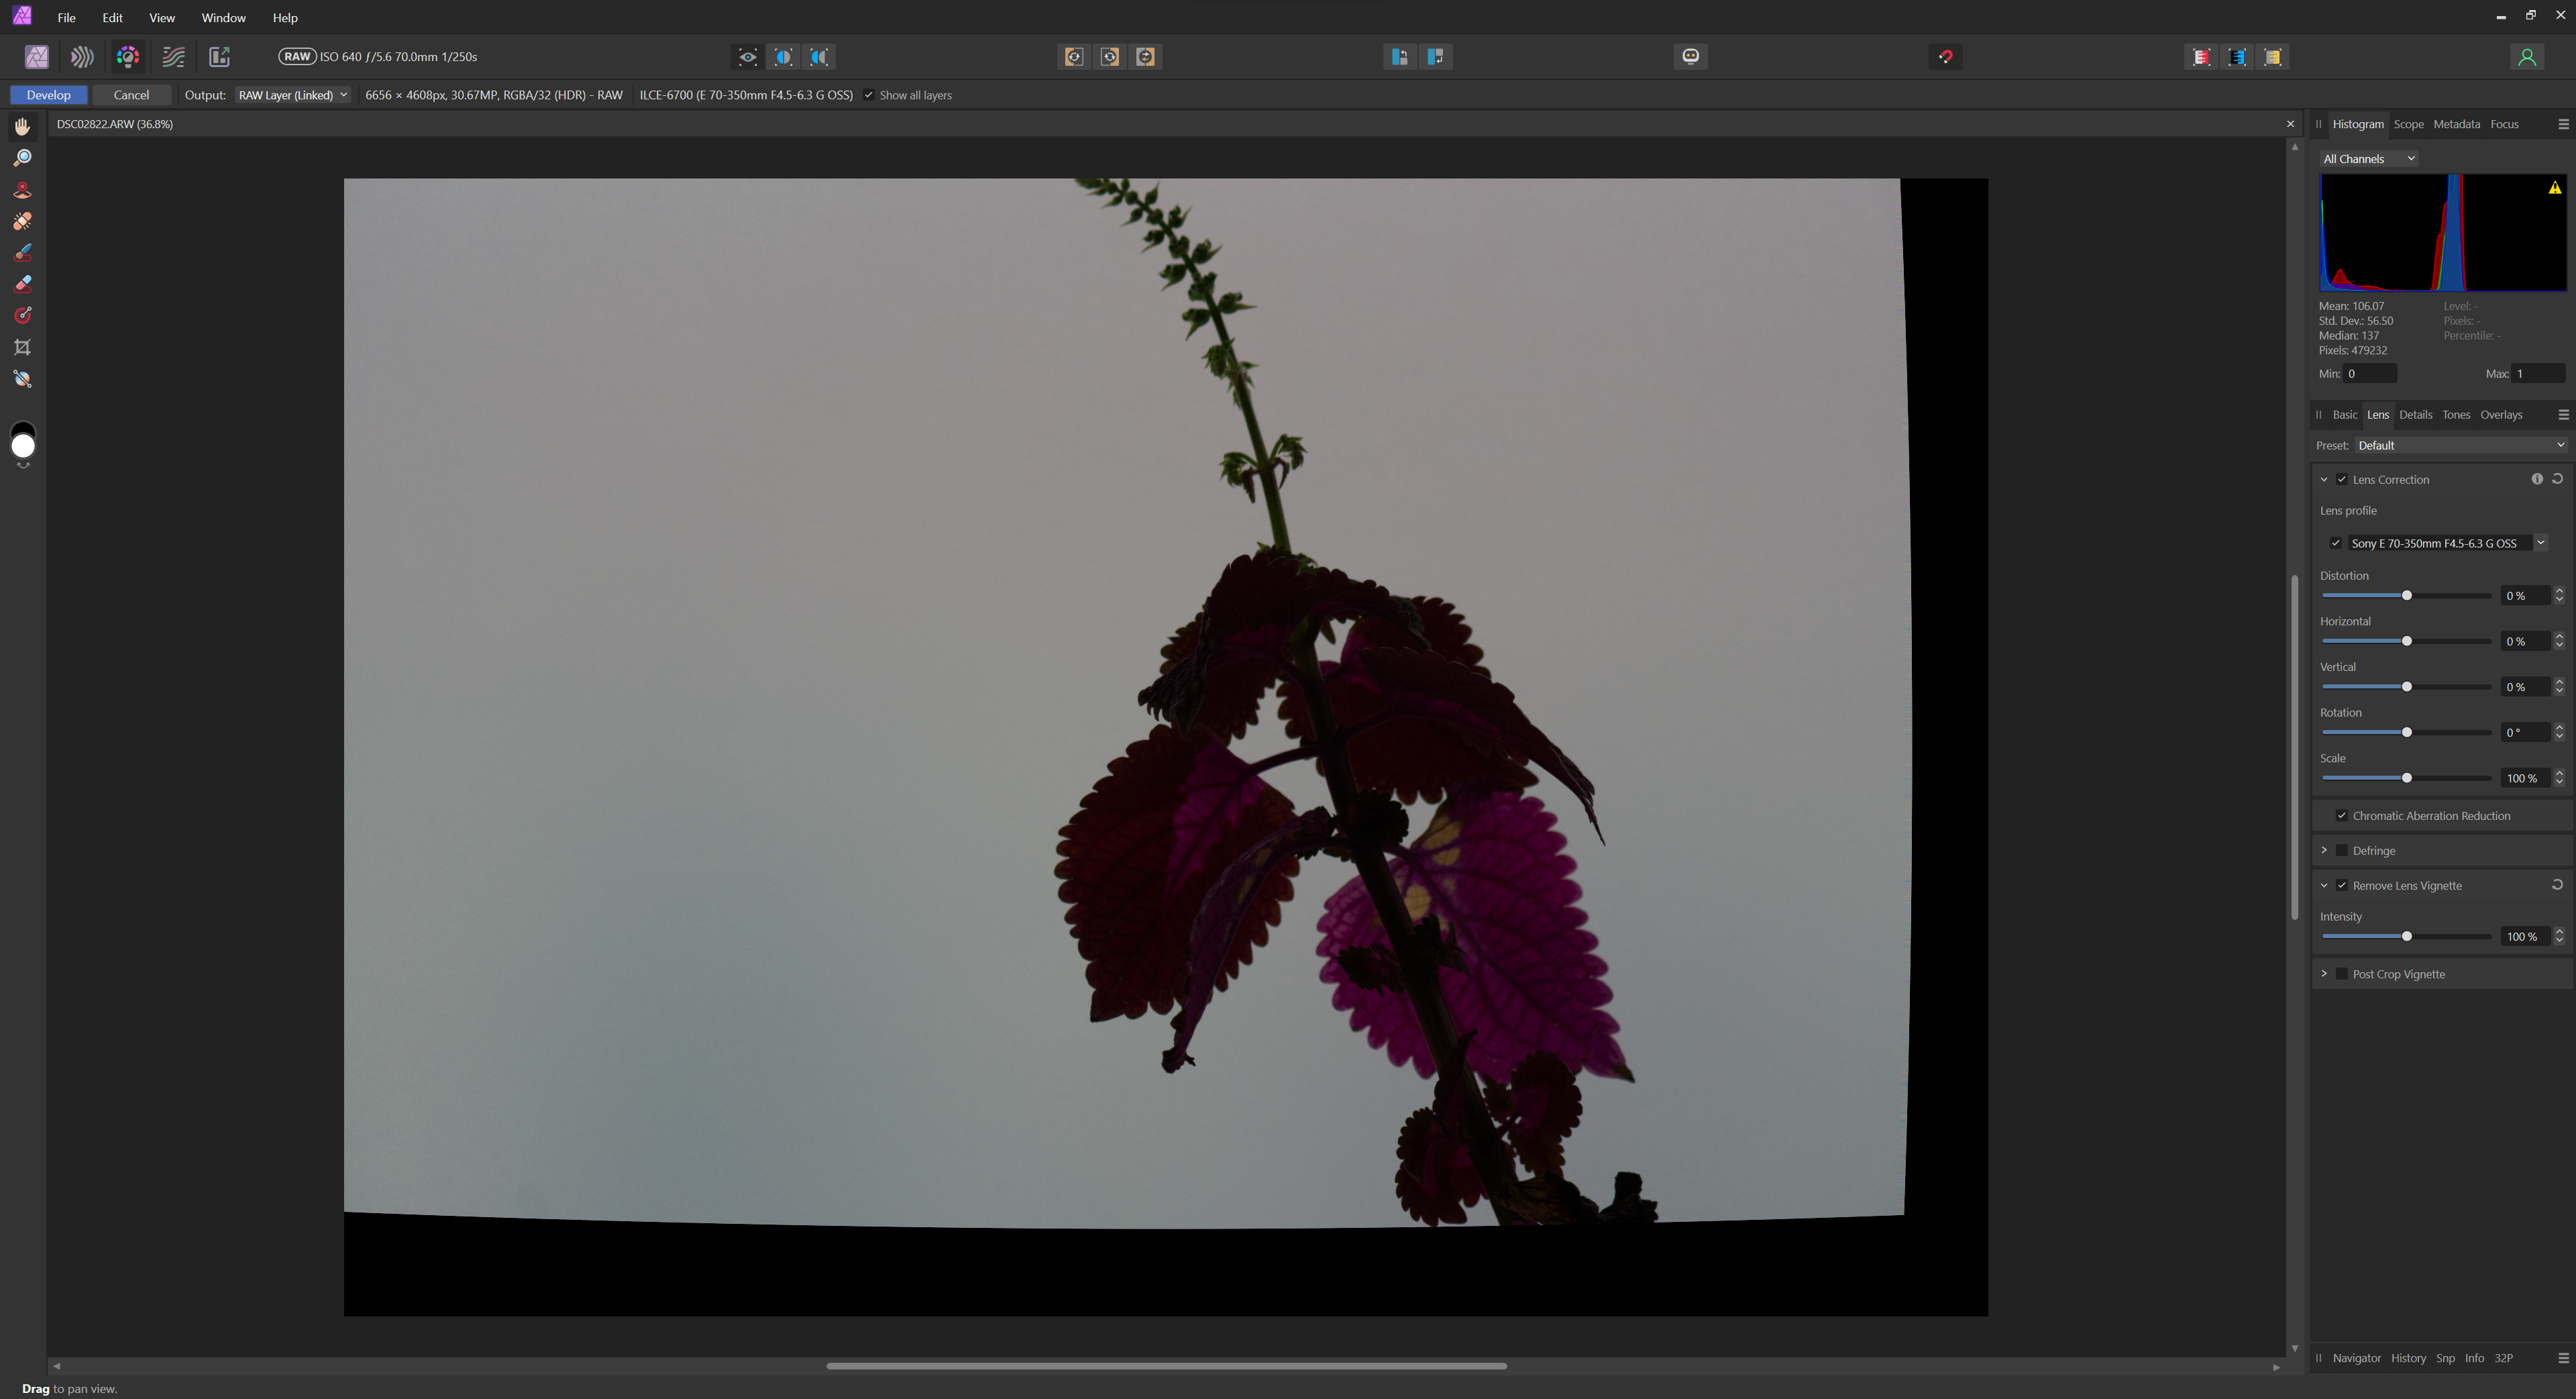
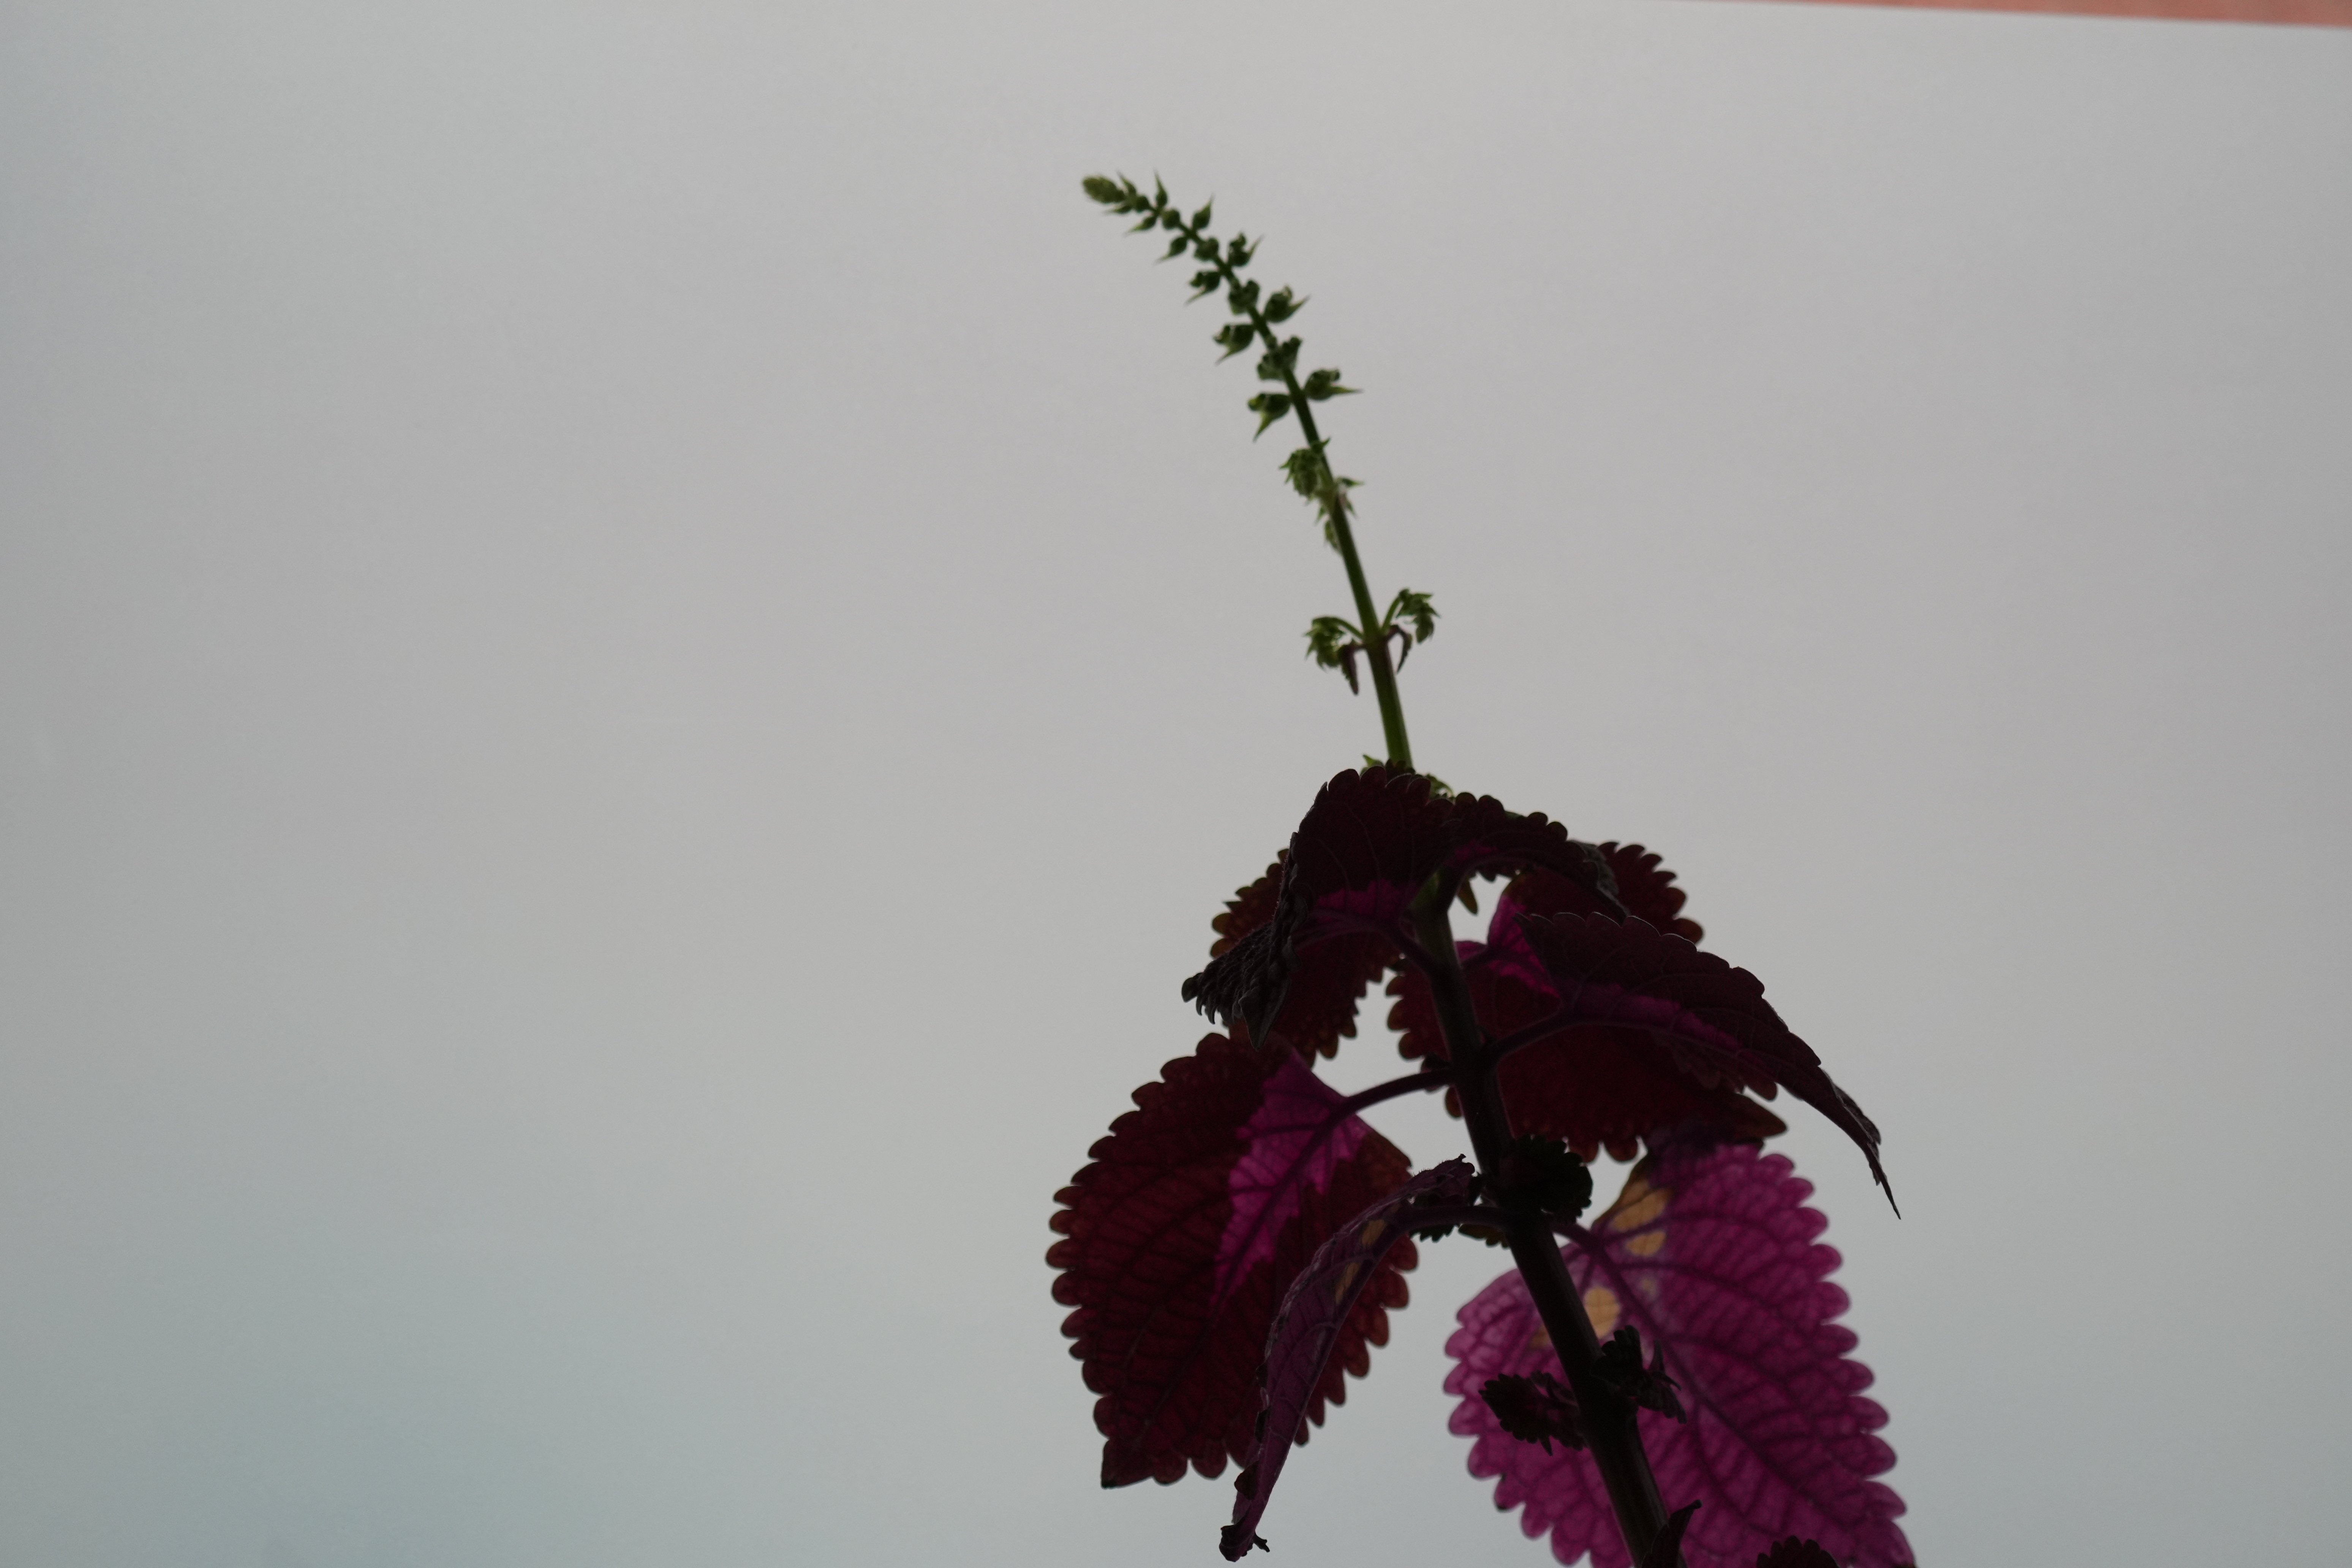
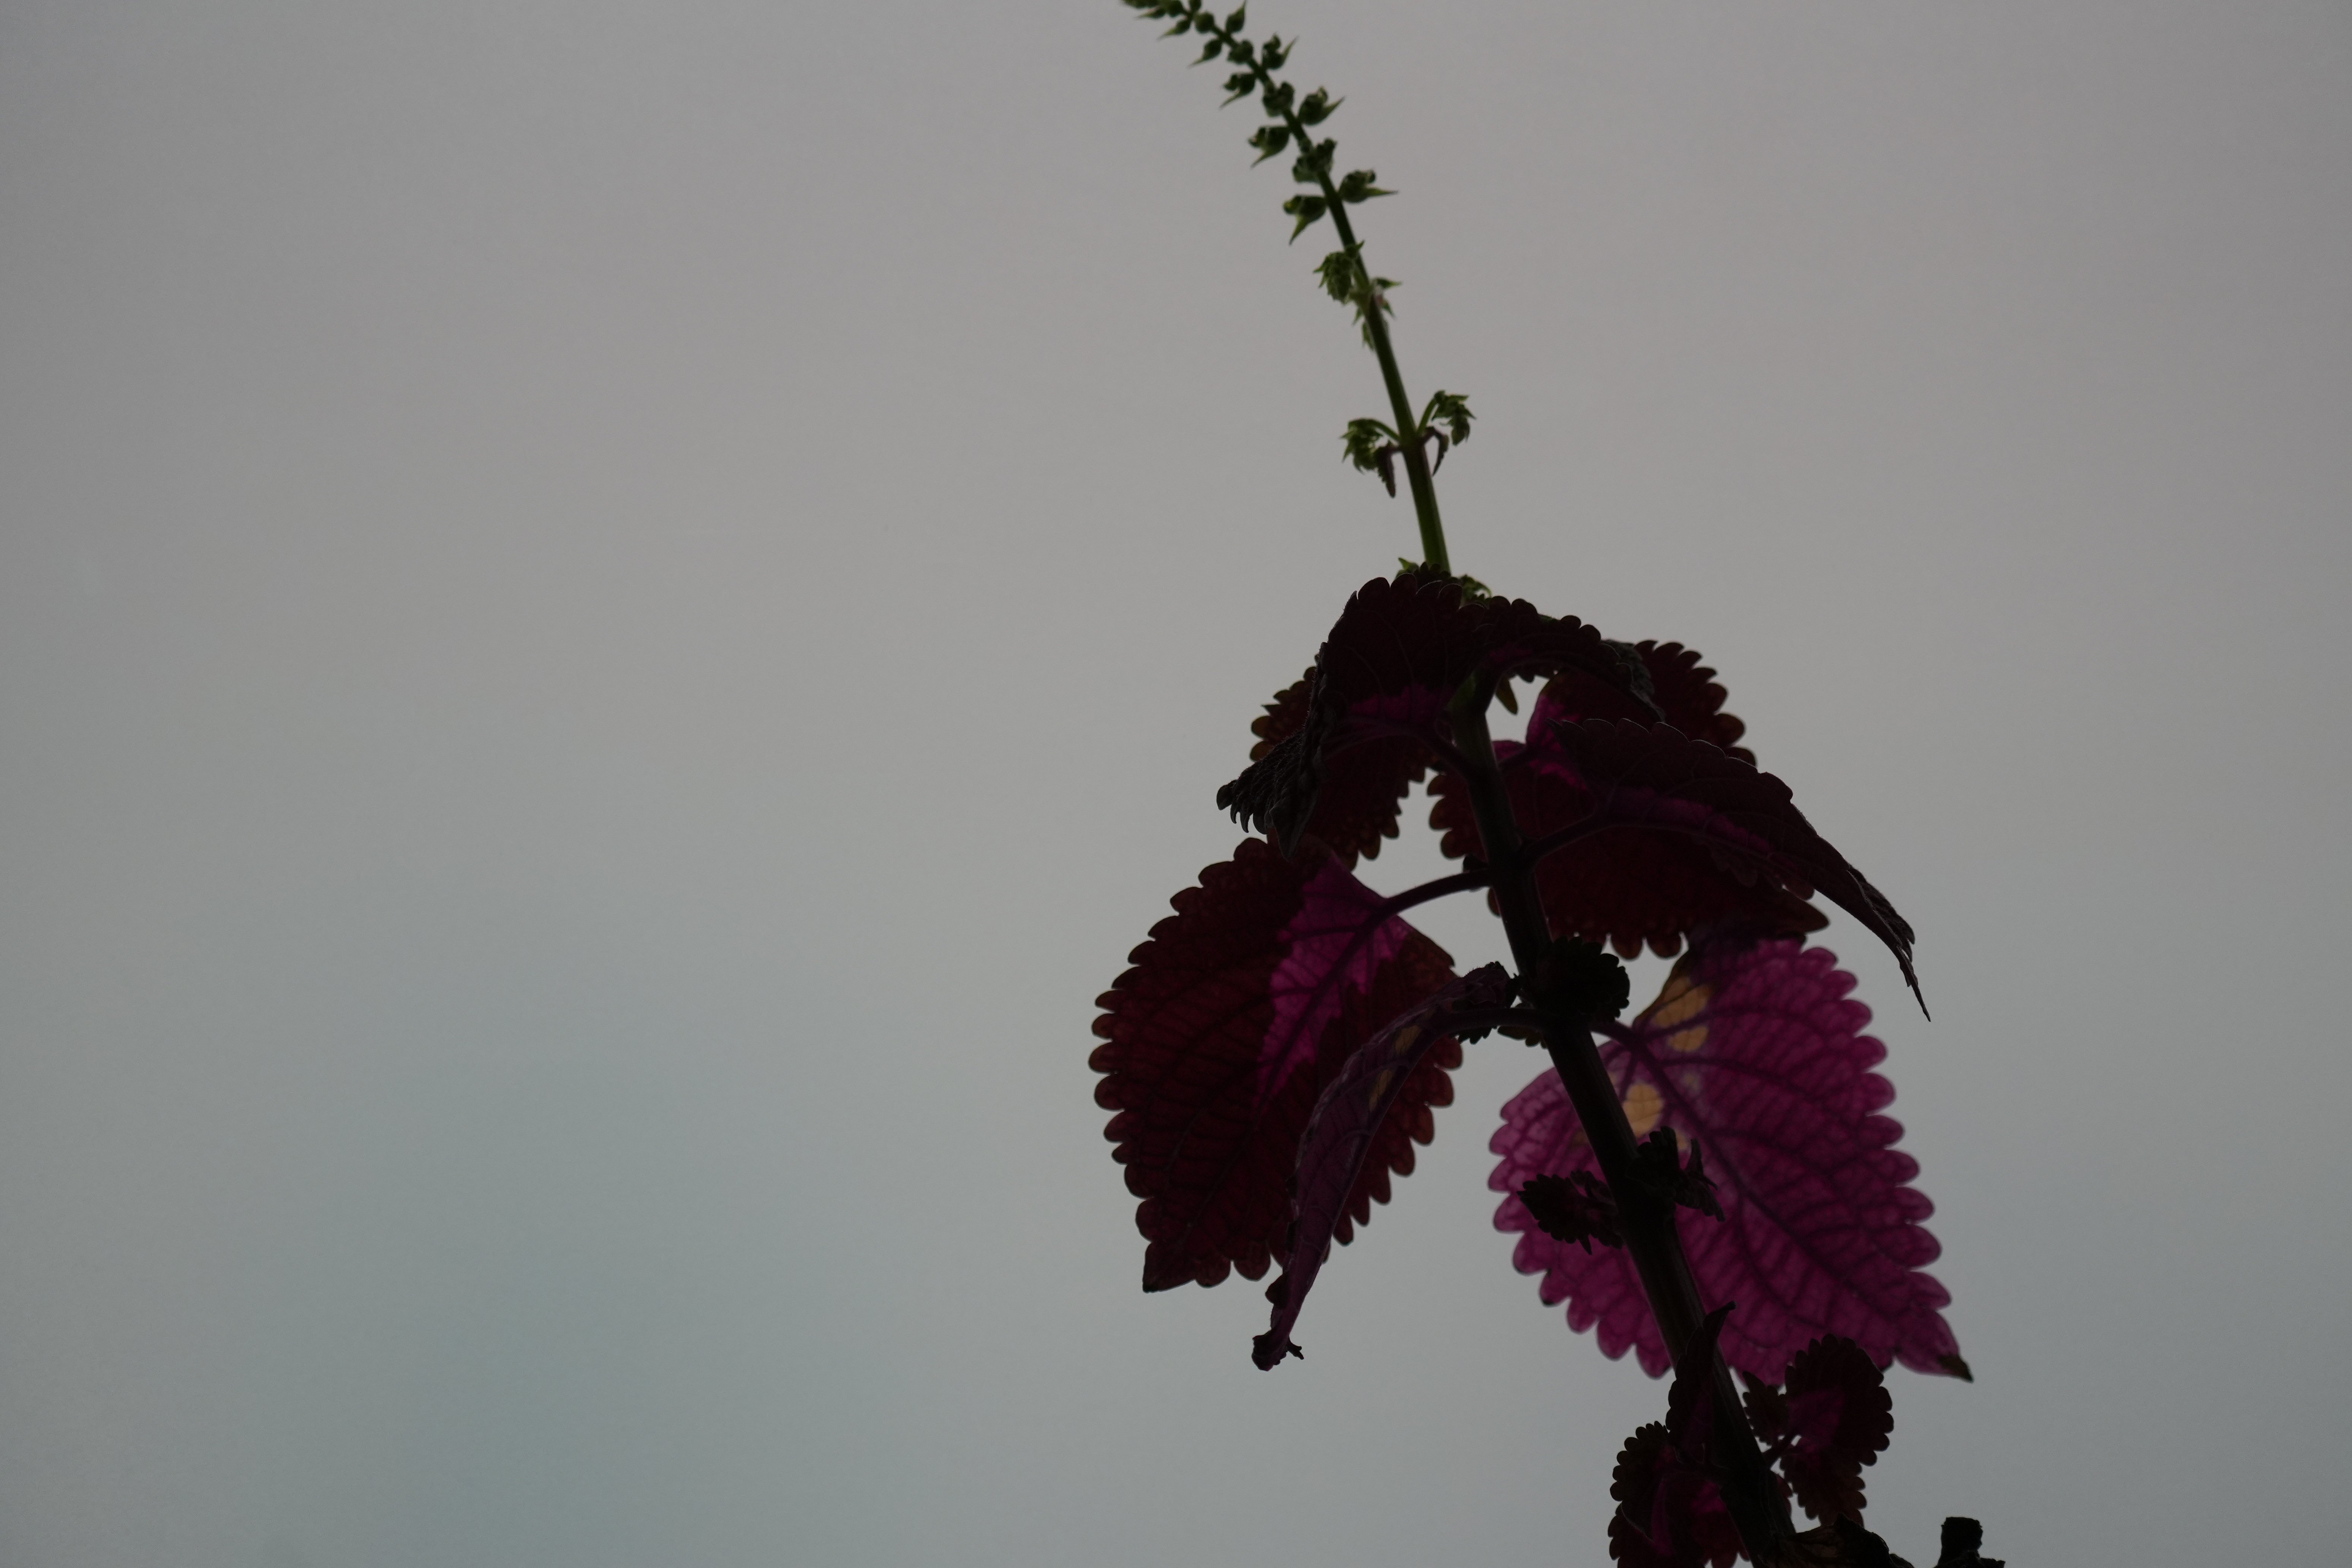
 Hi there, Affinity photo 2 is for some reason is not handeling the RAW "lossless comp" files properly. It seems that the lens correction is inverted and it makes blackbars around the image. When I use a compressed RAW image it is working properly. I tried resetting settings affinity photo 2 (no changes) Opend in ACDSee working properly Opend in Sony Imaging Edge working properly Opend in Windows photo working properly Test raw images added and jpegs all directly from the camera Specs: Camera: Sony A6700 All lenses when RAW compression setting is in "lossless comp" PC: Windows 11 32 gb ram Nvidea geforce RTX 4090 Affinity photo 2.2.1.2075 DSC02821 compressed.ARW DSC02822 lossless comp.ARW
-
 I want to check that the black text in my press-ready PDF is actually black. The document profile is set as CMYK Text colour is showing in the document as CMYK 0-0-0-100 I'm using the following export profile: Text colour in the PDF produced shows RGB 20-29-27 CMYK 69-66-67-77 A previous profile showed RGB 30-27-27 which my commercial printer flagged as an issue and I want to find out which setting I set actually corrected the issue. I've read the following threads but I am none the wiser:
-
 UPDATED: paint brush DOES NOT WORK when painting a mask as shown in affinity tutorial 2 pixel layers, black mask on the top one, I select the brush and white paint and try to paint on the mask, nothing happens. Am I missing something? you paint masks with black and white to mask out or in things right? EDIT: can confirm even after watching affinity tutorial on masking, paint bursh does not work atall on a mask, it doesn't wor for painting white nor black, the only available thing is to "paint" the mask with the eraser tool, operation which is not reversable. Help, there must be something wrong
 -
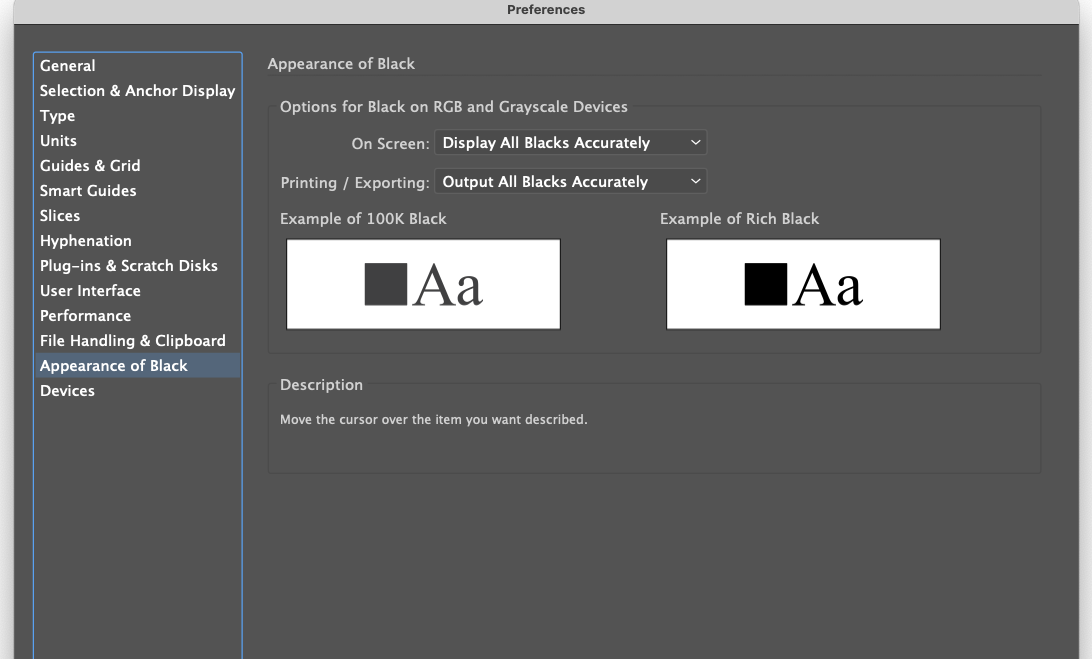
 I think an option to display K100 as 100% black in the CMYK mode in Affinity is needed. Illustrator/Indesign has the option in the Preferences to choose the appearance of black. Everyone has their taste. you should let users choose.
-
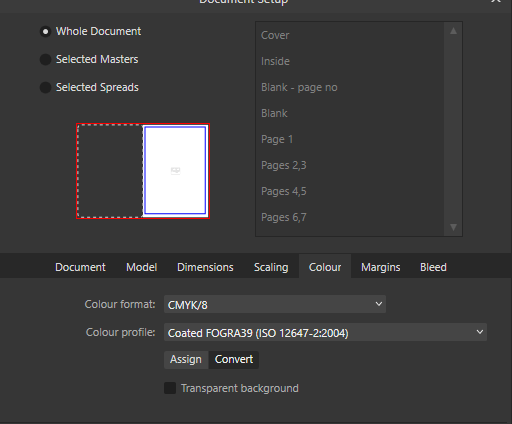
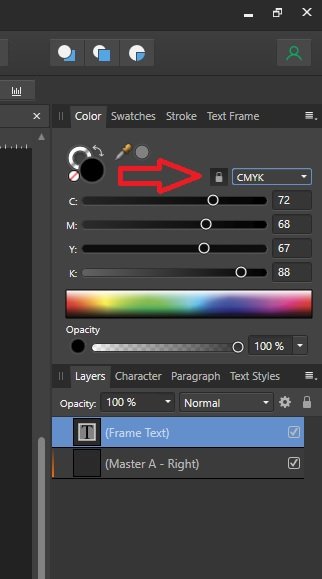
 I set up a new document (for a paperback book) and chose grayscale/8 in the initial set-up box. But when I add a text frame, it is CMYK with values of 72-68-67-88. Is this correct, or should I change the text box’s setting to grayscale too? And while I’m here, are those the best CMYK settings for type, or should it be 0-0-0-0? Thanks.
-
 I recently noticed that none of the "black" text in my document was actually printing on my laser printer as black. I created the attached simple Affinity Publisher document to demonstrate the problem. This document accepts all the default settings for a new "Press Ready" letter sized document, which includes the CMYK/8 color format and U.S. Web Coated (SWOP) v2 color profile. I changed nothing, added a single line of text, and printed the document. The text on the printed document is noticeably dithered. I tried exporting a PDF (also attached) and find that when I try to print it, the text is exactly the same, dithered a bit. I have confirmed that the document has (by default) chosen the proper C0 M0 Y0 K100 color of black for the body text. Note that I can use the same laser printer to print a similar simple test from Apple's Pages software and the text appears crisp and fully black. What am I doing wrong with Affinity Publisher? How can I be sure that when I export my PDF for the printer, it will export with proper black text when I cannot confirm this myself before sending it off? I'd like to be able to print decent proofs in my office, it is extremely frustrating that everything I print comes out looking pixellated (see the photograph, Affinity Publisher sample on top, Pages sample below). test-black.afpub test-black.pdf pages-black.pdf
-
 Comin' around the Clubhouse Turn, it's ‘Black Matte’ two lengths ahead of ‘White Matte’ … See how exciting a Graphix Forum can be … ? I know — Who’da thunk, right? Today’s Big Question: What does “remove white matte” and “remove black matte” do? What should I expect to see happen after they’re invoked? ‘Remove white paper’ is pretty straightforward and does an excellent job. I've never had cause to need or use the two ‘matte’ options enquired about, but it'd be nice to know what they're for, when and how to use them, and what to expect after use. On a separate matter, I have become SO used to being able to just tick a box to automatically create a new file with a xparent background. That is worth the price of admission. Returning to our Big Question: All input welcomed and appreciated.
 -
The object supposed to have style="fill:rgb(0,0,0);" but it's not. Though some SVG viewers show it as black, it's not good thing to omit the fill color. Black(#000000/ 0,0,0) <?xml version="1.0" encoding="UTF-8" standalone="no"?> <!DOCTYPE svg PUBLIC "-//W3C//DTD SVG 1.1//EN" "http://www.w3.org/Graphics/SVG/1.1/DTD/svg11.dtd"> <svg width="100%" height="100%" viewBox="0 0 2481 3508" version="1.1" xmlns="http://www.w3.org/2000/svg" xmlns:xlink="http://www.w3.org/1999/xlink" xml:space="preserve" xmlns:serif="http://www.serif.com/" style="fill-rule:evenodd;clip-rule:evenodd;stroke-linejoin:round;stroke-miterlimit:2;"> <rect x="903.885" y="890.274" width="1108" height="1006.4"/> </svg> Green(#00FF00/0,255,0) <?xml version="1.0" encoding="UTF-8" standalone="no"?> <!DOCTYPE svg PUBLIC "-//W3C//DTD SVG 1.1//EN" "http://www.w3.org/Graphics/SVG/1.1/DTD/svg11.dtd"> <svg width="100%" height="100%" viewBox="0 0 2481 3508" version="1.1" xmlns="http://www.w3.org/2000/svg" xmlns:xlink="http://www.w3.org/1999/xlink" xml:space="preserve" xmlns:serif="http://www.serif.com/" style="fill-rule:evenodd;clip-rule:evenodd;stroke-linejoin:round;stroke-miterlimit:2;"> <rect x="903.885" y="890.274" width="1108" height="1006.4" style="fill:rgb(0,255,0);"/> </svg>
-
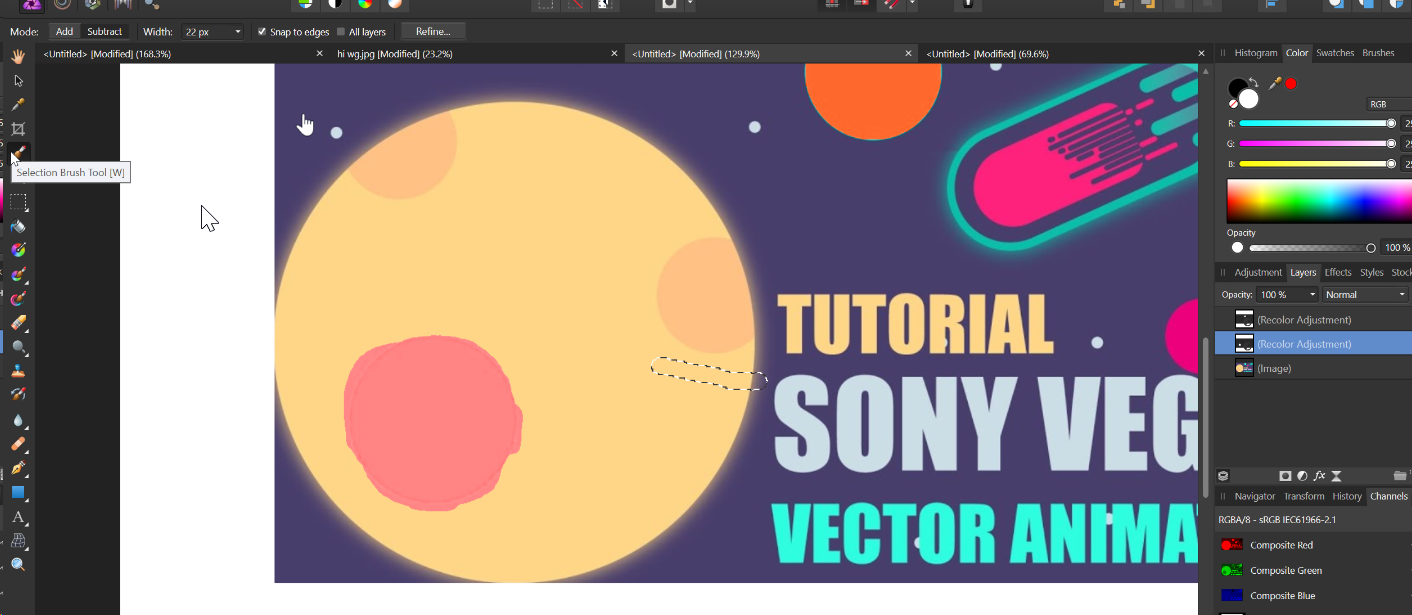
 I have an image that I want to apply an adjustment layer over. I want to keep the image mainly black and white, but then I want to paint over specific colors using the In-painting brush tool. For some reason, whenever I paint the image, Affinity just wipes out whatever progress I made, for absolutely no logical reason (I suspect it's a bug). Here's a video I want to follow, for reference purposes: https://www.youtube.com/watch?v=NXANeRRPBdw Any help is very much appreciagted.
 -
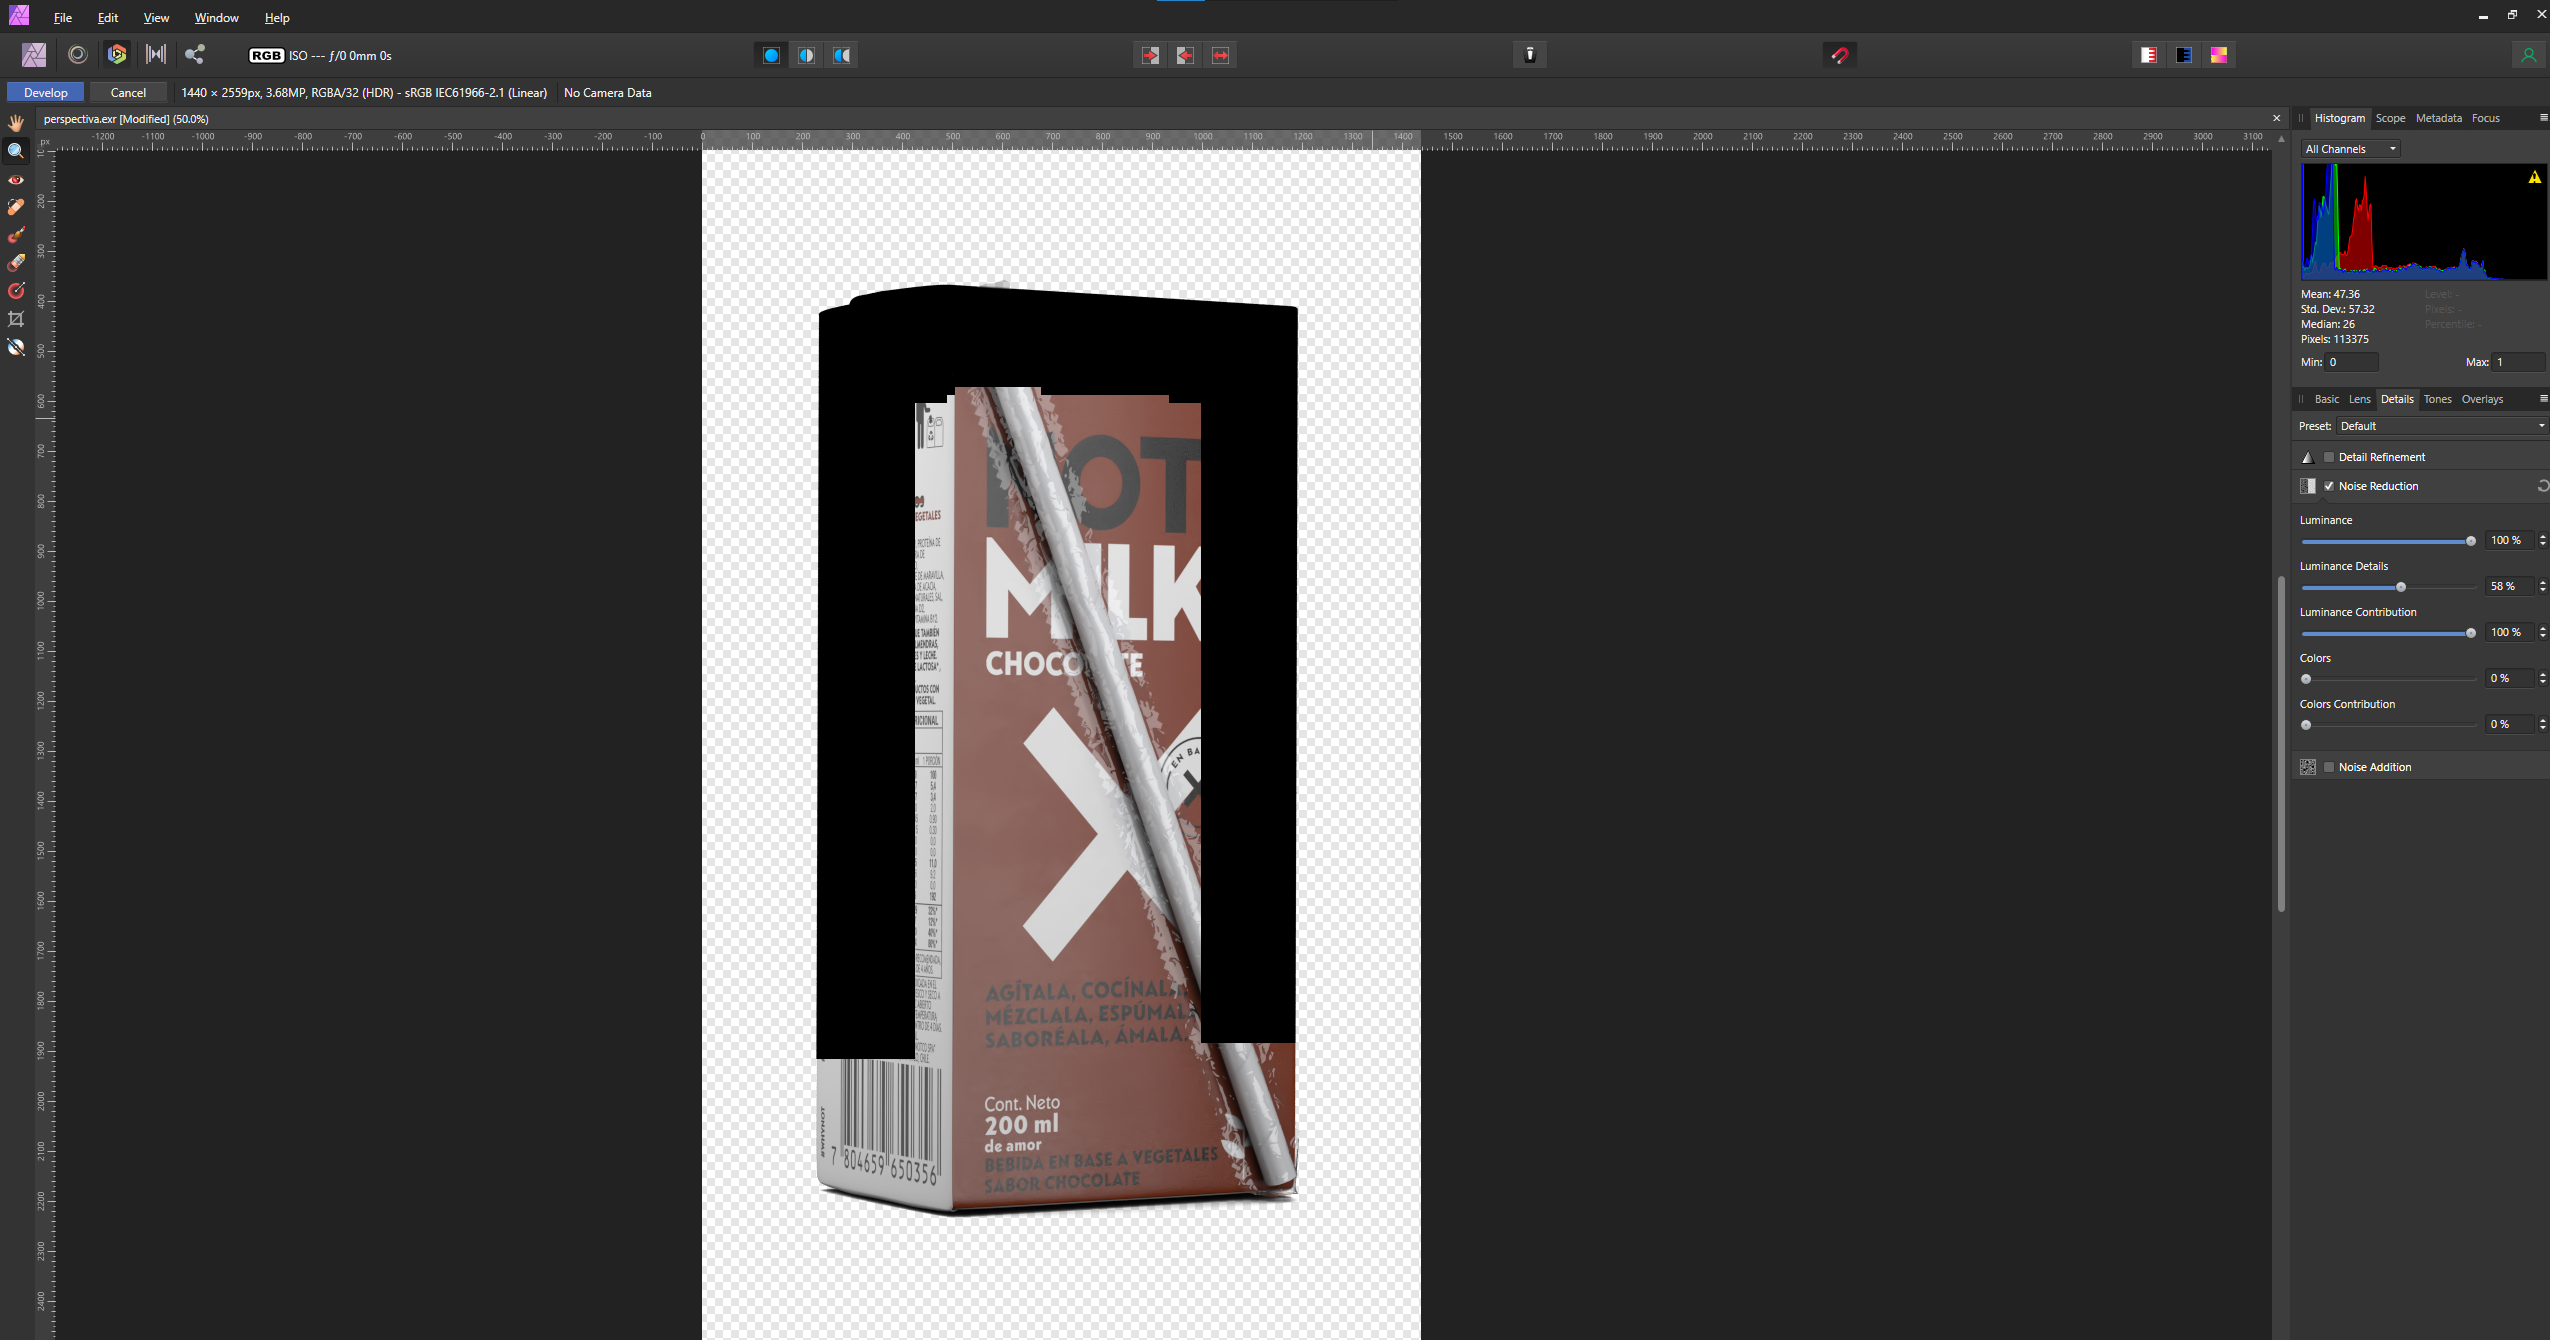
Hi i cant de noise my renders (32 bit exr), as they produce black areas that don't desapear. This will happen with other renders as well. my specs: Affinity Photo 1.9.2 win 10 (updated) geForce gtx 980 4GB (Latest Drivers) i7 9470k 32gb ddr3 perspectiva.exr
-
 I have a question concerning colour. When I create a new Affinity Designer document, the Default Black colour isn't 100% Black, it is 72 Cyan, 68 Magenta, 67 Yellow and 88 Black. Why that colour? If it was "registration" (100% of all colours) I could understand but it isn't. It is odd because I have set the colour space to be CMYK when I created the document. Is this a bug or is it supposed to be that way? For someone who has experience working with images for print it isn't as much of a problem (it is annoying but can be dealt with) but for someone who doesn't quite understand the printing process this could be a problem. On screen it looks black but if it were to be printed commercially, it wouldn't look so good.
 -
 Can you convert from color to grayscale and/or black/white in Affinity Designer and/or Photo? This is very helpful for designing for the very few people who cannot see color in checking for background/foreground contrast.
 -
 HI all, I have all 3 Affinity softwares. I have the Asus Zenbook Duo Pro i9. Now, it's great, but when I first got my laptop I had to change the colour management profile to sRGB virtual from the system default because all colours were coming up black. This worked for a while and the laptops been working fine. After the latest windows 10 update however, my email application (mailbird) would crash on start up due to UI errors (Microsoft updated their colours/themes or something) and their fix was to tell me to change it back to the default settings. This worked for Mailbird, but all the colours then turned black again in all Affinity software. Now, after changing the profile again to do some work, none of my Affinity software will even start. Don't you just love Microsoft and their silly updates? --- Before I email Affinity support, does anyone have any ideas?
 -
 I am new to Affinity to to photo editing. I am practicing from the purchased workbook. However, I have a deadline to meet and can't figure out how to change the background of my photos to solid black. I received the ceramic images photographed with a mixture of busy backgrounds. I am re-photographing all 30 of the ceramic pieces on black cloth backdrops, but I am running out of time. Where can I find step by step instructions on how to take a photo and change its background to solid black? Thank you so much for your assistance!!
 -
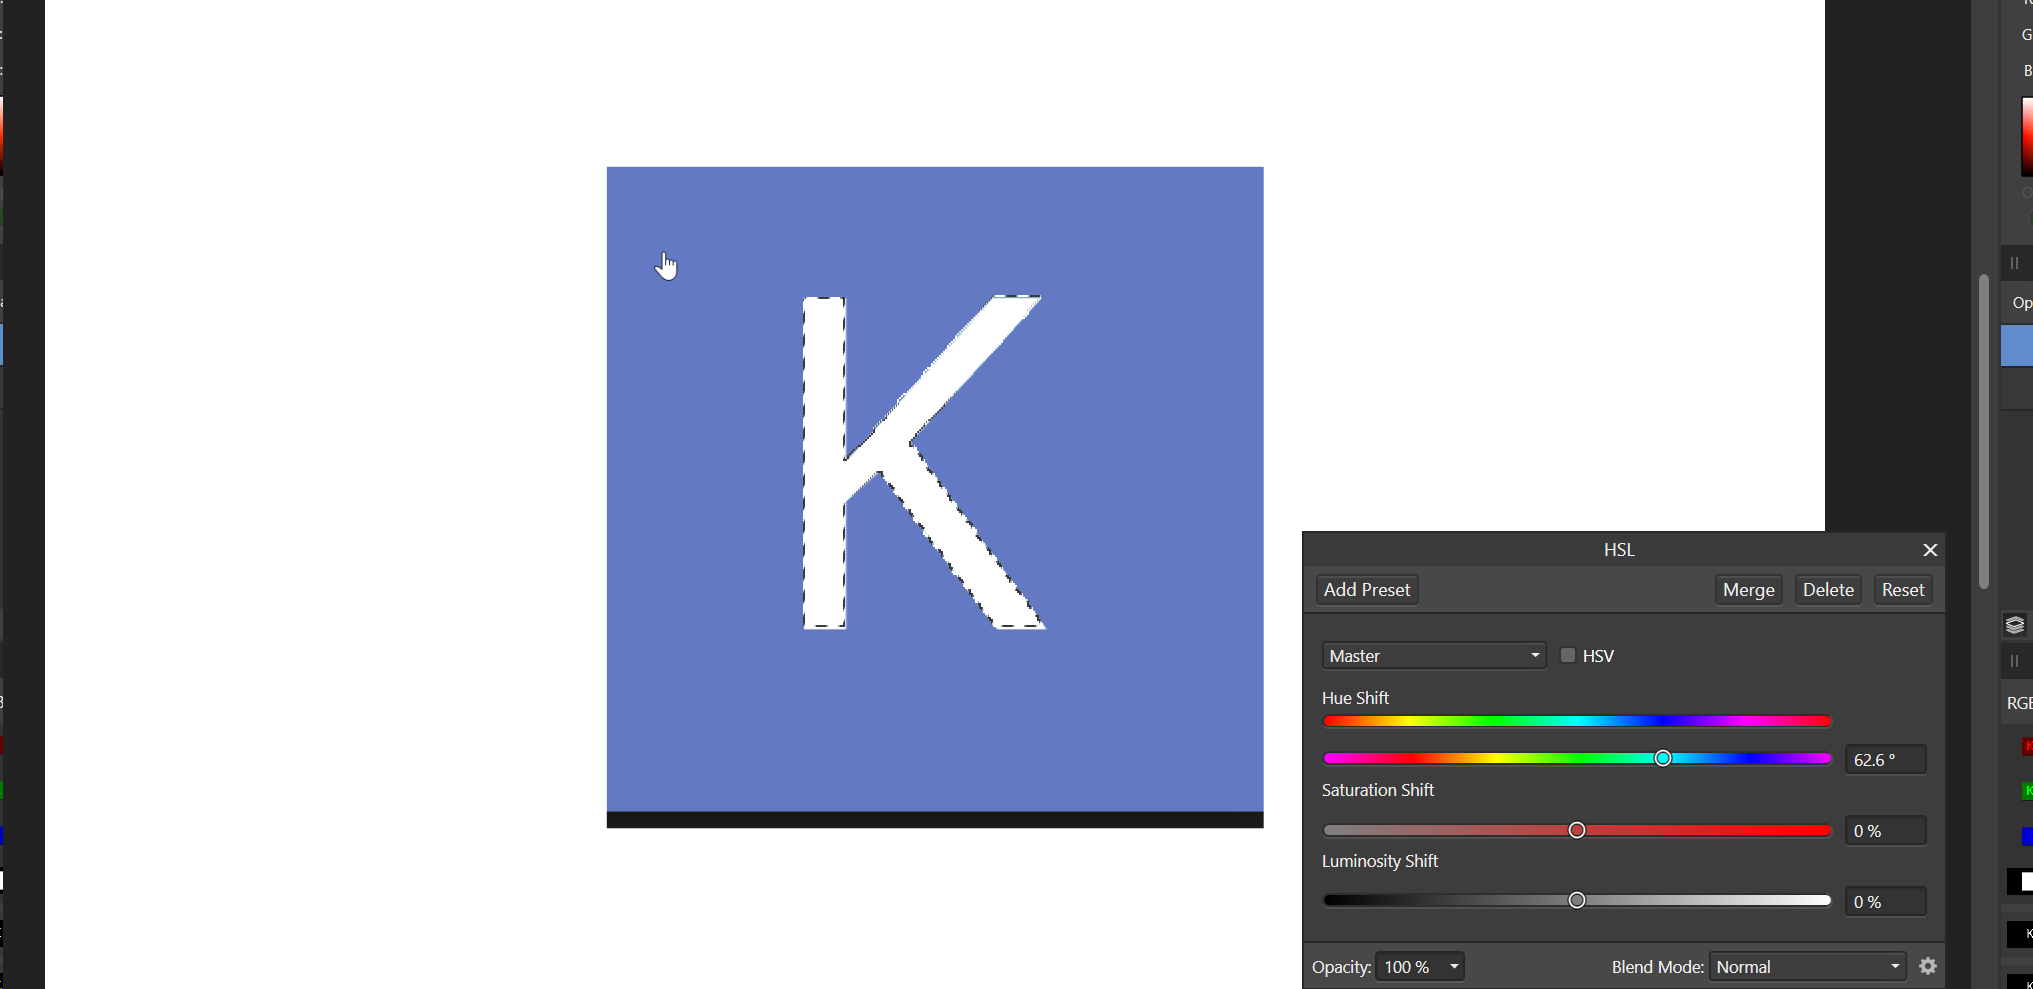
 Hi, I'm very sorry for asking this question but it's been driving me insane in the last 2 days. So I have this png file of a bunch of icons, they are all black and white. I want to colorize them to make them super pretty :D Looks like this So I then: 1) flattened the doc just to be sure. There's only one, unlocked PIXEL layer 2) set the color format to RGB16 3) converted the ICC profile to RGB generic 4) selected a part of the (only) layer using the square selection tool 5) pressed the adjustement panel/button and selected "HSL" .... nothing happens. This is odd because it works just fine using a color image (I regularly change eye colors and stuff like that without any issue) So something tells me that affinity doesn't consider black to be a color, but of course if i try to pain over the black it doens't take the aliasing into account and looks terrible. I tried 'filling' the black space with a different color and that doenst replace the black either, it just paints on top (and badly so). So in a nutshell what i want is replace the black and all its gradients of grey that forms the antialiasiang to say, red with gradients of red. I hope this makes sense, again, sorry for the n00b question!
 -
 Hello forum, I hope, someone can help me out with setting up a Publisher document: The colours used are black (from cmyk) and one spot colour. By writing the PDF for printing, all texts (set to 100% black in Publisher) are being transformed to "rich black" containing cmyk colours. (Nooooo!) How can I prevent 100%-black-elements from being converted to some cmyk colour? I've found a suggestion to create a solid colour for 100% black. That solution is not working for me: I am using greyscale photos as well. So now the created PDF contains three colours. The first spot colour, the black from the greyscale photos and the spot colour I created to prevent texts converting to cmyk. That is very annoying, I need the PDF to be used only the black from cmyk and the one solid colour. Is there a soloution for this? Thank you guys for suggestions / help. Cheers
 -
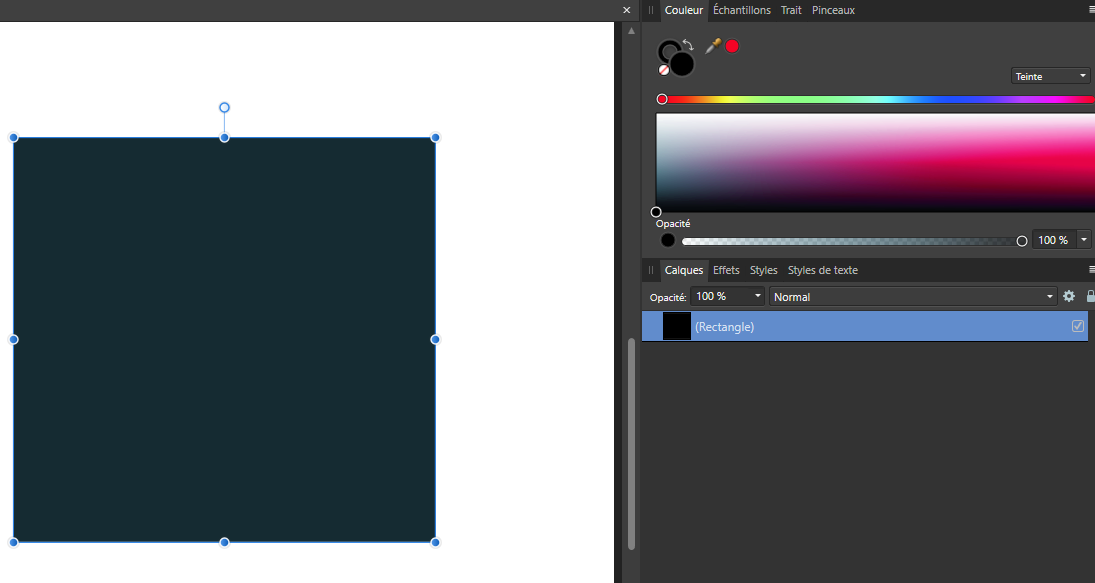
 The black color is not display in black but in dark blue in Affinity Designer interface. If I export my test file with a simple black rectangle in a other format as PNG or SVG the color is well display in black in the exported file. I tryed all available configurations (RVB/8-sRGB, CMJN-...) but nothing changed. Thank you for your suggestion. I am working with Affinity Designer, released 1.7.3.481 on Windows.
-
 Hi, I am new here. I jusr recently purchased Affinity Publisher and I am starting to use it for some black & white typesetting. However, as soon as I started with some tests, I can’t seem to be able to print the text pages (Black only) on my laser printer and ensure it actually comes out as Black. It always prints screened, at a percentage which seems to be about a 90% Black. I have searched the forums and Google to see if other users had encountered a similar problem, but I can’t seem to find anything. I tried to set my document both with CMYK and Gray color format, to no avail. I also recreated the Black from scratch, giving a value of 0-0-0-100, but it prints in screened dark gray both if I use a "rich black" or a 0-0-0-100 CMYK Black. I am using Publisher with an old Mac Tower and operating system El Capitan 10.11.6. The problem seems to be with Affinity alone, as my old InDesign prints the Black correctly.
 -
 Hey guys, I'm trying to make a black to transparent fading gradient, I drew a rectangle shape on 1/3 height of the page and use the transparent tool to click on bottom of the shape and drag to the top straight, midpoint set the standard 50% but on top of the shape, it appear to have noticeable edge and not completely fade to transparent and blend in to the background image, can you guys let me know how to settle this? I try to set the midpoint to 55% because I want the black are to be a bit higher and then make a second midpoint and set it to 45% and the edge don't noticeable much but because there's 2 midpoints, the gradient looks like a 3 bar with black, dark gray and light gray shading. And how do i make sure tire's no banding problem with amazon KDP print? Please help! Gradient Test.afdesign
 -
 I like to set up keyboard shortcuts to reset the colours back to black and white. So I did that in all the Affinity programs in Publisher. When I start a new document default (white) is set is set to R=231 G=232 B=233 and Default (black) is set at R=35 G=31 B=32. If I use my keyboard shortcut to make the actual Black and White (not sure why they are not by default) White will be R=255 G=255 B=255 as it should be. But Black is still as it was R=35 G=31 B=32. If I change both colours and use the keyboard shortcut, they return to actual white and not black numbers as stated above. Is there a way to set the colours by default to white and black and is there a way to edit the colours got via the keyboard shortcut? On a side note, I have also set up a keyboard shortcut to get 50% grey, when I use my shortcut the colour I get is R=147 G=149 B=152 surely 50% grey is R,G,B=128?
 -
 i would like to recolor the black selection i made. if its in color i can recolor it using the recolor option, but if its white/black it doesnt allow it to be recolored. and stays white no matter what
-
I created this cute little penguin character in Designer. He started out as some basic shapes and I converted them to curves and added them together. Then I tweaked the resulting shape to create his body.
-
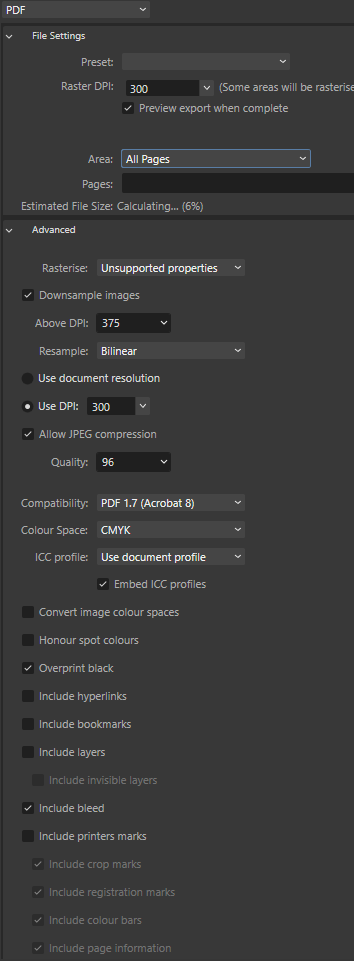
 In searching for an Adobe alternative for 2 small newspapers I found a working example that maintains CMYK color space and preserves accurate black text and artwork. This small example is of one ad using CMYK artwork and CMYK swatches to include accurate black (100% K). The attachment should tell the story, but basically created a 6-column by 2 inch doc in AFPub. I then copied text from an InDesign 2019 ad of the same size and pasted it into the new AFPub document. In the process, the color settings in the INDD doc for Goss 45u2 carried over with the text and also set the AFPub workspace of Monitor August 2015 for a Goss press. The color swatch and the accurate K swatch also were brought over during the copy and paste process (to include the fonts). When exporting to a PDF, I created a preset as shown while trying to maintain no color conversion. The results for the AFPub PDF and the INDD PDF were exactly the same with measurements from the Acrobat Output Preview. This probably is not a solution for everyone, but for this small publication company it seems to fill the bill. The real test will be to have a press test, but the PDF tools all measure the same for both INDD and AfPub. Enlarge the attachment to read the process.
-
One of my first creations with Affinity Photo. #stillearning Stocks: (from left to right) www.pexels.com/photo/man-s-bla…www.pexels.com/photo/photograp…pixabay.com/en/caribbean-man-g…pixabay.com/en/guitar-beautifu…
-
 Hi Together, maybe I havent used the correct search terms, but I could not find anything in regard to my problem. In AD I see my canvas, but the space around it is always black. So I lose elements that I drag out of my canvas. I am used to place all my layout elements around the canvas and even explore design outside my canvas. Is there a way to change that view so that I can see everything that is placed around the canvas as well? I hope my question is clear (not english native speaker). Feel free to ask if anything is unclear.
- 1 reply
-
- 1
-

-
- affinity designer
- canvas
- (and 1 more)