Search the Community
Showing results for tags 'batch'.
-
 I am using Designer to make assets for a board game, and the slice tool is really great for separating into the digital vs print needs. However, when I open them to print, it's made assumptions about the scaling. I'm exporting at 300dpi because that's the print size but most are scaling them to fit. If I manually export, I can set the scaling and paper size. Is there any way for me to change these settings upon batch export? If not, does anyone have any workflow suggestions to do this? I can't be the only one with this problem.
 -
 I can't seem to get batch processing to work, it just seems to hang forever and I can't find any expected output files. I had to force quite Affinity Photo but now when I try and create a new batch job no batch queue wind shows and processing never starts. Can anyone shed any light on whether this feature works reliably enough to use. Why would it be hanging? Why are there no output files being generated? Any other options for batch processing of images - all I need to do is clip the image to remove any white space around the edges and resize to a fixed width. Thanks
 -
Would it be possible to add percentual resizing to the batch processing? At the moment *50% doesn't do anything and simply 50% is converted to 50px. Thanks
-
 Hi, I've recently purchased Affinity Photo 1.6.11 (running on macOS 10.14.4.) I'm having a problem similar to the one described here: https://forum.affinity.serif.com/index.php?/topic/63849-photo-batch-processing-does-not-save/. But I'm not using Default Folder X as the OP was. After pressing OK, the New Batch Job dialog disappears instantly and doesn't seem to do anything. When I examine the output folder in Finder, the file is not there. Thanks
-
 Hi, I'm seeing an odd issue trying to use AP to batch process a whole bunch of .pdf files. All the pdfs are the same dimensions and resolution, but when i run through a batch job to open and save them out to a different target pixel dimensions, some pages will end up several pixels out. If I look at the pages in Preview, there doesn't seem to be anything different about them, or if I open / rasterise them in Photoshop, there's no difference. If I open the files on their own in AP, choose their native 300 dpi, then go to resize canvas, all of them show a native size of width: 2007px, height 3070px. BUT if I use batch to process the files, with a target output size of 2007x3070px, some of them will be sized differently by a few pixels in either width or height. If I turn off all the content layers in InDesign before outputting (so that it's just the background colour of the master pages), then AP batch seems to output a consistent size, so I think the batch process is using a content box of what's on the page, rather than the crop box for the page itself (to use Photoshop's description of rasterising options). Attached is the file to try it with. It ends up as 2003x3070 when batched to png or any other format, but when opened, it's 2007x3070. Any ideas for how to get this consistent? page.P006.pdf
 -
 Hi ... can't find an answer anywhere -- is there a way to batch convert a bunch of photos to rotate them all at once? I just need a 90 degree rotation on a folder full of sideways pics. Thanks in advance for any guidance.
 -
I am currently designing some custom blu-ray covers for my films at home and build everything off a basic template file. When I edit in the release date of the film I have to adjust the year in a text field on the front, on the back, and multiple times in the copyright block below the barcode. I was thinking it would be great if I could edit all of these at the same time so I don't have to hunt down every instance of it. I think the best way to do this would be to have a system of global variables. I could create a custom variable called [Date] and embed that in my template file. When I start to work on a new film cover I would simply set that variable to equal a different year and in one action I will have saved a lot of time. The same logic could apply to graphics as well if a user needed to replace a logo.
-
 Good Morning All! I am currently attempting to find a replacement for Adobe Fireworks as the business I'm employed by would like to move away from the costs involved with Adobe. We have narrowed it down to Affinity Photo as a necessity to have for the batch function but also a luxury to have the Photoshop capabilities to use on the rare occasion. We had some custom scripts written which we imported into Fireworks. I cannot get the same end result with solely the batch process function within Affinity. Below is the script contents that were written for us for Fireworks. Is it possible to automate this inside Affinity? Essentially we want the option point the batch tool to the files to resize multiple photo file formats into 1000 x 1000 72dpi. For example, If the image is 1000 x 500 before batching, we want the batch program to fill out to 1000 x 1000 with the colour white. We no longer require "makeResize" and only "makeLarge" within the script. var theDoc = fw.getDocumentDOM().filePathForRevert; var origFile = Files.getDirectory(theDoc) + '/' + Files.getFilename(theDoc) var newFile = 'file:///C|/batched/'+Files.getFilename(theDoc, true) makeLarge() makeResize(227, 227, '_m') makeResize(75, 75, '_s') makeResize(40, 40, '_t') Files.deleteFileIfExisting(origFile) function makeLarge() { var oldHeight = fw.getDocumentDOM().height; var oldWidth = fw.getDocumentDOM().width; if (oldHeight > oldWidth) { newWidth = 1000 var temp = oldHeight/newWidth newHeight = oldHeight/temp newWidth = oldWidth/temp } else { newHeight = 1000 var temp = oldWidth/newHeight newWidth = oldWidth/temp newHeight = oldHeight/temp } fw.getDocumentDOM().setDocumentImageSize({left:0, top:0, right:newWidth, bottom:newHeight}, {pixelsPerUnit:72, units:"inch"}, true); fw.getDocumentDOM().setDocumentCanvasSize({left:0, top:0, right:1000, bottom:1000}, true); fw.getDocumentDOM().setDocumentCanvasColor("#ffffff", true); fw.getDocumentDOM().selectAll(); fw.getDocumentDOM().align('center vertical', 'true') fw.getDocumentDOM().align('center horizontal', 'true') var theDoc = fw.getDocumentDOM().filePathForRevert; var theFolder = Files.getDirectory(theDoc) var theFilename = Files.getFilename(theDoc, true) var fullPath = theFolder + '/' + theFilename var theExtension = Files.getExtension(theDoc) fw.exportDocumentAs(null, newFile+'_l', ({applyScale:false, colorMode:"24 bit",exportFormat:"JPEG",jpegQuality:80,jpegSmoothness:0,jpegSubsampling:0,name:"JPEG - Better Quality",numEntiresRequested:0,percentScale:"100",useScale:true,xSize:0,ySize:0})) } function makeResize(height, width, ext) { fw.getDocumentDOM().setDocumentImageSize({left:0, top:0, right:height, bottom:width}, {pixelsPerUnit:72, units:"inch"}, true); fw.getDocumentDOM().setDocumentCanvasSize({left:0, top:0, right:height, bottom:width}, true); fw.getDocumentDOM().setDocumentCanvasColor("#ffffff", true); fw.getDocumentDOM().selectAll(); fw.getDocumentDOM().align('center vertical', 'true') fw.getDocumentDOM().align('center horizontal', 'true') var theDoc = fw.getDocumentDOM().filePathForRevert; var theFolder = Files.getDirectory(theDoc) var theFilename = Files.getFilename(theDoc, true) var fullPath = theFolder + '/' + theFilename var theExtension = Files.getExtension(theDoc) fw.exportDocumentAs(null, newFile+ext, ({applyScale:false, colorMode:"24 bit",exportFormat:"JPEG",jpegQuality:80,jpegSmoothness:0,jpegSubsampling:0,name:"JPEG - Better Quality",numEntiresRequested:0,percentScale:"100",useScale:true,xSize:0,ySize:0})) } Convert for Web.jsf
 -
 I have 97 JPEG source files. I ran batch jobs to apply crops to these and save the outputs as JPEG to another folder. For three runs of this, I had the following results: All 97 files processed okay 1 file was skipped 3 files were skipped By skipped, I mean that the affected file simply did not appear in the output folder. The files skipped appeared random. They were not at the beginning or at the end of the list. There were no error messages. I manually redid the skipped files without problems. The input files all had identical dimensions of 600 x 1800 pixels. The batch macros consisted of one crop only -- no other changes. MacOS 10.13.6; iMac (21.5-inch, Mid 2011) 2.7 GHz Intel Core i5; 12 GB RAM; Affinity Photo 1.6.7 I would be willing to provide info or test cases to reproduce this.
 -
 I've recently started using the batch feature to speed up my workflow. I had a few recordings saved in the library but the other day I went to use one and poof...they were gone. I couldn't even see the default presets. Thinking that maybe it was a glitch I tried replicating one I'd made (I needed to edit a group of photos). Once I'd completed it I tried to save it to my library....nothing. No popup window no nothing, like the link had been cut. I tried resetting the program but it didn't resolve the issue. I dont know if I deleted the batch folder or something by accident, but regardless it's not working and I need this feature for my business. Can someone please help me??????
 -
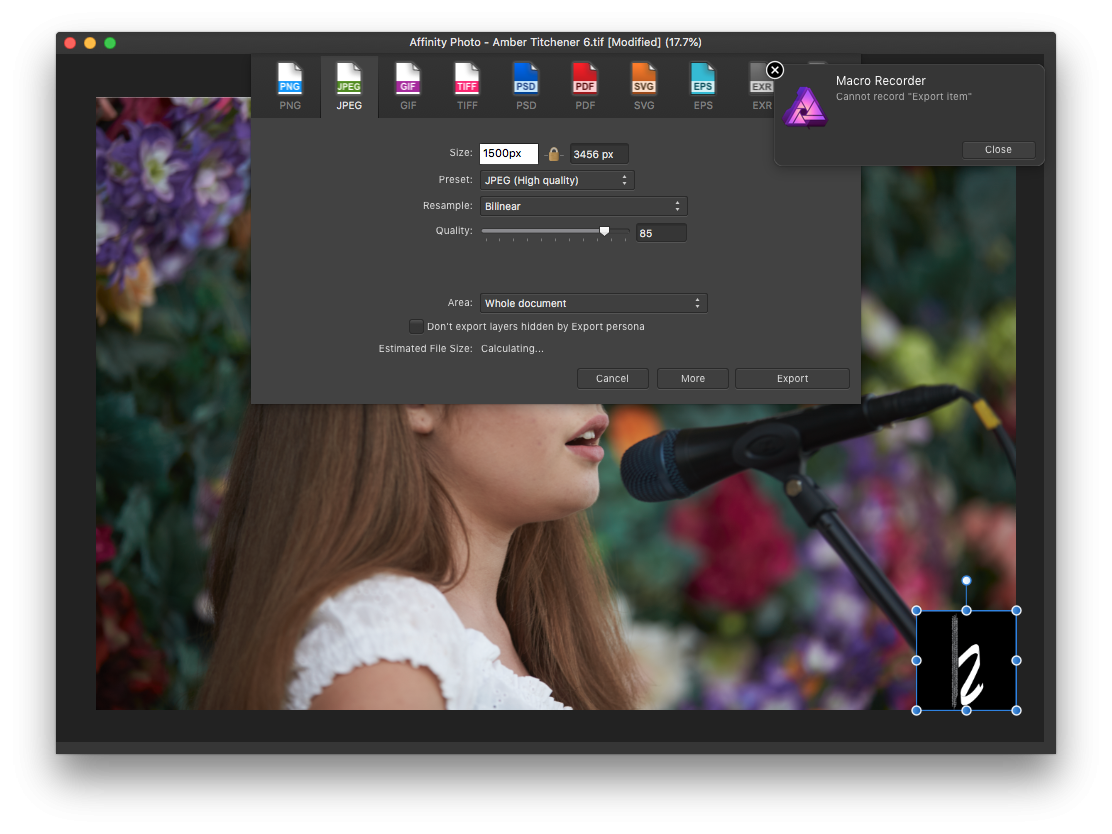
 Hi I know there have been topics on batch processing but I keep hitting a problem, I'm wanting to resize and watermark my photos to send to clients, but when recording the macro it says it can not record the save instruction in the macro. is there a workaround for this, as it basically means you can not do any batch processing even though the option is there.
-
 As the files in AD are increasing, there is no way to export and delete them in batches. Did I miss something?
 -
 I have a similar question in AP, my workflow likes these.. 1- open (or new from clipboard) 2- changes to CMYK mode 3- resizes the image to 300dpi I record the above steps as a Macro to apply on the other images as step 1, but the results are distorted, may be all follow the original width & height within the marco any way to make a "flexible" macro to acquire the result? thanks (split by mod)
 -
 I have hundreds of images of various sizes, mostly very large sizes, that I want to resize to a maximum width of 1920px, at 72DPI, RGB colour mode, JPG format. The height should be variable since the original images have various heights as well and I need to keep the aspect ratio to prevent distortions. (1)is this possible with Affinity Photo? (2)what would be the steps for the resizing to record as a macro. (I tried recording resizing one image and then use that recording for a batch job but AP used also a fixed height on every image resulting in many distorted images)
 -
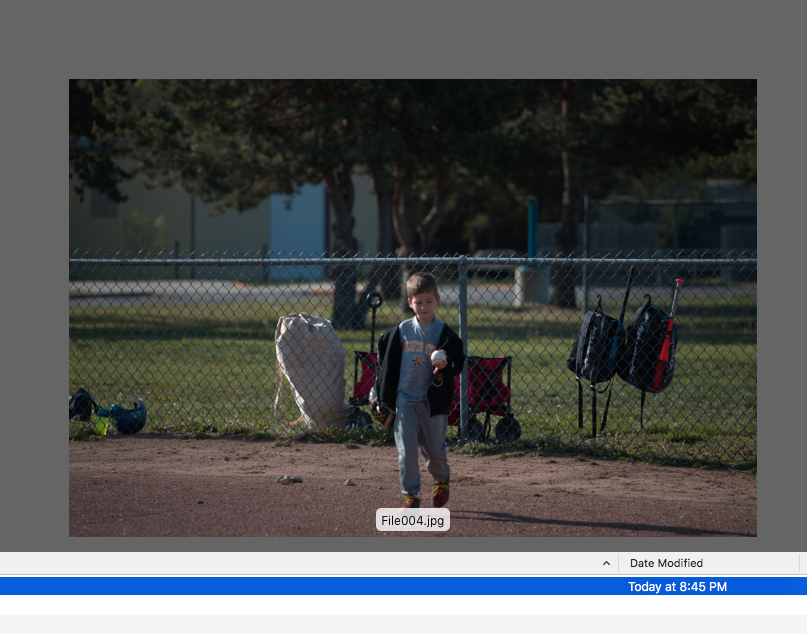
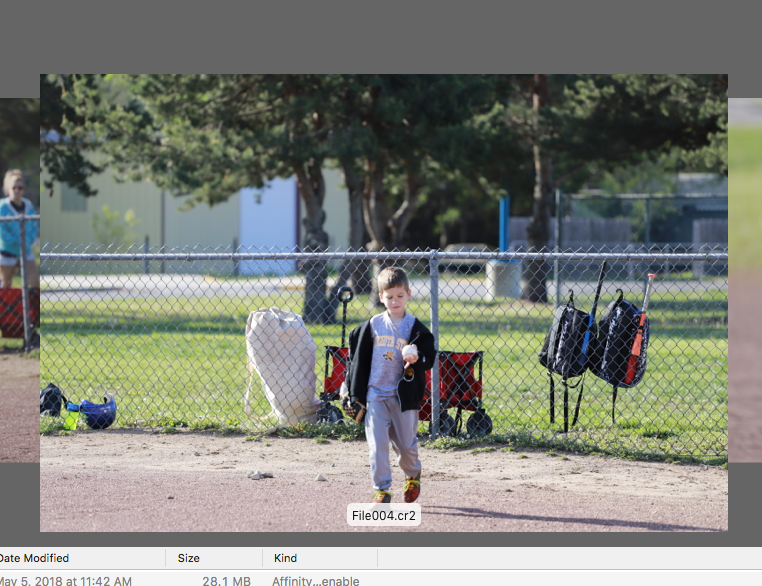
 I am somewhat new to affinity but not photo programs, I was trying to batch some Cr2 RAW from canon to jpeg for facebook uploads, when i go to create the macro all I am doing is sharpening, I would loved to create the presets or macro in the persona ? and not have to go into develop just to do that, maybe I'm missing something, these are just quick changes nothing super important. I open the RAW and exposure looks good just needs a tad sharpening....however after the batch they are 1-2 stops darker, i can't hardly judge batching them from the develop to the batch for the macro original and batched attached I just don't understand why or what I am missing, well i'd upload the files but i get an error 200 so here is a couple screen grabs you can see the difference in the brightness but like i mentioned all I'm doing is batch converting to jpeg and a sharpening, even if i don't do the sharpen it still makes them darker
-
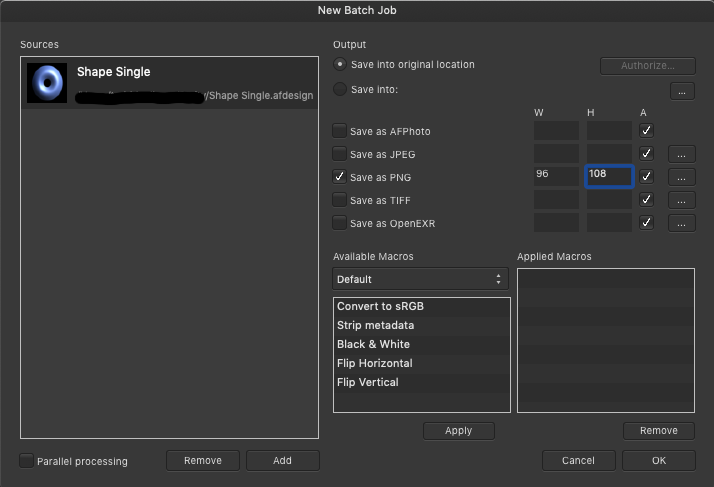
 On the "New batch job" windows, Add button, the "Open" window has a selector named "Affinity Files" that select several file types besides affinity files (JPEG, PNG, PDF, etc) Would be nice to have an entry that select only *.afdesign and *.afphoto file types and, please, change the name of former "Affinity Files" to "Image files" or whatever and name this option as "Affinity files".
 -
 Hi guys, I have taken a number of time-lapse images in Sony Raw and want to develop them. I can't see a way to do this in a batch. Is this correct? Leigh
 -
 Hello, First I want to thank you guys for the great tool Affinity Photo you have created for us to use. It takes some time to addapt to it, but it certainly works really good. I have an issue I want to tell you about. I am taking the product photos for an online shop and it's a big collection. I have developed some Macros, and lately I have been suffering from LOW DISK SPACE. Well, I started looking for the reason and I saw that the reason was 'My pictures' folder. I told you it's a big collection and I have thousands of photos. The Macro I apply is very simple: Exposition correction Curves editing Streightening + Square Crop Adding 3 guidelines and that is all. Should be simple. Of course, I need to keep the working file until the Season is over, just in case. But the thing is, these simple steps are converting my 5MB pictures into 50MB .afphoto files and it's eating up my Storage Space. Thank you for your work and I hope you will be able to solve this in following updates. Best, Anelia
 -
 Hi there, I would like to partition a lot of picture into nine subpictures each. In other words: I would like to digitally cut every picture into nine pieces. And at first, using the slicers available in export persona seemed to be the perfect solution. Since the partition always stays the same, this sounded like a job for batch mode. I just have one problem: When recording a macro, I cannot define a slicer. So right now it would seem that I cannot use this awesome feature in batch mode. Does anyone know any way around this? Thank you very much and kind regards, Dreamer
 -
 Hi I'm trying to figure out if there is a way to batch watermark photos with different dimensions. I want my watermark in the right-hand corner on the bottom of every photo. I've tried looking and can't find what I'm looking for.
 -
Hi, I was editing some images on the iPad yesterday. I'm trying to force myself to use the iPad more for photo editing because I'm tired of doing a quick iPad photo edit, then have to recreate a similar but more detailed edit on the desktop... double the work. I've grown increasingly more trusting of the Photo app in general. I've had some "serious edits" done solely in Photo on the iPad... printed large and was happy with the results and accuracy. So, back to my question... I was editing about a dozen images yesterday in Photo on the iPad. They were all RAW images, shot with nearly the same settings of basically the same subject matter. I found myself doing pretty much exactly the same preliminary RAW edit on all of them. Is there a way that I can somehow save RAW edit settings, and them batch apply them to multiple RAW images on the iPad? I'm guessing not, but I thought I'd ask. If not for RAW, is that possible for JPG sources?
-
 It should be possible to apply the same settings of the develop persona when importing a set of RAW images. Saving the settings, loading the photos one-by-one and loading the settings every time is too time consuming. In Photoshop Elements this is no problem! Please refer to this thread:
- 1 reply
-
- 1
-

-
- raw
- develop persona
- (and 1 more)
-
 So I am trying to edit a star lapse I took by recording my macro then re applying it to a batch. However the results are way different when I do this. How come? I know the Macro is good because when I run it on just a single image it looks great. However when I run it as a part of a batch it doesnt even look the same. Whats the point of the batch processor if it doesn't work? I was really hoping to use affinity over Adobe products but its looking like for mass image editing nothing beats adobe. Might have to just suck up and pay to stupid monthly cloud subscription. ugh. Anyways the first image is my original macro ran on just a single image and then the image on the right is from the batch, and yes I used the same macro for both. Image 1 https://www.dropbox.com/s/ikm4y3e0hh6sue4/PTRO5713.jpg?dl=0 image 2 https://www.dropbox.com/s/vkt8y5jnecfz7kx/PTRO5713b.jpg?dl=0
 -
 I enjoy using Affinity Photo on a Mac (OS X 10.12.6). I frequently need to resize a folder of images and run a small macro to place my studio logo on these lower-resolution images for use by the client, post them to social media, etc. I downloaded the update for Affinity Photo v1.6.7, and it's great. But is there still no way to run a batch job on a folder containing both landscape and portrait orientation images and end up with all of them properly resized to the same pixel dimensions without distortion? I saw a discussion about a complex macro for this purpose in another thread. However, this essential function should be included as a basic part of Affinity Photo's capabilities, yes? Has anyone had success with this sort of operation? I really love Affinity Photo and tell all of my pro colleagues about it as a potential replacement for Photoshop, but this simple issue could hold many pros back. Thanks very much for any insight that you developers and experienced users might have.
 -
 Hallo allerseits.. Habe gerade gesehen, dass es hier im Forum auch Deutsch sprechende/schreibende kompetente Leute gibt; so kann ich mir evtl die Mühe sparen mein 'Problemchen' in Englisch zu beschreiben. Für die webseite meines Turnvereines verwende ich Logos/Piktogramme im png-Format die frei verfügbar sind. Allerdings passt das angebotene Rot nicht so recht zu unserer Corporate Identity An einem habe ich es per Makro recht gut hingekriegt. (Rottöne ausgewählt - angepasst - deselektiert- neu abgespeichert - fein) Gibt es eine Möglichkeit, die etwa 100 Icons in einem Rutsch -per Batch- umzufärben, ohne jede einzeln zu öffnen? Für Eure Hilfe schon jetzt vielen Dank Liebe Grüsse aus dem Rheingau adus