Search the Community
Showing results for tags 'autotrace'.
Found 9 results
-
 Here's a thread from 2014... It's crazy to think that you would have implemented this by now (2022) unless you're going the Reason Studios route, "We know what you need, you don't!" unless I'm missing something....
- 30 replies
-
- 10
-

-
- autotrace
- affinity designer
- (and 8 more)
-
 Good day! Please tell me if Affinity Designer has a raster image autorouter to turn them into vectors, if there is, how to enable it, apply it?
 -
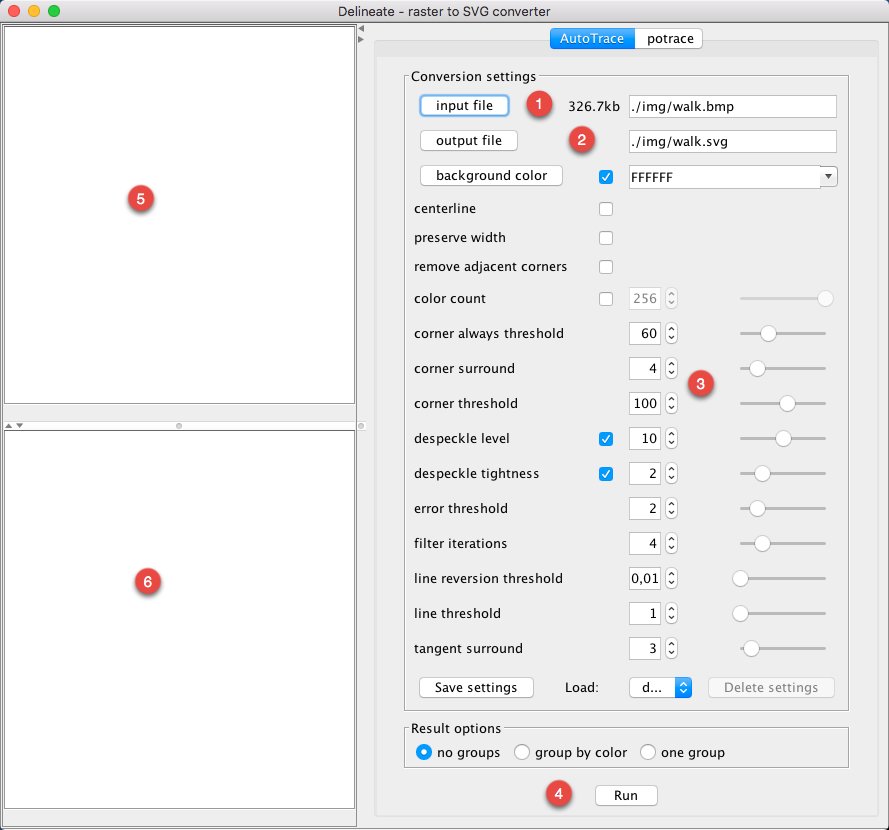
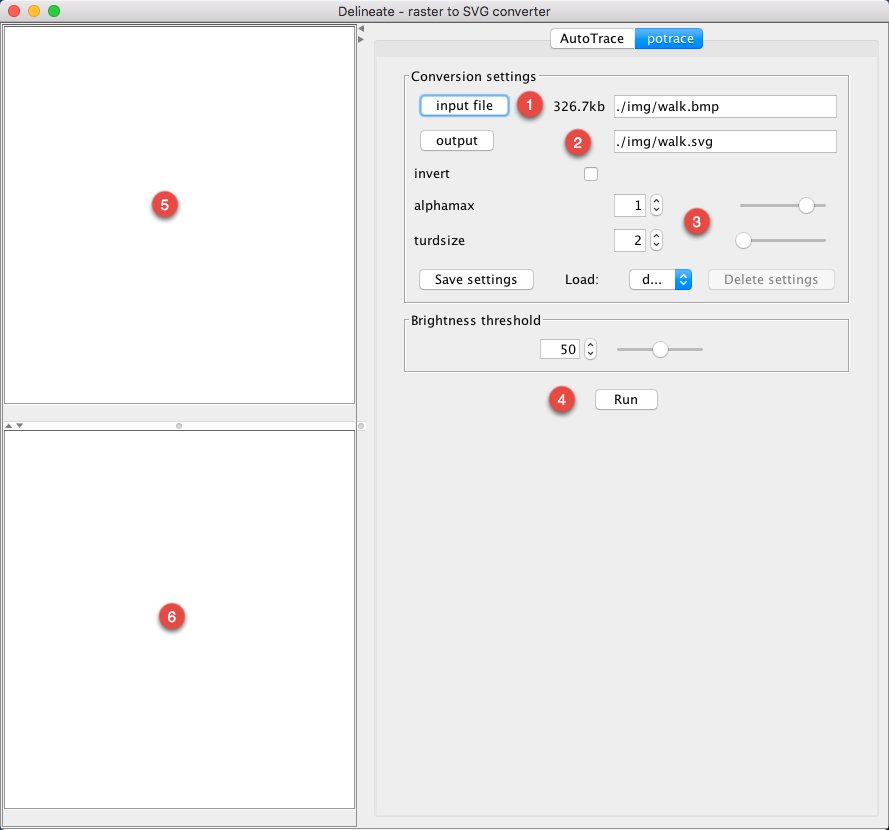
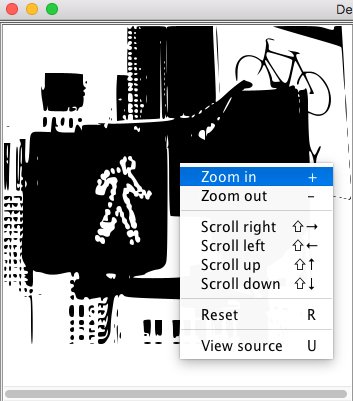
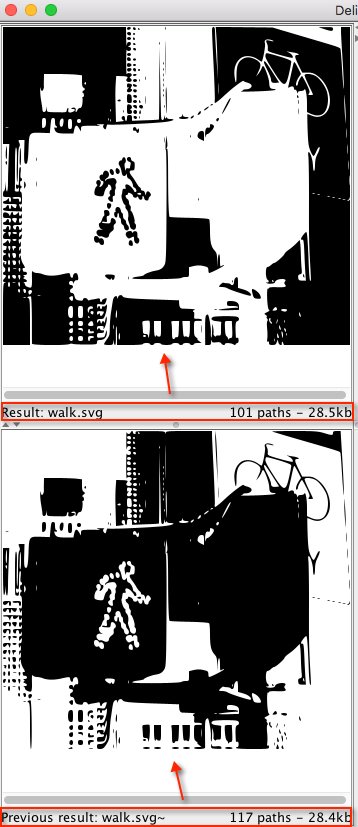
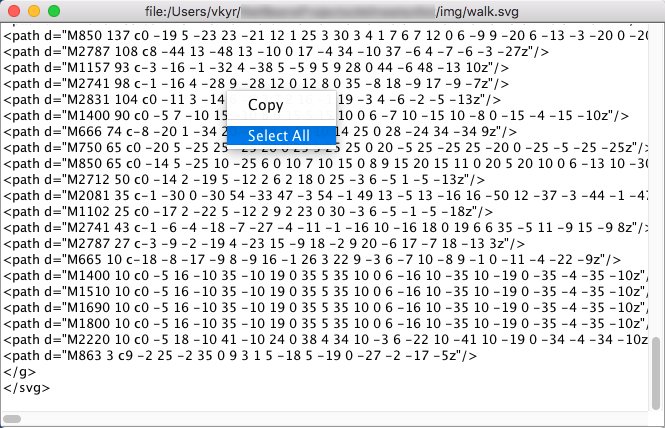
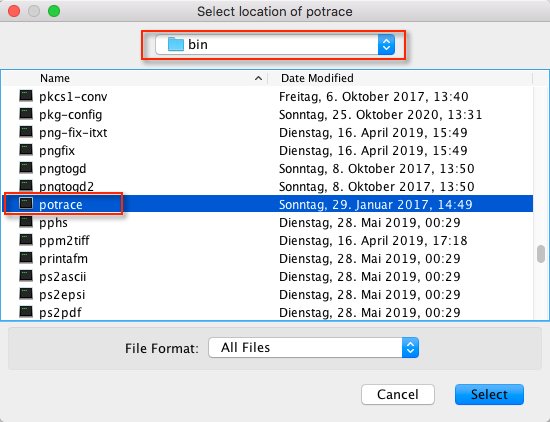
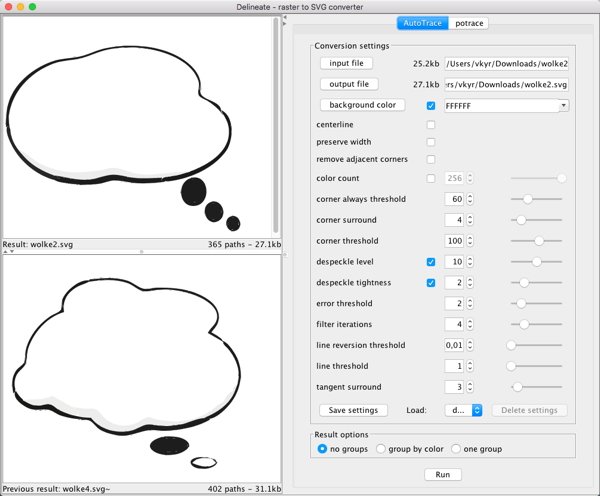
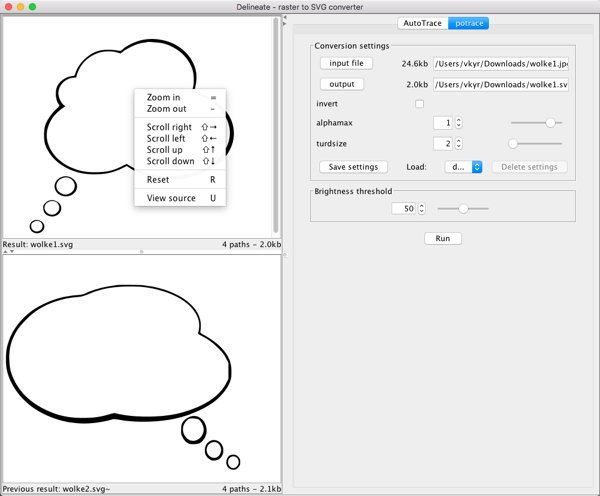
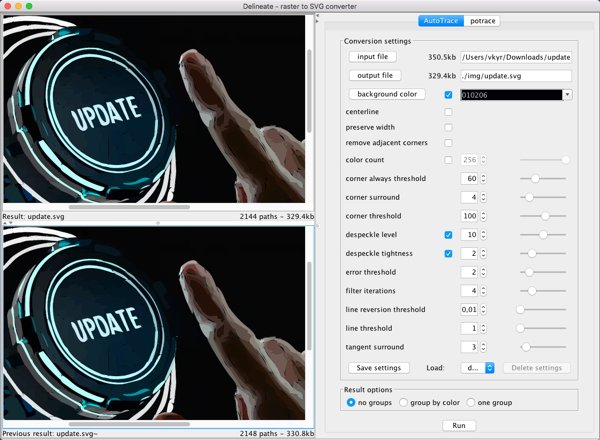
D E L I N E A T E - A R A S T E R T 0 S V G C O N V E R T E R What is it? Delineate is a tool for converting bitmap raster images to SVG (Scalable Vector Graphics) using AutoTrace or potrace. It displays SVG results using Apache Batik. Input formats are JPEG, PNG, GIF, BMP, TIFF, PNM, PBM, PGM, PPM, IFF, PCD, PSD, RAS. - Output format is SVG. Delineate is distributed under the GNU General Public License, see the in the ZIP-archive included LICENSE.txt file. For more information about Delineate, see http://delineate.sourceforge.net NOTE: that the old original Delineate 0.5 version might not run anymore nowadays with actual Java runtime environments. Thus you should use delineate-0.6.zip, which is my refactored, slightly enhanced and adapted over Delineate 0.6 version here (see also below under Installing for it's distribution archive). Also note that my port of Autotrace 0.40.0 for MacOS (autotrace-0.40.0-MacOS-vkyr.zip) is different and more clean than the version found on GitHub. My version is compiled against El Capitan (MacOS 10.11.6) with all library dependencies, which the GitHub version isn't, the later (the GitHub version) needs probably at least High Sierra (MacOS 10.13), or Mojave (MacOS 10.14) and uses GraphicsMagick instead of the original ImageMagick, which I used and compiled against. Installing Installing - GNU/Linux & Mac OS X 1) To run Delineate, you will need to install the following software: AutoTrace 0.31.1 or AutoTrace 0.40.0 (needs MacOS >= 10.13) or autotrace-0.40.0-MacOS-vkyr.zip (MacOS >= 10.11) NOTE: that the above MacOS AutoTrace 0.40.0 versions are just CLI apps (command line programs) inside an app wrapper (AutoTrace.app) thus you can't start those as common OSX apps via double clicking. - You need always to access and run the autotrace CLI binary inside the app wrapper: --> ...autotrace.app/Contents/MacOS/autotrace I suggest a user best makes a symbolic link from the binary inside the app wrapper to the Desktop or /usr/local/bin etc., thus like ... --> ln -s /Users/<your-username>/Applications/autotrace.app/Contents/MacOS/autotrace /Users/<your-username>/Desktop ... or ... --> ln -s /Users/<your-username>/Applications/autotrace.app/Contents/MacOS/autotrace /usr/local/bin ... so that you can point from inside of Delineate to the needed autotrace CLI binary then! potrace 1.16 Java J2SE 13 2) Set your JAVA_HOME variable to the location where you have Java installed. 3) Extract delineate-0.6.zip on to your machine. 4) To run: cd <install dir>/delineate chmod a+x delineate.sh ./delineate.sh ... or alternatively in a shell/terminal ... > cd <install dir>/delineate > java -jar delineate.jar 5) When you run a conversion for the first time, you'll be prompted to select the location of the autotrace or potrace application file. You must have these applications installed (see step 1). In the file chooser dialog window select the appropriate file: <autotrace install dir>/autotrace or <potrace install dir>/potrace Installing - Windows 1) To run Delineate, you will need to install the following software: AutoTrace 0.31.1 or AutoTrace 0.40.0 potrace 1.16 Java J2SE 13 2) Set your JAVA_HOME environment variable to the location where you have Java installed. In Windows you can add this environment variable by going to: Start -> Settings -> Control Panel -> System -> Advanced -> Environment Variables Click the New button: - enter the variable name as JAVA_HOME, and - enter the variable value as the location where Java is installed, for example: C:\Program Files\J2SDK_13 3) Extract delineate-0.6.zip on to your machine 4) To run: Go to the directory: <install dir>\delineate double click on or run the file: delineate.bat ... or alternatively in a Powershell ... > cd <install dir>\delineate > java -jar delineate.jar 5) When you run a conversion for the first time, you'll be prompted to select the location of the autotrace or potrace application files. You must have these applications installed (see step 1). In the file chooser dialog window select the appropriate file: <autotrace install dir>\autotrace.exe or <potrace install dir>\potrace.exe Quick Delineate usage overview: When Delineate starts it's main window should appear, where you first can on top select and switch which tracing tool, the Autotrace or Potrace tracer, to use for vectorization ... (1) The input file setting area (2) The output file setting area (3) The trace option settings area (there are always slightly more descriptive tooltip popup help strings shown when you hover over certain areas with the mouse) (4) The run button, which when first time used will ask after where to find the path to the autotrace or potrace binary, which it needs to use ... (5)+(6) The traced SVG result preview areas, the top area shows the actual trace result, the bottom area the previous traced result ... There is a right click popup menu with command entries (which also show the keyboard shortcuts) you can use on both SVG preview areas ... ... in order to zoom in/out and scroll around the view. Further you can inspect the generated SVG code (via View source) in an text view popup window ... ... where you can select all (the keyboard shortcut is Cmd-/Ctrl-A) SVG code, or SVG code portions and copy (the keyboard shortcut is Cmd-/Ctrl-C) these to the system clipboard. Some common usage screenshots: Final words I hope this raster to SVG converter GUI tool is useful for the one or other Affinity community member here then, regards v_kyr!

-
Here are some layouts I created for two poems with a spider theme in Affinity Publisher ... The corner spiders were created using the Autotrace function in DrawPlus X4 from a photo I took and saved as a wmf file. I wish Publisher would support the smf file type as well. The background image was created in Corel Paint It.
-
 Hi All, New to the Affinity range. In DrawPlus there is a tool called Auto Trace. I can import a picture or a logo, and it converts it to editable vector which is great for scaling, changing individual elements. Is there something like that in Designer?
 -
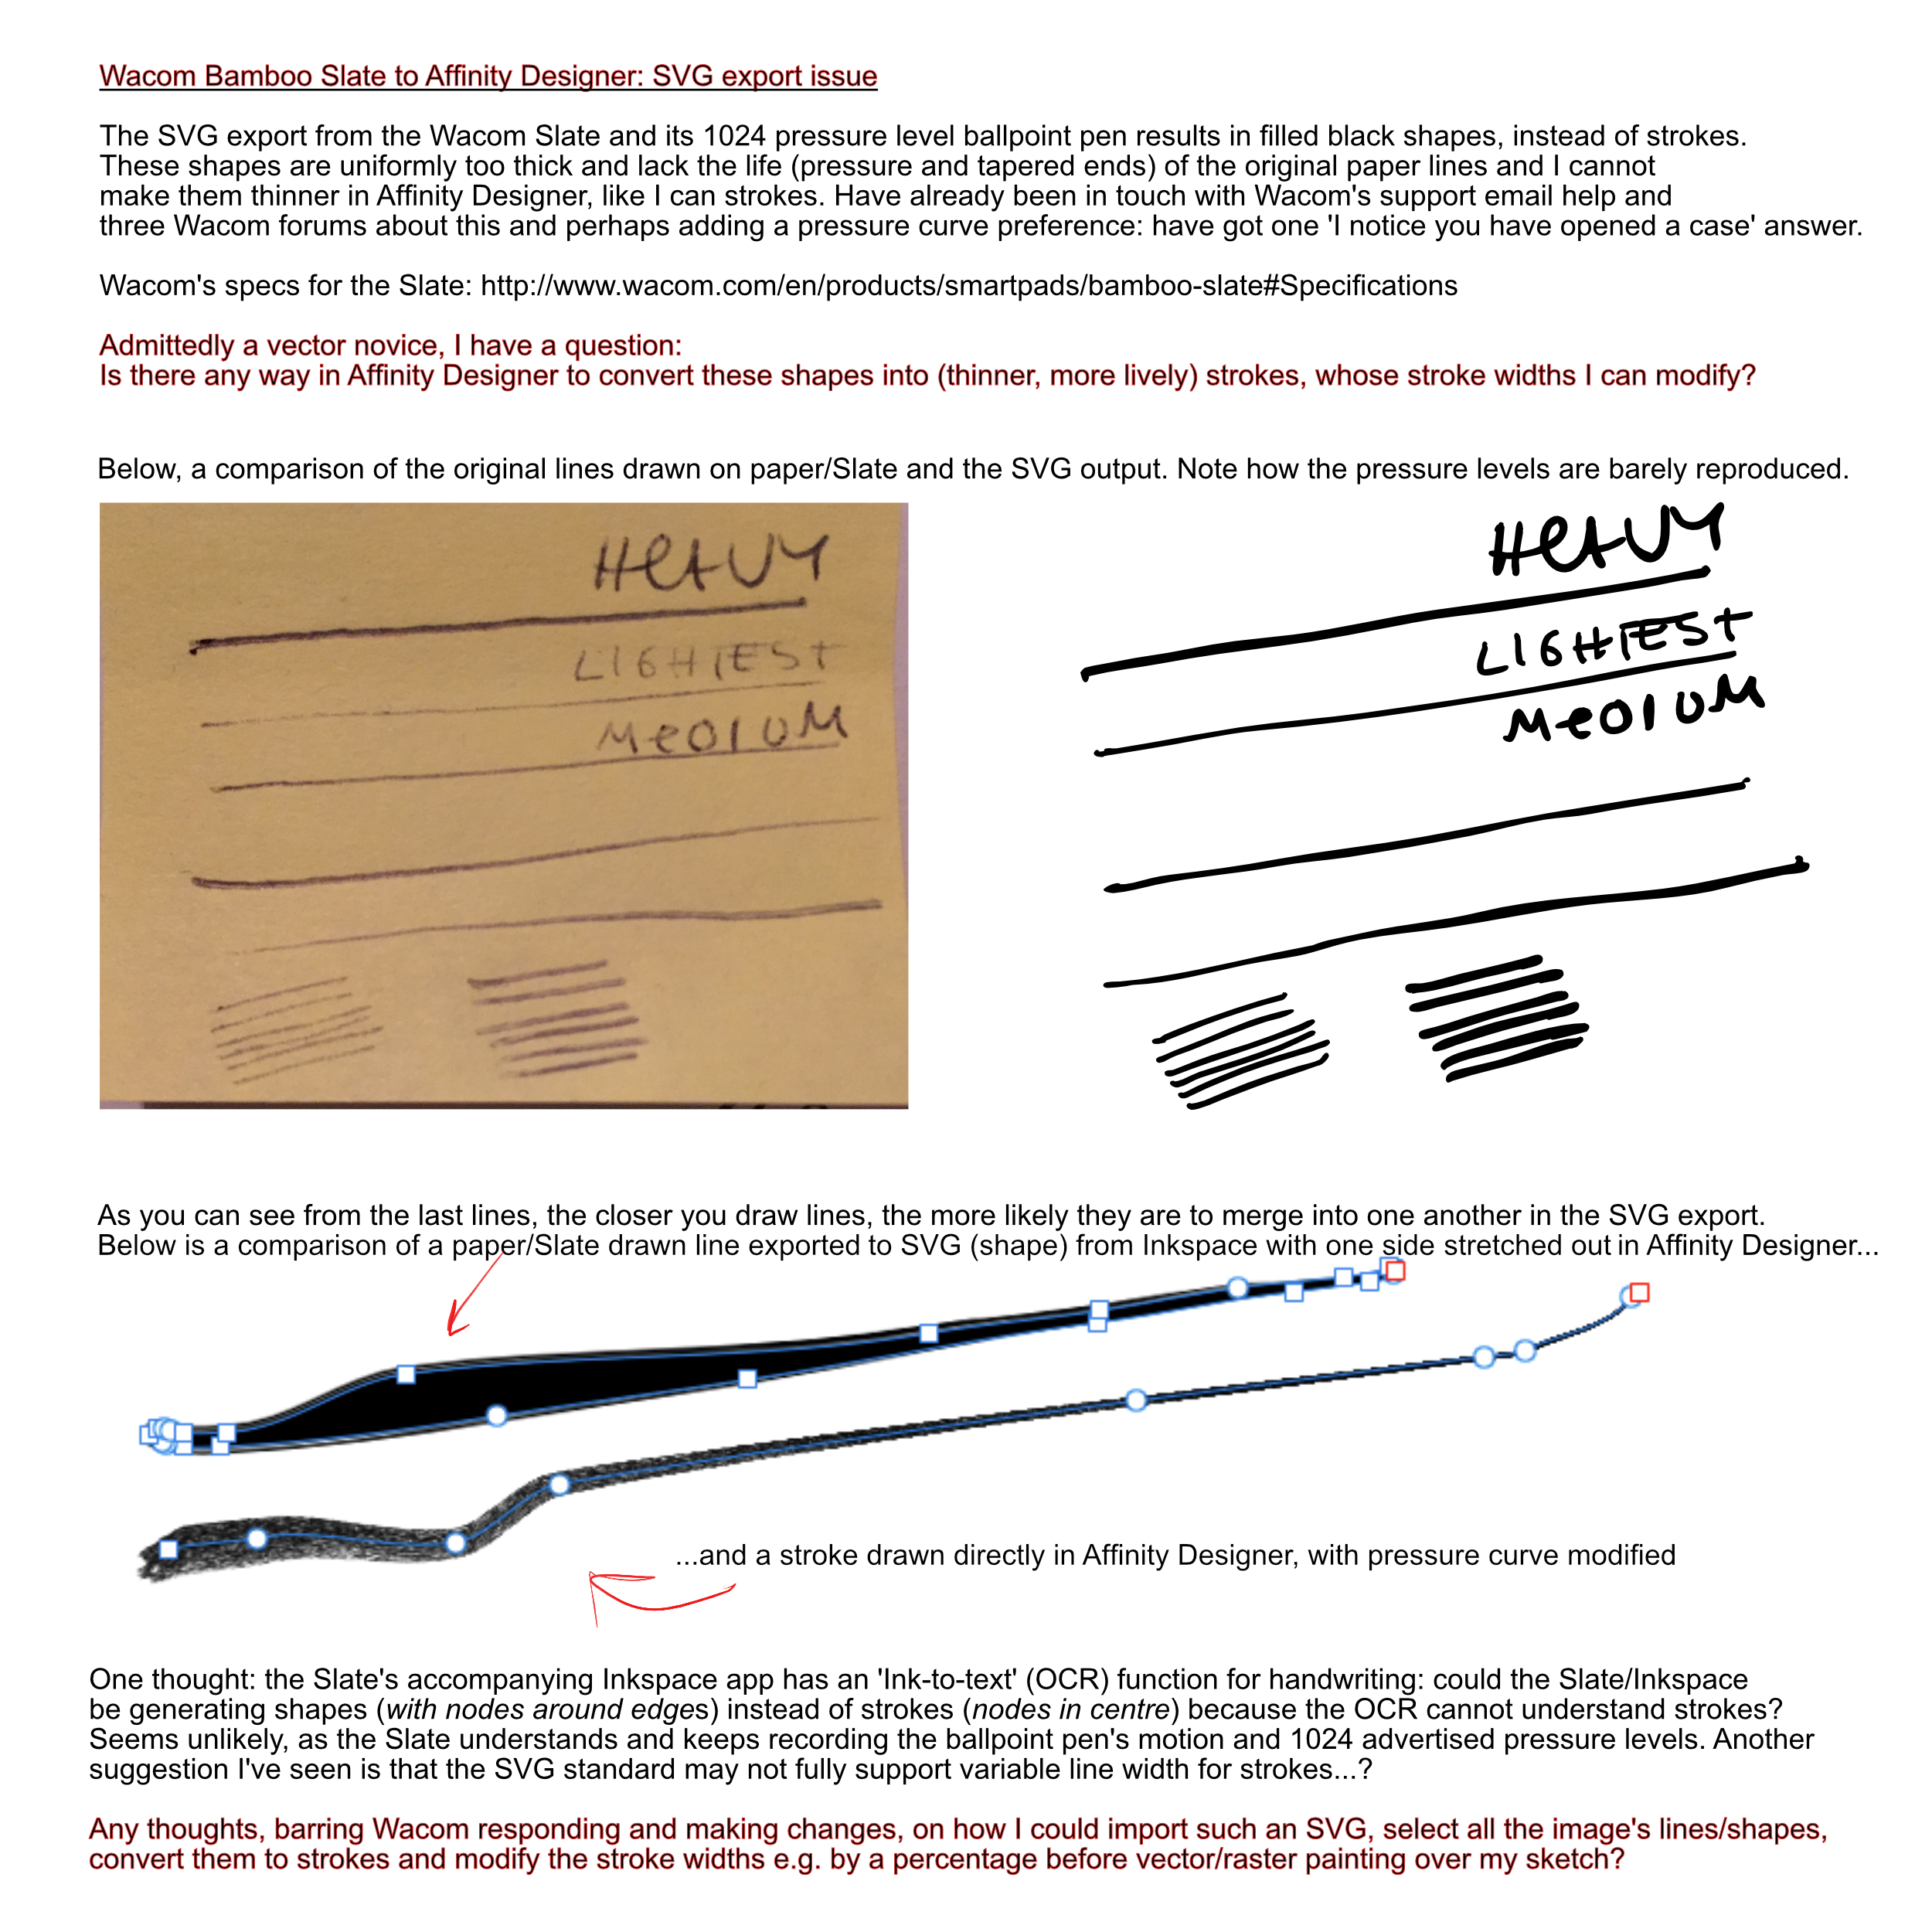
 Hello there, I am drawing on a Wacom Bamboo Slate, which can export your drawings (and writing via a kind of OCR) to text, image formats and SVG. Here's Wacom's specs for the Slate: http://www.wacom.com/en/products/smartpads/bamboo-slate#Specifications The Slate's ballpoint pen is marketed as having 1024 levels of pressure which in theory seems a bit much for a ballpoint pen, but would be nice if it could reproduce the light and heavy strokes you have made on paper. My problem is that the SVG files exported from Wacom's Inkspace app are filled black shapes instead of strokes. The shapes are thicker than the original paper lines, losing most of the line width variance, and I cannot find a way to reduce the width as you would with a stroke. I am attaching an image to illustrate my problem. Any thoughts on how to convert these shapes into strokes so that I could make them thinner? Many thanks in advance! PS there may be an answer in the thread below ('line width is not yet fully supported in the SVG standard'), but I'd like to confirm if something can be done about this using Affinity Designer? https://forum.affinity.serif.com/index.php?/topic/45452-how-do-i-import-paths-they-keep-turning-into-shapes/#comment-227169
- 35 replies
-
- 1
-
-
- wacom will
- affinity designer
- (and 8 more)
-
 can you please guide me how to trace image from jpeg or pdf
 -
 Please forgive if I'm jumping any guns here, but I'd like to share my thoughts with you. I'm sick of the Adobe subscription model; I've jumped ship back to Quark, and wish to use Designer instead of Illustrator. However... 1) I suspect I'm not alone in using Autotrace nearly daily. This omission in Designer is a serious brake on my adopting it wholeheartedly. I've tried separate programmes, and they range from awful to ludicrously expensive. 2) When you are churning out production graphics daily, having simple commands for Select>Same Fill, and Select>Same Stroke etc. are massive timesavers. Not having these means I spend extra time clicking and grouping to get the same result. It's obvious from your latest book (superb, by the way) that you are looking at some pretty clever stuff, and Designer does it well. However, we daily Joes need the basics to be there, fast, and reliable. I'd appreciate your comments. (Not trying to be contentious, honestly!) Keep up the good work. N (Ooops, just spotted typo...!)
- 4 replies
-
- 1
-
-
- Illustrator
- select
- (and 1 more)
-
 Will there ever be an Image Trace feature in Designer, such as is available in Adobe Illustrator? I frequently have to redraw bitmaps in vectored format. Illustrator's tracing feature makes that very easy. It sure would be nice to be able to do it in Designer.


.png.7230c143b774df0ca4e49cebd33a62de.png)
.png.68de137a4e8f5129af2b619b575a46f1.png)