Search the Community
Showing results for tags 'apl-1274'.
Found 2 results
-
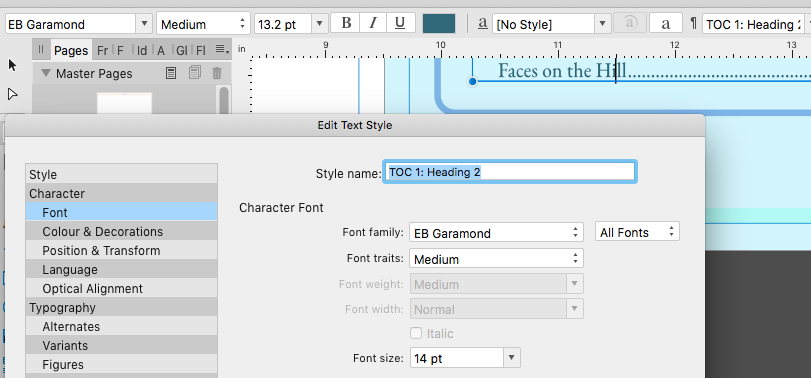
 Take a fully developed document with text, photos,etc. And one that uses Text Styles throughout the document for the text. Now whatever dimensions you have, go to Spread Setup, set the selection to "All Spreads," set "Rescale" on the "Scaling" tab, and "Anchor" to the center (dot) of the page, and change the dimensions of the spread and select OK . Let's say you go from 11" x 8.5" to 9.5" x 8" - that makes it all smaller. Now you have a new document where everything is smaller but has been scaled to "look" the same as before. Now investigate your text boxes (select some text words) and you will notice that the font sizes, tab settings, paragraph "Leading" and "Space After" and other settings have (mostly) all changed to reflect the smaller dimensions. And notice, too, that the "Paragraph Style" on the Contextual Menu for a specific text section is still "attached" to one of the Text Styles listed in the Studio. However, if you "edit" one of the text styles that you used for the changed text you will note that the Text Style itself (its settings) has NOT changed to reflect the, in this case, smaller dimensions in the document. This means that you cannot continue to use the Text Styles as you had before after scaling the spreads until you manually make all those (smaller dimensional) changes to the Text Styles. Otherwise, if you use a Text Style on a text section the text will revert to the original sizes before the Spread Scaling was done. What I would expect to happen and would hope, is that ALL of the supporting document settings/tools would be changed to reflect the new Spread Setup dimensions. That way, you can continue to use the tools as before and not run into problems. A smaller "nit" in this process is that the Master Pages must be run through the same Spread Setup separately instead of automatically changing when you select "All Spreads" but I think that it should also be automatic since the masters and spreads would need to be in sync to make good sense. scaled Screen Screen shot shows the dimensions after making a spread setup dimension change. The Text Style: TOC 1: Heading 2 font size is set to 14 pt while the actual text for that style is less at 13.2 pt. If you use the TOC Heading 2 text style again, all the affected text will be changed back to 14 pt. Other settings are not mentioned here, but they need to be changed as well to avoid problems.
-
When an overflowing text box is used to create a new text box, the text in the new box is tiny (typically 5pt) and when this is corrected the text in the original box becomes huge (around 48pt).