Search the Community
Showing results for tags 'adjustments on specific areas'.
Found 1 result
-
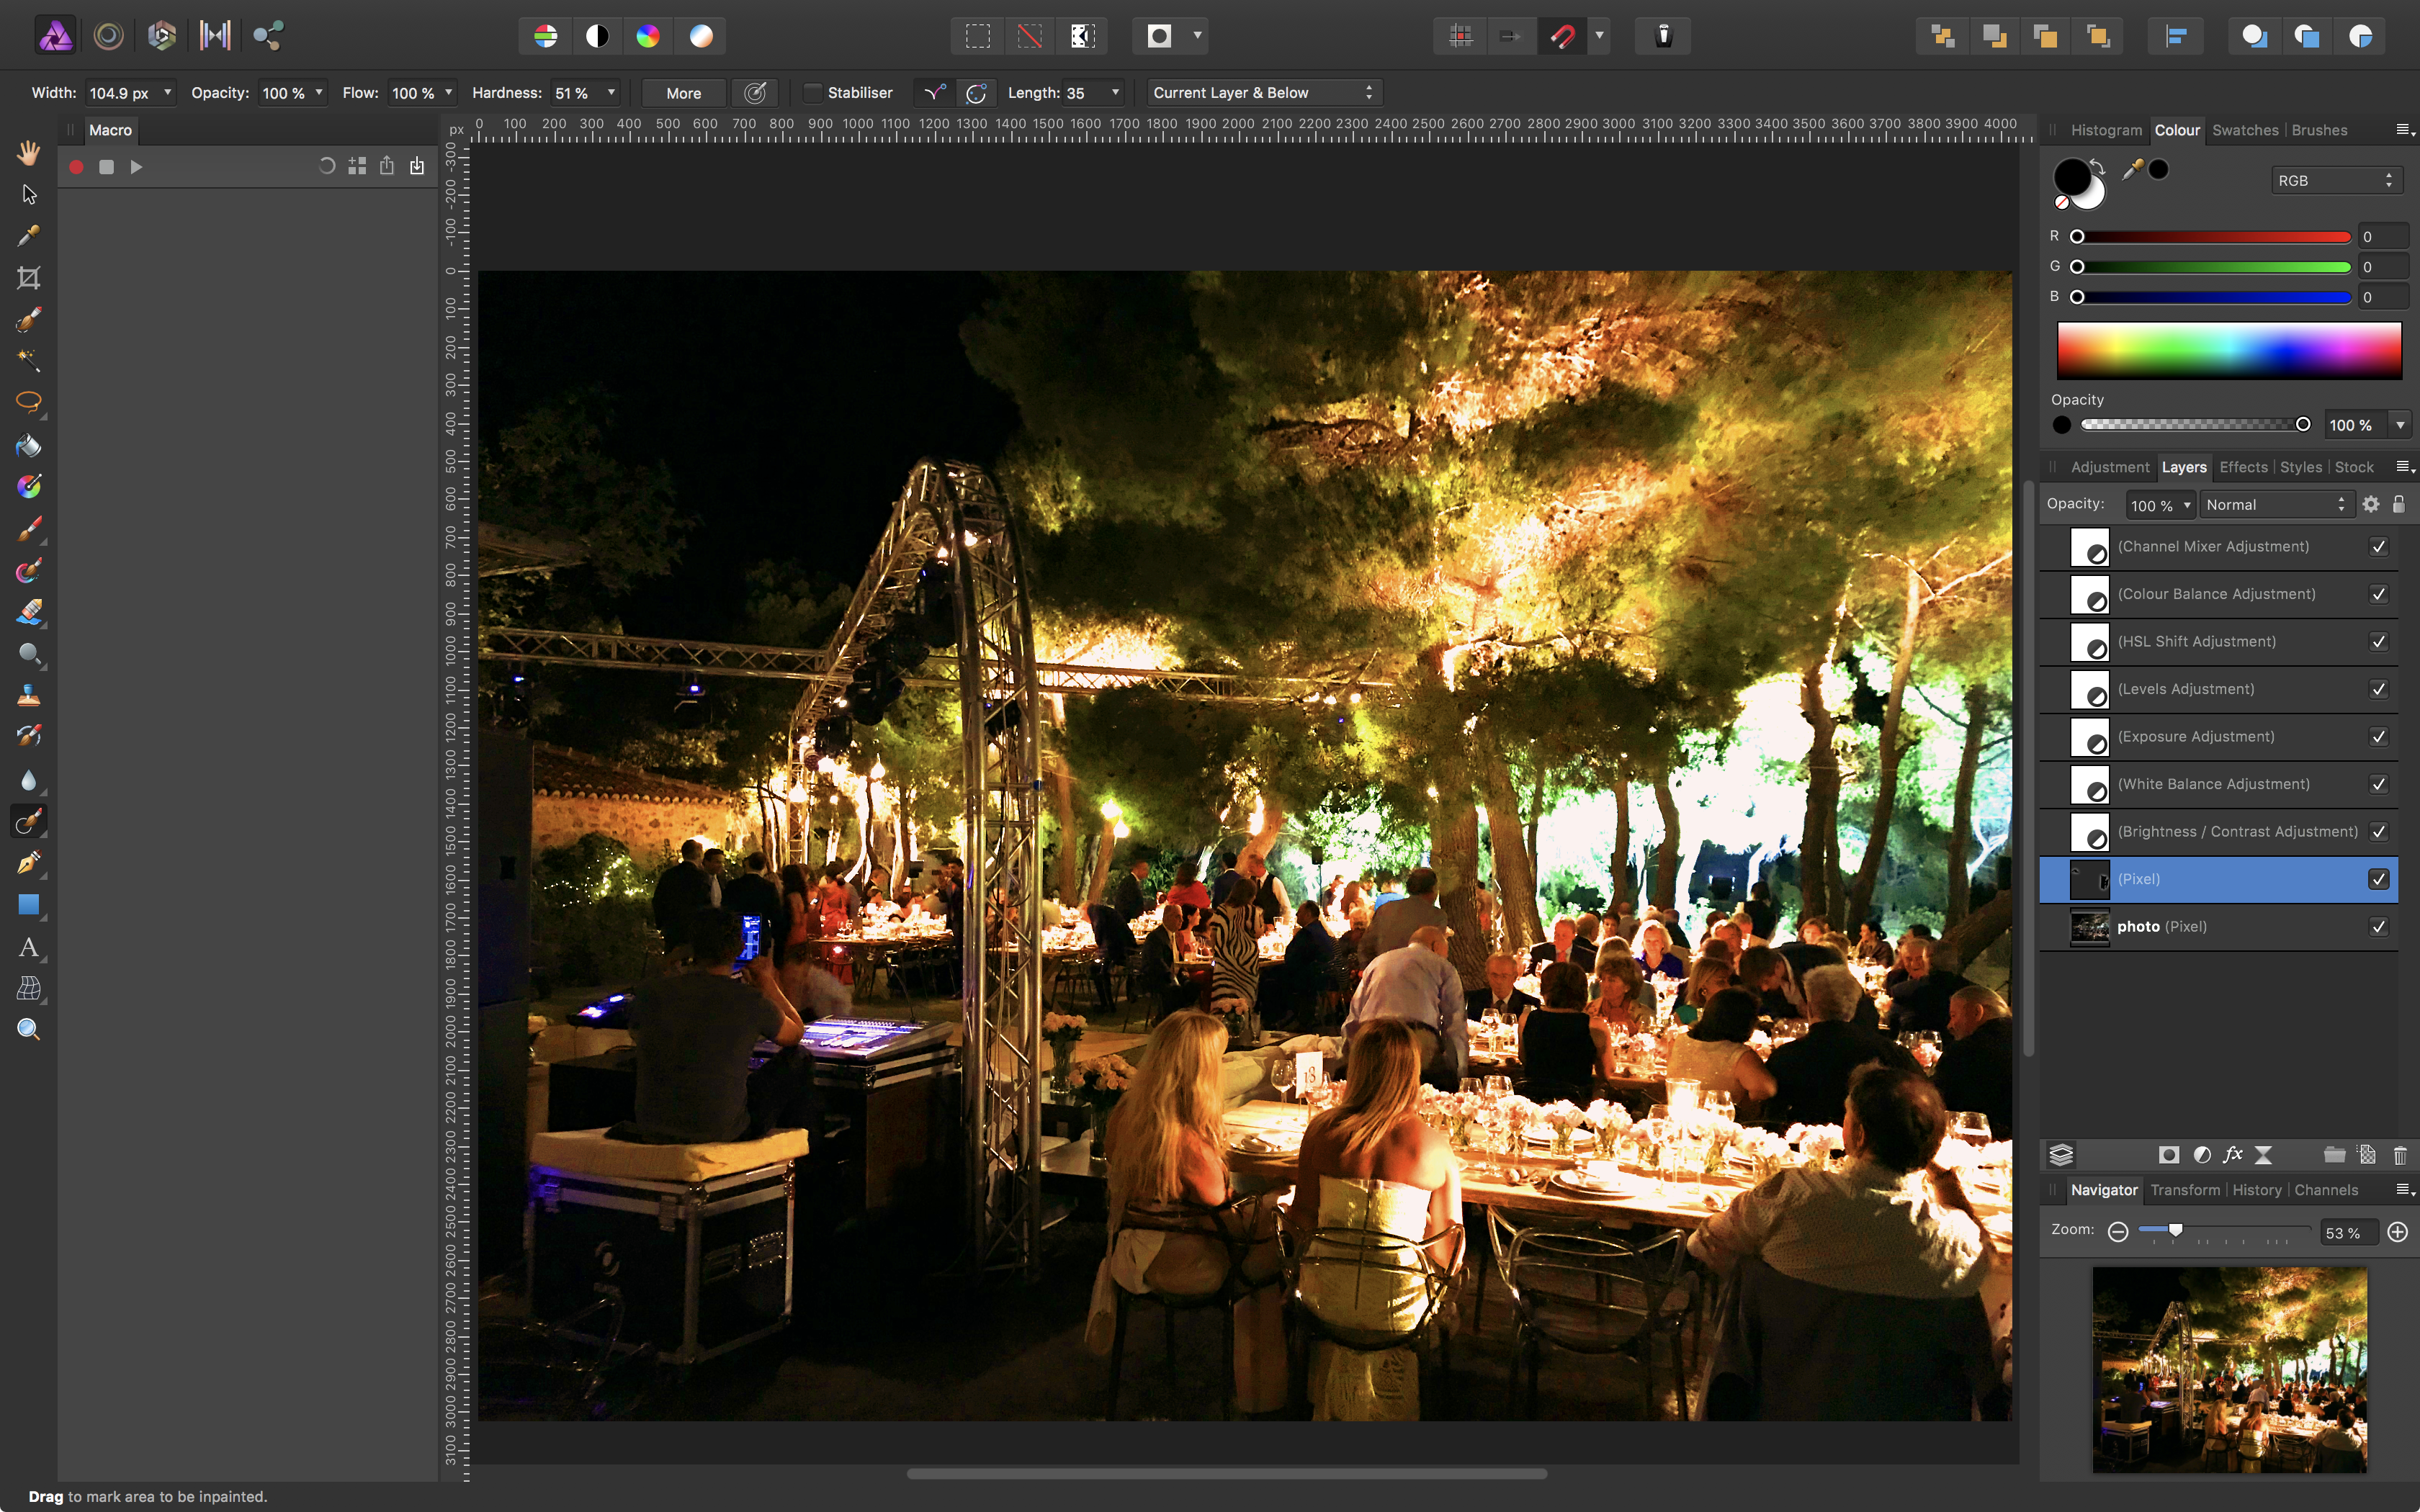
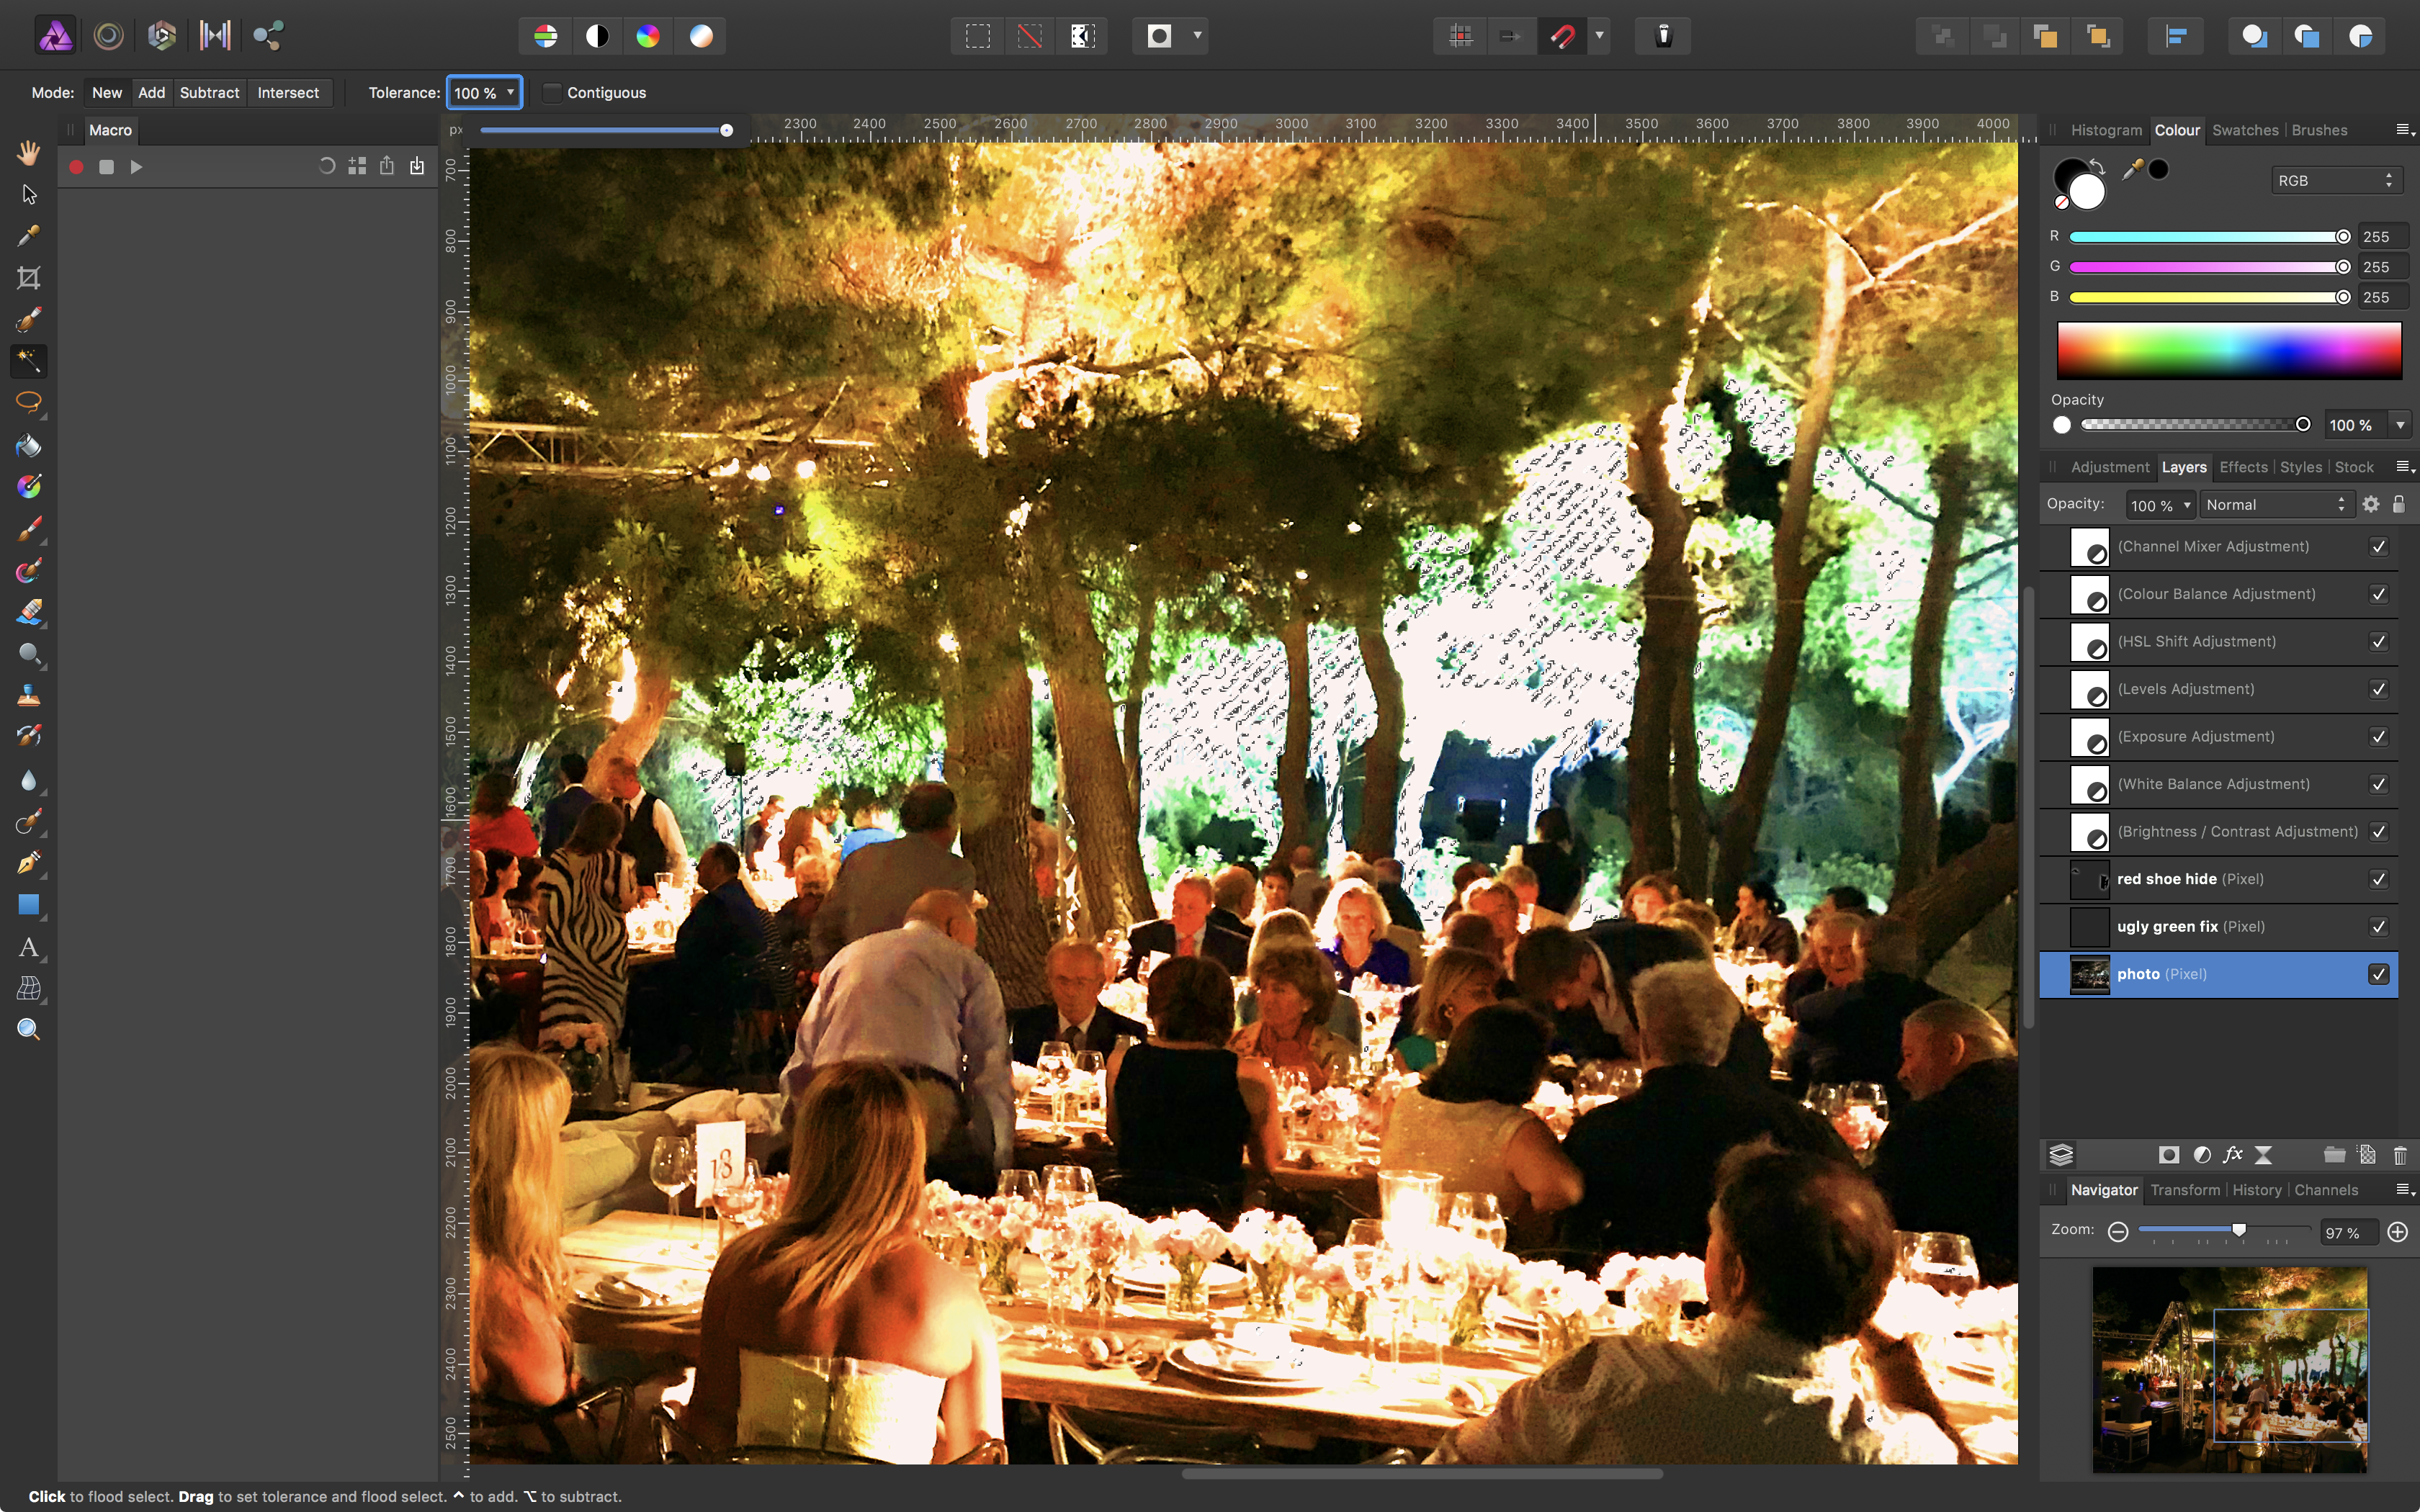
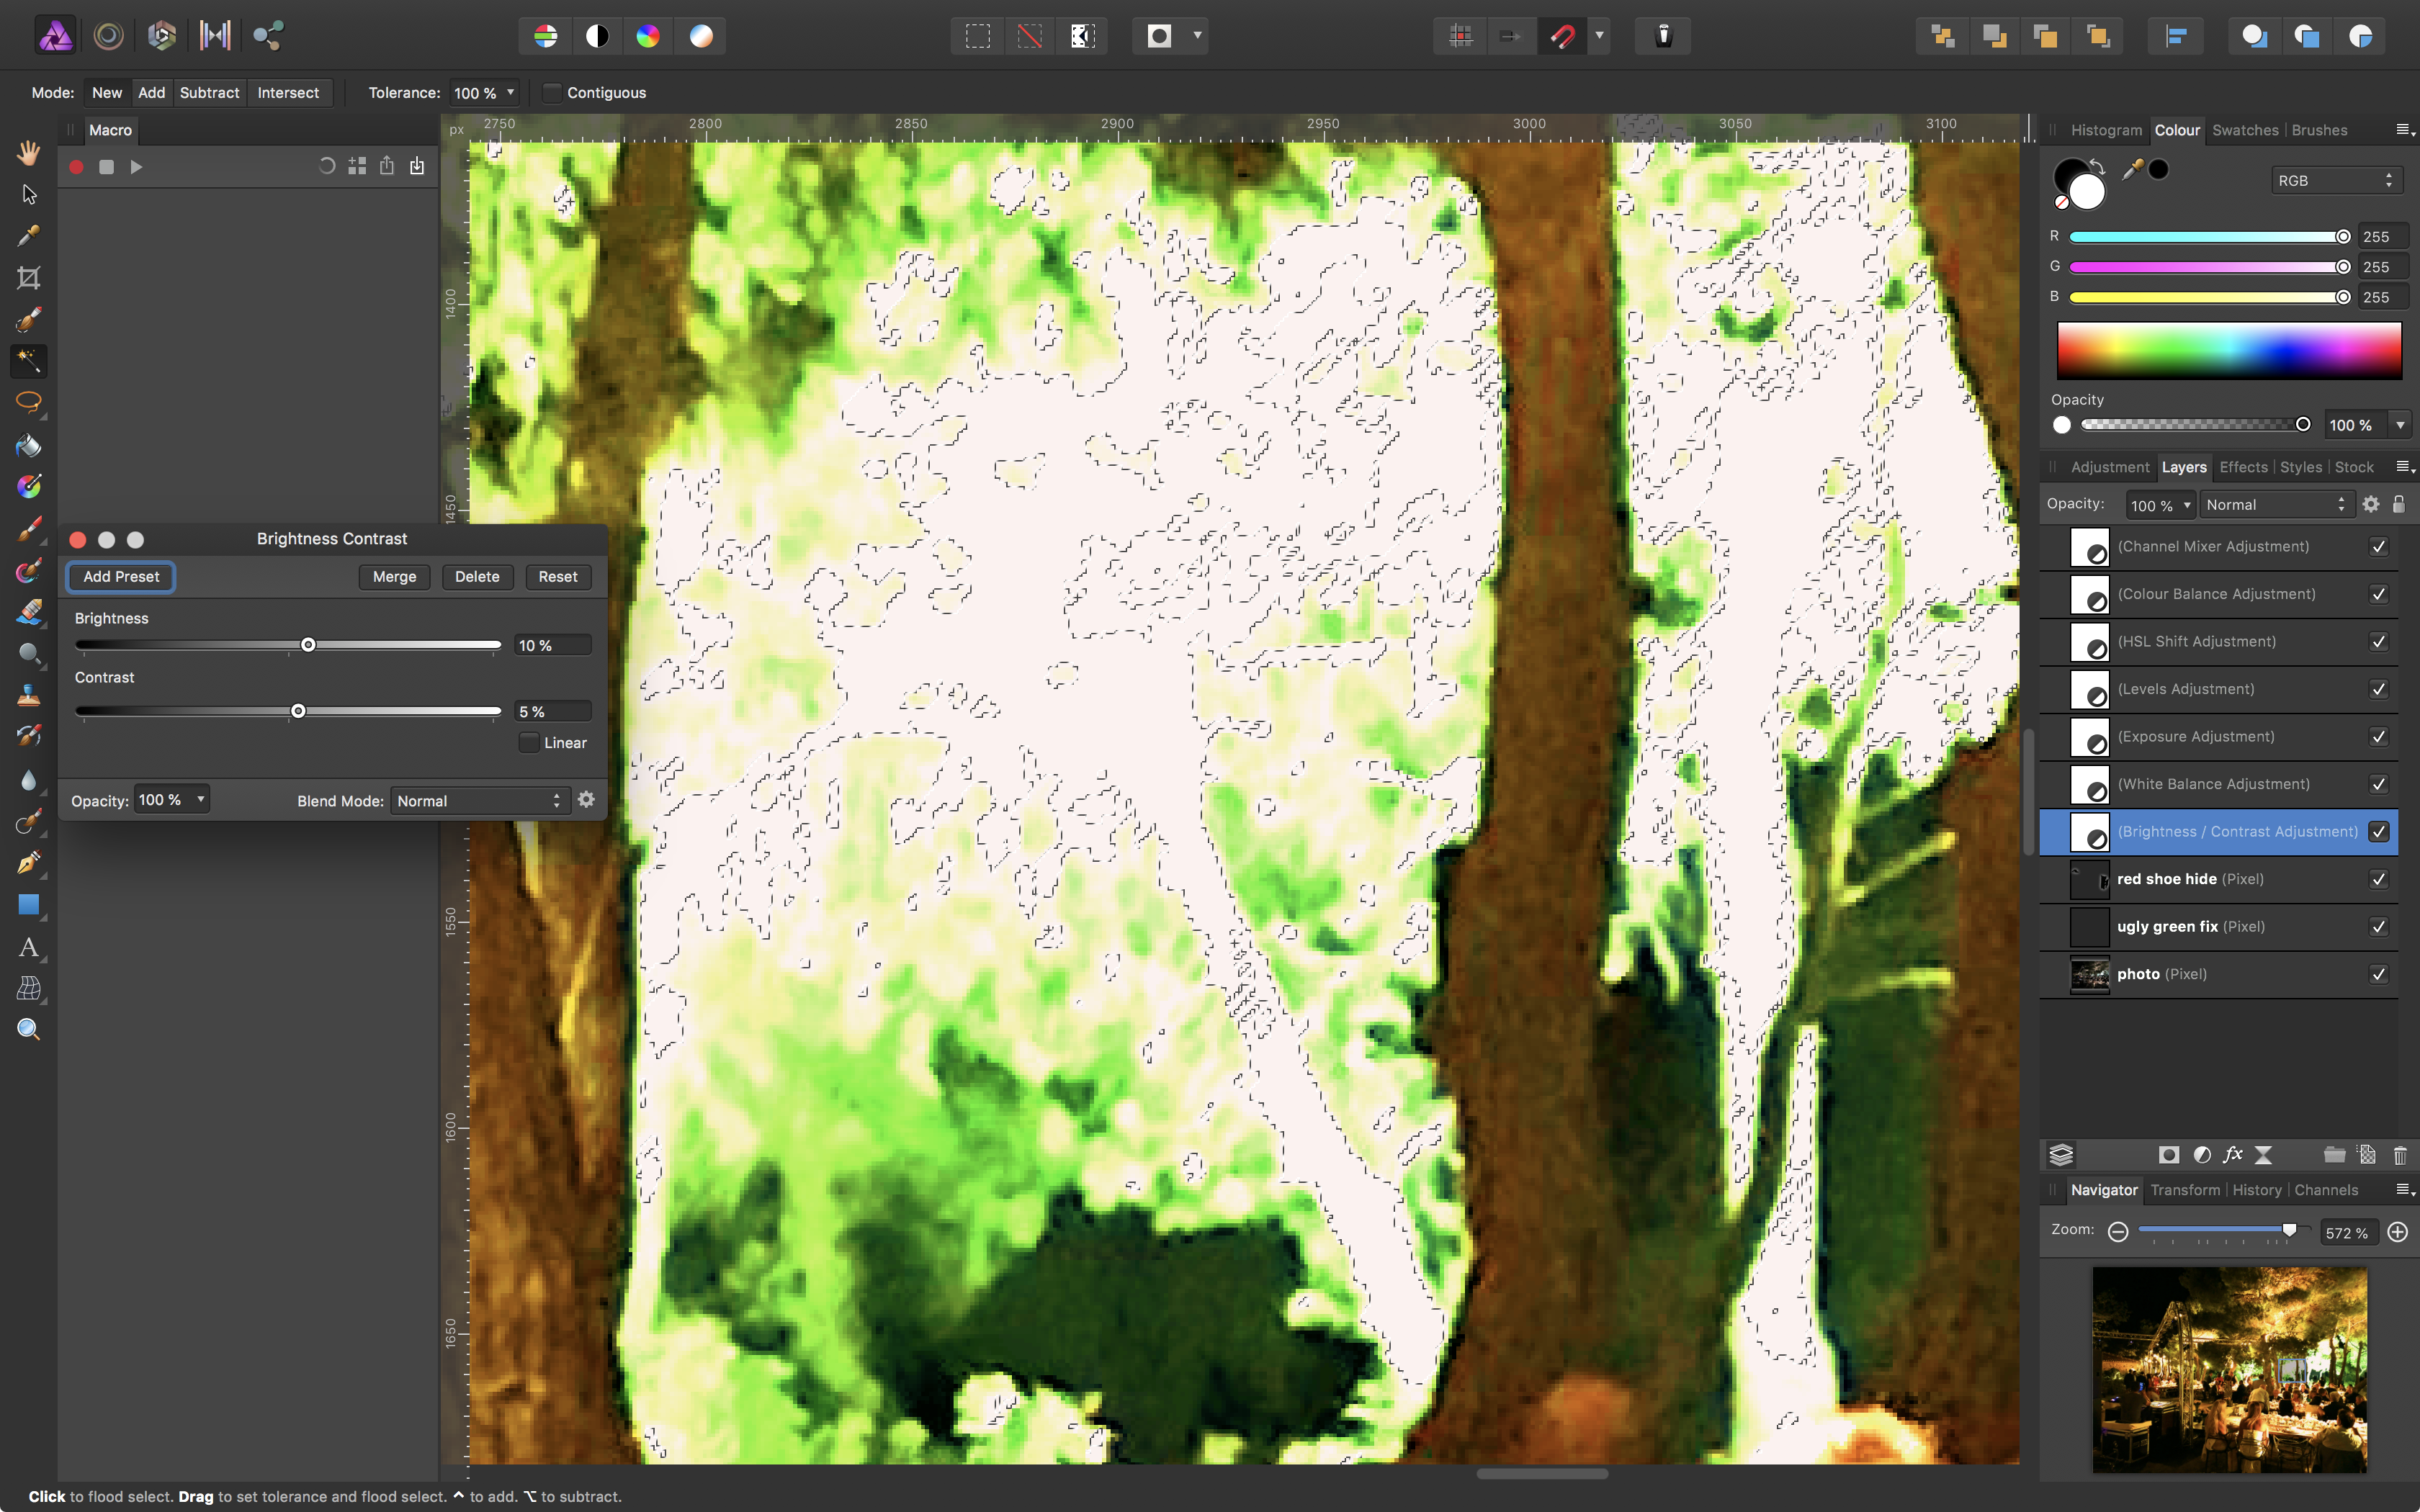
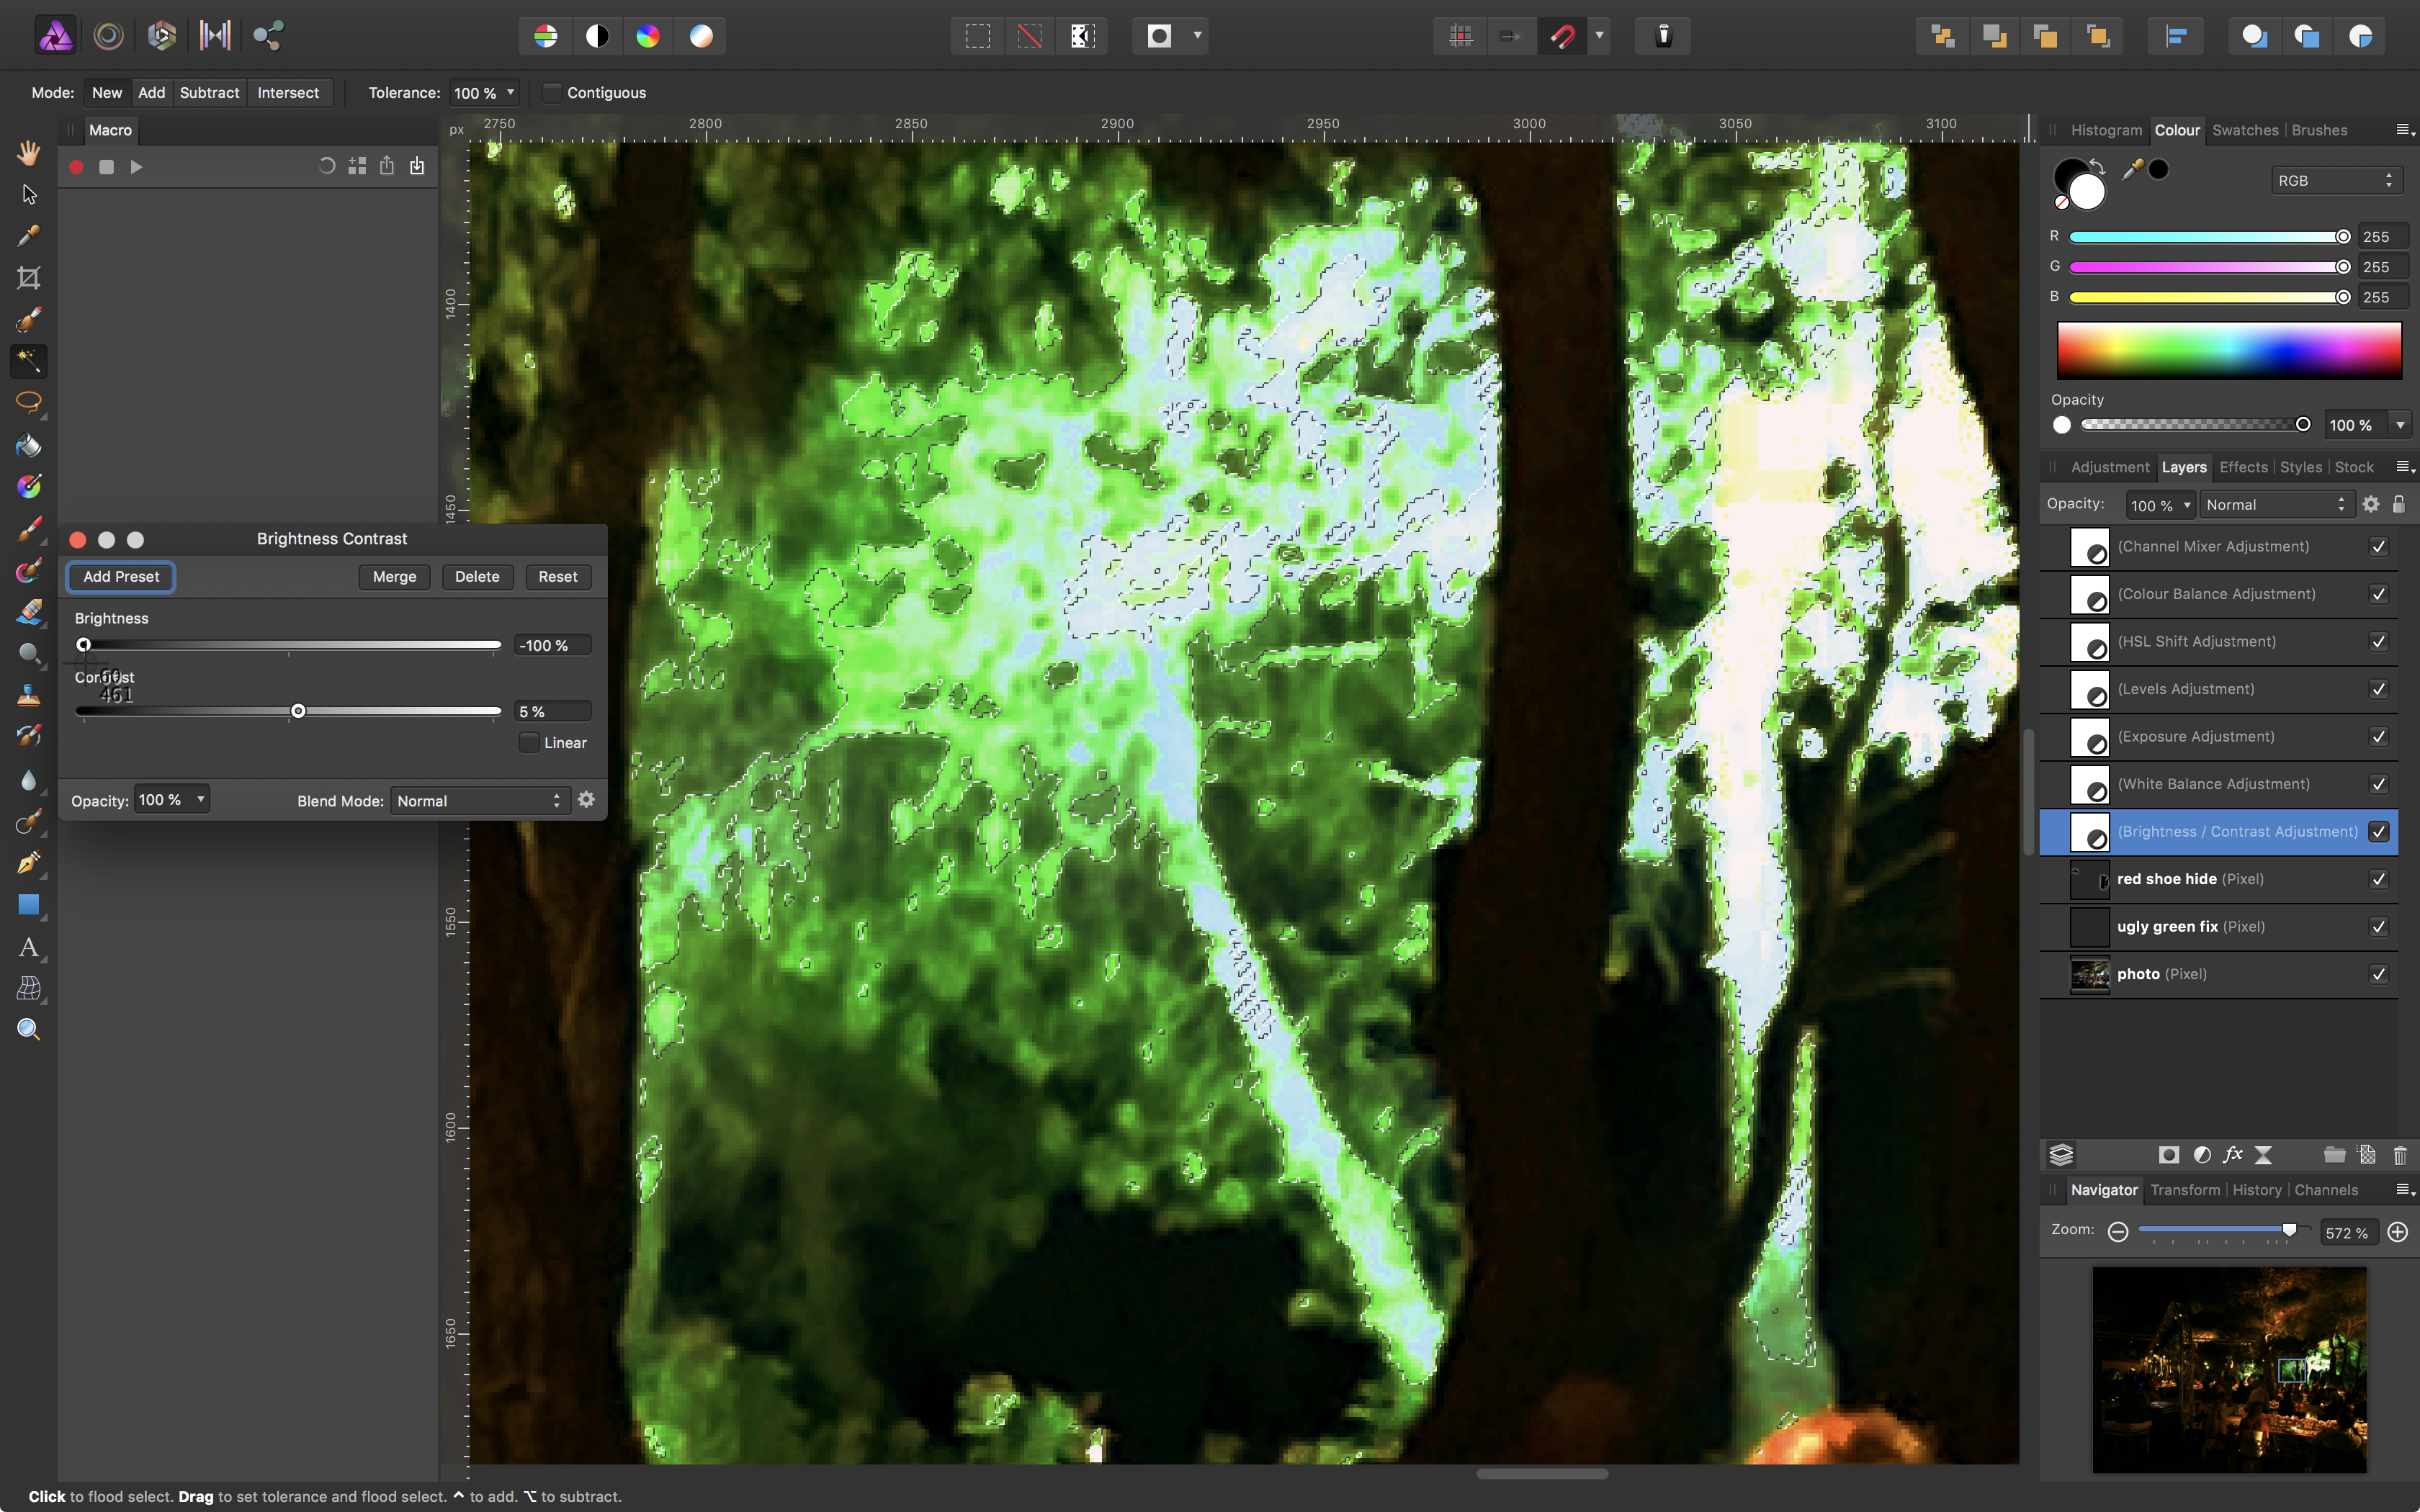
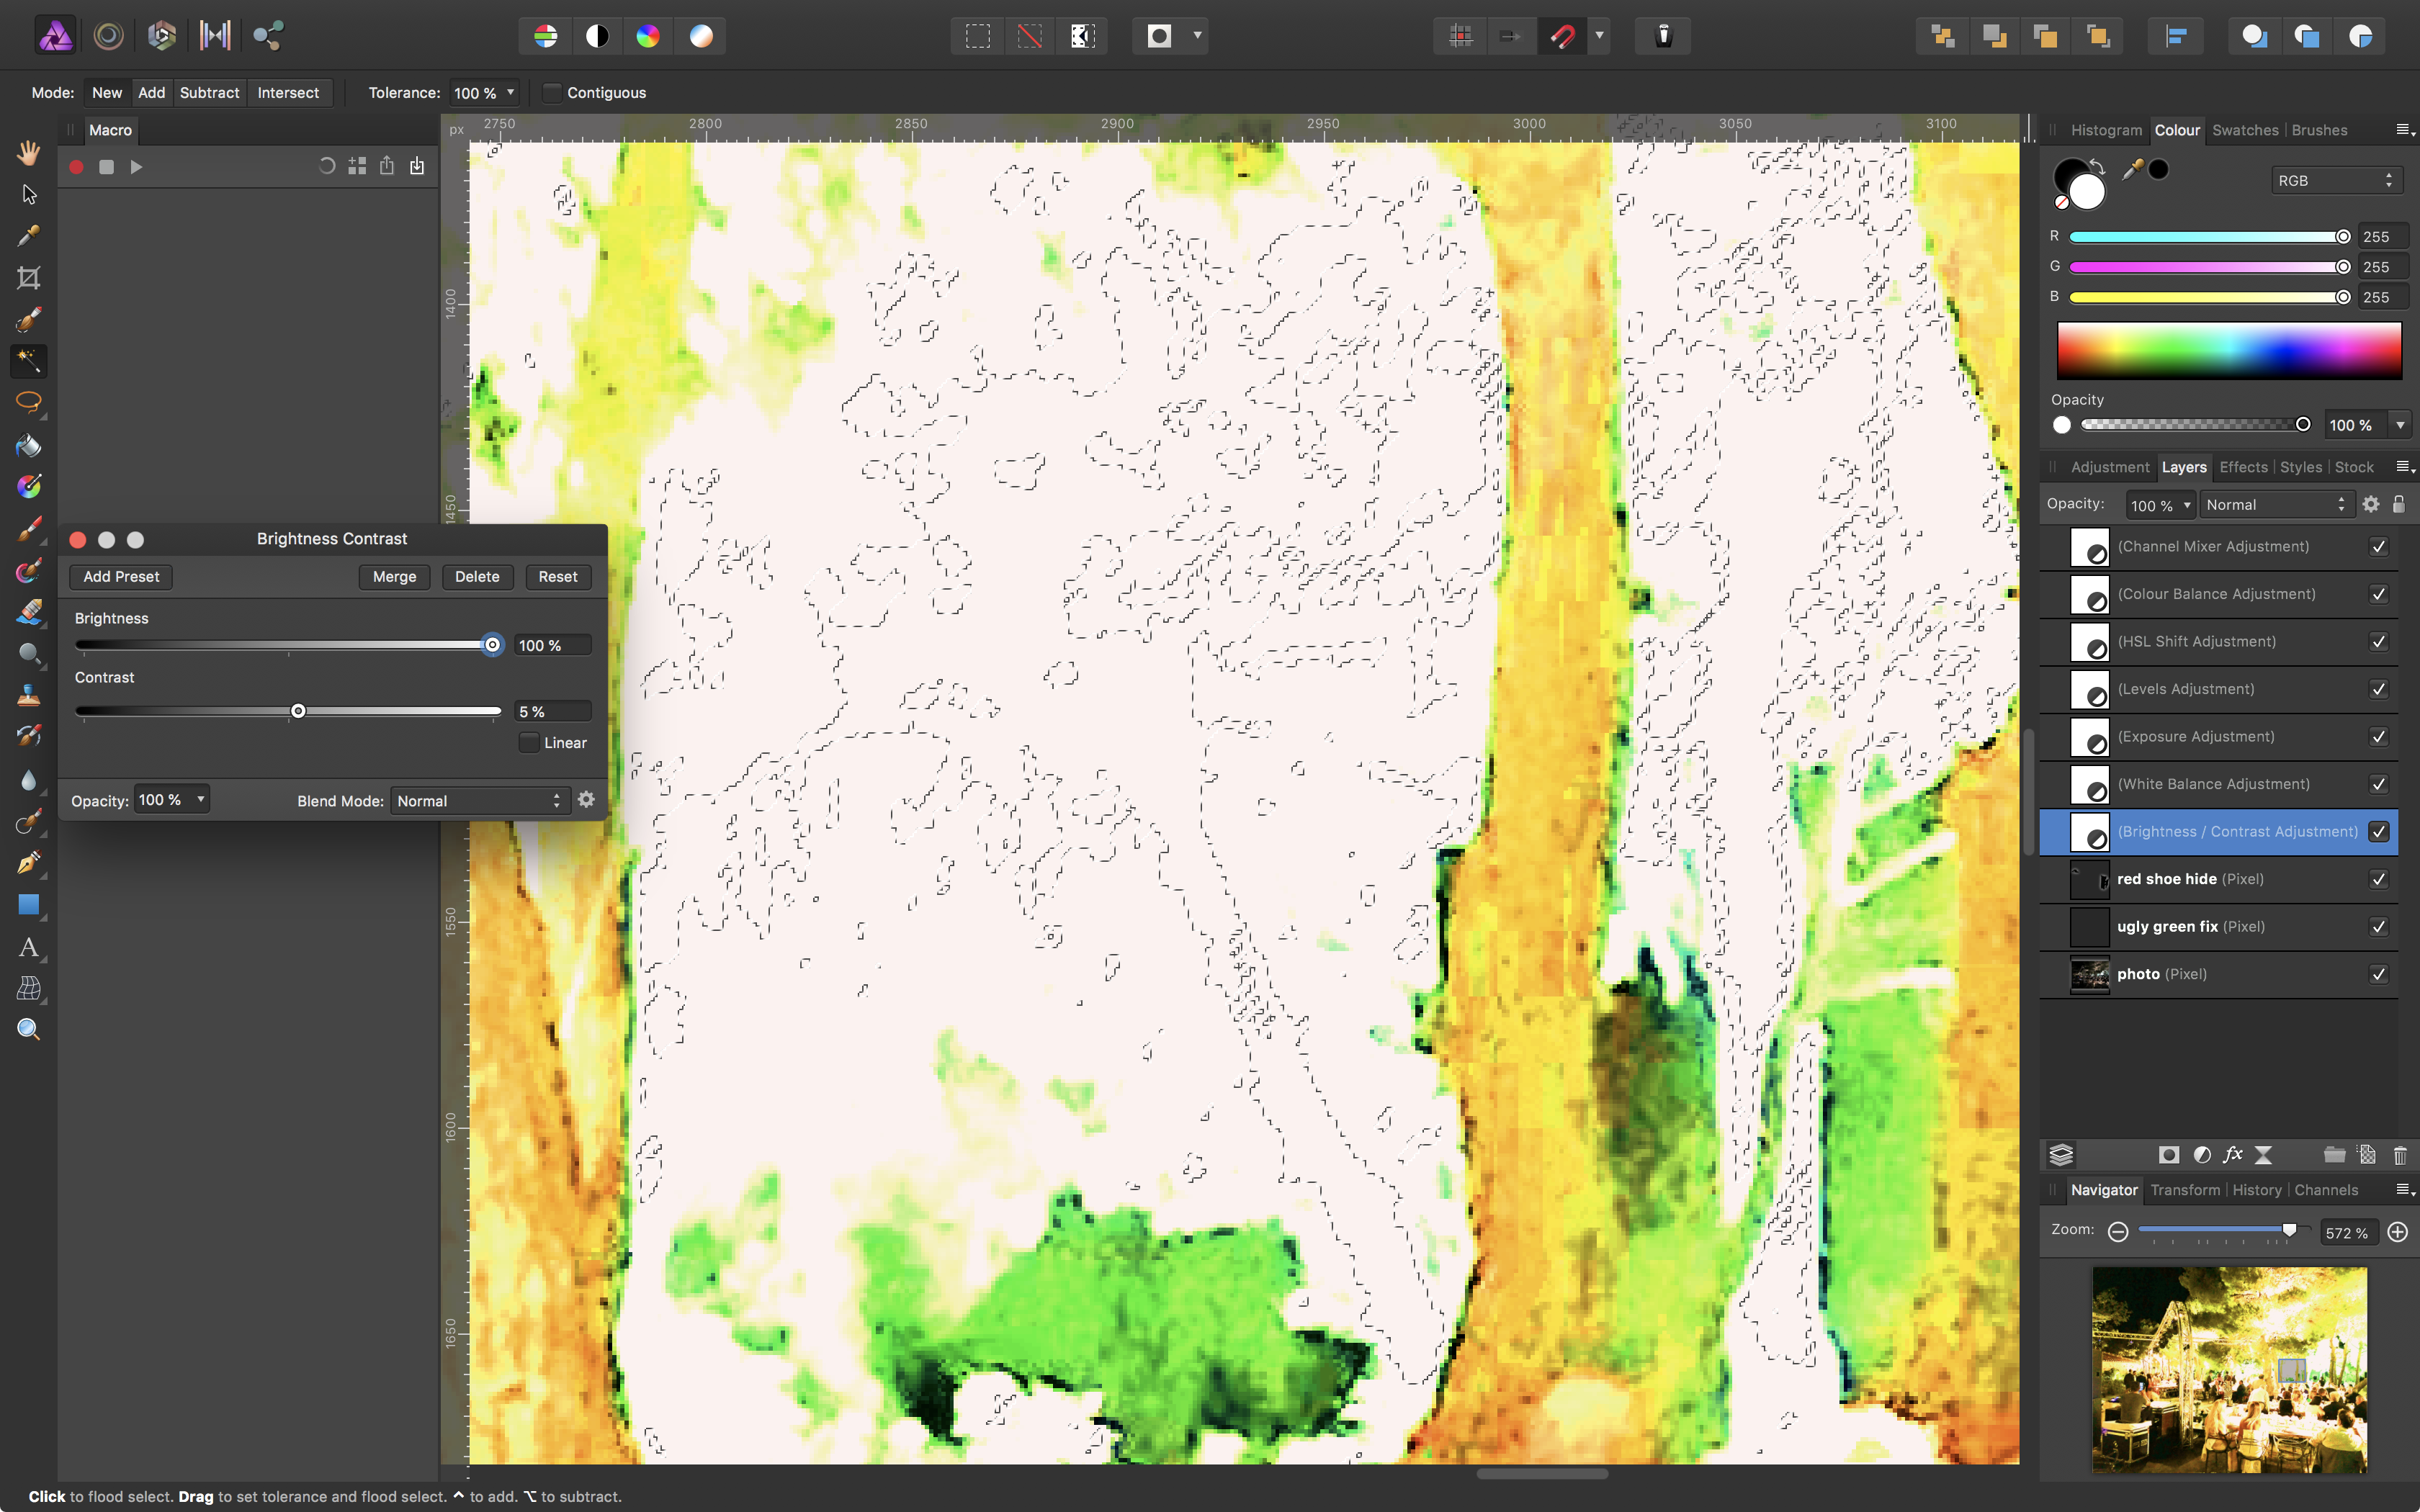
 I have a photo (Screenshot #1) that shows venue illumination for a private event we've covered (the tree & table lighting's photos are the problems to fix via AP). The problem is that the camera "perceived" the background trees in an awful & unnatural light tint ("florescent"-looking green & cold white) which looks nothing like it did in real-life; so I am trying to fix those areas to make the photo look like the setting actually did. I have made various adjustments to the photo (saturation, exposure, white balance, brightness, color adjustments etc) and have made the table lighting and the near-trees' lighting look as they actually did during the event. The problem is that while achieving this realistic look for the front part of the photo (trees, tables & general ambience), the background trees' lighting & color were also altered to the point were they look appallingly unnatural and nothing like they actually looked like. This is what I want to fix. So, I tried making a new pixel layer (above the rasterized base photo - named "ugly green fix") in order to select the background trees (florescent green & white color) with the Flood Select Tool. However, the Flood Select Tool would just not select any pixel areas WITHIN the layer and the tolerance slider did nothing. It would only select the outskirts of the image as if it could not "see" the pixels in it. (Screenshot #2). So I then tried to rasterize this layer too so maybe it would maybe work. No difference. **Why is this not working? I thought that the correct, non-destuctive, way to do anything in AP is to do it on a different layer. But AP doesn't let me do so. So, then, I had no choice but to try the destructive way, and tried to do this on the original base pixel layer (named "photo" in my project). For some reason I have not yet understood it worked there (Screenshot #3). **But this means that I will be "destroying the original file so i would like to find out how to do it correctly on a separate pixel layer. From there I was able to select the florescent white light areas in the background area with the Flood Select Tool (the different cold-green and florescent-green areas would not be selected with this tool - I suppose because it is a different color than the white selected area - so I would do that later I guess). **But what is strange is that even though the white area IS selected, when I change adjustments (eg brightness as in Screenshots #4, #5, #6), the ENTIRE image is affected, not just the selected area/s!! What am I doing wrong? How do I affect ONLY the selected area/s?? (I mean, that's the whole point of selecting areas, right?) **Last, as this photo is a perfect example of the things that I will frequently need AP for (adjusting selected areas within images) - which is actually exactly what I bought it for as Photos in Mac OS can't do this; it will be very important for me to know if for this photo, and for similar situations, the Flood Select Tool is really the best tool I can be using. (?) Maybe if a photo is more simple (lighting- and color-wise), the Flood Select Tool is very fast as it'll quickly select all the similar pixels and you can immediately do whatever you want to those areas. BUT, if it's a situation like this photo where the USER (myself) wants to decide which areas he wants selected (in this photo its the background tree areas that are bright white, bright green and florescent green) in order to adjust them together but separately from the rest of the image, even if they're not similar pixels; then maybe some other tool is faster??? **Maybe some magic tool that you guide around the area/s you want, and it "magnets" to the actual borders if it sees them? I'M REALLY SORRY FOR THIS ESSAY, BUT SINCE YOU DON'T HAVE PHONE SUPPORT I HAD TO WRITE MY QUESTIONS OUT FOR AN HOUR (INSTEAD OF BEING ABLE TO VERBALLY ASK THEM IN UNDER A MINUTE!). I hope an expert will reply ASAP as I'm on hold to get A LOT of work done, and I'm stuck now...