Search the Community
Showing results for tags 'Vector'.
-
Recent work, personal.

-
- 7
-

-
- personal
- illustration
- (and 3 more)
-
Digital drawing. Personal work.
-
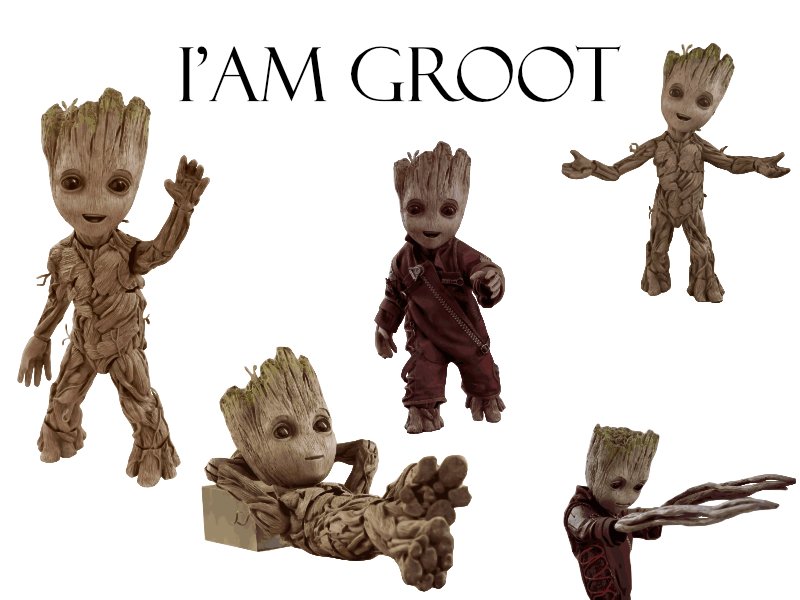
Who doesn't know the Gardians of the Galaxy and one of their coolest protagonist, so here are some reusable Groot vector assets to share. groot_assets.afassets License: Free for personal use only, not meant for commercial reuse !!!
-
new video showing my process using affinity designer on ipad. Very simple steps! brushes used are from my Master Vector brushes available on my gumroad
-
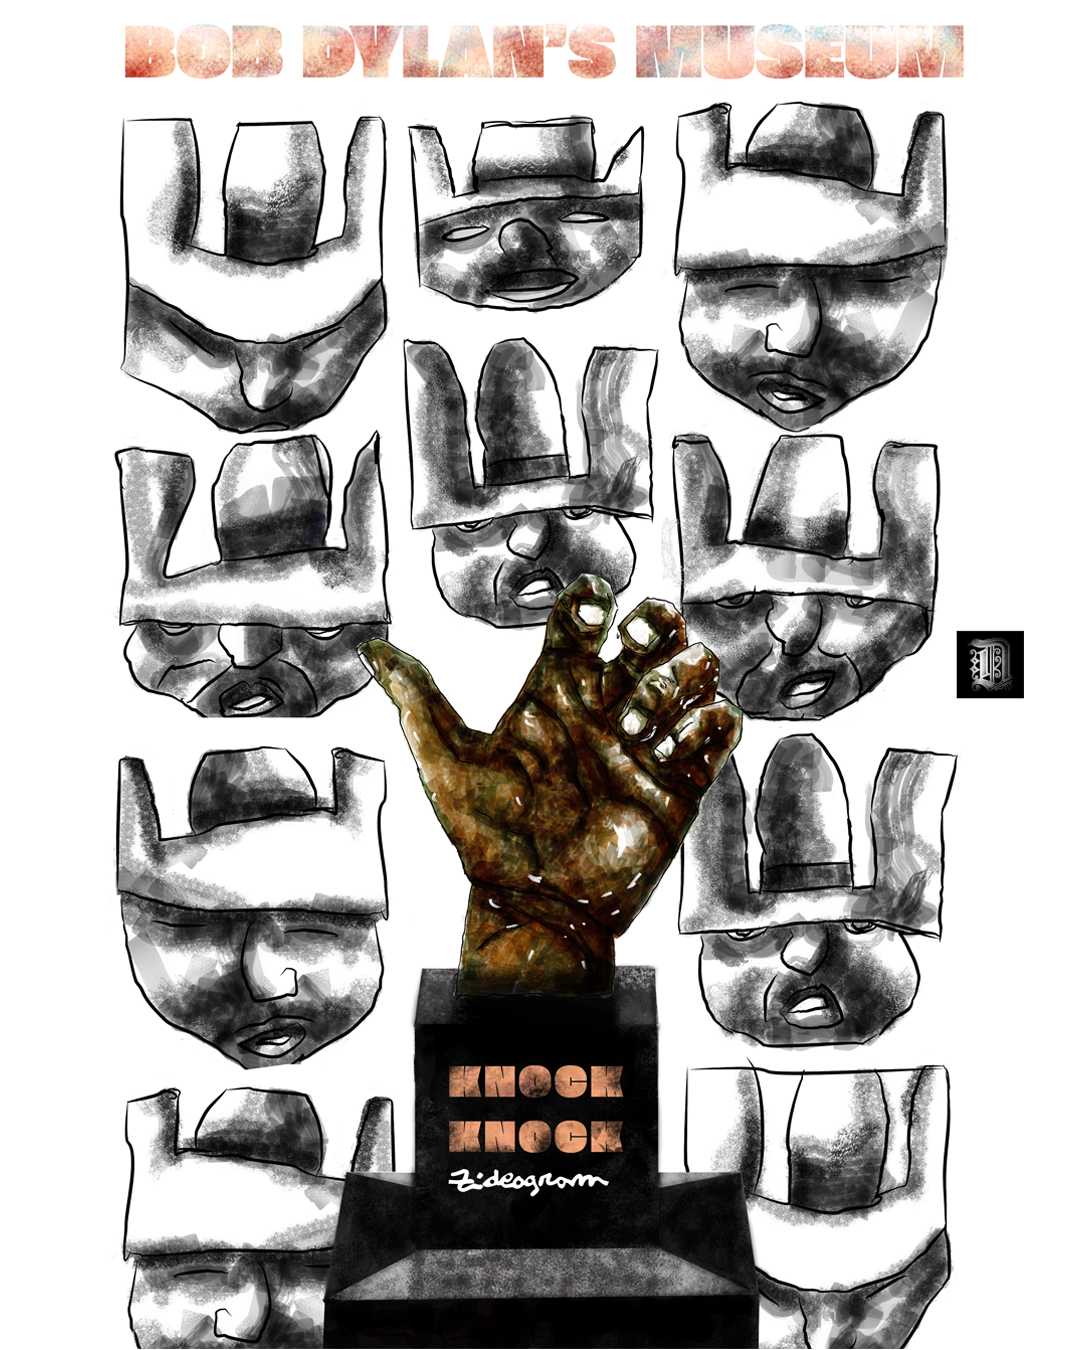
Latest vector/raster digital artwork. By me, an avid DC's music listener. Not commercial, personal work.
-
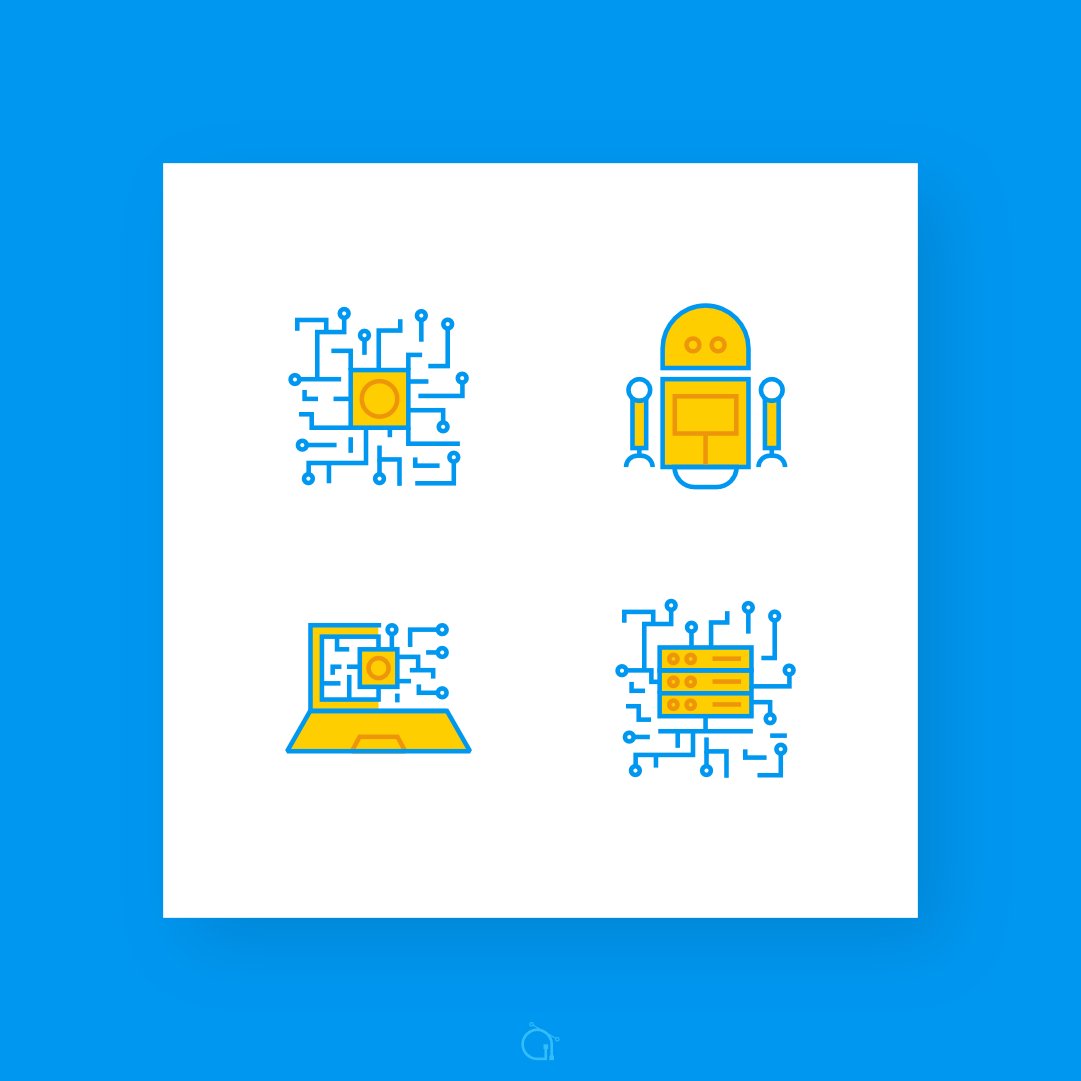
Hai I want to share some of my newest icon design (this is only half design) . To see full collection, you can check my behance page.Created in affinity designer.another my works : Behance.net/andrigraphic Instagram.com/andrigraphic Youtube Andrigraphic Thank you
-
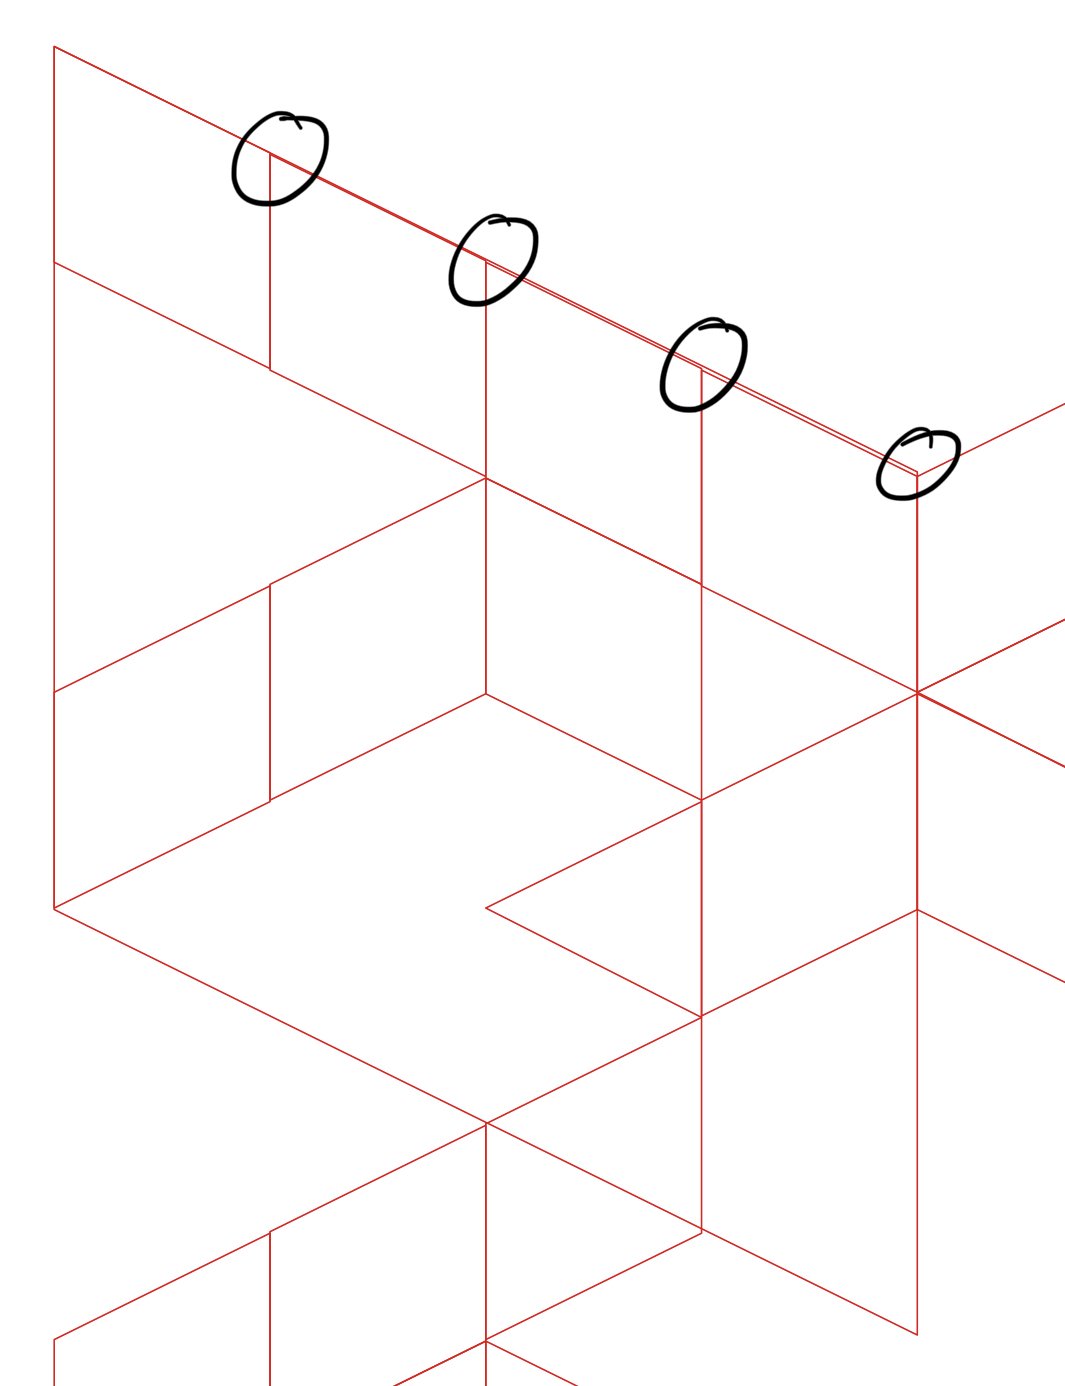
Is it just me and my faulty settings or is Designer for iPad rather inaccurate? The document I am working on is setup for print, it’s 500 x 700 mm at 300 dpi. The section in the screenshot is at 200% and covers an area of about 35 x 35 mm. Here’s the problem: within each circle the gap between two points is getting bigger, however according to the dialogue the coordinates of these points are exactly the same. It may seem like a minor detail but that flaw will be visible in the printed version. More so since the margin between both points will increase with each iteration. Of course I like to assume that this isn’t my mistake (which on the other hand it quite possibly may be) and hence my blunt question: are there any plans to fix this in the foreseeable future or will I have to rely on other products if I need precise vector graphics?
-
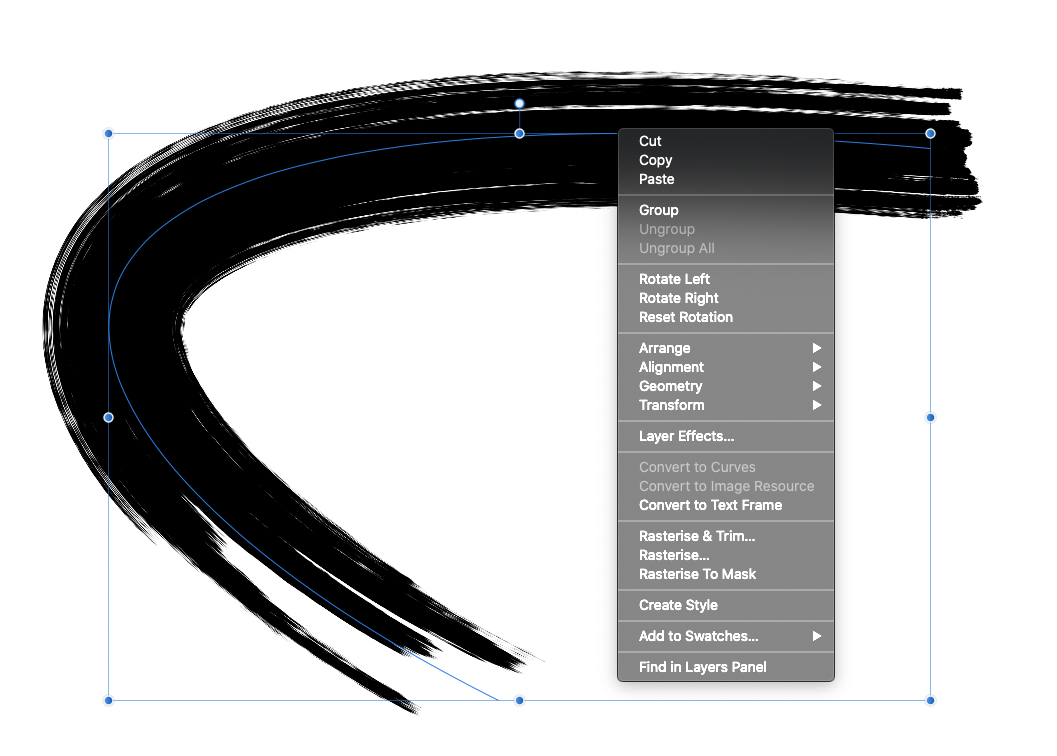
I've been wondering, why there it no option to convert vector brushes to curves? I'm in Designer Persona, brushes supposed to be vector, but the only vector thing about them is that I can edit the trajectory of the brush. Yet, when I wanted to make a 100% vector file out of it, I realised that vector brushes are exported as bitmaps. So, even though the brush tool is labeled as "Vector Brush Tool " it actual isn't. This is all so mixed up - I would expect such behaviour only in Pixel Persona, not in the Designer Persona, where all should be 100% vector graphics. Any tip how to deal with it? Thanks
-
 Firefly River Tam, All vector on background paper.
-
 Hello. This is my first serious artwork in Affinity Designer. It was made 100% vector, based on a real image.
-
 There are websites that offer brushes with .abr extension. How can you tell if the brush being offered is a vector brush or a raster brush? I downloaded a few and all of them turned out to be raster brushes which do not scale. I am a new AD user and I have 1.8.5 for Windows.
 -
Firefly Serenity created in Affinity Designer, all vector apart from background.
-
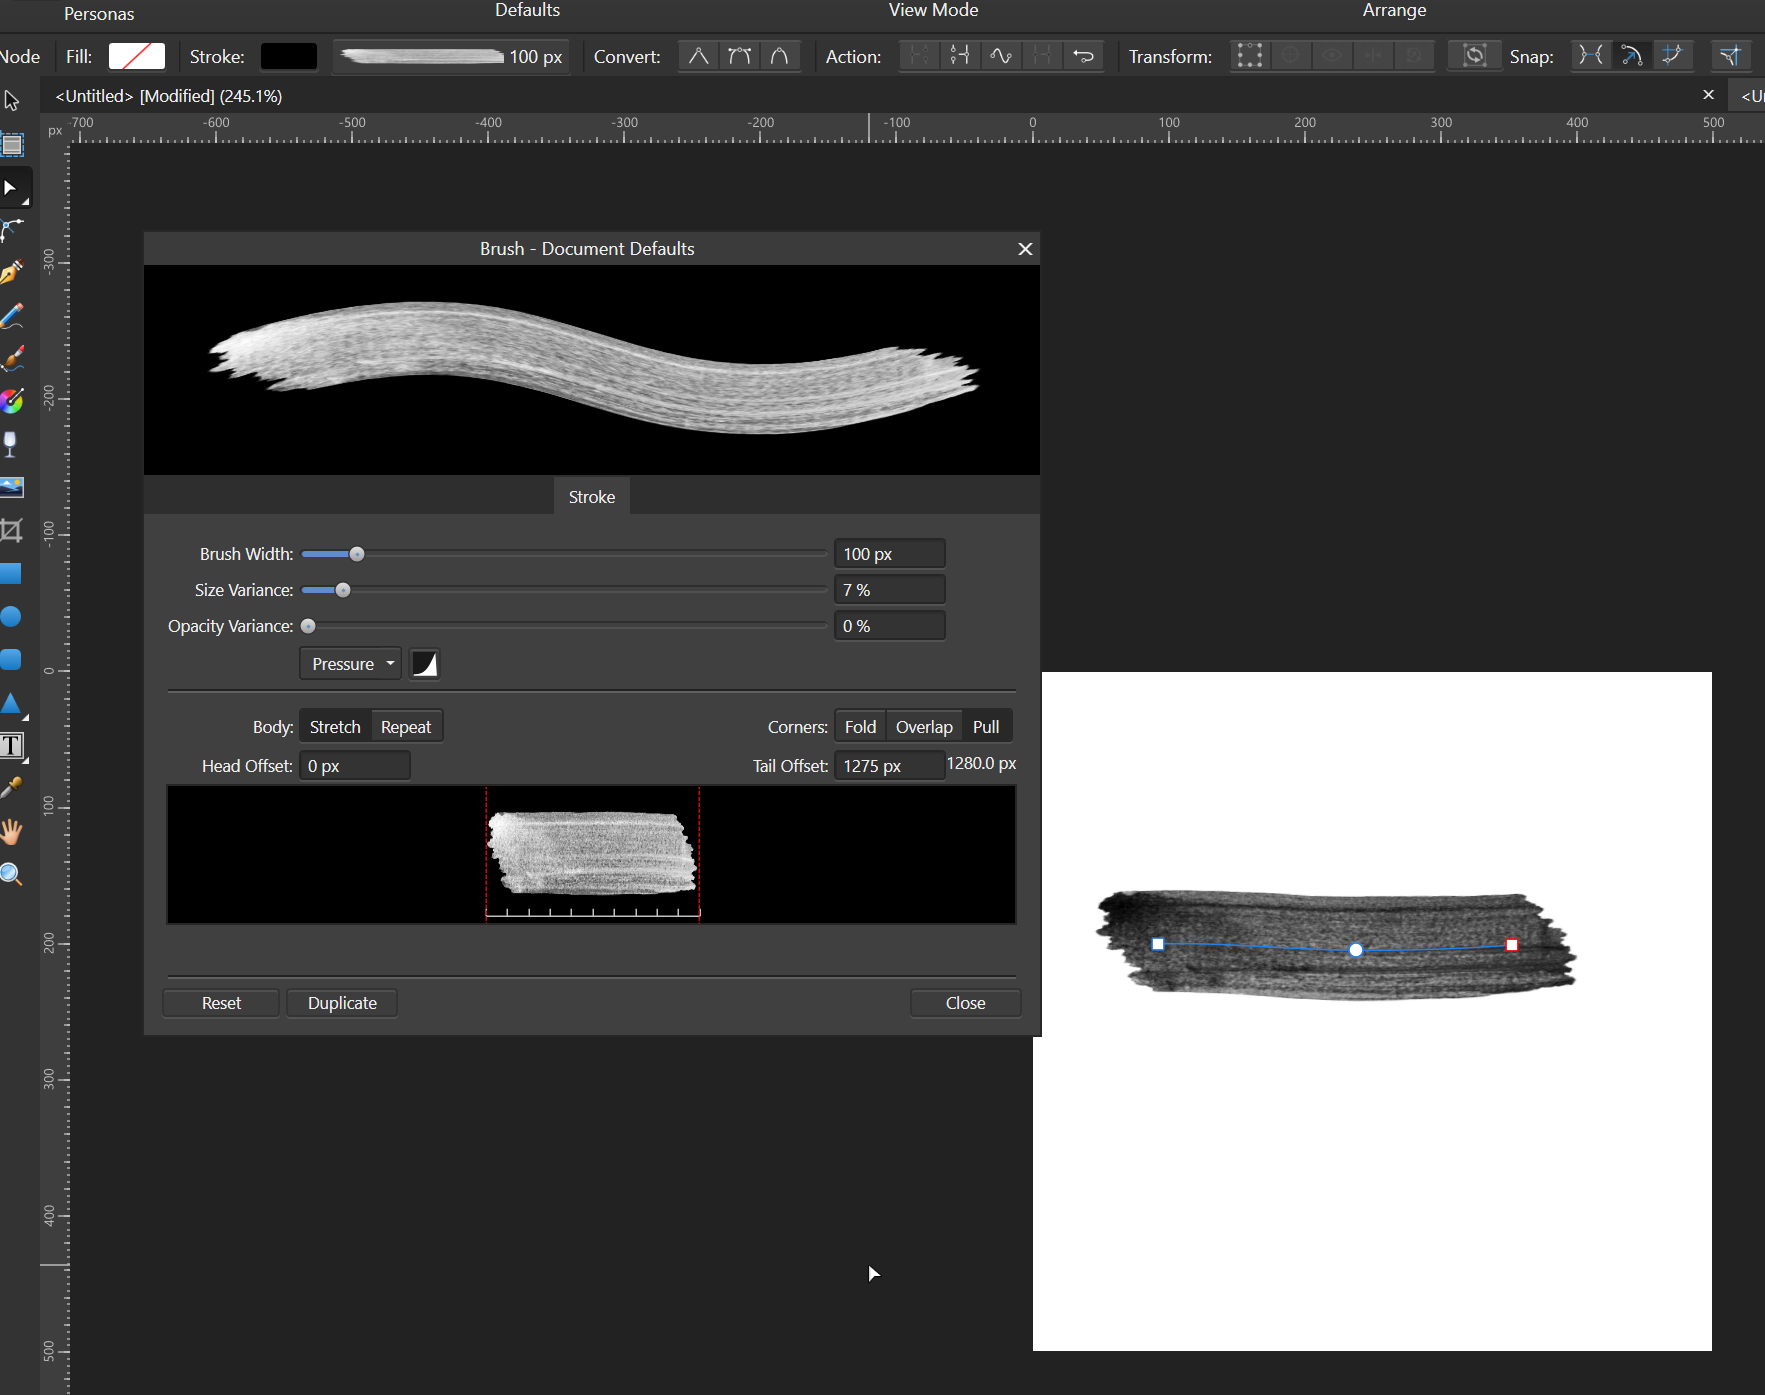
 I'm a recent convert to Affinity but I seem to have a problem with Affinity Designer on Windows. Assuming I have a new document and the first watercolour brush is set to a width of 100px, size variance 81%, opacity variance 100%. Select the first water colour brush and select the Vector Brush tool. (Context menu bar shows 100px width). Change the width in the context menu bar to 10 px. Paint a line (which appears at 10px wide, as expected). Type 'A' to select the node tool. The nodes in the curve are selected and the context bar correctly shows 10px: Click on the brush preview to the right of the fill and stroke to get the brush properties Click the properties button The brush properties dialog opens (called Brush - Document Defaults) with a brush width of 100px, size and opacity variance of 0% so it doesn't match either the selected stroke OR the document defaults! Start to change the Size Variance slider and the line in the document immediately jumps back to 100 px wide. So how do you change the properties (e.g size variance) of a brush stroke after drawing it without setting the other properties it back to other values? I assume that double clicking on the brush in the brush palette is supposed to edit the document defaults for that brush and that selecting the properties via the context menu bar should edit the properties for the selected brush stroke(s)?? Or am I doing something wrong? Thanks.
-
I started off writing this as a question because I couldn't work it out, but a few times I accidentally got it to work although I couldn't work out how I had done it. (Affinity Designer Desktop v1.8.5, Windows 10). After much fiddling around I have worked out how to make it repeatable. (Admins: please feel free to move this to a better place in the forum if there is one). This is useful if you use a tablet and want to draw vector brush strokes in a mask in pressure mode, see the effect as you draw them and be able to edit them afterwards. Here is the explanation - there are three important steps which are not obvious but omitting them will leave you without editable vectors in the mask: Select the layer or group you want to add the mask to. I'll call this layer A. Click the Layer Mask button to add a pixel mask (even though we are in Designer Persona). This serves no actual purpose except that if it doesn't exist, this method doesn't work. Draw a vector brush or pen stroke (this creates its own layer above layer A). Create a group with this single curve (or more if you want to); the point is, it must be a group. Lets call this M (for mask) Make sure the group is open (i.e. click the triangle so that it points down and you can see the vector curve(s) in the group). Drag the Group M into the mask position of layer A. The vectors in group M are now a mask and the curves are individually visible and editable. A black 100% density stoke reveals anything below Layer A. Select the vector brush (or pen or pencil) tool and click on a curve in group M (select a curve in the group, not the group itself) in the layers window. No points in that vector curve should be selected because this will just extend that curve, unless that is what you want to do. Draw a new vector curve and it will be added to the curves in group M; i.e new brush strokes add vector masks in real-time. You can delete the pixel mask layer created in step 2. I have tried to record a video of the process (the context menu for the layers window doesn't show up in the recording but the actions were creating a group and later, deleting some of the vectors). Affinity Designer 2020-12-02 11-43-09.mp4 Note: if you don't create the pixel mask (step 2), group the brush stroke (step 4) or have the mask group open (step 5) when you drag it to the mask position (in step 6), you get the vector curves as a mask but you can't edit the individual curves or add any others. You can only do that if you drag the mask back out so that they become an editable group again and then re-drag to the mask position.
-
 Hi, y'all... I just purchased a vector image for my project. It looks like this (see pic bellow) if I open it on Affinity Designer. How can I edit the pic? I just need to make it smaller or bigger, and modify it for my project. I am very thankful for any hints.
-
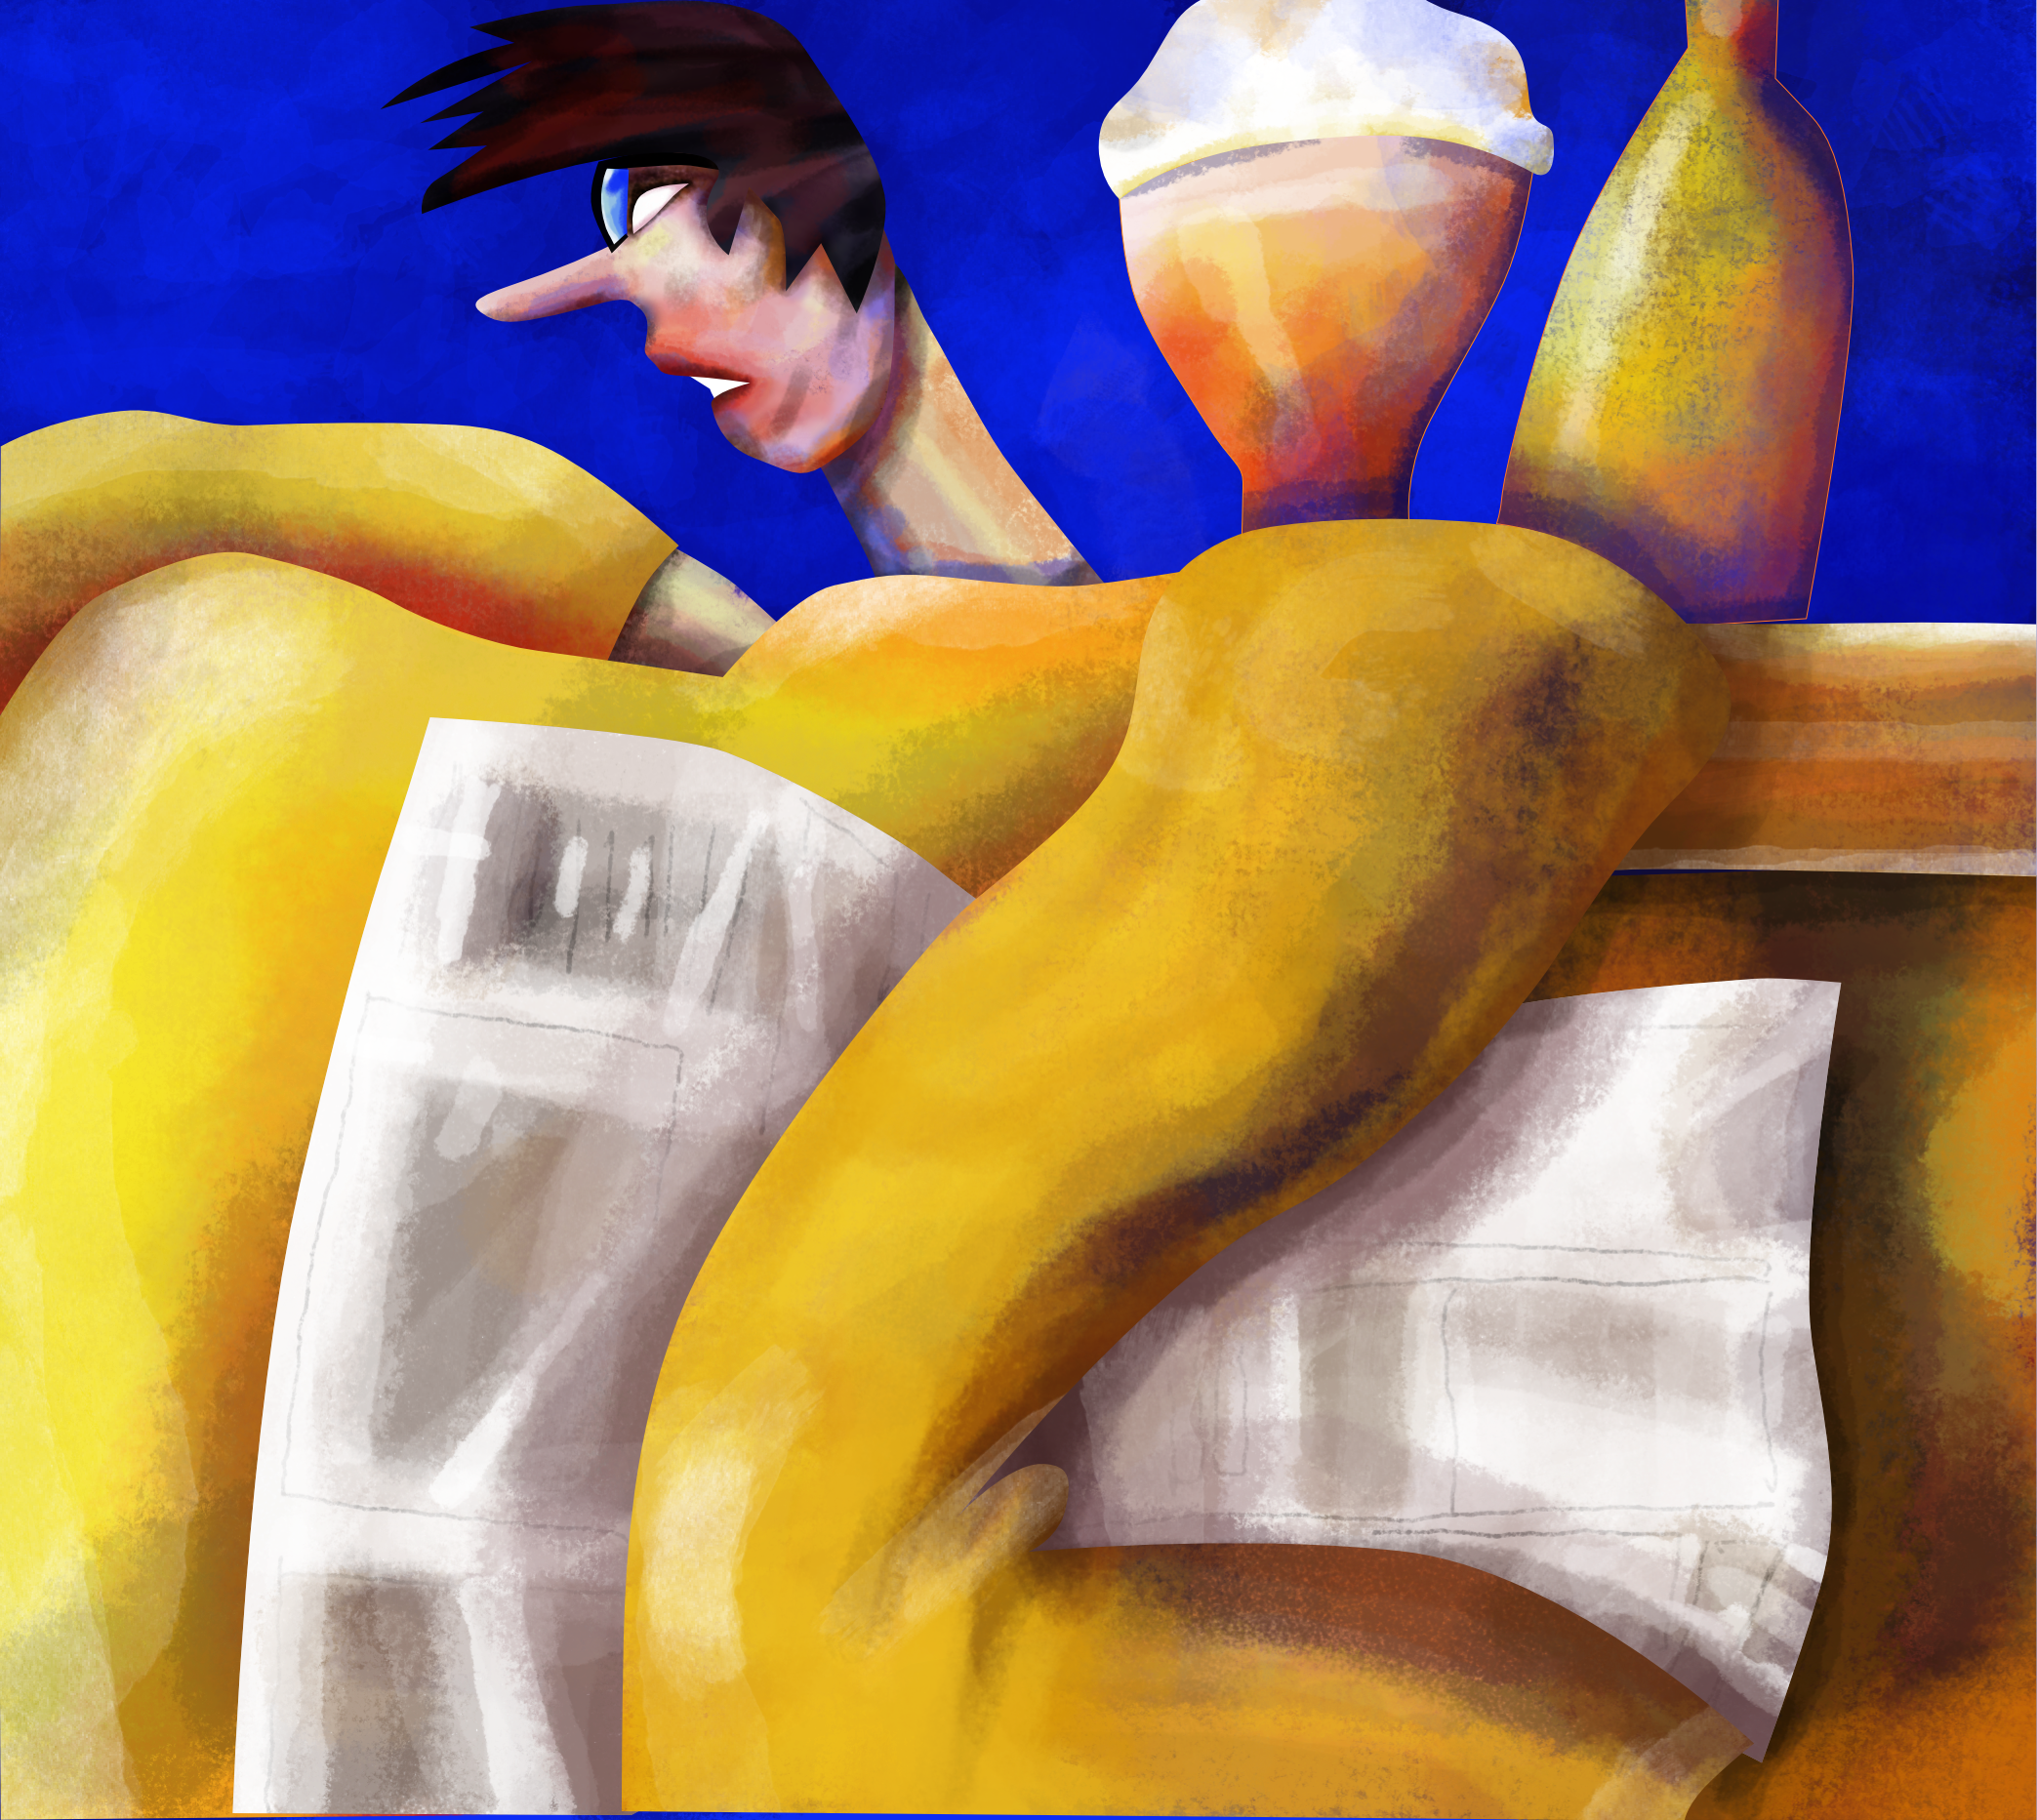
Always makes me laugh when I see people who probably don’t like each other very much air kissing in greeting so I thought I”d draw it. I’d previously abandoned this piece as I couldn’t get it to work, but after returning to it last week it suddenly came together, so I’m really pleased I made the effort to revisit it. It’s given me a lot of confidence to go back and examine some other projects I’d previously given up on.
-
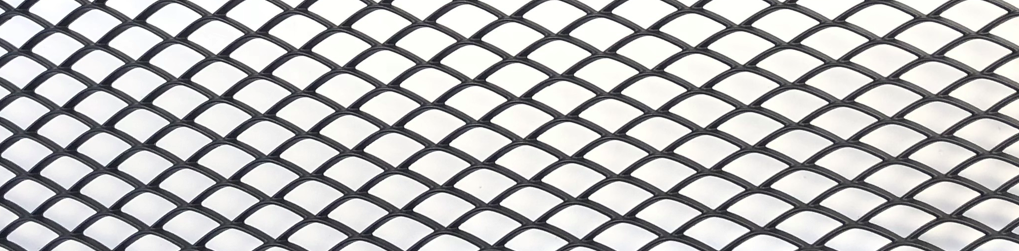
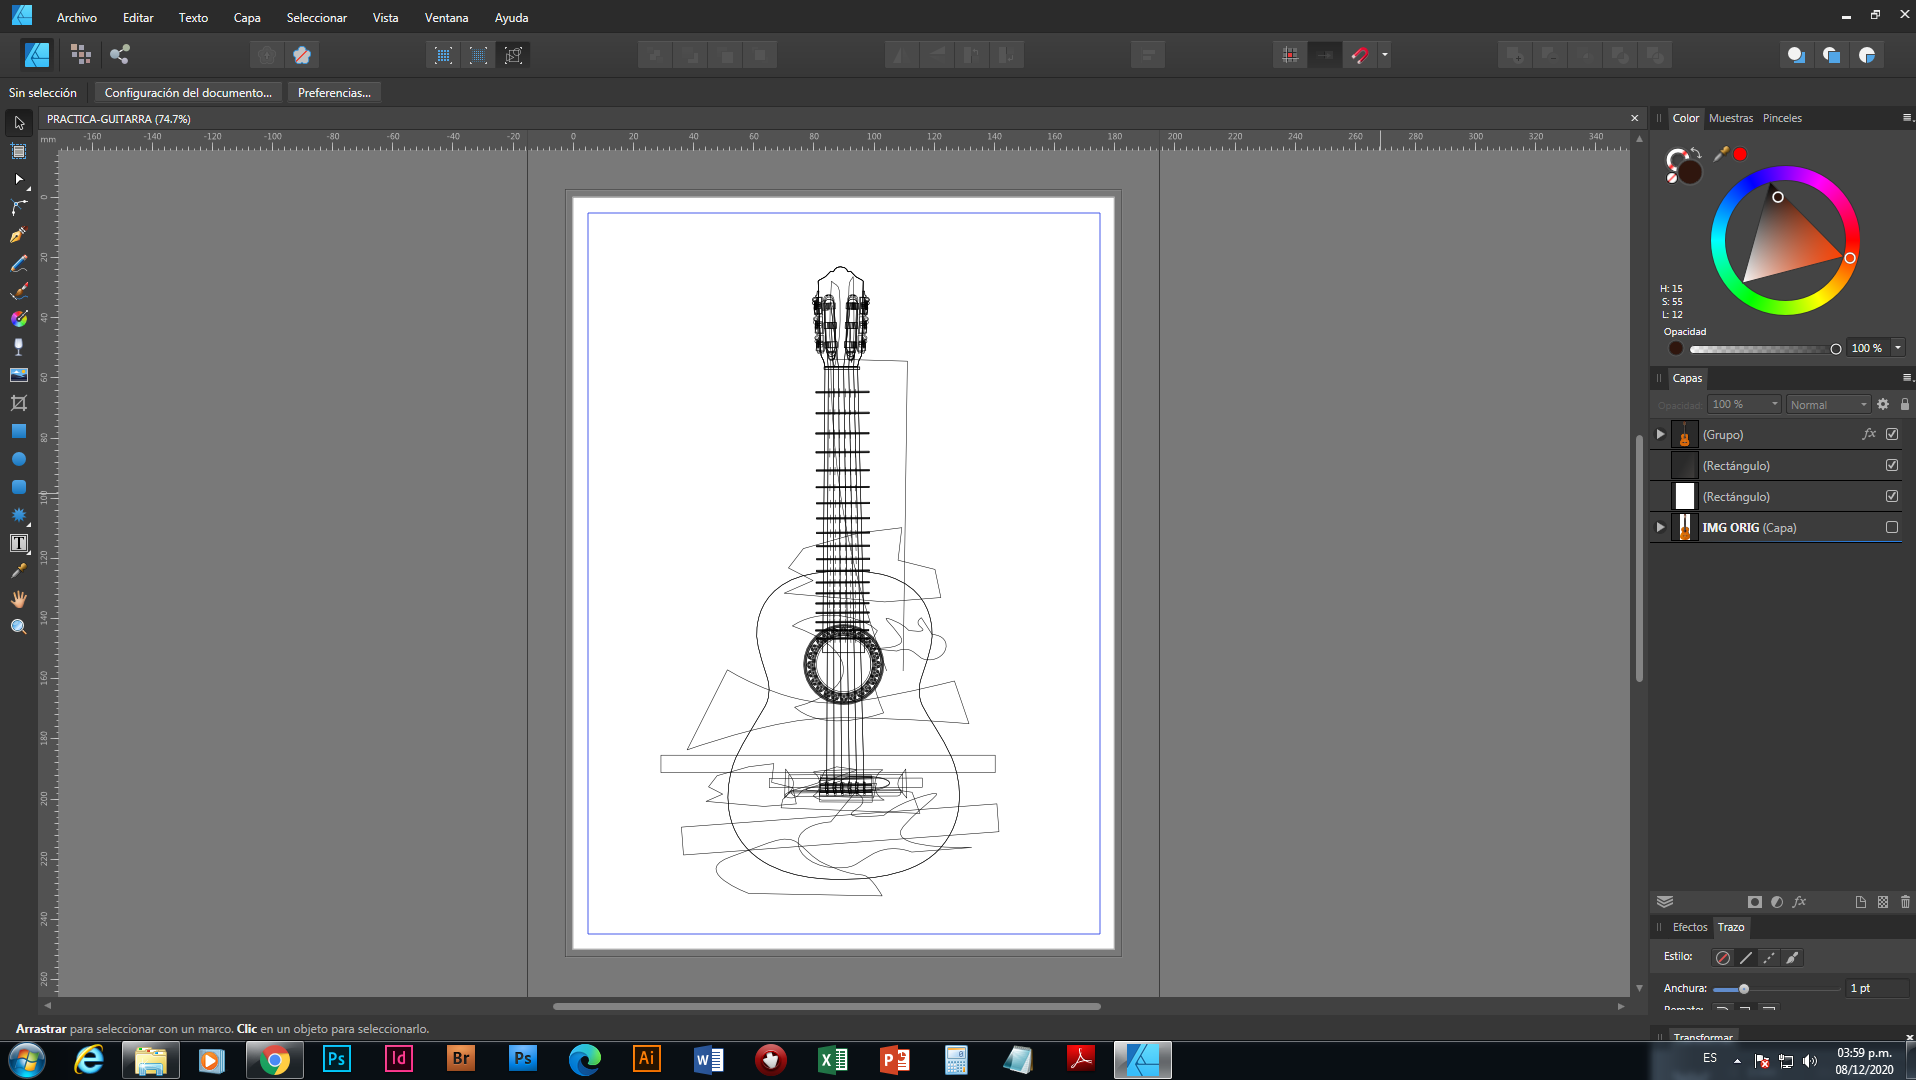
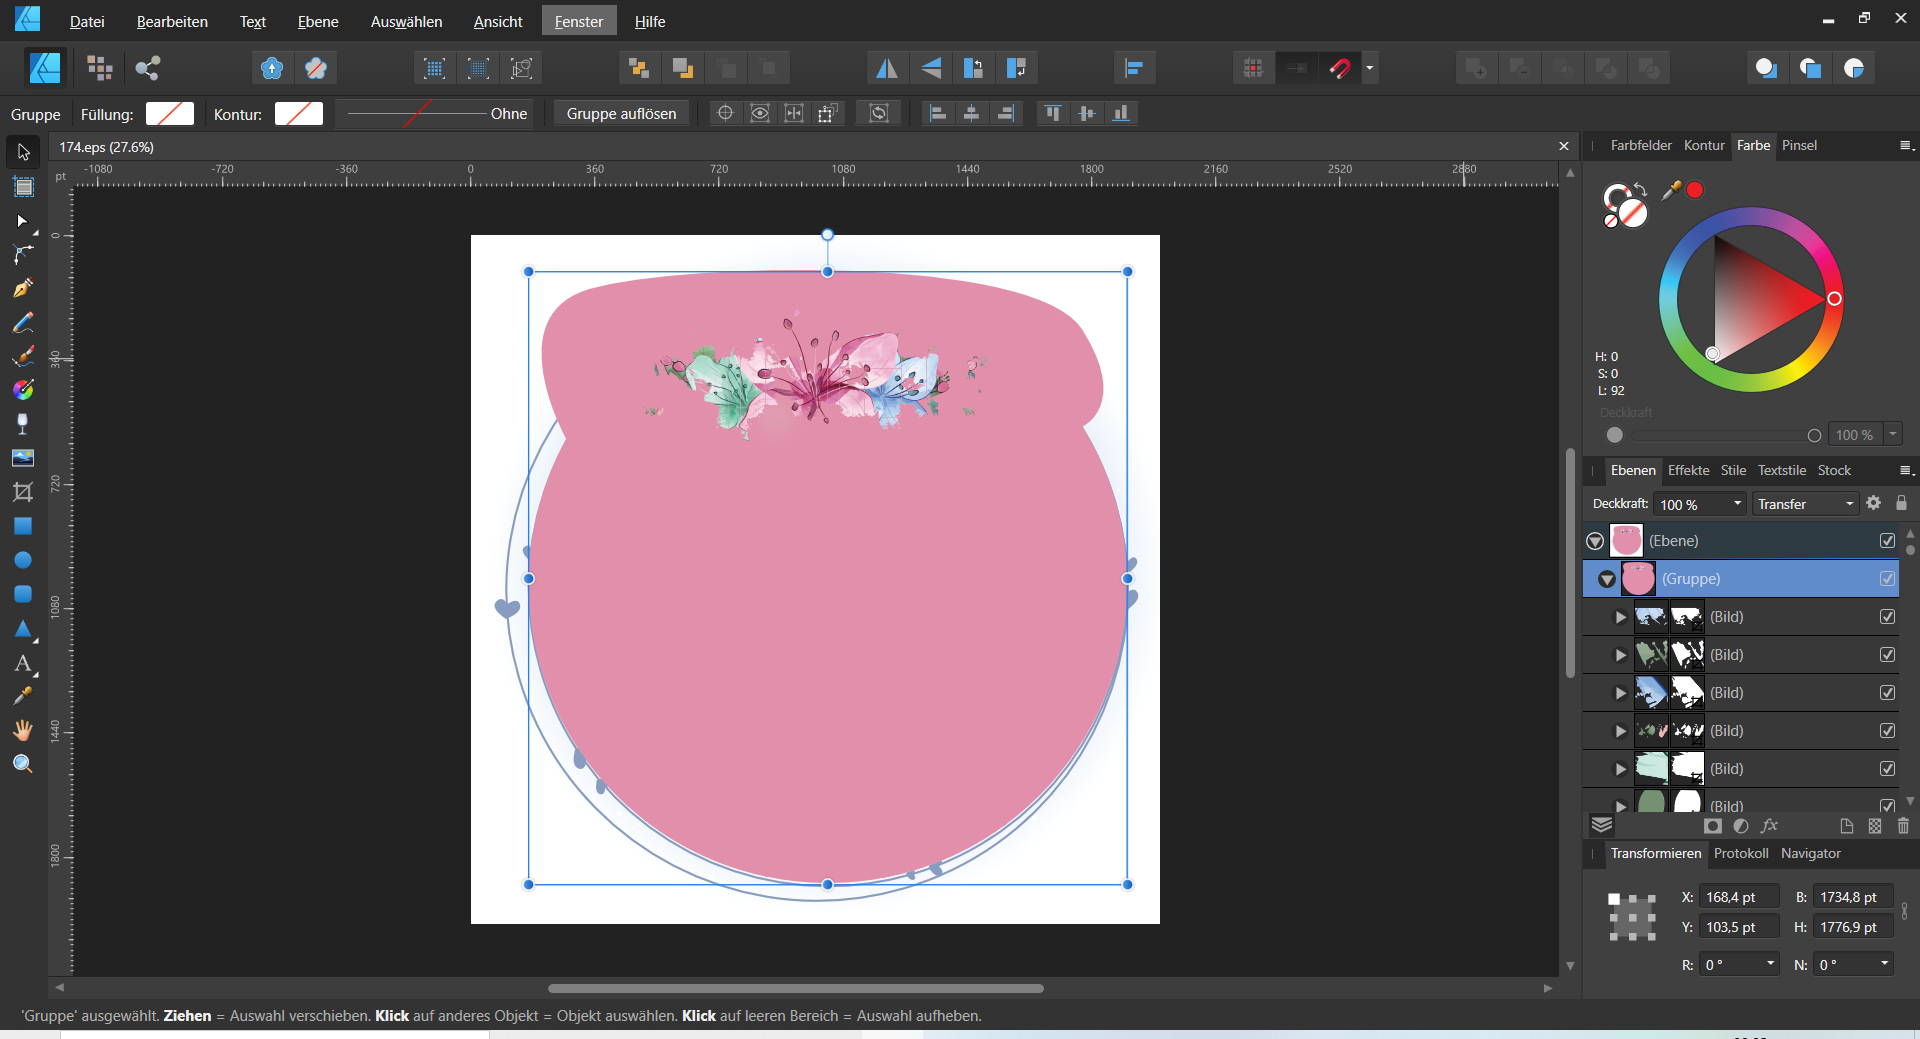
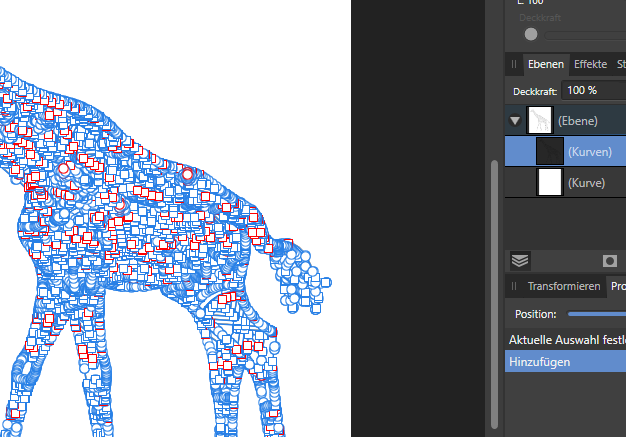
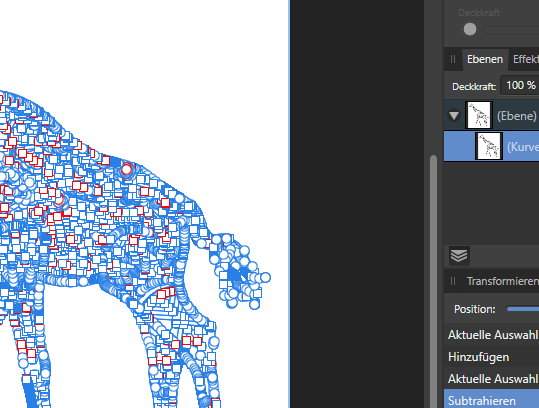
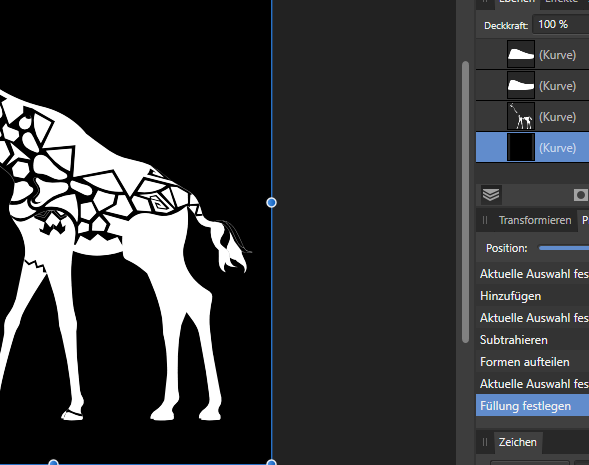
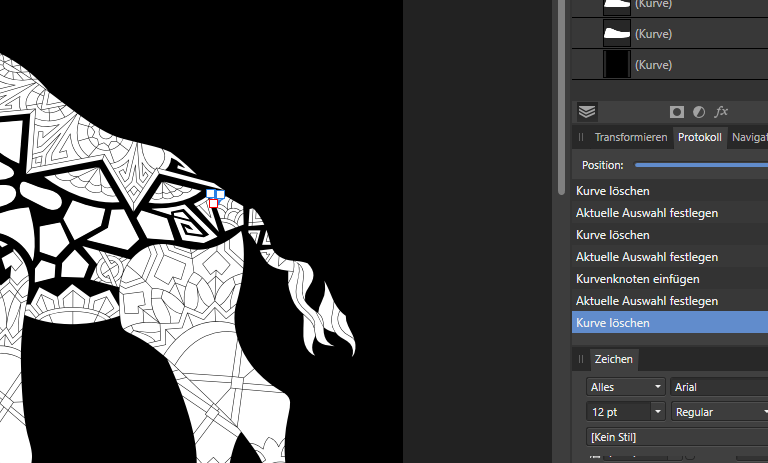
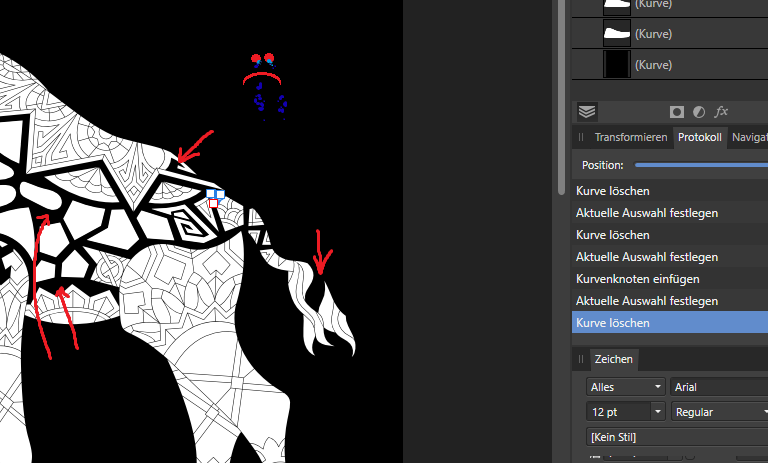
 Hi everybody, first of all I'm not professional at using Affinity right now but keen to improve. I've come to a point where I don't know how to proceed or not sure if there is a more clever way in doing it. My Target: I would like to fill in all enclosed areas in a vector frame. And have borders and the enclosed areas as seperate vectors. The vector consists only of borders surronding empty areas. My Problem Vector Below u find a vector work, where I would like to fill all enclosed areas with white while ( not really a must have but would be nice to have) [ and the surrondings should be black as an border.] Currently I do the following: 1. ADD funktion so i get one big Vector where all borders are connected 2. I subtract this big vector from a new white layer in the very back. 3. Then I use the split up function to split this into pieces 4. Deleting superimposed layers -manual work- Sometimes difficult and not possible sometimes crazy vector failurs... 5. Sometimes usable results... Maybe you have a more sufficient way in solving my problem. *Incase this has been mentioned already I'm very sorry but I didn't find it using the search function.* Thank you in advance for your input! PS.: Very best from Germany stay healty. Silent.
-
 I was initially a bit underwhelmed with Photo betas Pattern fill tool as I prefer to use vectors for this kind of thing, but just had a thought today about using Publishers Data Merge layout tool to create vector patterns and it turns out to work really well, at least for my usage - I'm not really up to the job at making tutorials, but thought I'd make a few screen captures in order to share the technique - it really does seem powerful and doesn't seem to slow down the way the old step and repeat symbols technique does First here's an earlier post from today where I first began messing around with the technique - this covers the basics of how to set up a repeating pattern And heres the technique put into practice on one of my old cartoon illustration jobs - hope someone can make use of it Pattern_test.mov
 -
Affinity Forums Hello friends, greetings from Honduras, now will share a link to download vectors and more. link: http://es.all-free-download.com The site is ideal for use with Affinity Designer. greetings To You
-
Poison So impressed with AD....had to resort to embedded files with this one but handled 1000's of vector objects brilliantly.. Again based on a sketch from 2017 Inktober Project All vector 420 x 200 mm 300dpi
- 71 replies
-
- 41
-
-

-
- inktober
- conversion
- (and 1 more)
-
Hai I want to share some of my newest icon design (this is only half design) . To see full collection, you can check my behance page.Created in affinity designer.another my works : Behance.net/andrigraphic Instagram.com/andrigraphic Youtube Andrigraphic Thank you
- 4 replies
-
- 3
-
-
- vector
- illustration
- (and 2 more)
-
Hai I want to share some of my baby clipart. To see full collection, you can check my behance page. Created in affinity designer.another my works : Behance.net/andrigraphic Instagram.com/andrigraphic Youtube Andrigraphic Thank you
-
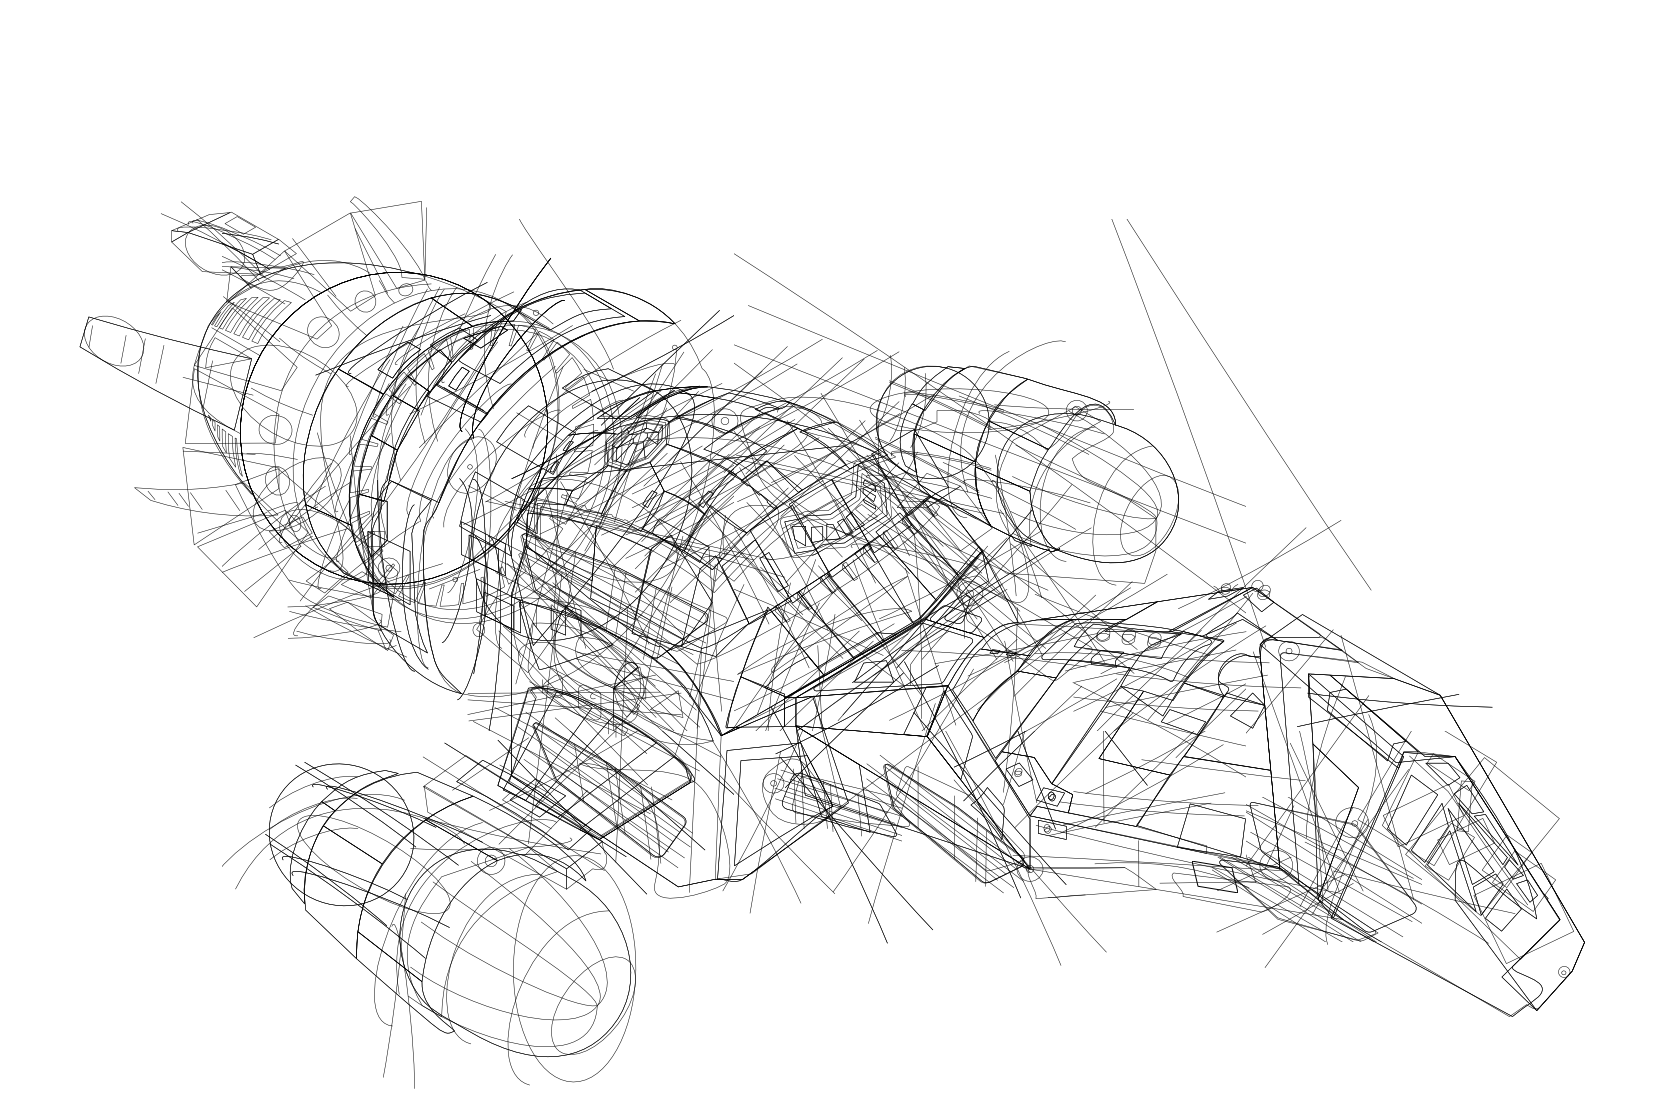
 Hi can anyone please let me know the steps in creating a vector custom brush from an image in Affinity Designer? Please note the image i want to create the custom vector brush is attached herewith. Appreciate your support and assistance in this regards.
-
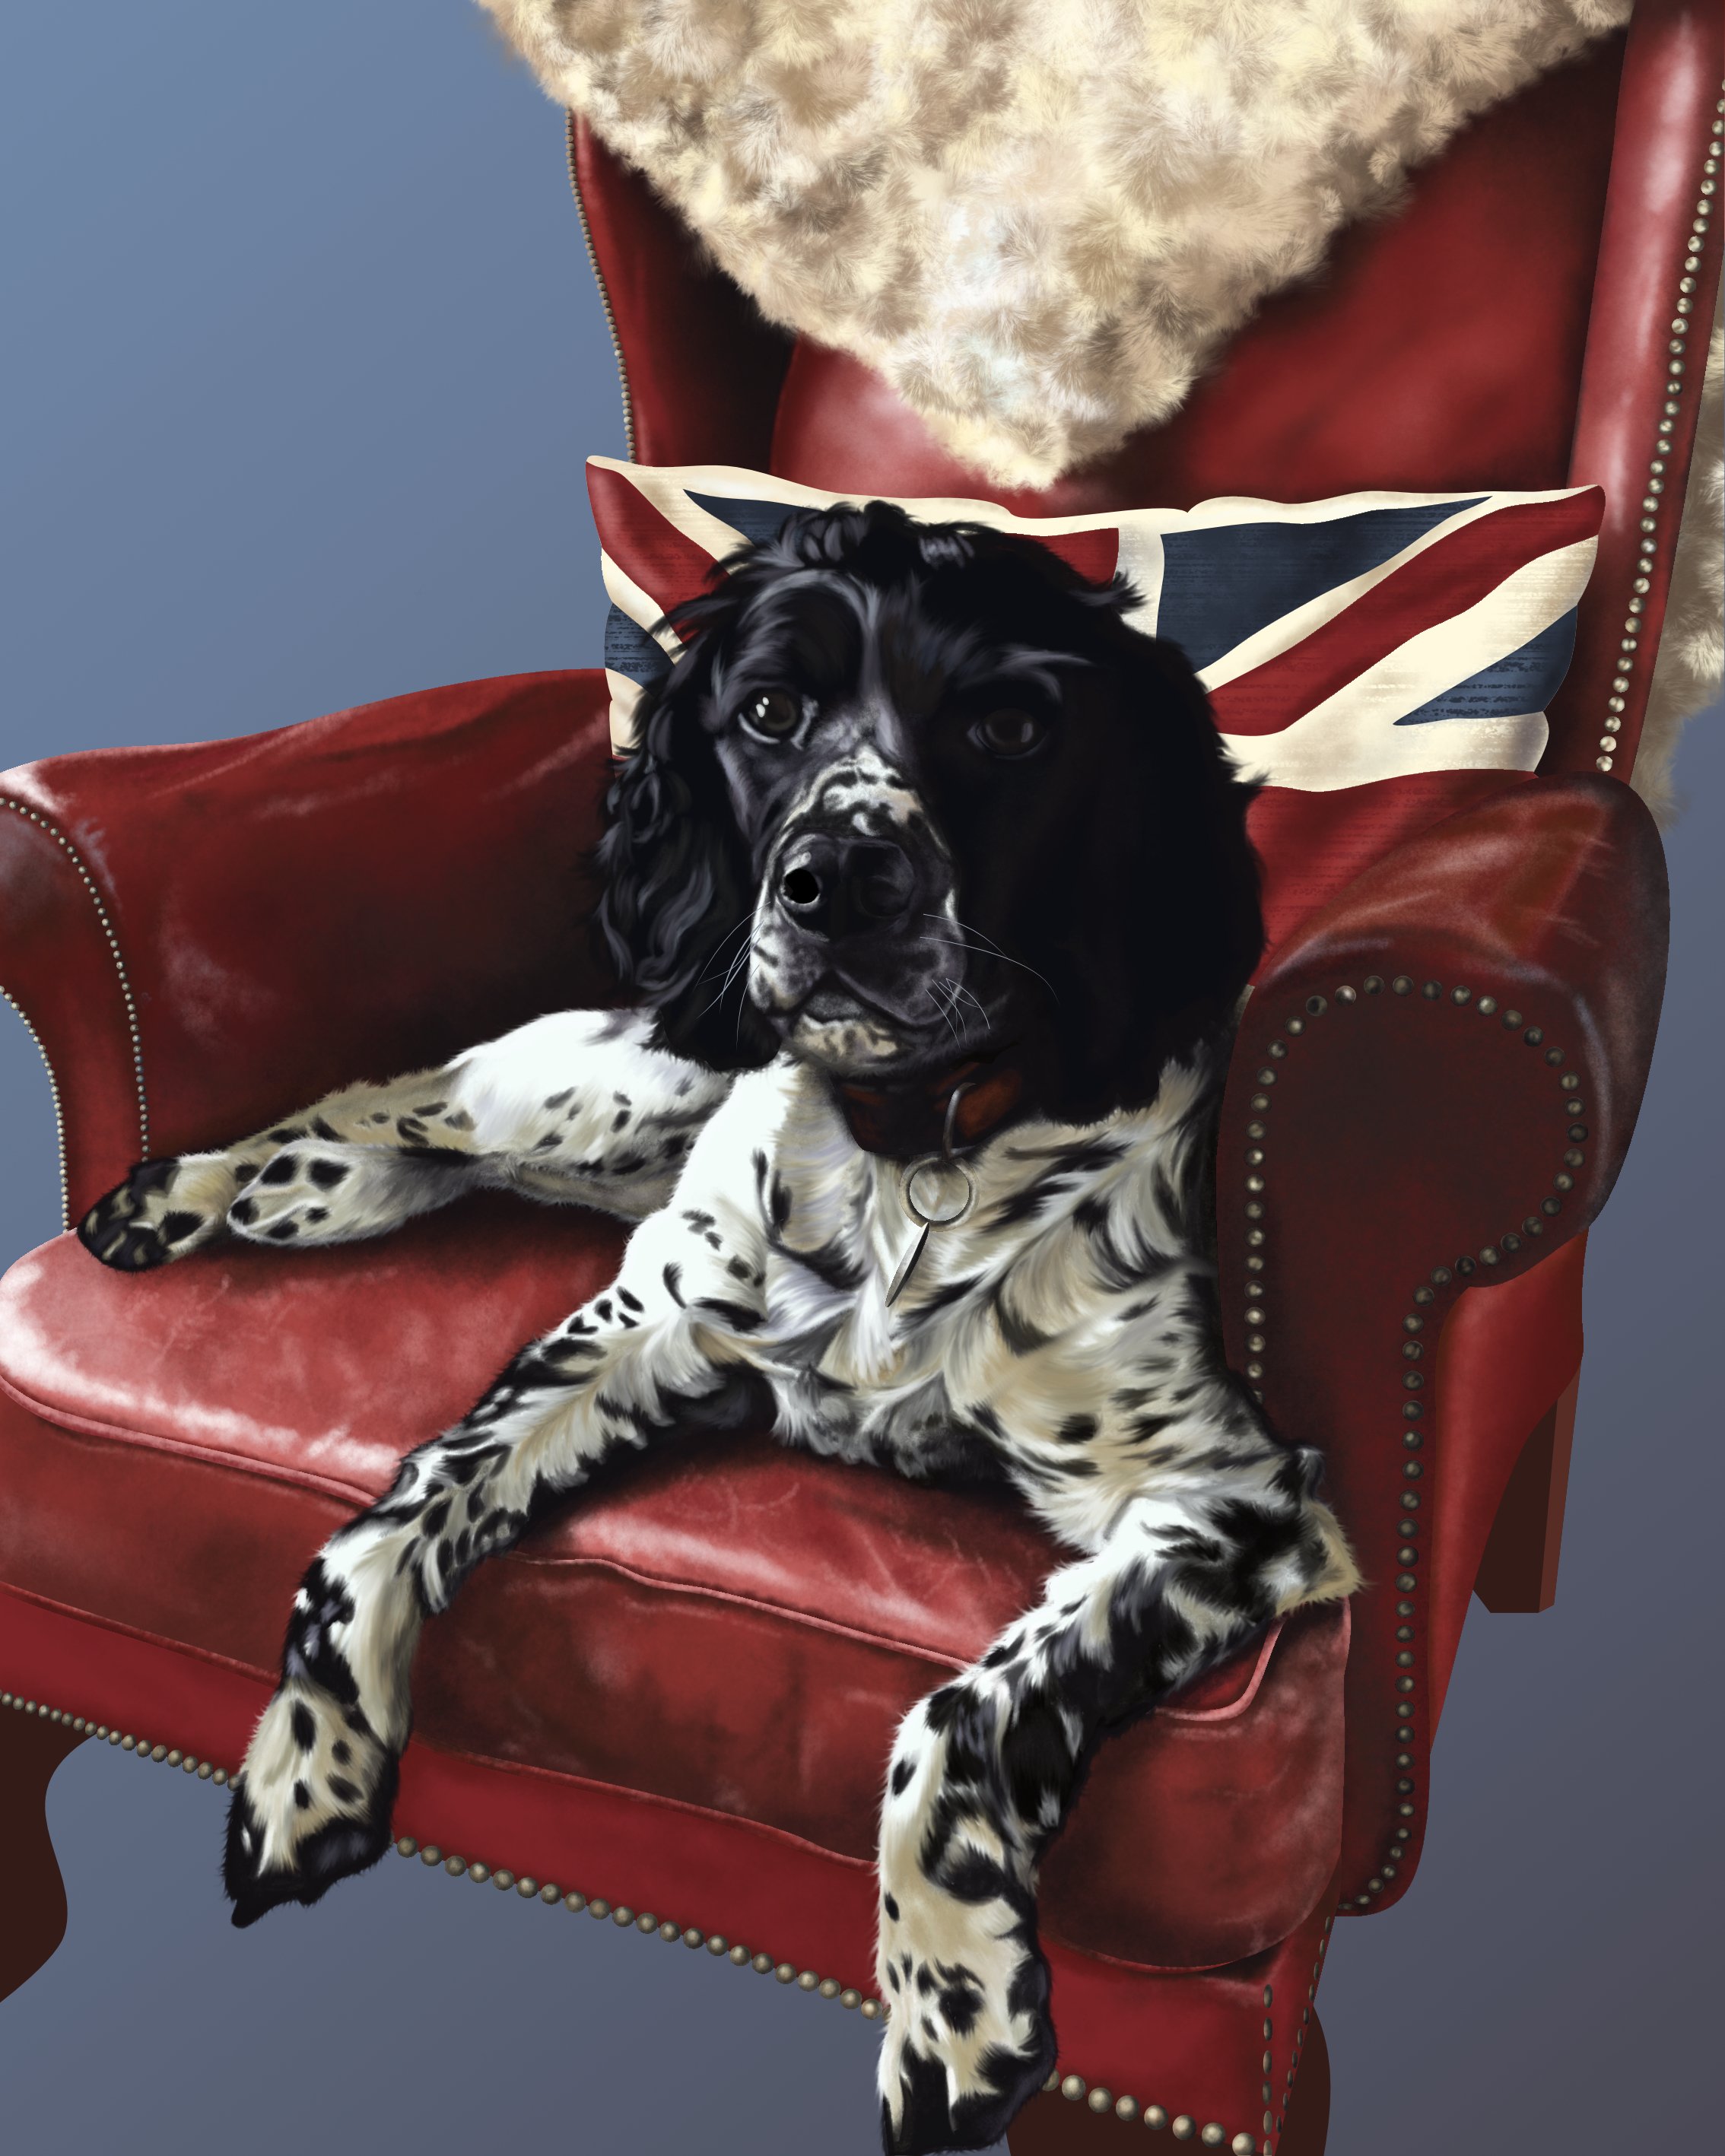
This is a recently completed commission, which was fantastically enjoyable to undertake. Frankentoon’ s Texturiser Brush Set was a great help In creating the patina of the leather and the cushion fabric,, and Gagatka’s fur brush set really helped in creating the texture of the throw over the back of the chair. Otherwise, the smudge tool in pixel persona was essential in creating the sheen of the dog’s fur.
-
 I have a vector spiral and I need to put text on the path, but the spiral is the wrong direction. When I flip the path and then attempt to place text on the path, the text is also now flipped. How do I place text on a flipped vector shape without the text also being flipped? EDIT: As always inevitably happens I figured it out immediately after I posted. Using the 'Node' tool I selected all the nodes, pressed 'Transform Mode', scaled it horizontally, then applied text to the path and it's flowing the proper direction.


.jpg.5f012a5f572827c3f4528ec25aa08f44.jpg)
.jpg.5d735830f8a0aace0b7bb6a423cc7f41.jpg)
.jpg.fde33eb19a4c823c6c84a3ea9b3b5f42.jpg)