Search the Community
Showing results for tags 'Text'.
-
 Right now, we can only apply a fill to a text box in the character/ text styles. Or a fill + stroke in the text frame studio in Publisher (this should also be available in Designer and Photo for text graphics!). I would love to see additional features to control the text box styling. Changing the size of the textbox dynamically with a top/bottom/left/right offset, a top/bottom/left/right stroke (or multiple strokes for double lines) rounding the frame that is used for artistic text, etc. It is very handy if you have more granular control, so you can create more sophisticated styles that are applied dynamically. Saves a lot of manual editing work.
 -
 I am having an issue with masks not behaving the way I'm expecting during export. Not sure if it's a AD issue or a me issue. - I have a white object/icon (the Massachusetts text) - I placed the icon/text over a navy rectangle and used "Mask to Below" to create the navy icon/text - on export to pdf, the final file just shows the rectangle as in the screenshot Where am I going wrong here? EDIT: I sort of figured it out...if I use a black version of the MA logo, it works. I am still confused by why it appears the same in the project both ways, but when exporting only works if the logo is the black version. Would love to learn more!
-
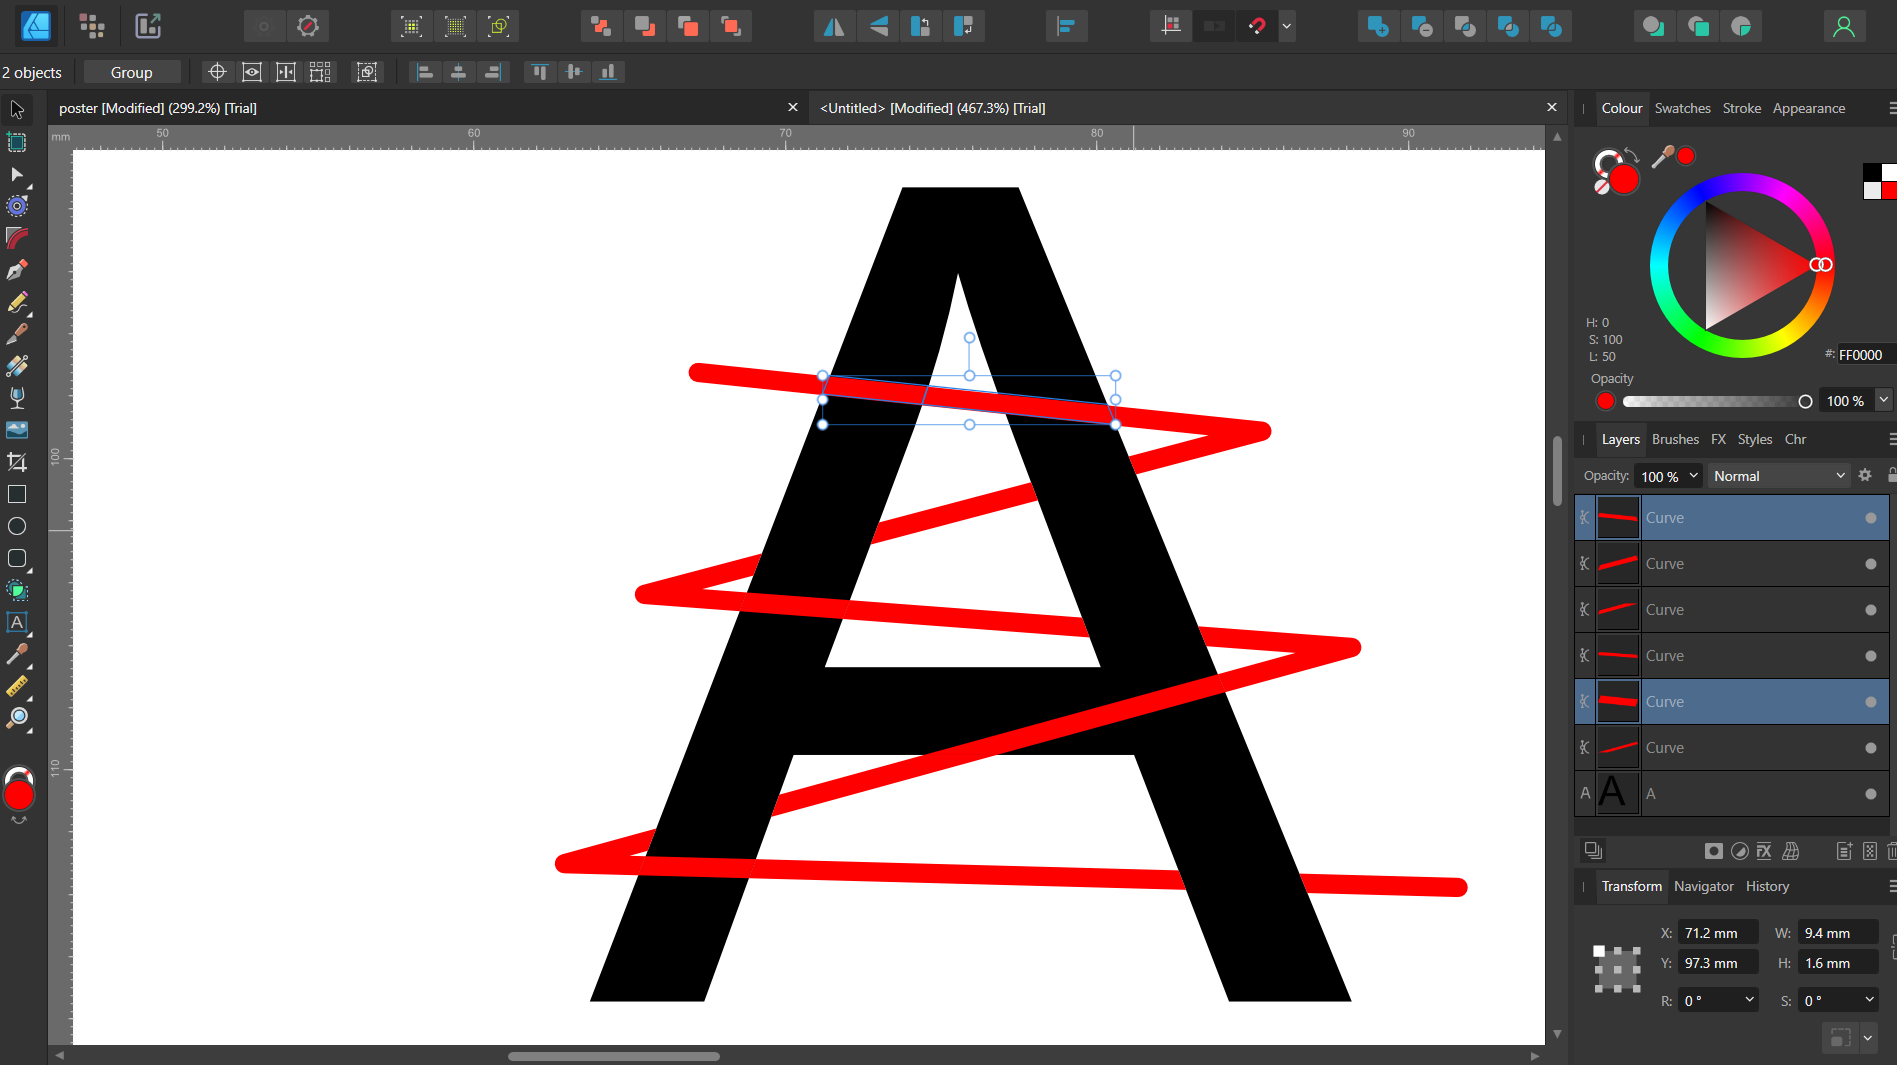
 So I am trying to create a letter with a line laced through it. So I create the letter (let's say A), then I create a path using the pen tool. And then do a divide operation so that I can bring the path or letter to the front with each cut out part. But it divides fine for every cut except for the second cut, where it only creates one part where it is supposed to create 2. Steps to reproduce: 1. Create a letter (I used A) using the artistic tool 2. Draw a continuous line using the pen tool, zig zag across the letter 3. Select the line, and then do layer->expand stroke 4. Duplicate the letter 5. Select the duplicated letter layer and the line, click Divide from the boolean operations list I have attached an image of the issue, most of the divisions are correct, except for the selected division which should ideally have one more cut, but dint seem to cut it correct.
-
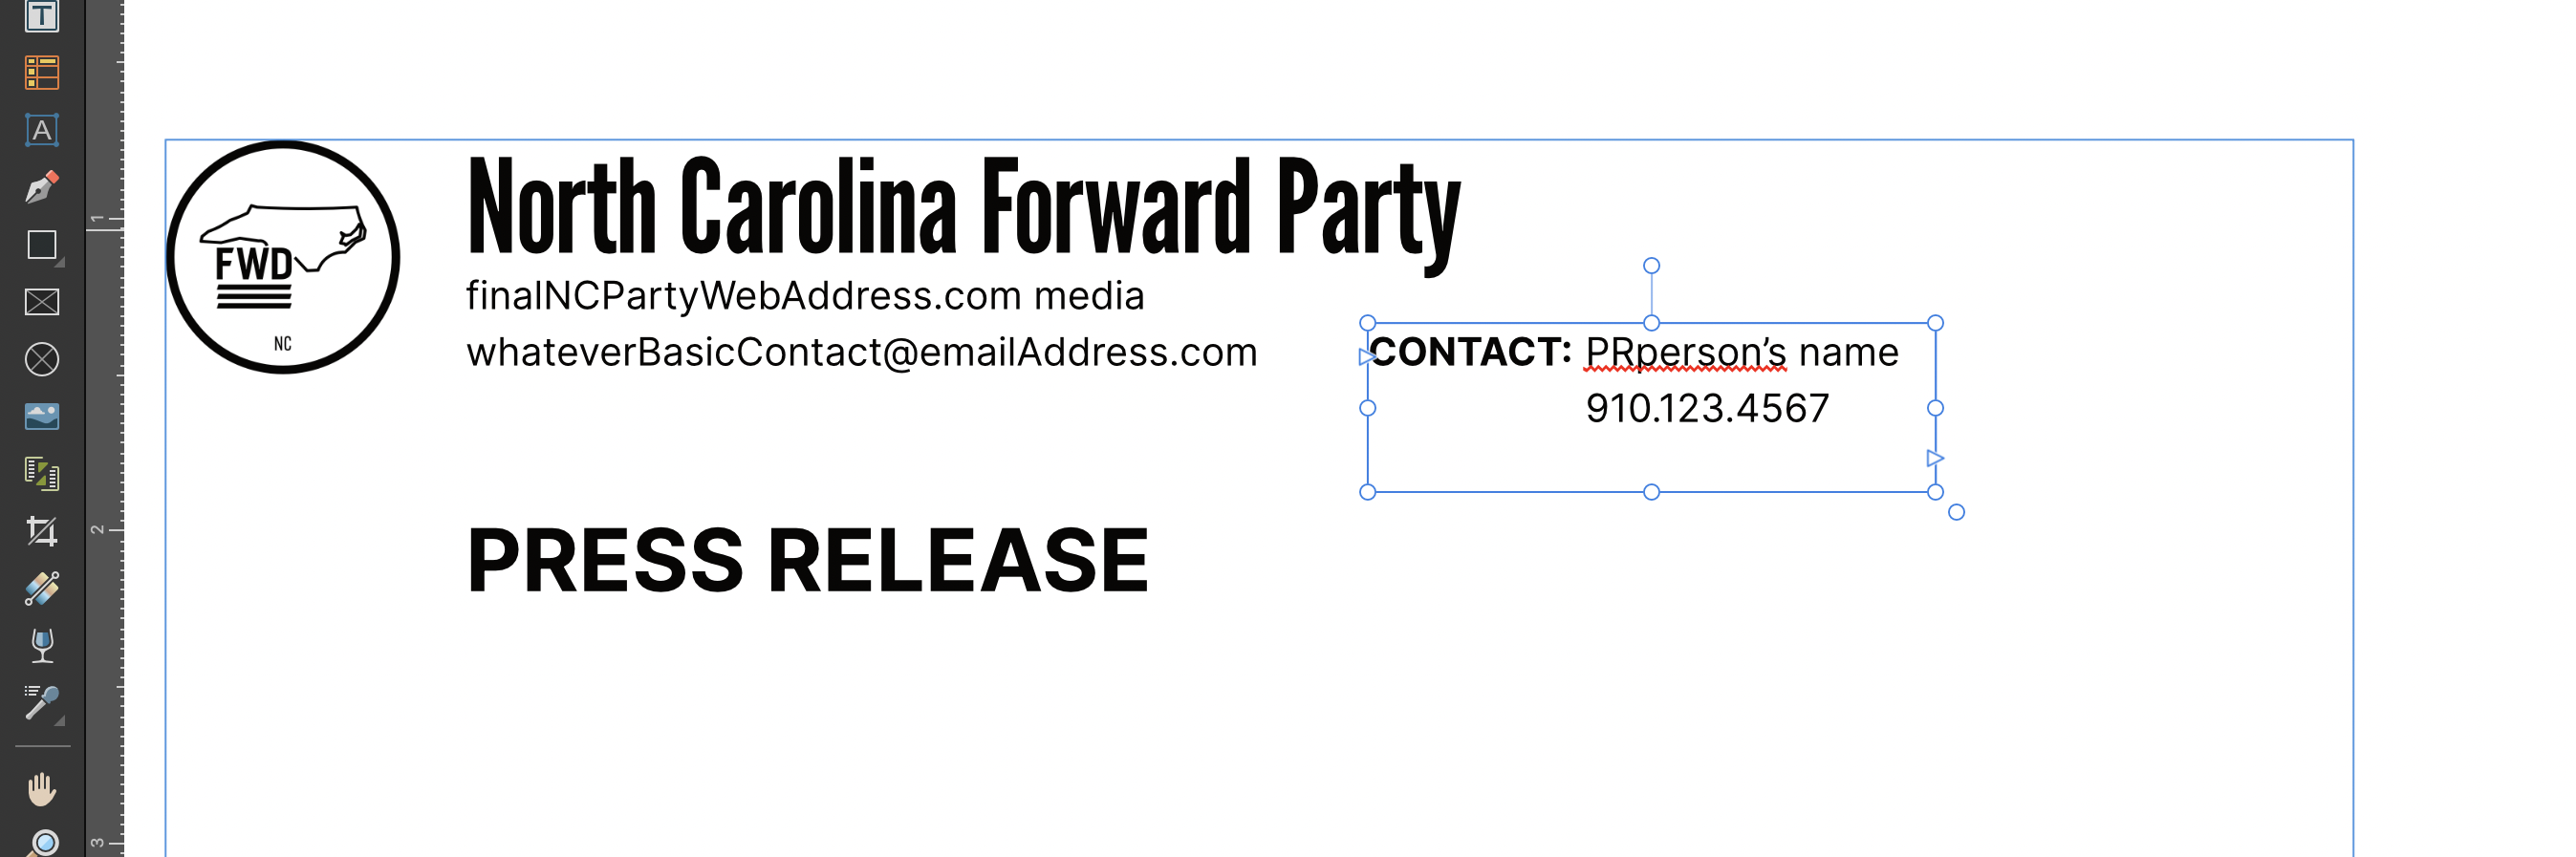
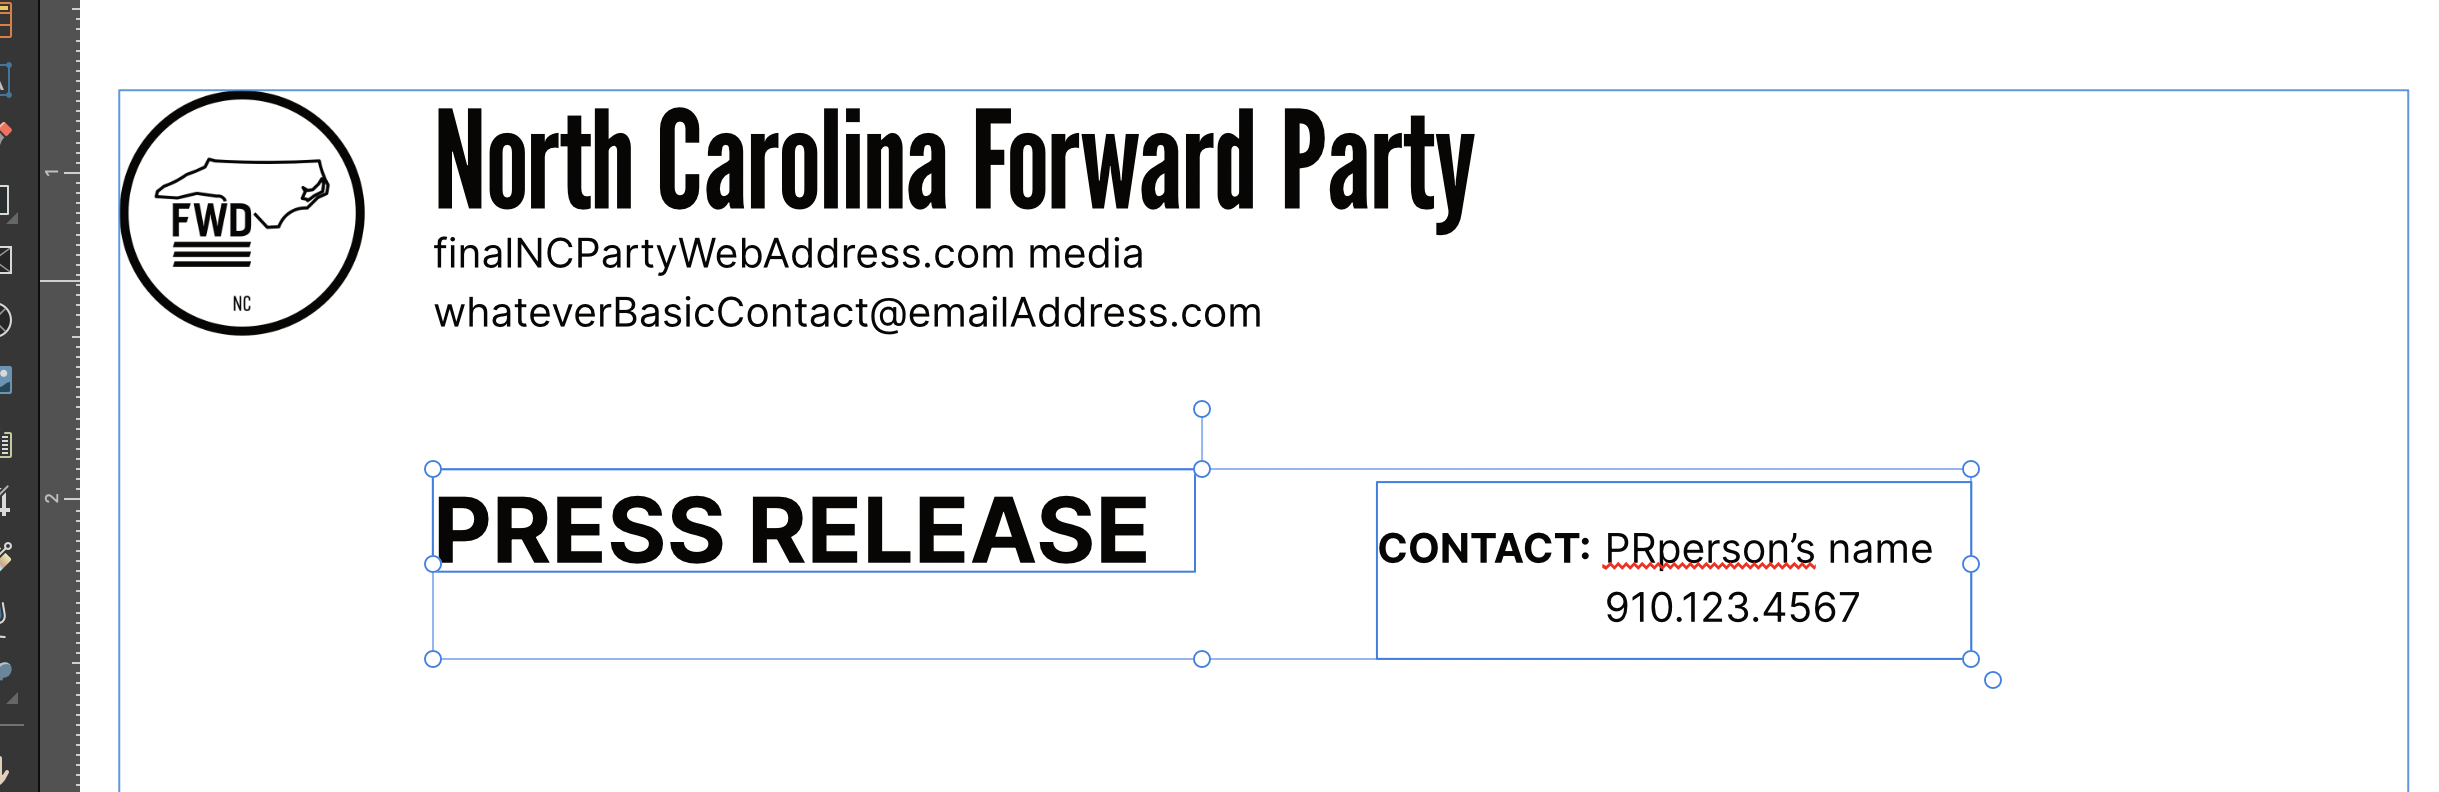
 The text is shifting in relation to the position of the text frame. There are no text styles or wraps on any text Pic 1 - the text is at the top of the text frame Pic 2 - when I try to align the <Contact block> with the <press release block> the contact info shifts down I cannot align these text frames
-
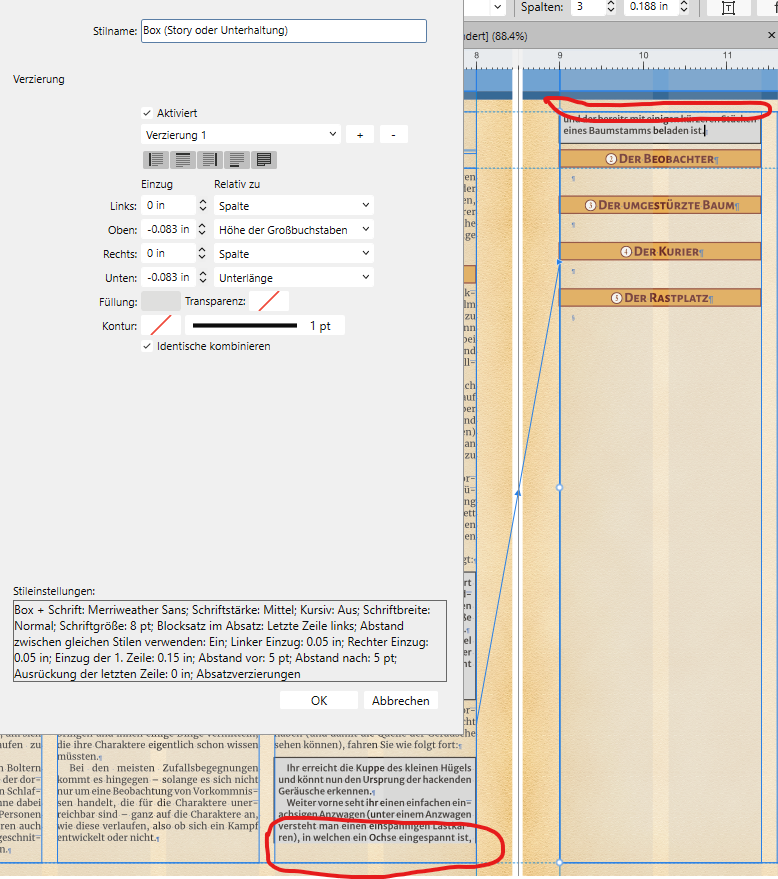
 Hi all, I've run into an issue with the automatic column break and paragraph text decorations, and was wondering if I'm missing something (or if Publisher is). I'm writing a role playing game module and I want to add some text which the game master should read out loud (which should be clearly visible to the reader), which means that text needs to be at the correct spot in the surrounding text and move with it if I edit any text before it or add some illustrations (I'm still at the writing and editing stage, so some small text changes can cause bigger changes in the layout because of text wrapping etc.). I know that once I've finished everything, I could just manually adjust the text (e.g. split a paragraph into two at the right position) to get the wanted effect, but I think there should be a better way. As you can see, I've created a paragraph style for a boxed text (this is not a text frame, just some text which has a different background and a 1 pt box around it because of a paragraph style with decorations enabled). The problem is that when Publisher auto-wraps a paragraph with these decorations, it literally cuts them off, which means that in the first column, there is no lower line (or background) for the text, while in the new column, there ist no upper line (and no background, either) before the text starts. Is there any way to get Publisher to adding those missing parts when a paragraph wraps onto a new column or page? I guess if I use a text frame and just pin it in place at the correct position in the text, the whole frame would be moved to the new page, which would leave me with a big empty space in the first column, and is - again - not what I want. I guess I could just use the left and/or right line together with the background (so it's not a boxed text anymore, but still clearly visible), but I would prefer to have a full box around the text. Any ideas?
- 9 replies
-
- 1
-

-
- text
- decorations
- (and 2 more)
-
In Designer v1, I didn't have a problem at all. In Designer V2 it's a horrible experience. what's the trick to select a couple of specific lines in a paragraph? I assume it's broken, or at least for me it is. I can highlight text but if I try to drag the handles to adjust the selection—the pencil draws a black line as if it is trying to access the writing to text... but it just readjusts my selection and not even close to what I am trying to select. Any tricks or is this a bug? Thanks, Jim
-
 Hey there! I just want to bring here to your inbox a new awesome tutorial This is a tutorial about a method to create Stylized Texts! A very easy step-by-step to guide you in getting better at using Affinity Designer 2! You will learn this: ✅ How to Insert Text ✅ Creating a Symbol ✅ Generating a Seamlessly Pattern ✅ Texturing ✅ Export PNG ✅ Duplicate Text ✅ Import BITMAP on Text ✅ Text Layer Effects Overlay You can watch here below Many awesome methods in a quick tutorial, See you there, enjoy!
- 1 reply
-
- 2
-
-
- affinity designer
- tutorial
- (and 1 more)
-
 A two-part about importing text. Can I import a Word document into Publisher, where all of Word's ¶ and character styles have styles of the same names in Publisher, but with Publisher's formatting, rather than the original document's? And, related, I'm losing italics when I apply a paragraph style, even if the definition is to leave italics alone with the formatting. Or am I misunderstanding the little dash in the box next to "Italic" in the paragraph definition? Thanks much.
 -
Tutorials display text boxes easily routinely fulfilled. My own text box, shown in the image, suffers the dreaded NOTHING HAPPENS effect. The cursor moves along as if it's typing with invisible ink. This occurs at the very beginning of a file opened on a simple, inserted image by a simple beginner user.
-
 I am noticing I can't type a soft return using the shift + return keys when on a Bluetooth keyboard (Logitech Keys To Go). This is a generally used function in other apps. Would love to see it in designer as well. On an added note it is possible to do a soft return in other apps using this same combo with the software keyboard. That would be great if Affinity Designer could do it, so I don't have to open the special characters tray.
 -
 When I import a page made in Publisher as a PSD into Photo, the text imports as a pixel layer. I've turned on the 'import as text for PSD' in preferences... (Within Studio Link it's editable as text... But as a separate, stand-alone PSD file.. It's not). Would appreciate any help.
 -
When I print from affinity Designer, the text is always bolder than what’s on screen. Tonight I exported the document as a PNG then printed it from the PNG, and the font thickness is as it should be on screen. Does anyone know how or why this is happening? Or how to fix it? im using a Mac and V1 AD. I’ve attached a photo so you can see the difference in the print direct from AD and one from the exported PNG.
-
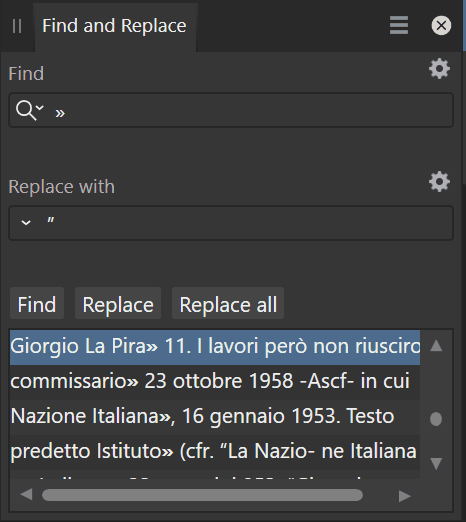
Considering that one day there may be options to filter search queries by layer/ page/ chapter/ text frame/ column, etc., see: It would be neat to have a batch Find and Replace in which you can add multiple queries for finding and replacing something. That way, you could batch replace various pieces of text, characters (e.g. to do clean up for multiple white spaces and break characters) for particular pages in at once. The way I see this is you could add another Find and Replace query by clicking on a "+" button, which will run after the first Find and Replace has run.
-
- 1
-
-
- affinity publisher 2
- find and replace
- (and 5 more)
-
When I have to batch replace large pieces of text without a consistent way to do this using RegEx, I would like to shift click multiple instances to replace rather than clicking the replace button for each item individually. That way, I can go over the edits much quicker manually.
-
Dear Serif, please make the text style shortcuts context sensitive, meaning that text styles are not applied when I try to type my text. I prefer to use the alphanumeric keys for text styles so I can activate them with a single keypress. But currently, if I have a body style associated to the "B" hotkey, I cannot type the word "body" in a text frame. 😭
-
You can currently resize text frames horizontally by double clicking the centre handles on the left or right hand side of the text box. The same goes for vertical resizing. I would like to also have a resize to smallest bounding box of the text by double clicking the handles at the corners of the text box (e.g. bottom left/ right). That would be convenient for example for reworking large text boxes for titles, which overlap with other text frames.
-
I am working on a scanned pdf document, which is much easier to add in Publisher than in Acrobat Pro (which I used to recognise text from the scan), but if I want to get rid of certain pieces of text from a text frame (e.g. the titles on a text page) I cannot easily copy and paste it back in its original position. 2022-12-03 20-22-40.mp4
-

Text & Logo pixelated
carlcengiz posted a topic in Affinity on Desktop Questions (macOS and Windows)
Hey folks, I have a problem:) I created a Christmas card with affinity designer. In affinity, everything looks fine. If I export the file (png or jpg) the text is not sharp. I tried almost everything I found on google, but it doesn't work. Attached the jpg. Can anybody help me out. Thanks Carl
-
 hi I am having a nightmare at the minute no matter what i do both of these programs are crashing i cant change font or do pretty much anything or add a few picture without it shutting down i have so much do do right now i dont wont to pay for the v2 just yet as i have hardly used the photo one due to crashing i have a really good laptop so its not the specs on that please help i have uninstalled it and reinstalled it and it does the same thing it was design was fine before hand only crashing the odd time
 -
Hi, I am working on a presentation in Affinity Publisher. I have masterpages with two text frames: one for the title of the slide and the second for the chapter of the slide. Having started with my previous presentation file, I am now wondering how I could update all chapter text from the masterpage without affecting the title text of the slide. For the chapter text, I have a bar that contains all the chapters. Within this, I want to apply a different characterstyle to the active chapter, so I can have Chapter 1 displayed in bold when I talk about Chapter 1 and have Chapter 2 in bold for Chapter 2 etc. I prefer not to have individual masterpages for each chapter, because that would multiply the amount of masterpages by 7 (leaving me with 21 masterpages to manage). How could I approach the text updating efficiently?
-
 Hello, I have been working on a pdf, and noticed that some objects keep being highlighted with the purplish outline eventhough they are not selected: When I select the text, there is no line set: I'm on Win10. Juan
-
When using a document that was created in Designer 1 I cannot change the leading of text. This behavior continues if I paste the text box into a document created in Designer 2. The example document contains two text boxes. One was pasted from Designer 1, and the other was created in Designer 2 and the text was pasted in. You'll notice if you change the leading of both, the second text box is the only one that changes. paragraph test.afdesign
-
Hi folks, I feel there is a big regression on selection precision and a very effective productivity killer. The following is similar to this topic but applies more globally on my video. This first video shows the selection process using Affinity Designer V1: If I need the selection items inside a group or a shape, I'm pressing cmd. Please note that selecting the white rectangle works flawlessly whenever the pointer does not hover a text. This is all perfectly working. Affinity - V1 Selection Behavior.mov This second video shows the selection process using Affinity Designer V2: Here I'm trying to select the white rectangle. Even if my pointer clearly not overlap texts, those will select, making impossible to reach the white rectangle. It's like there is a huge invisible contour/offset around texts. Also, the tendency of the move tool to switch to text tool is super annoying. Affinity - V2 Selection Behavior.mov Hope this helps. Regards.
-
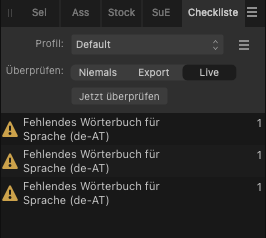
 According to the documentation of V2 most dictionaries – except a few – should be already installed. The German dictionary is missing see attached screen capture.
-
 I'm sorry that I'm not good at English. I'd like to use the vertical writing in Japanese. Vertical writing functions are essential in Japanese, especially for DTP software such as "publisher". Japanese creators are currently hesitant to purchase the product simply because it does not have this feature. I am afraid that only Japanese are the only users of this system, but please consider implementing it.
- 40 replies
-
- 15
-
-

-
- vertical writing
- text
- (and 2 more)