Search the Community
Showing results for tags 'Stroke'.
-
 Dear Affinity-Community, hopefully one of you knows something : My client needs a file (pdf) that requires some lines (strokes) to be RGB-red and have a width of exactly 0.001pt. This hairlines will later define the cutting lines for caoutchouc, so I guess some kind of laser cutting. When i set the stroke width to 0.001point it jumps to zero!?! What do I do? Any work-arounds or solutions? Thank you so much.
 -
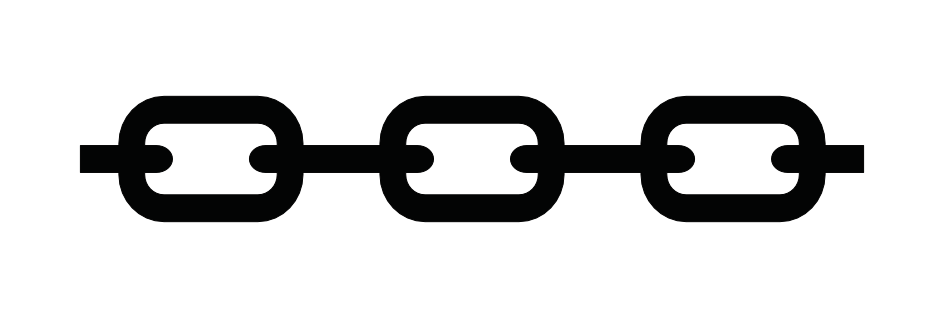
 Hi, sorry for the inconvenience. But I searched for everything and couldn't find it. How do I create a stroke or brush to use in the vector stroke? I need to create a metal chain tracing, where I can make the turns. Note: If there's a topic that looks like this, I'll close it and link to the topic.
-
 Hi, I would like to suggest adding a Path Width Tool for easier and more precise stroke adjustments. This tool would allow users to thicken the outline at specific points by simply clicking and dragging with the mouse. Other software like Adobe Illustrator and Amadine have a stroke width tool. The current method, using the Pressure chart in the Stroke panel, is not as user-friendly or accurate as it could be. Current method: Suggested (like Amadine or Adobe Illustrator):
- 9 replies
-
- 12
-

-
- suggestion
- tool
- (and 4 more)
-
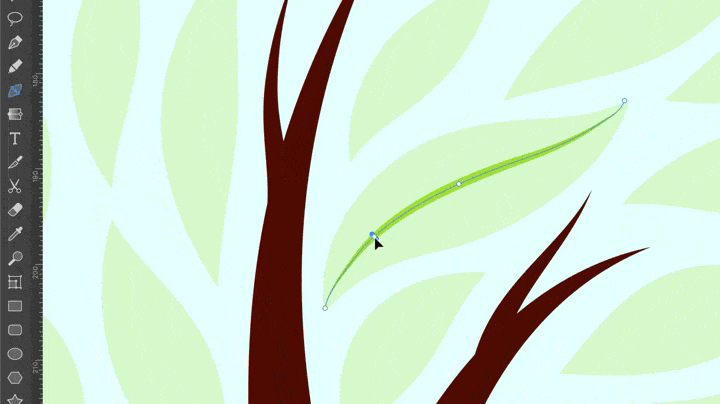
 Apologies if this isn't the right place to post this. I'm new to the forum and playing with some letters in order to learn Designer 2 more. In Designer (currently 2.3.1) I have a couple strokes made in two separate layers, and I've noticed the strokes in this layer aren't smooth like the other strokes. In the highlighted nodes on the stroke for example, the stroke seems 'wobbly'. However my other letters are smoother. All my strokes are using the Brush Pen 03. Any tips?
-
 Why can I not paint in Affinity Photo? It is as if the program does not register that I am putting a black paint stroke on a layer...or any other color stroke for that matter.
 -
 I know you can save stroke profiles during the period the document is open. But it would be better (for me) to have a permanent save so they are available always.
- 5 replies
-
- 7
-
-
- affinity designer
- stroke
- (and 1 more)
-

Apply Raster Brush to Path
ChristiduToit posted a topic in Feedback for Affinity Photo V1 on Desktop
Having the ability to apply a raster brush to a path would be such a welcome feature, even if the path is not editable after applying the brush effect. In many cases there are obscure shapes or angled lines that are difficult to draw freehand, and in those cases it would be great to be able to use the pen tool, but still retain the same texture and style of the raster brush you were using, as if you drew the stroke by hand. I know you can apply vector brushes in AD, but I mostly use the raster brushes in AP to sketch. Furthermore, the brushes in AD are stretched along the path, where in AP it would be great to rather have the ability to make it look like the stroke was drawn as if you were using the brush tool. I’ve recently been drawing out a lot architectural interiors for clients using a drawing tablet in Photo, and have really missed the ‘apply brush to path’ feature from Photoshop - would really speed things up and improve the end results! I’ve seen a few mentions of this online, but wasn’t sure if it was logged as a feature request yet, so here you go.- 11 replies
-
- 6
-
-
- affinity photo
- brush
- (and 3 more)
-
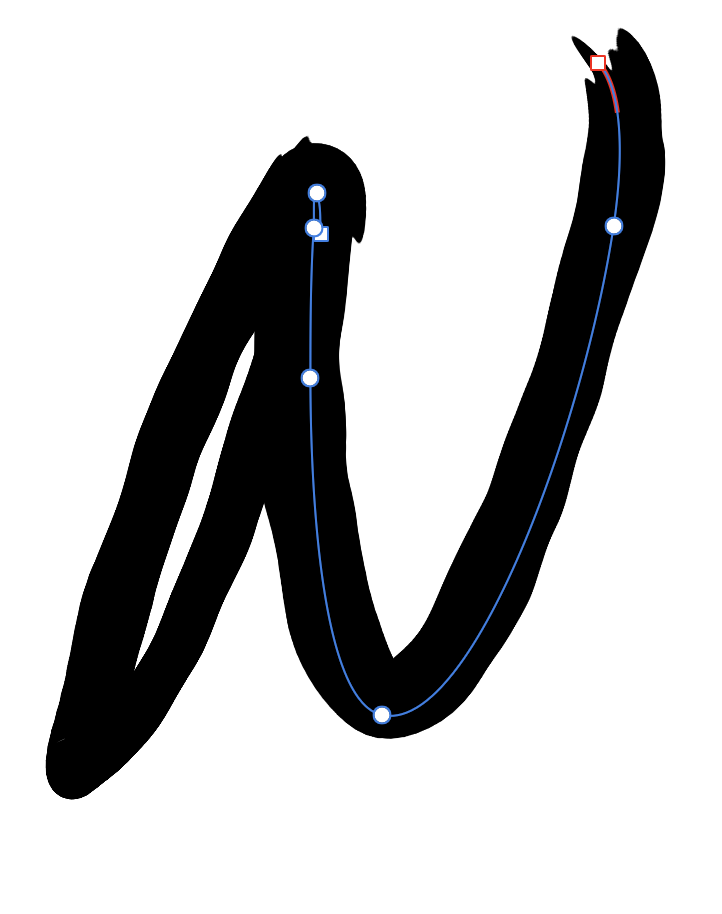
 I don't know what I did to create this monstrosity but I used Pencil Tool if that helps. This is all I did in this file. It also exports the same. Adding pressure variance makes it worse, but it's by no means required to cause a defect. Testing the stroke in other programs does not cause an issue... Document attached: 231201_stroke-odd-behavior.afdesign
 -
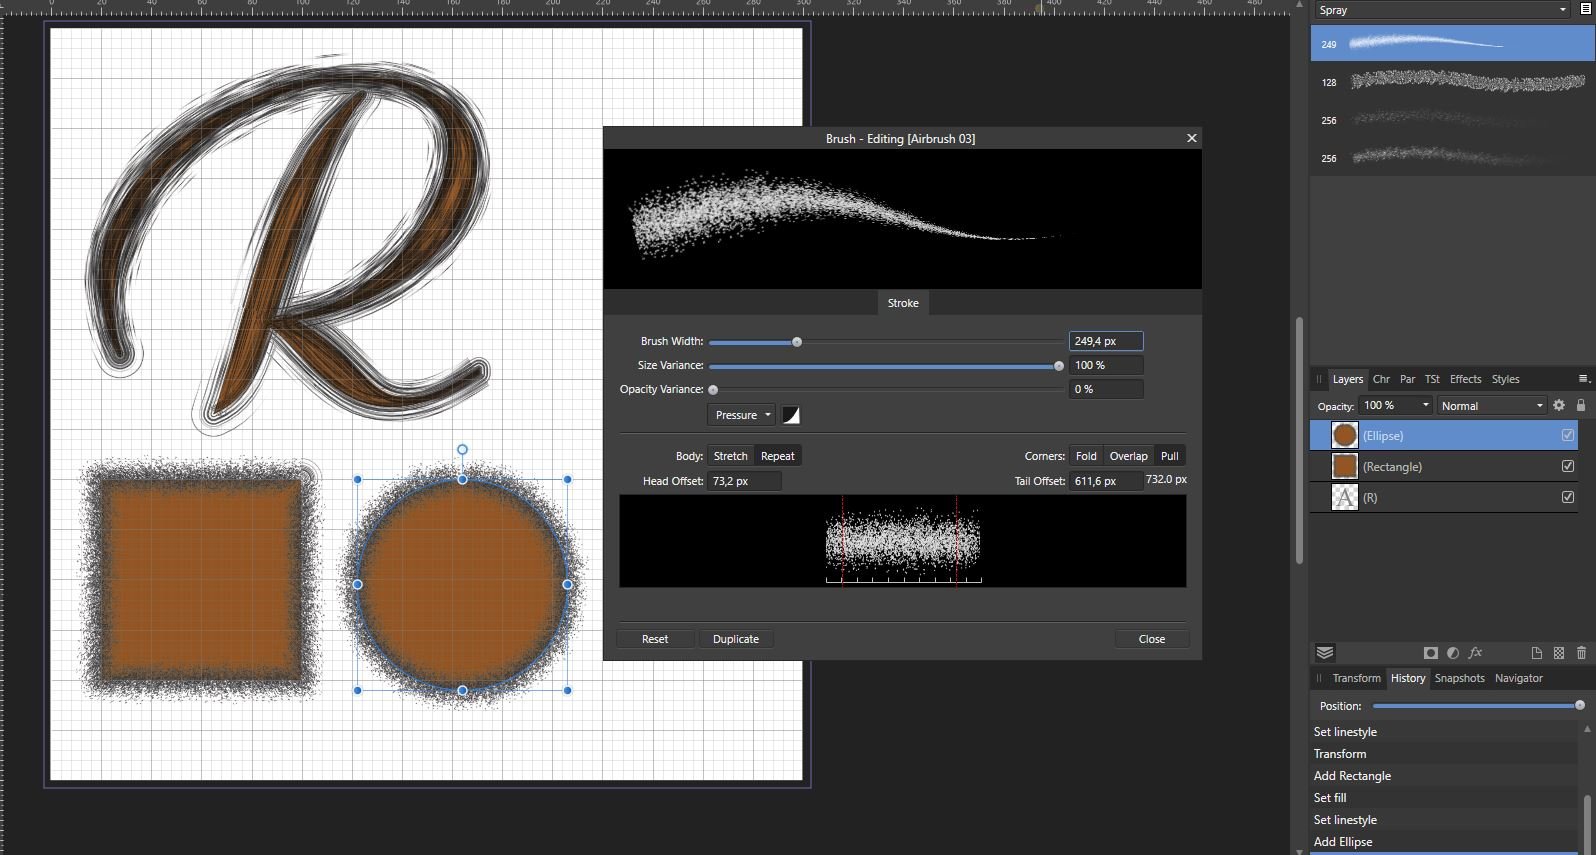
 Hi! I possibly found a bug. I tried to give a letter an outline with a selfdesigned brush to make its contour a little rough. So I created a new image, placed a letter with the Artistic Text Tool, scaled it by dragging its edge and then clicked on the brush in the Brushes panel. The brush was set to repeat, but the outline that appeared was stretched. So I controlled if this also happens to ellipses and rectangles. In that cases, it worked as it should. It has no effect to convert the letter into curves before. But sometimes, after having added some objects like ellipses, rectangles, curves..., suddenly it even works with letters as it should. But sometimes even that doesn't help. I attached a screenshot to show what I mean. All outlines of shown objects are made with the same brush and the same parameters. My OS is Windows 10, Version 20H2; Designer 1.9.1.979.
-
 Hi there. I have been using the pen tool on Affinity Photo for Mac for a long time and often use the ability to create tapered lines using the pen tool. I cannot see anywhere on the ipad version where I can change the line thicknesses over distance. Am I missing something? Also when I import a file that does have varying vector stroke thicknesses, every shape and line I create in the ipad app afterwards has the exact same line profile which I am powerless to change. Is this a glitch? Or is there a section were I can change this in app? Please help!
 -
Hello, I am trying to adjust my stroke on some text and the adjusting slider and unit pad are both being very buggy. When I try to slide the stroke up slightly, the adjuster slider goes straight to 106.4 pt or higher. Regardless of which exact unit it is at, the slider is all the way to the end. At that point, it won't let me slide it back at all, or it might go down a few points. If I tap the beginning of the slider, it will go back down but again if I try to slide it slowly forward, it jumps straight to 106.4 pt or more. Then I tried to adjust the stroke by tapping on the 106.4 pt sign and punching in 50 pt. The slider goes to 53.2 pt, then I try to get it to 55 pt and it goes to 58.5 pt. In other words it's all over the map. I am using an iPad Pro 12.9" 3rd Gen. It's running Affinity Designer (all three apps are installed) and it's updated to 2.2.0. My iPad is updated to 17.0.3. I was using an Apple Pencil, second gen. I uploaded a video for reference. Thank you. RPReplay_Final1697401343.mov
-
 When the dash pattern for a stroke is clipped (meaning the stroke is too short for the dashes to apply) the pattern is ignored. Steps to reproduce 1. Create a line with the pen tool| 2. Apply a stroke colour and set the stroke to be dashed 3. For the dashes, set increasing sizes, like 1 | 1 | 4 | 4 | 10 | 0 (cap type doesn't matter) 4. Change the length of the line, if the line is too short to display all dashes, only the first two 1 | 1 will be used, rather than clipping off the parts that are too long (e.g. the last 10 should become 5 to make the pattern fit) Video 2023-10-04 09-41-45.mp4 This is on Windows 10.0.19045, Publisher/ Designer 2.2.0.
 -
 Hello: I have an existing EPS logo I'm adding to a photo illustration and want to shrink it first, then maybe rasterize it. But when I shrink it, the strokes remain the same thickness and do not scale proportionally. If I were working in Adobe Illustrator, this is a simple preference that can be checked or unchecked. But I can't find any sort of preference like that in Affinity Photo. I tried opening it in Designer, but it similarly didn't have an option to keep strokes the same proportion. So how do I keep the vector strokes the same proportion when scaling? This is one of the MANY frustrations I've had with Photo! While Photo does have easier ways to edit PHOTOS, it's hard for me to use it for GRAPHIC raster-based illustrations the way I did with Photoshop (lack of bitmap mode, lack of raster stroke selection, etc.) Thanks.
 -
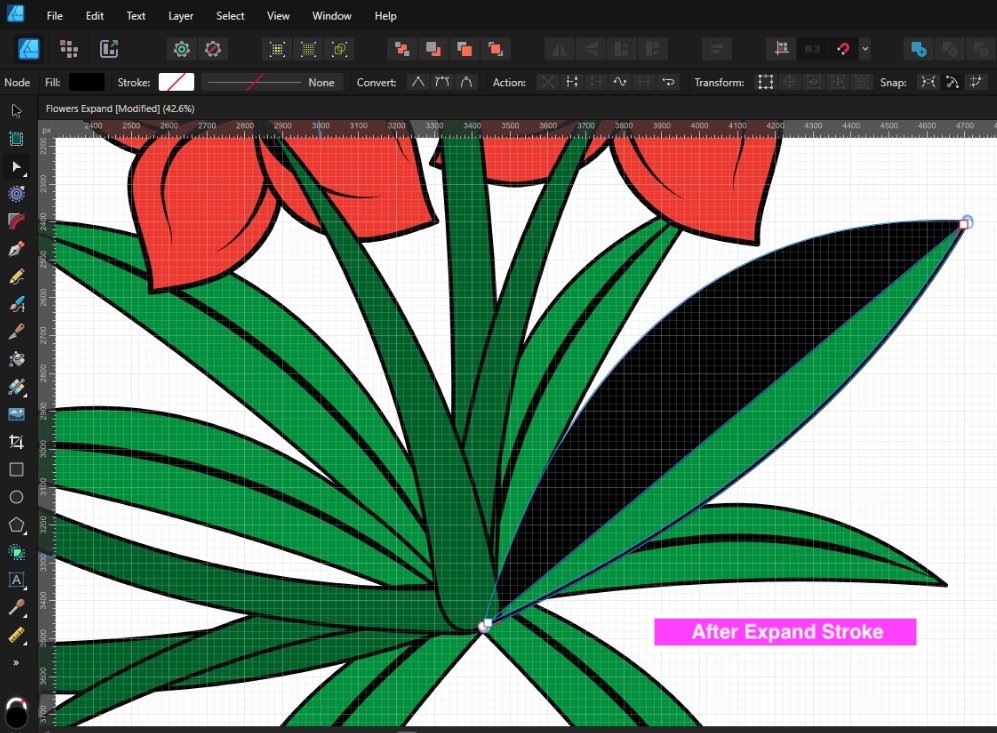
 Hey all, i have a problem crash when expand stroke like this picture
-
 In version 2.2.0, Affinity Designer (PC) found that the stroke thickness in numbers is not displayed. When I move the slider, I don't see any changes in the numbers. The changes are visible only after I release the slider. But, in the panel on the right, everything is displayed correctly. Or is it not a problem and should it be?
-
 Hi, I am having a strange problem on Publisher. I created a stroke on text converted to curves, but when I try to export it to any vector format some strokes are missing. Nothing I tried work! Additionally I can't expand the stroke in Publisher, because that option is missing! Of course I can open the page in designer, but I have 50+ pages and "Edit with Designer" opens only one page, so that is not a viable option! Because of that I missed my deadline ... 😞 But it will be helpful if I understand what is the problem. I am attaching a test file to see what I mean - just try to export it as any vector format. Also why is "Expand stroke" missing in Publisher and why "Edit with Designer" opens only the last page. I am using version 2.1.1 of Publisher and Designer on Macbook air M1. Thanks! Bad_stroke.afpub
 -
 Having used the pen tool to produce a curve, I select the brush line style, by clicking on the line graphic, click on properties, click on a brush in the brushes panel and the brush appears in the properties panel and then ... nowt. Help.
 -
 What is the alternative to the smooth tool of Adobe Illustrator or what is the way to do it in Affinity Designer; and not using corner tool. Thank you
 -
 I hope this is new - did not find it in my search. Please calibrate the sides of the Stroke Width graph in the Stroke Studio in the same unit as the Stroke Width setting. I think it does not need to be ultra high-precision, just close enough to gauge the weight of the thinnest part of a stroke. Some media cannot hold very fine strokes. Regards Lionel
 -
 When I use the Brush tool with pen tablet Contoller on "Pressure" (which is most of the time) and I use Shift to to temporarily draw a straight line, the stroke goes up to the maximum width setting of the brush and looses all pressure capability. This means one cannot draw a series of variable parallel lines and one needs to go through a longer process of reducing the thereby obtained thick line or drawing the straight lines with the Pen tool. Curiously, I've seen a similar behaviour with the Vector strokes in Clip Studio Paint (and it's not ideal there either).
-
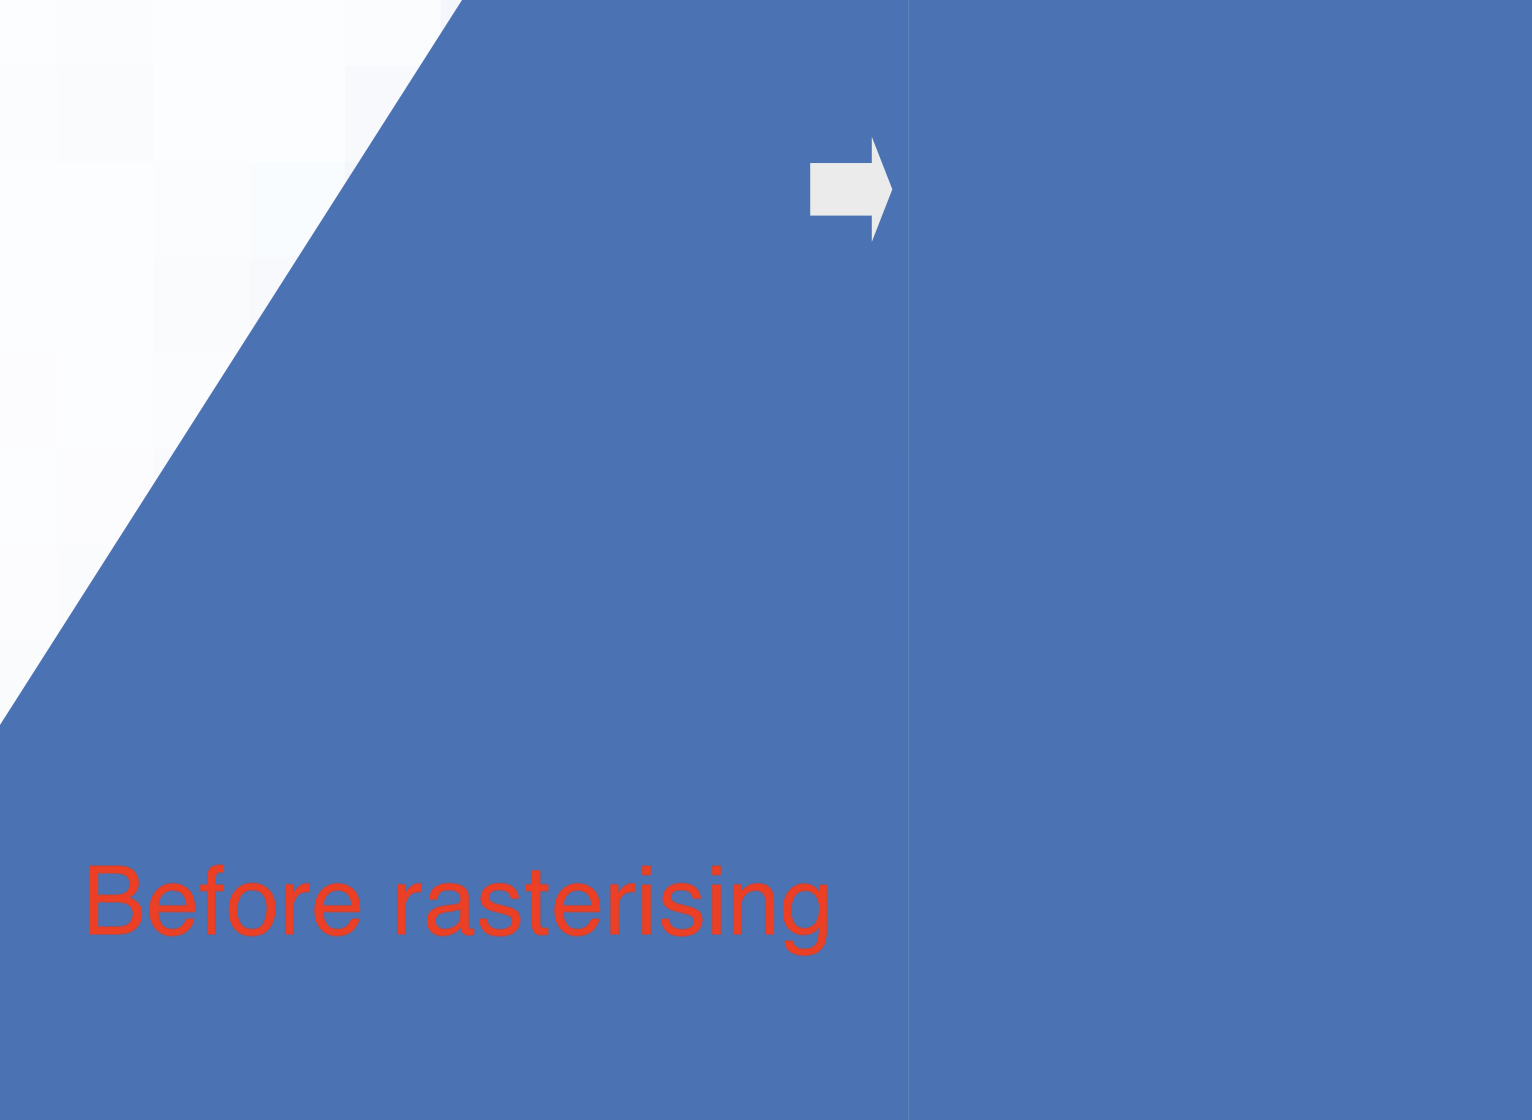
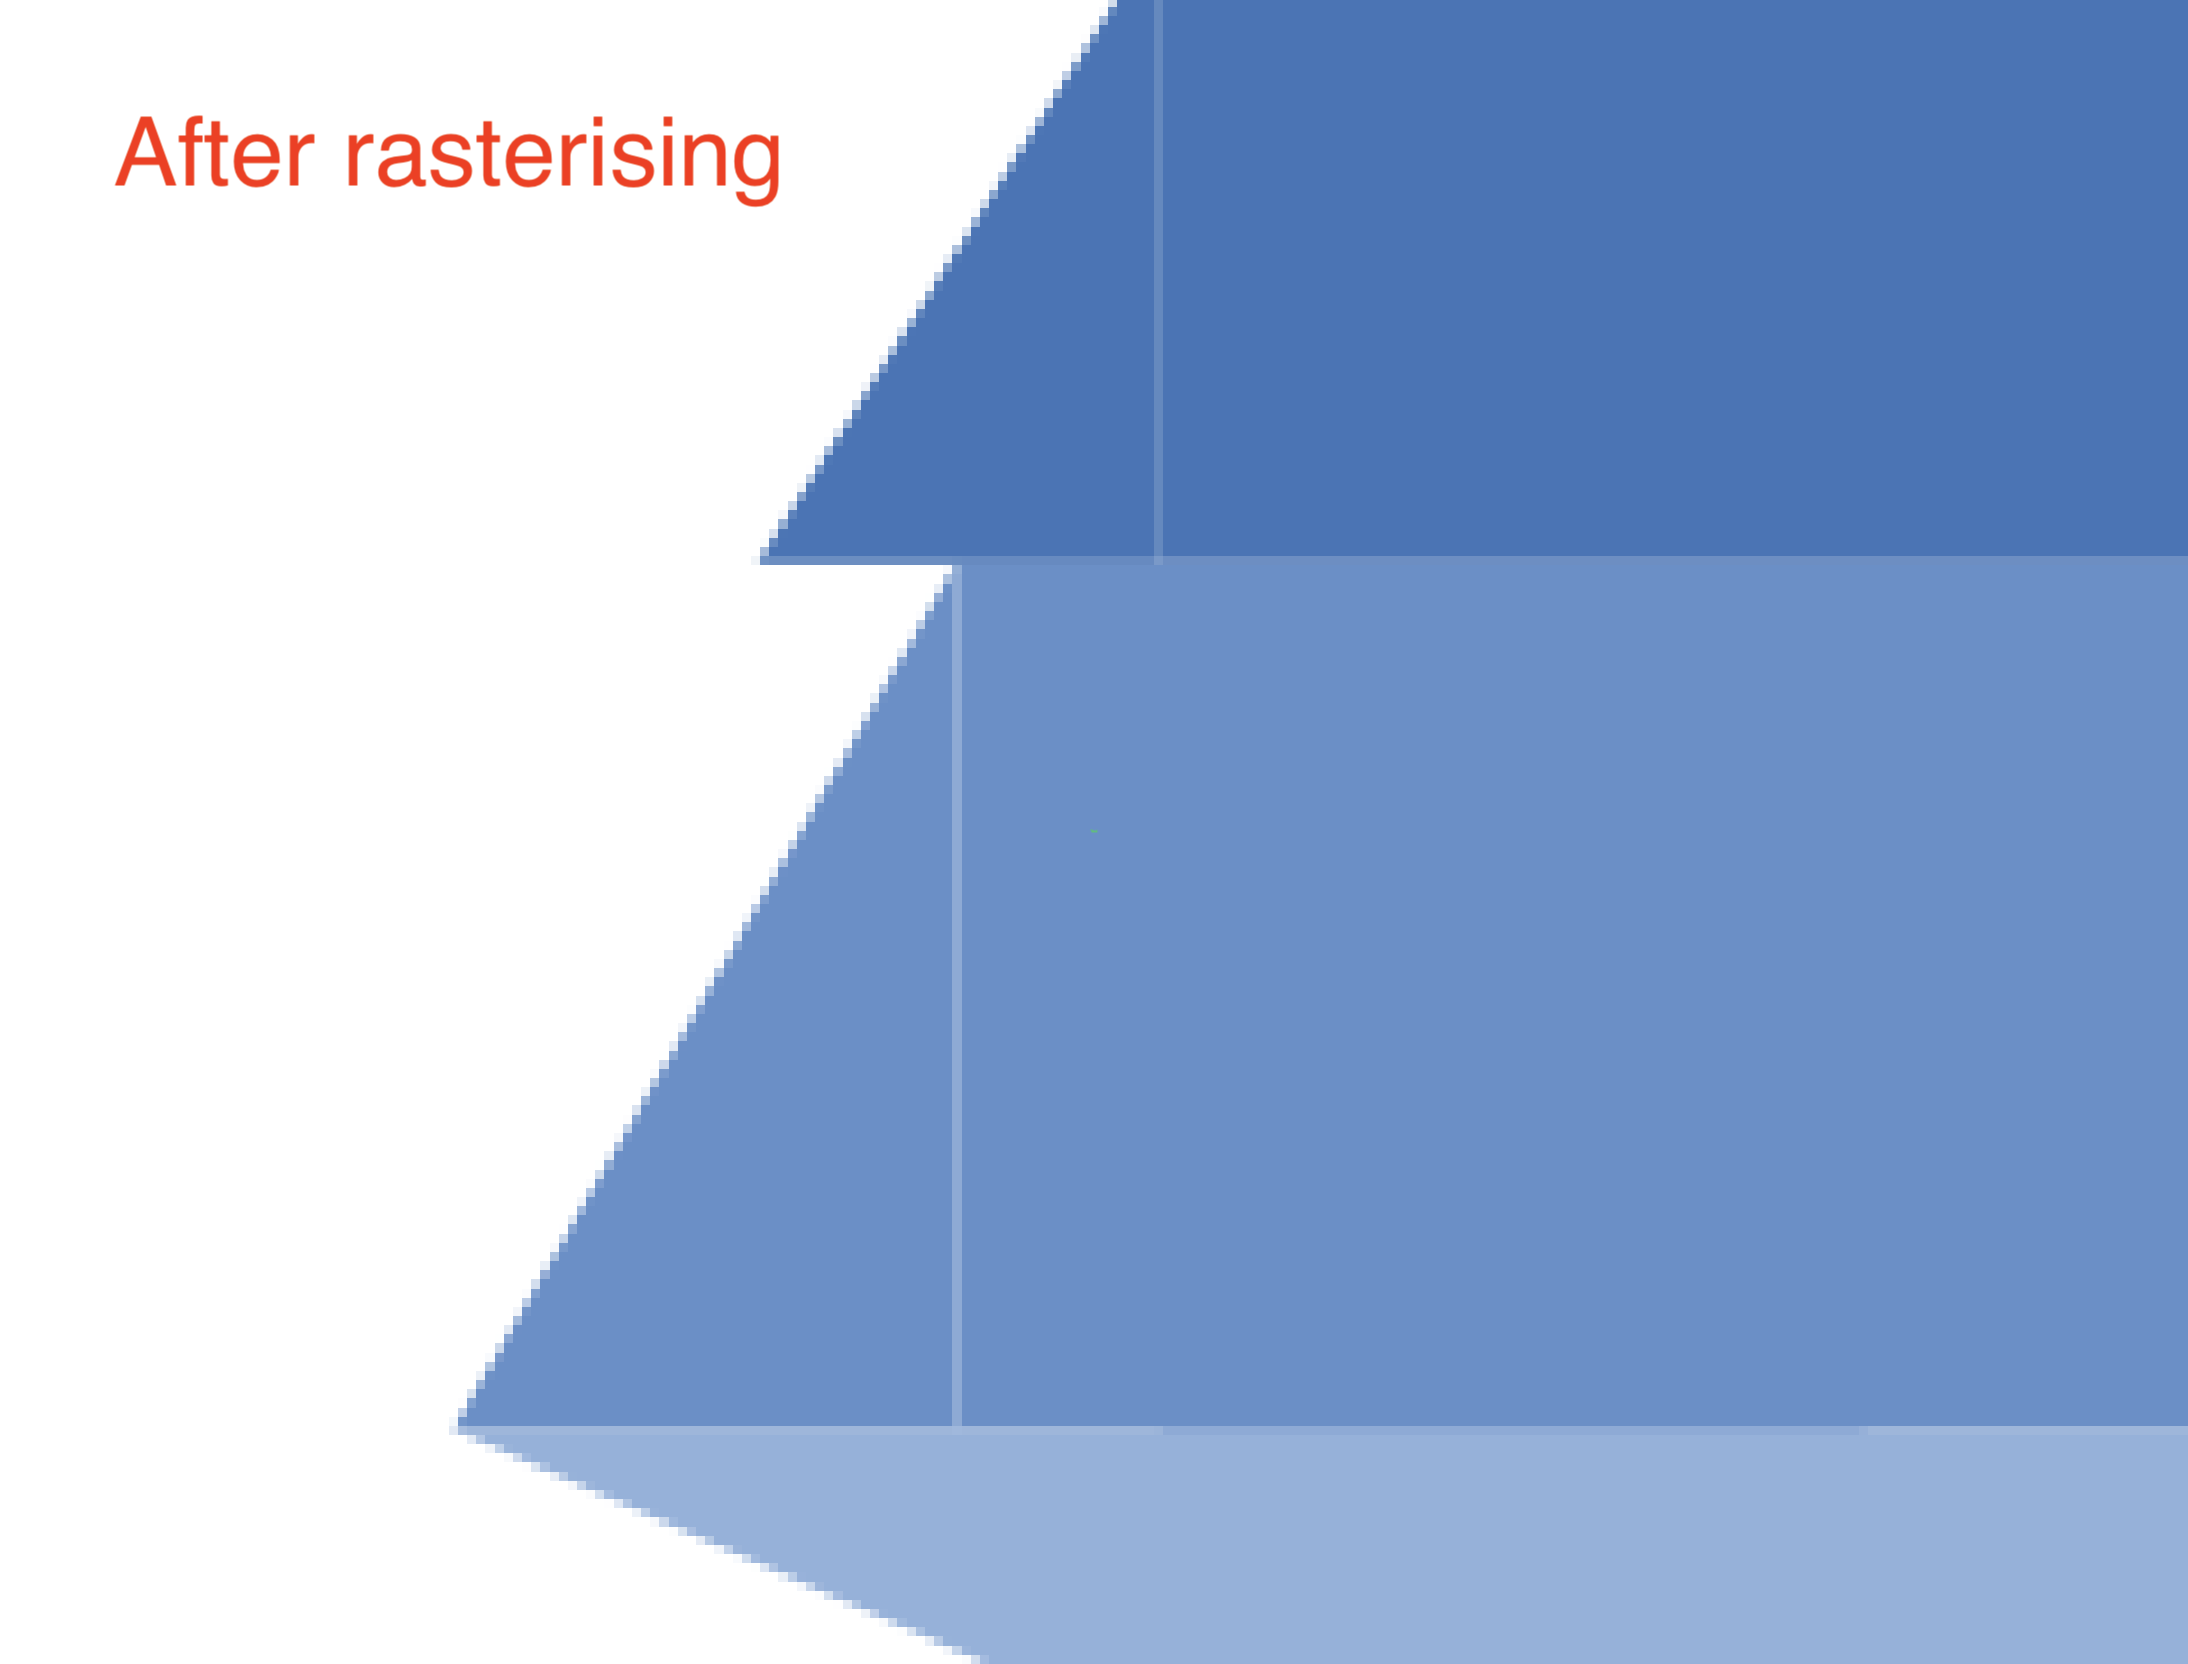
 Heya, I put two objects side-by-side with snapping enabled, they should line up perfectly, but there is a visible gap between the two (see images), both in editing and after rasterising. This old thread seems to talk about the same issue: It seems like this has not been fixed? I honestly don't know how anyone can use Designer (2) for creating anything geometric (assuming I am not doing anything wrong here) and I am kinda bummed out about my purchase here, the freeware I used previously did this just fine. (Stroke is at 0 for everything)
-
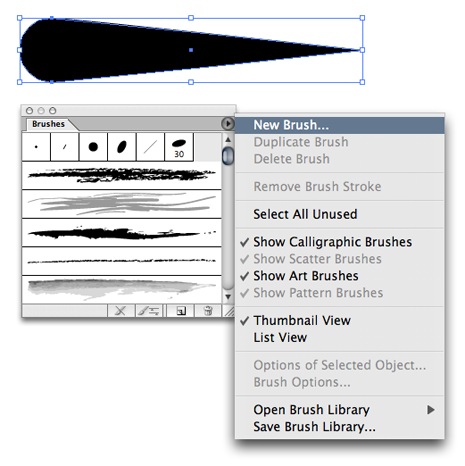
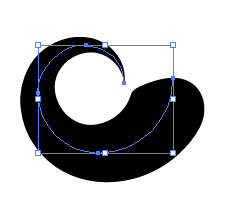
 I'm brand new to Affinity Design and I'm having teething problems trying to do certain things I'm used to doing in Adobe Illustrator. For example the custom brush, or a brush that is thin in a point at one end only and responds to pen pressure. Also I used to be able to draw this out neatly with a line from the pen tool and then drag the brush from the menu of brushes to instantly change the pen line to this stroke effect. What's the best way to customise this type of brush? (The pictures come from this custom brush tutorial suitable for Adobe Illustrator http://www.bittbox.com/illustrator/illustrator-how-to-make-custom-swooshes-swirls-and-curls ) Another question while on topic, I already have some brush files suitable for illustrator but wont open in Affinity, is there anyway they can work or be converted to work? Thanks
- 9 replies
-
- 1
-

-
- custom brush
- brush
- (and 3 more)
-
 Hello! I posted one day the idea to separate the « placing within the line or at the end of the line » for the start and the end of a stroke but sadly it wasn't popular, so I don't know if this one will be. It would be great to get a third placement options for arrows beside « end » and « start ». A « middle » one would be great too! Especially if we could choose the middle point with a pourcentage of the stroke length It would save a lot of time creating stroke like illustrated in the screenshots I provided in the attachment of this post.
-
Right now, we can only apply a fill to a text box in the character/ text styles. Or a fill + stroke in the text frame studio in Publisher (this should also be available in Designer and Photo for text graphics!). I would love to see additional features to control the text box styling. Changing the size of the textbox dynamically with a top/bottom/left/right offset, a top/bottom/left/right stroke (or multiple strokes for double lines) rounding the frame that is used for artistic text, etc. It is very handy if you have more granular control, so you can create more sophisticated styles that are applied dynamically. Saves a lot of manual editing work.
-
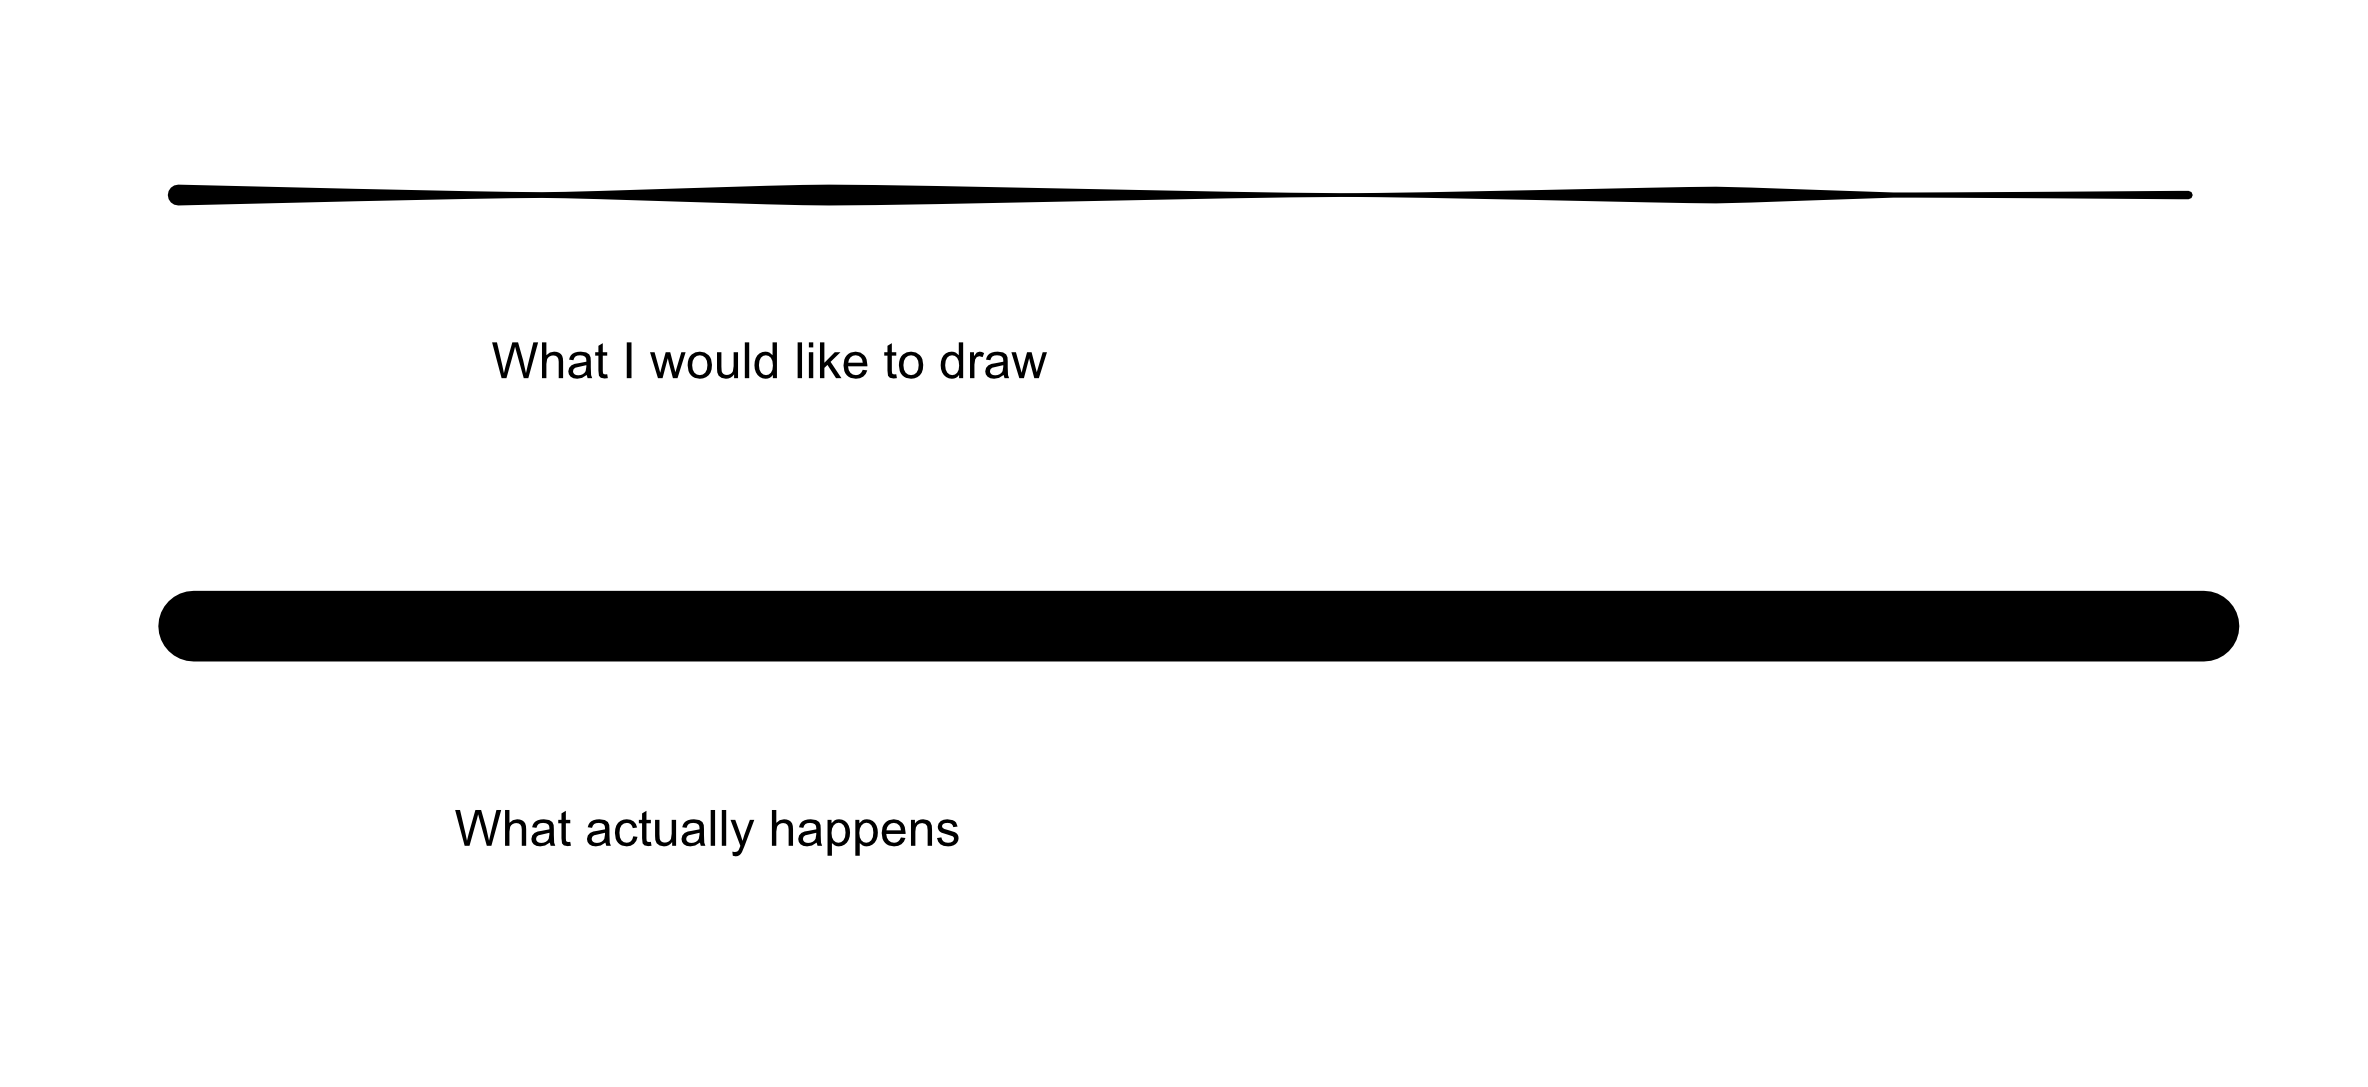
Expanding strokes of smaller size does not keep the same shape as the stroke.