Search the Community
Showing results for tags 'Snapping'.
-
 We often get asked what the purple lines are that surround some layers – the snapping candidates. The subject comes up a lot and is confusing for some beginners, as evidenced by the number of times it comes up as a question, e.g. today, June 1st, June 5th twice, May 23rd, May 21st, May 18th, May 17th, May 6th, May 5th, May 4th, etc. Would it be better if the applications used a different default Candidates setting so that Candidate List was something that users could find for themselves rather than it being the default? I realise that everyone has different preferences at different times – which is why we get a choice – but having a default which causes such confusion doesn’t seem right to me somehow. I have no personal preference as to what the alternative default would be, only that is probably shouldn’t be this one.
 -
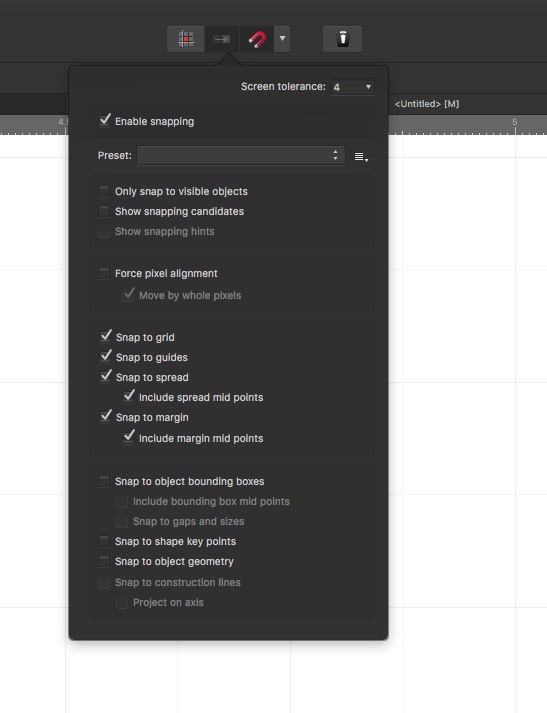
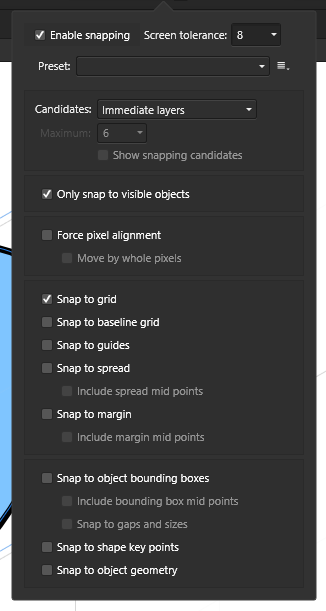
 I have an Affinity Designer document on which I have set up a 1-inch grid. I wish to use the Pixel Persona and a Paint Brush Tool brush to draw lines that snap to the grid. That is, when I place my cursor near the grid and draw, the lines on the Pixel layer should follow right angles on the grid only. Is it possible to turn this behavior on—perhaps with a snapping setting of some sort? I've tried checking all settings contained within the "Enable Snapping" drop-down, but it doesn't happen. None of the help pages or Serif tutorial videos I've seen seem to include or mention this behavior, so I want to know for certain if it is possible.
 -
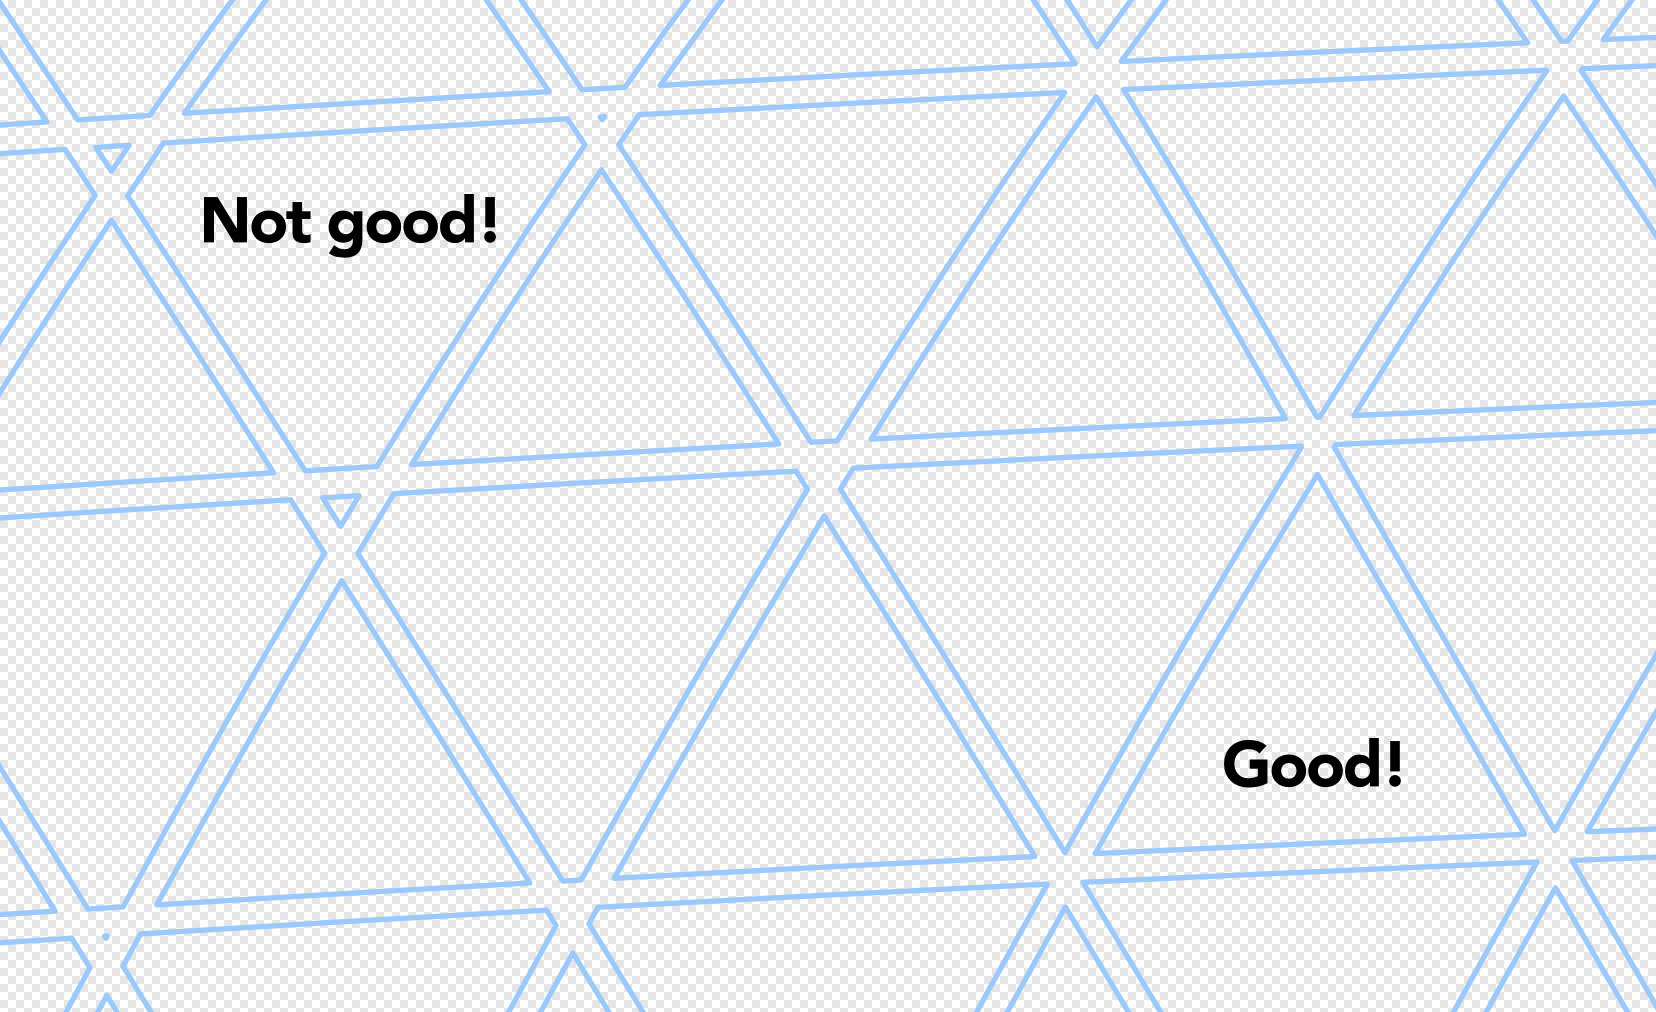
 I've probably read all the posts on the forums about this topic. Even the ones from almost 3 year ago. Yet the issue still remains. Is there a way to snap objects together without having a gap between the objects? I have tried the force pixel alignment and move by whole pixels. I also find that this does not only happen when snapping shapes to shapes, but also having a shape on top of another shape. It is also visible when a shape is on the side of the art board and exported to PDF format. I also tested this in Adobe Illustrator CS6, which is old, and I don't see this issue when putting shapes next to each other and exporting the file to other formats(jpg, png). The strange part is, while writing this post, I tested it in two documents. In the one I see the gaps and then in another the gap between the two shapes are gone. Please see the documents attached with examples. snapping_test.afdesign shows the gaps and snapping_test_successful.afdesign exports correctly without showing any gaps in the exported file, only in Designer itself. Please explain this, or I would really appreciate if this can be fixed or improved with an update. snapping_test_successful.afdesign snapping_test.afdesign
 -
Two features that would be incredibly useful when using the Crop Tool would be: 1: To be able to constrain the crop in the same way as when transforming a shape/rectangle. Using shift to constrain proportions, or cmd to resize from the centre point. It would be really helpful with speeding up the cropping process without having to place guides first. When working on a square canvas, for example, having the ability to constrain the square crop and resize from the centre point would be really useful. 2: Including snapping for the crop tool. Snapping the crop to extremities or elements within the canvas would be really handy, instead of first having to place a guide using the rulers and then snapping the crop to those rulers. If I had an image that was off of the canvas and wanted to crop the canvas to include it, it would be great to snap the crop tool to that image's edges so that I can neatly resize the canvas to include the added element. Two small features that I feel would make a huge difference.
-
 I want to snap to the outer side of the circle. This is a stroke from a curve. As you can see in the video the pen tool won't snap to the stroke. Even with all snapping settings on. Does anyone know how this comes? Or is this feature not implemented jet in Affinity Designer? Thanks for answering, Tom snapping-to-strokes-not-working.mov
 -
I can't seem to get the marquee tool to snap to a grid. I have enabled snapping and checked snap to grid in the snapping mgr. I can snap to a guide but not to a grid. Help please - this is a big issue for me.

-
 (Apologies if this has been reported. Searches didn't turn it up.) I'm taking a for-beginners online class in Affinity Publisher. The presenter uses a Mac and a pre-1.8 version of the software. I'm using Windows version 1.8. One lesson includes creating two columns, with gutter, on a master page. Then on document pages, you are to draw two frames per page with the Frame Text tool, snapping each frame to a column. On the presenter's machine, I can see the text frame snapping to all four sides of both columns. But when I draw out the text frames, the snapping happens this way: 1. Snap to top and bottom of both columns: Yes 2. Snap to left (outside) edge of left-hand column: Yes 3. Snap to right (outside) edge of right-hand column: Yes 4. Snap to right (inside) edge of left-hand column, adjacent to gutter: NO 5. Snap to left (inside) edge of right-hand column, adjacent to gutter: NO On the presenter's screen, colored guidelines appear temporarily at locations 4 and 5 to indicate that the frame text tool has reached the precise snapping point. On my screen, no guidelines appear at those two positions. Compared with what's happening on the presenter's screen, the two "NO" results were unexpected. Is there a snapping setting pertaining to columns that I need to enable?
 -
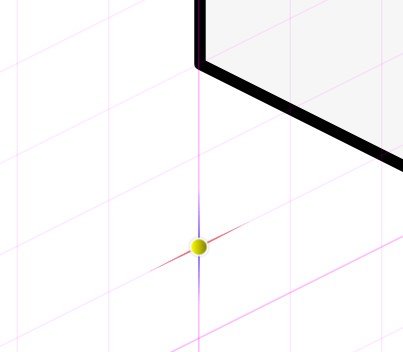
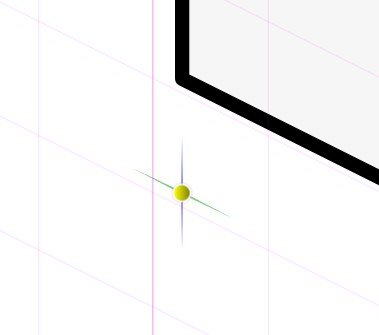
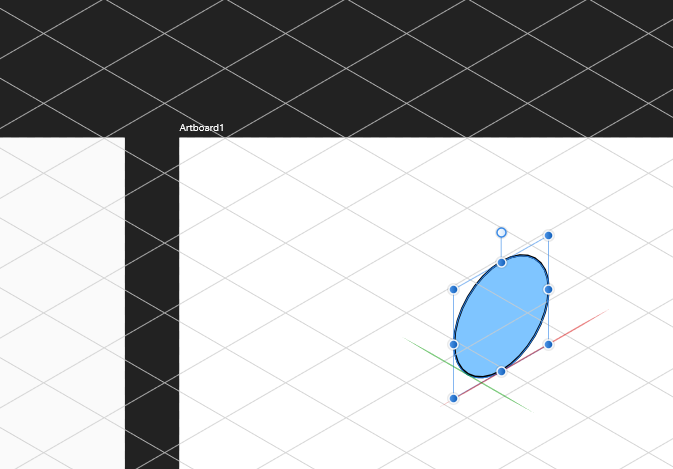
 Hi, apologies if I'm being stupid here, but I can't seem to figure out why my isometric shapes aren't aligning properly... I thought it was supposed to snap exactly to the grid? Am I missing something?
 -
 On the Export Persona of Affinity Designer, I am able to create column guides via the Guide Manager but snapping to them doesn't work. I made sure that snapping to guides is turned on the main toolbar. Snapping to ruler guides does work, yay! I would also like to be able to reposition placed ruler guides by dragging directly over them aside from editing their values on the Guides Manager while on the Export Persona.
 -
 Hi Folks, Symmetry question. I don't quite get use snapping tool/guide. I find it hit and miss, probably because I am not using it property I suspect. Some times I get the nice green lines showing that I have lined up one of my shapes nicely with another and yet other times I get nothing?? Any ideas what I am doing wrong with this? Short on info there I know but If you need more let me know. Cheers Mark
 -
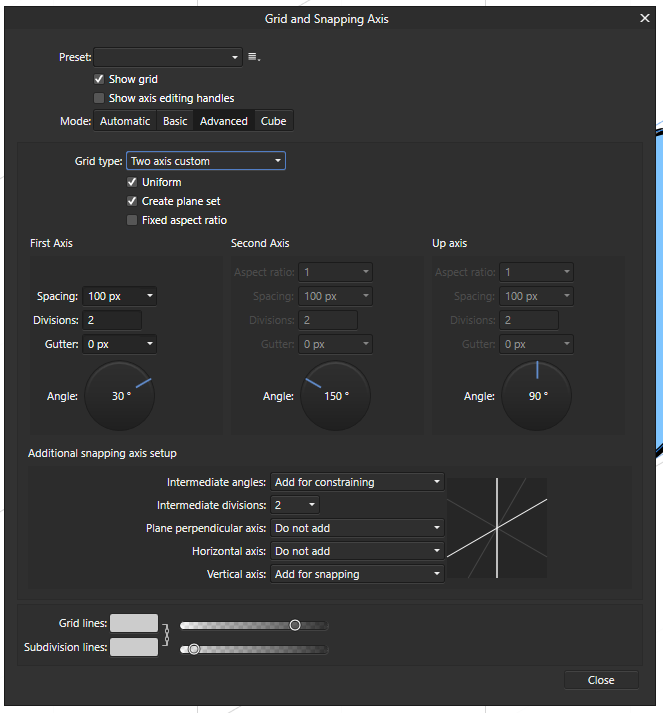
 Hi, I am having issues with grid snapping in isometric view with a second artboard Create a new document Type: Web, Page Preset WXGA (1280 x 800, 16:10), Create Artboard Checked. Enable Snapping, choose only Snap to Grid. In Isometric studio, click Modify Grid... Choose Preset: Isometric 64x32 Pixel Isometric (with Planes) In Isometric Studio, Current plane choose Top With the rectangle tool draw a rectangle. the rectangle snaps to the isometric gridlines, as expected. If Front or Side plane is chosen, and a rectangle is drawn, snap to those grids also works as expected. Choose the Artboard tool and click on Insert Artboard in the context menu. On the new artboard, repeat steps #3 to #6, except the drawn rectangle does not snap to the gridlines anymore. I have attached a sample file (see below the images) with the issue, created with the above steps. Can anyone confirm they are getting the same behaviour? Second Artboard Iso Grid Snap.afdesign
-
Firstly I did a quick search here to see if this is a new issue but I didn't find anything with this exact issue. When I create a document and turn on the grid for snapping everything works as expected until I change the grid type to isometric or oblique, etc. After doing so the snapping locations are misaligned to the grid, even if I change back to the default grid layout. Please see the attached screenshot. Affinity Designer Beta 1.7.0.284 Windows 10 Pro Version: 1809 OS Build: 17763.379
-
The snapping works fine and corrects itself to 0,0 of the artboard, but the visual grid doesn't transform. Added some pics for clarification
-
Found in AP and AD. The node is deleted in some cases during the movement with snapping option allowed. See the behaviour in my screencast. Affinity-snapping.mov
-
Just purchased Affinty photo and I am very disappointed by the way guides and snapping are implemented. In short snapping just doesn't work, you just can't tell whether snapping is on or off , its not positive enough when snapping to either guides or the grid , I have tried this on 2 separate machines and get the same result. Secondly show/hide guides is also not working , the guides just stay on screen , again this happens on 2 separate machines. You really need to check out how this REALLY BASIC FUNCTIONALITY works in Photoshop and other graphics programmes too because this is the worst I have ever seen. Please fix this asap.
-
 So I tried making a shuriken. For that, I wanted (at first) to make a triangle and cut out a bit of that in the middle. I made a quite simple shape, wanted to duplicate that, flip it horizontally and then combine those. But there remains a seam, no matter how I snap the two together. Someone on an unofficial Affinity Discord Server (credits to gromofdoom) helped me out by saying the snapping was never really working in this software and I need to overlap the two halves, combine them and then delete the unneeded nodes. Why does Affinity make such a simple task this painful? That's a pretty difficult workflow for something that wants to be an Adobe alternative. Or am I blind and there's actually a better way to do that? I attached my project file (with extended history in it!) so you can see what I did (there's much stuff I did which didn't make any sense, lol). shuriken.afdesign
 -
 I'm having a problem getting used to ADesigner as a noob.... I have been practicing with the pen tool per an online course and seem do be doing well until the pen tool starts to snap to unseen guides/grids and I ultimately have to back up to the last practice project completed without issue, save and close ADesigner and then restart to continue. This seems somewhat weird and very annoying - actually extremely annoying. I'm using a Windows 64 bit laptop with Intel i7-3520M Core, running Win10 Pro with 16Gb ram & Wacom Tablet. I can currently run the Adobe Ai, Ps, Id, Ae, Au, Pr and other intense power programs without any issues. If anyone has encountered this issue it would be much appreciated to get a solution as quickly as possible. Thank you all for your assistance
 -
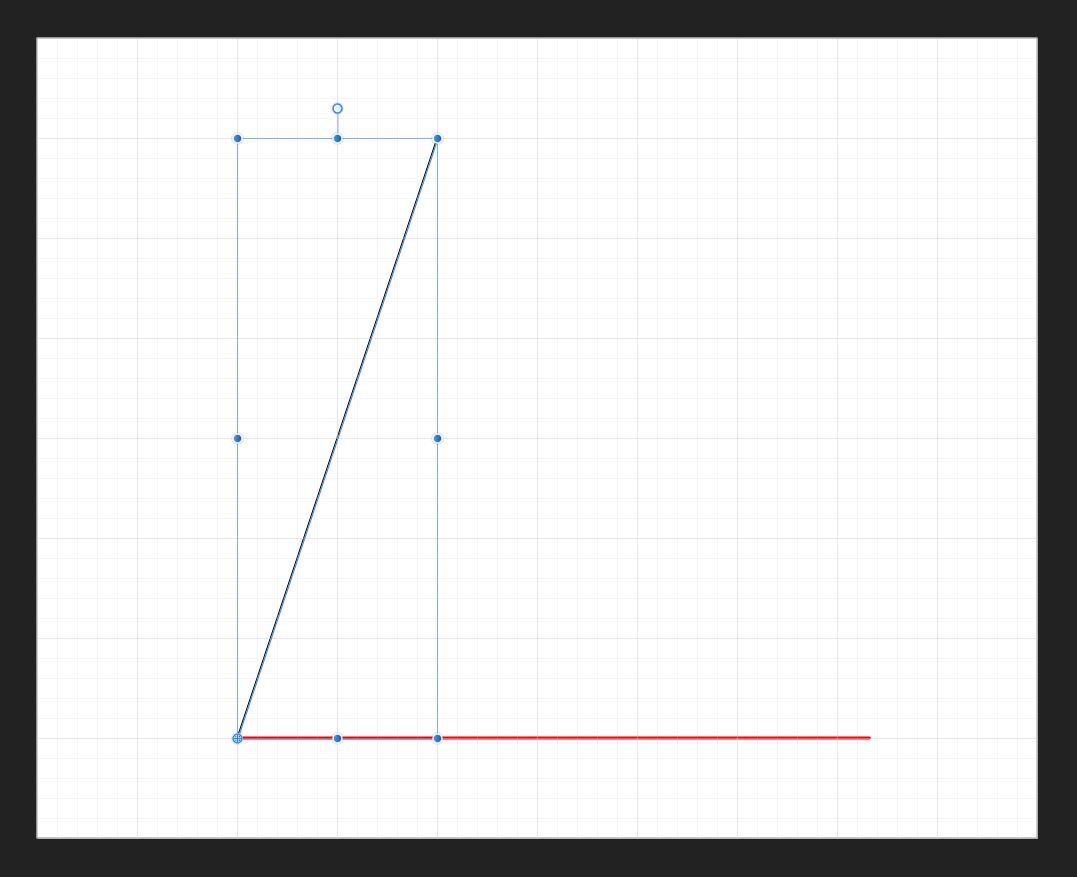
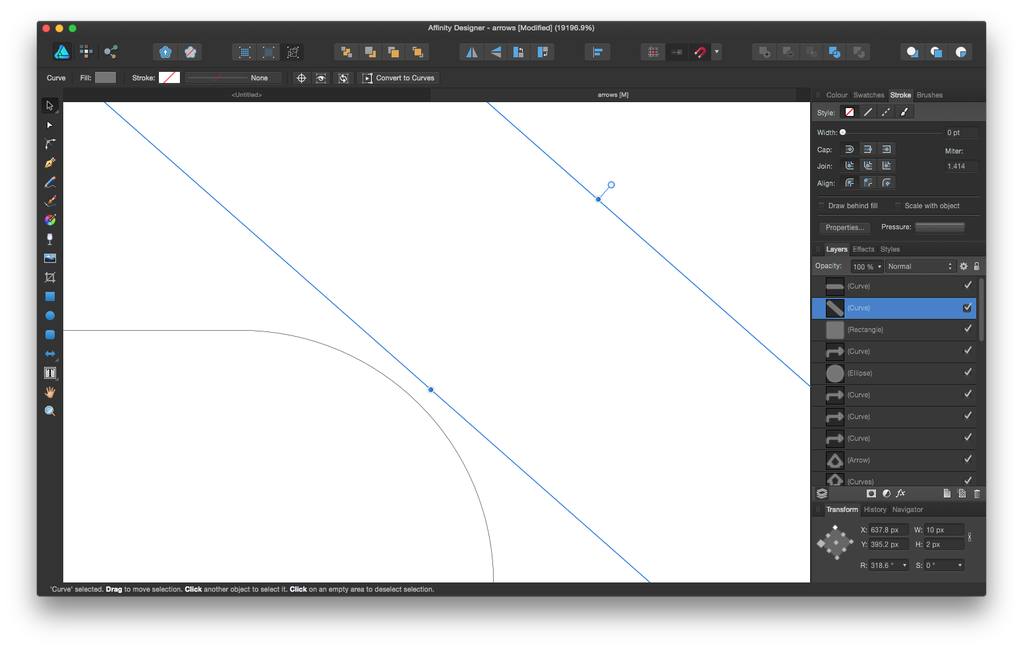
 I have a problem which I feel sure must have a very simple solution but for all my efforts, I can't find it. Referring to the image, I have a non-vertical line which I simply want to rotate and snap to the horizontal axis ( shown in red ). I've moved the rotation centre but can't figure out how to snap it to the horizontal position. I can use the node tool but this doesn't preserve the length. Any help would be much appreciated.
-

Adding midpoints to (line) edges
Dybkjær posted a topic in Feedback for Affinity Designer V1 on iPad
I am mainly illustrating origami diagrams, a relatively geometric discipline. A common operation is to fold the paper, or a flap, into half. This translates into dividing an edge (a straight line between two nodes) by adding a new node between the end point nodes of the edge. Could we get a feature in AD (iPad) supporting this? Could be: Select a segment (an edge). Press Add point (new operation, places the new point in the middle). This is how InkScape does it. Oe better: Select n nodes. Press Distribute (new operation). This way might be more in line with the iPad AD way, and much more general. Please note I am not asking how to construct the midpoint of an edge and place a node there. I know how to do this, several ways. I am asking for an operation that directly supports something I do often, and which might be of general interest. There is some partial support when the edges are vertical or horizontal (when holding one finger down while dragging the node with the pen), but not for anything else. My apologies if I have overlooked an existing operation on iPad AD. -
 When I create a new artboard from an existing one my ability to snap to the grid stops working, with the snap being a little off the grid lines. Just wondering if anyone else is experiencing this problem?
 -
 Is it possible to draw a single point in AD? As in, a single point, not attached to a path? Or is there another way to create an object to snap to that is a single point only - perhaps a small circle and snapping to its centre? I have a complex drawing of a building to create, and need to align many irregular points into a triangular 'grid'. Because the grid is 'wrapped' onto the building, the triangles are not a uniform size or shape. It is critical for my project that they are actually triangles (3 points only, though the sides can be curved). My first attempt was to draw in the lines across the whole building and then use their (expanded) stroke to 'punch' out the triangles. This worked visually, but any inaccuracy in the meeting points of the lines created 'clipped corners' on the main triangles, and small triangles in the joins. After a few attempts, I think an approach could be to mark the intersection points on the grid, and then use those to snap the points along the lines, to ensure they cross accurately. This seems easy enough, except I can't think of a way to create a single snapping point that's not on a path. Lastly, I need to place many hundreds (maybe thousands!) of these points manually, so a solution would need to be reasonably streamlined to be practical. Any ideas? Thanks in advance!
-
 Hello, I've been facing this issue for around a year, I was thinking to post it, but may be somebody didn't notice and still exists. If you press space while drawing any shape, that let's you re-position the shape without confirming the shaping with releasing mouse. This is a great feature in PS and in AD too.. I have seen in AP too but there it has some issue too. Please take a look at video (screen recording) I did it for a quick demo. If i dont' press the space, I can't relocate my shape before final mouse release, and If do, the shape starts snapping in some angle (0, 45, 90) and so on. I've even turned off snapping. Kindly disable all snapping when "snapping is turned off" and specially which space bar.. or add it on later moving with mouse with combination of Ctrl, or shift. Thank you. Affinity Designer 2_5_2019 8_37_19 PM.mp4
 -
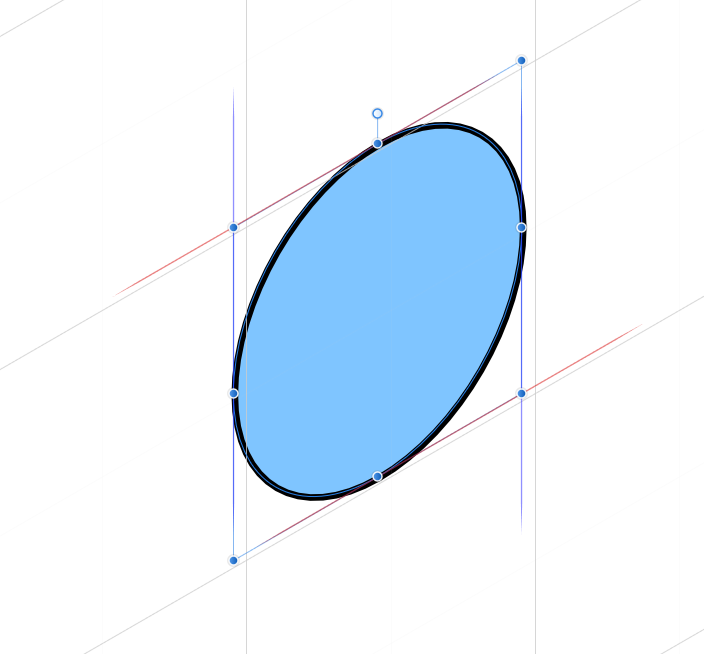
 Greetings, I am having trouble snapping shapes to a curve. Is this possible? (In my screenshot, I am attempting to snap the rotated rectangle to the curve it’s close to, but can’t.)
-
Publisher 1.7.1.404, Windows 10 Home 1903. When Preview Mode is OFF I can only snap to Column/Row Guides when Only Snap To Visible Objects is switched ON even though the Column/Row Guides are visible. When Preview Mode is ON I cannot snap to Column/Row Guides at all no matter if Only Snap To Visible Objects is ON or OFF. See attached GIF. When Preview Mode is ON I think snapping to Column/Row Guides should be allowed if Snap To Guides is ON and Only Snap To Visible Objects is switched OFF. This would make page layout much easier as there would be less switching back and forth to/from Preview Mode.
-
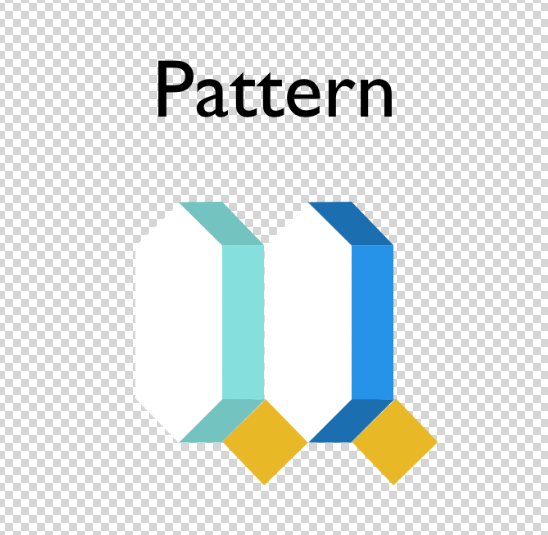
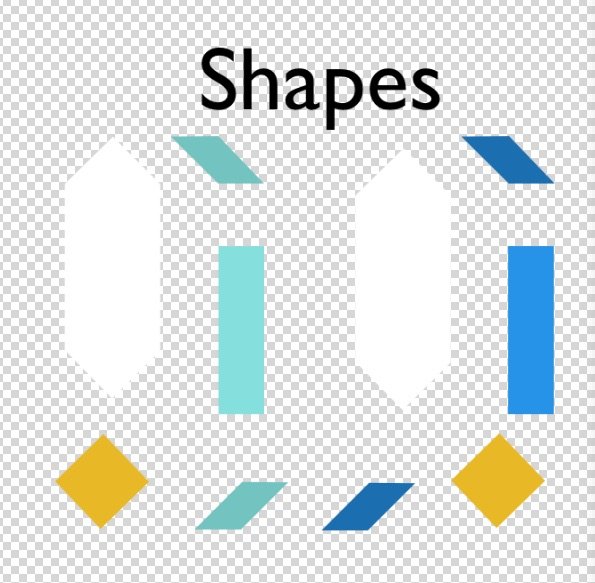
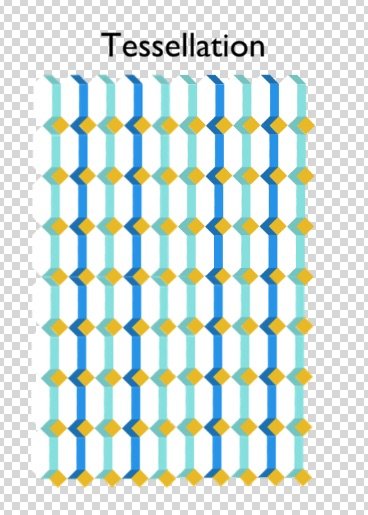
 I build Tessellations using Affinity Design in normal mode (not Isometric). To do this, I create Shapes, adjust their size + arrange them to build a Pattern: So that the Shapes snap within a Pattern and so that the Pattern when duplicated, snaps within a Tessellation (as demonstrated in the 3 images below) Below I describe my workflow followed by questions looking to make my process more efficient. WORKFLOW Step #1 - Find Shape Dimensions for Pattern To find the dimensions of the Shapes within the Pattern, I: Create the Shapes, then I Adjust the constrained size + Rotate + Move the Shapes so they snap to each other (this provides the necessary Shape dimensions to fit within the Pattern) Step #2 - Find Shape Dimensions for Tessellation as well The dimensions of the Shapes must snap within the Tessellation too - so I: Duplicate the same Pattern (from step #1) as many times necessary so the duplicates fully surround all sides of the Original single Pattern, then I Adjust the constrained size of the Shapes so that all shapes snap to each other within both the Pattern + Tessellation (this provides the Shape dimensions within the Tessellation) Step #3- Erase the erroneous, extra Shapes that don't fit within both the Pattern & Tessellation Once the Shape dimensions are final (they snap within both the Pattern and the Tessellation), I erase the erroneous, duplicate Patterns, keeping only the Pattern with the correct Shape dimensions that snap within both the Pattern and Tessellation. Step #4- Merge the Patterns into images rather than shapes (so document 's size don't hinder its agility) Once the erroneous Patterns are deleted, I: Duplicate the Pattern one time Hide the Original Pattern Merge the Duplicated Pattern Step #5- Create the Tessellation Duplicate the Merged Pattern enough times so it fills the entire canvas, creating a non-heavy tessellation QUESTIONS for: Steps #1 and #2, is there a more efficient workflow to adjusting the constrained shape sizes, rotating and moving them so one can learn if they fit into both the *Pattern* and *Tessellation* at once? (rather than having to go through both steps). Ideally, I'd create the Shapes & fill with their corresponding image as usual - but then Adjust, Rotate and Move the Shapes within the Pattern and Tessellation so they snap to eachother in one step. Also, this more efficient workflow would allow me to skip Step #3 that would have multiple erroneous shape sizes [How] can I use the isometric panel for this? Step #3, is there a different format or method I can use so that the repeated, individual Shapes and Patterns don't reduce the document's agility? Otherwise, when making modifications the document's large size hinders its speed. Also, if I don't merge the patterns into images, when returning to the document for any additional modifications, I can avoid having to re-create the tessellation. Thank you so much for any feedback or guidance.