Search the Community
Showing results for tags 'Selection'.
-
 Hi all, I cannot find the information of the dimension of my selection. If I use the rectangle marquee tool around my design - I supposed to see the dimension of the current selection in the transformation panel, or in the navigator. But there is none. Because now I have to "guess" and create my artboards by eye, move the content of my mockup into the artboard and adjust the artboard afterwards. Thanks, Stefan.
 -
Following on from a previous post, I've created three sets of macros for selecting a part of an image based on five Blend Ranges 'luminosity' curves (nominally called Blacks, Shadows, Mid-tones, Highlights and Whites). You can download the zip file here (the forum doesn't seem to like zip files, so I put it on my website). A few points of note (more in the included .pdf file): The 'Preview' set just cuts out the selection so you can see exactly what is being selected. It also lets you inspect the Blend Ranges curves. The 'Select' set turns this into a selection in the image. The 'Blend' set does the same for adjustments and filters. Curve overlaps are deliberately symmetrical so together they should sum to 100%. All sets include all contiguous combinations, such as 'Blacks+Shadows'.
- 7 replies
-
- 6
-

-
- luminosity
- selection
- (and 1 more)
-
 Is there an option for the color panel to auto-select the color of the stroke or fill, depending of which one is used so that I can change it with just one click (instead of clicking on the selection I need first)? This would be the case where a shape has only one of these two attributes. For example, I have a square which only has a fill color (no stroke). If I click on another shape, let's say a circle and I'm changing it's stroke color, when I click back on the square, I would like the color panel to auto-select the fill attribute (since it's the only attribute the square has) instead of keeping the stroke attribute selected (from the previous change). My logic is that I would want to change it's color rather than add a stroke to it. This way would eliminate an unnecessary extra click. Does anyone have an ideea if this is possible? In Adobe's software obviously it's not, but I'm keeping higher hopes for Affinity.
 -
A few tips on this highlighting the shortcuts available in particular when using marquee select:
-
Hello, I'm new to Affinity Photo. I'm trying to make a marquee selection, centered on the starting point. In Photoshop i did this using the ⌘ modifier, but in Affinity Photo that's reserved to subtract to the selection. How can I accomplish this? Thank you in advance.
-
 Hello, I'm starting with Affinity. Please help. I am trying to select the bright background by using flood select. I set as in the tutorial https://vimeo.com/130975378, ie. New - Contiguos checked. After that I click and drag, the selection will appear with a number of dots in a row in the same location, even when you drag every other way. I have Windows 7, Aero is running. Thank you. I have already solved.
-
 Hi guys, I finally got into reediting in AP after a long time. I know the questions thatfollows have been answered before, and trust me I searched in the forum but to no avail. 1-So the first one would be, keyboard and mouse shortcut for increasing and decreasing brush size, as of right now no combination of strokes seems to work. And no, left and right bracket keys are no viable option nor do they work on an italian layout keyboard 2-the slice tool in export persona: I do post images on instagram after having them resized to 2048px on the long edge, so for pano I usually use the clise tool on PS and make say a 3 slice off of a pano that has been cropped to 3:1 and export them, so that I can upload them as multipe images to instagram and retain the pano. How do I do that in AP? it seems that the slices are only there for free and rectangular slices...any way to tell AP to slice my document in 3 equal part vertically and export them? 3-Copy one layer mask to another layer/adjustment layer, how do I do that? 4-when I have something selected and marching ant areon, how do I flood that selection with back or white? (on a layer mask) 5-I do like lthe stack option for files I already have on my HDD (I don't know what, but it's freaking stupid fast with 16bit tiffs), but let's say I have 4 layers in a document that I want to align, do I simply select 'Live Stack group' from the arrange toolbar? since it does not give me the option to align layers i am skeptic It'll actually align them PS. I am using English as a language even though I am using an italian layout keyboard. BTW, thanks AP team
 -
Wouldn't it be nice if (WIBNI) there was a luminosity selection brush. So I could just grab the brush and paint a selection based on a chosen luminosity/colour range. Something more controllable than Select/Tonal Range, more flexible than Select Sampled Colour, and easier than duplicate layer then Blend Ranges within a selection. eg. A new selection brush. Colours dropdown (Master, RGB, CMYK, LAB, etc.). Maybe colour picker? Value slider. Tolerance slider. Or some other way, but do keep it simple. The easier it is, the more people will use/value it.
-
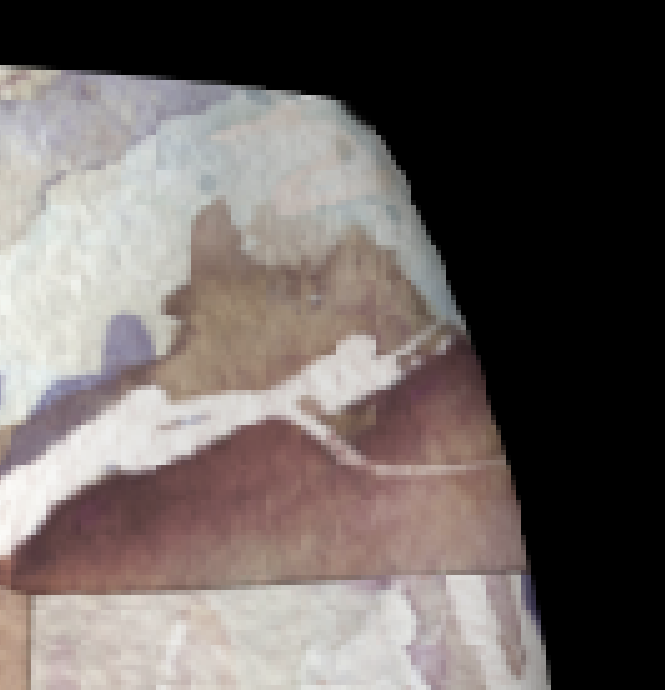
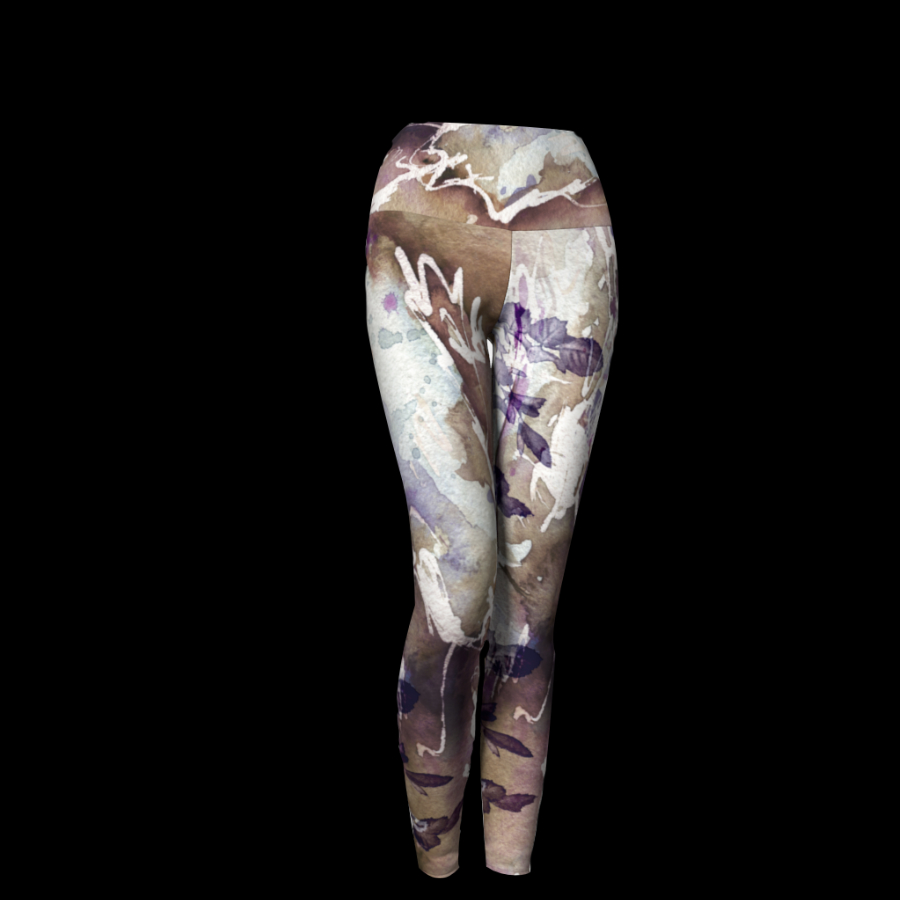
 I am trying out Affinity Photo intensely to make up my mind before I pay for another year of Photoshop. One thing that I'm not quite liking is the selection tools. Though on the tutorials they look amazing but I find that my selections have jagged edges. After fiddling with refining for a good while and then going to the trusty pen tool I had to manually delete white pixels... while in Photoshop the same selection is perfect with the magic wand. In photoshop I expand my selection by 1px.. I tried the same thing here but my jagged edges remain. I'm attaching the original image, then a zoom of the section after I selected with the pen tool and lastly a zoomed out with my image on a black background where you can see the nasty edges... What am I doing wrong?
-
 Hi, I am a long time AI user and I'm not very fond of how selecting an element in AD works. In AD you have to drag select every pixel first to select it. How do I make it like AI where I can just drag select some part of it and then it gets selected? Any options how?
 -
Good evening, I've been struggling to find the alredy repeatedly mentioned button to convert a curve created with the pen tool into a selection. It is said that this button should be shown in the context toolbar, but I fail to find it. I've wondered if it has been removed with a previous update, since the posts I've been reading on this topic dated back to 2015. I tried to look around in the right-click menu and other places but I did not manage to solve the problem. Please help :)
-
 Hello, When I CTRL+Click in Designer (Windows) it always selects the deepest level in the hierarchy, so if I have a rectangle inside a symbol inside a group and ctrl+click it, it will select the rectangle. Is there a way to set the depth of this selection, so that it doesn't select the "insides" of symbols, or only selects up to the first child of a group? Thanks, Fernando
 -
 Hello community, thanks for the possibility to take part here. Trying to figure out how "selecting by colour" works, i am not able to find the solution. Does anybody perhaps know how to do it? Similar to the Illustrator function "Select ... same colour". It would b nice if someone could help. Greetings from Berlin :)
 -
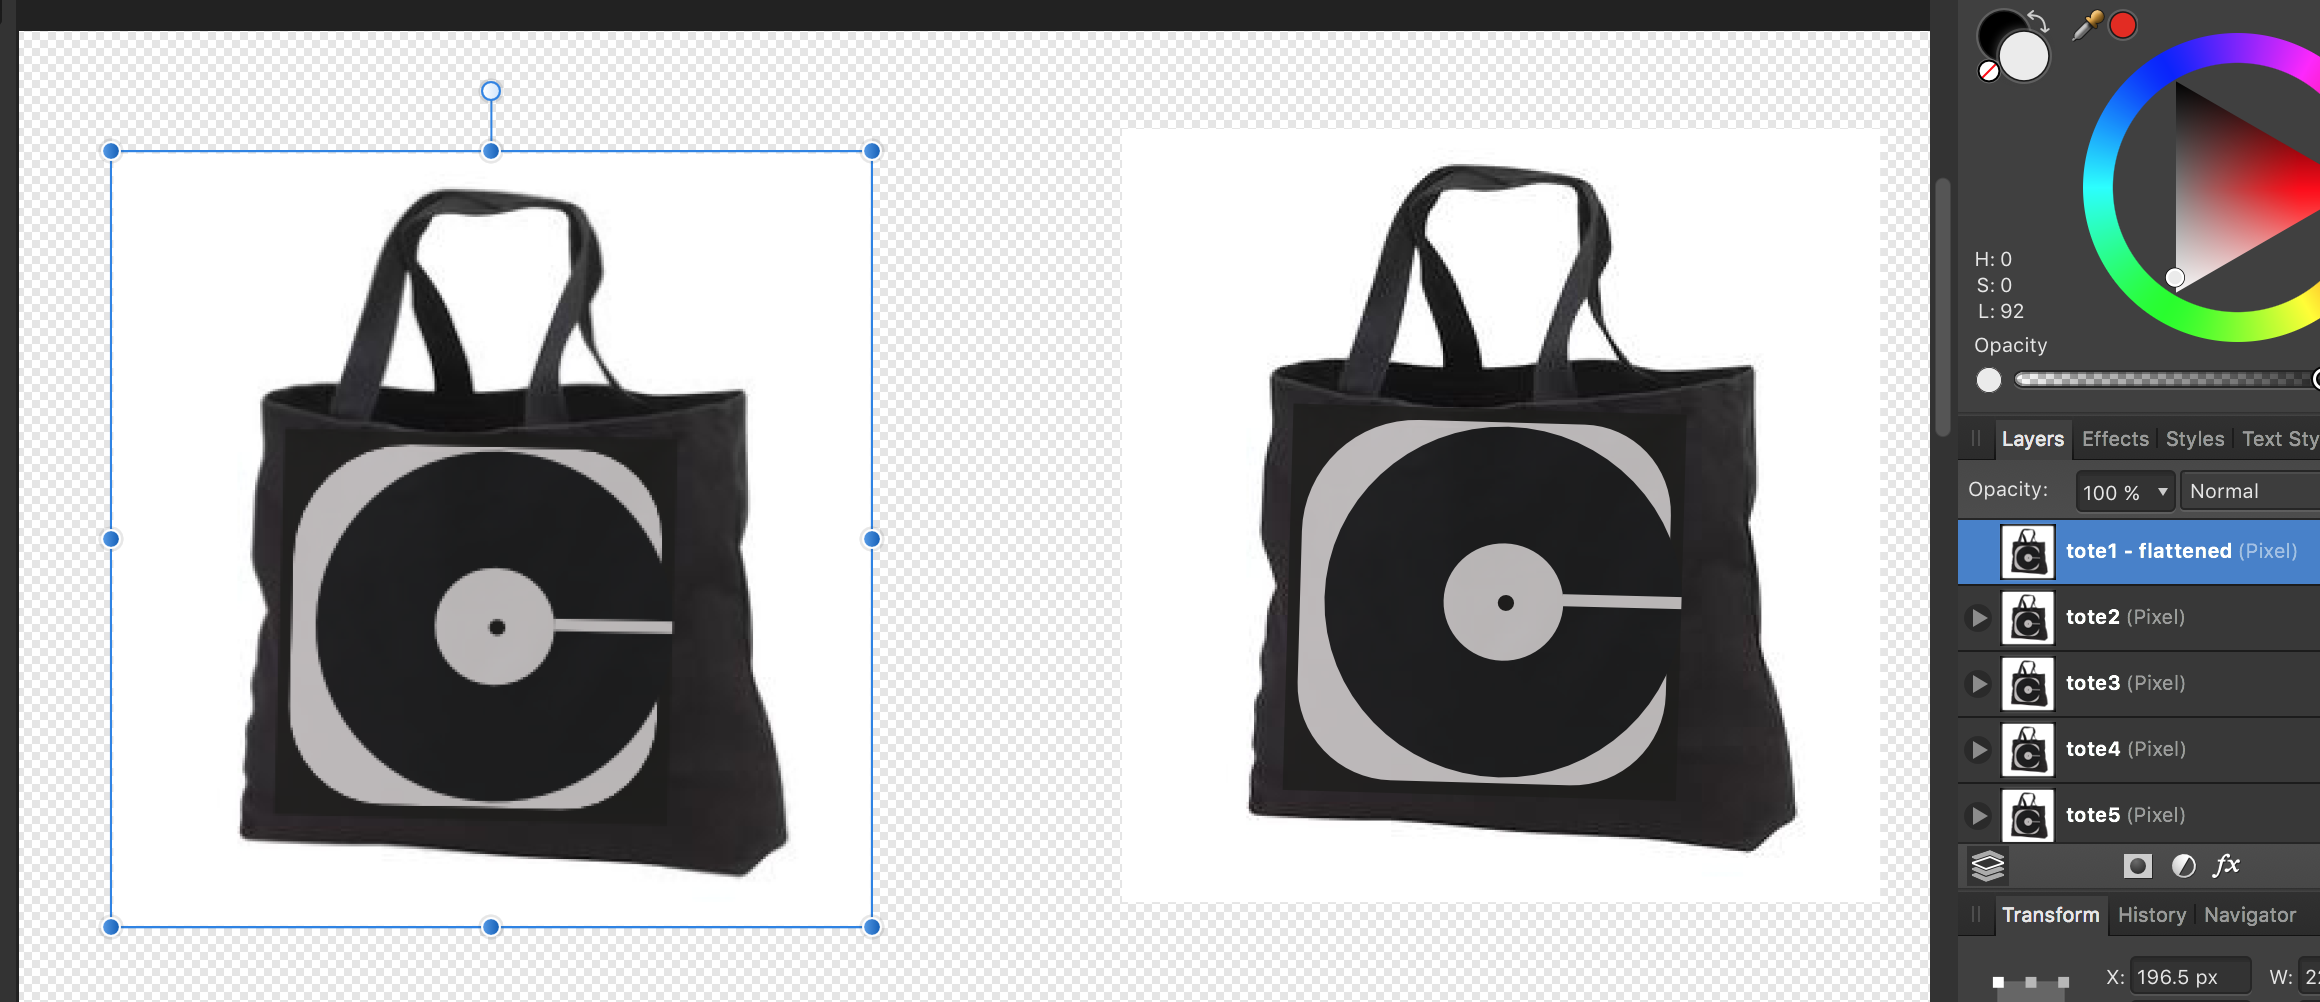
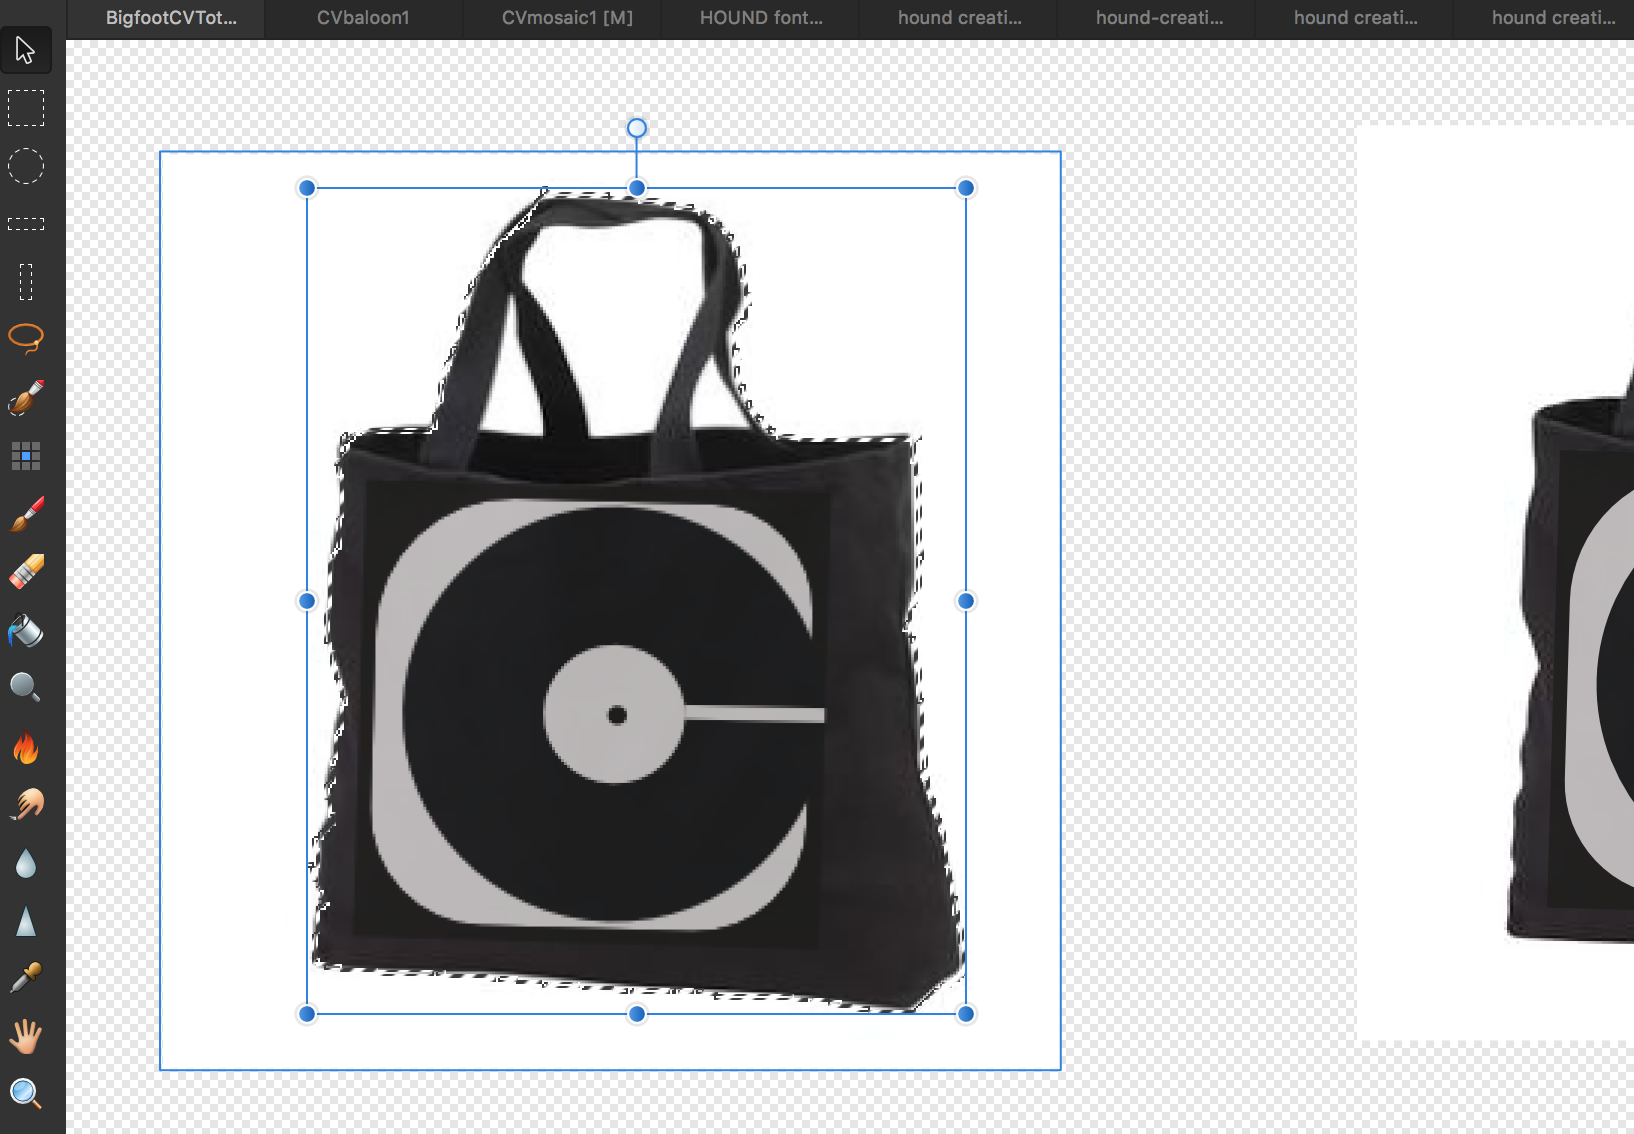
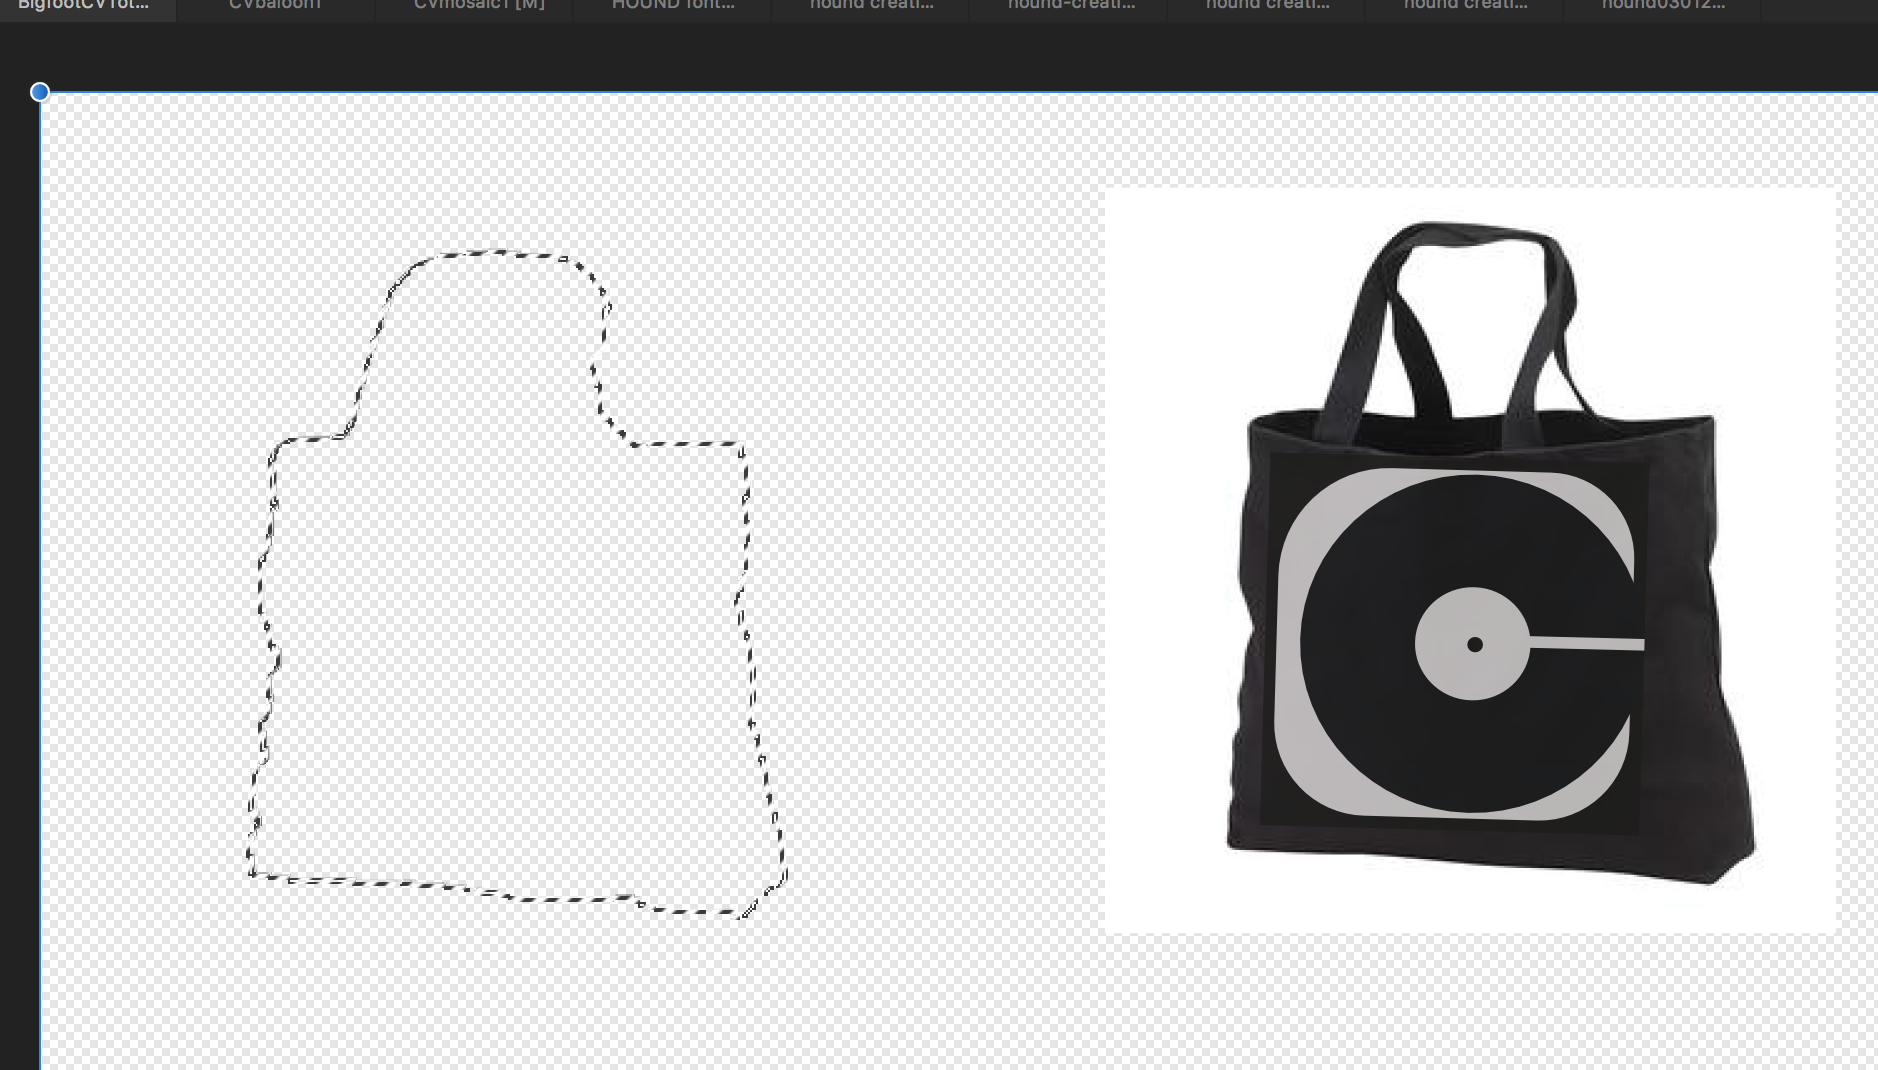
 Dudes/Dudettes, a little help please... Missing something obvious and simple again, I'm sure - and I've sincerely tried to research the forums myself, doing my own leg-work but am just stuck on this one. This time I brought along some visual aides. Working on a MacBook Pro with AD 1.5, all I am trying to do is remove the white background behind this black tote back (see images below). After surveying the forums, I understood that in order to accomplish this I needed to do the following (please point out my error): 1) add new Pixel layer over image 2) outline the image wanting to kept using Selection tools (I used the Brush selection tool)...pardon the crudely traced selection line, I'm just practicing 3) Invert the Pixel selection (I used the Ctrl+Shift+I keyboard shortcut)... **this is where I'm stuck - a post in the forum says to now 'paint in the selected area'. Would I not used the In-Fill tool by selecting a color then clicking on the selected area? This is what I tried, yet was unable to paint-in the selection. Feel like a major dork here guys - what am I missing? -Thanks as always AD Fam, --Christo
-
 I see there is no contrast feature in refine edges tool as PS has. I just want my selection not flow over adjacent pixels, without any feathering effect at all. Am I missing a feature to do such things?
 -
 The Rectangular Marquee Tool will not draw a box and the dotted lines do not show. The other 4 marquee tools work fine. Please tell me what I am doing wrong? Or do I have a faulty copy of the software? It is v1.5.1.54.
 -
 Is there a way to convert a path to a selection, and have the selection be added/subtracted to a selection that is already made?
 -
 How do I draw a 1 pixel stroke inside a selection rectangle in APh? I use this quite often in Photoshop, but cannot find a way do do it in APh? I looked at refine edges but this does not give what I need.
 -
It would be helpful if there was an tonal range option of selection that allowed a user to set a lower and upper threshold - two bars. The three current choices are not sufficient for assigning say different exposures to "bands" of tonal ranges. Most helpful would being able to set points at different tone points and being able to assign specific filters or level adjustments to each band. I understand that photoshop may have something like this, I am not familiar with photo shop. Thanks -
-
Hello, I would like to suggest a couple features for layer management. The first being able to click and drag down the column of checkboxes (layer visibility) and be able to toggle them on and off in the process. Targeting each individual layer can be tedious and time consuming. This would also be a great function to add to the locking of layers. Also, being able to alt+click one specific layers checkbox to turn the visibility off of all other layers, accept the one clicked. Thanks!
-
 Is there a way to use the elliptical and rectangular marquee tools and have them expand from the center of your initial click? I would think holding a modifier key would allow for this but I can't seem to find any combination that works. Thanks for any help!
 -
 For Affinity Photo: There is an option to put a + sign in the center of the Selection Brush Tool. Would it be possible so that this sign is changed to the minus "-" sign whenever you switch the subtract mode? The reason I asked for this the Selection Brush Tool seems to start in the mode it was last used it. I believe that most of the time when you start the Selection Brush Tool you want to be in Add mode. If in fact the Selection Brush Tool is in subtract mode then you have a visual clue so that you know to switch the setting. Thanks
 -
Steps to reproduce issue: 1. Select Pen or Shape (Rectangle, circle, etc) tool 2. Select stroke and fill colors 3. Create many shapes with it 4. Select them all 5. On the upper bar only align and distribute actions show up (Next to "N objects") Expected: 6. The upper bar should show fill and stroke colors for selected objects, just like it does when only one instance is selected
-
 Hi, I've been searching around but I can't seem to find a solution: I have a a simple jpeg file with black text on white background. I want to marquee the text so that I could create a shape/s out of the text. In PS, i would simply magic wand the text, when the marquee comes out, I create paths from selection. I have looked around and I read somewhere that after selection, I can go to Selection>Outline. I can't seem to find that command in my version. I;m using ver 1.5.1.43. Is there any other workaround for this? I know different software need different approach, so I guess I need time to wrap my head around this. Also, I have tried to export the paths from PS but when I open in designer there are no paths! Thanks.
 -
In the following topic I discovered that there is not an option to turn off scrubby zoom (and therefore turn on marquee/area-based zoom) in the Windows version of AD as there is in the Mac version: https://forum.affinity.serif.com/index.php?/topic/32241-ad-features-request/?p=164936