Search the Community
Showing results for tags 'Selection'.
-
 Hi guys, yesterday I've updated to the latest version and now all of a sudden I'm not able to select what's in the layer. With the older versions I was able to hold Ctrl + click on the layer icon and it would select the shape of what's in the layer (no matter pixel or vector shape). After that I can do whatever I want to do with that selection, cut it from another layer, etc. Is there something I'm missing? There is no way to make this selection now and I've tried whatever came to my mind. Still nothing. I'll appreciate any help
 -
 Hey Guys, could anyone help me with affinity photo on IPad? I can‘t select any color with the color selection tool! Thanks for your replies Your I_like_cameras
 -
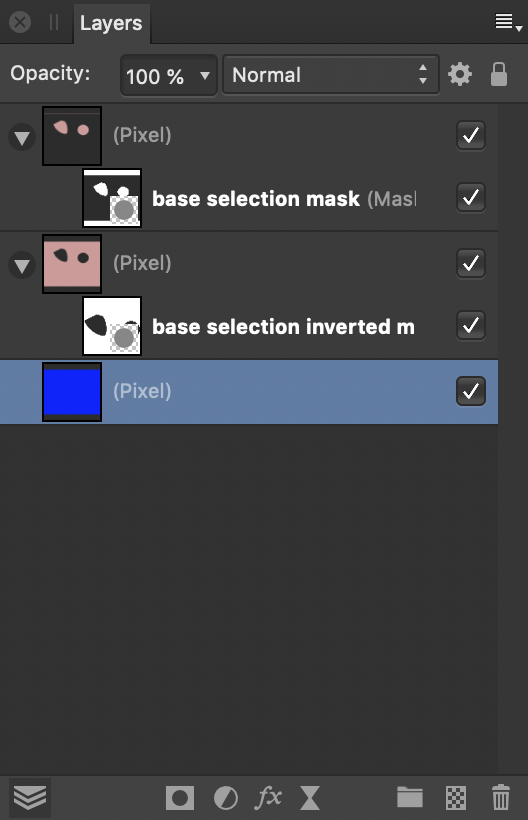
 I am trying to understand what is going on under the hood when I invert a selection. Situation: I have an image with a selection. The selection consists of two parts, one (at the left hand side) done with the freehand selection tool, the other (to the right) with the elliptical marquee tool. The freehand part has a blurry boundary, the elliptical part has a sharp boundary. I now want to create two layer masks, one from the selection and the other from whatever is outside of it. I use Invert Selection for that. The idea is to stack two layers with the original image, with one of the masks applied to each of them. Hopefully, each mask will let through just enough so that together they will blend into the original image. I expect normal blending mode should do the trick. My way of working is the following: - the original selection I save into a channel that I call "base selection". - I then invert the selection, and save the result in a channel called "base selection inverted". - I create a pixel layer and fill it with pink colour. - I duplicate that layer. - For each of the two layers I create a mask. The "base selection" channel I load into alpha of the first mask, the "base selection inverted" channel into alpha of the second mask. - I stack the two layers with normal blending mode. - I activate both layers and their masks. - Finally, to see clearly what is happening I create an extra blue pixel layer that I use as background. This is the resulting layer panel: I would now expect, perhaps naively, that I would see the original pink image back, since the masks are complementary and both let their own part of the original through. Instead, I see the following: Whereas the elliptical selection to the right is invisible, the blurry freehand selection to the left lets part of the blue background shine through. I now have the following questions: - how exactly is the selection converted into a mask through the channel? As I understand it, a mask is a mapping that tells what opacity to assign to each pixel of the (pixel) layer it is assigned to. White has 100% opacity, black is fully transparant. Fine. For black and white positions in the mask, this works. But if there is a position in the mask with "grey tonal value", an opacity between 0 and 1 is assigned. What is the formula for that? How is this "gray tonal value" determined, and once you have it, how does it translate to an opacity number? - How do the opacity numbers relate between a mask derived from a selection, and a mask derived from its inverse? Are they complementary, i.e., add up to 1 in every case? - From what I am seeing, it looks like inverting a selection does not necessarily lead to masks that are complementary in the sense that they can work together to restore a full image. They may leave spots with less than full opacity, if selections have blurry edges. This leads to the following question: is there a way to achieve what I am aiming for? Or am I missing the obvious here? Thanks to everyone who read through all this. I do hope you can shed some light. For reference, I attach the project (done with AP 1.7.0.128). Jeroen. selection inversion test.afphoto
-
 Hi.. Is there any command similar to the Photoshop "Image - Crop" after making a selection? I want to crop and image to that seletion but i can't find how Thanks
 -
 Hi, I have a little Problem with Affinity Photo. I think the solution is simple but I can´t find it or understand it (not in the workbook, tutorial ?? where to find ? ) 1. I make a screenshot with the print key.on the keyboard. 2. Next I paste the screenshot created by Windows into Affinity Photo 3. Now I only need some parts of the screenshot. I want to make a rectangular selection and copy this part into i.E. word or another software. 4. Because the colors are very similiar (another Tools won´t work properly) , it is the easiest way to use a rectangular selection. Every time when I try to copy and paste the rectangualar selection it will always paste the whole screenshot. The rectangular selection isn´t copied at all. Is there any way to make a quick selection and copy this part of a picture into another software? At the moment I have to create layers and a background, next save this part of the screenshot, load it into another software. This Costs a lot of time. I don´t need to save these pictures on the harddrive. How can I do this in a quicker way? Is there any clue ? Regards, timbojones
 -
 Hello Team, Want to know if the add of Luminosity mask (Live) is planned for AfPhoto ? actually in beta cycle. Yes Luminosity masks will make life even better and easier for a lot of people, i've learned to use it and it makes a lot of things possible. I know people have said it is possible to mimic it but i'm actually asking about a native one and if it is planned to be implemented. Blessings !
 -
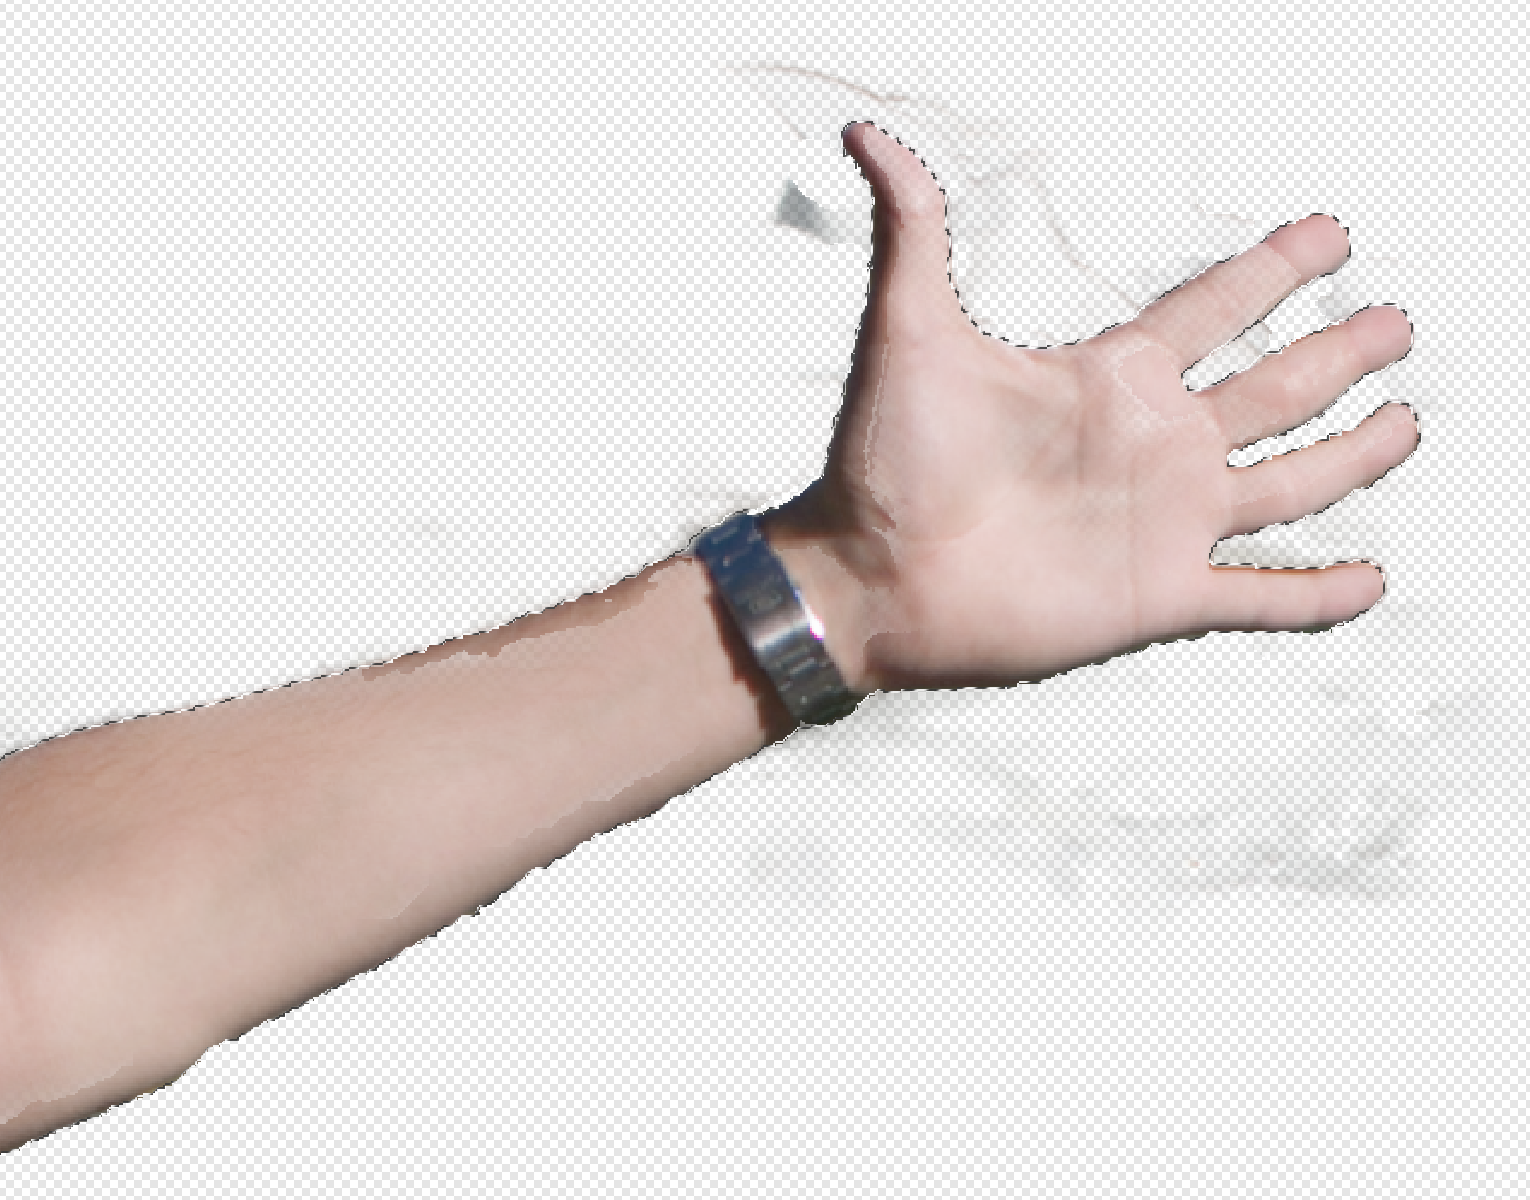
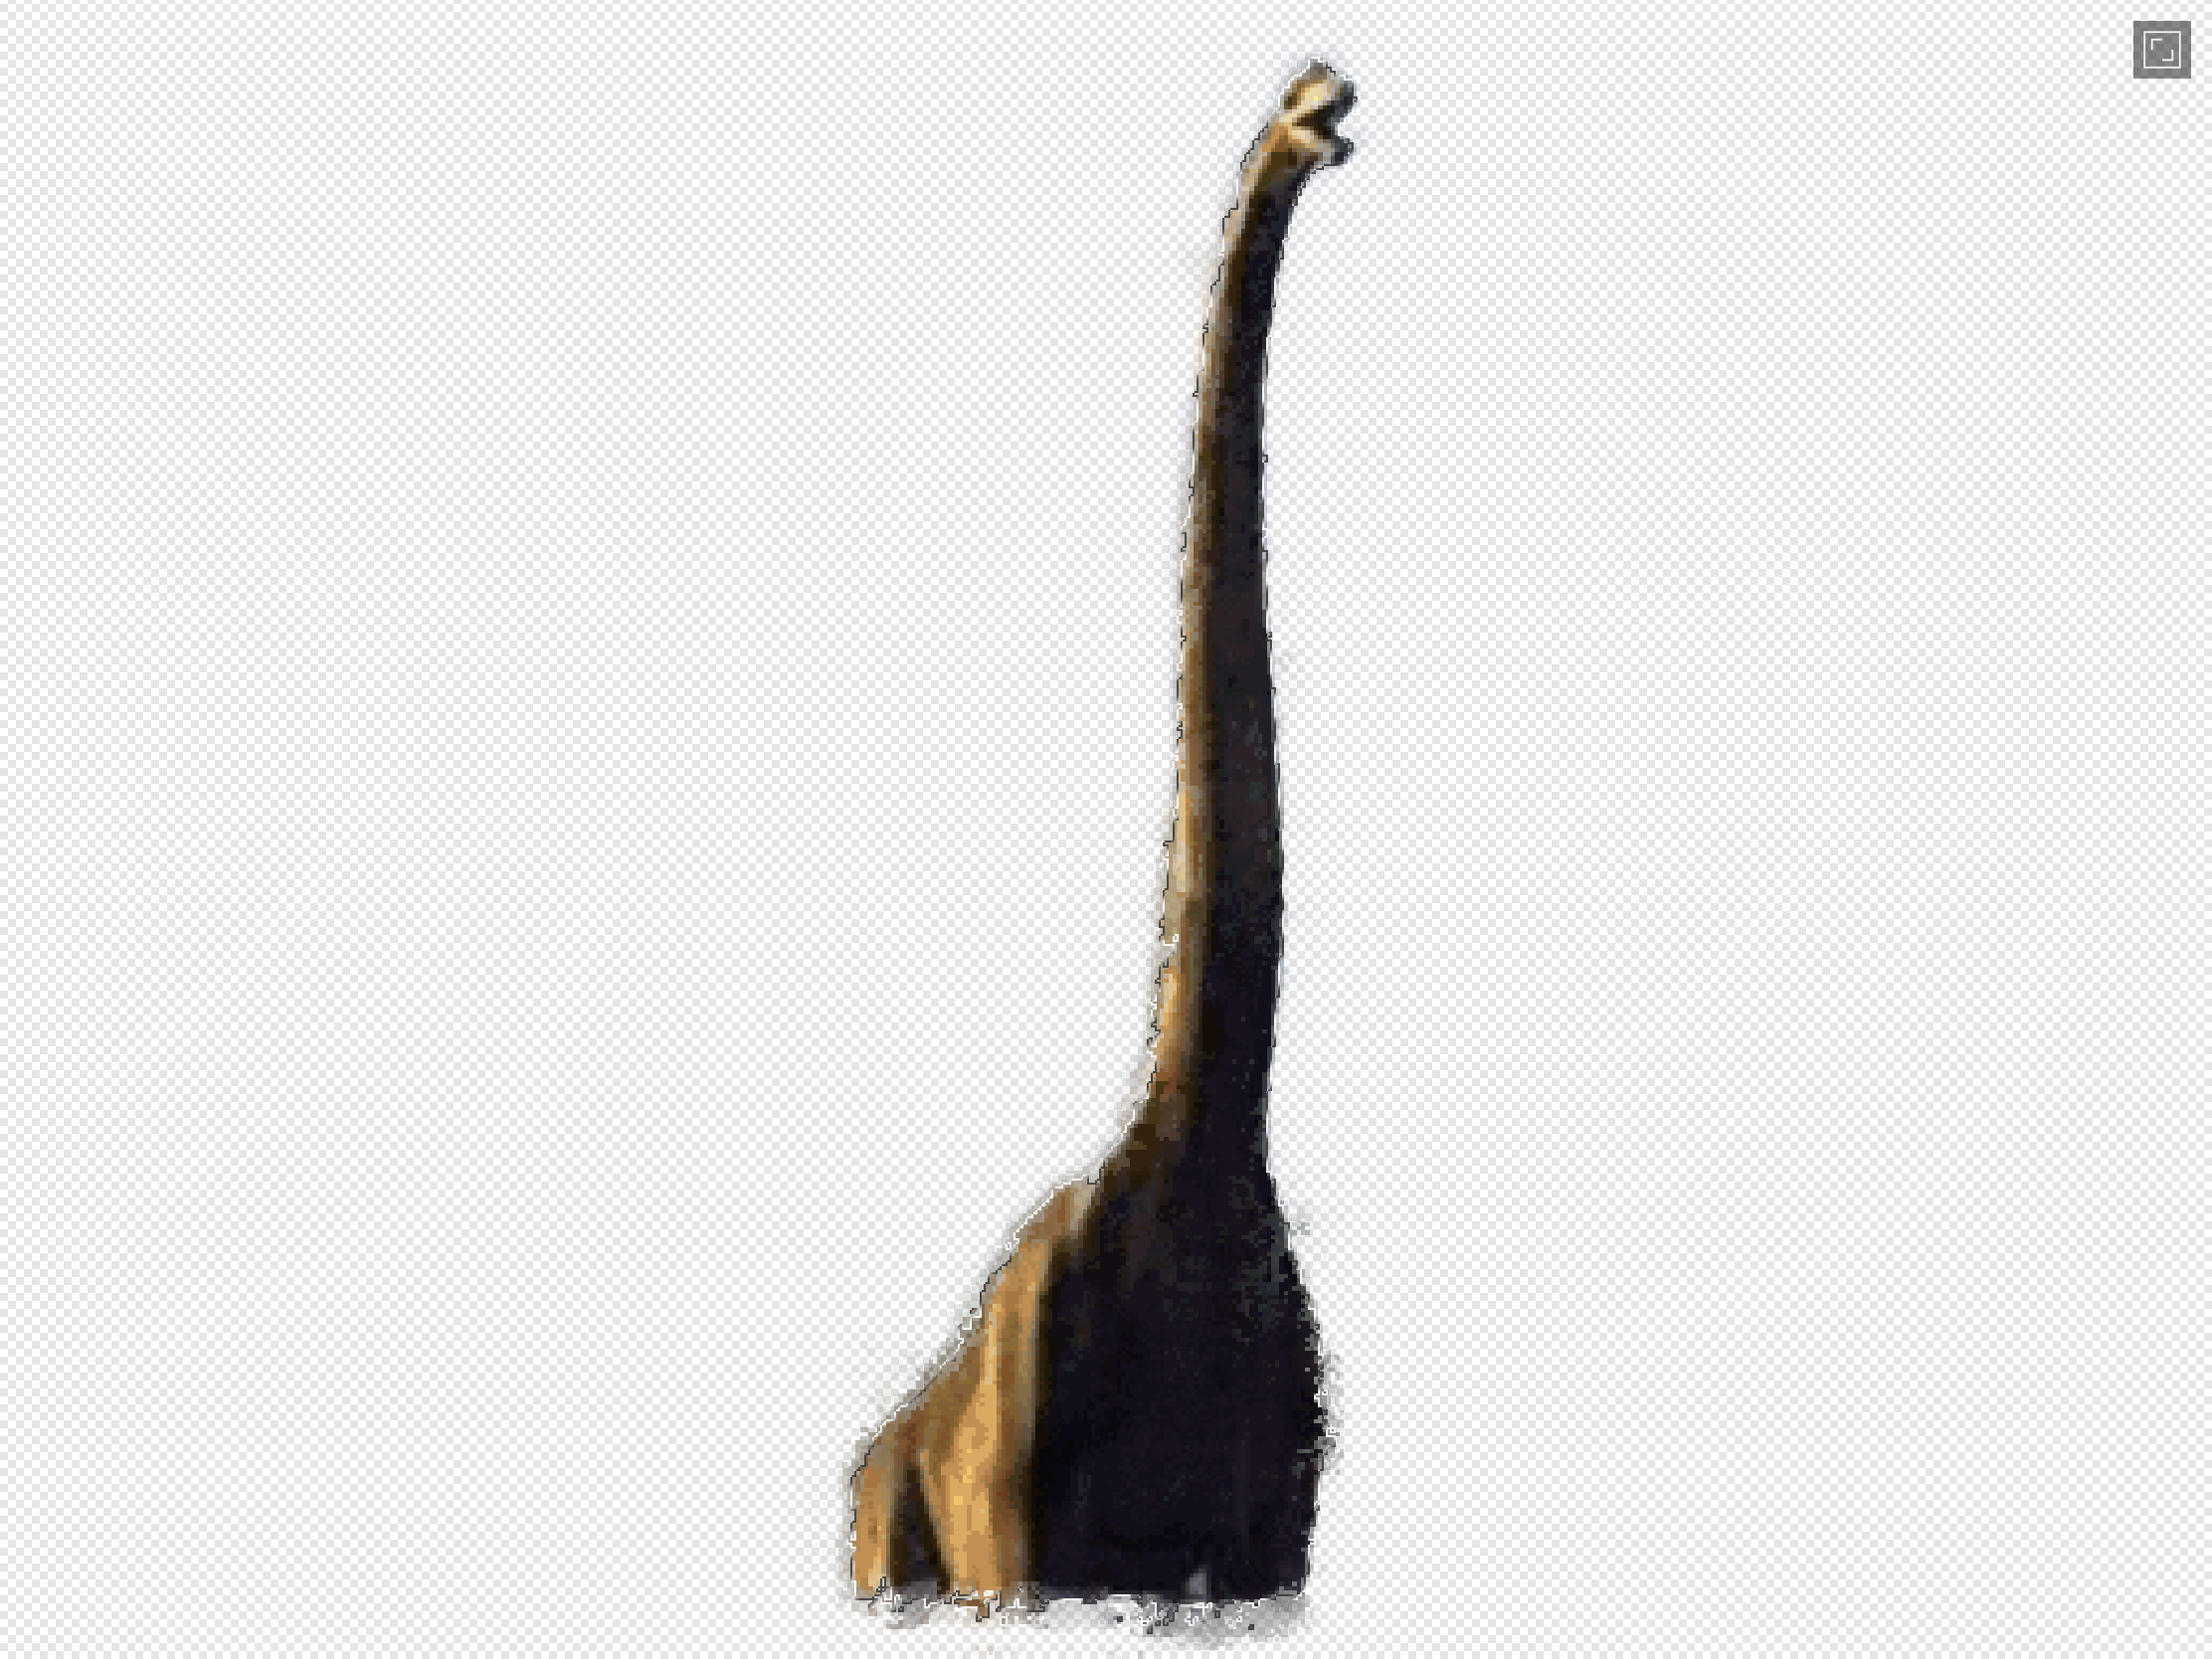
 Hi all! First of all, thanks in advance for reading and helping me out, if you can. I have been using Designer for a little bit more than a year now, but I never got to use Photo a lot. I recently came back from holidays and wanted to extract a person from a picture with Affinity Photo, and I'm having trouble with something that should be super easy, and I want to understand why is this happening and how to fix it. The problem is that after using the flood and wand selection tools, I have my desired outline selected, but when I copy and paste (cmd + c and cmd + v), the pasted image is like with a "weird opacity". I don't know how to solve or configure this, and I'm not too technical on image editing either (so apologies for the non-technical terms). I just want a simple selection and copying/pasting whatever is inside, in full, without opacity variation and without copying things outside the outline. I also used selection refining without any good results. It ended up removing selection I wanted, adding unwanted one, even while adding with the refine brush and removing with the modifier, it did whatever it wanted, so I went manually with the wand, varying sizes and snapping configurations. Here is an example for you to see what I'm talking about. The first one is the original image with the selection I want to copy and the second one is how it looks when I paste/mask it. If you see, the light/shadow areas are all wrong (like "low quality") and it even adds something outside the outline for whatever reason. Tried googling and searching with no solution Thanks all for your help!
-
 Why does it select content outside the selection when using refine selection?
-
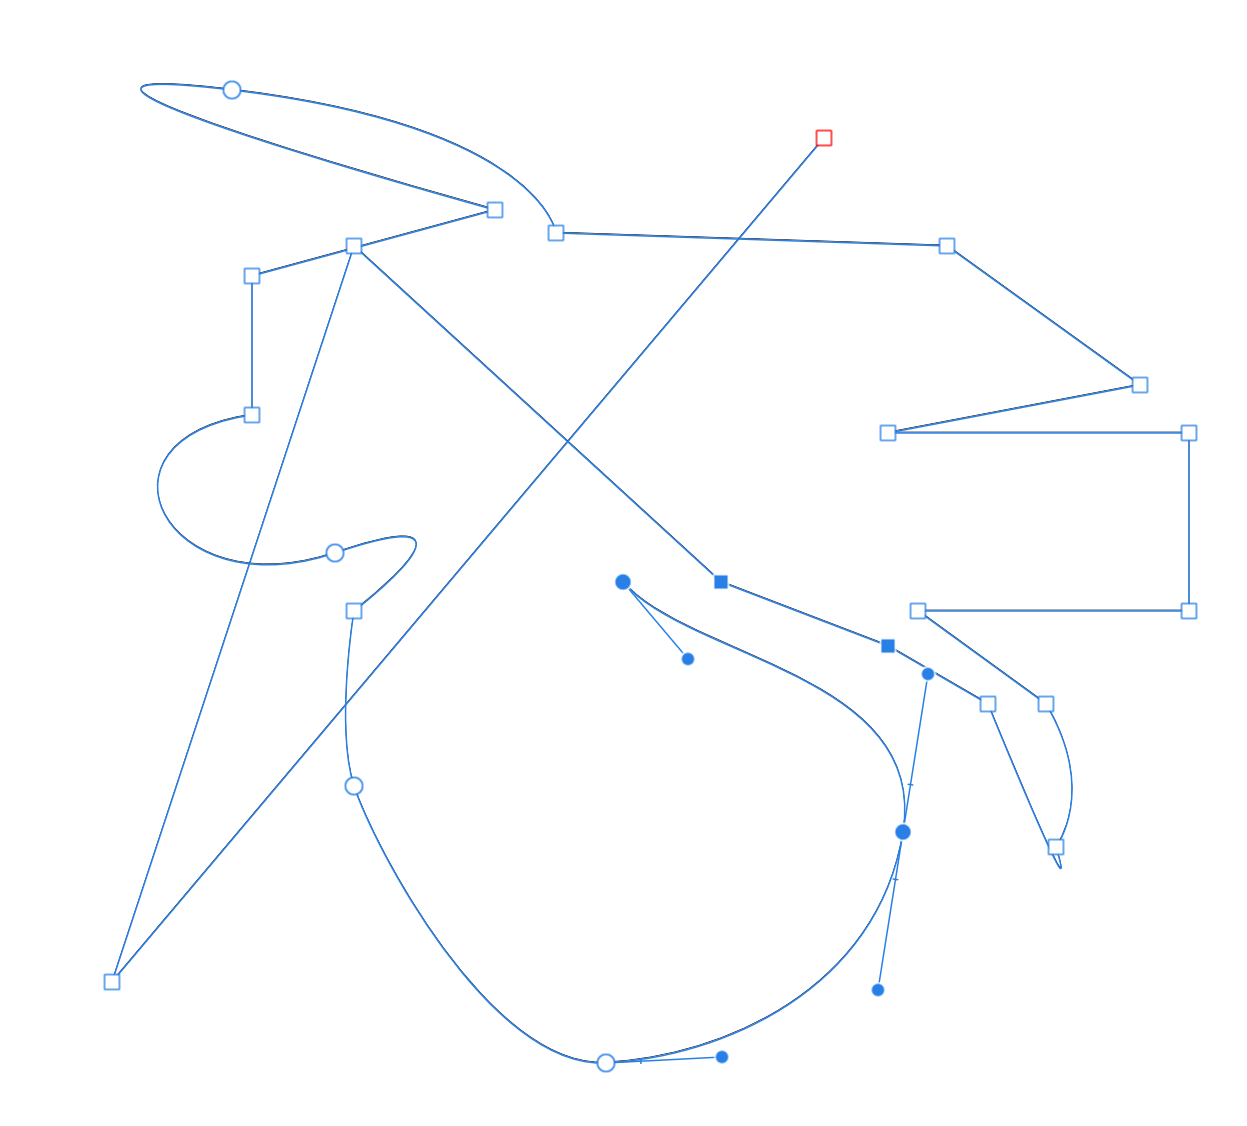
 Hi, I was testing out the Node Tool Selection Lasso. With Node Tool selected, Alt-Drag around the intended nodes to select on your open shape. Sometimes the lasso will select nodes not within the lasso boundaries. Seems to happen when starting a lasso and it is ambiguous as to which "side" the selection is going to be. I uploaded a screenshot of the entire shape I was playing with. Admittedly one would probably not be using a shape like this for anything, but worth noting how it affects the lasso selection. The two screen grab videos show the irregular behaviour. 2019-03-12_08-12-28.mp4 2019-03-12_08-17-17.mp4
-
 Windows 10 Home 1809, Publisher 1.7.0.257. The attached GIF shows what's happening better than I can explain it. Basically, selecting some cells from the bottom table actually selects some cells in the upper table, sometimes. Same document that I attached to this post: https://forum.affinity.serif.com/index.php?/topic/80965-spacing-between-table-cells-in-affinity-publisher/&tab=comments#comment-426146
-
 Bonjour Je cherche comment couper un morceau d'image avec l'outil "sélection rectangulaire" je pensais qu'il fallait juste sélectionner la partie à couper et ensuite "ctrl + X" mais ça ne marche pas, cela supprime toute l'image merci pour votre aide
 -
 Dearest forum members I fell in love with affinity photo and -designer and am getting a lot of work done. Thank you devs. There is an issue with my way of thinking and I'm sure I'm just one little step aside. I scanned a ink splatter and wish to create a outline of it to print only the outline. The selection is easy and even giving it a stroke, but the moment I deselect the selection area, the artboard is empty. I tried to rasterize, tried to create a new layer with the selection selected and created a stroke but again, the moment I deselect, the artboard is empty. It's like I'm just doing some little mistake but can not find out what it is. The forum post show that a lot of designer wish to stroke a selection and some tips are not bad, but none of them work. I created a "style" but again, the stroke will not remain . Please help. Kindest regards Urs
 -
 I hesitate to post in this august place, but I think one of my selection techniques has not been explicitly described before.. This video is aimed at real world outdoor photography which is often taken under less than ideal conditions; and where we need to cheat because there was not a camera there when we wanted one.. This image is a composite. It was constructed in Affinity Photo. The video is a workflow demonstration - it is not good enough to be called a tutorial. Outdoor activities can often be difficult to photograph. My pastime is sailing, and I now have a motorboat. It is surprisingly difficult to get images of your own boat at sea. So you have to use what you can beg, borrow, or steal. The video is about using a photo taken by a friend, taken from a moving platform(another boat) under less than ideal weather conditions. We take the image and transform it so it can be used in an entirely different context. I have used three techniques described in official Serif Affinity videos by James Ritson. They are "Bringing Out Water Detail" <a href="https://vimeo.com/202899215" rel="noreferrer nofollow">vimeo.com/202899215</a> "HDR from one exposure" <a href="https://www.youtube.com/watch?v=Ar6CZvfyFvk&feature=youtu.be" rel="noreferrer nofollow">www.youtube.com/watch?v=Ar6CZvfyFvk&feature=youtu.be</a> "Making Images Pop" <a href="https://vimeo.com/178575803" rel="noreferrer nofollow">vimeo.com/178575803</a> The first part of the video deals with enhancing the basic image, including two different applications of tone mapping. The second part deals with four different approaches to selection, to deal with different aspects of the image and how to combine them. I have not seen the use of the pen tool to create fine detail precise selections before, but maybe I did not look far enough. So far as I know, it is a first. The same problems apply to a lot of outdoor activities including windsurfing, climbing, motocross, horse riding. Wherever there is equipment, wild background, fine details (such as reins or ropes) then complex selection may be needed so you can blag an exciting picture. Please view
 -
 Affinity Designer for iPad. I cant find tutorial about „selection of objects and nodes“. There was one... i want to look it again. Can somebody post the link, please? thankyou for Support. MMMax
 -
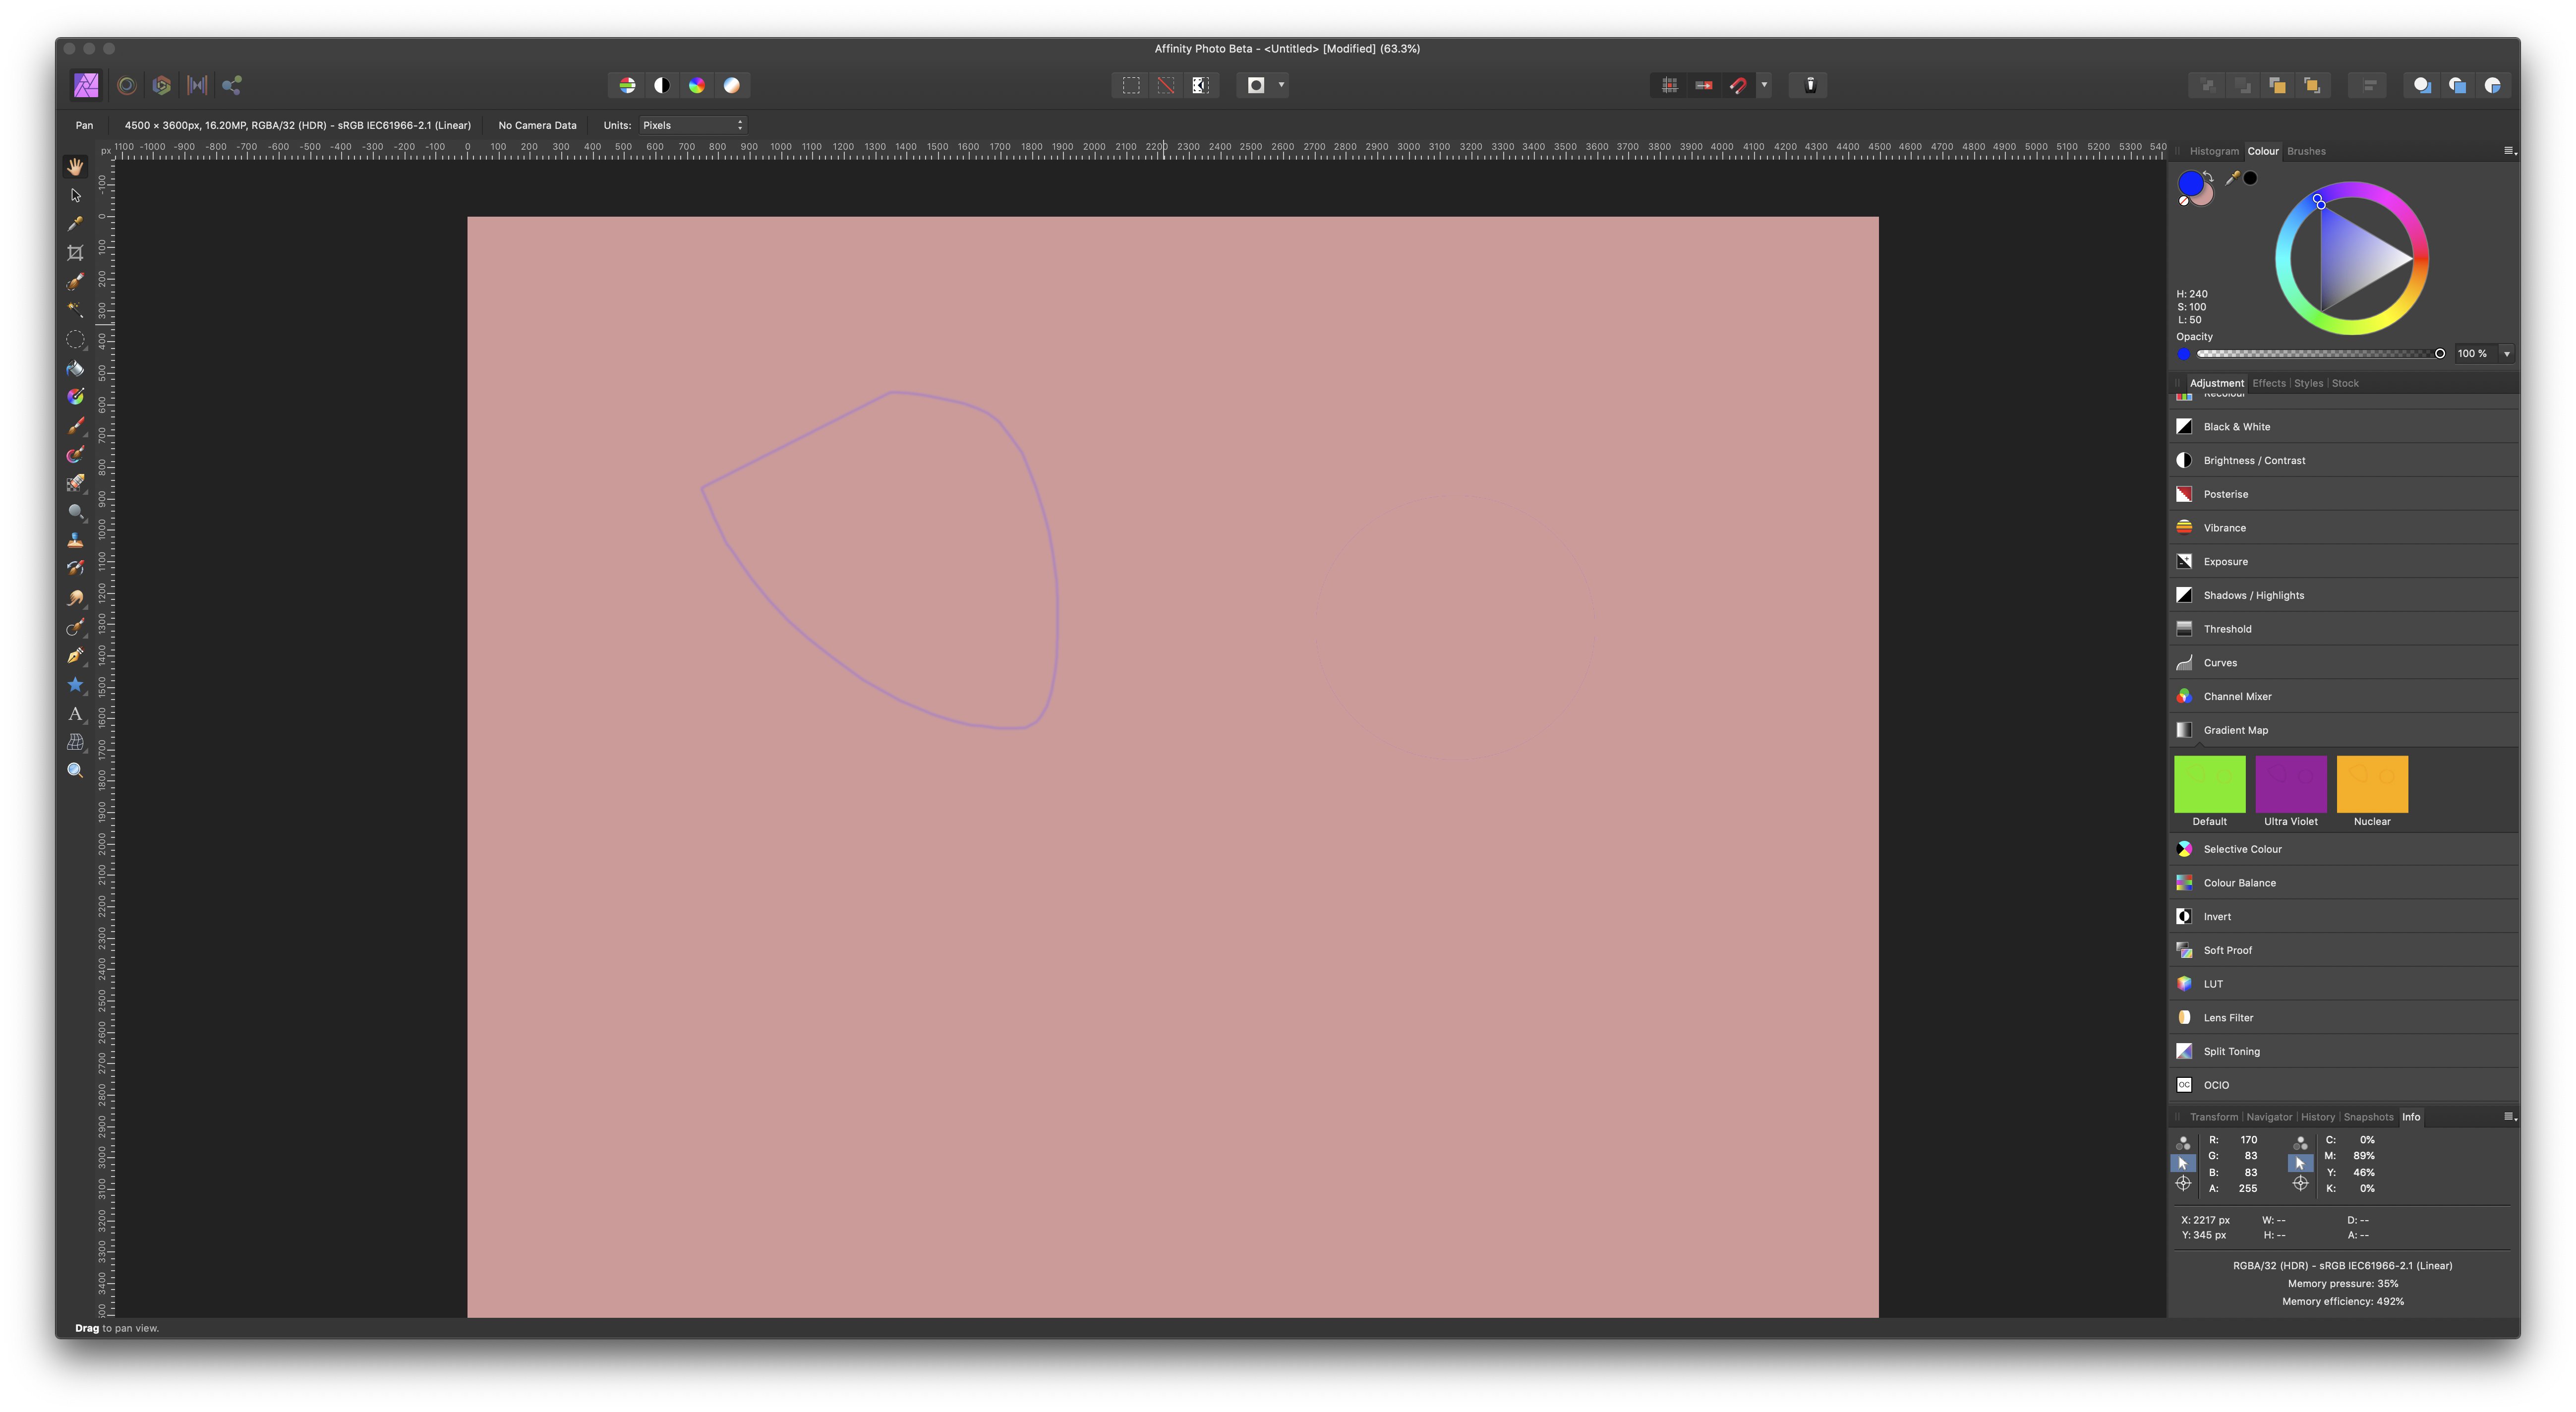
Hello Peoples ! Coming again here but with few questions that you may like or not but i believe it is quite useful to ask. All my questions here are based on Beta version of Affinity Photo not on the stable version and they're intended for understanding and helping to improve what already exist and not to raise comparatives between Apples and Oranges. ---------------------------------------------------------------------- Object: The Ring Function! I've been using it (not that much) since it was added to HSL Adjustment; well i really enjoy it and found it very useful when it comes to narrow and make precise color selection ...but i only see it in few of the adjustment layer that aims to work on colors. Q: Don't you think Recolor adjustment needs it to ? --------------------------------------------------------------------- Object: I've seen that there is the gear icon on the bottom right of adjustment layer when we have them opened but for unknown reason it does nothing when i click on it. Q: What it is intended to do or achieve ? --------------------------------------------------------------------- Object: As we all know that there is not enough online tutorial talking about really crazy tricks with Affinity Photo, i usually watch PS tutos and work on applying them in my AP workflow and they just work but ... for some reason i get lost when it come to do the Blend if thing. Q: Can you please point to a tutorial talking about that in details or simply share here how you do Blend if with Affinity Photo ? --------------------------------------------------------------------- Object: i often use the blend ranges function and just found it not working even if you click a million times on that gear. Q: Bug or me missing something ? Possible to fix it ? --------------------------------------------------------------------- Object: Let say i select a red color and want to add more to already selected using the same method, well ! on other software such as PS i would simply sample more color selection color by clicking Shift + Click and drag or click to add to already selected color. Q: How to that with Affinity Photo ? --------------------------------------------------------------------- Object: It is really useful to save selection made on a Photo or any other pixel related stuff but in the same time i personally found it to be quite hidden, burried into menues. Q: Possible to create a button on related tools (Sel. Brush - Flood Sel. etc.) next to the refine tool that allows that to be done without trying to find it in the menu ? -------------------------------------------------------------------- Object: in this last one, i will come to something i already asked about but i see no change until now. Let's talk about Masks (also i target adjustment layer because i love using their masking functionality). Okay ! Let's create a mask and press cmd/ctrl+i to invert it ... it stays the same i mean pure white when it should turn black (actually dark grey) when inverted and even when i paint with the brush tool on the mask it shows after i do another action such as cmd/ctrl+s or switch to another and start using it. Quite bad hein ! Q1: it is possible to fix this and make work as it should ? Q2: Possible to make the painting on mask more live and less delayed ? Okay ! Here i'm done with this. few here you will understand are bugs that need to be corrected and few other are kind of request but i count them as things that needs to be corrected at this level of development of Affinity Photo and what i point to here should also be checked and if possible get applied to Affinity Designer and Affinity Publisher because all 3 are based on the same principle and should not grow independently one another when it comes to these basic stuffs. Blessing to Y'all and don't forget it is not to raise a troll but to help improve the software.
-
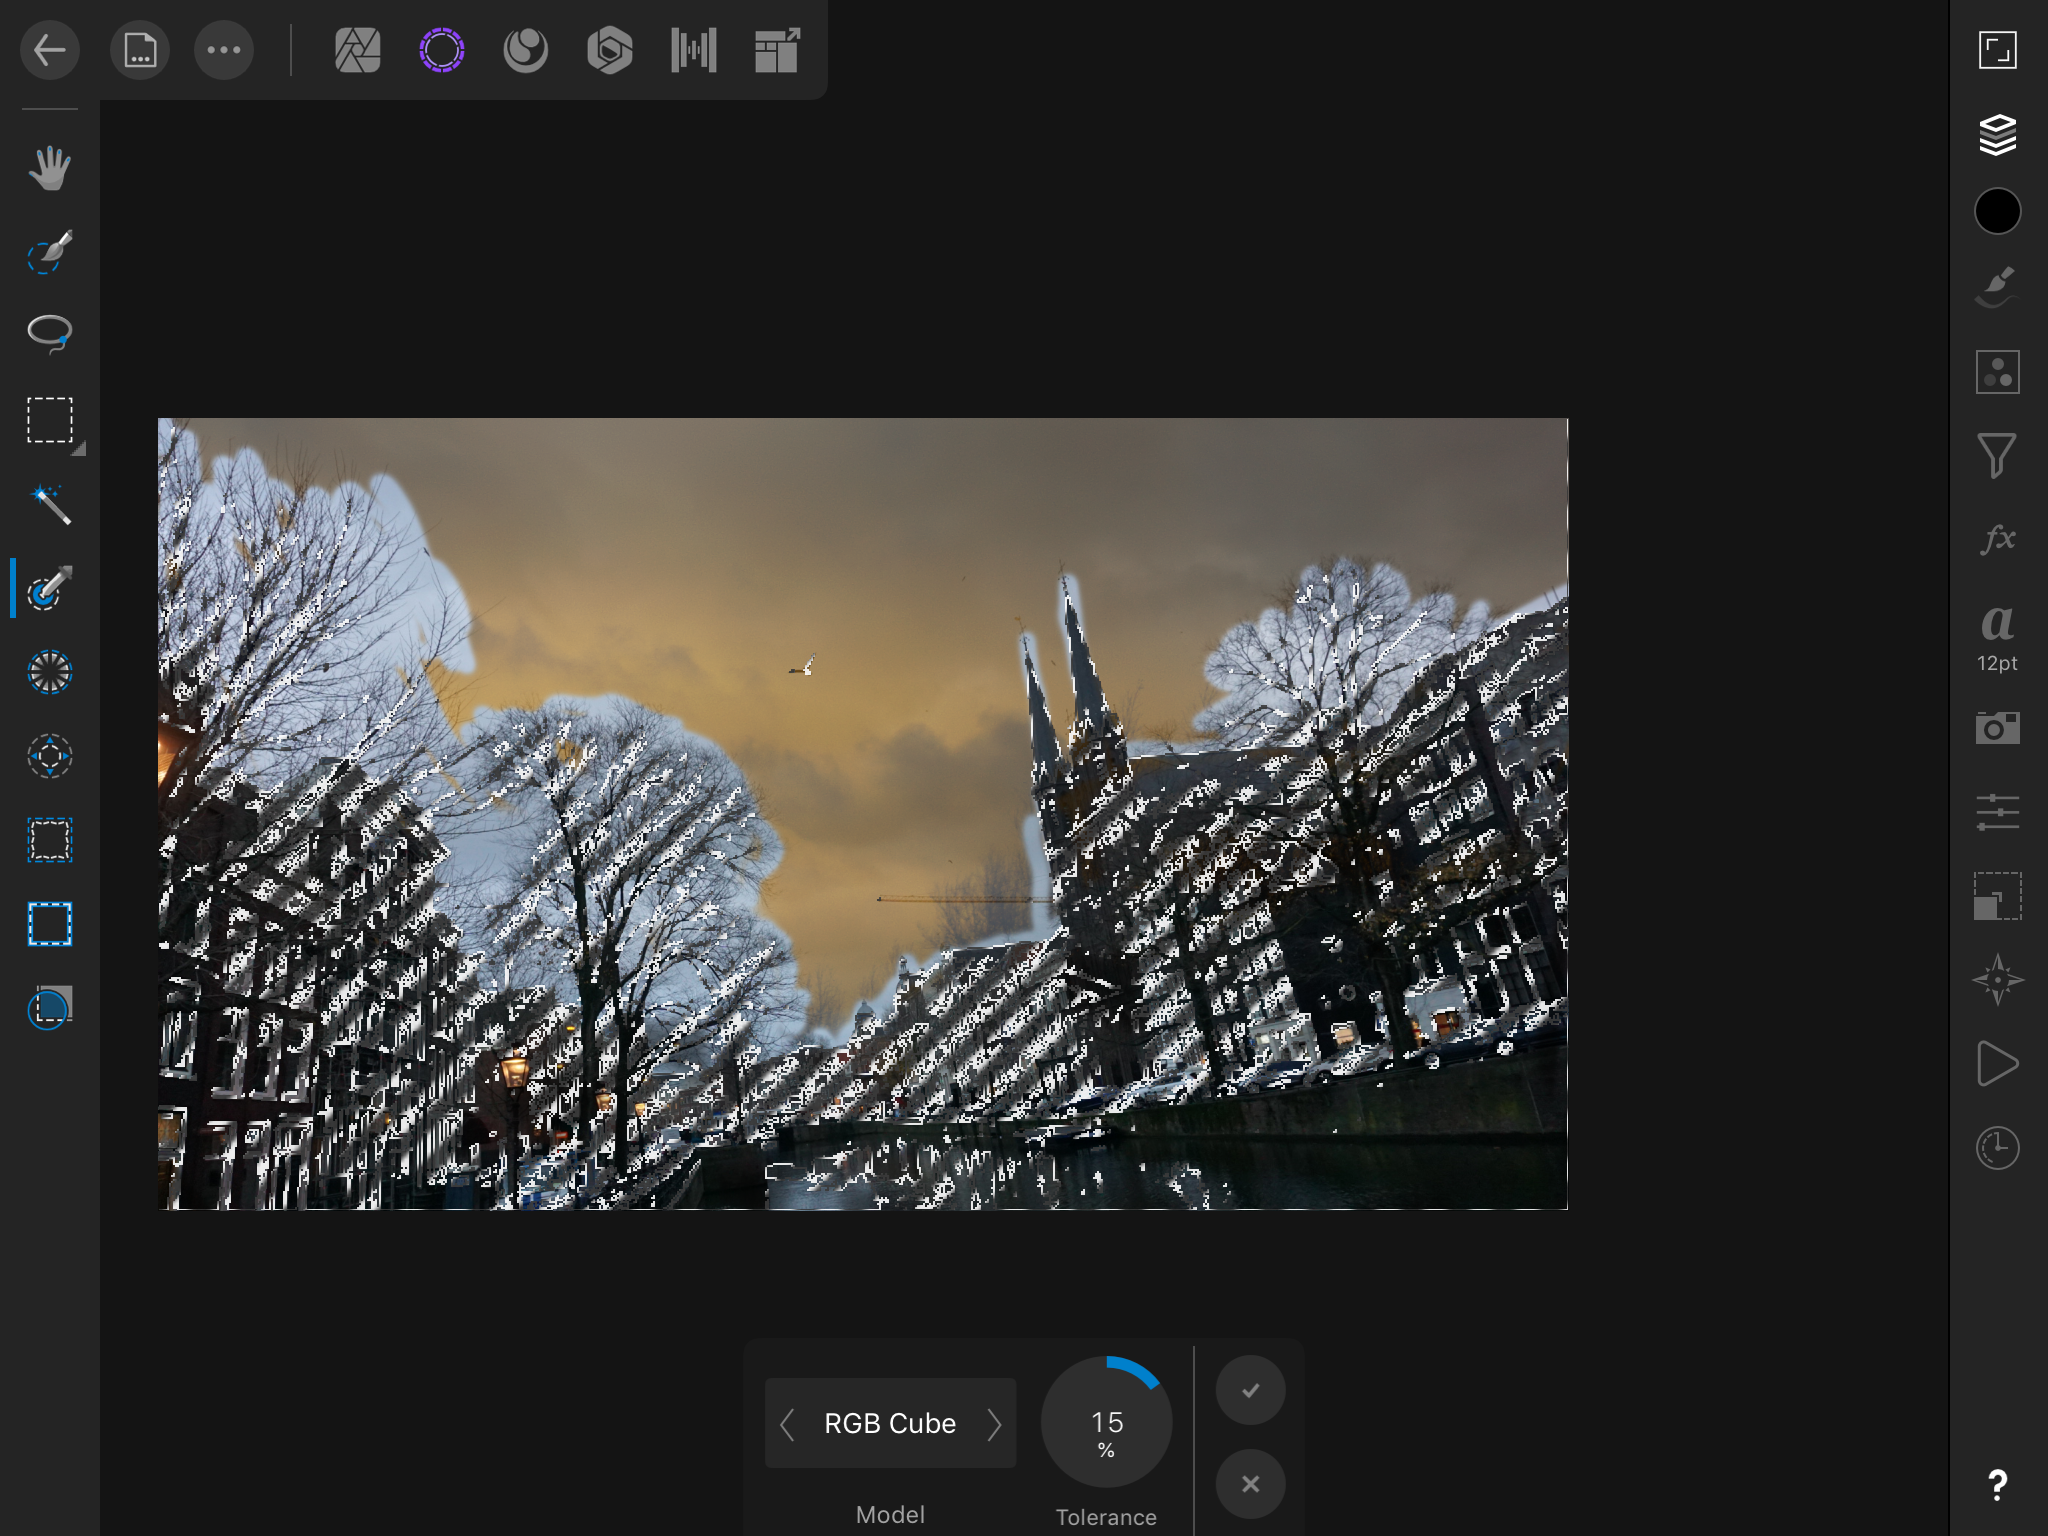
Hello again dear community, as I am very new to Affinity for iPad I am once again seeking help. So essentially what I want to do is blend a sky image to a foreground image. The issue is the foreground image has a lot of trees and small details and on the sky layer I am using a mask to only draw on part of that area. What i wanna do is go down to one layer make a selection based on color because i see that as the fastest way then have that selection applied to the mask layer of the other layer so I can only paint without affecting the foreground image. Posting a screen of it, hopefully someone can help out
-
 EDIT: Nevermind! I figured out what I was doing wrong. Thank you, though! I'm using Affinity Photo. This is the scenario: I have an 14 x 9 inch (landscape) jpg of an advertisement that I need to edit to fit an 8.5 x 11 inch (portrait) page. I need to cut and paste parts of the ad around in order to do this. I created an 8.5 x 11 inch document. Next, I placed the image onto the document. Naturally, some of the image falls off the document. As an image layer, I am unable to select part of the image, cut it and paste it onto a new layer. What happens is the entire image gets pasted onto the new layer. So, I converted the image layer into a pixel layer. Now, I am able to select a portion, cut and paste into a new layer, but the rest of the image (the part that fell off the document bounds) has disappeared. It has been clipped to the canvas. Unclipping the canvas is pointless because although it now shows the entire image, it defeats the purpose of creating an 8.5 x 11 document in the first place. What am I doing wrong? In Photoshop, I'm able to create a document of whatever size, place or drag in an image of any size, and manipulate the image as I need to and the parts that fall off the document bounds are still there.
-
- 1
-

-
- affinity photo
- photo
- (and 5 more)
-

Feature Request: Crop To Selection
Gackt posted a topic in Feedback for Affinity Photo V1 on Desktop
Hello, There's been a lengthy discussion about it already. But it's perhaps in the wrong channel? I hope it's ok that I brought it over to the Feature Request channel It would be great for productivity to have a crop to selection function. Thank you -
 Is there a way I can selelct smoot edges, because somehow the selection brush tool avoids them... I just want to select a black logo which has a white background, its has not some sort of difficult shape but yeah, the grey border gets not selected. This has to be possible, right? Maybe there is some simple solution for this, besides zooming in very hard and selecting pixel for pixel... Thank you!
 -
Hi all, please add the option to create a brush from selection, I really can't see why we have to export a brush shape only to import it back in, it seems a very convoluted and needless process. Brush from selection would streamline the process of brush creation substantially.
-
- 3
-

-
- affinity designer
- affinity photo
- (and 3 more)
-
 I'd like to select a continguous group of pixels (same color) and then stroke select them to draw an outline extending away from the selection. Rummaged through threads for almost an hour and couldnt find out how to do it, though I did see mention that stroke selection was possible in Designer. Seems really complicated. Could someone give me a step by step, or link me to a vid that explains the aforementioned procedure? I can do it gimp really easy, but I don't know how to do it in Affinity Designer or Photo. I use Photo most of the time, but it seems I have to use Designer to do stroke selection. Not sure though... Thanks in advance for any help!
 -
 Ok, so I'll try to phrase this question as clearly as possible I am experimenting with cutting selection of one photo layer (background) into another that is a new tab in Affinity. With beginners luck I was able to get it how I wanted it to look, the selection that is, in the second photo (in the second tab) with the ability to RESIZE and MOVE. This is what I want, to be able to cut, copy and resize the selection from the first photo to the second one. But now I can't cut and copy a selection in such a fashion that it would be resizable in the second image like before. I think I played around with something in "refine" dropdown when selection brush tool was clicked. Please advise. Getting a bit frustrated trying to cut, copy, and resize the selection. Can only cut and copy it into the photo without ability to move it or make it smaller. Thank you!
 -
 Hey there guys. I couldn't find a topic regarding this, I'll just try to describe what I am talking about. :) Not sure if this is a question or a feature request either. Lets say I have a few adjustment layers on top of several motives. I want to export every motive in a separate file with the adjustment layers on top. Like a series: motive_a.jpg, motive_b.jpg, motive_c.jpg, and so on. Right now I only can do this by toggling the motive layers on and off every time I want to export a different one. I’d like to assign what layers to export per slice. I'm aware of the feature to create a slice for exporting one specific layer even if other layers are turned on (so they’re kinda getting ignored), but I'm looking for something similar … like different slices for every motive plus the general adjustment layers. Like this: Slice 1: export layer 1 and adjustment A and B, but not layer 2,3 and 4 Slice 2: export layer 2 and adjustment A and B, but not layer 1,3 and 4 Slice 3: export layer 3 and adjustment A and B, but not layer 1,2 and 4 Slice 4: export layer 4 and adjustment A and B, but not layer 1,2 and 3 … Sorry if this sounds stupid, but does anyone understand what I’m talking about? :D It would make exporting much more efficient in situations like these or even more complex ones, I think. Like you configure it once and hit export all and don't have to change the visibility for every motive. I’ll attach an example file with named layers and slices … maybe that'll help understand what I'm talking about. Maybe there’s even a solution that I don't know yet. Would be handy in Affinity Designer as well as Affinity Photo. Example – Layer Selection Export.afphoto Greetings Dennis
-
Hi all, Would it be possible to have the All Layers option from the Selection Brush tool into the Flood Select tool as well? Cheers, Juan
-
 Hi there, I just got an iPad Pro and was so excited to start replacing my Mac & Intuos combo with it using Affinity, but I must say I feel rather disappointed. If you see my illustrations at xebius.com you can tell the amount of layers on top of layers I need to deal with to get that level of detail. It’s essential for me to be able to select layers that are underneath without needing to open the layers menu every time. On PS is so simple, you press Cmnd or the button on my Wacom pen and will pop me a window showing all the layers underneath so I can choose. Is any gesture or way to do this on Affinity?? I am not talking of the layers that are underneath on the layer order in the menu, but in fact right underneath on that part of the canvas. It would be awesome having a gesture for this, since is frequent to have a big layer covering a smaller one and you could find it easily, move it on up or down, etc. Is any way to do this? If not I will have to pass on using this software, I am afraid. Thanks in advance! Manuel