Search the Community
Showing results for tags 'Selection'.
-
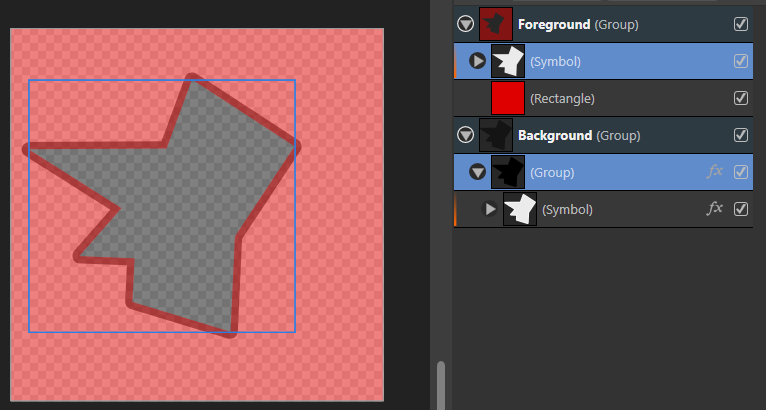
I frequently have objects with different parents which should always transform together, for example I can have an Erase object which cuts a certain layer and reveals itself underneath, something like this (but generally much more complicated): They are separated so I can export the layers individually. It would be good if I could save a selection of objects (whose relative positions, rotations, and sizes should always be maintained), similar to how snapshots or symbols are created. Then if I want to move them all I can easily select them all, by selecting the selection group.

-
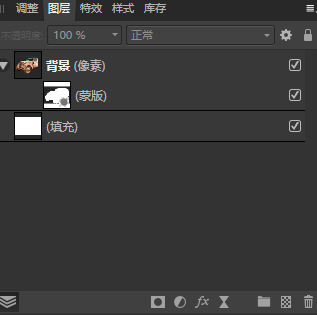
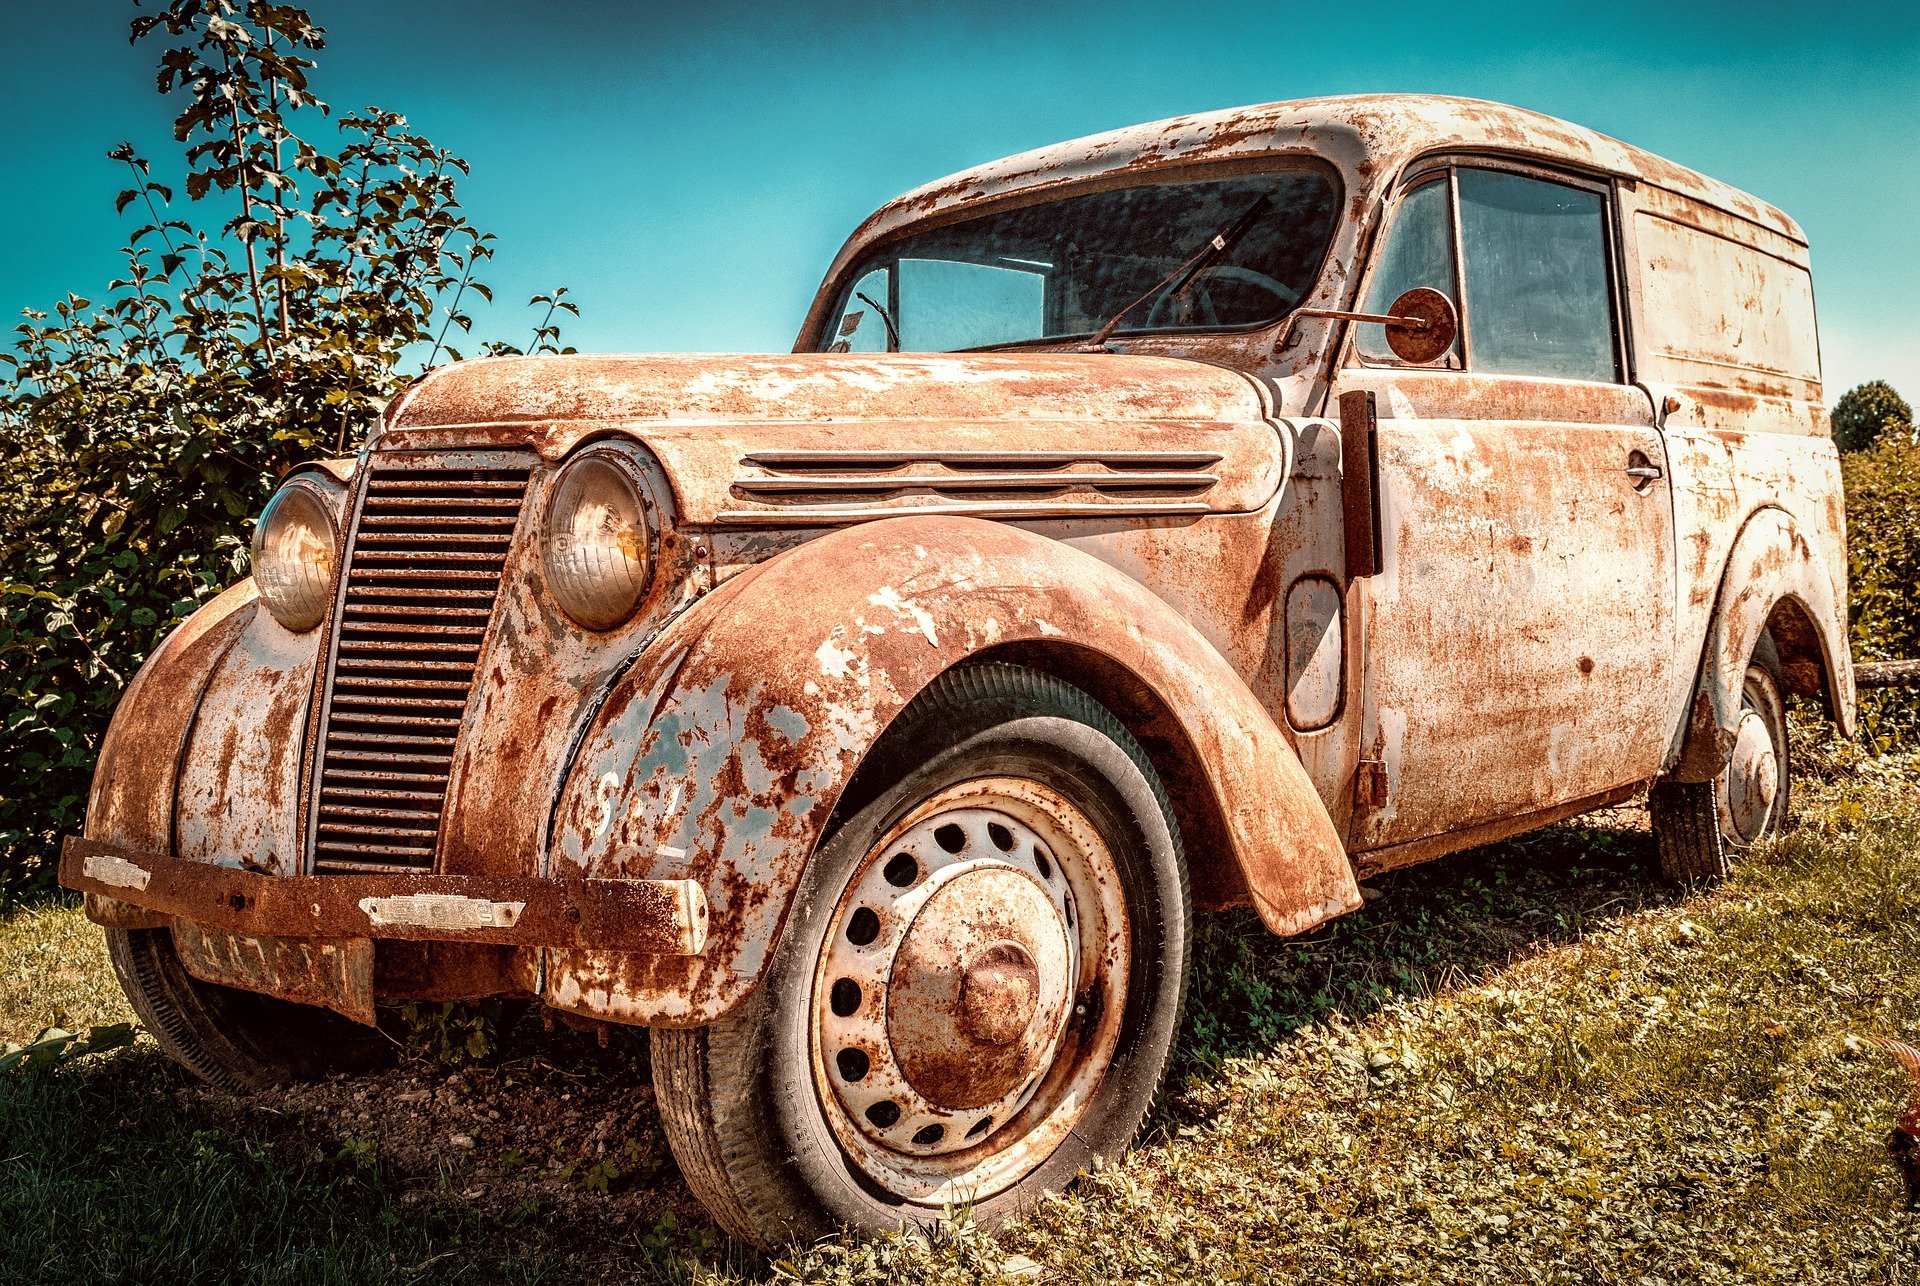
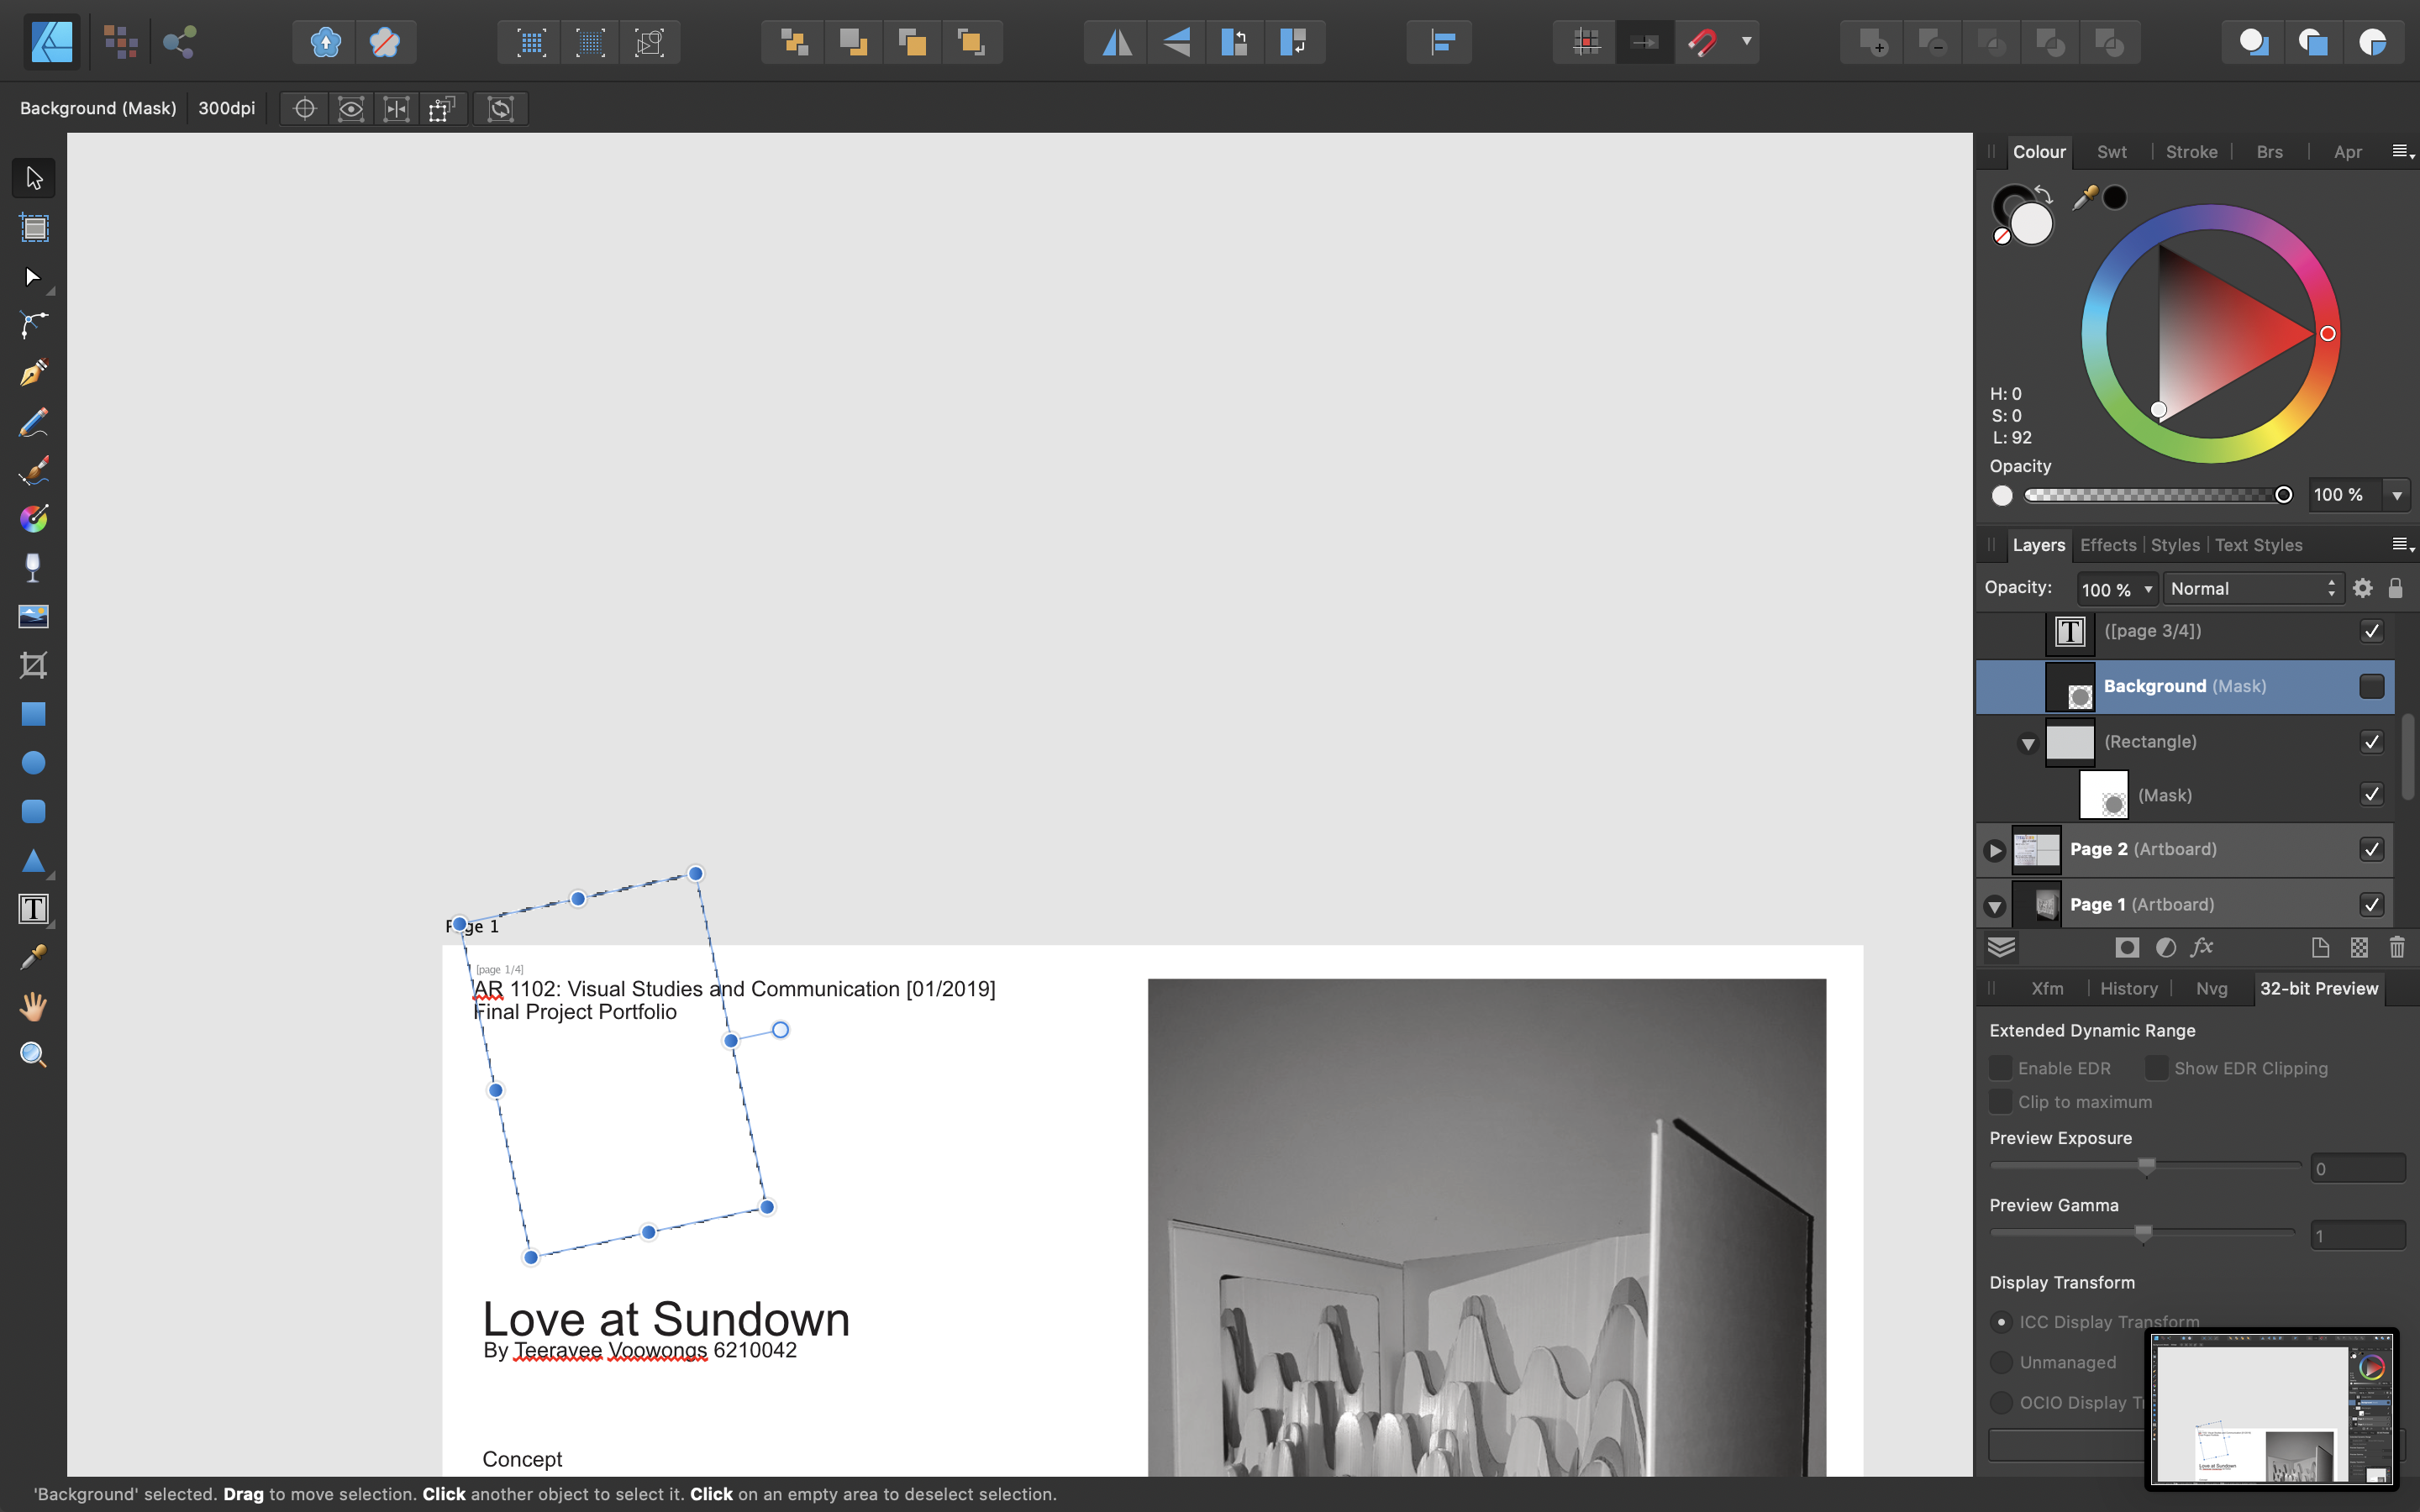
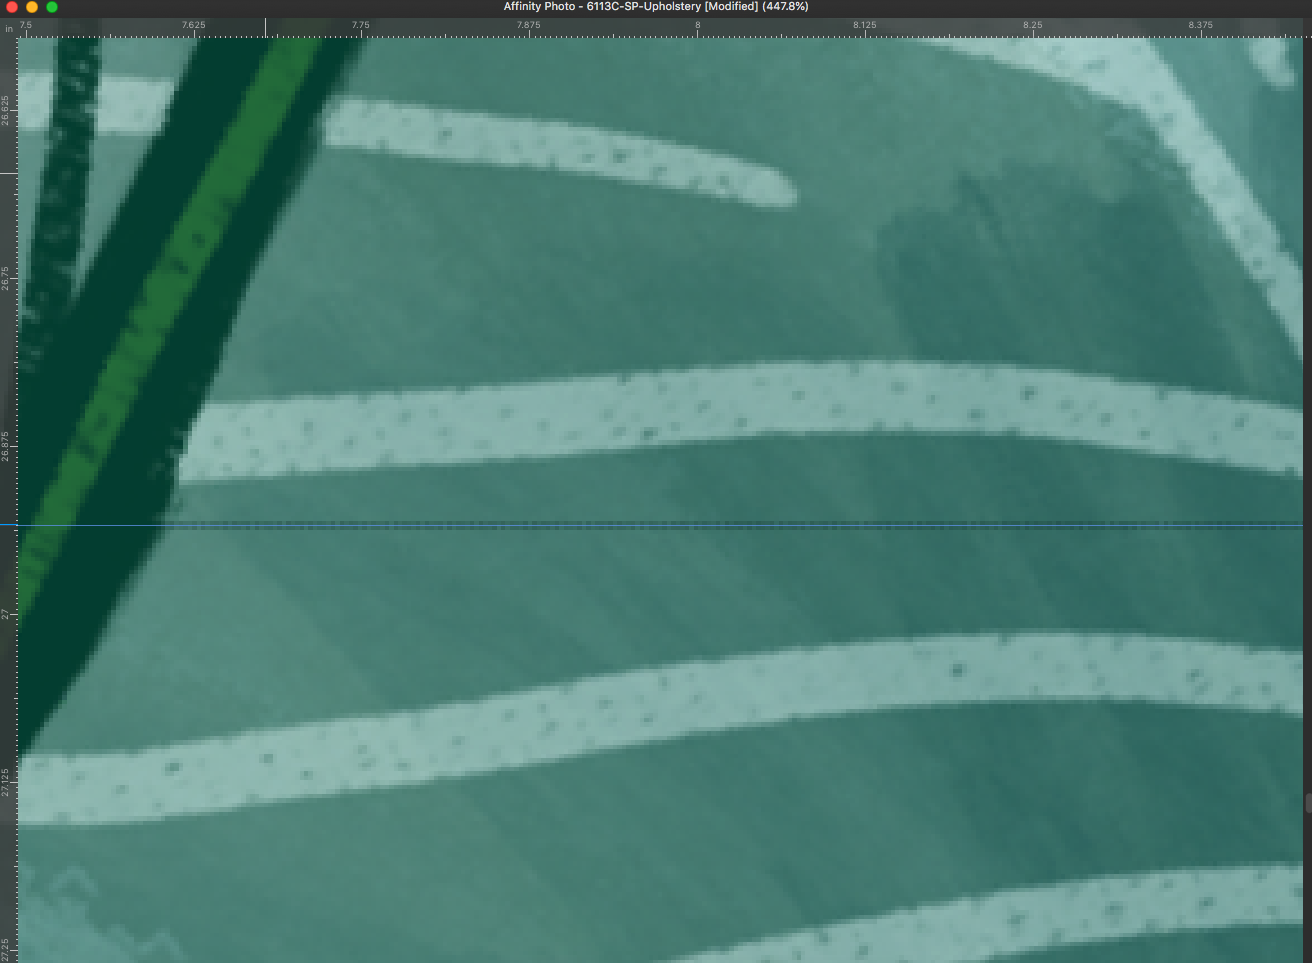
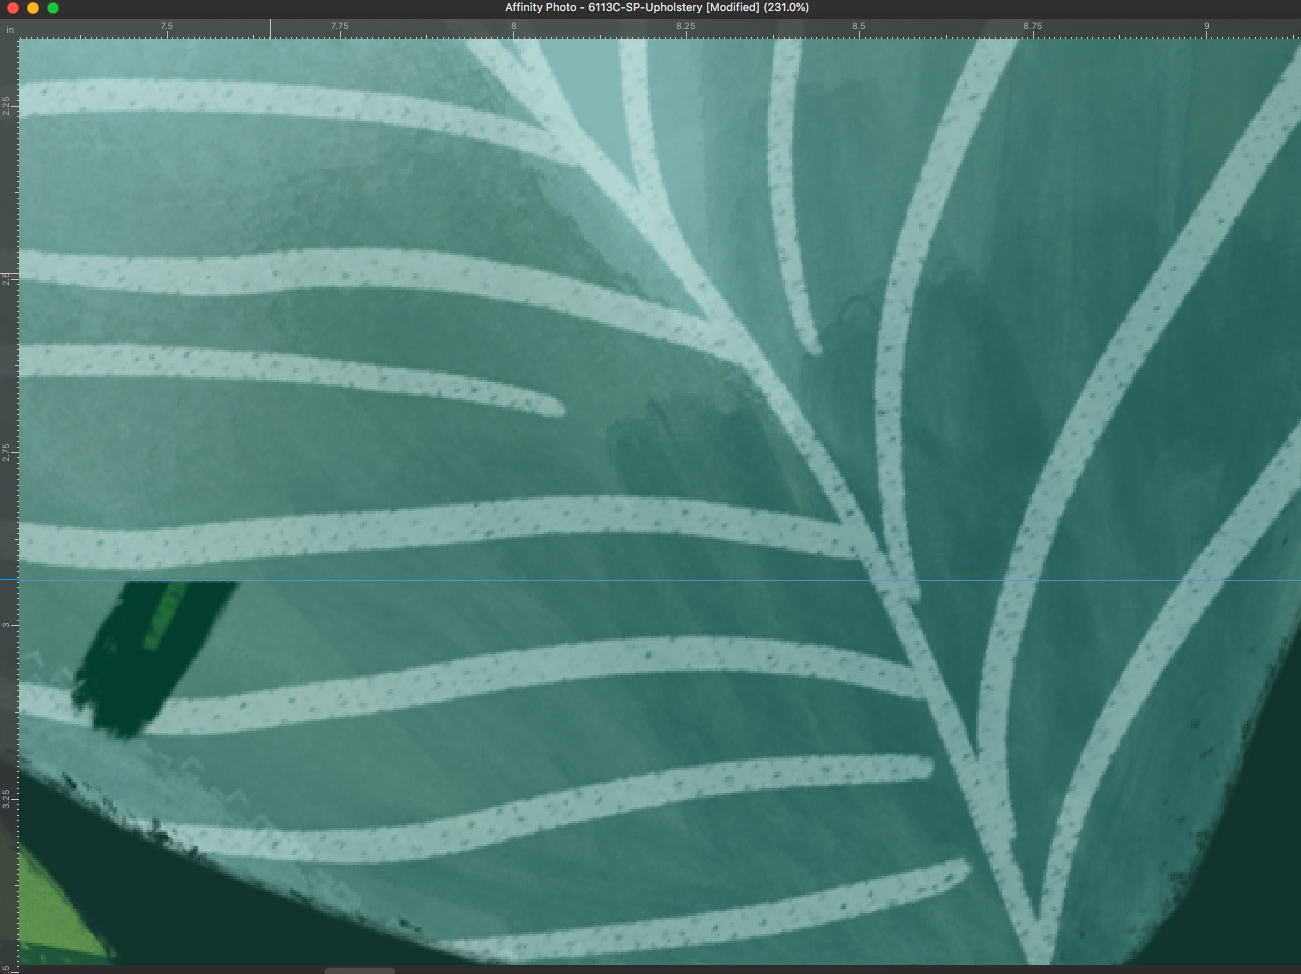
 When I wanted to use photo for image matting, I found some problems. I selected the part of an image that I wanted to keep, then I clicked on the mask button in the layers palette and moved the whole thing around a bit. I found some remnants of the original image on the edge of the image rectangle. I then realized that this was caused by placing the mask background in white and filling only the currently visible area with black. This is a problem not only for photo and Windows platforms, but also for design and the ios platforms. Of course, I can do this by creating a mask with a black background and then making the selection white, but is it really necessary to go to all that trouble? I mean, it should be natural to set the mask background to black by default when doing this, just like photoshop did. Here are some screenshots of the problem.
-
 I'm used to using the "Magnetic Selection Tool" in Photoplus. I can't find it in Affinity Photo. What has it been replaced with?
 -
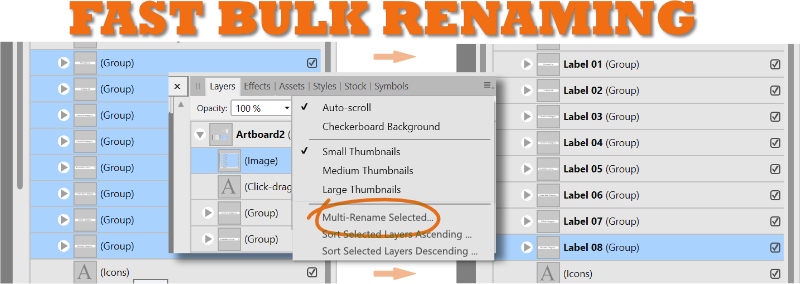
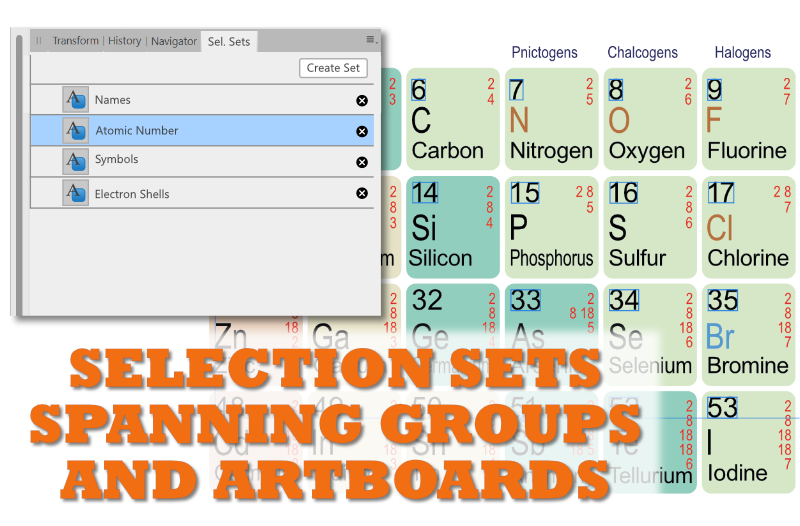
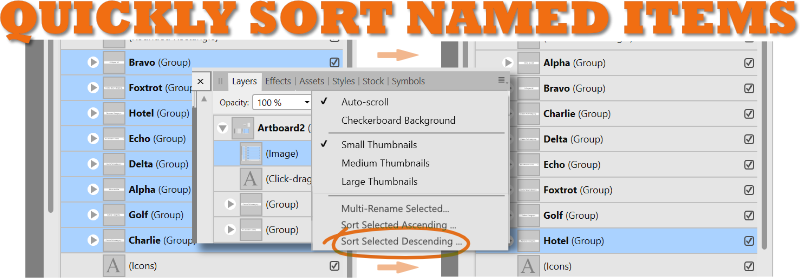
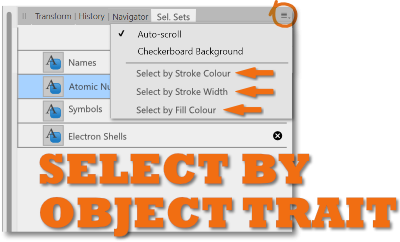
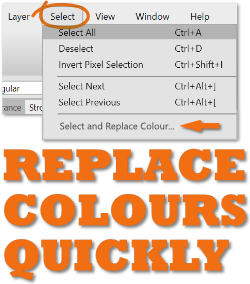
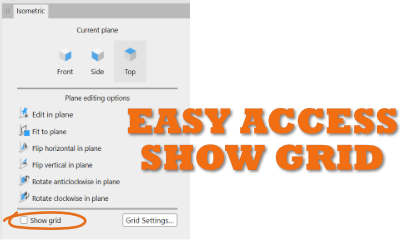
 After using Affinity products professionally for quite some time and observing the development team’s patience and openness to new ideas on the forums, I have a few “unsexy” suggestions to enhancements to take the tedium out of repetitive tasks and keep designers organized. I am truly impressed with Affinity’s products. In gratitude for that, I am inspired to create this Wishlist with some new ideas, and to chime in with some support for the classic, already-suggested ones. Thanks for reading/listening! Most of these suggestions can span all the affinity desktop products some are Designer specific. 1. Organize Assets, Swatches, Brushes, Style Libraries with an edit mode, using an interface like the the "Presets Manager" in Shapes, to allow for re-arranging, renaming, moving between categories. 2. Stoke Pressure Profiles can be saved on an application level. Organize and manage, with an interface like the "Presets Manager" in Shapes. It’s all about efficiency, and not having to reinvent the wheel (stroke!) every time. 3. Layers Panel – Select objects and groups and rename them with a multi-rename tool. Instantly get organized so you and even other people can understand the layer groups and objects in your Affinity document. Interface would allow the user to add a numerical counter as a prefix or suffix when renaming. Handy before using Export Persona to create some basic naming conventions. 4. Sort Layer Groups or artboards in the Layers Panel alphabetically, ascending, descending. Yes, it will change the arrangement order, but properly organized groups can make complex file layers much easier to navigate. Handy for PDF Exporting where the order of pages depends upon the artboard order. 5. Save selection sets that can select items spanning multiple artboards and also within groups. Often similar objects need to be adjusted or moved, but they are on multiple artboards or nested in other functional groups. This can quickly solve that problem. 6. Select by object trait (stroke color, stroke thickness, fill colour). A handy way to quickly select and adjust objects with similar properties. Otherwise selecting these can be a nightmare in complicated projects. 7. Select and replace non global identical colours. Does your client want all the red elements blue? What would they look like in teal or taupe? Play rapidly to your heart’s content. 8. Search Assets Panel ACROSS BOTH categories and subcategories, results displayed as filtered choices. Do you have multiple categories/libraries and need to find the right icon fast? This can save you time. Currently a search has to be made within each asset category, which can take some time if you have multiple asset categories. 9. Handy Show Grid checkbox in Isometric Studio Panel. True, you can use a keyboard shortcut, but it would be nice if this button was upfront. Handy when you are working in Isometric view you have to turn on and off the grid to see the artwork uncluttered. Chances are you have the panel open to constantly switch planes anyways… I hope this helps to add votes for the unsexy underdog features. 😊
-
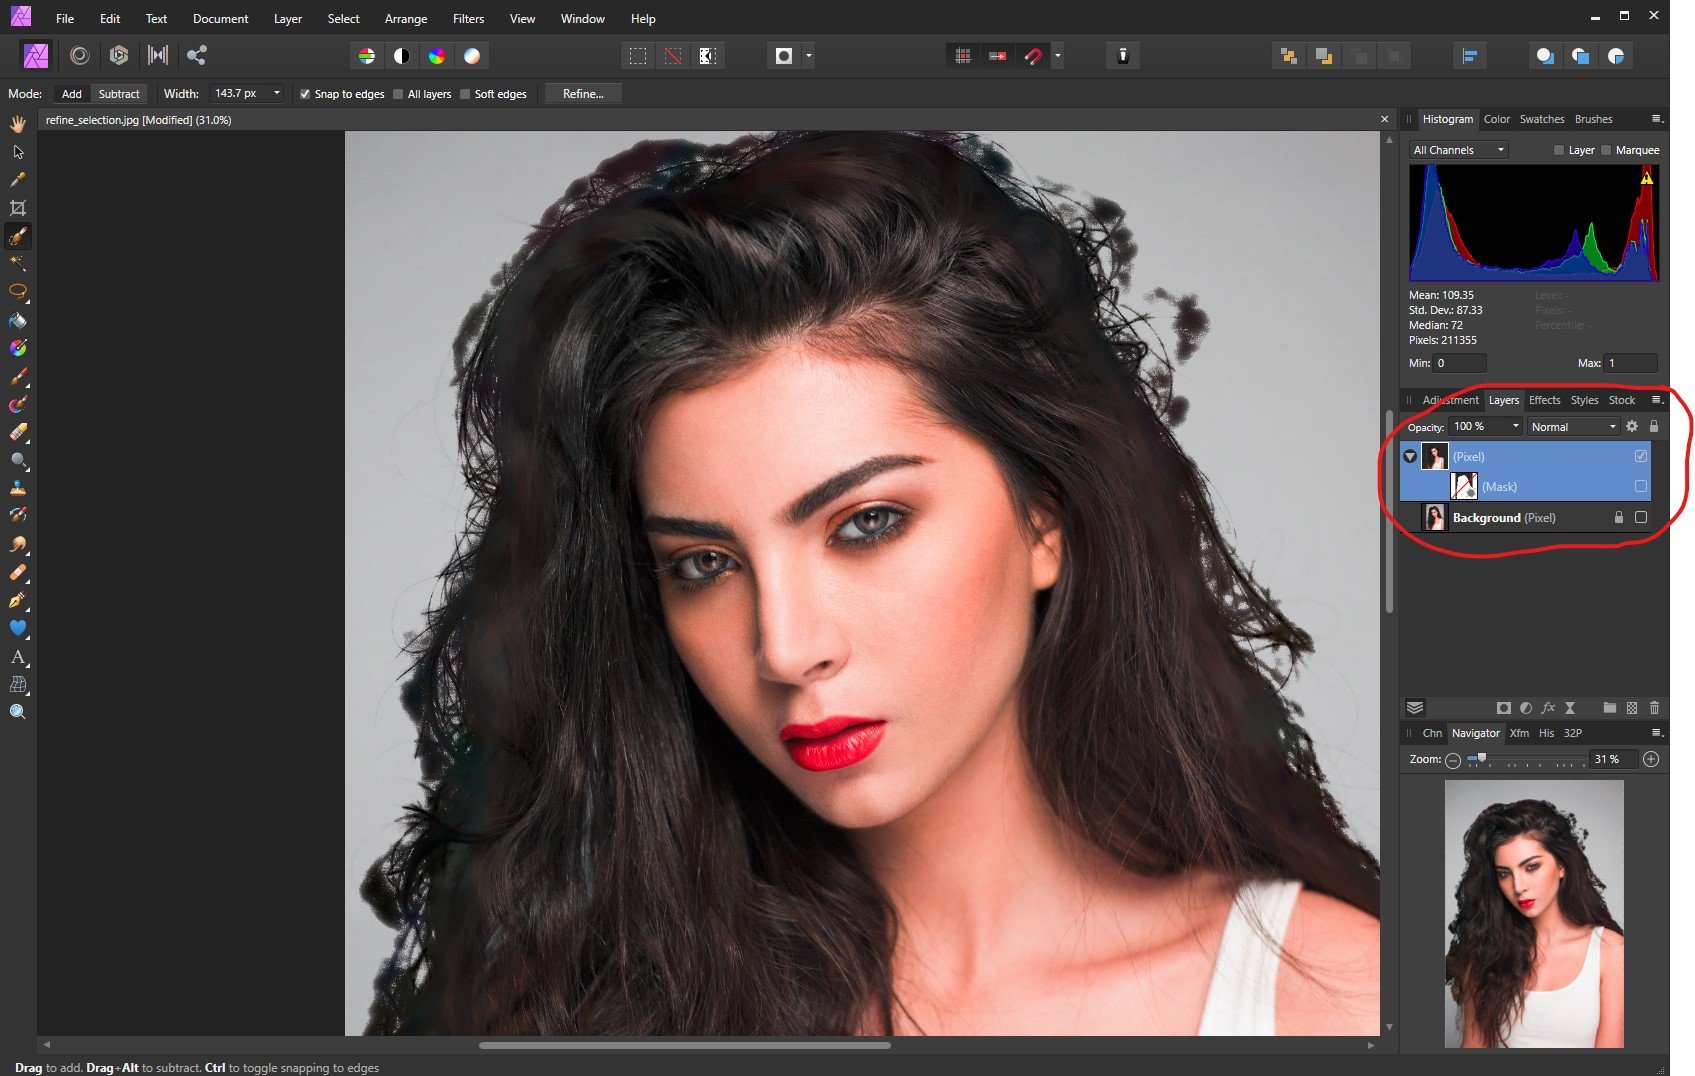
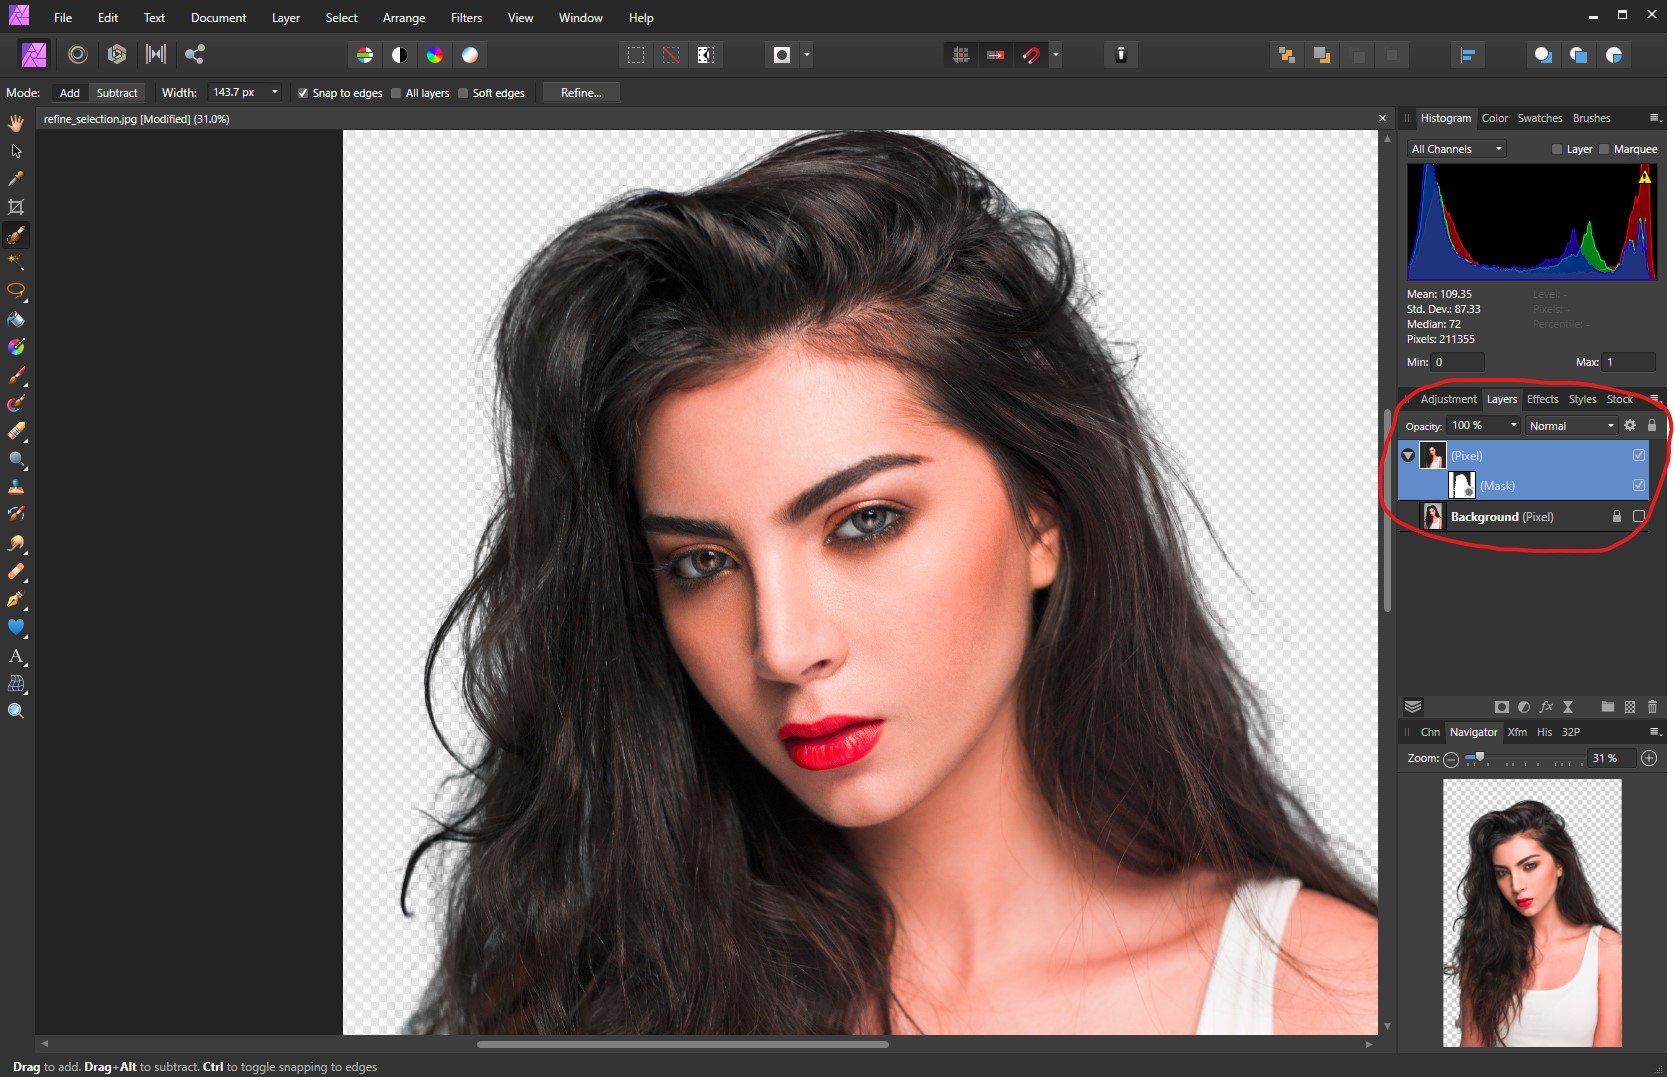
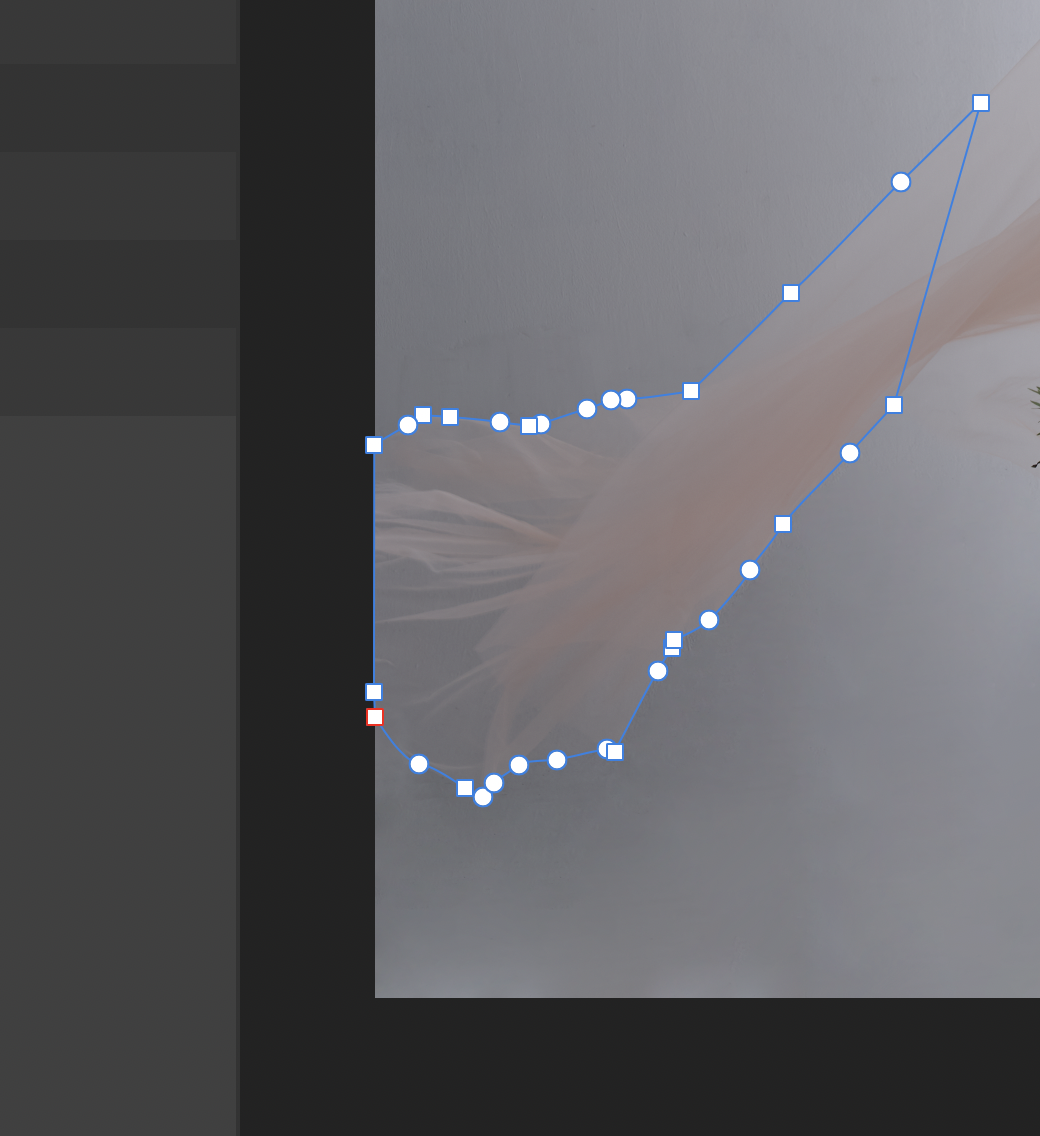
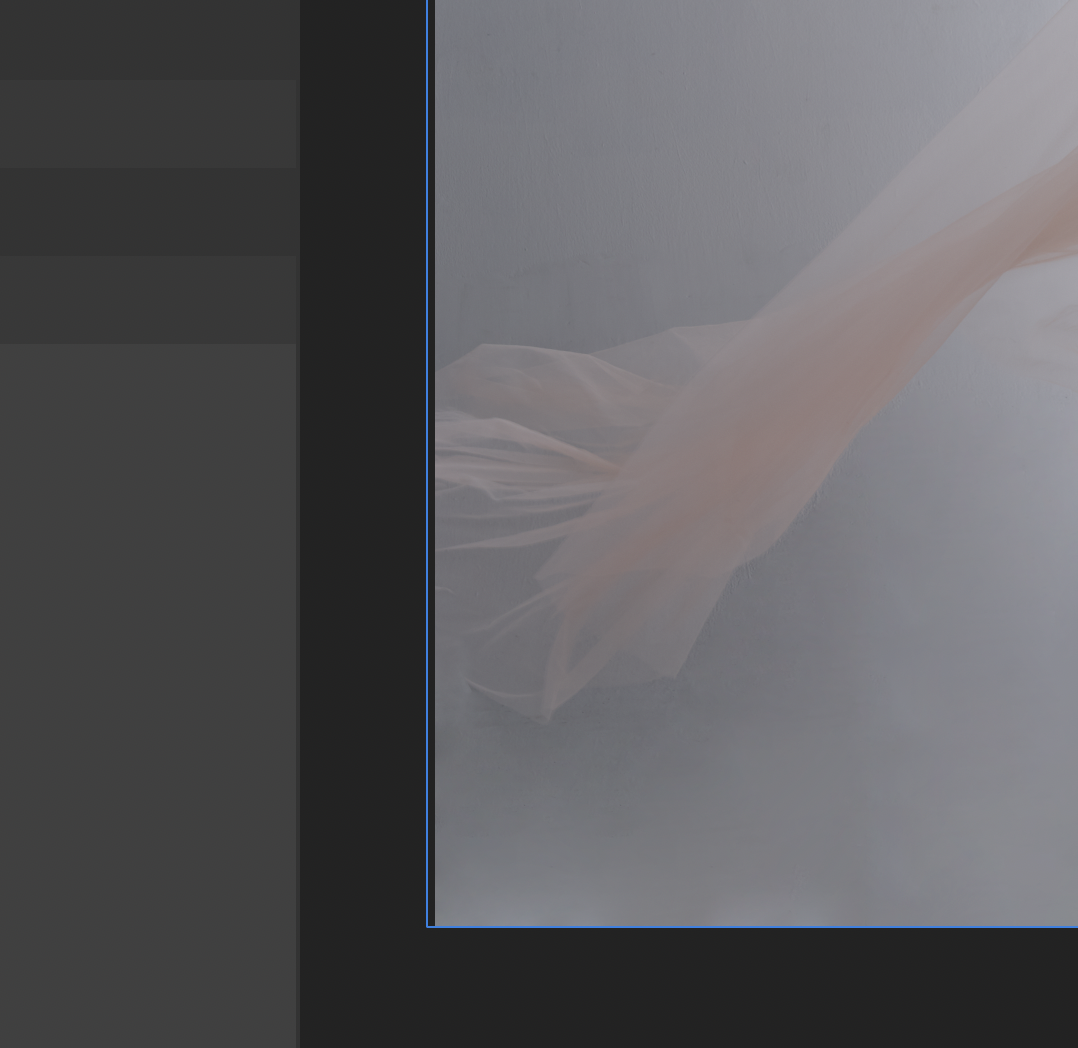
 Hi folks, I am doing the exercises in the Affinity Photo Workbook and am doing the selection exercise. When i selected the girl, and did the refine selection and then copy to new layer with mask, everything seems fine, until I turn off the mask. When I do there are black splotches all around her hair where i refined the selection. See attached screen grabs. Thanks!
-
 Looking to find the "create selection from luminance" (alt-ctrl click on layer thumbnail) on the iPad version of Photo. Any clues ?
 -
 Somewhere, I've seen a way to select a colour from another program for use withing Affinity Photo, for example a swatch held on my desktop. Can anyone help with how this can be done?
 -
 When using the tablet in windows ink mode, I cannot complete the selection with a polygonal lasso. Double-clicking with the pen does not work to complete the selection. Also, I cannot complete the selection by tapping the pen at the beginning of the selection. The bug is repeated on the computer and laptop. Also, in windows ink mode, I can’t use the right mouse button configured on the extra button in pen on the studio panels. I have to use a long press of the pen. It's a long time and very often this does not work the first time. This is very annoying( ScreenRecorderProject1.mp4
 -
Hi, In the whole 1.8.2 Affinity collection I can't add or remove object to/from already selected objects by shift-dragging the selection marquee. The preference option "Select object when intersects…" doesn't make change. Peter
-
 I usually use paint.net for editing and am used to be able to refine a selection by dragging handles on the selection edge. I can't find a way to do this in AP. The only thing I see is the option to use the column selection, which is rather cumbersome. Is there something I overlooked or is that way of selecting not possible? Thanks!
 -
I've bee experiencing two recurring issues/bugs using your suite of programs for quite some time now. 1) selecting and copying all layers in a file cause the program to close immediately 2) selecting all layers and clicking on a color (to change the color of the selection) makes the program freeze/crash It happens with all programs (Photo, Designer, Publisher), on two different PCs I own (a desktop and a notebook, both running Windows 10, latest version). All programs are up to date (1.8.2.620) now, but I've been experiencing these issues since at least september 2019. Attached is a file where you should easily (I hope) replicate both issues. If you need any additional information (or maybe a video of what happens?), I will be glad to help. Thank you for your support, Davide BIT_pannello_4-5.afdesign
-
 When I use layers -> merge selection, the layer on top is marge as if it was under ... (ctrl + Maj + E).
 -
 It will be an awesome feature if you put a "Selection method according to attribute" which means when we need to Select Same color (Fill or Stroke), same opacity, or same appearance. It is so much helpful after tracing an image to select a range of colors. When working on a flyer or packaging design for production selecting similar color or select strokes that have same thickness or fill color to change together all those needs select with attribute option. Consider a special tool for those selection purpose with a bunch of option to rectify and narrowing selection range or Add all those features to the Move/ Selection tool.
-
- 2
-

-
- affinity designer
- selection
- (and 8 more)
-
 Hi I cannot seem to select this object - not sure why. No lock ? This is the latest beta 180555. I will attache file. Is there something I am missing? It has happened before on another project. video affinityproblem.afdesign
-
 I got a problem I got a photo and make a Selection on then I go to the other panel to duplicate to a new layer but doesn't work, sometimes duplicate but the hole photo even when the Selection is there can someone help me IMG_0014.MP4
 -
 I’m sure I’m doing something obviously wrong but, despite a number of searches and videos, I just don’t seem to be able to find the answer. Yesterday, I was working on a photo of a home and improving the color of the grass. After applying the improvement and moving on, I realized I missed a piece of the grass and wanted to add to the original selection. Here’s what I did so far: - Selected the area using the selection tool - Added an adjustment layer for HSL and applied adjustments – adjustments were only applied to the selected area - Added an adjustment layer for contrast/brightness and applied adjustments – adjustments were only applied to the selected area - Moved on to other functions and then realized I missed a bit in the original selection Now, there doesn’t seem to be a way to expand the selection area and add it to the areas being adjusted by the HSL and contrast/brightness. I can call up the original selection, and when I try to add it appears to show a newly selected area, but the adjustment isn’t being applied. Sorry if this is obvious but I’m obviously missing something here.
 -
 Hi. All I'm trying to do is save a rectangular selection (made with marquee too) to a file. However when I follow the instructions, repeated below in blue, the only file type that available is "afselection". I don't know what that is, but all I want is to save it as a JPG or PNG file. Please advise. Thanks. To save a selection to a file: With a pixel selection in place, from the Select menu, select Save Selection. Adjust the dialog settings as required. Click Save.
 -
 Hello! Please help! I’m trying to save as a jpg a selection with a transparent background. I want the object alone, without the black or white background. I did that once, but I’m unable to repeat the process. Frustrating! Your help requested, Please...
 -
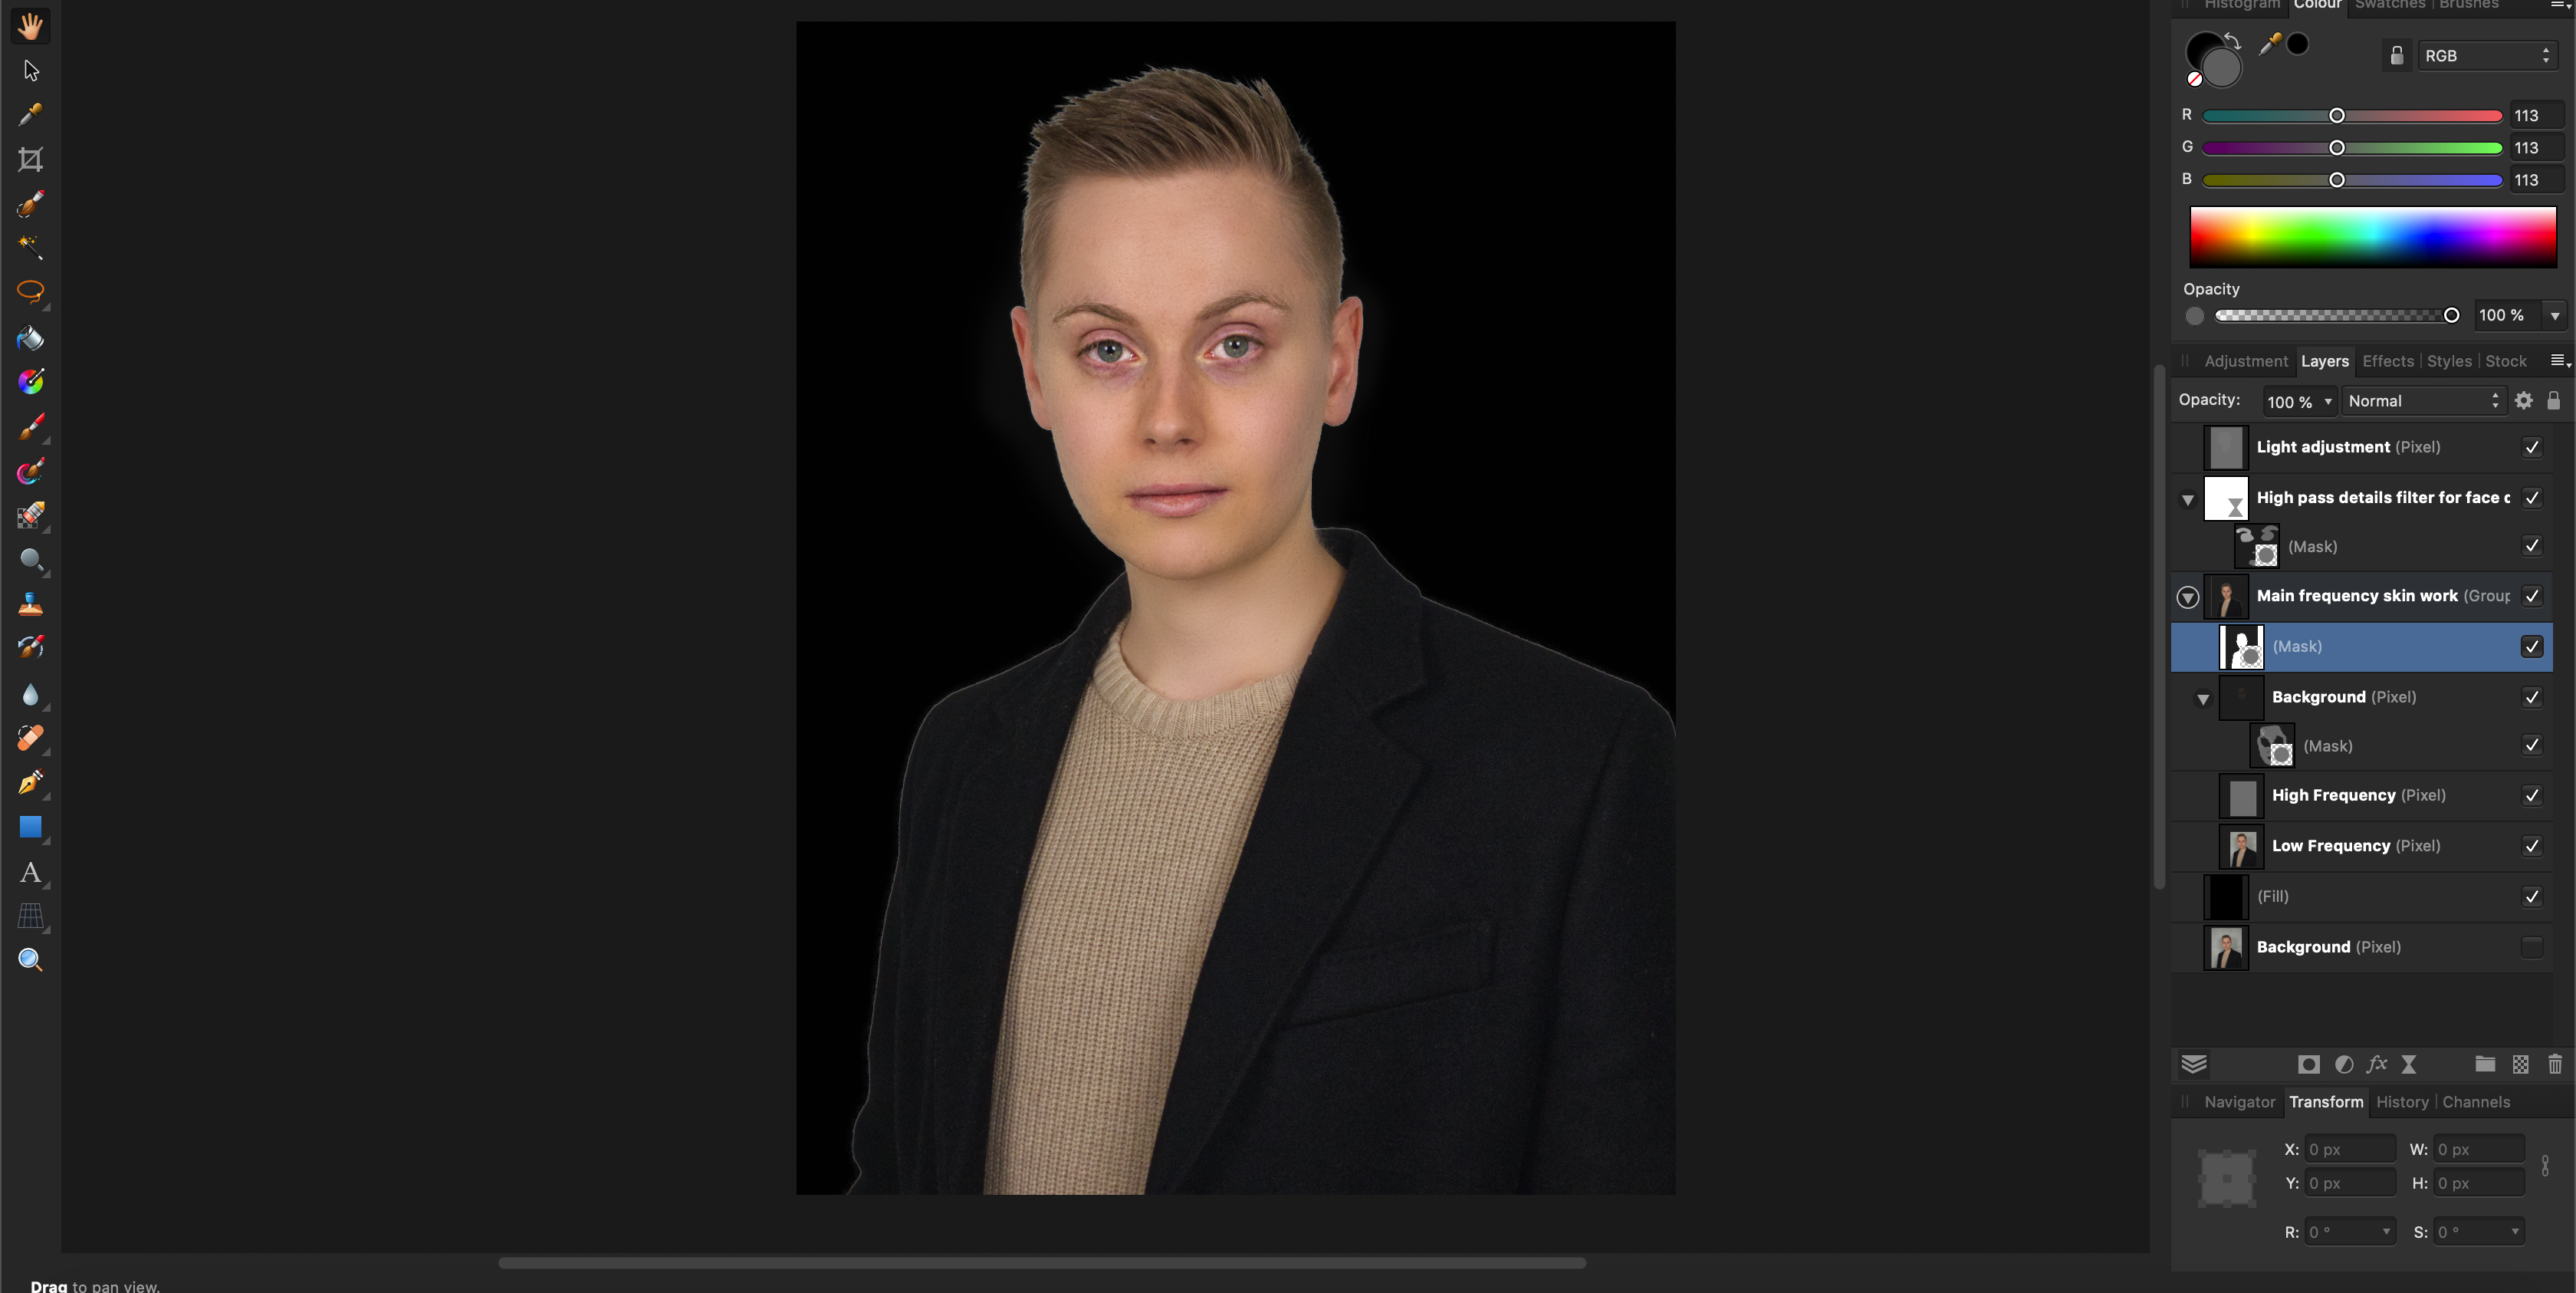
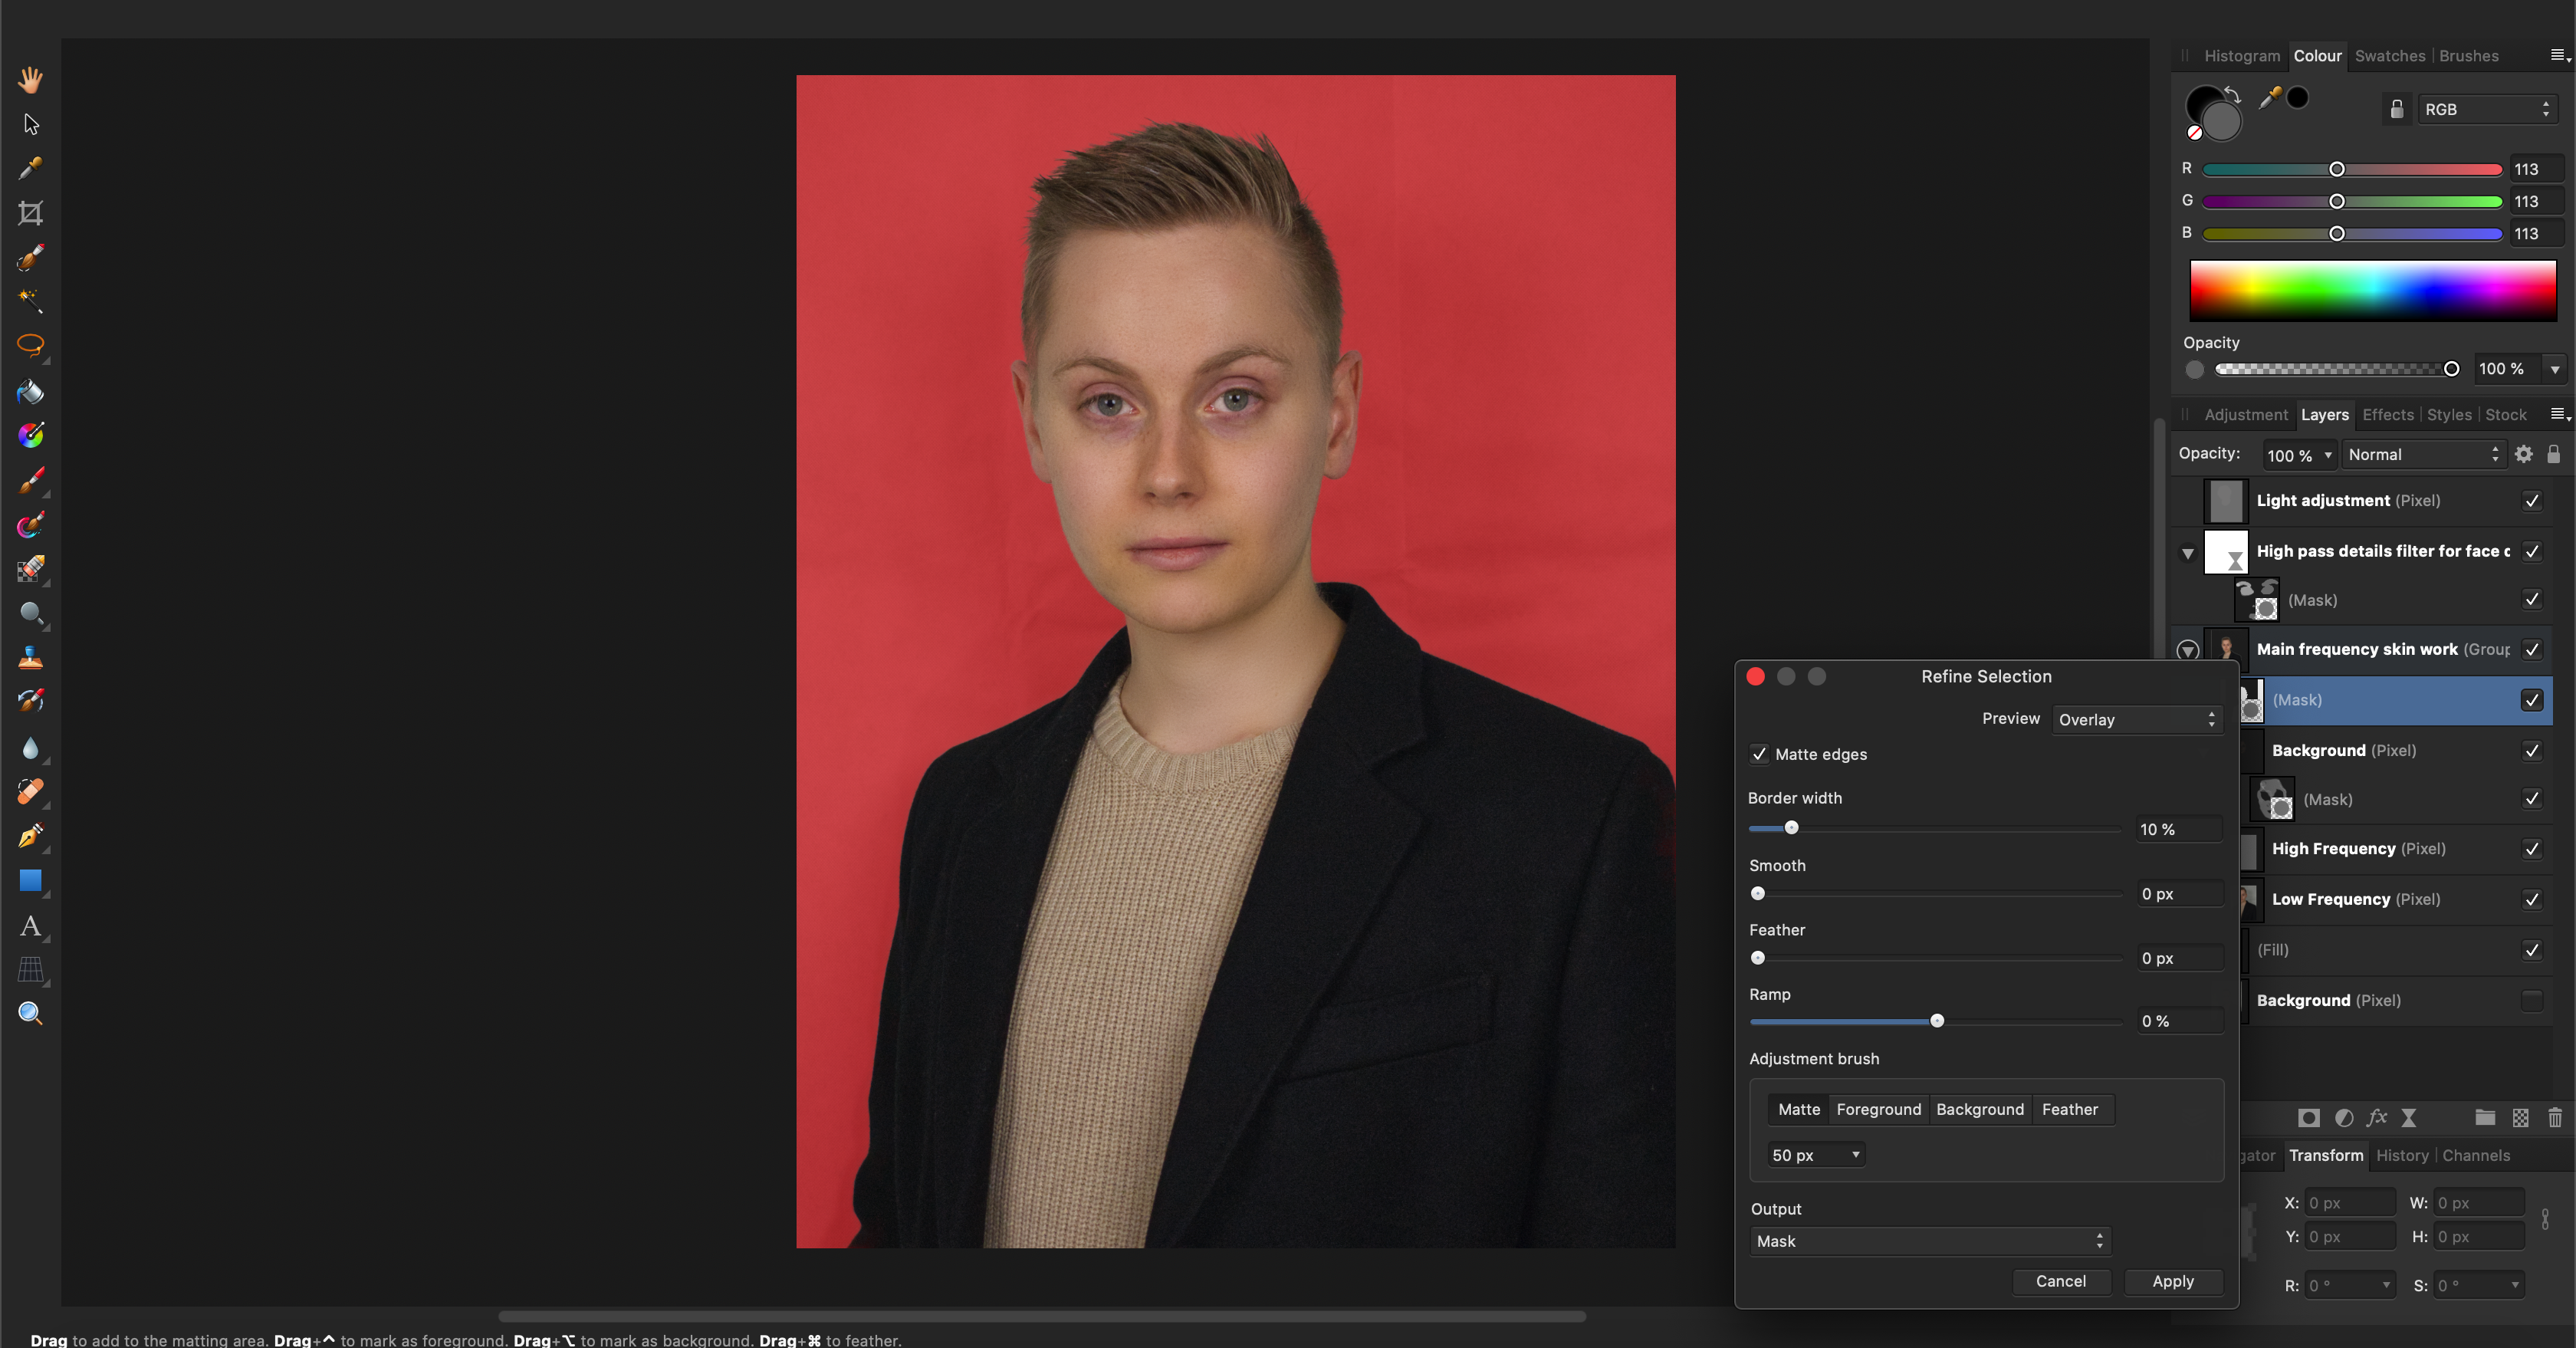
 Hi! I am having a problem while trying to separate (remove) the background from the photo. After masking the subject and replacing a transparent (black in masking) background with a fill layer my selection (in this case me) seems to have a white glowing outline. In the picture below you can see it around the black coat and it is really visible when putting a black solid fill under the masked selection. You can see that in the refine section window the "glowing outline" is not visible, only once the mask is applied. Do you know how to fix/remove this issue? I haven't had it with my previous photos, it only started like 2-3 days ago. The glowing outline around me doesn't look good and therefore I would like to get rid of it. Thank you in advance for the help :) P.S. see the attached photos in full resolution to see the glowing outline problem.
-
 I cannot delete selection on my work space ,helpppp....
-
 When I convert my closed path into selection by press selection icon and it shows selected whole pic with blue line and pixel selection invisible but still masked a closed area. I tried to do another path and worked as normal. What happened to the previous one? I tried repetitively still unable to address.
-
I often create repeating patterns which (among other things) require dragging a selection of motif from the top to the bottom of square in order to create the repeat. I'll select the portion to be copied and moved (just below a guide line), create a new layer (cmd+J), and drag this below my other guide at the bottom. But when I do this, the edge of the motif has a shadow, as though the selection didn't fully "grab" the motif. Feathering and anti-aliasing is turned off. This seems like a huge bug (unless I'm doing something wrong, but then that wouldn't be intuitive).
-
 Hi guys, Is there any way to automatically create a vector shape based on a selection I have made inside Affinity designer? Thanks, Mario
 -
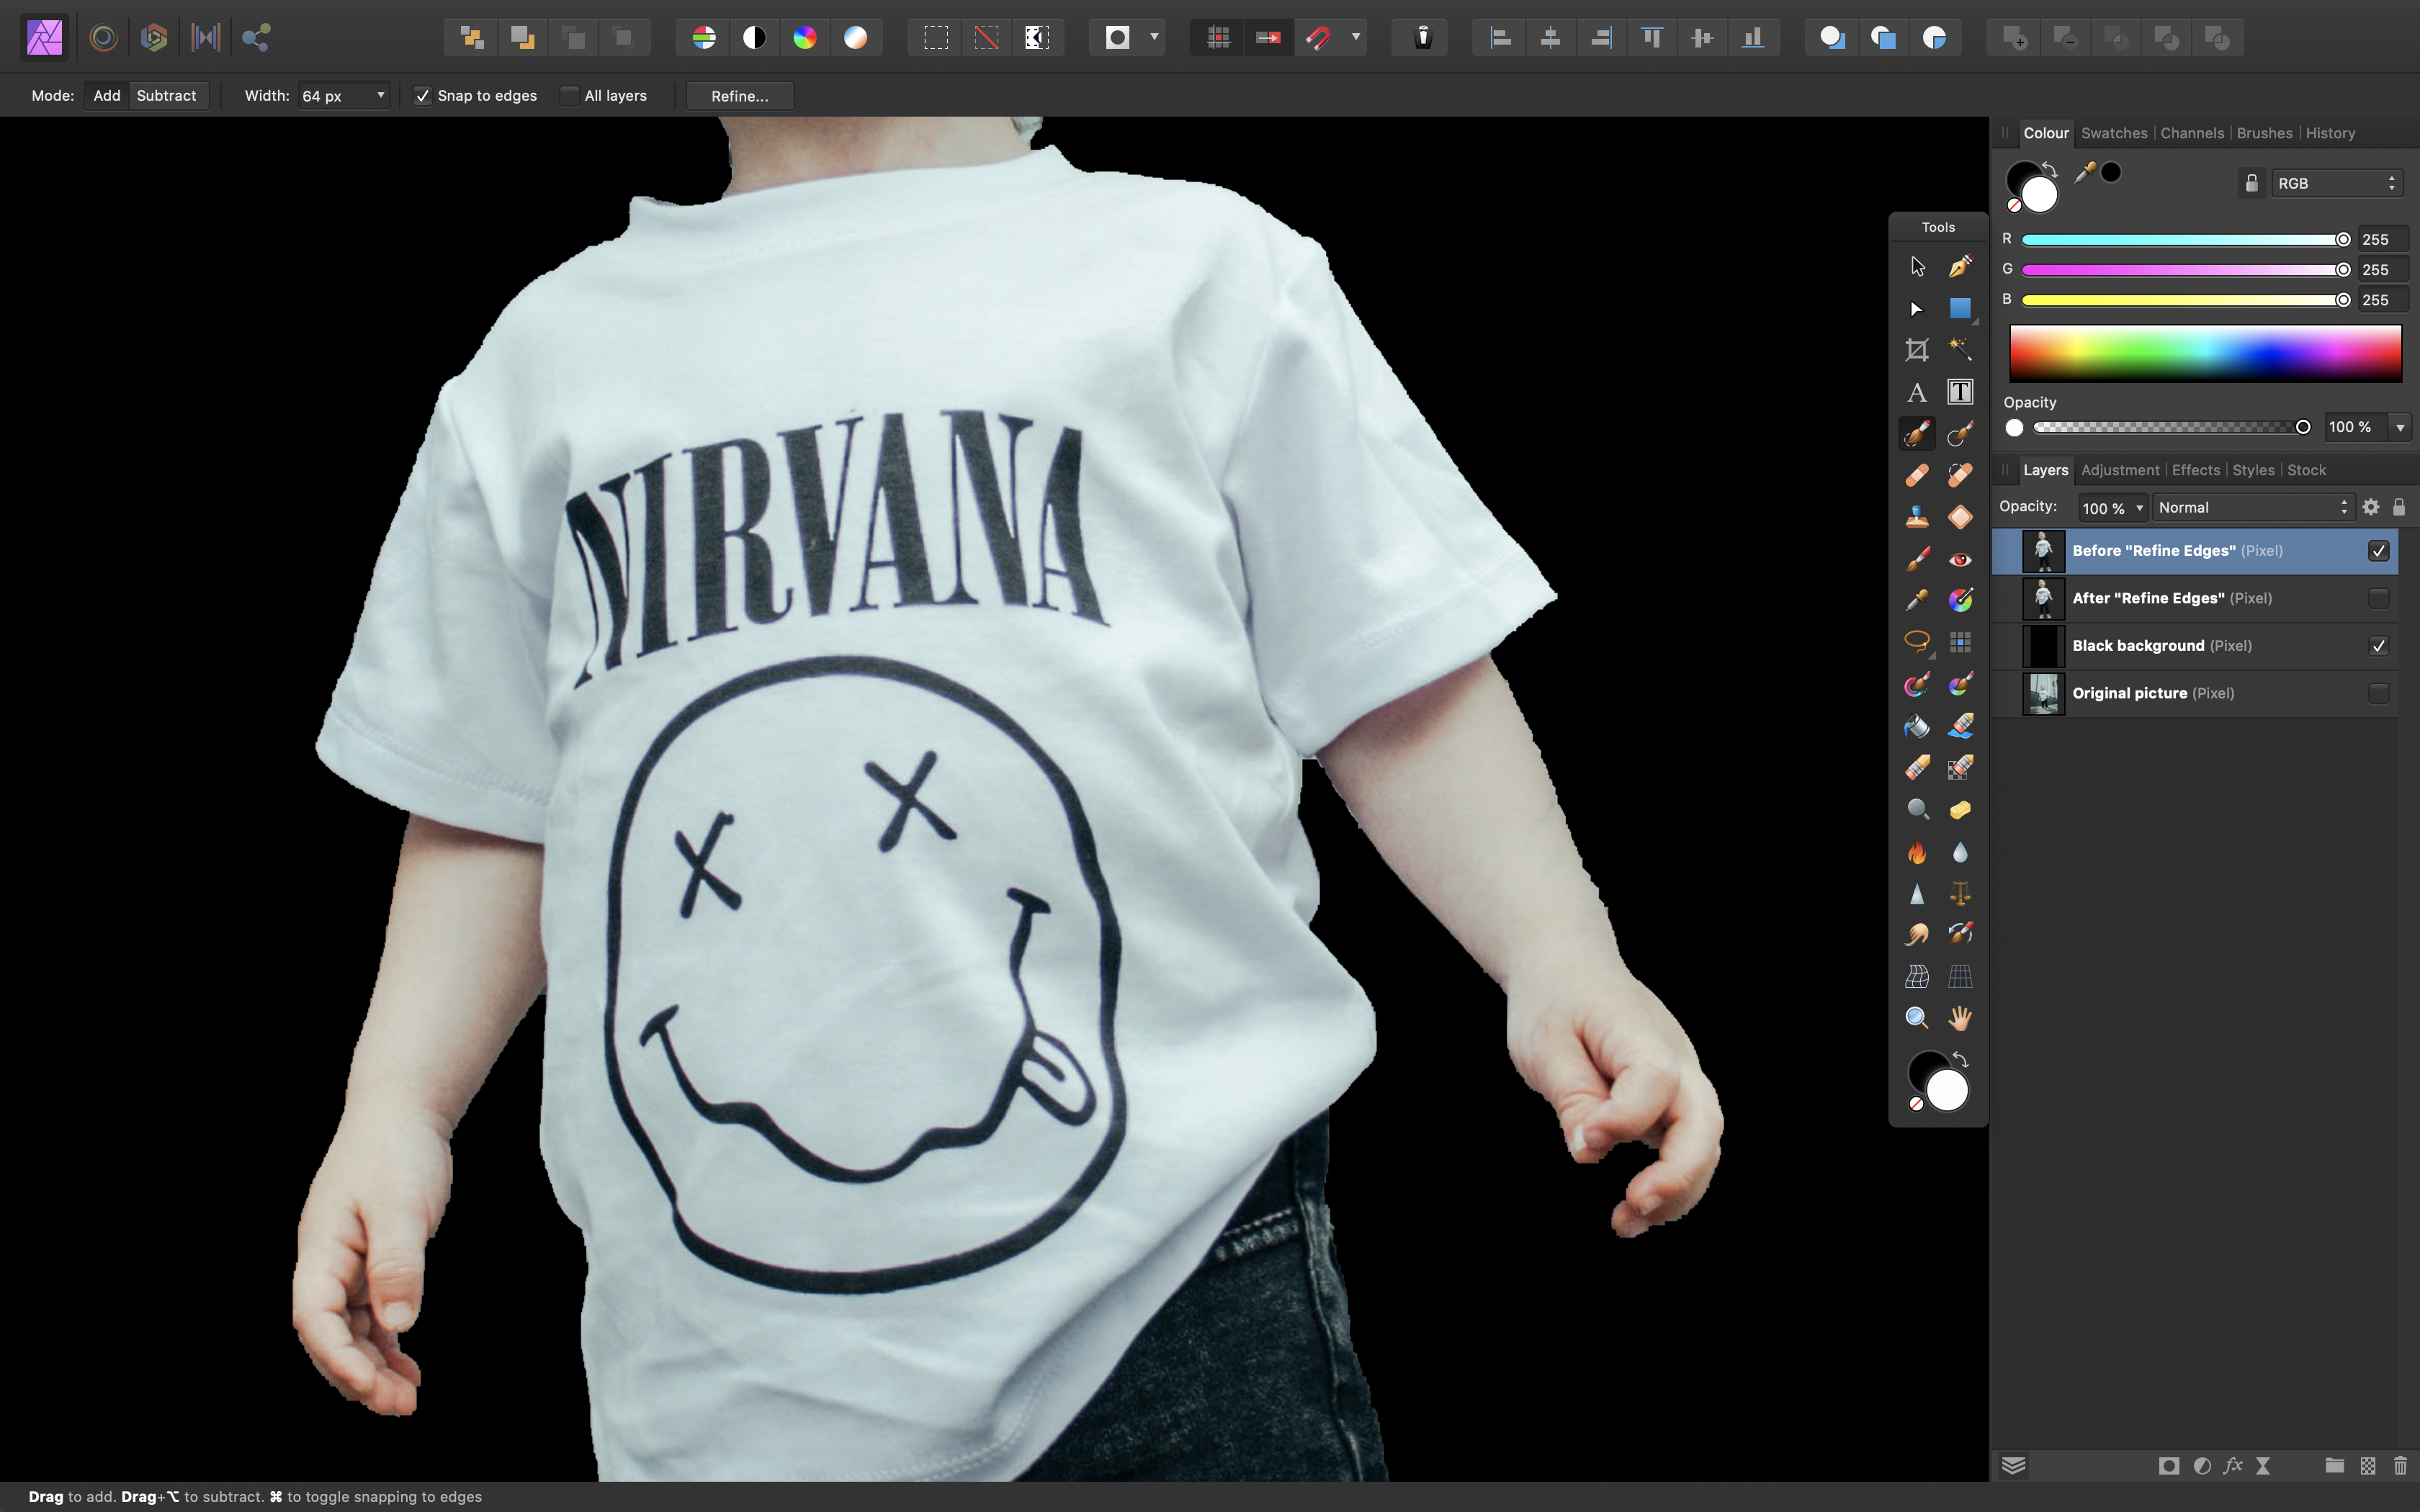
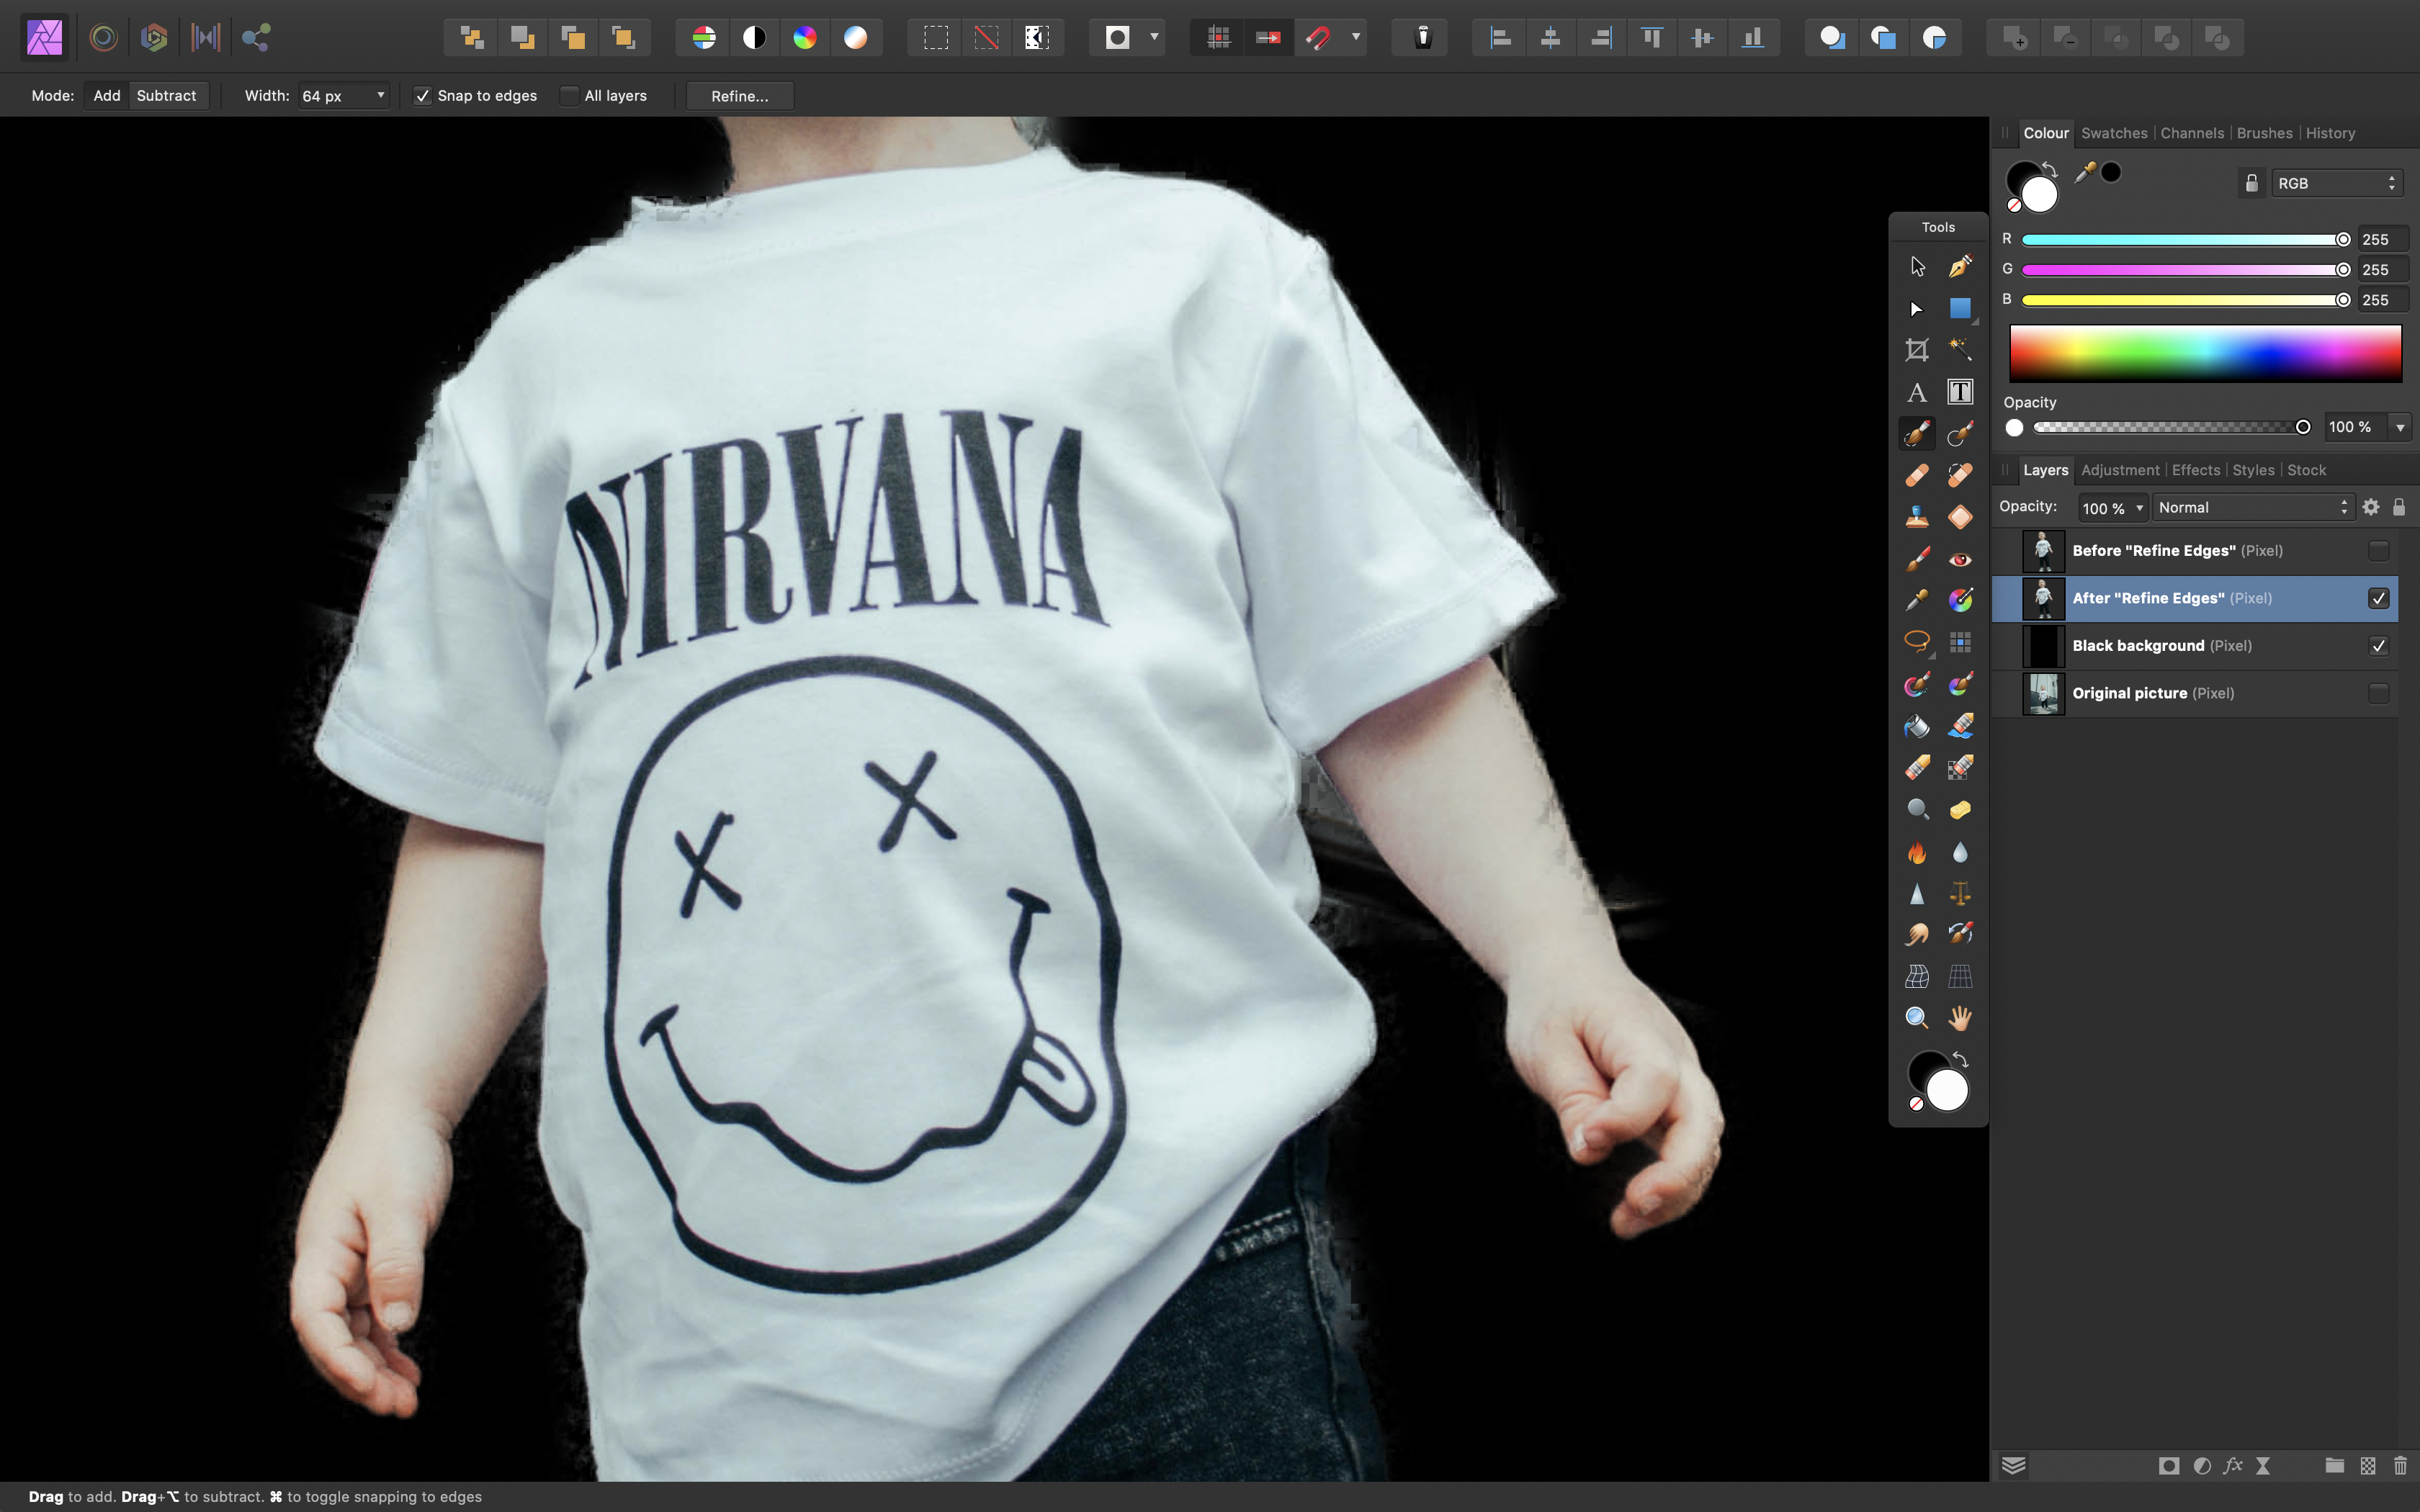
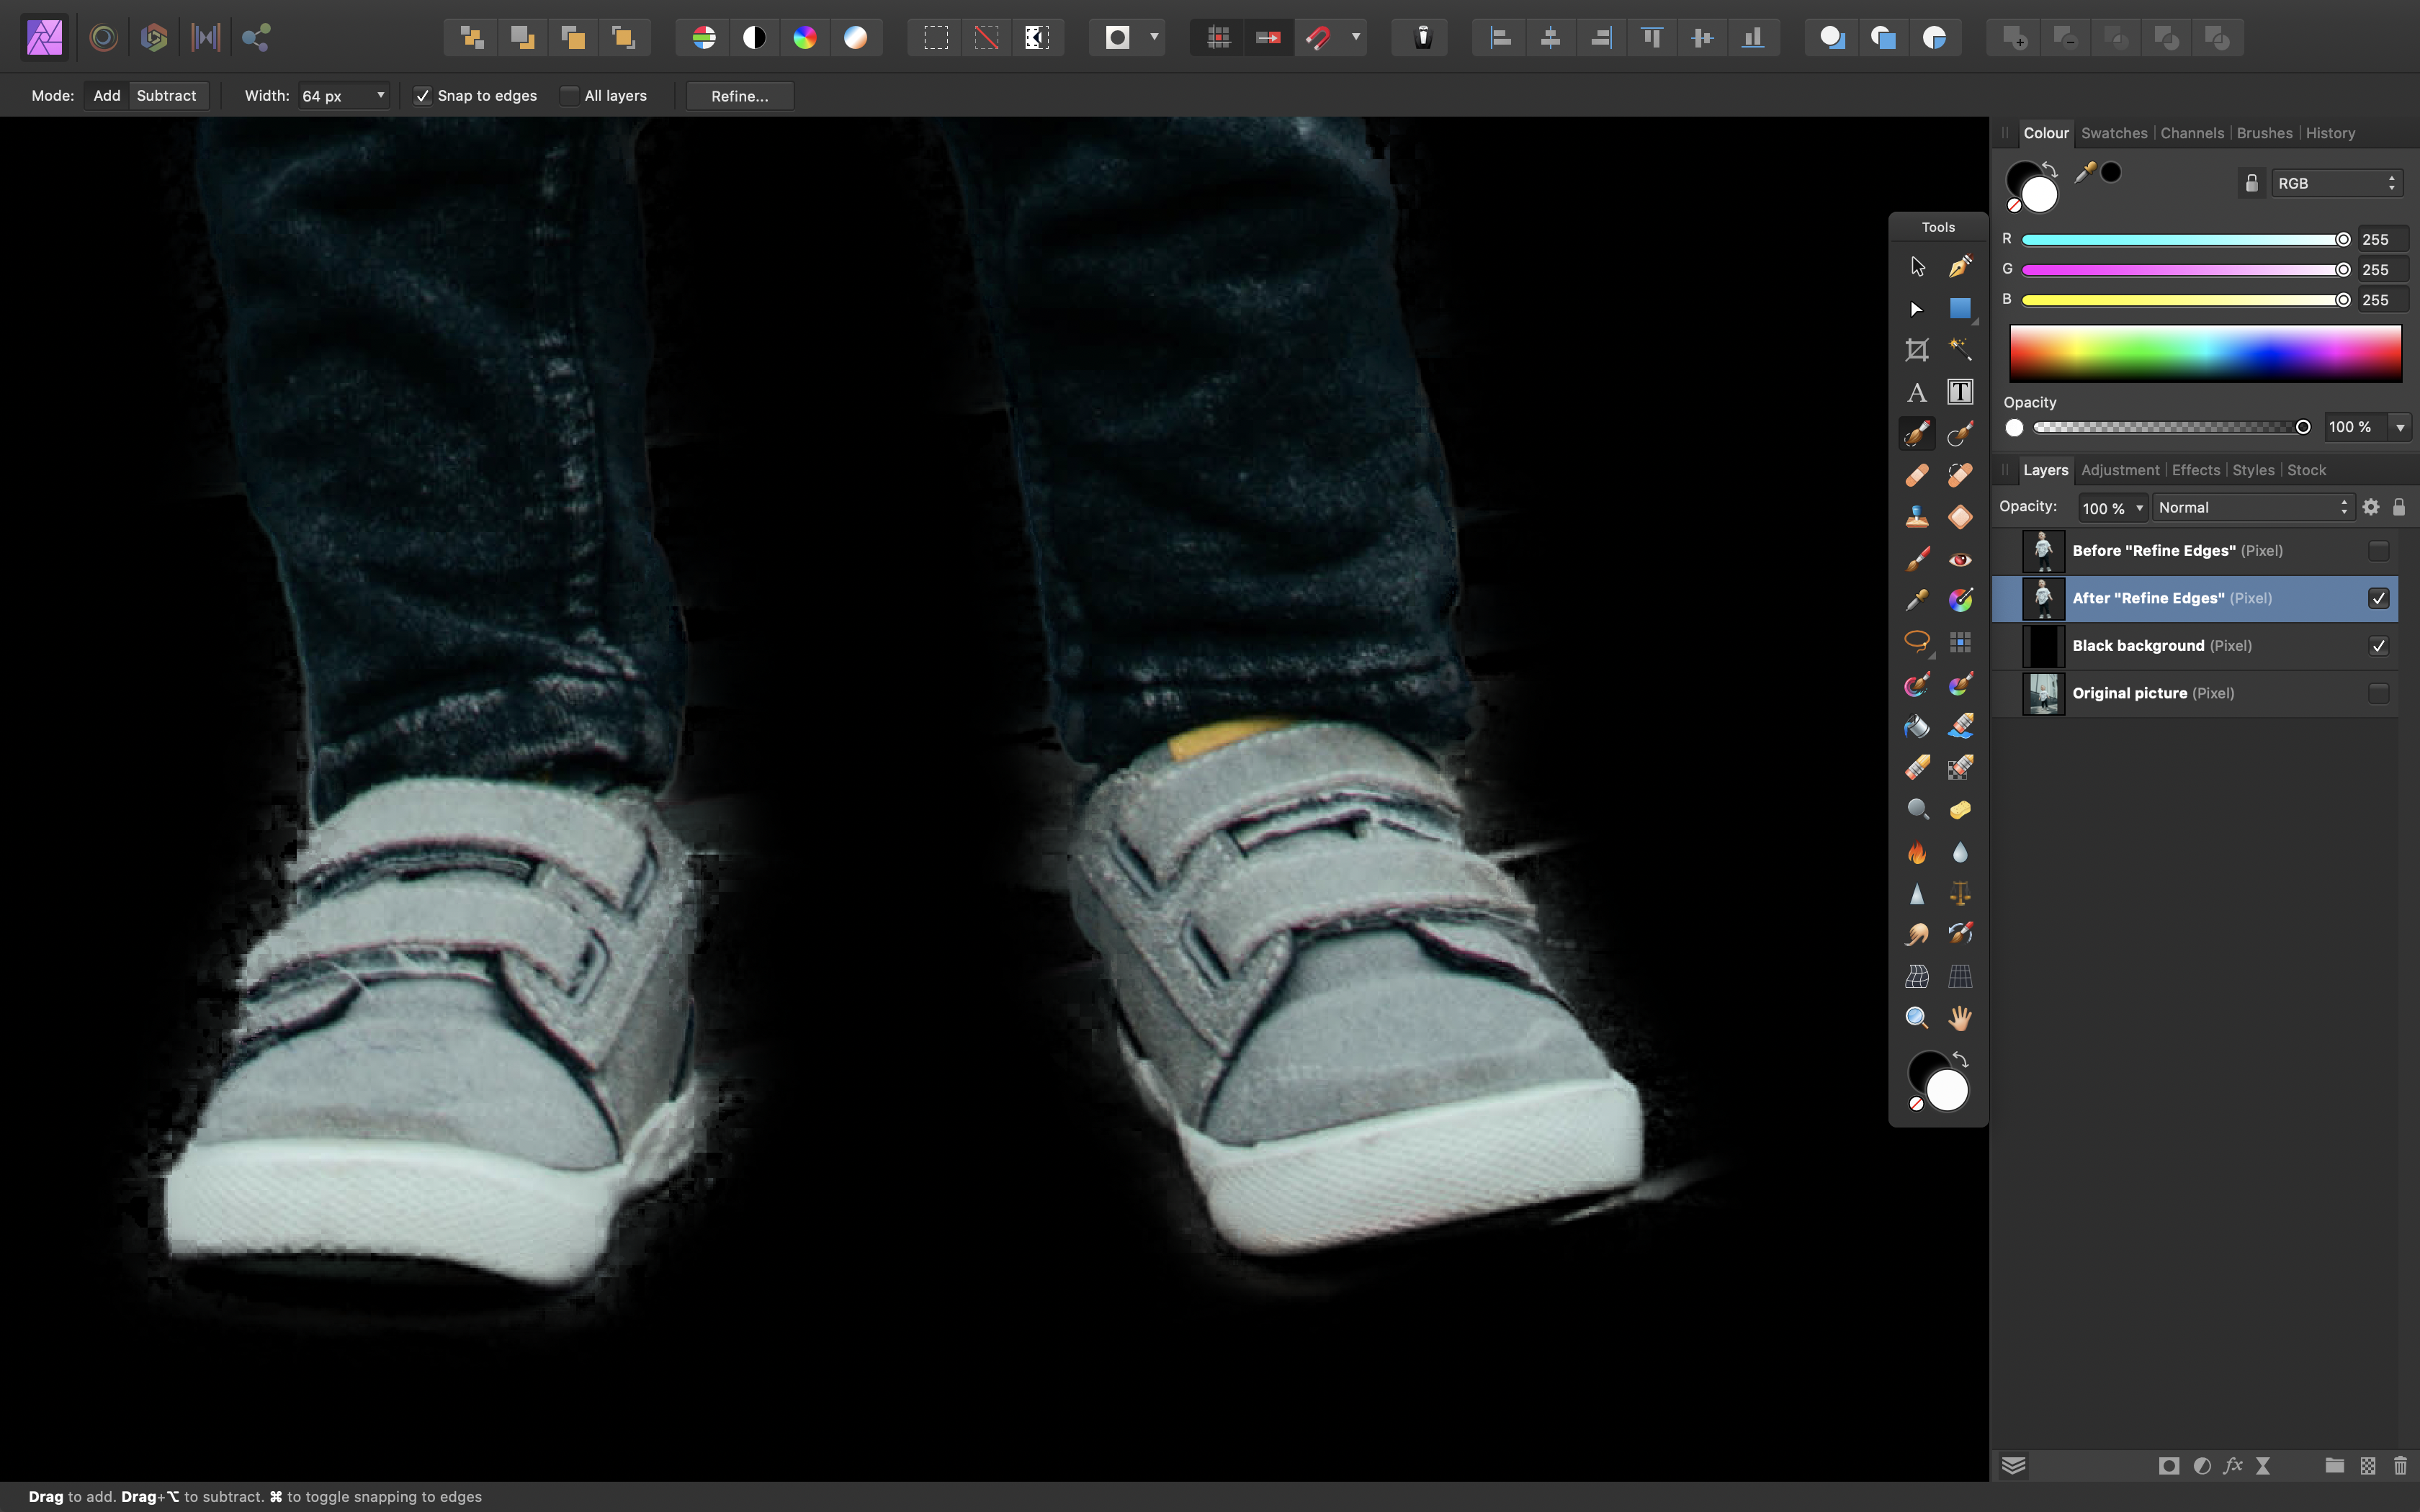
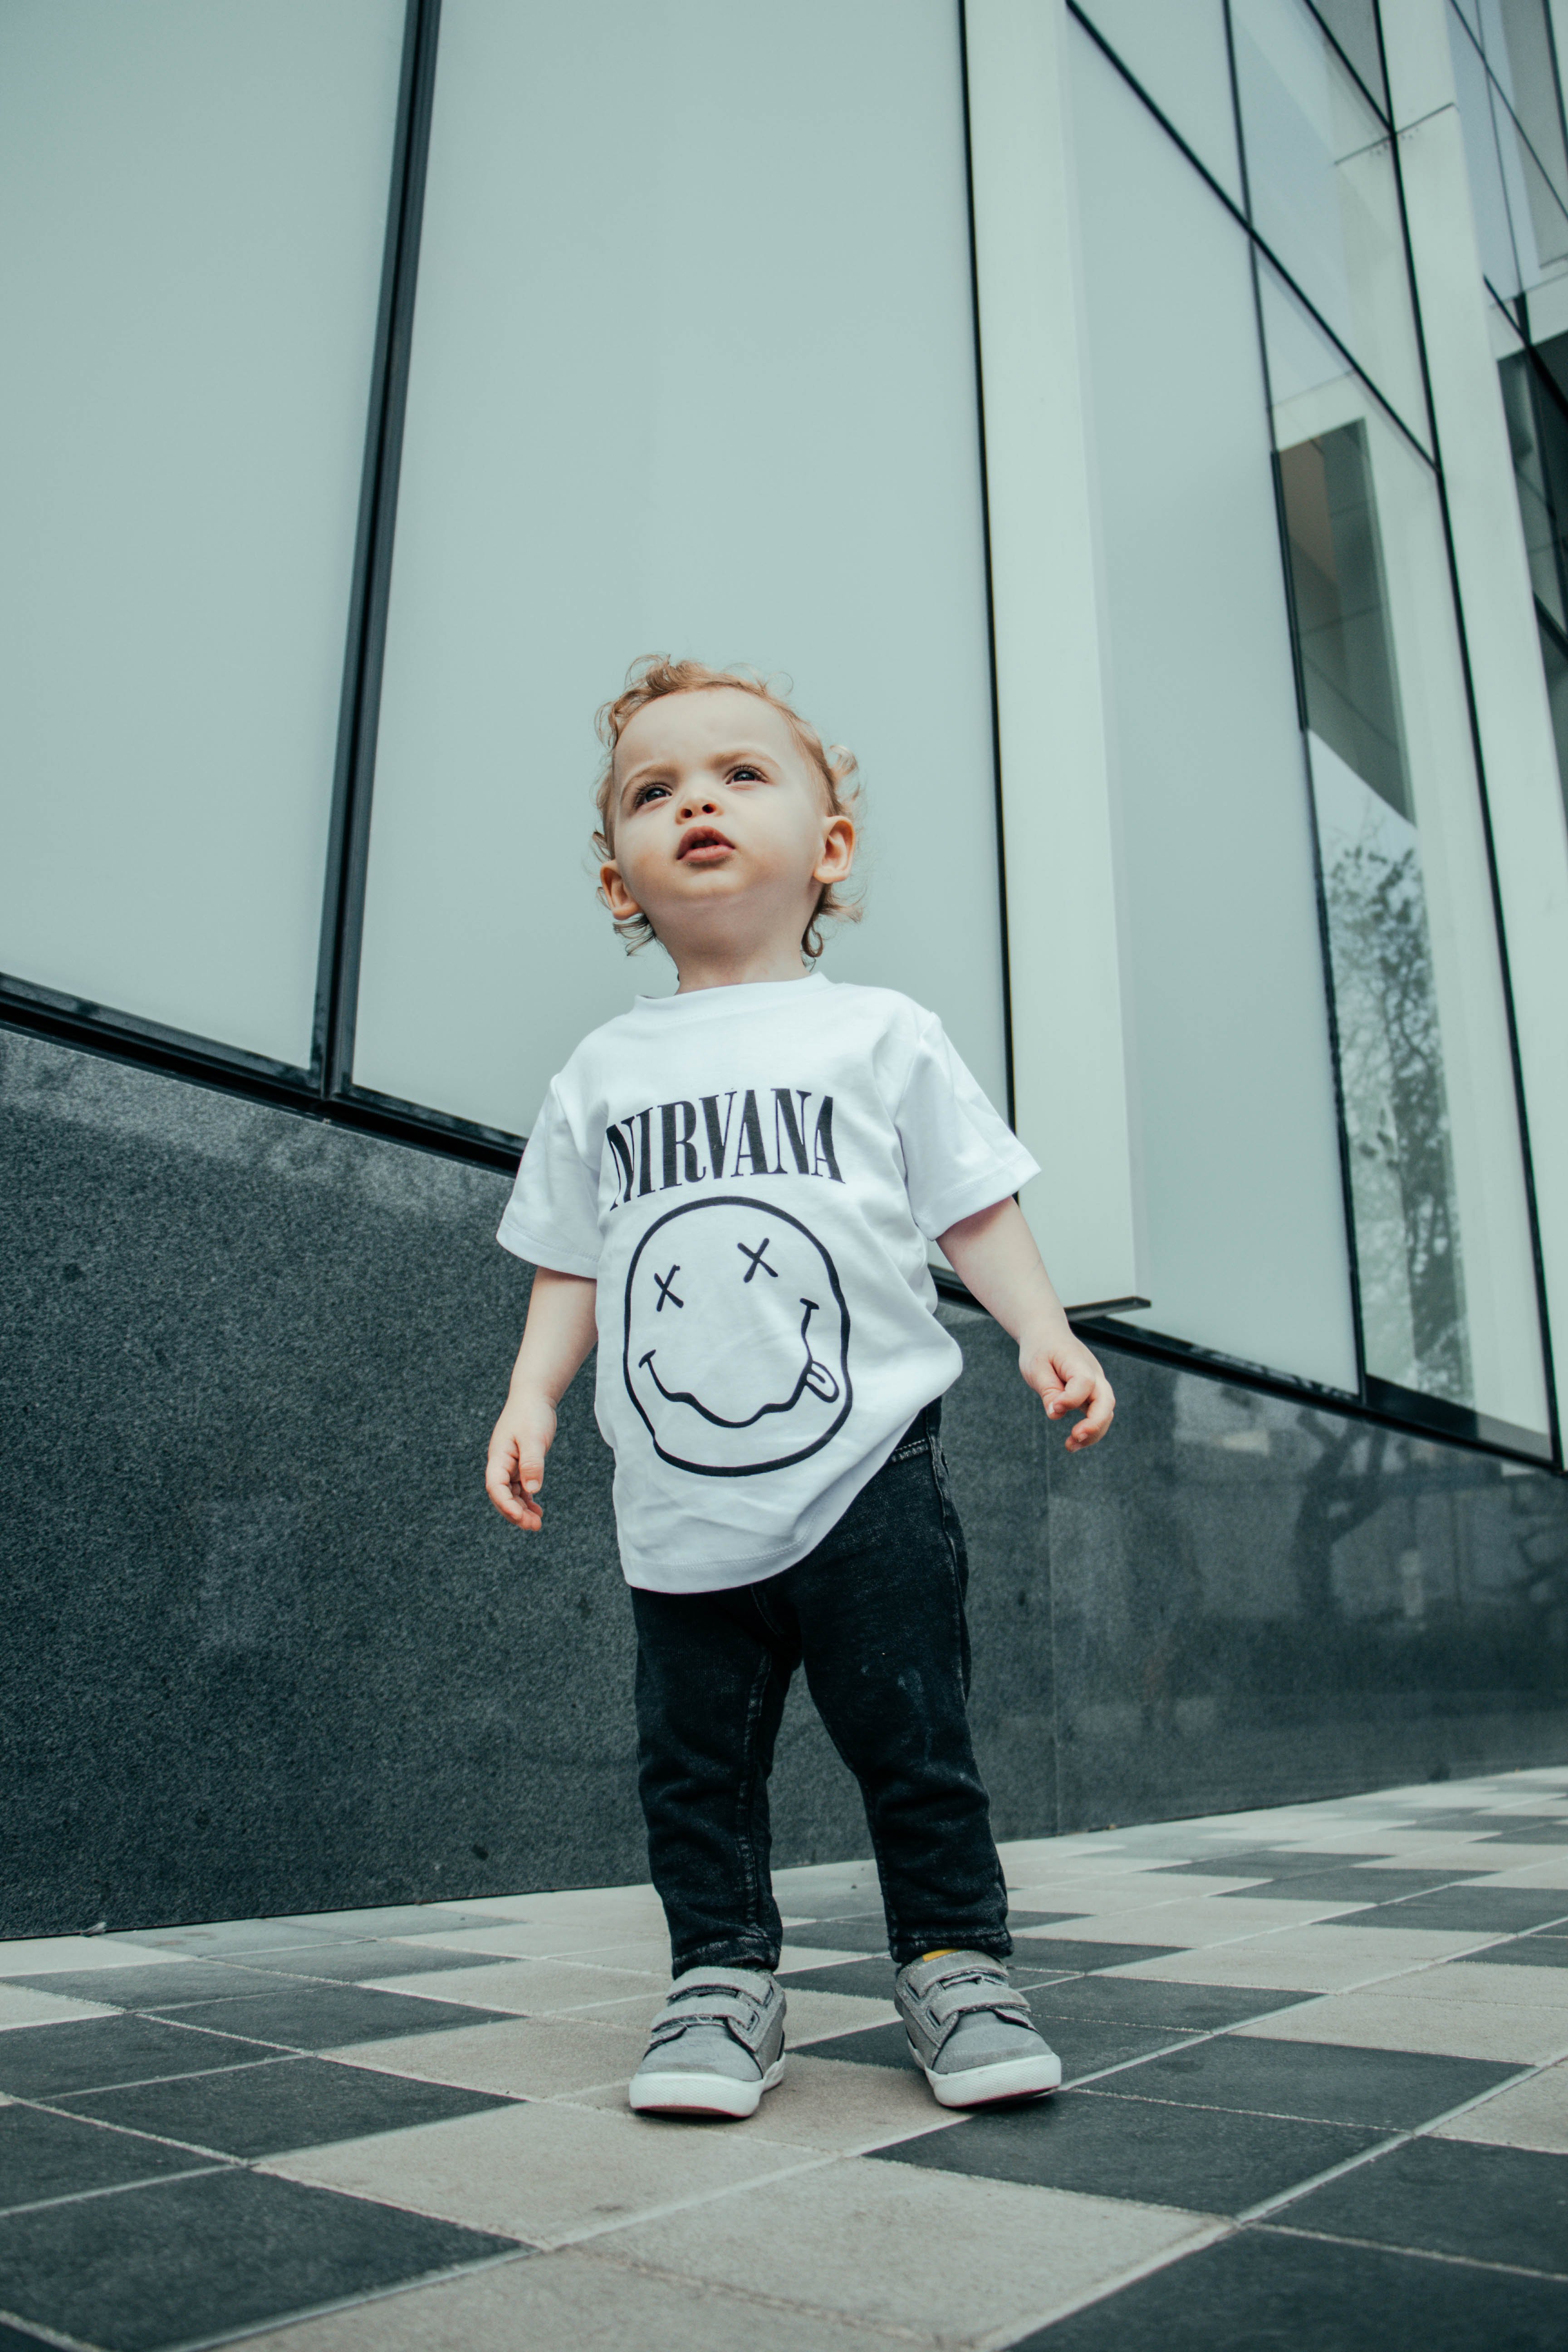
 Hey there, I've been having some issues with the "Refine Edges" tool when it comes to selections. After carefully selecting my subject in the picture, I intended to refine my selection when I noticed that as soon as I clicked on the "Refine..." button, the edges of my selection became fuzzy and inaccurate right away, making my overall selection much worse. This happened without even altering the settings or painting with the brush. After spending plenty of time trying to refine the selection with the help of the "foreground" and "background" brushes the result was not much improved, so I had to resort to Photoshop in order to get the job done. Here you can clearly see the what happens: Recording.mov Now I'm aware of the low contrast in some of the edges which make the task more complicated, something moderators keep mentioning in similar posts forgetting that's often the case in real-life scenarios. However when I managed to get a nearly perfect selection on Photoshop, I realised that was just an excuse (not to mention the improvement "Decontaminate colors" makes, a feature currently lacking in Affinity Photo). You can find the original image and my results in Photoshop as a comparison below, as well as the .afphoto file with the original selection saved as a Spare Channel, in case you want to give it a try. I've seen several posts regarding this issue, but since no actual solutions where provided and the topics were just forgotten (as you can see here, here and here), I decided to post about it myself before having to unfortunately switch back to Photoshop for good. picture.afphoto


.png.eabbf1763dd6578bf9d24c4b2c5aeba9.png)
.png.053503e34b6b40a0e2355ff051f2e089.png)