Search the Community
Showing results for tags 'Resolution'.
-
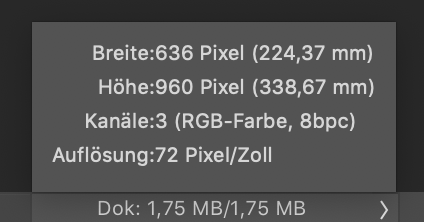
 If would be nice, if AF photo displays the resolution of an image at a specific size like PS do it in the bottomleft of an imagewindow. So you can decide on one look if the image is printable. The image in the sample isnt (72dpi on imagesize 224 x 338 mm).
-
 I just spent over 3 weeks creating a coffee table book 300 pages all color images and placed images in the document 300 dpi preflight tell me image resolution is approximately 180 dpi.. when I look at the original images they are all 300dpi. what is going on? Help. Is there a quick fix and what did I do wrong. I tried to wait for Infinity publisher, but i got a deadline
 -
 Has anyone tried to use an eps vector file from shutterstock? The file size is ca. 8MB, so obviously it contains a lot of data. But when I open it with Affinity Designer, I only see a bitmap image of a very low resolution (something like 60 dpi). Shutterstock claims the file is a valid eps and opens correctly with Adobe or Corel. Looks like AD has some kind of problem with these files. Is this a known problem, or should we file a bug report somewhere?
 -
 Hi, I've found the handy resize image tool slider in Publisher - double click the image. But is there a way to check the resolution of the expanded image so that it's still, say, above 300 dpi for printing? Cheers for any pointers on this
 -
 Hey everyone! It would be great if there was an option to save and load presets for documents. For example, this would avoid having to type in a specific resolution each time when creating a new document. Best wishes, Shu
 -
 Hi, i tried to make an updated facebook and whatsapp logo for a friend. I completely remade it in Designer. No matter how i export it, it looks messy on mobile and little size screens. I tried jpeg and png with different sizes. My export setting were: PNG-24 and 300x300 as well as 600x600 and bigger. Bigger makes it way worse. I followed the guidlines given by facebook support pages. But nothing seems to help. I know text on logos is a bit supoptimal, but that outcome is to bad for my taste. Do i have to change settings on my side and in Designer or does it have something to do with facebook compression? Any help is appreciated. Greetings =) Facebook on Desktop Whatsapp/facebook on mobile logo_source.afdesign
-
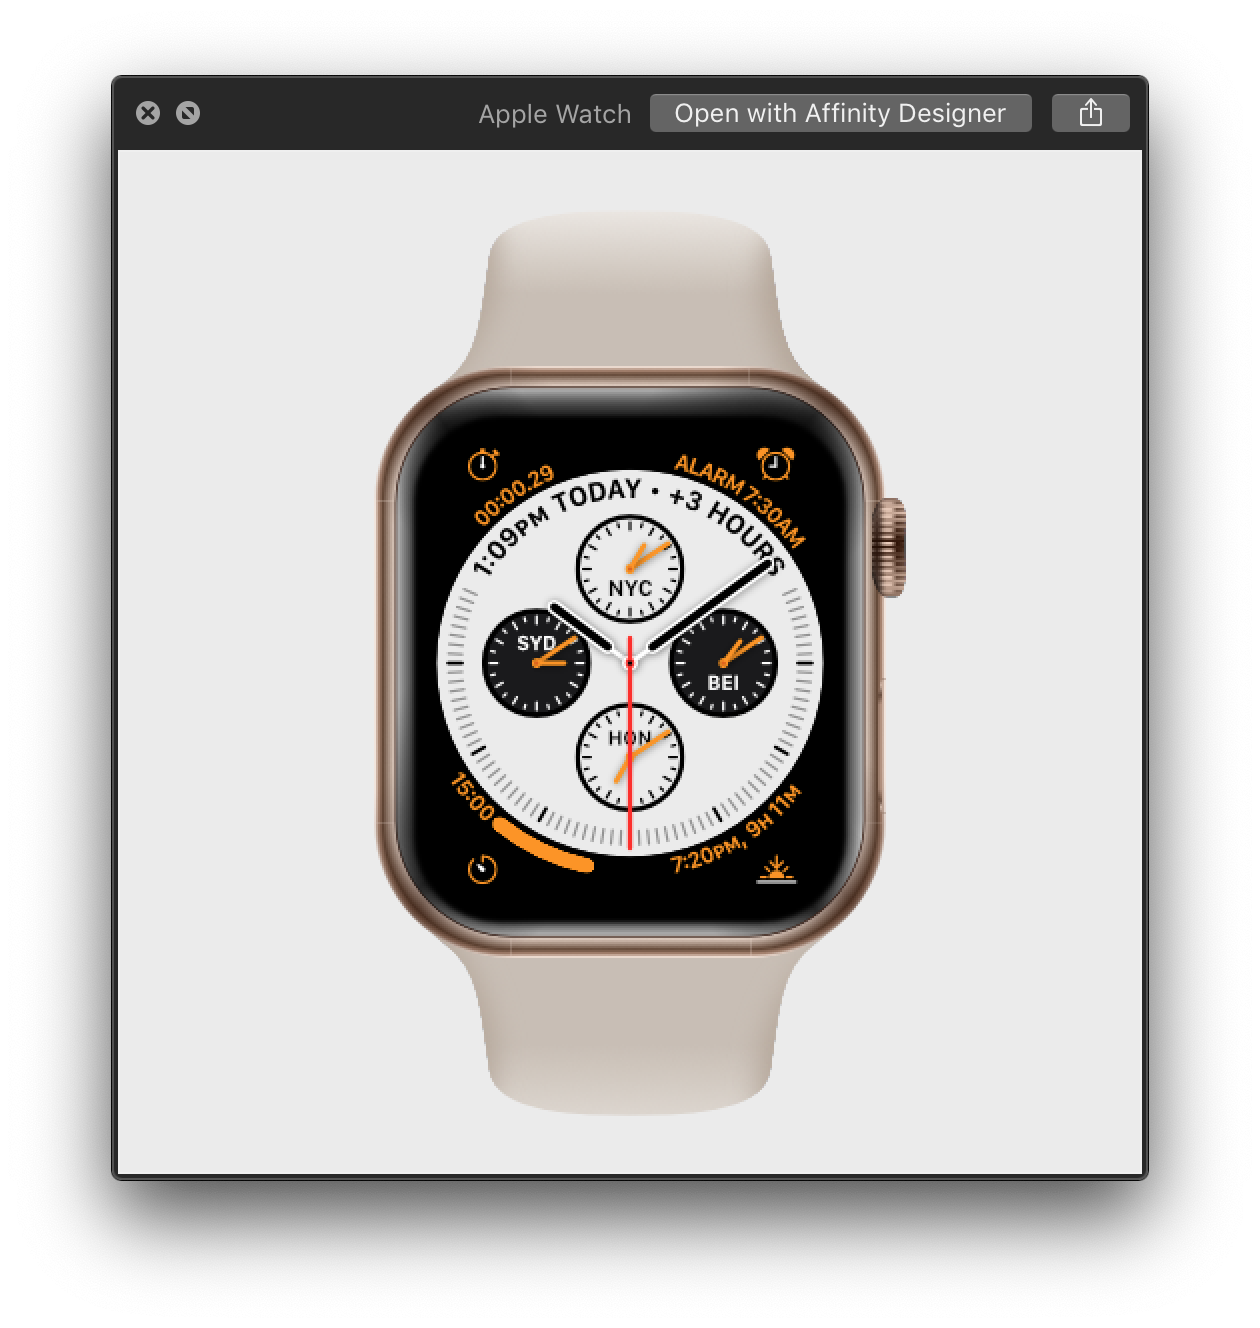
 When browsing project files in Finder (macOS) I noticed that the same project as a .psd will preview a high-res thumbnail of the artboard but if the project is saved as .afdesign there is a low-res thumbnail. I was curious if anyone else noticed or has this behavior. If possible, I think it'd be great if Affinity would save higher-res thumbnails of the project file to make browsing in Finder a little more useful. I included screenshots to show the difference.
-
I feel I ought to apologise because I know that some will think this pedantic nonsense, but there is no escaping a simple reality - DPI is not the same as PPI, and it does not belong in any dialogue box. The world is awash with confusion over this. Designers, publishers, photo editing, ALL need to know PPI. The only people that need to use DPI are the print shops and printing presses. DPI has no place in any software in Affinity, or anywhere in the desktop publishing office or suite. I await thine fury!..............(but I can prove it if you so must) PS, the dialogue box should really range from about 90 then 180 then 260 300 360 and stop there. 360 being the absolute maximum. No quality improvement is available or visible after 360.
- 27 replies
-
- 1
-

-
- document setup
- printer
- (and 2 more)
-
 Hi, I have a problem with a brandnew hp es27 inch display. I use it as extended display connected to a macbook pro. If I am using the macbook pro with standard applications no problem. If I work with affinity photo problems coming up: - after developing an raw image, the image ist right after developing not sharp and with pixels. If I pull the open program to the mac - the same problem. If I disconnect the display and develope the picture again on the macbook - no problem. - Sometimes the picture contracts so you can see a part of the picture - the rest is canvas as you know it from an empty design template. - the menu bar on top is sometimes fixed sometimes not. When I connect my surface pro with the creative cloud applications, then I have no issue. Hope you can help me, I want to switch complete to affinity solutions - but with such a problem it will not work. Thanks a lot in advance!
 -
 I have read the previous discussions on this topic, and none have resolved this issue for me (and from what I have read, for a lot of other users as well). I am going to try to state this as simply, clearly, and specifically as I can. I am using Windows 10. If I right-click on my target jpeg image, and select properties, it shows a Horizontal and Vertical resolution of 72 dpi. I open the image in AP, and select Document - Resize document. In the pop-up box, I uncheck Resample and change the DPI to 300, and click Resize. I can then either Save or Export (doesn't matter which) the file. Now the problem. If I check the properties of Saved/Exported file it still shows 72 dpi. I need to send the file to the end user, as well as upload the file to a processor for printing an enlargement. Both will reply the file is unacceptable because the resolution is too low. Not surprising since the properties still show 72 dpi. In comparison to Light Room, when I change the resolution in that program the Saved/Exported file properties show 300 dpi. Bottom line - how do I end up with a file from AP whose properties show 300 dpi?
 -
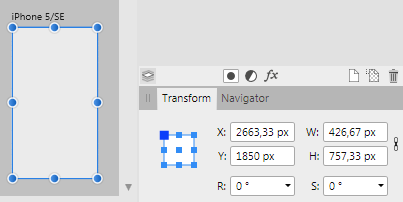
 Aff. Designer 1.6.4.104 Windows Hi, I am confused by the resolutions of the artboard presets. For example why is iPhone 5's artboard size 426.67px x 757.33px? Hardware resolution of the iPhone 5 is 640px x 1136px and "CSS resolution" is 320px x 568px. The size values of the artboard preset are not even whole numbers. Maybe I am missing some crucial information/knowledge here. Can anyone shed some light on this? Thanks.
-
 File size matters ! I use designer for web-design. As long as you work with pure vector and text, designer is a quite handy tool (despite some annoying bugs). But as soon, as you place images (typical workflow for webdesign) in your layout, it becomes really inconvenient. The filesize of the layout document EXPLODES and becomes really unpredictable. The size of a designer layout document becomes far bigger than the sum file sizes of the placed original compressed JPG or PNG images. I read somewhere in the forums, designer and photo store placed bitmaps uncompressed with the layout file - to speed up document loading? However, in my opinion this behaviour is not practicable. Some people may say: disk space is cheap, so why be so miserly? But first of all, all documents have to be backuped. And when it comes to data transfer it's a big difference if i can send e.g. a 20 MB file as email attachment or have to upload a huge 200 MB file to some document cloud. Filesize also means waste of time and other resources. We know the problem of Photoshop local smart objects. But PS stores/attaches the underlying bitmap data in it's original compressed format (JPG, TIFF, PNG etc.) and only points to it when rerendering an instace. I guess this is the correct method. If i have to transform the smart object instance later (e.g. design changes by customer), PS can allways rely on the original high resolution pixel data. But the PS document size increases only for the amount of the rendered instance layer + original bitmap attachment. It's even possible, to edit the smart object in place (isolation mode) and reduce the original bitmap resolution (destructive scale) without touching the instance position and size. In essence the filesize of the whole PS document is far smaller than a comparable AD document and approximately predictable. In essence: placed/imported images should either NOT be stored within the document. OR if stored within the document, then in it's original file format and compression. Placed images should not blow up the overall document size in the way they do now. Designer workaround - the rasterize dilema The only way i found to minimize document filesize is, to rasterize placed images, so they become a local pixel layer. This reduces overall filesize but the result is stil unpredictable. Sometimes the document becomes soon very small after rasterizing a high resolution image layer and saving the document again. Sometimes it becomes even bigger - later it becomes smaller again. So it seems, that redundant pixel data is not cleaned up at every save procedure? The bad thing: the document becomes smaller at the end, but now i loose everey connection between the bitmap layer and the orginal placed image. AND i loose every layer effects! I even don't know what was the original scaled size of my old bitmap. If i have to do design changes lateron (we all know our customers...) i have to spend extra time to search the orginal image, place it in its actual size, rebuild layer effects (hopefully made some notes in the layer label). After that extra work i can do the actual design changes. Much, much extra time spent! To prevent this, next time i leave the original image in the document and have - yes a huge file again :-( Another impractical point of rasterizing is the lack of control over pixel density. I'm talking about real count of pixels in the bitmap NOT the relative dpi (document settings). There is an ellipsis beneath the menu item "Layer -> Rasterize..." that meant to show an additional settings dialogue before rasterization is done. But there are no raster options to set. The document dpi has no effect on how the layer is rendered - to say how many pixels are created from the layer. And the rasterized quality is only moderate - seems to be 72dpi with method bilinear? There should be precise settings for the rasterize command: - absolute resolution: means, how many pixels are rendered per inch/cm (presets or explicit manual setting). - relative dpi (relevant for print) - render method: there should be an option for high quality rasterization of layers - e.g. bicubic andd so on. Simply compare this to the slice settings in the export persona.
 -
 I'm trying to get a file I've been working on in Affinity over to a friend using Illustrator for final (minor) edits. At minimum, he at least needs to be able to open it on Illustrator with no loss of resolution. I have tried exporting it as every file extension available with Affinity and they all lose resolution or effects upon export. Does anyone know how best to tackle this problem? DZONE Jersey.afdesign
 -
 I'd appreciate some feedback on the process I'm using to convert image files for print (book). I've recently come over from Photoshop and am sure that Affinity Photo/QuarkXPress2017 are the right combination to produce the result I want, but I need reassurance - or suggestion of a better way ... This is what I do: Open the file (usually a .jpg) in Affinity Photo Change colour format to CMYK (8 bit) Using Resize document, change DPI to 300, uncheck Resample and click resize Then using Resize document again, change units to Millimetres (is there a way to make this the default unit) and then change the width to slightly over the finished size of the image in the book, choosing Resample at this stage. Then save as ... Then Export as TIFF CMYK (making no other changes on that dialogue box) However, I then always seem to have to resize the image (sometimes to less than 10%) once I've imported it into QuarkXPress2017 ... and the image file produced is rather large. Can anyone suggest what I'm doing wrong? Help would be much appreciated!
 -
 I am working 2K 2048 x 1080 resolution video. I use AP in Mac to clean old photos and framing also them for editing. I found out that sometimes AP does not give right resolution 2048 x 1080 resolution when I am exporting the photo but adds or cuts off +-1 pixel for example 2047 x 1080. What should I do about it?
 -
 Today I learned that pasting elements between Designer documents with different resolution results on different object size. This is a normal behavior on bitmap software, like Photo or Photoshop, because they work with pure pixels and must adapt to the number of pixels the pasted image has upon the resolution, but is a complete hassle on vector apps like Designer, where the key is that you usually design on physical objet size, independently of resolution. This is specially hard when you are working with exact measures, like packaging or any technical illustration. I suggest three possible solutions A: Document or application setting to allow users to select their preference on copy pasting. B: Let the app auto select the pasting behavior based on the measure unit for the documents. (Preference to resolution if pixels unit, or preference to real size if a measure unit is selected) C: Special paste command for "paste preserving size" Hope I'm not the only one finding this important on his workflow. cheers!
 -
 Hi! Please Add Decimal Places for Rotation, Shear and dpi resolution (number shown in top-left when Move tool is selected) It can be useful and in many cases and make program more precise;)
 -
 When I open a photo for which I'd like to resize the dpi in Affinity Photo, I go to Resize Document and I see the default dpi is 72. When I change the dpi to 150, the pixels adjust accordingly. However, when I export that photo, reimport to Affinity Photo, and go back to Resize Document, it shows dpi as 72 again. Why does it not show 150? Any insight would be greatly appreciated as I want to ensure these are best quality for printing. Thanks!
 -
 Hopefully someone from Affinity can answer this one: It seems that the Geekbench scores are confirming that the hardware internals of the new iPads are identical, except for the battery and screen resolutions (the 12.9 having larger batteries due to the larger display). Knowing this, will the 10.5 iPad handle more live filters and adjustment layers to be applied on a project, because of its lower screen resolution? If so, does that make the 10.5 the better choice if the main concern is squeezing performance from these tablets? I'm looking for an objective, evidence based answer: Can the 10.5" handle more adjustment layers and overall processing than the 12.9 due to the lower resolution? Thanks!
 -
 What steps would one need to take in order to increase the resolution and quality of a low resolution photo? I have been searching on Youtube for a tutorial on Affinity for some time now, but unfortunately all I've been able to see so far are some tutorials for Photoshop. Any help would come in handy. This is the image that I would like to have its size increased while still getting high quality image in the end if possible.
 -
 Note: See below for update on 1.7.2.471, it's still happening. Using AD 1.5.2.58 on Windows 10. Is this a feature that I just don't understand or is it a bug? If I have rounded corners on a shape and then reduce the DPI of the document, AD increases the rounding amount. Workflow to replicate: * Create new A4 300DPI document using points as the UOM. * Add a triangle (any size will do) - actual shape doesn't matter but a triangle shows the issue nicely. * Use the Corner Tool to give any (or every) corner a radius of 2pt. * De-select and use Document Setup to change the DPI down to 72. * Select the triangle. * Go to Corner Tool. The radius (wherever it was applied), in my case, has been changed from 2pt to 8.3pt. The 2pt value seems to have been increased by the same ratio between 72DPI and 300DPI, I.e. 300/72 = 4.16(recurring) and 2*4.16 = 8.3(recurring). Increasing the document DPI from 72 back to 300 returns the corner radius back to its original value. Have I just misunderstood how things work or is there something wrong? It just doesn't seem right to me. This forum post: https://forum.affinity.serif.com/index.php?/topic/12239-resizing-the-document-scales-the-radius-of-corners/?p=52905 seems to be about a similar thing but their use case is very different from my own.
 -
 Can I increase the resolution on a jpeg photo. If possible, how to do it?
 -
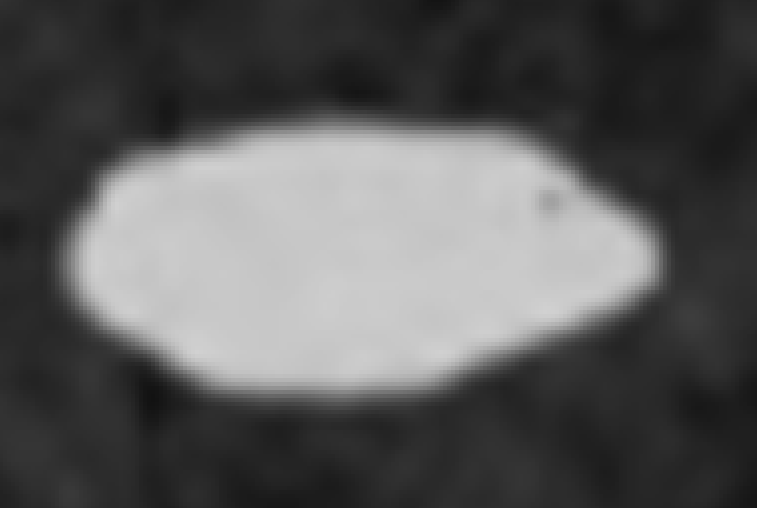
 I apologize if this question has been answered, but previous answered look like they referred to just the resizing of a layer relative to the canvas. Lets say I have two images - both 300 dpi. I place one image on top of the other. Now I have to scale up the front image by 10x. Effectively, the new image has only 30dpi relative the actual canvas. The layer looks very pixelated, as opposed to blurred. If I were to blow this up 10x in it's own document by resizing the image, it would look blurry but not pixelated. It appears that AP keeps placed layers in their original data size. I'm wondering if there is a way to rasterize a layer in a way that it effectively scales up the source media using bilinear scaling, so that filters could then be applied to the higher-res document. I'm attaching a closeup of the two layers on top of each other with a composite mode applied (1). You can see that the white area is sharp, as it is a text layer. The black dot that overlaps the white area is a bitmap image that was copied from another document and scaled up. The black and white versions are the original image placed in a larger image and scaled, with no effects (2), and the original image scaled to 5x using image size (3). Although Image 3 isn't perfect, it's a little better to work with and can be cleaned up with some additional filters. Also, you can see I was able to get it a little smoother by scaling in increments (4) using 2x, 2x, then about 1.3x It would be great to just be able to place this image on top of the other, then run the rasterize function to create a solid bitmap to the native resolution of the image, and then be able to apply filters to at that native resolution. Thanks!
-
 Hi to everyone, I just have a quick question/tip. Can we expect option to import of PDF/EPS (general vector files), as raster "Photoshop Import PDF" style? I do a lot of sign making, digital printing, car wrapping, and I receive files that just need to be rasterised before going into production (CREO, VersaWorks, Raster Link Pro) (font, shadows, transparencies, messy CMYK/RGB files, gradients... and so on). So this option would be awesome step of replacing my CS3 :) Thanks. p.s. eps export that works with older programs (Illustrator 10 compatibility) would be good for industry users. btw in my whole life I didn't see cleaner eps file... like hand written :)
 -
 I bought Affinity 1.5 for Windows 7 and it absolutely refuses to resize an image (document) without re-sampling the size or resolution regardless of the little re-sample check box. I want to change resolution and size separate from each other! Any clues, that I'm missing something after dozens of try's or is this a bug. Such a basic thing renders the program useless to me. I've also noted other comments about cropping... I'd like to enter size and resolution into the cropping arms as well though that problem is not so immediate.