Search the Community
Showing results for tags 'Remove'.
-
 I often want to do object or layer deletion when I have other tools active than the move tool. For example, I draw a stroke with the brush tool and want to delete it (I could ctrl+Z, but that's not the point). Similarly, if I have objects already selected in the layers panel and I have a brush tool active, I can't do boolean operations. Since I always use hotkeys, this gets annoying, because I also have to check which tool I have active if the software doesn't what I expect it to do (perform the operation I pressed the hotkey for). So please look into adding operations outside of the move tool. This mostly applies to Affinity Publisher and Designer (basically the vector based tools).
 -
 Expected Behaviour: I create a new mask and make my first stroke, which I'm not happy with. I press Ctrl+Z to undo the stroke, the mask remains and I can start with an empty mask. Current Behaviour: I create a new mask and make my first stroke, which I'm not happy with. I press Ctrl+Z to undo the stroke, but the mask is also undone. I have to add a new mask every time I want to undo the first stroke. It's like I'm hitting Ctrl+Z twice, but I'm not. Steps to reproduce: Create a layer. Add mask to it. (Tested with Mask, not Empty Mask or Compound Mask, since I want to work with a regular Mask in that instance.) Make a brush stroke. Hit Ctrl+Z. Bug or by design? Workaround for now: Create an Empty Mask and in the next step invert it.
 -
Hey everyone! I was just wondering if there is an easy way or option to unpopulate/remove all placed pictures/resources from a previously defined selection of Picture Frames. Can anyone help me out and point me in the right direction? And if the option doesn't exist: Would this be a feature that would be handy for others as well? Or is it just me? 🥲 Edit: My current method (or the only official method?) since I was faced with a similar problem a few months ago is to use the Move Tool, double-click on the Picture Frame in question and hit delete. However, you have to be careful not to accidentally move the picture frame in the process. Alternatively, you could select them in the Layers Palette. But these methods certainly are not the most efficient, are they? Thanks! (Before anyone mentions Master Pages: I use them everywhere they are applicable, but the sizes of the picture frames in my current document vary too much from page to page for Master Pages to help in this case.) 😉
-
 Comin' around the Clubhouse Turn, it's ‘Black Matte’ two lengths ahead of ‘White Matte’ … See how exciting a Graphix Forum can be … ? I know — Who’da thunk, right? Today’s Big Question: What does “remove white matte” and “remove black matte” do? What should I expect to see happen after they’re invoked? ‘Remove white paper’ is pretty straightforward and does an excellent job. I've never had cause to need or use the two ‘matte’ options enquired about, but it'd be nice to know what they're for, when and how to use them, and what to expect after use. On a separate matter, I have become SO used to being able to just tick a box to automatically create a new file with a xparent background. That is worth the price of admission. Returning to our Big Question: All input welcomed and appreciated.
 -
 Hello, I would like know how to remove black background from my picture? In PS there was a slider like setup to remove the background. But where to find it is in Affinity Photo?
 -
Hello dere, chér … mais, me, I almost did not saw you dere, but I'm glad for you to see me yeah, I tol’ you dat f’true. Now, what I got to ax is mebbe a simple quextion but me, meh, I do not know dem answer no, me. Oh. What it IS, you aks? Well, I'm glad for you to axe me dat, so … When I use either the Artistic text tool or the Frame text tools, I begin by selecting one, then drawing out a rough-sized text box to put text in. That's when the problem crops up. The BACKGROUND is filled with white and the text is default black. I have no problem with black text, ’cos it's gonna be changed later anyway. The Big Quextion is as follows: How I got rid of dem WHITE BACKGROUND FILL BOX COLOR, hanh? Looking thru the Menu choices produces no clue as to Remove Paper Color, Remove Background Color, or anything else. It has not always been this way - and it happens in Designer and Photo, not just one. Ma chérs, if you know you dem Answer about how to done got rid of dem white Background coleur from dem tex box, I be Returnally Greatfull fo’ dat knowlidge. T’anks in advance fo’ you assist wit’ dis quextion.
-
 Hi guys, here's a new video about how to remove any white color in your photo with only a few clicks in Affinity Photo. I hope you enjoy this video, thank you!
- 2 replies
-
- 3
-

-

-
- affinity photo
- tutorials
- (and 6 more)
-
 Hi, I made à tutorial, where I show, how to remove unwanted and complex objects, which sometimes ruin a photo. Have fun with this Video. Ciao Jack P.S.: You can activate english subtiles with the gear icon in the YouTube window YouTube Link
-
Get rid of The toast notifications that pop up anytime we make a move, or undo / redo anything, and are positioned right in the middle of the screen. I think we are passed the point of needing to see that, so it would be nice to either have the options to remove it or move it to the top of the screen or something less obtrusive.
- 1 reply
-
- 1
-
-
- toast
- notifications
- (and 1 more)
-
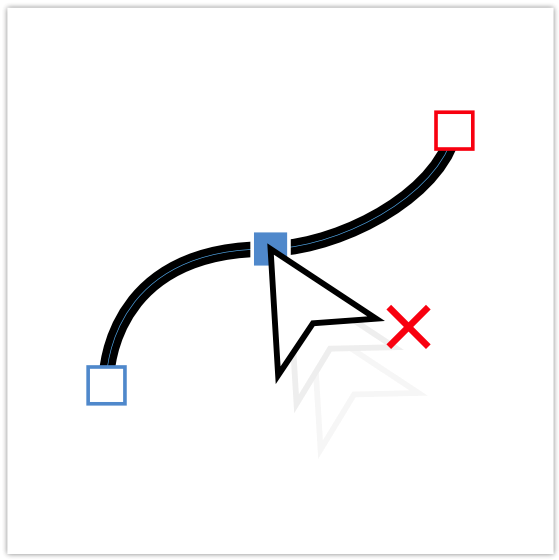
 Can you implement a function in the node tool that allows us to remove a node with one click? Maybe using a modifier key (Shift, Ctrl, or Alt) + click on the node we want to remove; or simply by clicking on an existing node. Something like this: Thanks! 😉
-
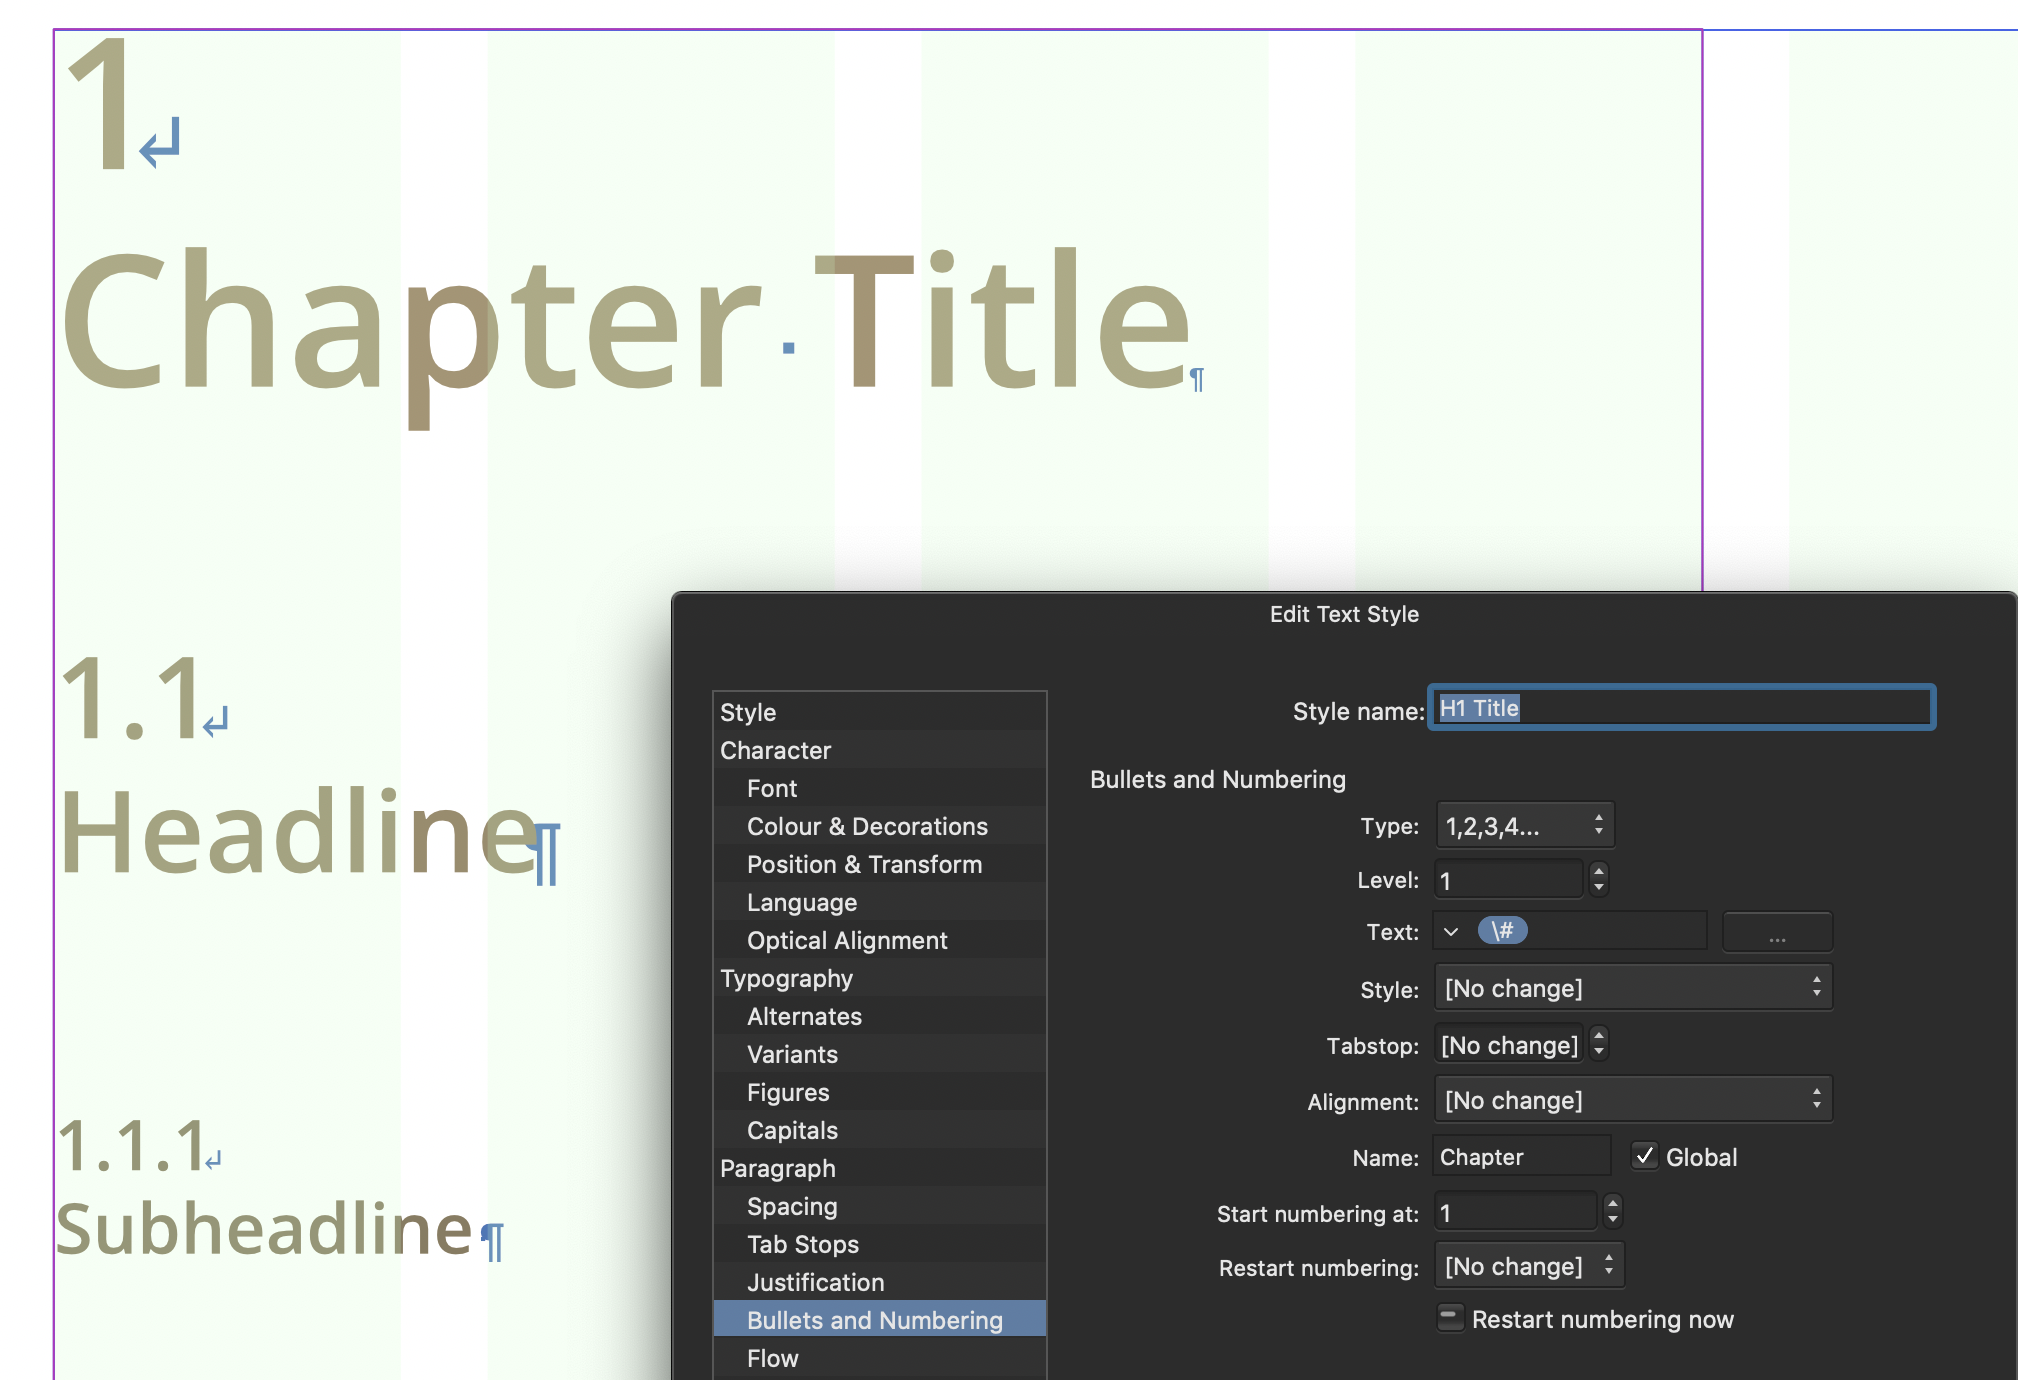
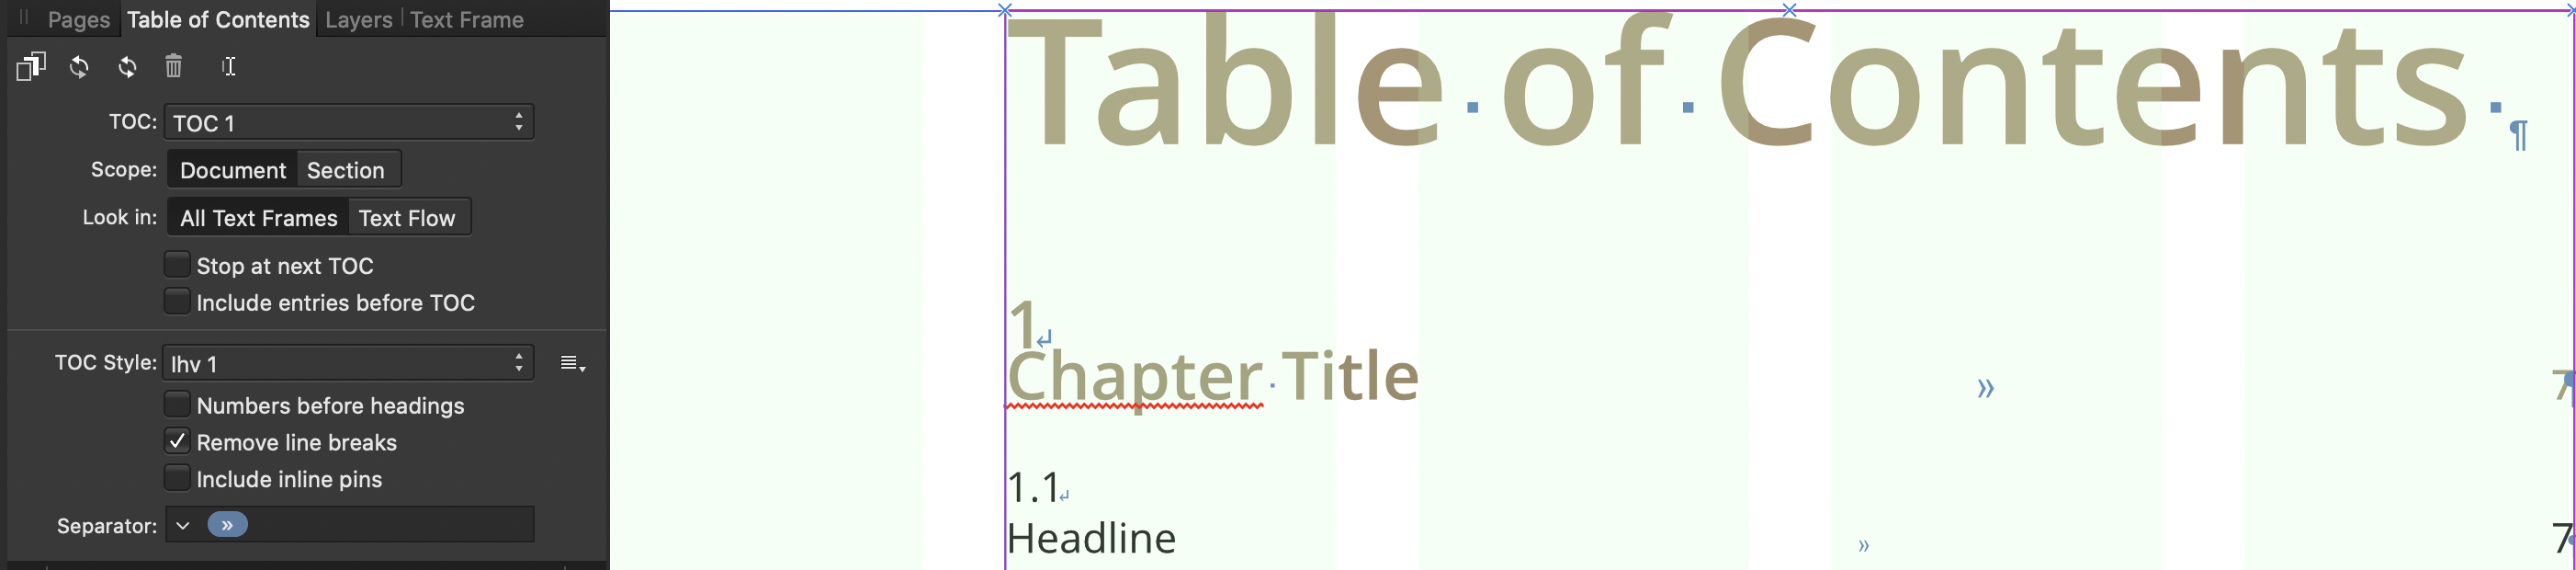
Hi everyone, I think I've run into a bug or some sort of problem with "remove line breaks " in the table of contents settings. Generally this functionality works as intended, when I manually set line breaks they are in fact removed in the table of contents. But for a new project I created headlines that are automatically numbered through the bullets and numbering settings in the text styles. And those numberes are seperated from the text by a line break. This line break is inserted in the "Text" field of the bullets and numbering settings. So it is automatically applied. When I do this, the Table of Contents does not remove the line breaks, which I whish it did. I think it's a bug, but maybe it's supposed to work like that? Is there anything that I can do? I use the latest version of Publisher (1.9.4) on macOS 10.15.7 Thanks in advance, I hope my description of the problem was understandable. Luca PS: In the uploaded pictures it's not possible to show that there was a line break inserted in the "Text" field in the bullets and numbering settings, beacuase there is no visual indicator for that.
-
 Hello all, I've just starting using Affinity designer (trail) and like it very much. I have a little problem though and I'm sure that when someone points out what I'm doing wrong I'll kick myself. I've applied a gradient to an object and now want to return it to a solid fill but I cant find a way of removing the gradient. If I create another fill and apply it always is set to gradient when I apply it the object. I've tried setting no fill creating a new fill then applying it but always its a gradient fill! I'm sure the solution is simple and obvious but I'm missing something here. Thanks in advance, Anthony
 -
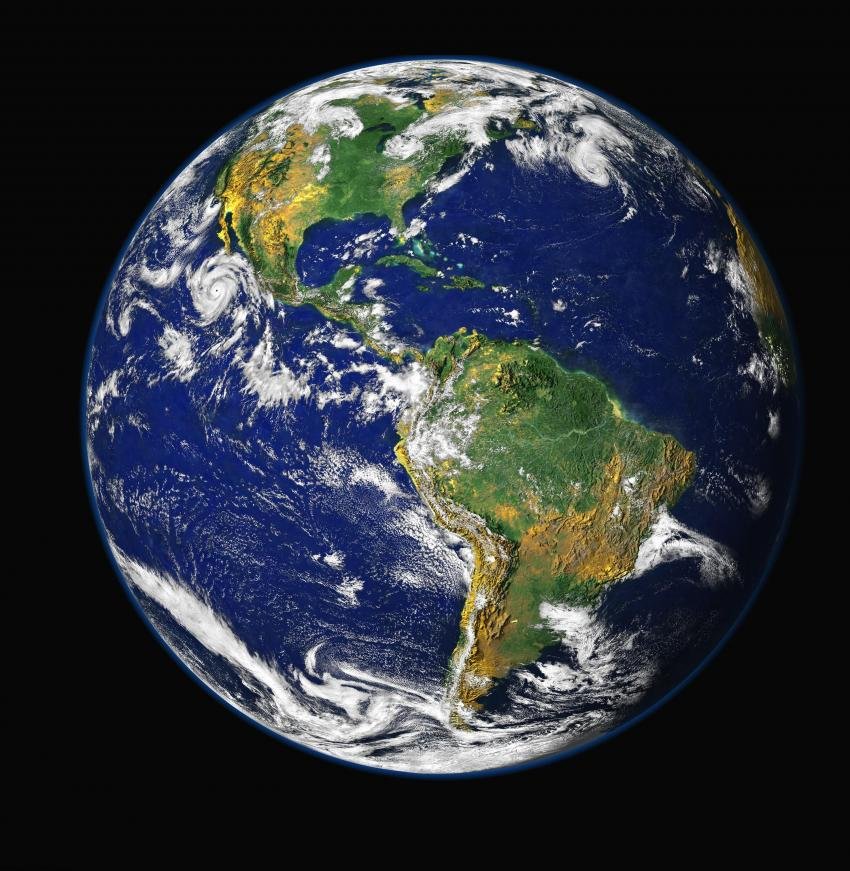
 I'm not sure how to do this but I am having difficulty removing a specific color on this image. I want to remove half of the water (blue) on this image. Or even change the color. What should I do? Thank you for the feedback.
-
 Ok, the newbie here again... I watched a video tutorial on removing the background. 1. It said to use the "Selection Persona"? I don't see that on the toolbar with the other personas. 2. Then it said to use the "Smart Selection Brush" to outline the object... I have a Selection Brush, but nothing says it's "smart"... is that the same thing?? 3. When I try to outline the object with the Selection brush, it makes double lines and I can't get rid of them with subtraction. They just jump around and become disconnected from other areas. 4. Then it said to use the "Refine Selection Tool" ... there's no tool in in my toolbag labeled "Refine Selection Tool" Egads!
 -
 Hi all I have an image with white background . I would like to remove that background , meaning select only specific object and choose other background. I couldn't find an option to do it . The image is attached . I want to remove all the white background surrounding the watch Thx !
-
 Hello, Just editing a raw photo and I used Blemish removal (worked quite well.) I went to edit my second photo and the Blemish removal spot where on this new photo. How do i remove these ?
 -
 I came across a tutorial for reducing 5 o'clock shadow or stubble from a photo. Can anyone help me accomplish the same thing in Affinity Photo? In particular, there's a step in this Adobe Photoshop tutorial (link below) where a "pattern" is created, and then the Healing Brush makes use of this pattern to effectively reduce the stubble. I'm not sure there is such a feature in Affinity Photo for creating a pattern that would be usable by the Healing tools. Or..... as often seems to happen inside Affinity Photo, maybe there's a better way than the Adobe approach. Thanks for any good input anyone can provide. *** Photoshop tutorial: Reducing 5 O’Clock Shadow And Beard Stubble In Photoshop ***
 -
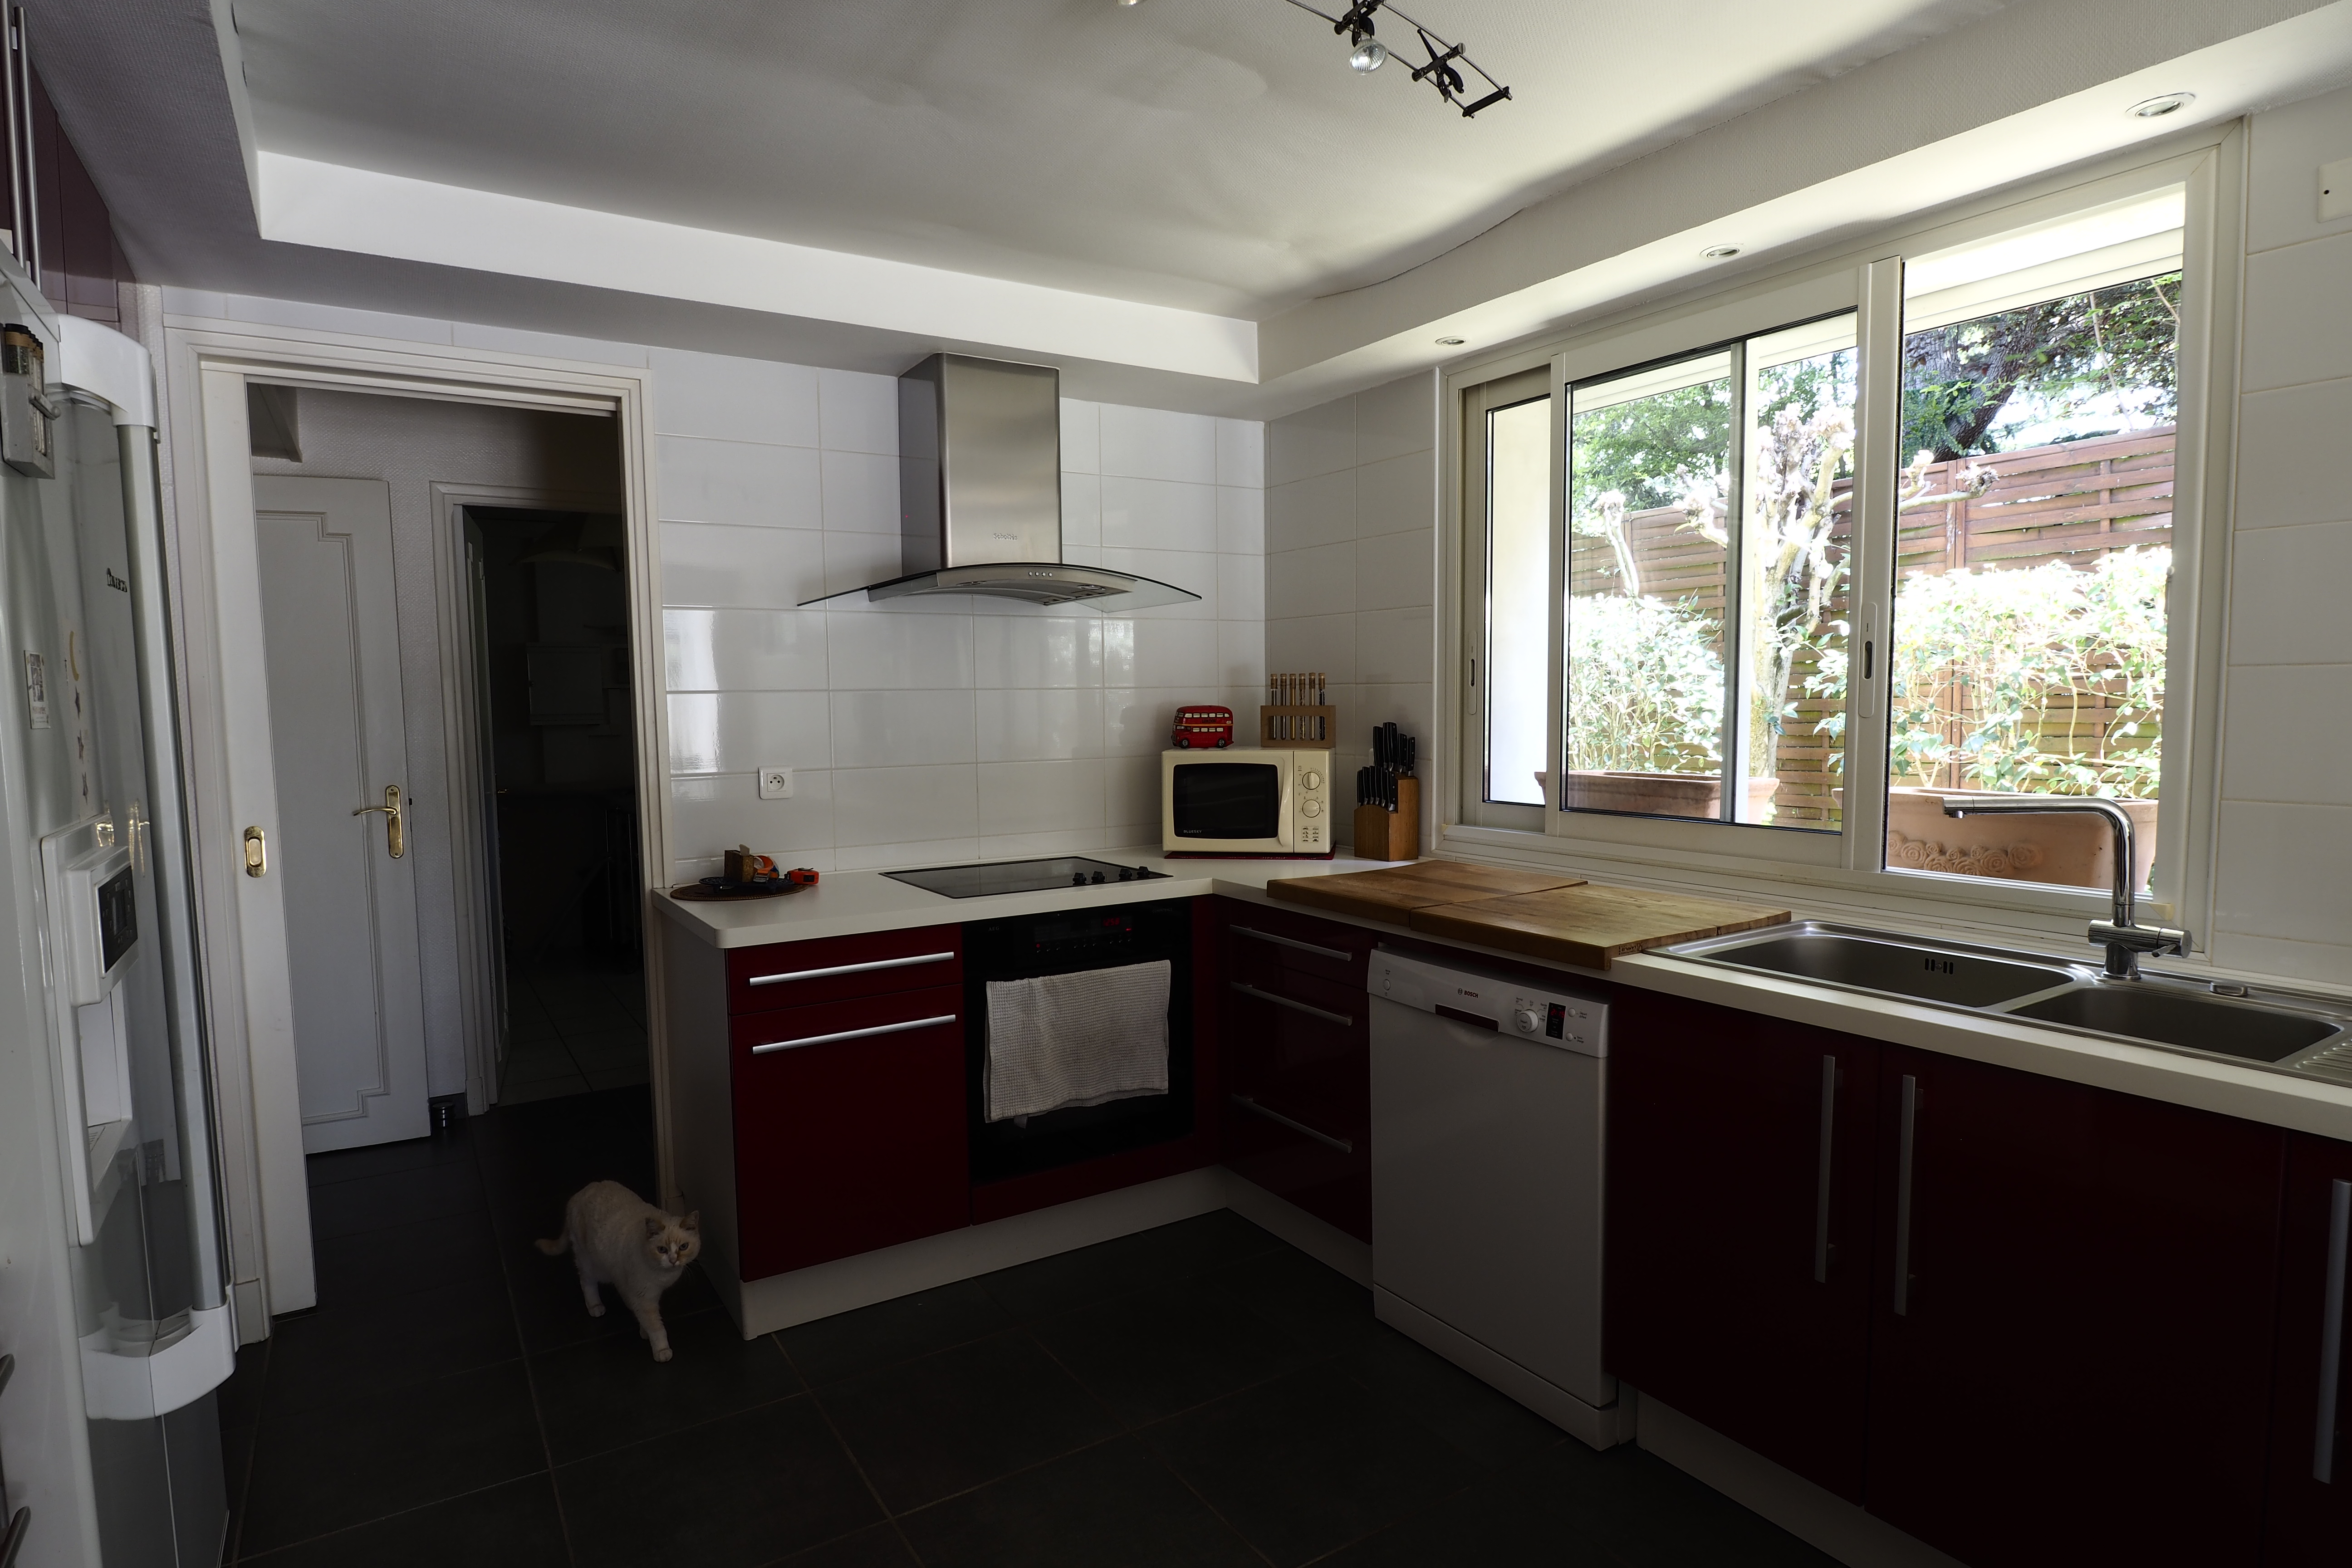
 Hi, I don't know how to do that.. How to remove the cat from my capture without altering the kitchen.. Is it even possible ? Any volunteers whou would accept the challenge ? Thanks a lot <config>Macintosh / Safari 11.1</config> _4240050.ORF
-
 Hey guys, I'm trying to divide (or something) the shapes in the attached example. Basically I wanna cut the dark red shape from the black shape, so that the black shape will have an empty circle where the dark red circle is. How do I do that? I tried divide, but that only works the way I want it to only if the shapes don't overlap completely. Thanks divide-test.afdesign
 -
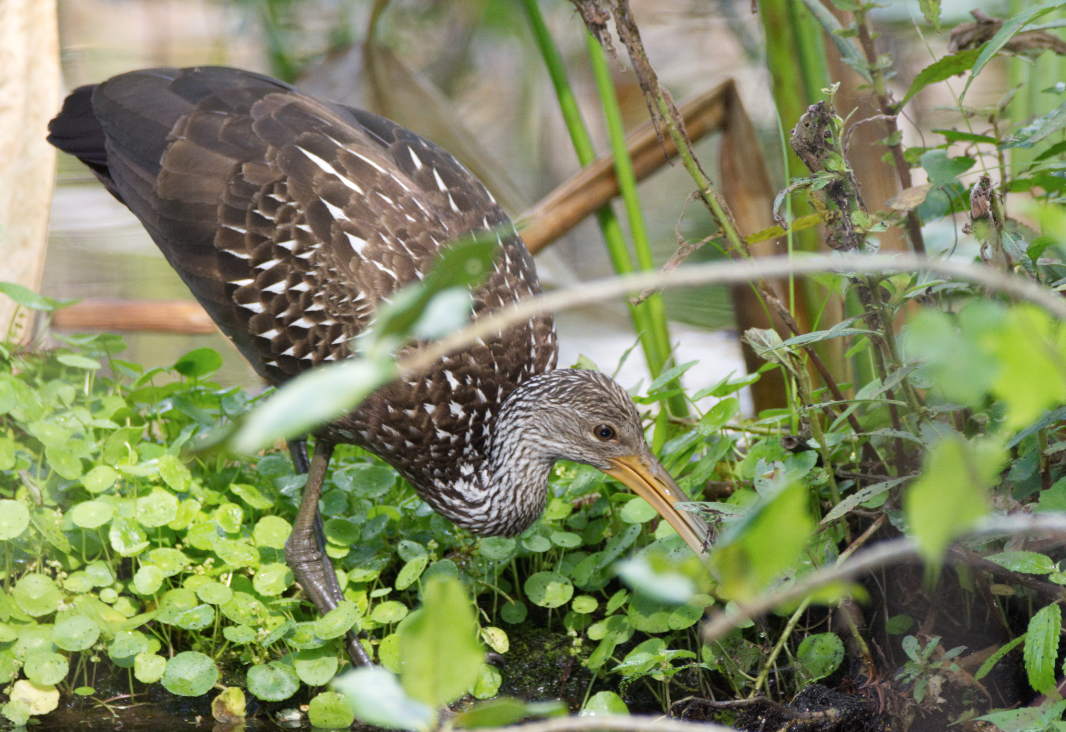
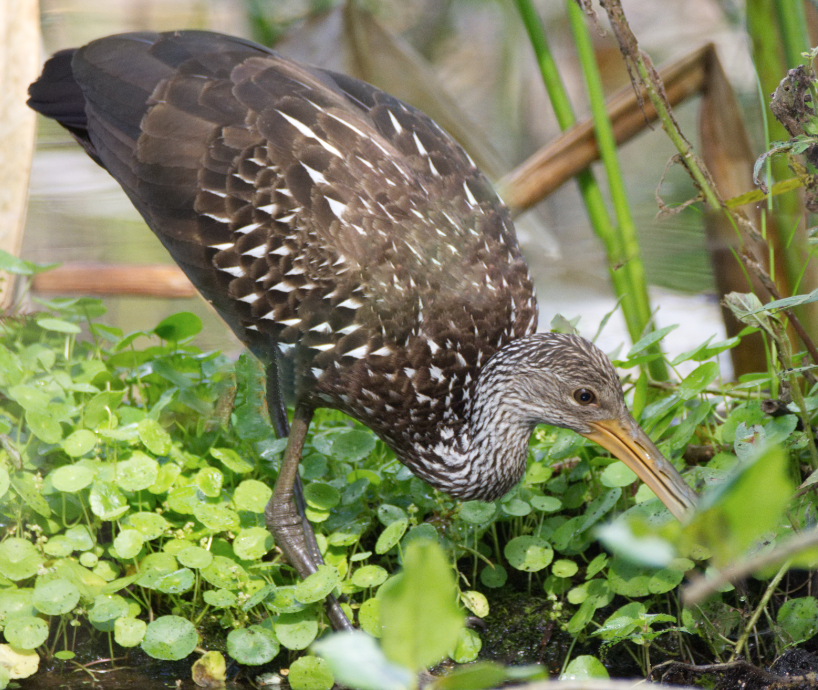
 Hi Everyone. I'm new to Afinnity but, so far, after watching the tutorials, am very impressed by the product. I often find myself shooting birds in thick forest regions. The branches can absolutely kill the shot (attached - "Before" is a Limpkin shot at Corkscrew Sanctuary in Naples, Florida). I used both the Clone and Inpainting brush tools to remove the branches with the result shown below ("After"). I'm not happy with the smudging and discolouration that resulted. Should I be trying a different approach to removing these pesky branches? There must be a better way given the obvious power of this editing tool. Thanks all!
-
Hi! I would have a big problem. If you open a .RW2 Panasonic Raw file for Affinity Photo, it will not fix any Hot and Dead pixels. Lightroom is perfect for the picture. It also delivers perfectly to Photoshop Express, but Affinity Photo can see Hot Pixels in multiple places. Is there a setting here that I did not notice? Why does not it fix automatically? Do you have a solution? This should be a very basic thing. I use iPad Pro 2017 /12.9"/ Thank you (Sorry Google Translate)
-
 Hi everyone, I’m fairly new to the iPad version of Affinity Photo. Is it possible to disable Anti-Aliasing for creating shapes? Being completely honest Affinity Photo for iPad seems like a great candidate for Pixel Art but that is getting in the way.
 -
I have a sun flair in an image, how yo fix it in Affinity
-
 Good morning! I have been an avid user of Affinity's Photo and hardly ever had to ask for help (I thought never but I found a question from 2015). A client asked me to take pictures before a greenscreen while I was on assignment. They had a very small green cloth and there was a mixture of sun and tungsten light. I did the best I could... Having no studio lighting I expected some color cast but it is far worse, probably because of the small screen/cloth so the group had to stand close to it Can anyone help me in regards to how to remove the green color cast from the models? Below I attached a screenshot of what it looks like. If you need more info etc, let me know. Thank you in advance! Dennis
-
 I've tried to search this on the forums with limited response. I want to know how to remove a black or dark background from white or colored lettering to reveal transparency. Generally this is for text logos etc. I'm some cases the text has graphics inside it that the selection tool struggles with. Would like this to be one click! Thanks!