Search the Community
Showing results for tags 'Raw'.
-
 Hi folks, I have just discovered that, when developing RAW in Affinity Photo—under the Lens tab and under Lens Correction—the Lens Profile dropbox selector no longer works. It doesn't drop down and say Empty nor show all the lens profiles I'm used to seeing, rather it simply blinks quickly and does nothing. As such, I cannot see any lens profiles at all. I read about going to LensFun myself on github and downloading the XML files from there into ~/Library/Containers/com.seriflabs.affinityphoto/Data/Library/Application Support/LensProfiles/; I tried that and restarted Affinity Photo and still I see zero Lens Profiles. I also read that this may have to do with Apple Silicon rendering RAW files. I am using Affinity Photo 1.10.8 on MacOS Sonoma 14.4.1 (23E224). I have tried with hardware acceleration on (Apple M3 Pro Metal) and off (software). The last time I used Lens Profiles was likely before I upgraded to 1.10.8 (but after 1.10.x) and before I moved away from my old Intel Macbook Air (which was November). Thanks!
 -
 We've had several reports of RAW files having Artefacts or Green Lines after updating to 2.4 on Windows. This is a known issue and appears to be related to OpenCL. Turning off OpenCL should resolve this issue for now. To do this, go to Edit > Settings > Performance and untick Enable OpenCL This has been logged with our developers to be fixed.
 -
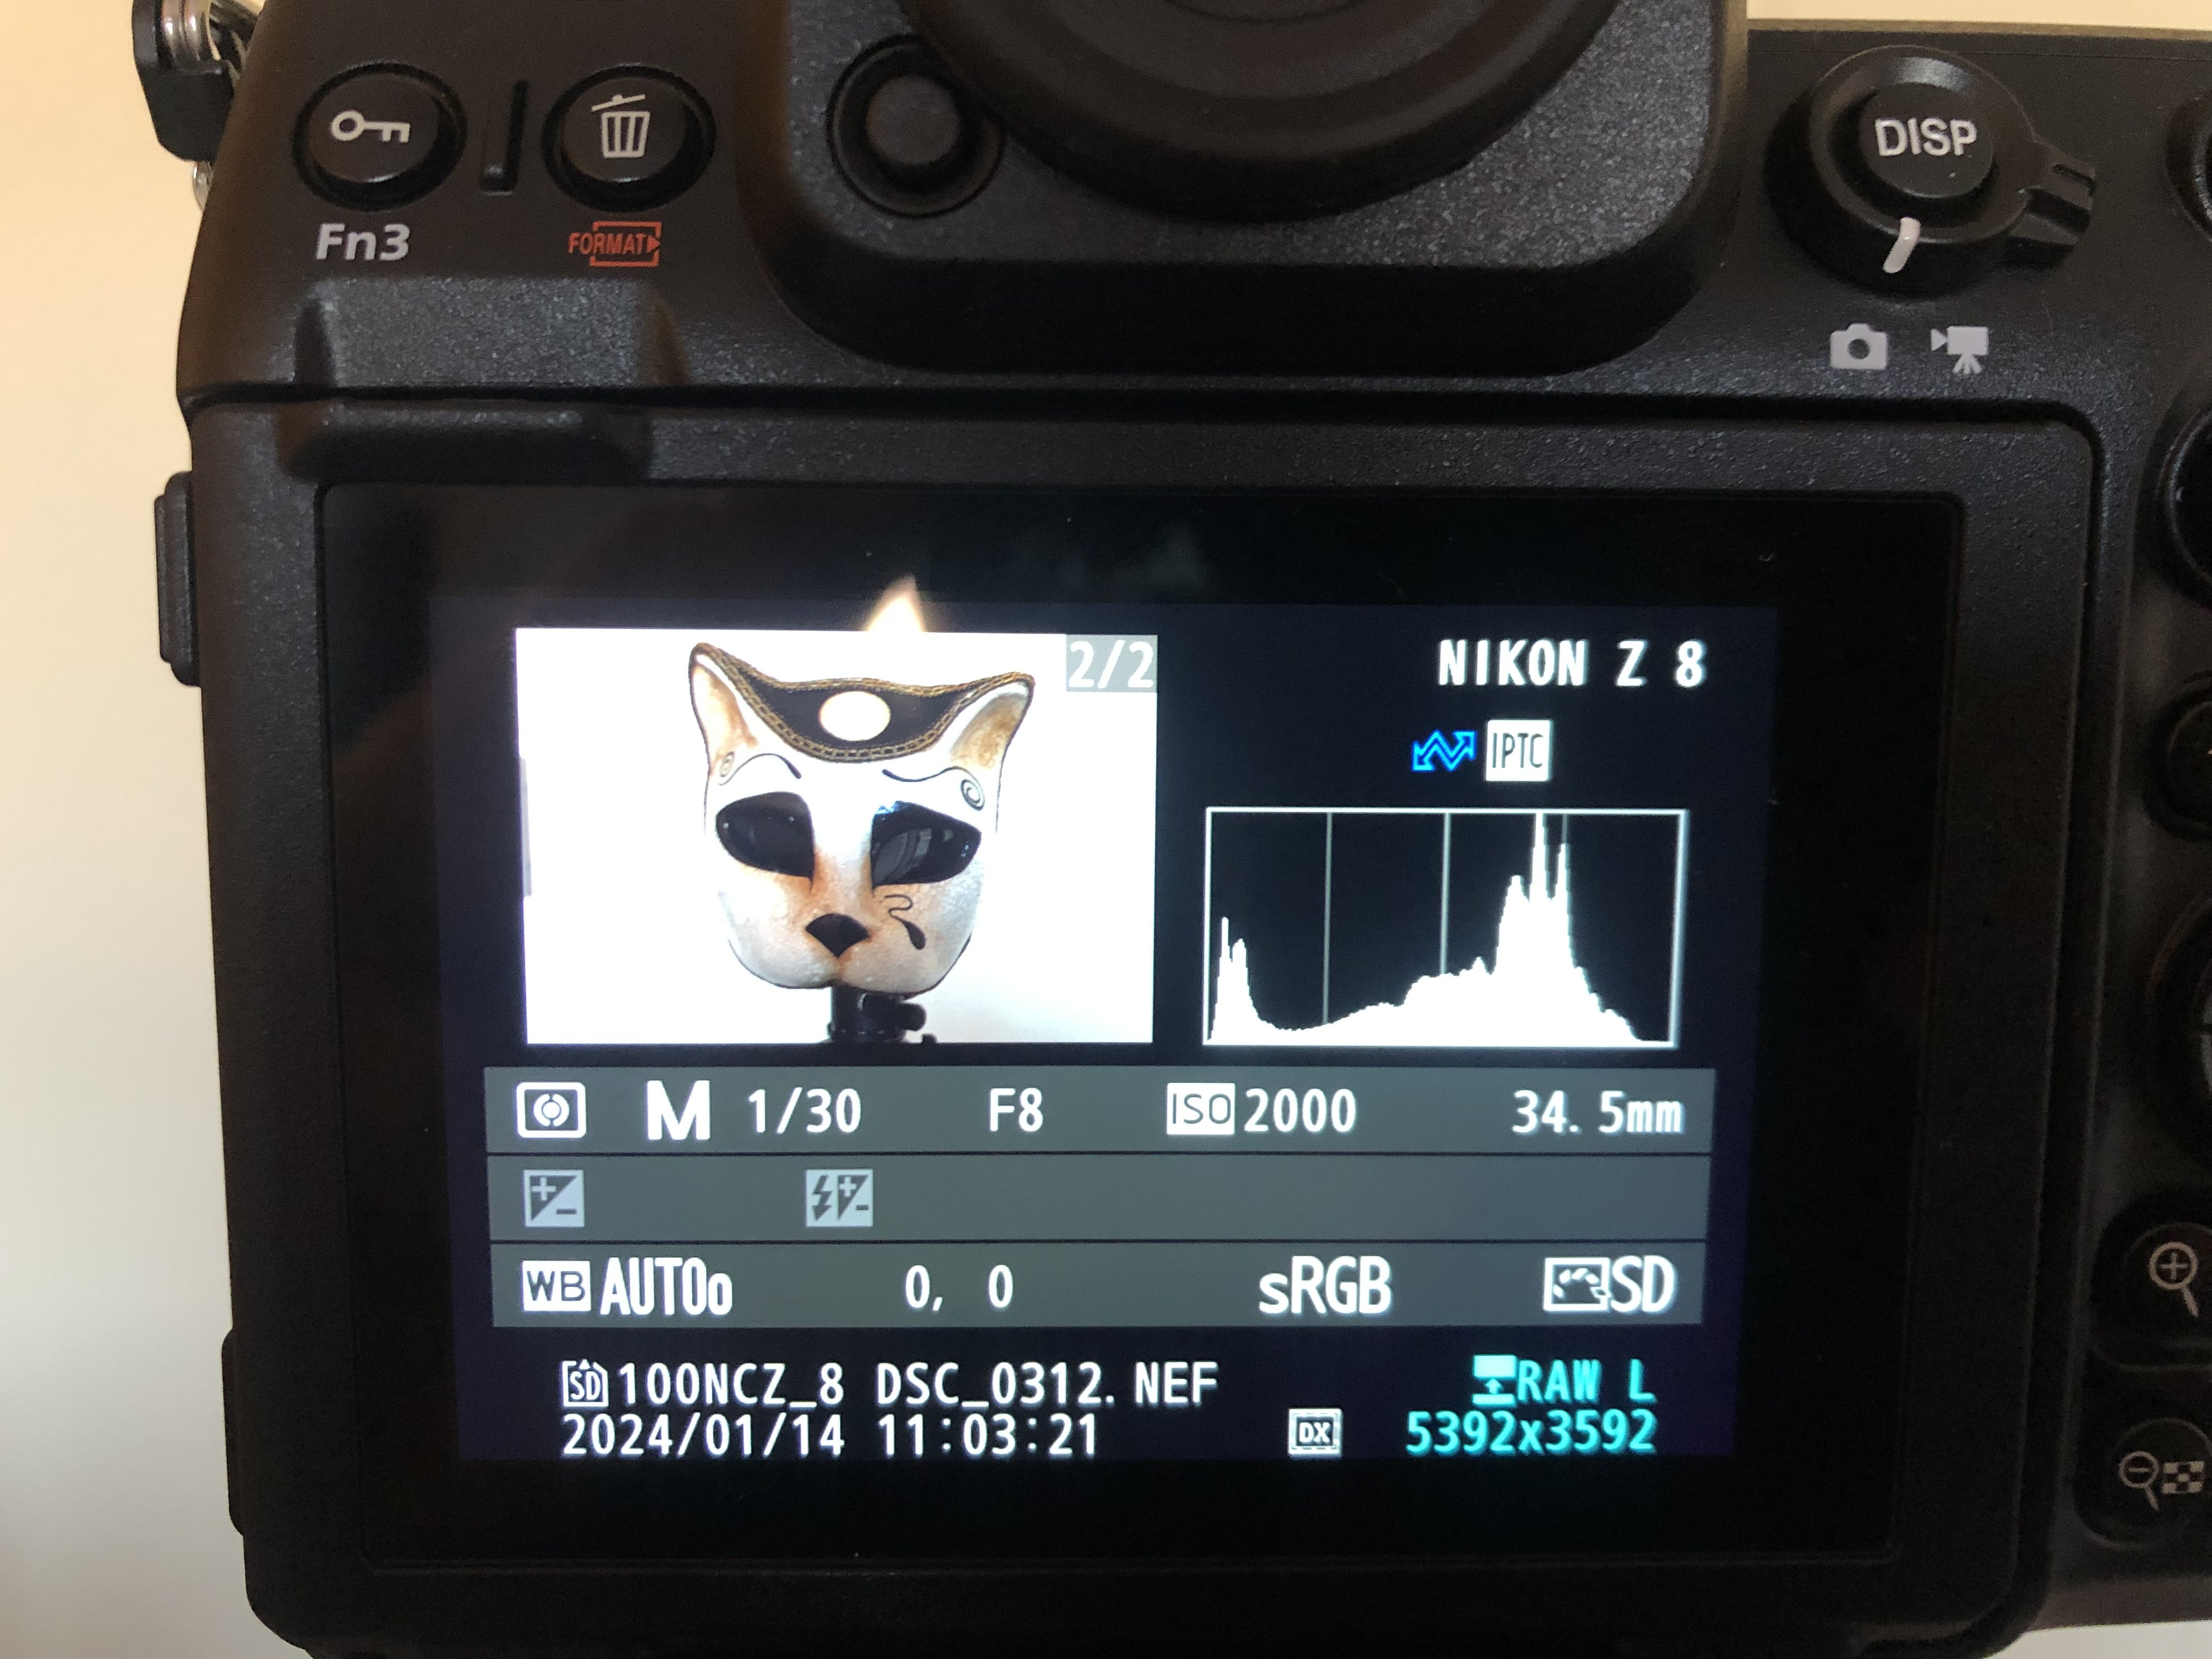
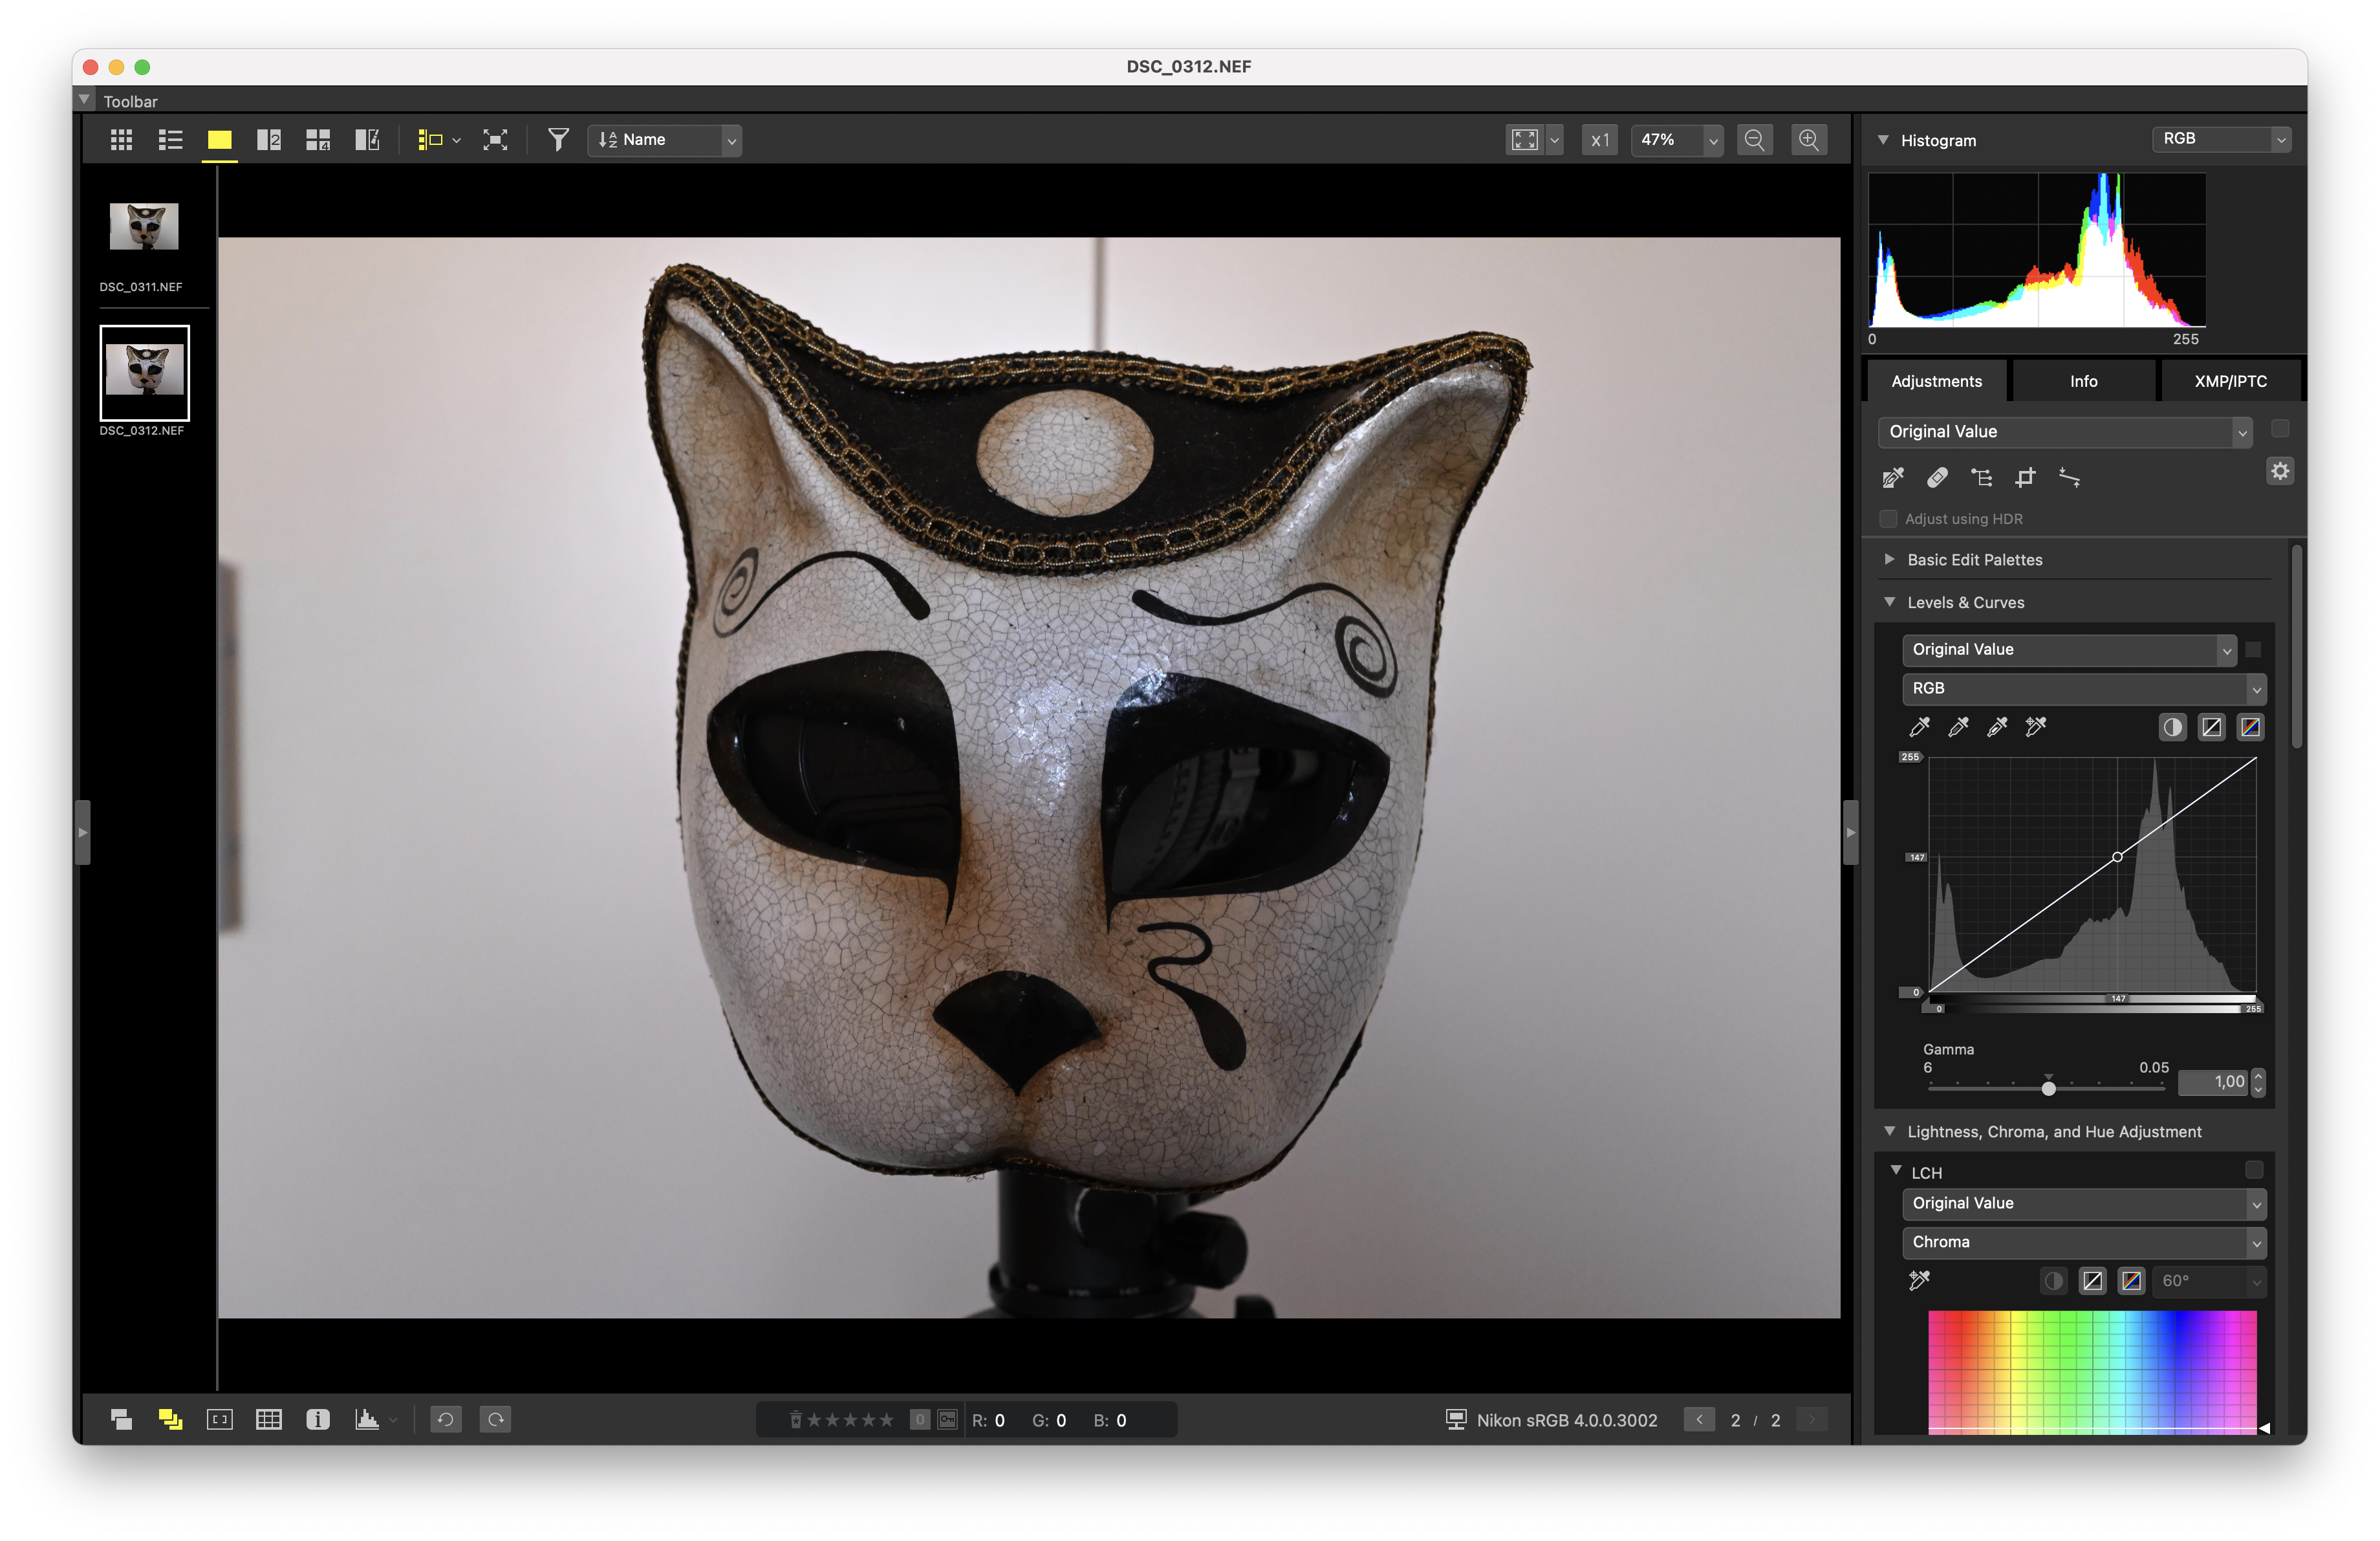
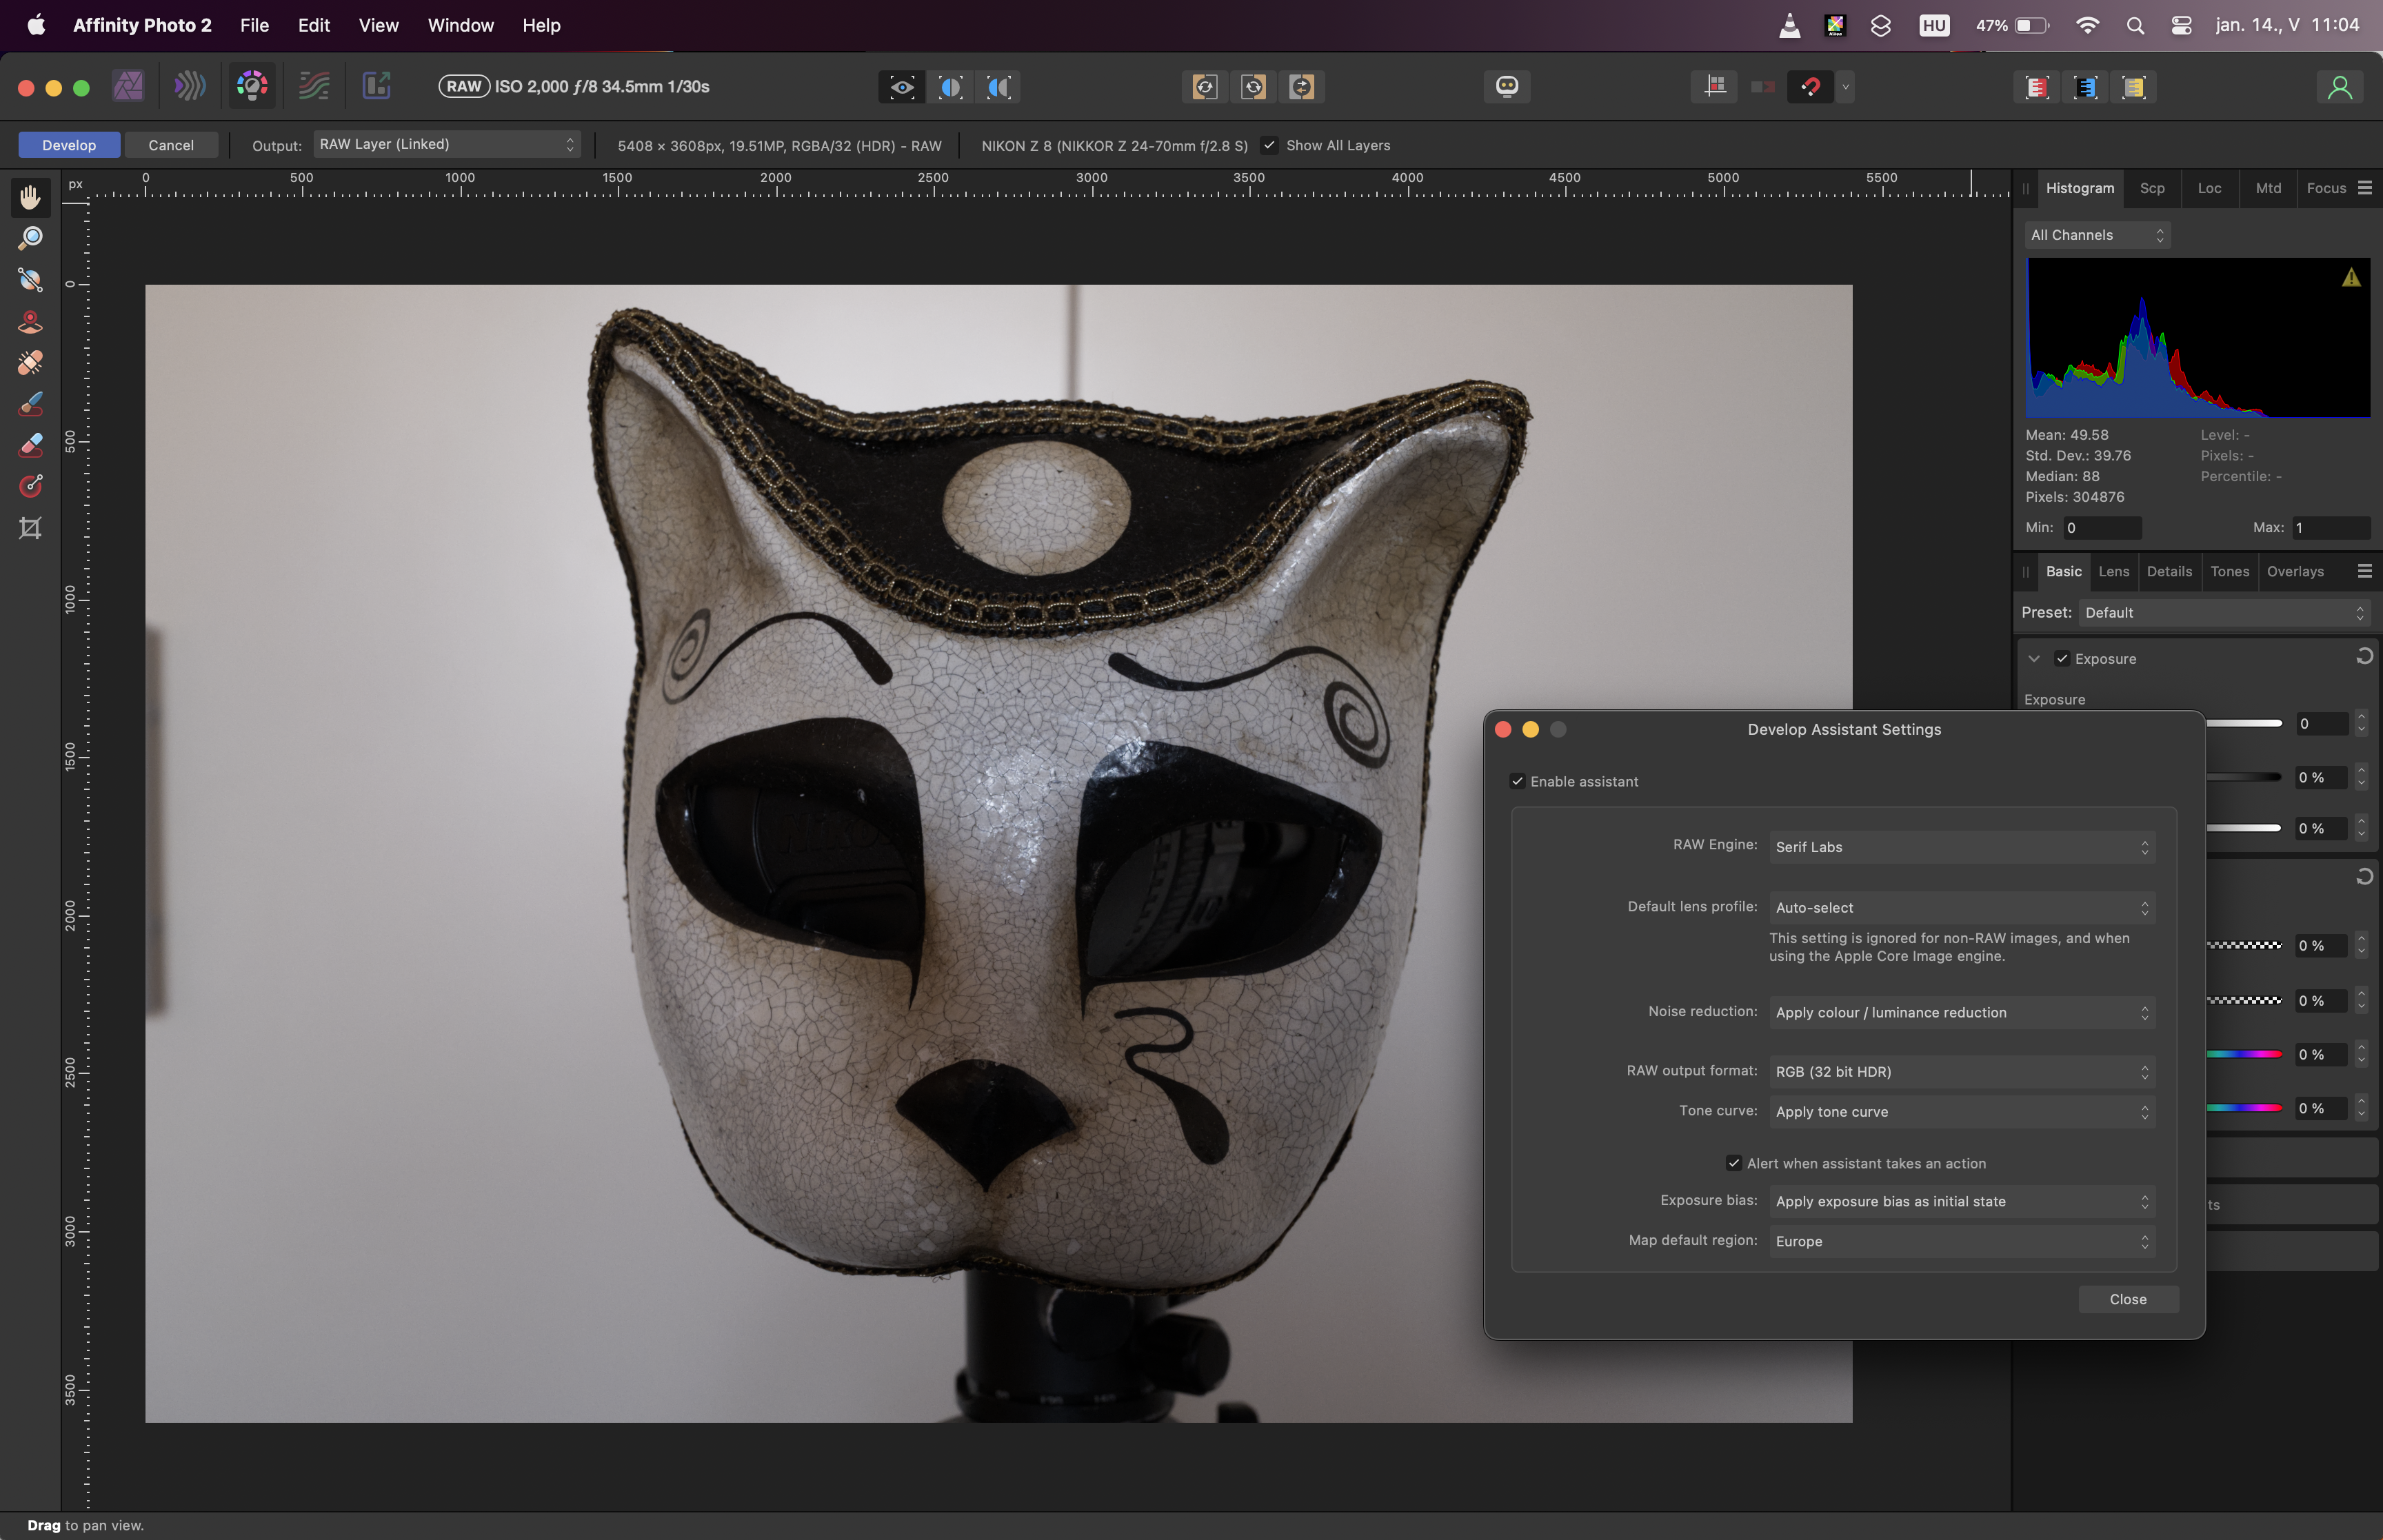
 Hello, I just faced a situation which makes me worry, and I'd like to understand whether I do something wrong or it is a real issue. I just bought a Nikon Z8, and I dowloaded all the Nikon softwares (NX tether, NX studio) for tethering. For developing and editing I wanted to keep using Affinity Photo, but when I sent to raw file from NX Studio to Affinity photo I realised that they are different. Please have a look at the attached pictures: 1. back of the camera, 2. in NX STUDIO 3. Affinity Photo develop persona. The histogram in the camera and NX studio is the same, but different in Photo and the overall, sharpness, and image quality as well. If I choose don't apply cone curve, the histogram is just even more different, and goes tot he darker side. If I change RAW Engine to Apple it's quite the same. My question is, whether this is something that can be fixed by some settings, or Affinity just can't process the NEF files equally well? Thank you very much in advance for your kind answer. I would love to be able to continue working in Photo. Zoltán
-
 Info: Camera: Canon EOS R6 OS: Windows 11 PRO CPU: AMD Ryzen 7 7700 VGA: ATI RX 6600XT RAM: 32GB HW acceleration: on (disabling has no effect on the bug) How to get the bug: - develop RAW - adjustment -> Curves - move the bottom left point up The procedure and result can be seen in the attachment. It also shows up in the latest public beta (2.3.1.2217) Maybe related to: CurvesProblem.zip
 -
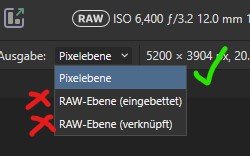
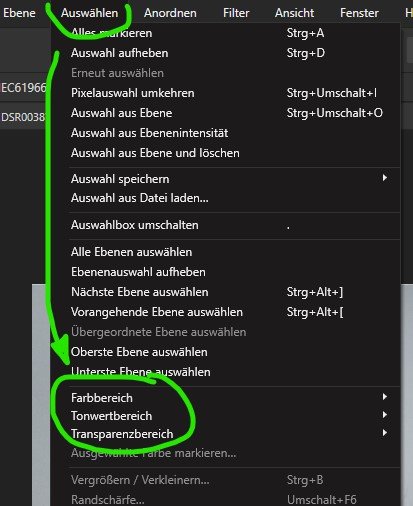
 Error after developping RAW: doesn't work. Menu: Select >Color Ranges or >Tonal Range... I suspect this is an Affinity program error and not an operator error. But I'm not an experienced user! The "bug" looks to be an incomplete implementation by the new RAW developer: · The “selection via menus” ONLY WORKS after the RAW is developed into a pixel image. · The "selection via menu" does NOT WORK if the RAW is developed with one of the two new options "RAW-embedded" and "RAW-linked". With several files (Sony ARW and Panasonic RW2) I had the same result, even after saving in Affinity format the error remains. For me, this new development was the main advance in version 2. So it's important to me. The selection via path etc. at least works (so far) and it was a good step to introduce the new RAW-Ooptions! Best regards
-
 The problem has been present since the release of the V2 version. MacBook Air M1 macOS Sonoma (also happened on Ventura). Only happens if I close the window before developing the photo. If I develop a photo and after developing I go back to Develop Persona and close the window the app does not crash. This happens every time with both hardware acceleration enabled and disabled. I recorded a short video. Nagranie z ekranu 2023-12-2 o 11.27.57.mov
 -
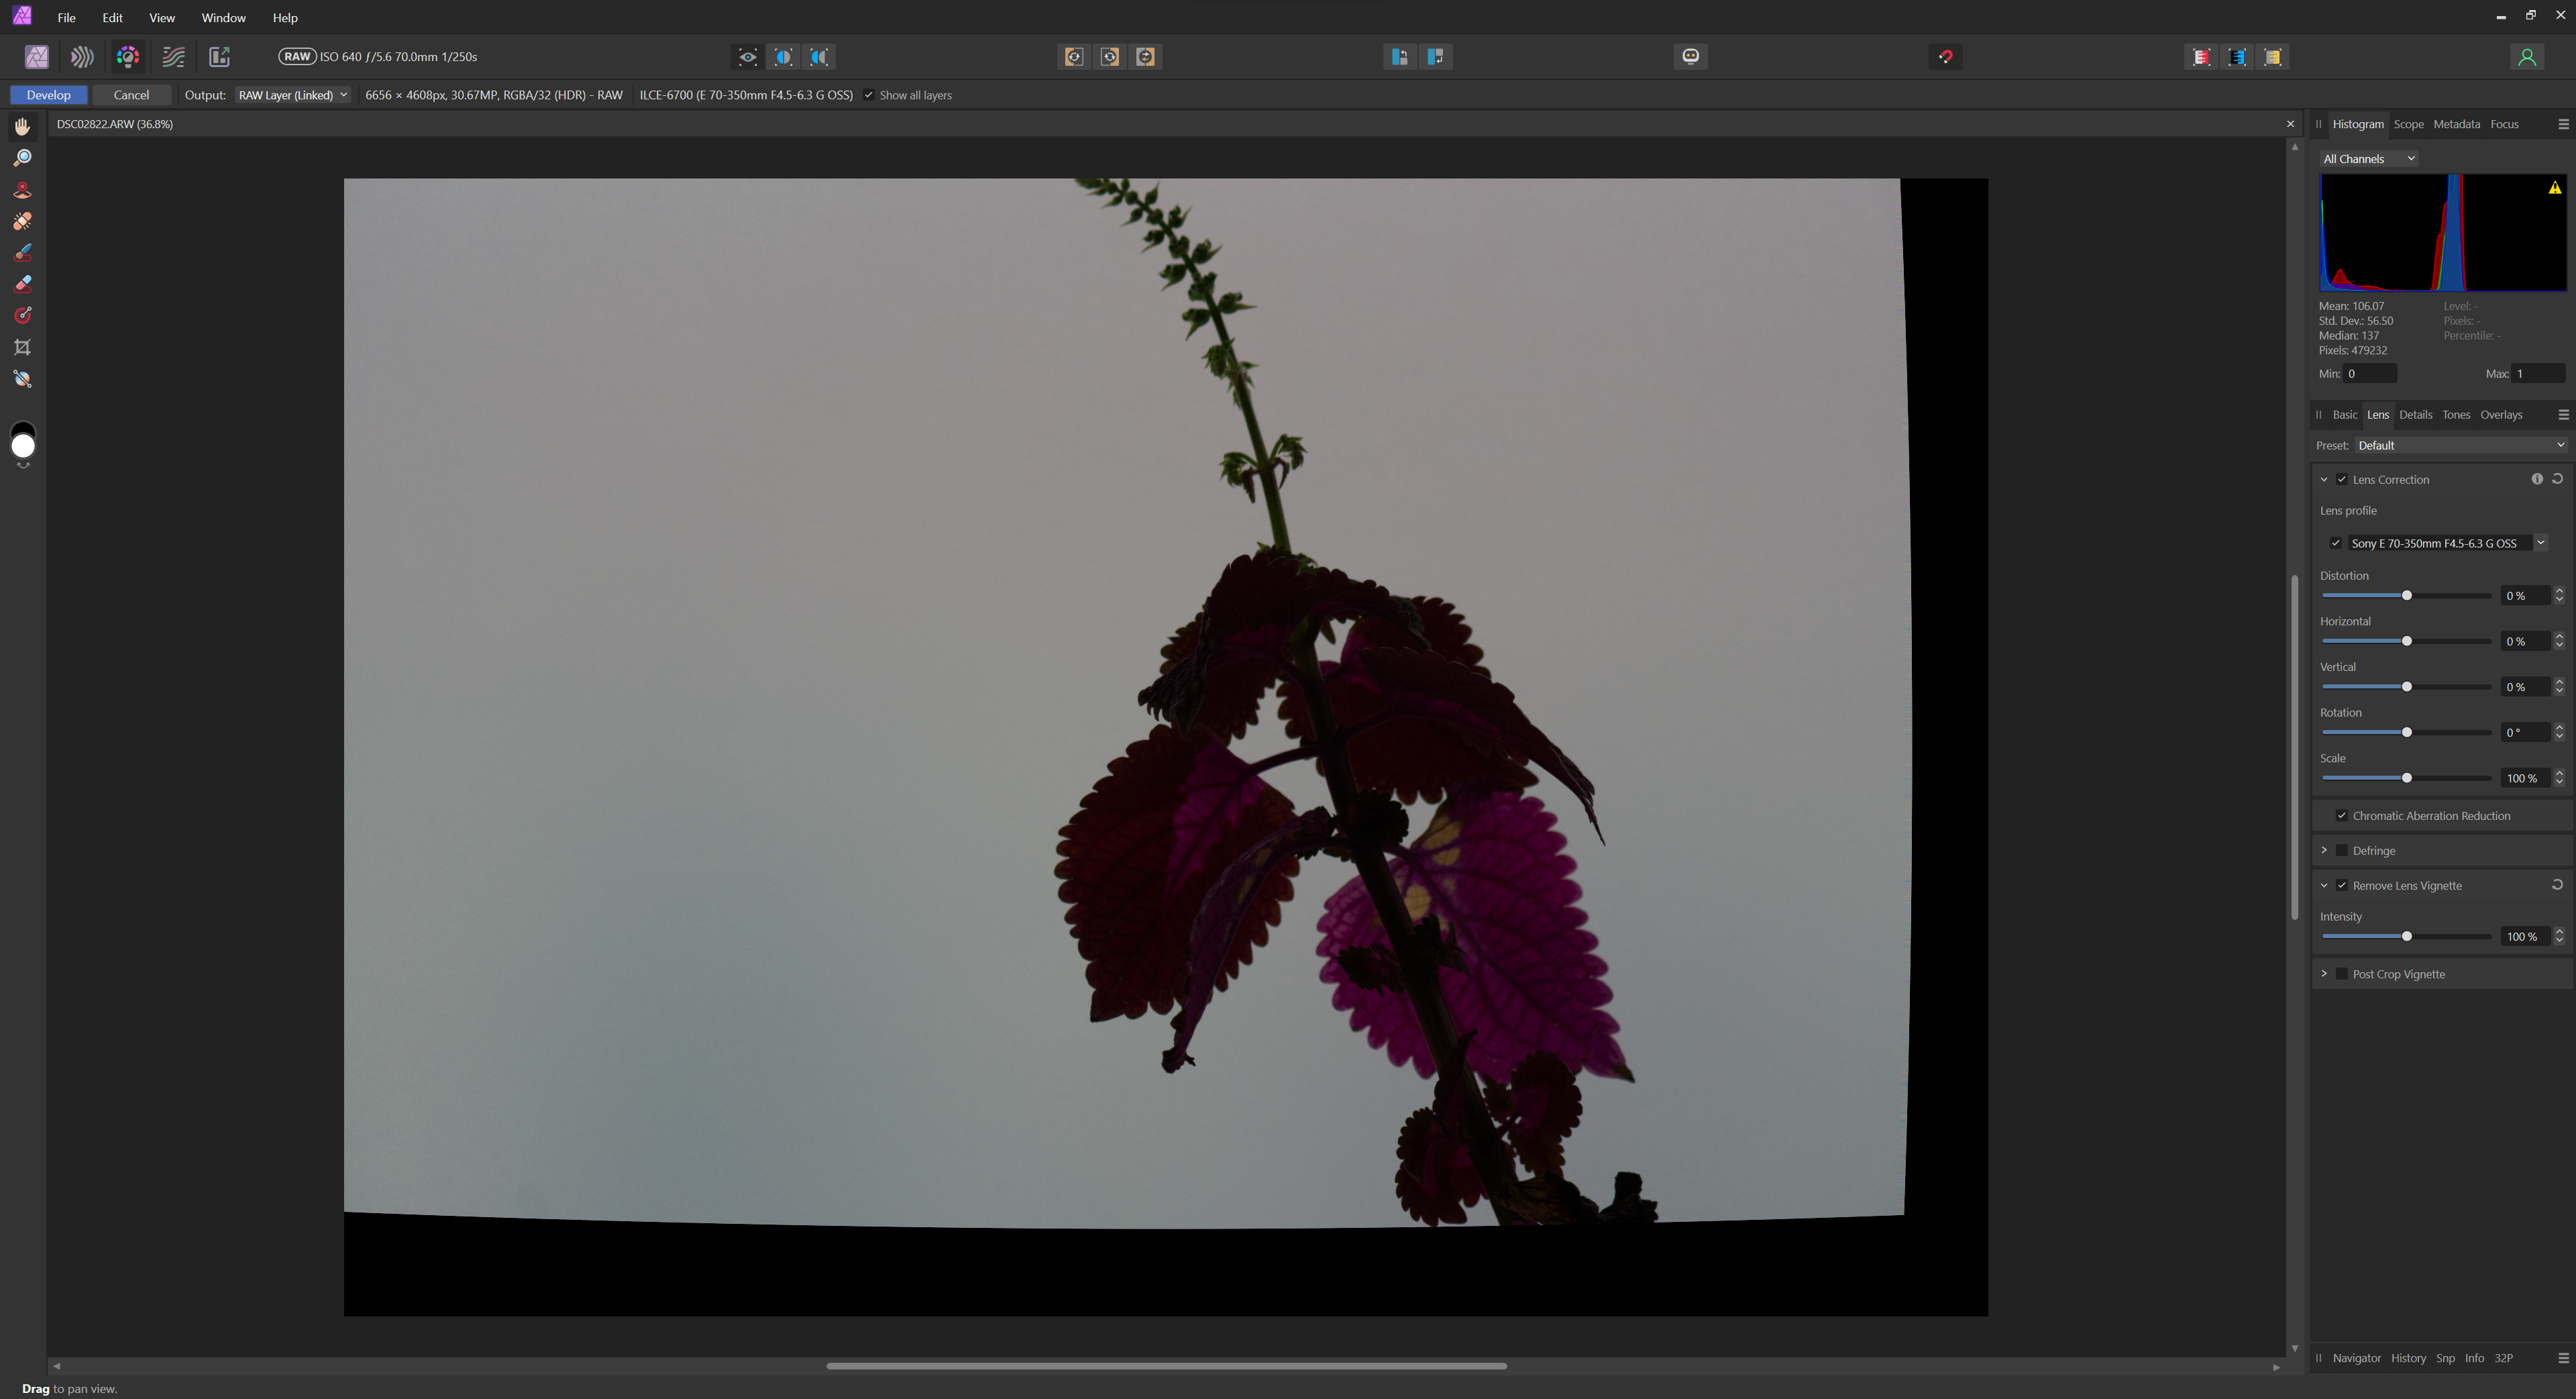
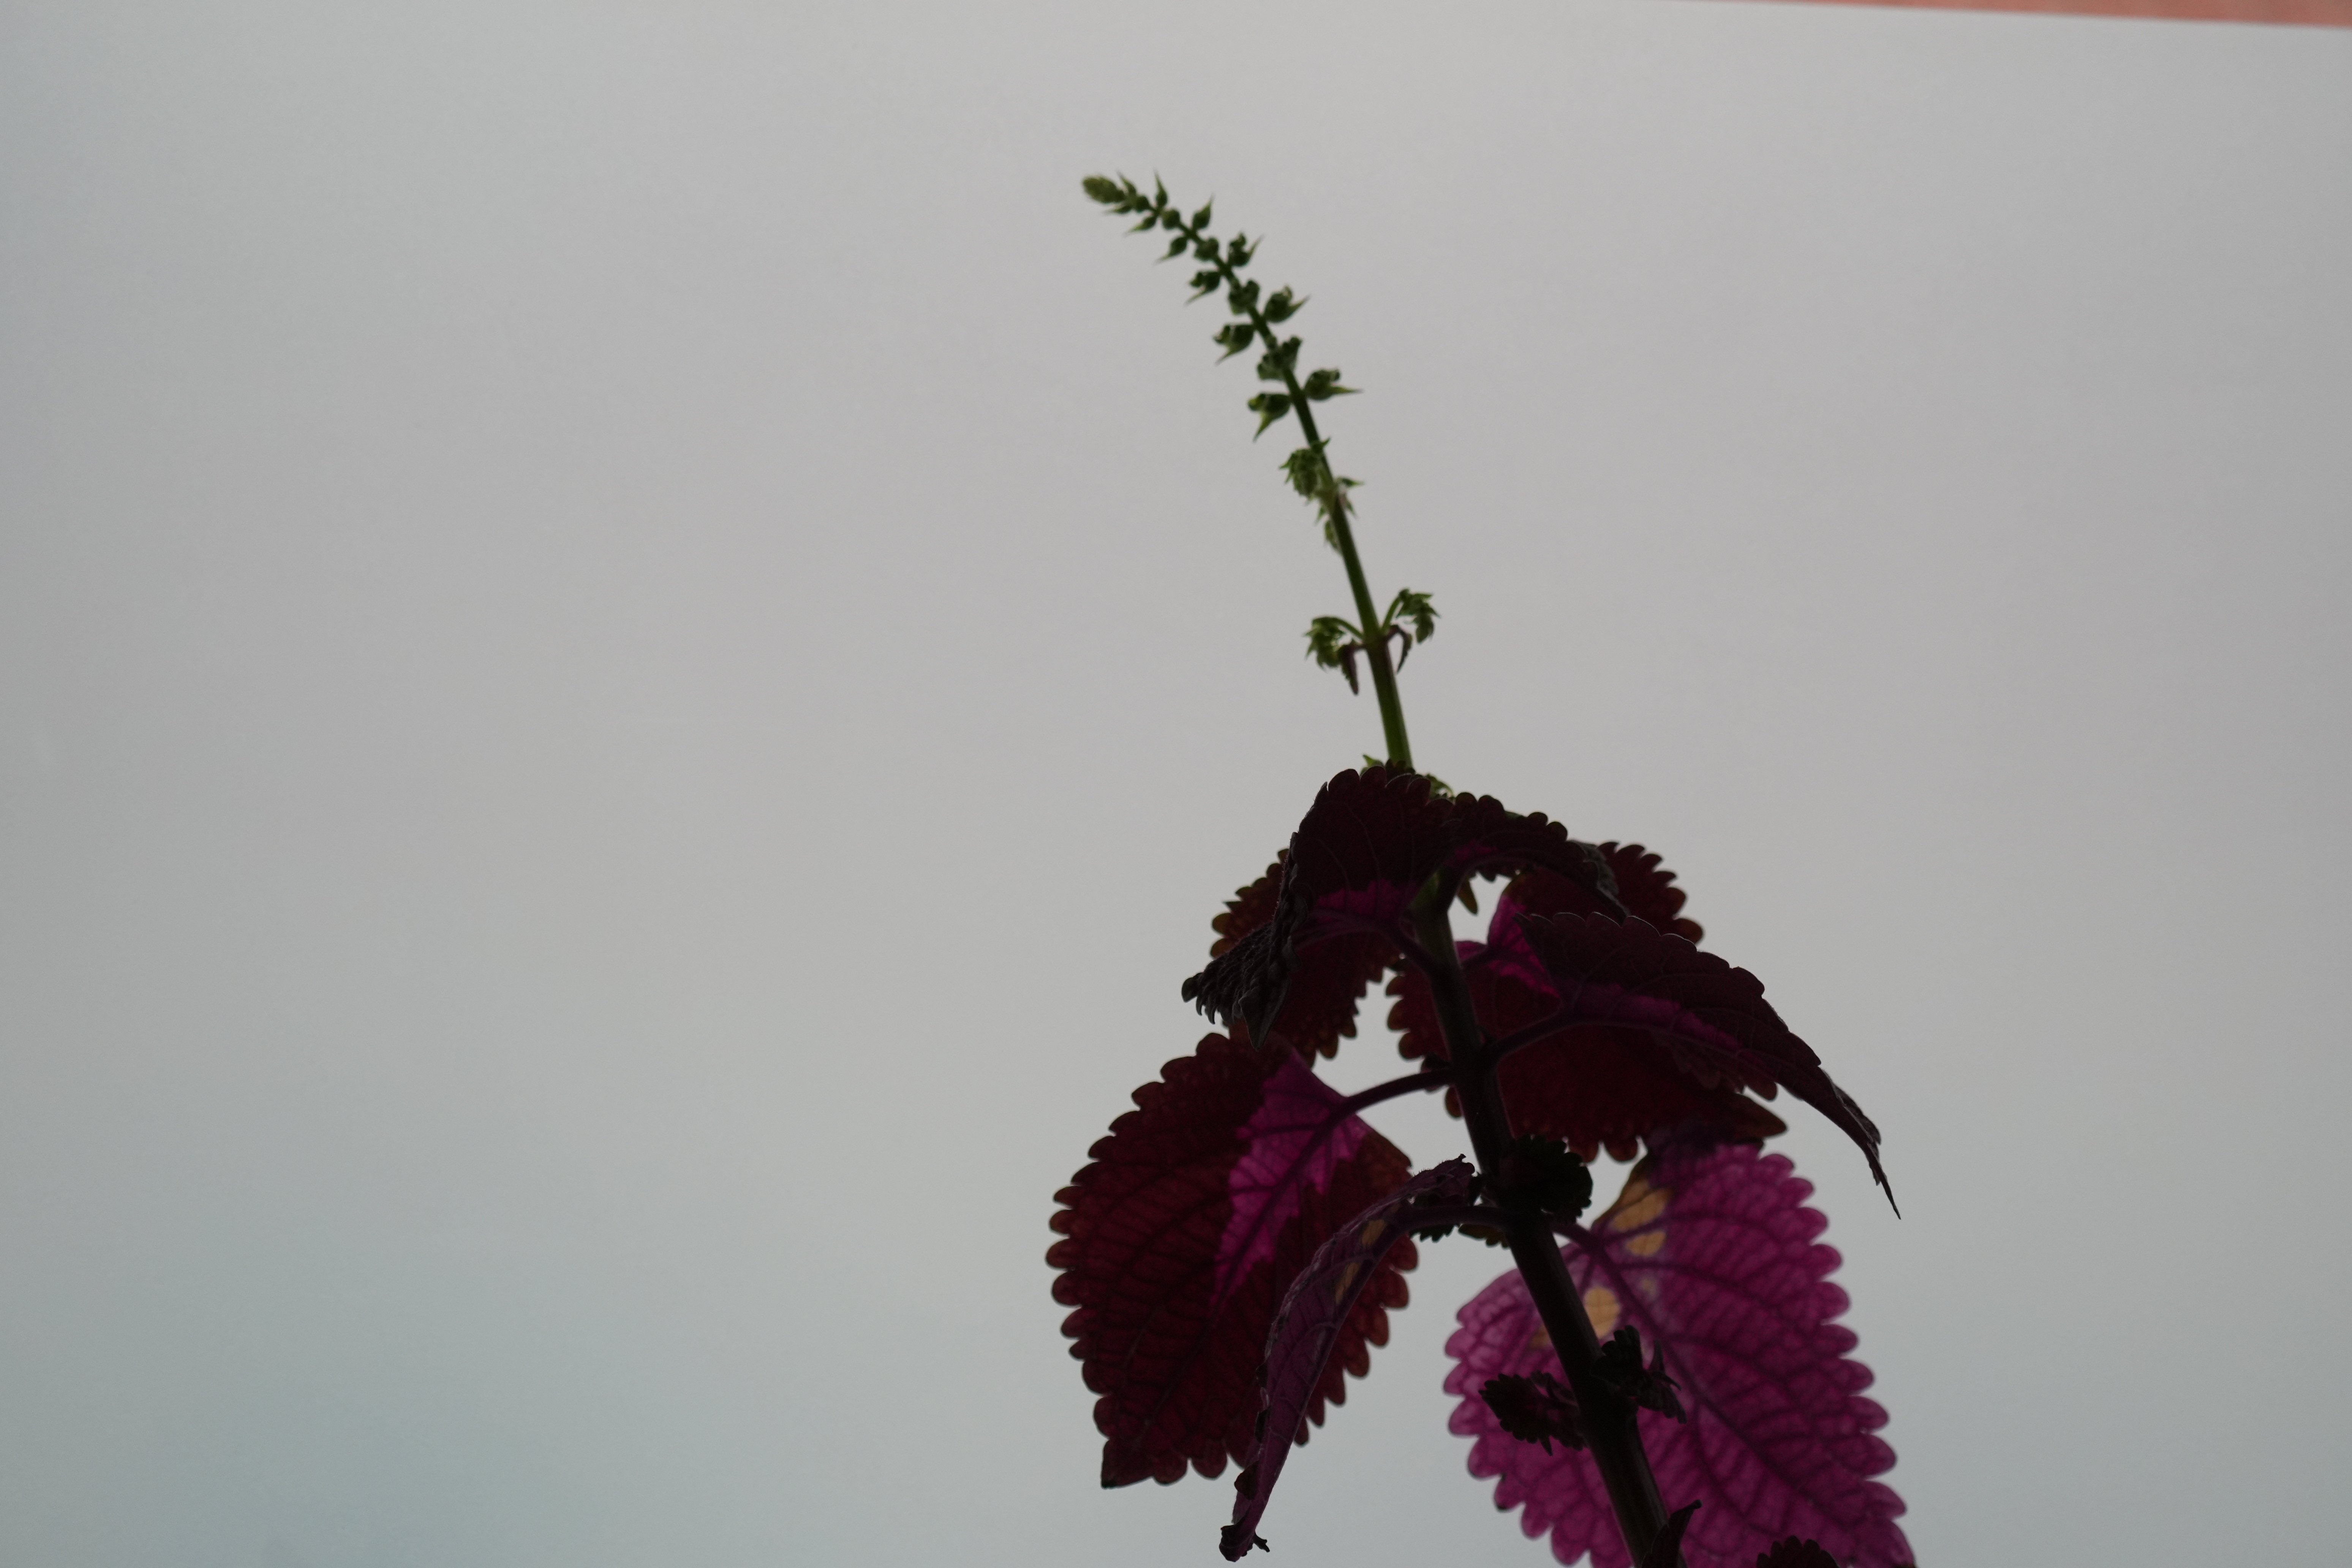
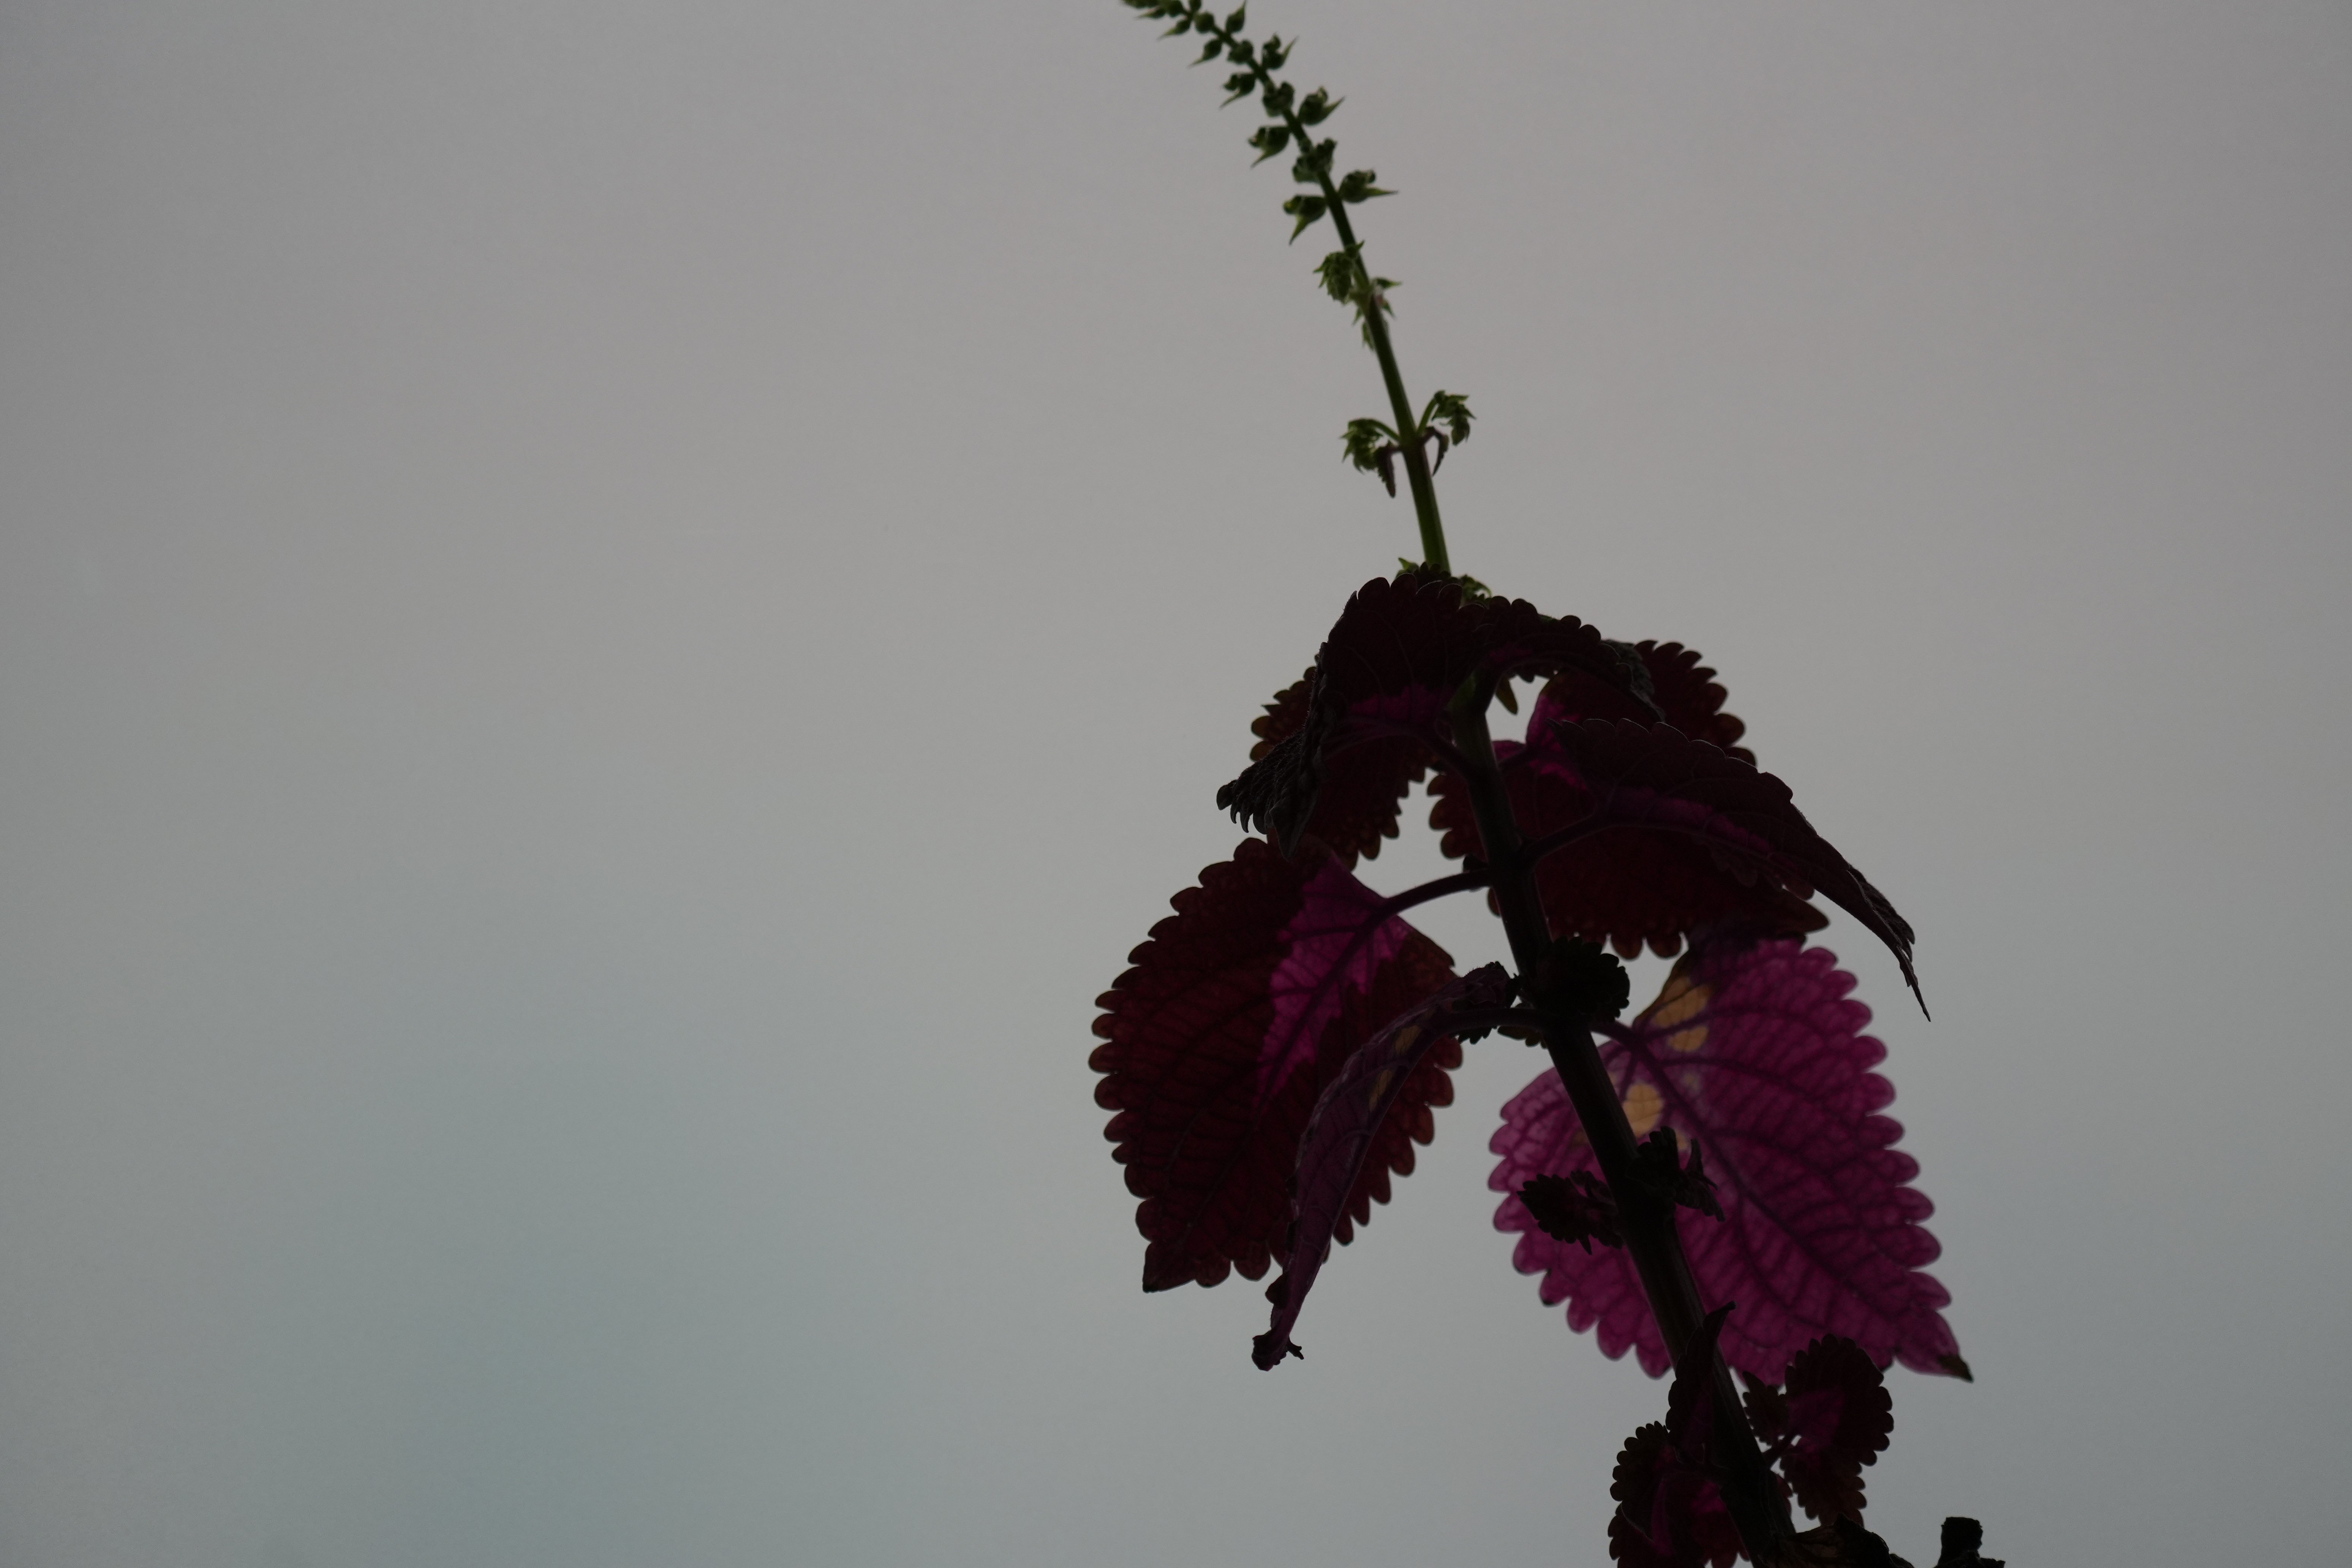
 Hi there, Affinity photo 2 is for some reason is not handeling the RAW "lossless comp" files properly. It seems that the lens correction is inverted and it makes blackbars around the image. When I use a compressed RAW image it is working properly. I tried resetting settings affinity photo 2 (no changes) Opend in ACDSee working properly Opend in Sony Imaging Edge working properly Opend in Windows photo working properly Test raw images added and jpegs all directly from the camera Specs: Camera: Sony A6700 All lenses when RAW compression setting is in "lossless comp" PC: Windows 11 32 gb ram Nvidea geforce RTX 4090 Affinity photo 2.2.1.2075 DSC02821 compressed.ARW DSC02822 lossless comp.ARW
-
 Dear Community! Shooting RAW files in cropped format (e.g. 4:3 instead of the default 3:2) can be very helpful for framing (knowing that one needs a ration of 4:3 later on anyway). Even though a non-standard aspect ratio (i.e. other than 3:2) has been set, the raw files will always be stored in full resolution of 6000x4000px, ratio 3:2. Opening DNG-files in Adobe Bridge will show the images as expected in the cropped ratio, the way I framed it and the way I want to export my edits as well. (The standard aspect ratio and image resolution, of course, do depend on one's camera model.) --> Question: Is it possible to apply the cropped aspect ratio according to the file's metadata in the "Develop Persona"? When opening Affinity Photo and loading the DNG file into the Develop Persona, the full RAW image of 3:2 with 6000x4000px will be shown, instead of the desired 4:3 with 5328x4000px. So far I was not able to find this option somewhere in the "Crop Tool [C]" or else where! Thanks in advance for any tips/links/hints/help!
 -
 Hello everyone. I have a question about what I'm doing wrong. I develop RAW files and I already have photos in Develop Persona that I am happy with, then when I press "Develop" my image looks completely different - it is much brighter. Do you have any idea what to do or maybe there is a tutorial about it? Thank you in advance Jurand Do
-
 On my Mac desktop affinity photo doesn't open my RAW files in develop persona, instead opens in photo persona. why? I don't know and need desperately to know why. thanks
 -
 Could someone at affinity please send an update on why the ability to open a raw file from Apple photos app on iPad M1 Pro no longer works in v2.1? It worked in the previous version so surely it’s not too difficult to compare the coding.
 -
 Attached is Revision A of my Tutorial on how I process and edit color negatives using Affinity Photo. (See Revision B later in this thread for an updated version). My original tutorial generally resulted in good conversions, but sometimes the deep shadows took on a blue cast. That could be corrected during editing, but was not ideal. Rev. A corrects this problem entirely and results in better, more accurate conversions. The process in Rev A is different, but is simpler to implement. I do not own a dedicated slide scanner, negative conversion software or plug-ins. Instead of scanning, I used my DSLR, a 100mm macro lens and an LED backlight to photograph color negatives, which I brought into Affinity Photo in their original negative form. I shot RAW, but full sized TIFFs work equally well. The approach described in this tutorial works with any brand color negative film and preserves the color relationships in the original negative. No special negative film profiles are required. This method works well for me and I hope others find it useful. There are many ways to process color negatives and convert them to positives, but this works reliably for me and yields an image that is easy to edit. Best, Lou Dina Processing Color Negatives in Affinity Photo-Rev A.pdf
- 23 replies
-
- 8
-

-

-
- affinity photo
- color negatives
- (and 3 more)
-
 When batch job exporting RAW to JPEG resulting pictures are too dark. Please help.
-
 Hi, Recently, I have been experimenting with using RAW files in Publisher. I have 6 RAW images loaded which have a gradient map adjustment layer applied on top of them. But loading the particular pages (FHD resolution for a presentation) really bog down the entire file. Are there any speed improvements possible still? Windows 10.0.19045, i7 7820HK, GTX 1070, 32 GB RAM
 -
Whenever I apply my master page that has a RAW image (developed in Publisher, default linked setting), to another master page, the app crashes. I have tried to go back to a simple and clean file, it still crashes. I went to the release version and the software crashed before I could even develop the RAW image, so I am reporting this with a Beta build. Cut out the part where it crashed: 2023-05-16 07-57-08_Trim.mp4 Steps to reproduce Create two master pages, one with a text frame for a title and one with an image frame. Place a RAW image in the image frame. Click on the RAW image and go to Develop it (e.g. change the exposure) When done, apply the master with the RAW image to the master with the text The software crashes This is on Windows 10.0.19045, using Publisher 2.1.0.1790. Hardware acceleration on. Also, it appears that if I change the way the image is developed (from linked to pixel layer) it works as expected. However, there seems to be no way to revert back to the linked file nor to replace the image like you would with any regular image.
-
I have a Canon EOS R8 and am having a problem. When I try and preview the .cr3 raw files on my Mac which is running iOS Ventura 13.3.1 affinity nor Mac will show me a preview of the the photo. Instead it only shows me the affinity file icon. This makes it near impossible for me to know which photo I want to edit without opening each photo up separately in affinity photo. Affinity photo does open the .cr3 file, however I am opening them blind and do not know which photo I'm opening since I can't preview them. I am using V2.
-
 I've been encountering a recurring issue with RAW development, but the issue happens inconsistently and seemingly at random. After loading a RAW file, I make some of the color and lighting adjustments I want to make to the file. But then I click "develop" and the edits are not preserved, leaving me with a developed image without any of the RAW edits I made. I use the same process for developing images every time, but the results have been inconsistent. Perhaps I'm experiencing a PEBCAK problem, but I'm not sure what exactly I would be doing wrong that causes inconsistent development results.
 -
 Affinity Photo v2.0.4 on macOS v13.3.1 – can't open Nikon .nef RAW files made with a Z9. Please advise. File appended. DSC_6063.NEF
 -
I recently sent a JPG file to a friend of mine and he opened the file in Photoshop. The JPG was exported from AP v2.0.4 (Mac Ventura). When he opened the file in Photoshop, it automatically opened the file in Adobe Camera RAW instead of opening it normally, as if the file I sent him was a RAW file instead of a JPG. I tried it myself on another computer I own that has Photoshop installed and got the same result. It launches Adobe Camera RAW, with a lot of crazy slider settings in the Basic Tab. The original file was a RAW DNG file from my Canon DSLR. I processed the original RAW DNG file in AP v2.0.4 (Develop Persona) and I chose to import it into the Photo Persona with the RAW file (linked or embedded, I forget which). I wanted to retain the ability to go back and forth between AP and the Develop Persona so I could make adjustments in the Develop Persona. That all worked fine, as designed. When I exported the file from AP to JPG, I suspect AP must have written something in the metadata so the JPG looks like a RAW file, which is what caused Photoshop to launch Camera Raw. To me, JPG is an industry standard file format and should not look or open as a RAW file in any program (even AP). The original AfPhoto file format is a different matter, since you want to retain that active link to the original raw file (if linked). Is this a bug? If intended, should it be changed? I suspect so. I don't want my JPG files sent to others opening as RAW files. I exported the file from AP to JPG twice, and will attach both files. One has sRGB embedded and the other is Adobe RGB.
-
 This has probably been suggested already, but I really wish Affinity Photo could add a method of saving RAW edits using a xmp sidecar file (or other non destructive way like how Adobe Camera Raw remembers edits to dng files) so that I can re-open edited raw files a later date. An option to reset edits back to original settings of the RAW file should be included too. The current method of having to bake edits after developing and to save as an .afphoto file is a pain, due to making another large file or having to re-edit the RAW again.
- 17 replies
-
- 5
-
-
- xmp
- raw editing
- (and 4 more)
-
Hello, I am new to Affinity and a bit confused to how to save DNG edits in Affinity Photo. My workflow when I was using Photoshop was to first convert my raw Nikon images in Adobe DNG Converter, open the dng file into Adobe Camera Raw to edit, then open into Photoshop. If I was to close that photoshop file without saving, I could re-open the dng file (back into Camera Raw and my previous edits would be saved. So I have opened a dng file into Affinity Photo 2 on iMac, it opens up in develop persona and I make my edits. I then click develop (raw layer embedded) and if I close the file without saving, and re-open that dng file again, the edits aren't saved. Is this normal behaviour? Is there a way to save the dng edits without making an affinity save file? Lee.
-
 The choice in developer is grayed. Input files are from a canon EOS R5 .CR3 file. I used to work in HDR, for getting better results in backlight with pictures of birds in a bush. Worked fine for me in photo 1. I recently stopped doing that, to give the RAW embedded function a chance. I am an amateur photographer. I made some changes to the settings of Affinity Photo 1 using information provided. Something seems to have created a problem!
 -
 I'm using Affinity Photo v2 on W10 and I'm not able to open RAW gopro gpr file from HERO 10 camera. Both 'Open' option or 'Drag & Drop' don't allow to import the raw image. The camera is listed as supported at the following link:
-
 Hello! When working with the “Develop Persona” section, I was very surprised by the lack of elementary tools for working with mask layers! Namely, what is missing so far: There is no way to show, turn off, hide or fix a layer with a mask. I can't invert the layer mask. I can't copy the mask of one layer to another layer. There is no way to adjust the mask to select dark or light parts of the image for processing the RAW file. All data about layers and masks is deleted after I return back from the "Photo Persona" section to edit the raw file in the "Develop Persona" section. A huge request to developers is to implement in the next updates these elementary tools and functions that are available today in almost every raw editor and converter. Thanks! 😗👍
-
 I like what was done in the Develop Persona in Affinity Photo. I use Affinity Photo in the last step of my processing. Today I had plenty of time to really test the output I could get from binging my RAW files into Affinity Photo after my first two steps of culling and adding IPTC and keyword data. So, instead of developing the RAW file in my regular editing software and sending a tiff to Affinity Photo I took the RAW file directly to Affinity Photo. What I found throughout the day was I was getting as good or much better final product with Affinity Photo, the result file size for the .afphoto was much smaller because it held the linked RAW file instead of a tiff file, and it had read and loaded the key words from the Xmp sidecar. I think if had a way to create presets that would let me populate several of the Metadata fields I could simply paste in the keywords for a photo and go straight to Affinity Photo from my culling of photos. I intend to keep working like this until I hit a snag that I didn’t encounter today. What I would like to see is: A way to click and have a larger area for the metadata fields so it would be easier to type in the data and paste in keywords. Something like an option button on the Metadata Panel. The current area and print is too small to work with for a long period. Anything to make entering that data would be good. Not having this now is not a problem that would prevent me from going from culling, to meta data entry in another app and all development. In short, the changes in the Develop Persona are going to give me a better or equal final product, save file storage space because of smaller afphoto sizes, and save me from having to maintain multiple RAW converters. Nice job by the folks who worked on this rewrite in any capacity. Thanks. Peace Marvin