Search the Community
Showing results for tags 'RGB'.
-
Hi to all, I would like to suggest an RGB indicator for the histogram in Affinity Photo, notably in the Photo Persona, but it would of course be good to have it in all the Personas. I've attached an image below showing the RGB indicator in RawTherapee as an example; it's the bar underneath the histogram, indicating where the R, G, B and luminance values of the hovered-over pixel fall in the histogram. I took this screen shot with my mouse positioned over the band of trees in the image. I find this indicator to be extremely useful, especially as a quick way of verifying details in very deep shadows or very bright highlights. It lets you see instantly, for example, if all channels are blown out, or if you have just one channel blown out with others still contributing detail. Seeing the position of the pixel value in the histogram is, at least for me, much more informative than the simple number given by the Info box. Thanks! KE

-
- 1
-

-
- rgb indicator
- histogram
- (and 1 more)
-
 The edit swatch pop-up pallete shows sliders and samples in RGB when in CMYK mode. The regular color pallete works fine.
-
 I'm working on a web design, and I am trying to make a custom navbar menu icon to use in my navbar. The color I am using is CSS3 SteelBlue RGB(70,130,180). I used the sliders to set my color, but on export to jpeg (using Lanczos 3 (non-separable)) my color turns into RGB(84,129,176) and no longer matches my navbar. What settings do I need to use to keep my RGB values consistent. And for those wondering, I am using Photo and not a different program.
-
 Hi.. I use this document setup: type: print (press ready) color format: cmyk/8 color profile: U. S. web coated (SWOP) v2 But I have some issues, when I choose the color on the box, and I pick that color with "color picker tool" to coloring another object, the result is totally different, only cmyk code is the same. Yes I can just copy the #xxxxxx code to coloring another object, but I want to use that color picker tool because it's simple. And the client usually use AI to open eps file, I tried to export my files from affinity to eps file, and open it in AI, and yes the color code is changing, I'm confused :p Please help me to solve this issues. Thank you for your attention :)
-
 This may be a very silly question. Is there a way to automatically convert a vector image created with rgb colours into CMYK without having to select each individual colour and changing it manually? No I don't want to convert it when saving it but to action it on the page.
 -
 hello, new here. I read some topics on conversion from rgb to cmyk but still in doubt... I have done some illustrations for a children book in affinity designer, with ,for some, backgrounds with gradients, text on a path. all in rgb. First time I am working in vectors. The infographist who is assembling everything for the printer ask me to convert to cmyk. I did, reworked the colours that were different and very dulled. when converting I choose, print (press-ready), 300 dpi, cmyk-8 (us web coated swop)V2, transparent background and checked " assign" He asked for a EPS file. When he opened the file, a warning appeared saying that some elements were still in rgb. Did I missed something? I have multi layers with vectors , should I merge them? Apparently, text on a path can be a problem as gradiant, some are from full colour to transparent. thank you very much for your help Benedicte
 -
 Dear Affinity-Community, I hope you can help me in this case ! I created a flyer using Affinity Designer. Colors are CMYK (ISO Coated v2 300% (ECI)). For this flyer I have approx. 50 photos of leather watch straps, where the color is one of the most important things. I edited these photos in Photoshop CC and they really looked fine in PS CC (also CMYK !). The colors are very rich and deep if you are looking at the photos in Photoshop CC. Then I exported the photos from Photoshop and saved them as PNG (CMYK / ISO Coated v2 300% (ECI)). Also the image looked fine when I opened it at the preview on the iMac. But as soon as I import this image to Affinity Designer, the colors are very very pale ! I hope you can help me get this problem under control. Thank you in advance ! Best regards Lucas
 -
 I've been using Affinity Designer for quite a while now, but this is a first today. I have the color chooser open and I am working in 2 separate documents that look the same, but are different size. I copy and past the EXACT same RGB color code into both documents and they are 2 completely different colors. On one document its a bright green, they other a dull green. This is the first time I've had this happen. It's extremely difficult to know what color this will appear as on my website. Any idea why this is happening? Thank you
 -
 Pre Export: Post Export: You probably get the Problem I've checked all settings and still don't get where the problem could possibly be..
 -
 How to convert all RGB to CMYK in Affinity Designer?
 -
 I have taken some raw pictures with my Nikon D5300 camera using adobeRGB format. When I import them to affinity photo (AP), first I do nothing to change the color profile and edit them as if they were sRGB, then I try and export them as jpegs using the embed ICC profile sRGB. But when i open this file in another program it says that it is a adobeRGB color profile, and I can see that the color does not match. Then I go back to AP and change the assign a adobeRGB profile to the picture and I get somthing that is similler to the export. I then choose to convert to the sRGB profile, and then do my andjustment, and export to jpeg using the embed ICC profile sRGB. However it still seems that the profiled red by the external program is adobeRGB, and the convertion has not made much difference. There is still a discrepancy between what i see in AP and what I see in the external photo viewer. I do not know if I am doing somthing wrong or if there is a bug with export, in that the ICC profile from the raw file is still included?
 -
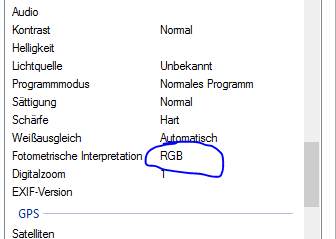
When I open a NIKON NEF raw picture in Affinity photo the color space and the dimensions are wrong. Affinity shows sRGB instead of RGB / 3900x2613px instead of 3872x2592px / see attached screenshots
-
 What are the quality & usage purpose differences between exporting an image via document format & 8bit rgb? They both appear to be jpgs. I'm uploading to an image site I sell my work on - thanks! Adan
-
 We're having some issues with transparent PNG images. One of the web apps we're using needs to have the PNG images use an "RGB Image mode". The app developer says they show as "Indexed". My guess is the designer created them in Adobe Photoshop or Illustrator. The designer is out of the country now and unreachable for several weeks. 1. How do I tell in Affinity Photo if this "indexed" mode is being used? I've gone through the settings but don't see anything. 2. Can I convert these images in Affinity Photo to RGB mode? In checking Affinity Photo, I see that if I go Export | More there is a setting for ICC Profiles that does have some "RGB" entries. Thanks in advance.
 -
 Right now, an Affinity Photo document can only be RGB, Grayscale or LAB at a time. However, there are several workflows where it would be beneficial to work in more than one. Examples are: Black and white conversion – you would like to end up with a grayscale image, but work with RGB data using channel mixers, HSL and so on and be able to edit these after the fact. The final image being saved as Grayscale is so important because it ensure that it ends up being separated into the CMYK black channel, leaving CMY clean. Applying LAB mode corrections like LAB curves inside of an RGB mode retouch (could also be implemented as an implicit conversion as part of the curves adjustment layer like in PhotoLine though) Manually fine-tuning the result of CMYK conversion by manipulating the image in RGB mode (possible through soft-proofing, but requires a manual CMYK-export in the end and you have to re-do any manual adjustments that may have been made on the resulting CMYK file every time) These will be even more relevant once work files can be saved natively as TIFF retaining layers and so on since you can then actually place your working files in third party software and not have to export a bunch of separate files. Especially in the B/W case, you currently have to keep your RGB original retouch, then your BW conversion RGB file, and then a final single-channel BW exported file. Currently, there seems to be no other way than to flatten the image and convert to another mode as far as I can tell (haven't tried placing embedded documents yet though). Photoshop provides a rather clumsy workflow where you can convert your entire document into a smart object and then change the colour mode of the enclosing document. But especially if you just want to quickly apply LAB curves a bunch of times in your retouch, the nesting just becomes unusable. If you had simple adjustment layers along the lines of "Convert to LAB" and "Convert to CMYK", that would make it easy to mix the best of all worlds in one single document.
- 1 reply
-
- 1
-
-
- Adjustment Layers
- RGB
- (and 6 more)
-
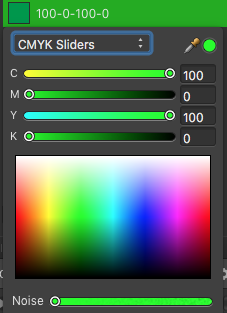
 I am not sure what I have done, but colors are no longer displaying correctly. When I enter the hex code, the color should be correct. It is actually lighter than it should be. in addition, the color chooser is not displaying correctly, with the top half appearing to have a white gradient over it, This is the second time this has happened, so I am sure i am changing a setting somewhere, I just do not know what it is.
-
While using a iPad Pro I'm trying to change the color of a door. After selected it, I opened the channel mixer, and chose RGB. The values are + or - 200% I was expecting, and wanting the values to range from 0 to 255 I had hoped to plug in the values for specific colors. Is it possible to change to the scale I want, and if not how do you choose a specific color Thanks,
-
 Dear Community, its my first question here and I'm a “newcomer“ of the photography-world, but I think that you have an answer for my question. We are a small company from Germany which are selling gift paper & -ribbons. At the moment we are modify our catalogue and online-shop. Caused by that we need a lot new photos of our products, which we release with PhotoKey 7 Pro (very easy and good) want to edit afterwards with Affinity. Certainly a lot of our products are similar but in different colors. We want to shot one or two main pictures which are colored afterwards in the certain color. We have already tried it with "recolor" or "HSL-Adaptation" but there it is only possible to change the color with Hue/HSL. Primarily we are working with Pantone for our products, but also have the option to use RGB/HEX/CMYK. My question now: How can I colorize our images in a precise color (Pantone/RGB/CMYK/HEX) “fast & easy"? Here you find an example for one of our products and I will upload some images which we already shot. http://geschenkpapierverpackung.de/geschenkbaender/chiffon-geschenkband.html (it is our old presentation which getting an update) Thanks in advance, Carl Buening P.s. the “green-screen“ & light situation is just a first try, it will be better later (but we like it already) 1. original image https://www.dropbox.com/s/vu5893p1pd1pt0r/IMG_9869.JPG?dl=0 2. released image with PhotoKey 7 https://www.dropbox.com/s/81jgvpu8qu75nba/IMG_9869%202.png?dl=0 3. colored image with Affinity (not precise enough) https://www.dropbox.com/s/w2qnt5583qgjiuk/probe.jpg?dl=0
 -
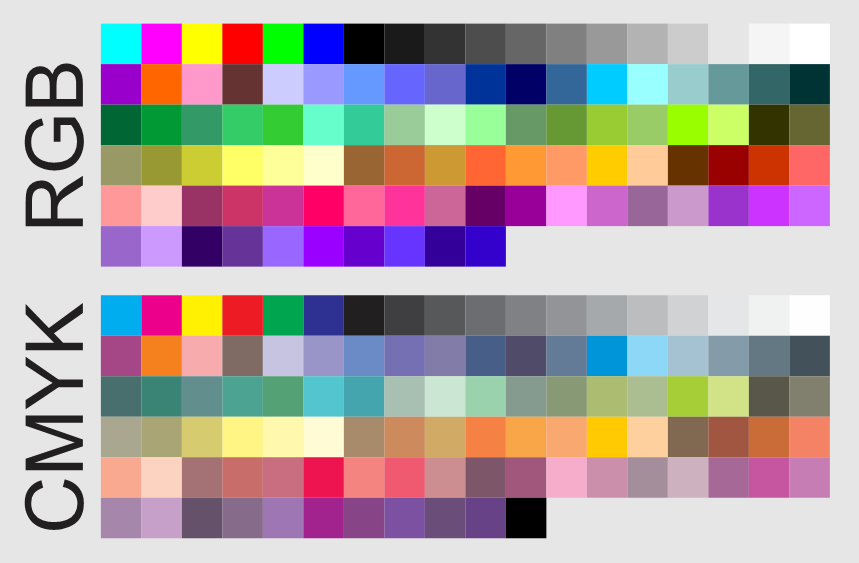
Hi all, im up this zip containing two pallets rgb and cmyk basic. colors set.zip
-
 Hello, I am fairly new to Affinity photo. I have taken a number of photos and need to edit, however when I open them up in Affinity photo the colour is dulled. I have checked and it is set up in RGB format. Any ideas how I can fix? I have attached a comparison from when I open up normally in the standard picture viewer. Thanks.
-
 Okay, long story short, I got a new boss and this boss wanted to rebrand. I'm an amateur and endlessly making changes to a logo isn't my idea of a fun time, so I had her open up a logo tournament. I set out the expectations of the final design, knowing it had to be a file I could work with. The designers soon realized that she had the final say and knew nothing about design, but only one of them would get the money, and that's the one who gave her a logo that looked good on the computer screen regardless of how it would print. She kept telling them she wanted a neon green, an electric purple, and he gave her an RGB logo. I requested countless versions, and the only one I can get to open right is the AI files. All of the EPS have issues, the gradients have issues, and when trying to use the CMYK versions we were provided everything prints like Pea Soup instead of neon green. I kept telling him to imbed the color profile and he keeps insisting that if I open it in Adobe it will work. I have issues with the files in AF and mac preview. I found that I can open the AI files and work on them but the colors will be off. I am going to post the files and see if you guys can help me.CW Logo Tournament.zip CELLULAR CMYK BK.ai CELLULAR CMYK.ai CELLULAR RGB BK.ai CELLULAR RGB.ai
-
 Hello guys (and affinity designer pros), I tried now 8 hours to fix this bug and it makes me crazy!!! First I have to say, I am not into graphic design, so I am only self-taught and everything I don't know how to do, I don not have any clue where to look for or what to google... I made an image with two colors, black and light green (#8EDB8D). Unfortunately because I don't have any clue about color management, when I save my image as JPG or PNG the colors look pale and sickly. I found out that it has something to do with RGB/CMYK conversion of print views and web views. Anyway I found an article in a forum, that I can save my picture as SVG (no rasterize) and open it again and export from new to JPG and then it should work... actually it did! For lots of small graphics consisting of texts and curves, this was a quite useful and effective workaround for noobs like me. Unfortunately, I made also an important big document with text, curves and pixel layers (I bought a Wacom tablet and drew some sketches, mostly shadows on my (boring) curves to have them look more realistic. I am quite happy with my results, because I started two weeks ago with 'graphic design'. Unfortunately, when I now export to SVG (without rasterize), all pixel layers disappear. If I export to SVG format with rasterize, they appear, but most graphics seem to be placed incorrect and stretched, so it seems to be difficult for lots of small pictures to correct them all by hand after a conversion, which should work automatically. So here's my two questions: 1) Does anyone know the official preferred way to convert my image without workaround (SVG conversion) to have the colors not being shale? 2) If not possible, does anyone know a way, how I can use my workaround with SVG conversion without disappearing all handmade pixel layers or having them stretched? BONUS: Does anyone know something else how to fix this? I'll attach my afdesign file (How to Flyer CMYK4) and a another jpg file (U CMYK) that shows, how the color of the light green should look like after conversion (not that pale, slicky one). Sorry for the probably dumb question... Thanks in advance for your support guys! You can't think how much your help will get me hope again, that it is possible with Affinity Designer to do some basic sketches for my homepage... Best regards, Matthias How to Flyer CMYK4.afdesign
-
 Hello, is it possible to open a pdf in RGB instead CYMK (presetting is pdf)?
 -
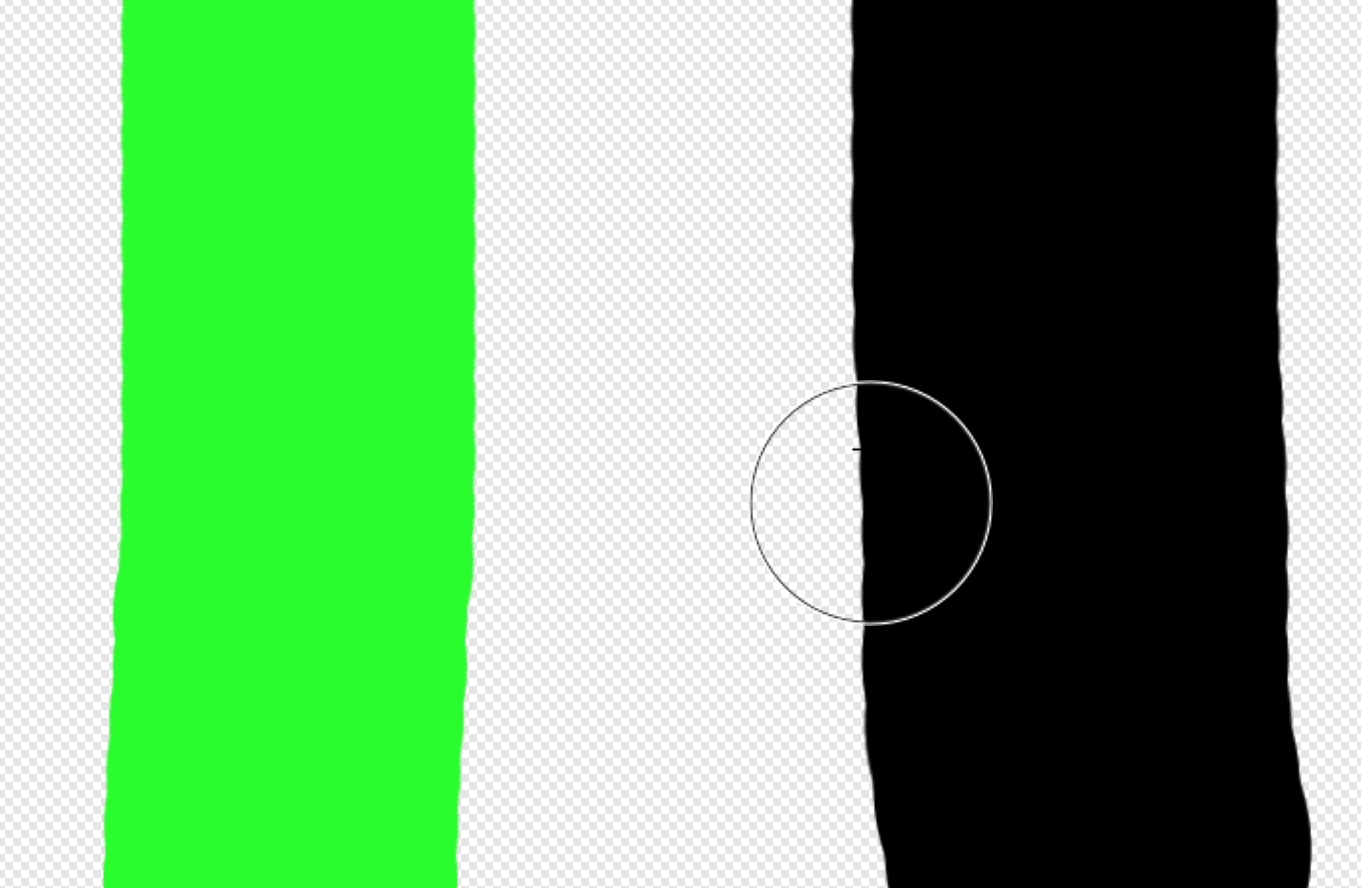
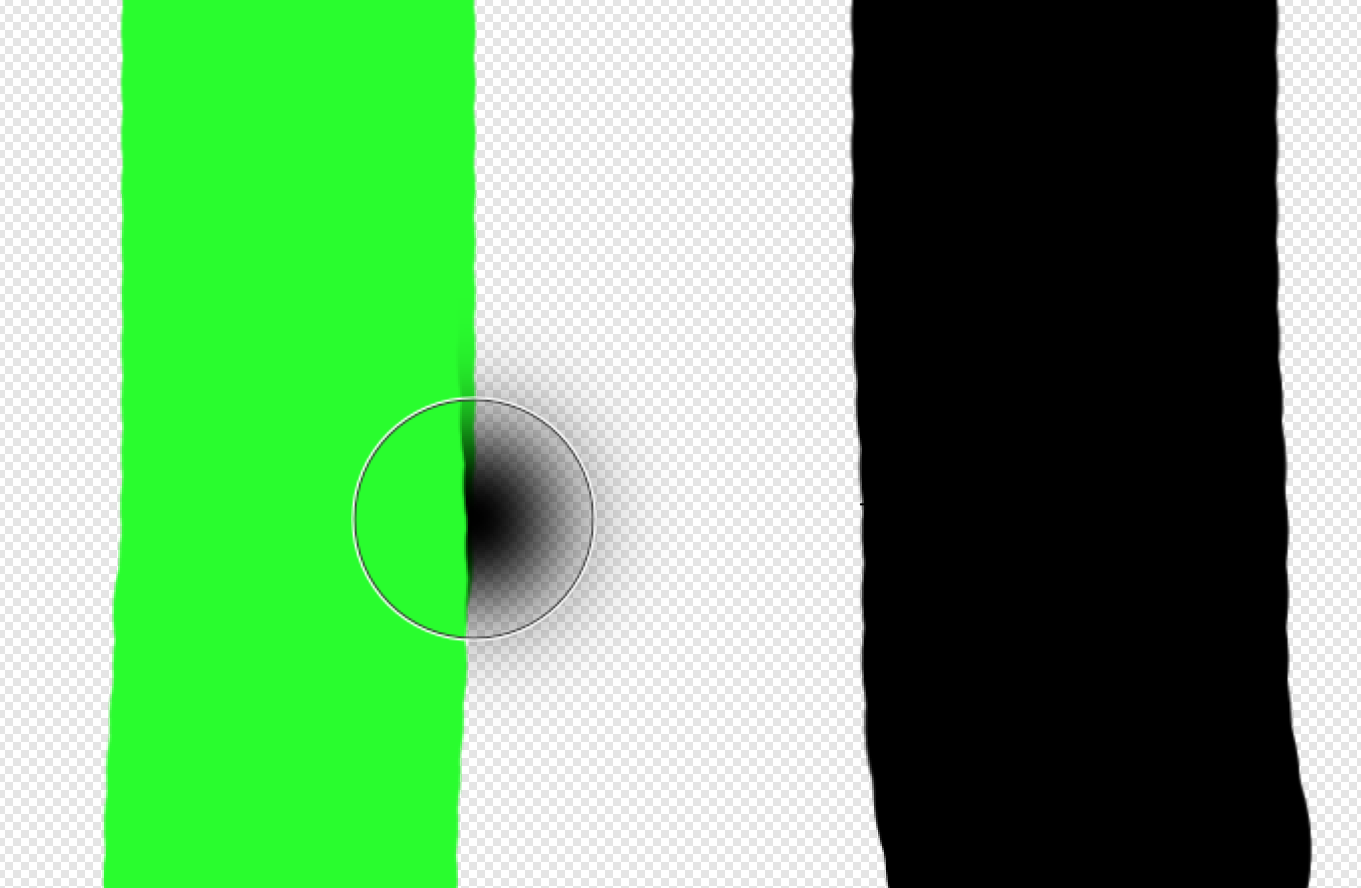
Hello everyone! Does anyone know if there is a way in Photo to stamp alpha values? While RGB values will overwhrite A, A does not get picked up by the stamp or it will simply not overwrite RGB. Here are two images to illustrate what I am talking about: Image1, showing where I pick up colors: Image2, showing where I want to stamp: In Image2, parts of the green should be overwritten by alpha ("erased"). If this is currently not supported, could anybody move this to feature requests? Thank you for any help! Best wishes, Shu
-
The export options for TIFF files always remember the last setting, rather than defaulting to the document color mode. I.e. if the last export was CMYK, the default the next time will be CMYK, even if the document is RGB, and the other way round. This is dangerous since it makes it easy to perform unintended color space conversions on export. Especially beginners who may not know about RGB and CMYK or just trust the default export settings might be in for a nasty surprise. Ideally, the export settings would check if the color format in the export settings is set to the same thing as the same as the document color format and in that case offer the document color format of the next document the next time. If the user changes the setting to something else than the document color format, it would offer that specific setting the next time, regardless of document format. That way it won't get in the way of, say, someone trying to manually export 10 RGB documents as CMYK, but it also wouldn't catch someone exporting an RGB file to RGB TIFF by surprise if their last export was a CMYK document to CMYK TIFF.