Search the Community
Showing results for tags 'Opacity'.
-
 When I try to change the fill color opacity of a text frame in Apub, the color changes from white to black. When I get to zero opacity it finally shows zero opacity. Affinity Publisher version: 2.4.2 macOS version: Ventura 13.6.6 | 3.5 GHz Quad-Core Intel Core i5 | Radeon Pro 575 4 GB | 40 GB 2400 MHz DDR4 Publisher Text Frame Fill Opacity.mov ADC Celtic Celebration Flyer 2024 v2.afdesign
 -
 All the way in 2021 @yitzaklr asked for something similar as feedback to Affinity Designer 1. I just posted there not realizing it's an old thread so I'll copy that here. It depends on the Color Space model used to interpolate the gradient. Ideally we'd have an option to choose from multiple color spaces and newer Color Appearance Models (CAMs) such as OKLAB and CAM16, but even just CIELAB would be a great improvement over RGB. This should also be an option for transparency interpolation. Also Adobe has offered this functionality for a while.. The steps to compute this from an RGB base are roughly: Convert the gradient RGB colors into the new CAM space Linearly interpolate between the CAM colors to fill in the gradient Convert those new CAM colors back into RGB space Affinity already has HSL sliders so it should be easy to at least implement HSL gradient interpolation. Hope to hear back about this!
-
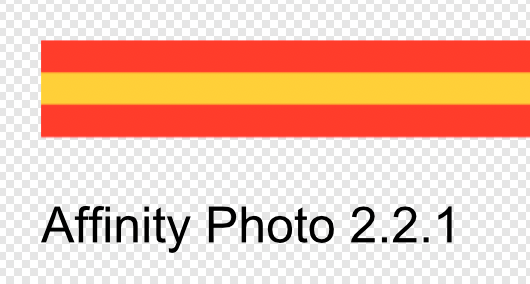
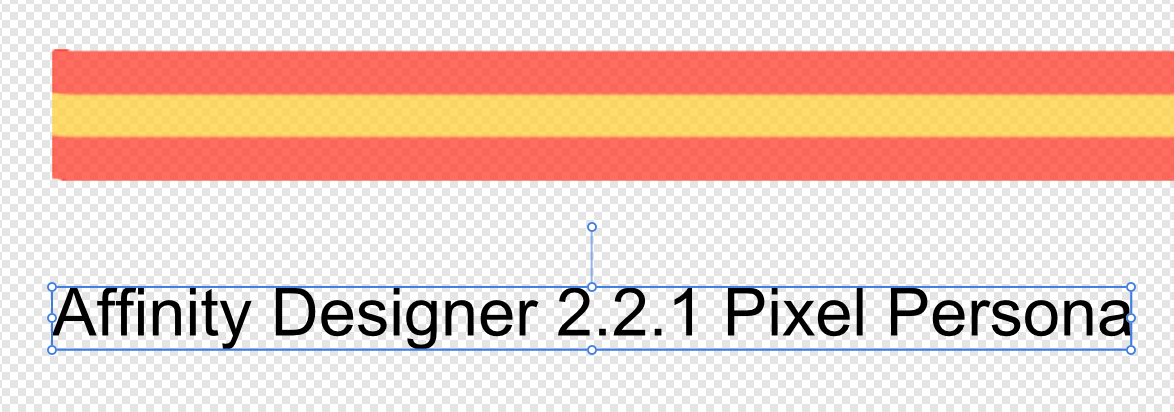
Using a pixel brush both in Affinity Designer Pixel Persona and Affinity Photo, shows the difference. In Affinity Photo the brush's opacity is 100 percent, in Affinity Designer Pixel Persona the opacity is reduced.
-
 The opactity changes when I click hold the Paintbucket tool in Affinity Photo 2.2.1, Windows 10.0.19045. If this is intentional, the changes are erratic, because the preview shows a change in fill opacity. Video 2023-10-27 13-37-12.mp4 Steps to reproduce 1. Create a new document 2. Add a pixel layer and make it white 3. Make a selection with a selection tool 4. Activate the Paintbucket tool, select another fill colour, click hold and drag the mouse sideways. 5. Notice the fill tolerance changing erratically and/ or the opacity in the Paintbucket tool changing.
 -
 Hello there Some days ago, my Affinity Photo's eraser tool started to act very strange were every time I try to erase something, I have to click several times to do so. It is like its opacity is set to 30 or so percent. But the opacity setting is at 100%. I have tried with multiple brushes and making a different document, but the problem still persisted. The dynamics settings are also turned off, so it isn't caused by penpressure. EraserProblem.afphoto
 -
 Greetings, Affinity Photo 2.0.3 Steps to reproduce: Take any raster layer, 8bit, sRGB Add Live Filter "Gaussian Blur" with eg. 10 px radius Change the opacity of Live Filter to 1% Change blending mode of Live Filter to "Overlay" Until now, everything seems to be fine. You are seeing an almost unmodified layer content. Now, change the Live Filter opacity from 1% to 0% First bug: Despite that blur itself is actually not visible, obviously the image is being applied to itself in Overlay blending mode, while You should be seeing unaltered image. For reference, You may want to convert the document to CMYK FOGRA39, and check there (it behaves correctly). You are still in sRGB. Grab the "Radius" slider and move it randomly. Image is being divided into semi-random areas, similar to screenshot below. Try to "merge" the Live Filter. The artefacts are likely to be embedded into layer pixels. This procedure takes "gaussian blur" as an example. Same glitchy beaviour occurs also when using different Live Filters. KR,
- 4 replies
-
- 1
-

-
- live filter
- affinity photo
- (and 5 more)
-
Could you add a flatten transparency command like Adobe Illustrator's? The way it works is that it converts the vector object with transparancy to a non-transparent vector with a colour that matches the one it had when opacity was applied. For more info see this thread: https://forum.affinity.serif.com/index.php?/topic/175099-flatten-transparency-set-opacity-to-100-and-use-the-colour-closest-to-the-transparant-colour/
- 14 replies
-
- 4
-
-
- flatten transparency
- opacity
- (and 2 more)
-
Is there a way to flatten transparency from within Designer? I know you can do this on export, but what about modifying your current document? E: For the feature request refer to:
-
 Hi there! I am new to Affinity but haven't found this question searching in the forum. I attach the illustrator file so you can try. Just import it to Affinity Designer (settings in the image file). It seems that the layers of the big logo (the small one is just the original, for comparations) keep the aspect as in illustrator, I mean they have some degree of transparency, but the Fill opacity values in Affinity layers are 100%. How to fix this without using the "Revert Defaults" which causes loosing the amount of transparency? Also, another question: In the Illustrator file I have another grey square out of the document space (to the left) but it is not kept in Affinity. How can I keep it? Thank you! prueba.ai
-
 I turned on my pc today and found that all my brushes do as per what is in the photo. Does anyone know how to change this back to just normal opacity? I can't draw using this as it ruins the colour.
-
I would like to request that the numeric keys, which are used to set the opacity of an object by default, become available for editing within the keyboard shortcuts section of the preferences. The reason for this is that these keys are very accessible, which is the reason I would like to use them to toggle between Photo's personas and edit inside of Photo/ Designer. Unfortunately though, some shortcuts will override the opacity shortcuts and others won't. This causes inconsistencies as discussed here:
-
 I have tested this on a range of colour profiles and in RGB/8 and RBG/16. Colours export fine to PDF without any opaque objects on the page, but as soon as I add a shape with even the slightest bit of opacity to the page, all colours get massively dulled in the PDF that is exported. Tried changing to a range of different PDF export settings, and made sure that colour space is set to use the Document Profile (Embed profiles is ticked too). "Flatten" is the only export preset that doesn't cause this issue, but I need to retain editability of the PDF. Sample 1.pdf shows a turquoise rectangle with no opacity (all colours are correct), Sample 2.pdfshows the results when I lower the opacity of the turquoise rectangle (dull). Please download PDFs and open in Adobe Acrobat to see the differences (colour differences don't show in browser). Using an iMac (Retina 5K, 27-inch, 2017) running Catalina 10.15.7 After switching from Adobe I'm loving AP and AD so far, please don't make me go back to Adobe! PLEASE I BEG YOU!!!
 -
Every time I change LUT the opacity resets. It would be great to be able to change LUT just pressing up&down arrow keys and keeping the opacity set.
-
 Hi guys, if you are using Adobe Photoshop or used it before, you must have seen the FILL option often right. It's located below Opacity in Layer Panel. So some of you might be wondering about the difference between Opacity & Fill Opacity because if you look at it, both Opacity & Fill Opacity do the same thing, controlling the transparency of a layer. But then, why bother to create the same feature, there must be a difference right. So in this video, I will explain the difference between Opacity & Fill Opacity, and where Fill Opacity is located in Affinity Photo. I hope you enjoy this video, thank you!
- 12 replies
-
- 5
-

-
-

-
- fill opacity
- opacity
- (and 4 more)
-
 Hello! I am still new to affinity photo on the pc. I haven't had any problems with it at all until now. As I am drawing an illustration for a client my brush opacity is dropping to 0% without me doing anything but drawing. I have changed brushes, I have checked the setting for those brushes it even does it with the erase brush. It just randomly drops to 0%. I am using a huion kamvas 22 plus to draw with as well as a razer tartarus chroma for shortcut keys. The pen driver has no issues and nothing has changed with my razer keypad. I am at a loss on how to fix this. I have to change the opacity back up to 100% every few minutes and I am unable to work. Is anyone else having this problem or knows how to fix it?
 -
 Here is an error that I was able to replicate on my system MacOS Catalina version 10.15.7 (19H15) Affinity designer app store version 1.8.6 In the attached affinity file you can see that the white object is in a group by itself and the group opacity is set to 90%. When exporting this to pdf (see attached), the grouped object has weird glitches around the edge. The version on the right is smooth and round. glitch.pdf pdf-glitch.afdesign
 -
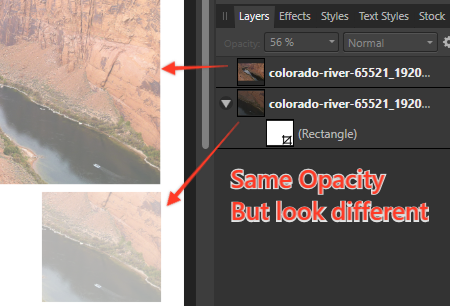
Vector crop tool on an image that's not 100% opacity look strange. It become different opacity though opacity value is the same.
- 5 replies
-
- 2
-
-
- vector crop tool
- opacity
- (and 1 more)
-
 Hi, I have a pixel layer that is transparent although it is at 100 opacity. there's no effects on the object. I drew a vector shape over it in another layer, made a selection from that object, inverted selection, selected the layer I wanted to cut out en pressed delete. The vector shape was transparent, but the selection was clearly around the edges. I've been browsing around on the topic but can't figure it out. What am I missing?
-
Adding a mask to a layer/group will multiply the end result's opacity by itself, since the mask inherits the opacity; so a 50% opacity layer/group will look like 25% opacity if a mask is added. In the attached file, the right layer and group are given a mask, and as such they look half as opaque as on the left (because 50% * 50% = 25%). (And the more masks you add, the less opaque it will end up being (so long as the opacity is not 100%), because each of them will inherit the opacity) Alpha Bug.afdesign
-
 Hi, I am still learning. I have inserted two objects that are set to white with 100% opacity, thus they should be solid white. However, they are placed over other objects of colour and that shows through the white objects with part transparency. I can't figure out why. Am I missing or forgetting a setting somewhere? Thanks for any help.
 -
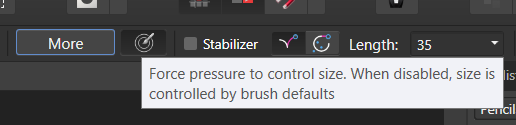
 I am trying to make it were the opacity of my brush is controlled by the pressure I'm putting on my tablet. I looked around and found this https://forum.affinity.serif.com/index.php?/topic/70576-opacity-pressure-control/&_fromLogin=1 But I tried what was said and shown and still doesn't work.
 -
 See screen shot. I have a background image on the spread. The printer advised to expand the image into the full Bleed so as not to risk some "white" unprinted edges when the bleed is trimmed off. Printer indicated a risk factor of about 1/16th of an inch. In this case, the image Opacity is set to 30%, but it comes out 100% in the bleed. I think this needs to be repaired - if the printer is off in the trimming, you would see the 30% image in the center of a page, but at the edge the risk is that you would see the image at 100%. This becomes even more important for the cover since there may be a wraparound and you wouldn't want the image to suddenly change opacity as it wraps around the cover edge. If opacity is not used, then the entire full bleed image is fine at 100%. Fortunately, if you export to a PDF, this appears to be only a visual, cosmetic problem. That is, what you see in AFPUB is not what you get when you export. The exported spread does not show a 100% opacity in the bleed area - in my case it is the specified 30%. I do not know if the export to other formats would follow suit. So, maybe not so critical, but it could cause confusion for users to see the difference in opacity in the bleed. Second screen shot is a PDF export.
 -
 Please add a force pressure to control opacity button besides the one that controls size. I just switch from photoshop and I really miss that button since I use it a lot.
-
 Hi there! One Affinity photo feature that is dearly missing for me is a keyboard shortcut to increase and decrease opacity of the currently selected layer. I would need this, so I could map this shortcut to a MIDI controller and be able to quickly set a layer's opacity with said controller. Since there is an ever increasing number of people who use MIDI controllers as quick input devices for the graphic softwares, I believe I am far from the only one who would benefit from such a feature. Currently there is only the possibilty to use the up/down arrow keys (+ shift optionally) to increase and decrease the opacity once I have set the focus to the opacity field. This does not really help me all that much as I would always need to focus this field first, before i can start to change the opacity. It would be great if there could be a global shortcut for this as well, preferrably also with the possibilty to use shift optionally to increase the increments to 10. I would not care if it is an obscure shortcut or if it is even turned off by default, as soon as there is any shortcut for this MIDI users could make use of this and map it to their controllers. Thanks! trych
 -

Set brush opacity and flow with an Affinity Photo action
Guest posted a topic in Feedback for Affinity Photo V1 on Desktop
Is it possible to set brush opacity + brush flow with an Affinity Photo action or with a keyboard shortcut? This enables a quicker workflow if one can just toggle between e.g. 20% opacity 20% flow and then go back to 100% opacity 100% flow without having to change it every time manually. Thank you for your advice how to do this or to take the time to add it to your feature request list. 😃