Search the Community
Showing results for tags 'Merge'.
-
 Hi guys I sent 200 files to Focus Merge, 1/10 second later I realised there is something missing. Once Focus Merge has started, it is impossible to stop it. Except you brutally kill it... Is this a bug or an enhancement request? Not sure, where to post this... Would be nice, if it will become fixed in one of the next versions. Cheers, Roland
 -
 Hi everyone, I've recently switched to Affinity Photo and am globally very happy with the program. However, I'm noticing something strange: The effect of a Live Filter sharpening layer (any of the three: clarity, UMF, high pass) seems to be dampened when I merge the layer down or flatten the image. The effect isn't completely lost, its just reduced, but visibly so. This isn't a jpeg compression thing, because the reduction is visible there in Affinity Photo, before any exporting or saving. I'm on a Windows 10 system, if for some reason that should be important. I've tried putting the sharpening filter immediately above the pixel layer, putting it at the very top, merging each layer as a separate step, just exporting without flattening... Am I doing something wrong? Has anyone else observed this? And if so, is there a workaround for it? Thanks to all in advance!
 -
Hi Often times we have to deal with bad vectors where there are many nodes stacked on top of each other, it would nice if we could just select all the nodes and "merge" them into a single node. Does this feature already exists? Thank you

- 4 replies
-
- 6
-

-
- affinity designer
- merge
- (and 2 more)
-
 Hello & HNY! I have been experimenting with the HDR merge and Focus merge modules and I'm experiencing a problem that Affinity Photo does not align the pictures correct. I can't find a way to align the pictures manually. Maybe I've not found the feature or this is currently not possible. Thanks, Rolf
 -
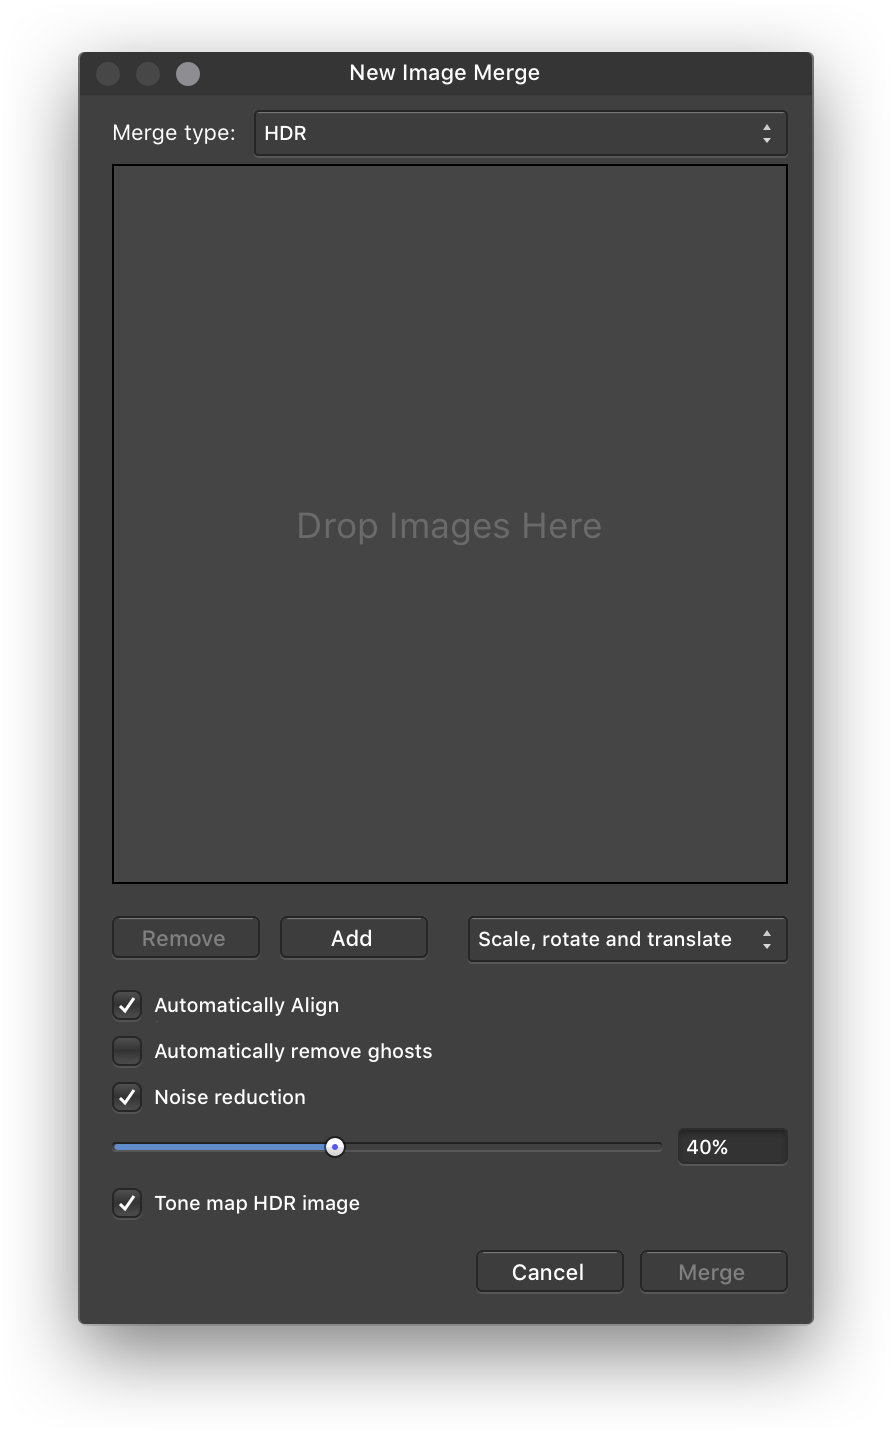
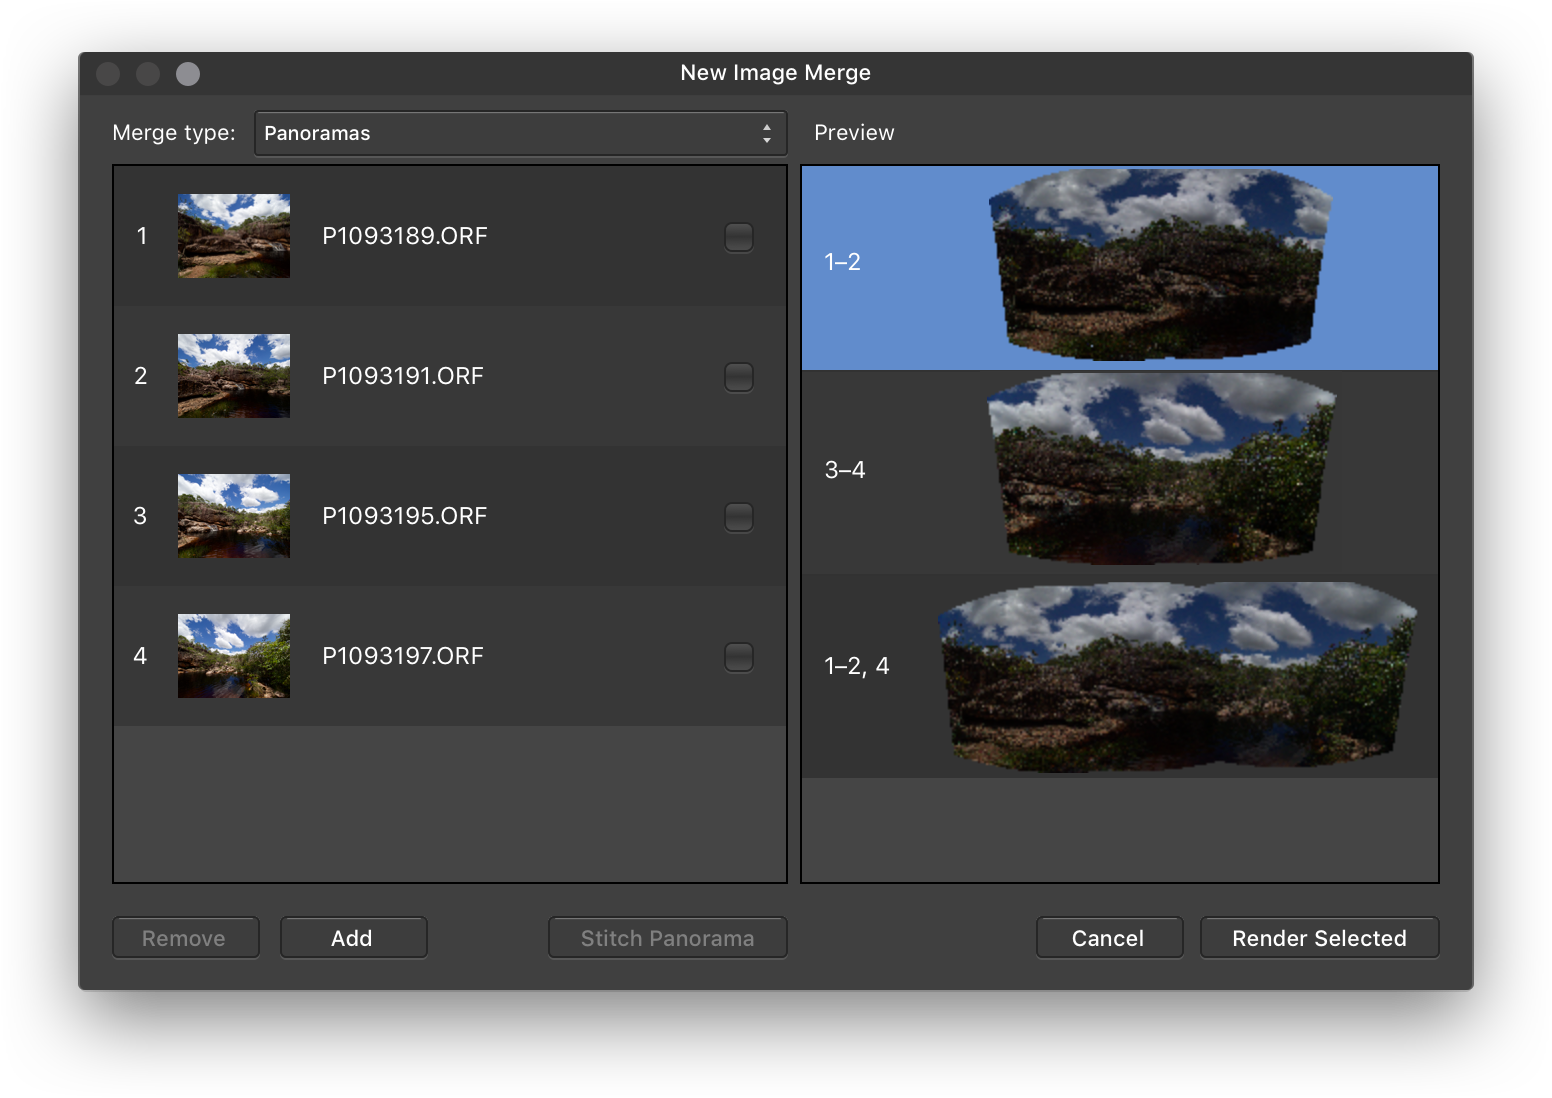
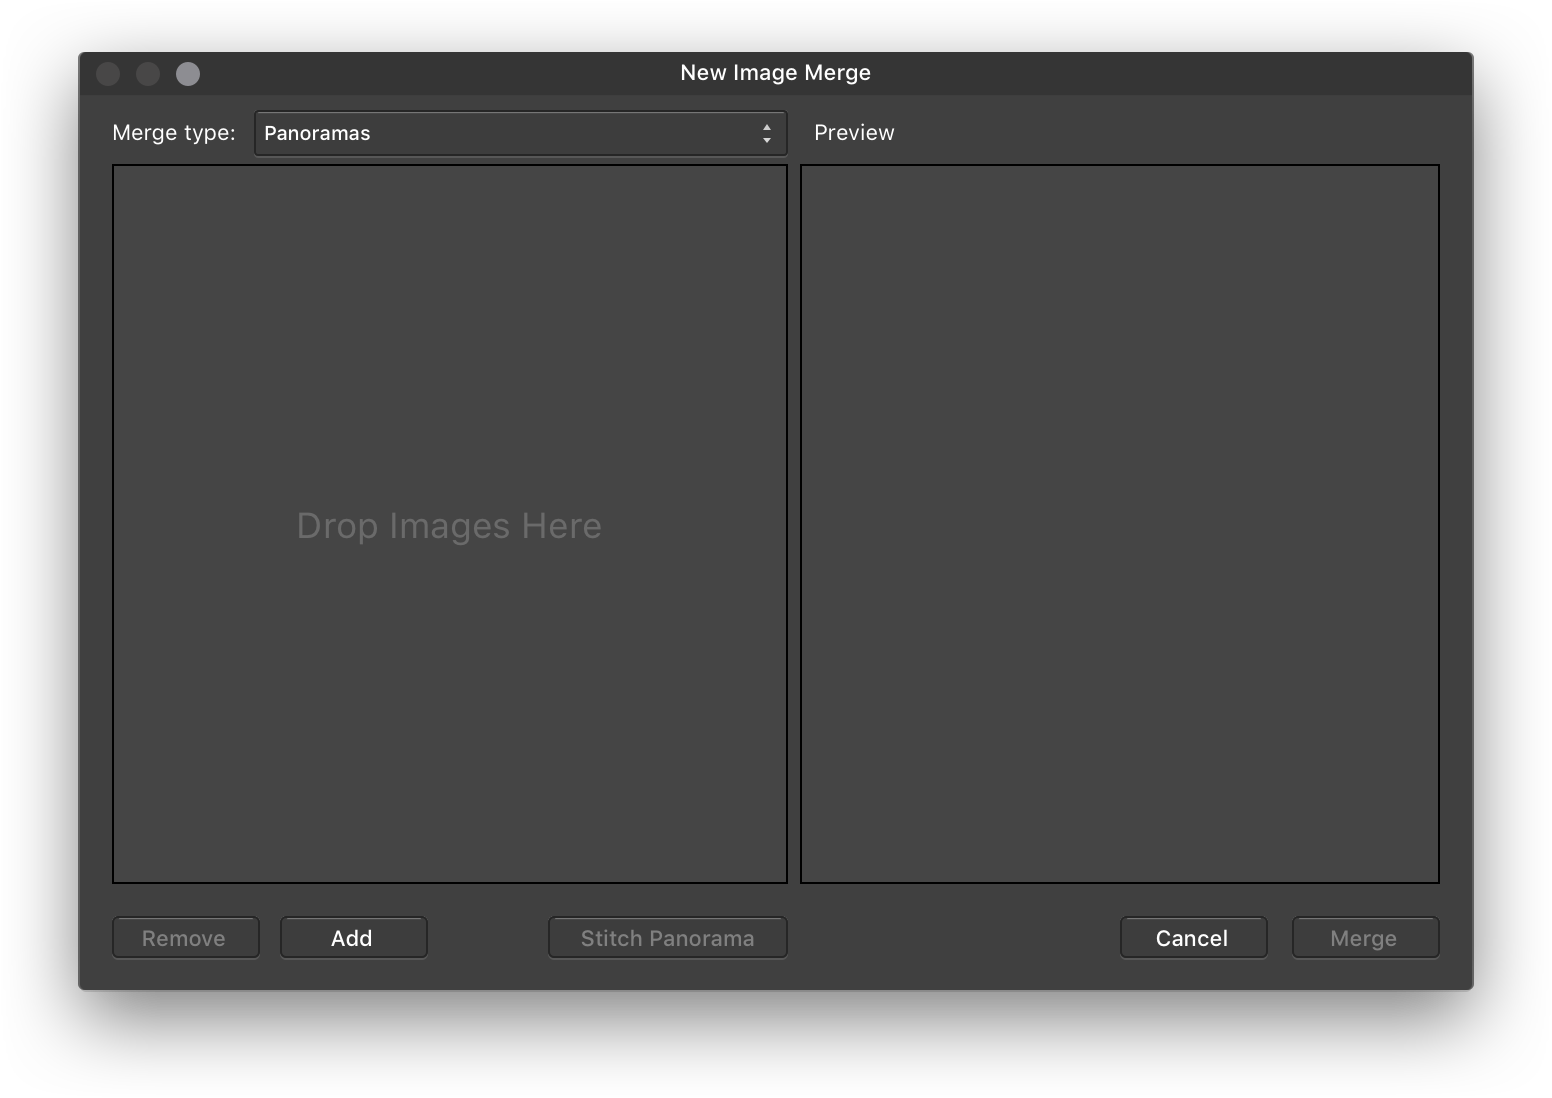
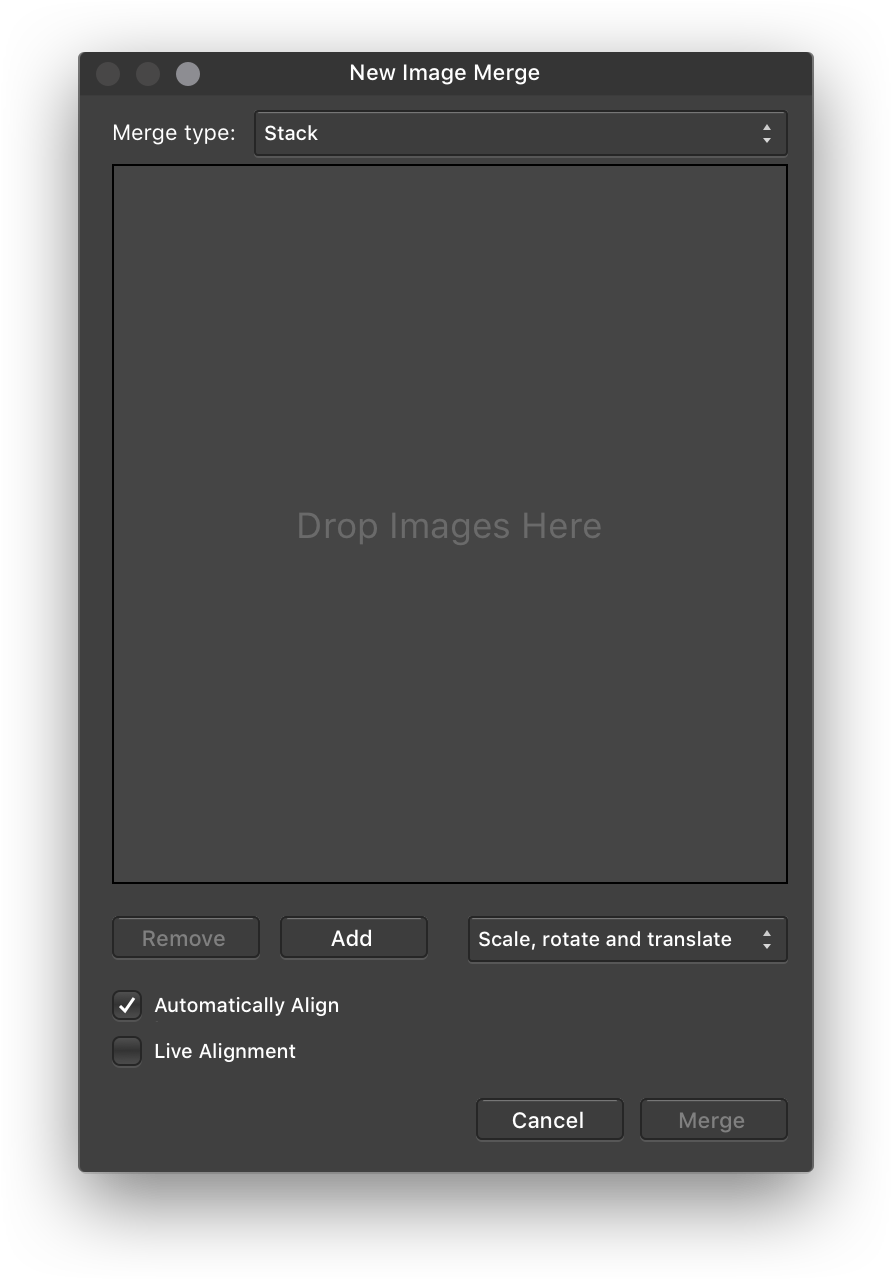
 Hi, I mocked up a few ideas that I think would improve the functionality of the Photo merge tools by making it easier to switch between them and add images directly. Say you drag a few images into one of Photo's merging tools, only to realize you opened the wrong one. The commands are grouped in the menu, two have keyboard shortcuts right next to one another, and the tools have similar layouts, making this a fairly easy mistake to make. Rather than having to hit Cancel, open the intended merge tool, then relocate the images you want to merge, what if you could just switch to it, with the images you added still in place? The functionality of the Batch tool seems different enough to warrant it remaining separate. To keep the various merging options visible to the user, it might be best to keep their individual items in the File menu. Each would just open the unified interface to the appropriate tool. It would be great to be able to drag-and-drop directly to the Images pane rather than having to open the file picker, then drop to it, then click OK. The visual styling of the window widgets is a bit confusing; the brighter widgets are disabled. This is contrary to most GUI conventions, including how the OK button is disabled in the tools themselves. If the Panorama tool isn’t resizable because the panorama previews would have to be re-rendered (a processor-intensive task), just fix the width of the preview pane while allowing the Images pane to expand. There is some ambiguity in the Panorama tool when you have stitched multiple panoramas together. If you don't explicitly select all of them in the preview pane before you hit OK, only the last selected one will build. A different button label or counter tallying how many panoramas will be rendered (Render 2 Panoramas) might be sufficient. NTH: a way to tell which images constitute which panorama after the panorama preview is generated. This could look something like the mockup below. Ideally, the number displays next to the panorama preview would handle discontiguous stitches nicely, so if you used three of 4 images out of sequence, something like “1 – 2, 4” would appear next to the thumbnail. Originally posted to my weblog.
-
 Hey guys, I am hobbyist user, so it's not a great deal if you cannot help me. I am trying to stack several photos, but to have the opposite of "object removal using stacks". I have four photos taken from the same point with my two friends sitting at the table and exchanging position between each shot. What I want to achieve is to have each of them several times in the final image. If I use Median stacking, then almost everything disappears from the photo with only table remaining and some ghosting. So I need to use masking, but that's where it gets a bit complicated. I tried Outlier stacking but that produces some artefacts and needs a bit refining, for which I also need some masking. For the stack I have live stacking checked. So I guess the question is how to most efficiently create masks from and for each stack layer? I figured I would select part of the one friend on one photo, e.g. hand, head and part of the body, and then I would apply the resulting mask to all other photos in the stack. But I would need to add all masks for all body parts to all photos... So that makes it a bit daunting. Not helping is that when I Alt-click on a layer and start selecting using Flood select tool that the selection outline is shifted several pixels to the left in comparison to photo itself. Also, I cannot get the tolerance to right amount; it always selects something from the background or not enough of what I need. Also, which blending mode would suit me the most? Do you have some other suggestion how to achieve what I want? Thanks! P.S. I've found that if I stack only two photos and then use Standard deviation as the stack operator that produces black areas where the photos are the same and some type of blending in the areas where there are differences. That seems like a good starting point for a mask. How to create a mask from such stack result?
 -
In AP 1.6.1 I have a live Curves adjustment with changes to the Alpha channel, nested inside a mask. This does affect alpha channel of the mask, and indirectly what the masks makes transparent. I would like to destructively merge the adjustment into the mask it affects. Clicking on the Merge button in the Curves Adjustment does nothing other than adding a new entry to the history. Please implement the feature to be able to destructively apply live adjustments to masks. To be clear I am looking for a way of getting a mask, with identical behavior as my current combination of mask with nested adjustment. As a separate feature request, please make the Merge button in the adjustment dialogs disabled in cases when it doesn't make sense, and won't actually merge anything.
-
 I recently had the good fortune of capturing a few photos of the gemini meteors and I wished to combine all of them into one image. I have 11 that are useable. How can I merge them in affinity photo? Thank you
 -
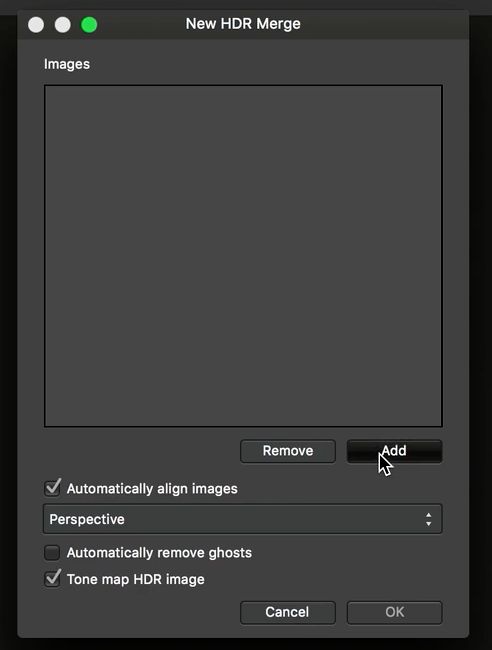
 It would be great, if I had the chance to see a preview of my HDR already in the window "New HDR Merge" where I'm choosing to remove or keep ghosts and several other settings.
-
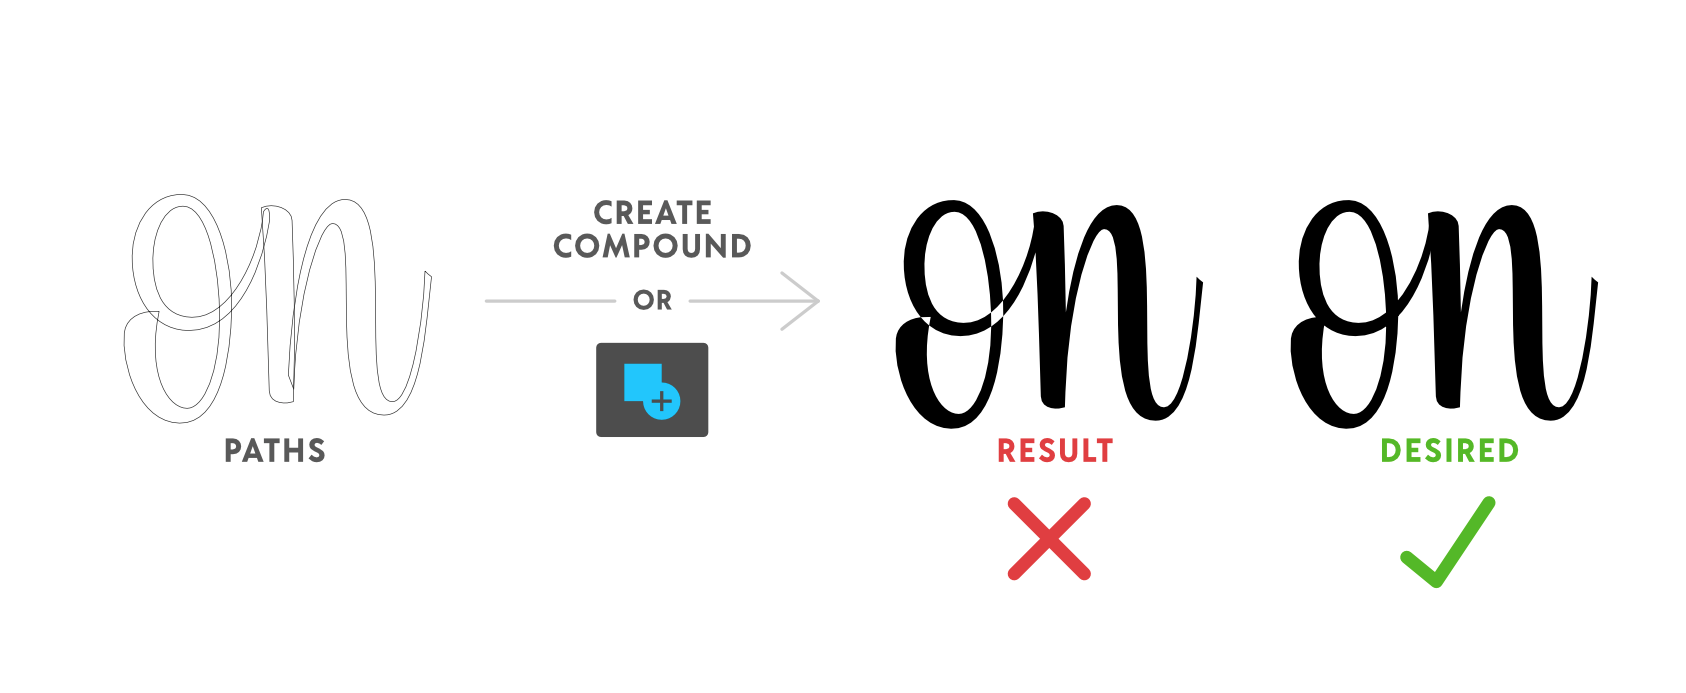
 Hello! I'm new around these parts (first post) so I apologize if this question has already been asked and answered. I did some searching, but I couldn't find anything regarding this. My question is: How does one merge or combine a self intersecting path/curve (to make a compound path) in Affinity Designer? I design type and it's desirable—crucial really—to overlap a shape/path within itself for maximum flexibility and ease of manipulation while working. Unfortunately, when it comes time to combine the final artwork I'm left with compound holes where the paths intersect themselves. :( I've attached an example of what I'm referring to. I've tried all of the options that can think of (Geometry, Create Compound, etc.), but none seem to work. I'm assuming that this is just the way paths combine in AD, but I'm desperately hoping that there's another technique that I'm missing. Also, I love AD thus far. Great work! Thanks for your help! :D
-
Hi. I've been experiencing a problem with layers not merging. The file is a mere A4 in size, 300DPI, 2 layers. 1st gen 12.9 iPad Pro, IOS 10.3.3., AP 1.6.4
-
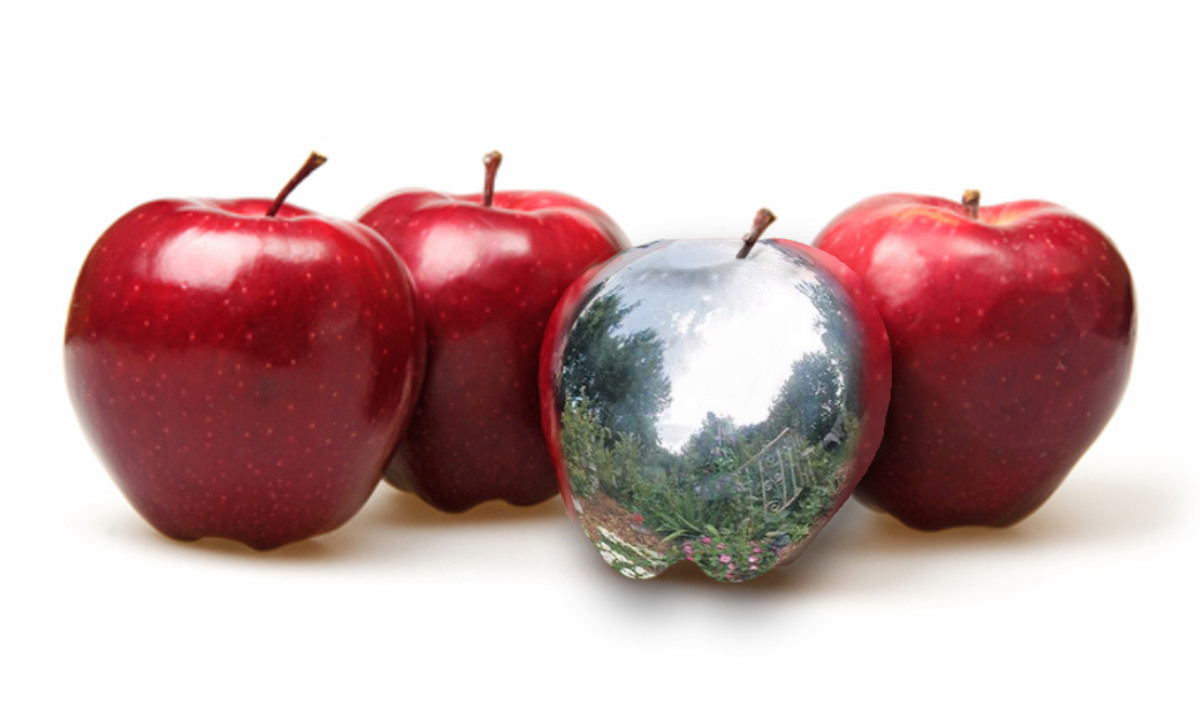
Tried to create the a image where the reflection of a Metal Apple flowed into the image, using iPad Affinity Photo. Used Mask, Liquified and merge image to get the overall affect.
-
 Posting this issue here on the Beta forum... Just tried on 1.6.4.49 beta on iPad Pro 12" (first model). Steps to reproduce: Open a new affinity file 4000 x 6000 px Import this image via safari: https://unsplash.com/photos/0wroxMXvPxk/download Long-press on the image and select "Copy" (this copies the image to the iOS clipboard) Go to Affinity > ... > Pasteboard > Paste Use "move tool' to place it on the lower part of the canvas Click "..." > "Duplicate" (with this image layer selected) Use "move tool" to place the 2nd layer on the upper part of the canvas On the "Layer Studio" select both layers (by swiping left each layer) Click "..." > Merge > Merge Selected bugz =>> nothing happens (it should merge) Click "..." > Merge > Merge Down bugz =>> nothing happens (it should merge) But if you click "..." > Merge > Merge Visible it creates a new layer with both images merged
 -
Hi, I'm unable to find a simple way to rasterise a group of layers? 'rasterise' flattens the whole document 'rasterize selected' has no effect when you have the group selected The only way I've managed to even do it is by hiding every other layer and then choosing 'merge visible' That's fair enough, I suppose, since I only have a few layers, but it certainly wouldn't be fair enough if I had any more than 10 layers on the go! Anyone else found a legit way to flatten a group? Thanks Wayne
-
 For example, if I take spherical photos, I would wanna add my name to the photo somewhere. Most of the cases it is the origin point on the ground, or up in the sky. Now if go to live projection and design my stamp there, how do I merge it to the background projection?
 -
 Hi, finally the moment has come that I have to ask for your help. Untill now I have always managed not to take your time, but now I am simply stuck. I am trying to make an HDR using 3 perfectly aligned photos of different exposures... Ususally I have no problem in doing that but in this case the result is terribly "posterised". Below are the source photos, and two results - one with all merge options unchecked and one with all options checked (by options I mean "align" and "remove ghosts" etc.). Does anyone have any idea of what might be causing such behaviour?
-
 I'm currently recolouring some photos so I made a selection of a dress, then went to the Layer menu and selected "recolouring adjustment" from the "new adjustment layer" submenu. I did my edits but discovered that I left out a part of the dress. In photoshop I would have edited the alpha or mask layer but here that seems to be uneditable? I see an alpha with a black and white image showing me my selection but I cant edit it. The workaround I found was to create a greyscale layer from my alpha channel, then do the same with the other one and combine these two followed by creating a new recolouring adjustment. While this works I refuse to believe that this is the right way to do it. Everything else is so simple, I must be doing this wrong.
 -
My first attempt at using the HDR merge function in AP. I used three exposures: -1, 0 and +1 stop.
-
 Hallo, gibt es eine möglichkeit, mit der ich alle erstellten Ebenen zusammen legen kann, ohne damit die erstellen Ebenen zu löschen. * Meine Lösung finde ich zu Umständlich = Alle Ebene zusammen Gruppieren, diese dublizieren und die Obere Gruppierte Rastern. Hat jemand eine bessere Lösung ? Danke Gruß Stefan
 -
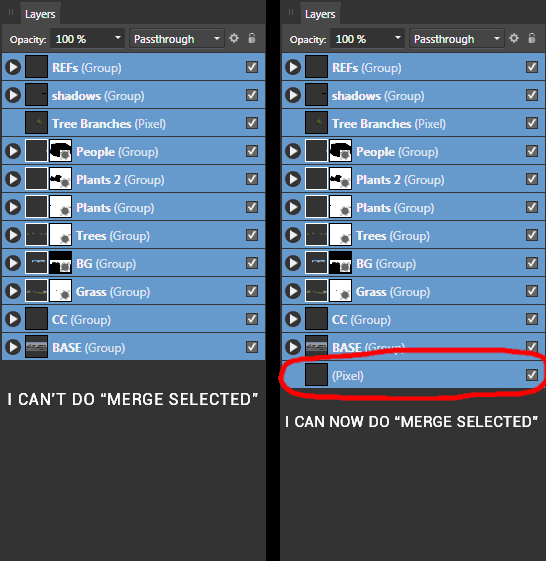
 I'm unable to flatten the document with "merge selected" (Ctrl+Shift+E) if there's no pixel layer at the bottom of the layers list. Why do I need to have a pixel layer there for this to work? I don't get it. :mellow: In Photoshop I can flatten the whole document no matter what kind of layers are there and their order. Please see the screenshot below.
-
Hello, I would like to suggest a feature like that of Illustrator's "merge". I would like for it to behave the same as in Illustrator. The union feature in AD merges objects and applys the same appearance to both without separating paths/objects based on appearance. Separating objects (paths) based on the appearance is a critical time saver versus having to go into each object and use the divide function in AD, causing multiple objects to be created which becomes a slippery slope to massive amounts of unmanageable objects.
-
 Running 1.5.4. on mac. My interface is in Separated Mode. Selecting Merge all Windows does nothing. I have tried to reset everything by holding Ctrl key while opening app, but that didn't help. BTW, I am running the latest Beta version (just installed). That is working fine.
 -
Using the Layers -> Merge Visible command, AP creates a new layer without removing the existing ones. I expect all visible layers to be merged into a one layer and then the individual visible layers be deleted. This is how basically every other application works. Is this the expected behaviour? (Merge Down works as I expect: combines two layers into one, so that only one remains.)
-
Combining/merging objects in Coreldraw and illustrator the order is first or last object select. AD has it bottom object only, would it be possible to change this to an active object like in illustrator or Coreldraw?
-
 The focus stacking is great: - Question: Can I use New Stack > Live Alignment > focus merge? I can't seem to focus merge a live group. If not then: - Feature request: Live alignment option for focus stack. QoL: Adjustment sliders: - Question: How do you reset an individual slider quickly, rather than the whole panel? - Feature request: Double clicking the slider header (lightroom) or right clicking the up/down arrows on the number entry box (3DSMax) resets the slider/number entry to default. Detail Refinement in the Develop Module: - This is sharpening, right? - Feature request: Unsharp mask/threshold for sharpening. Without this it's mostly useless on any photo that has blurred and sharp areas (dof/panning/etc). QoL: After selecting a menu with drop down options you can't transverse the options in the menu with the up and down arrow keys. Eg. Blend mode drop down menu. The Export Module: I understand the use of slices for advanced users, but most people just want a nice big simple export button. It should probably default to the slices pane rather than the layers pane when entering the export module and the export all slices button might need to be a bit more obvious. Just a few thoughts, feel free to disregard.