Search the Community
Showing results for tags 'Mask'.
-
 Hello Guys, I know, this is maybe a very ordinary question for the Pros of you, but I didn't found a solution on the Internet. I'd like to know how I can use text as a mask layer in Affinity Publisher. I have a shape in front of an picture, and I want the shape to be transpartent in the Pixels of the Text. In easy words, I'd like to have a text inside a shape which persists out of the picture behind the shape. There is one more thing to consider in my question, I don't want the Picture to be enclosed in the Text, I want the shape to be transparent in the pixels, the text consists out. In the annex you can see what I mean. I'd be happy about an answer😉 For the one's of you, who are German: Hallo Zusammen, Da ich im Internet keine Lösung dazu gefunden habe frage ich nun euch, ich würde gerne wissen, wie ich in Affinity Publisher Text auf einer Form aus dem dahintergelegenen Bild bestehen lassen kann. Einfacher gesagt der Text auf einer Form soll aus dem Bild bestehen, und das Bild weiterhin daneben bestehen. Also nicht so dass das Bild in den Text eingeschlossen wird, sondern so das die Form an der Stelle transparent wird, an dem sich die Pixel des Textes befinden. Im Anhang sieht man das ganze nochmal. Über eine Antwort würde ich mich freuen😉
-
 Hi Guys, I want to design a T-Shirt print. It should be a big blob or splash and the outlines of our Logo should be left clear inside the blob. I tried to create a mask with the shape of the logo outlines, but all It does is that the outlines get the colours and the texture of the splash. But ich want the splash with the Logo cut out in the middle of it. Has anybody an idea? Kind regards Florian
 -
 I created a vector mask according to the instructions in the help file ("Mask to Below"). The file consists of vector shapes, which I grouped, plus a circle mask. The goal is to see only what's inside the circle. In Affinity Designer, everything displays perfectly, yet upon export the mask is inverted and only what I want to remove from the original image is displayed. If I check "Rasterize unsupported effects," however, then the file exports and only what's inside the circle is shown, but I get a rasterized object in an SVG wrapper, which is exactly what I don't want. (Is a vector mask somehow an unsupported effect?) How can I export the file in SVG format only as vectors? Many thanks in advance for any assistance. (I'm an Affinity Designer beginner.)
 -
 Hi all, Is there a way to hide temporary the Liquify Freeze Tool mask? Just like the Hide mesh checkbox. Cheers, Juan
 -
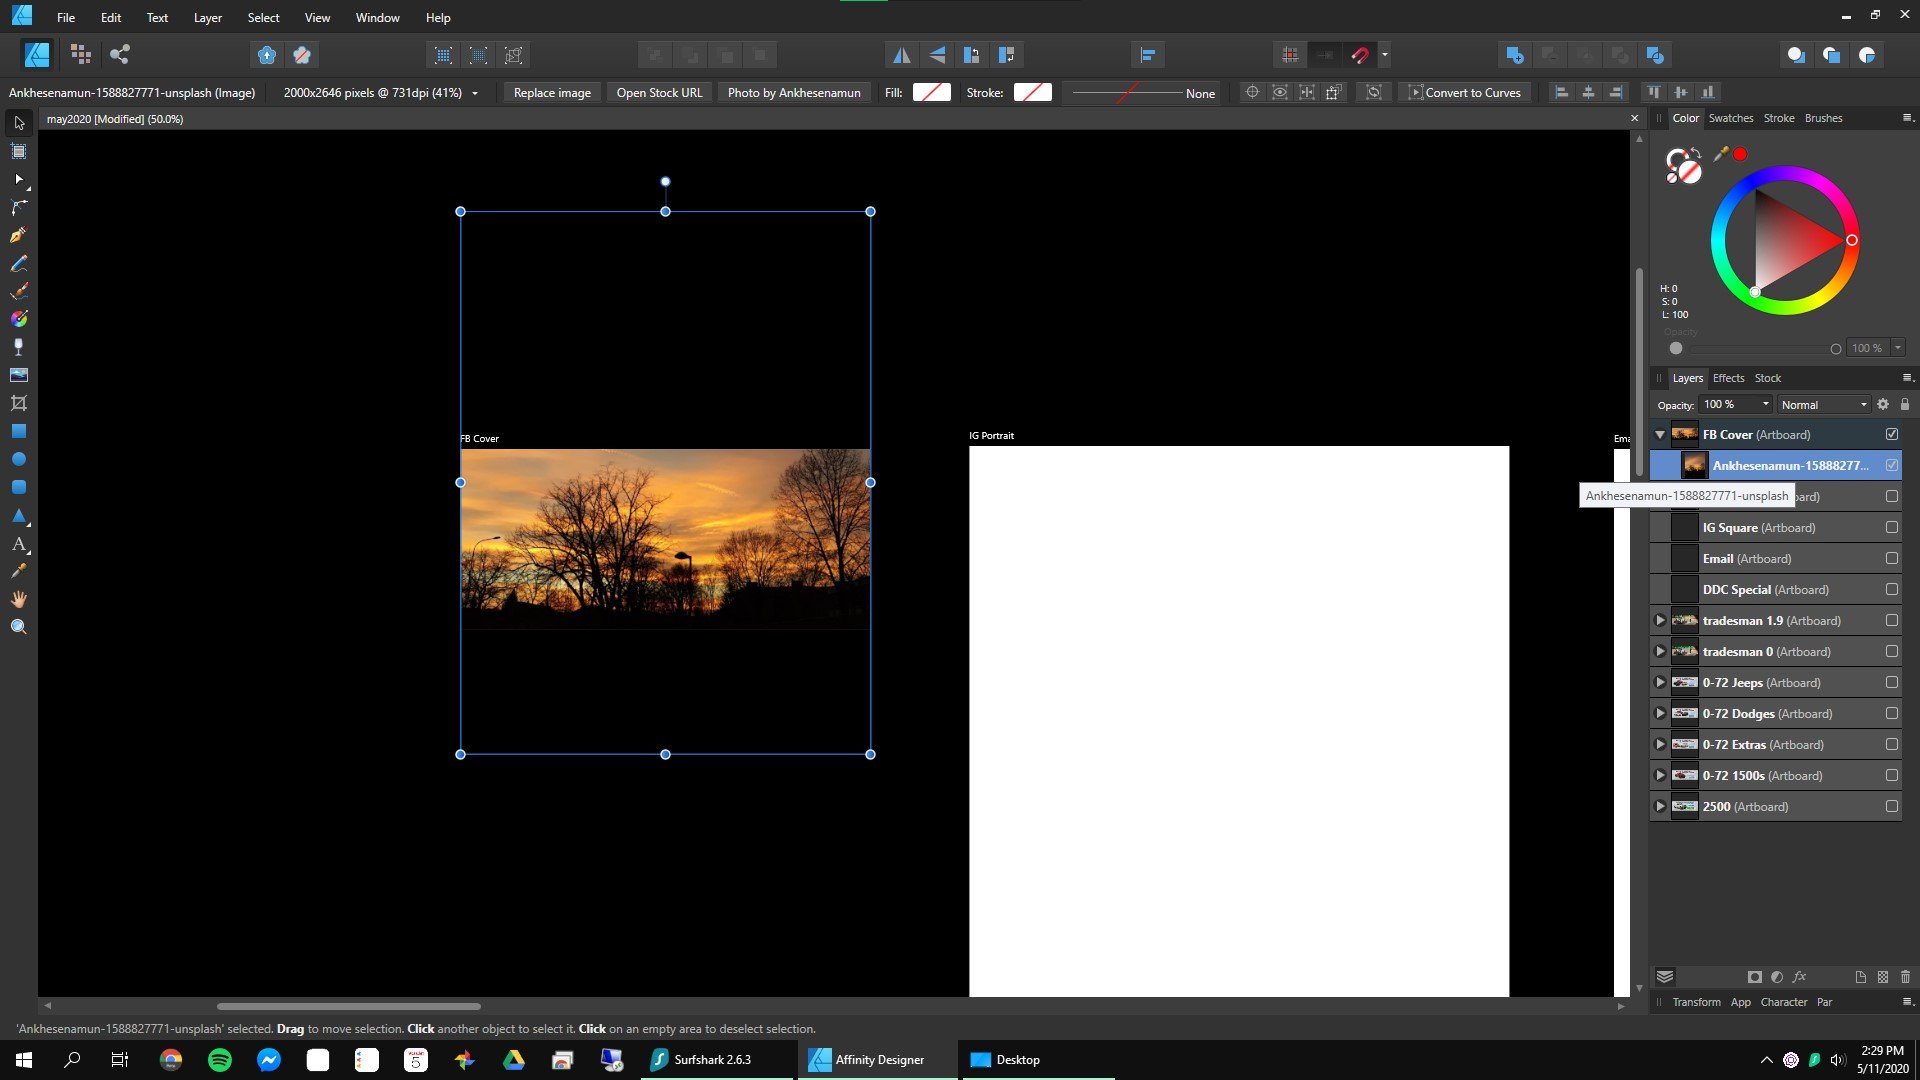
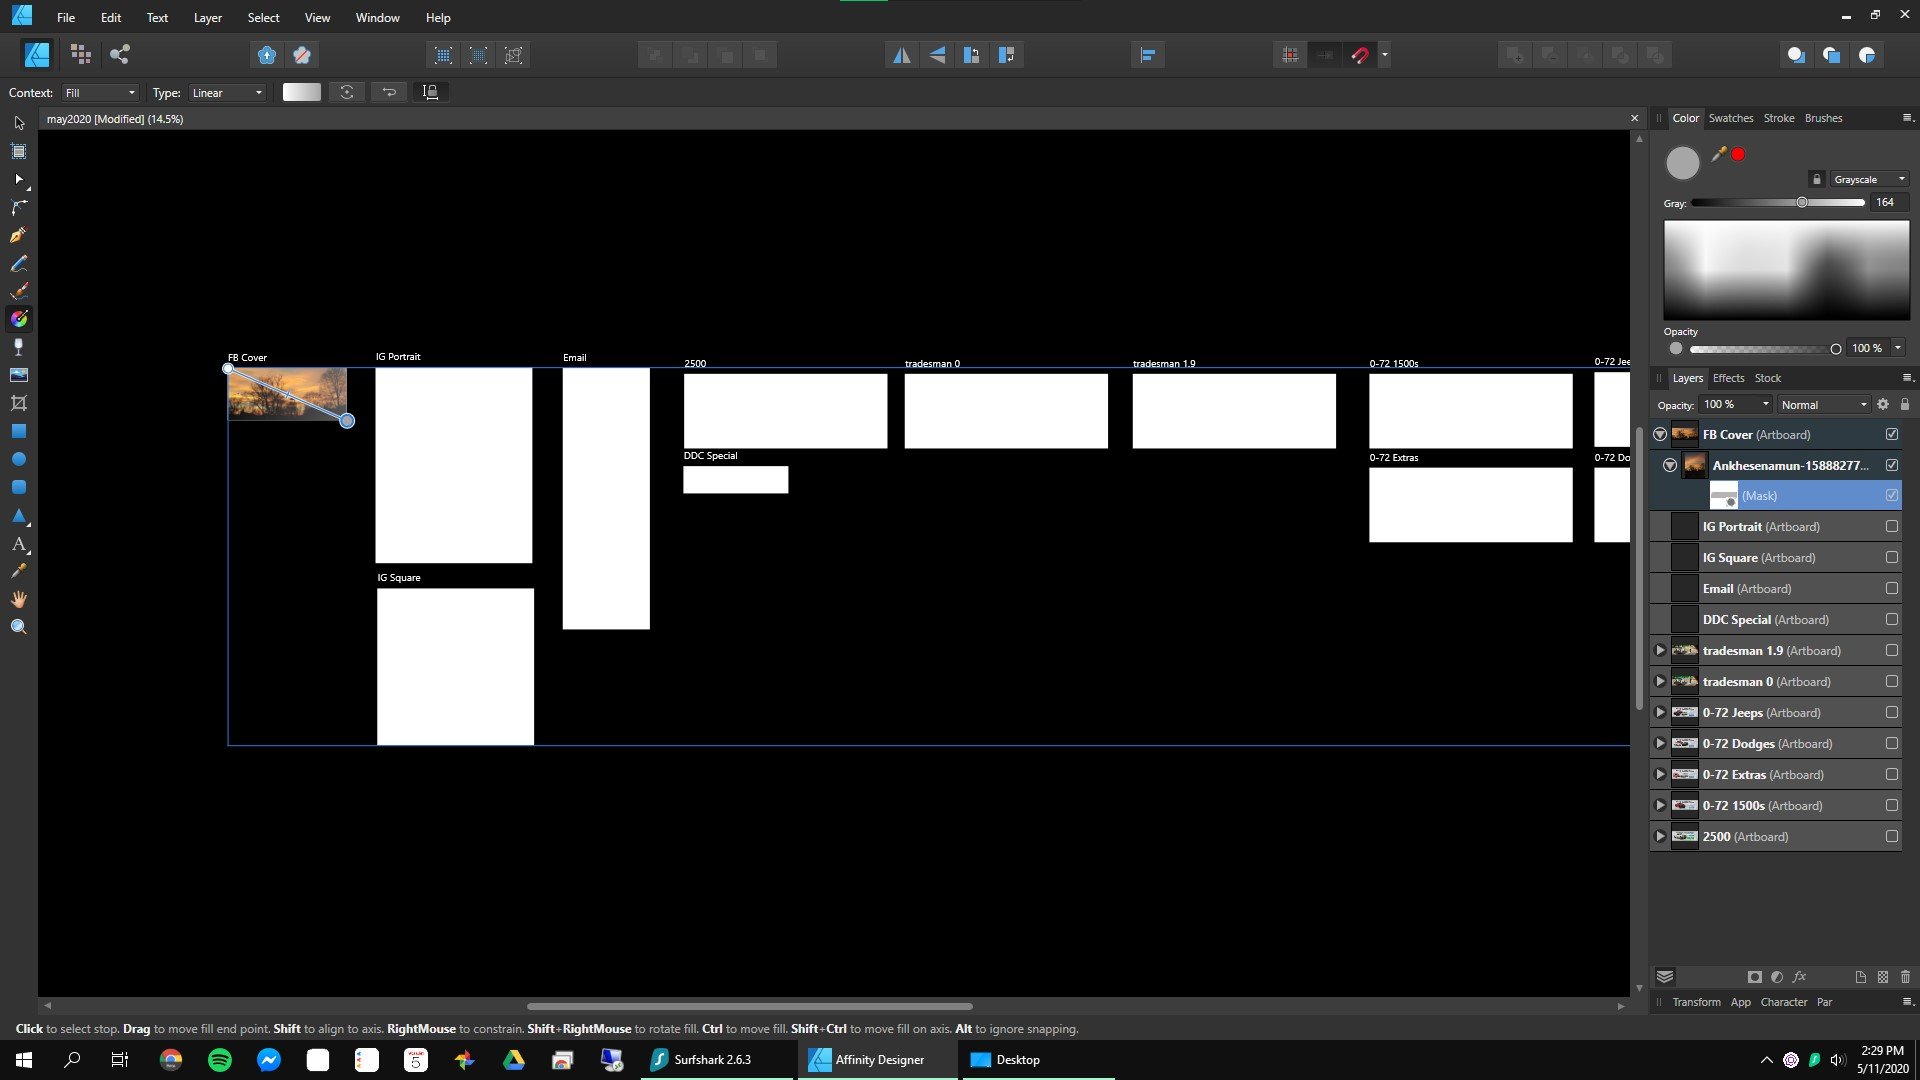
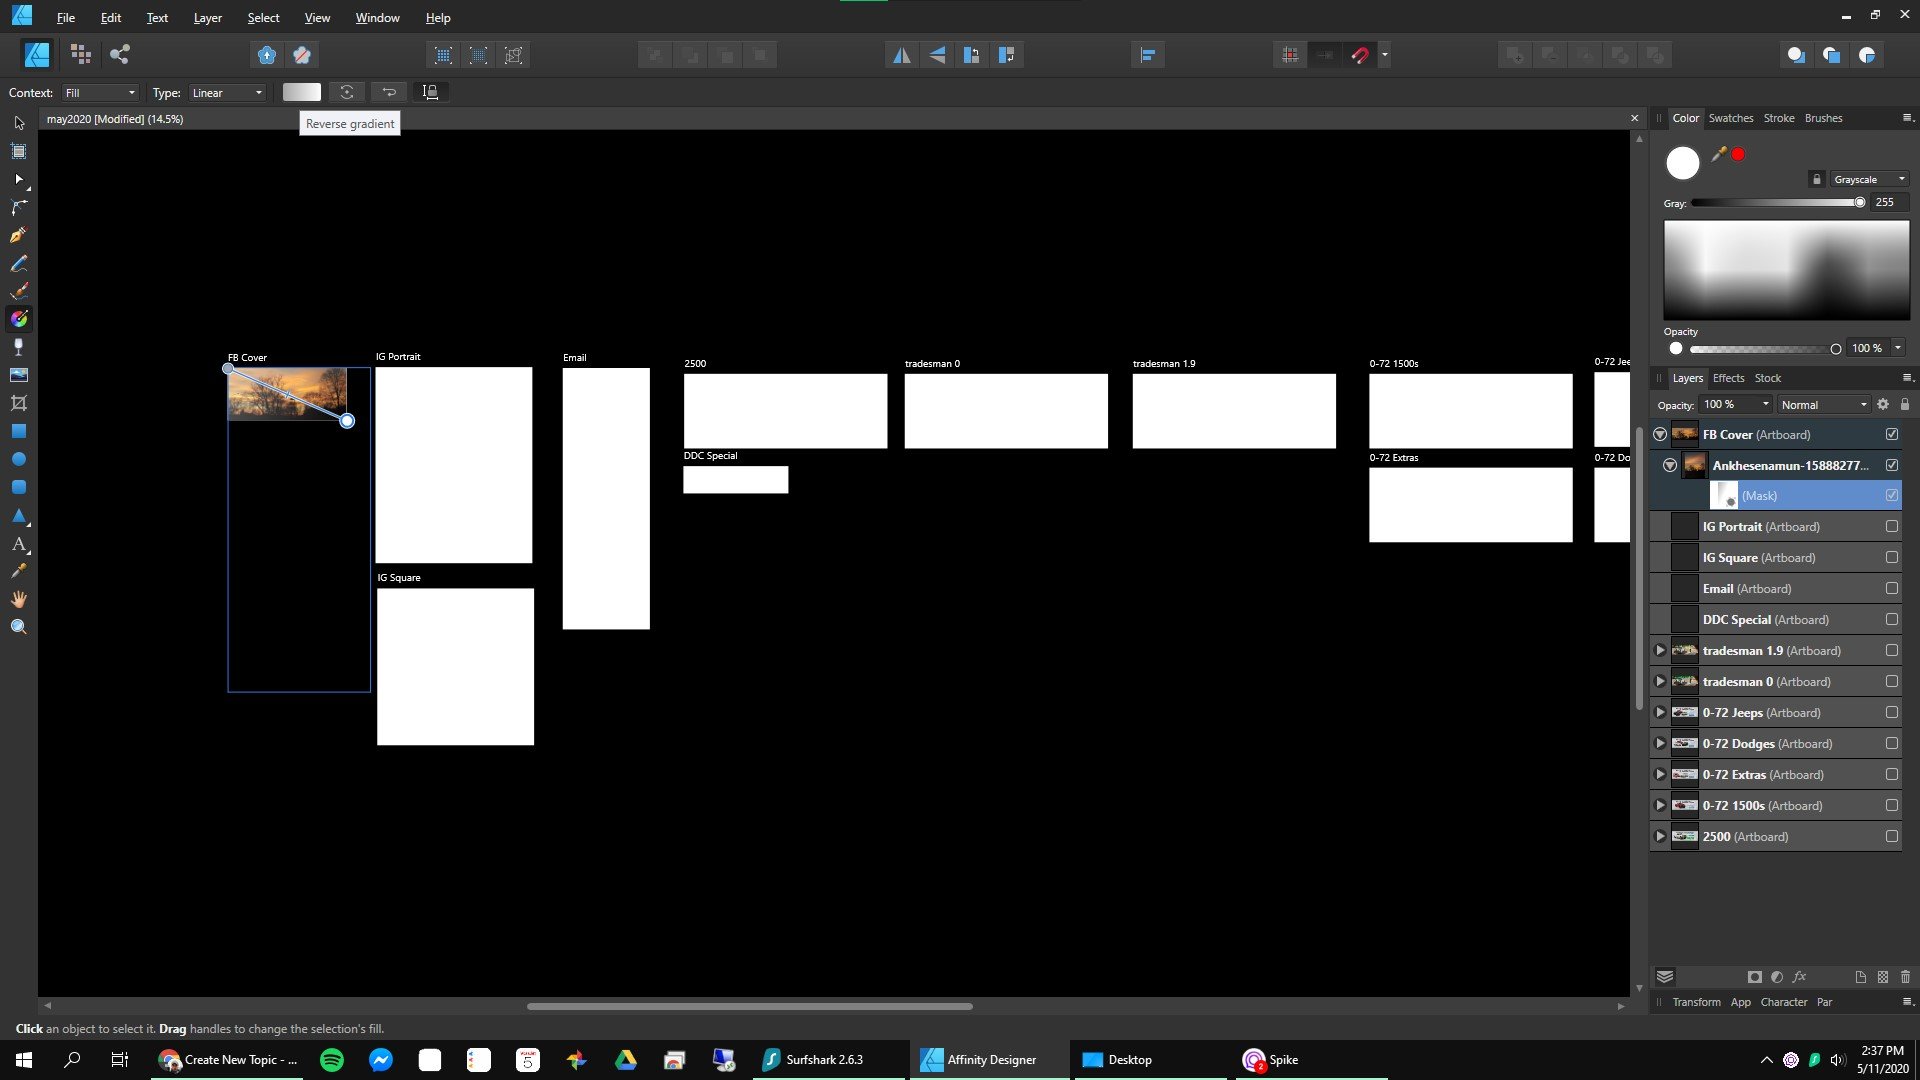
Windows 10 build 19603 Designer v 1.8.3.641 edit: also present on 1.8.4.650 beta Steps to reproduce: 1. Document created with multiple artboards. 2. Image applied to one single artboard. 3. Image selected, create mask. Works as expected. 4. Apply fill gradient to mask. Bug: Size of gradient mask applies to size of whole document. Expected behavior: Size of gradient mask should size according to parent image the mask is applied to. Images attached for evidence. Additional related bugs: 1. Click "Reverse Gradient" button in toolbar 2. Mask size changes to an unrelated size.
-
Masking only mask selected area. To have an inverse mask use Shift or Alt key then click on mask they goes to inverse mask otherwise they work normal.
-
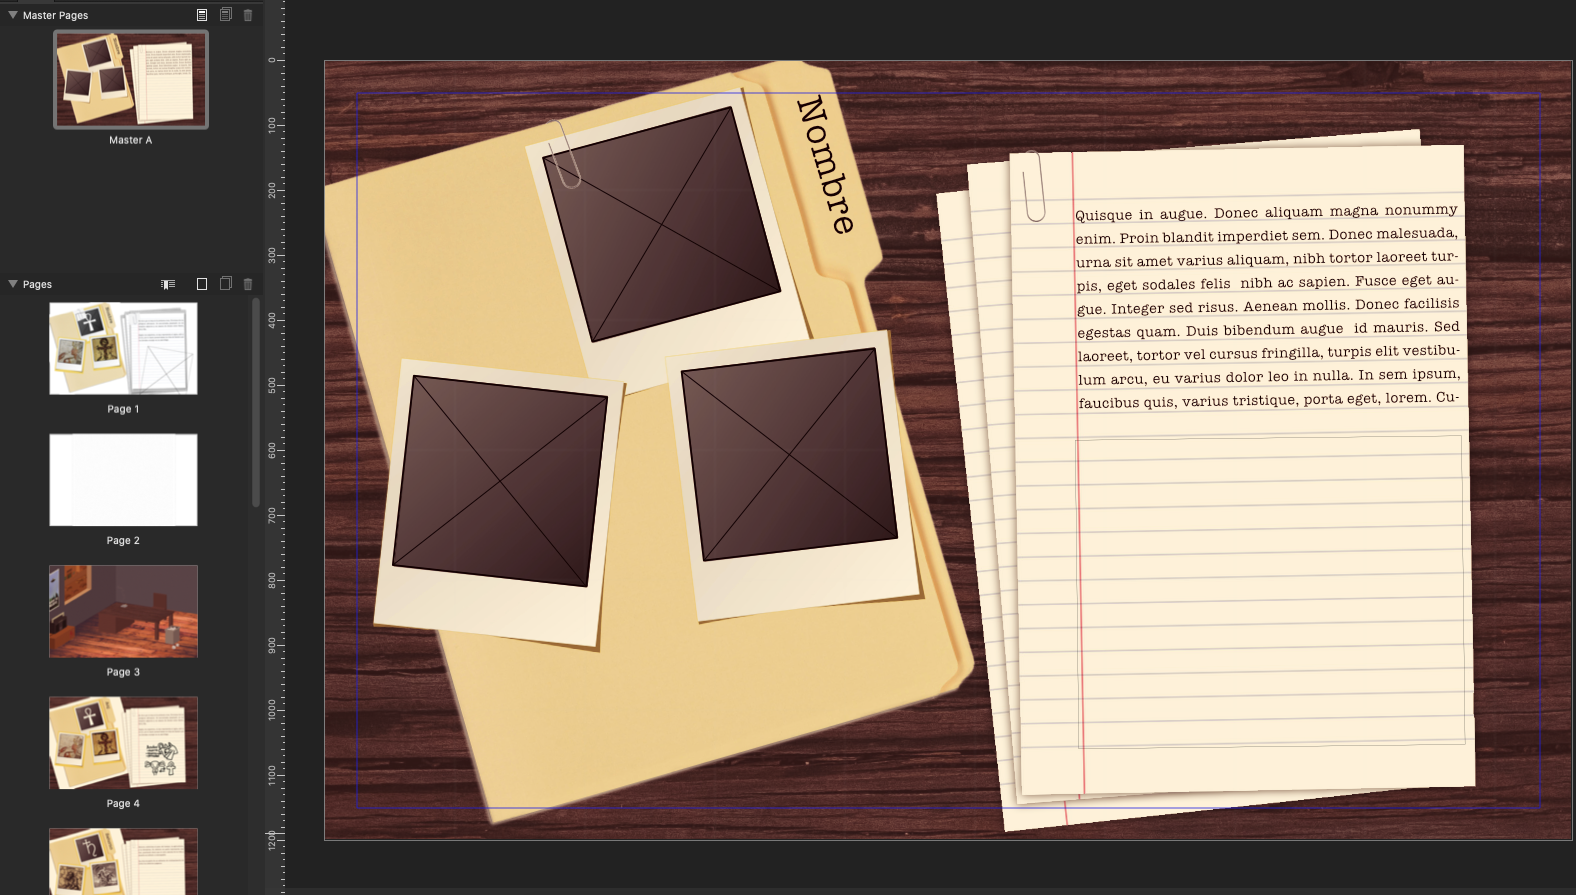
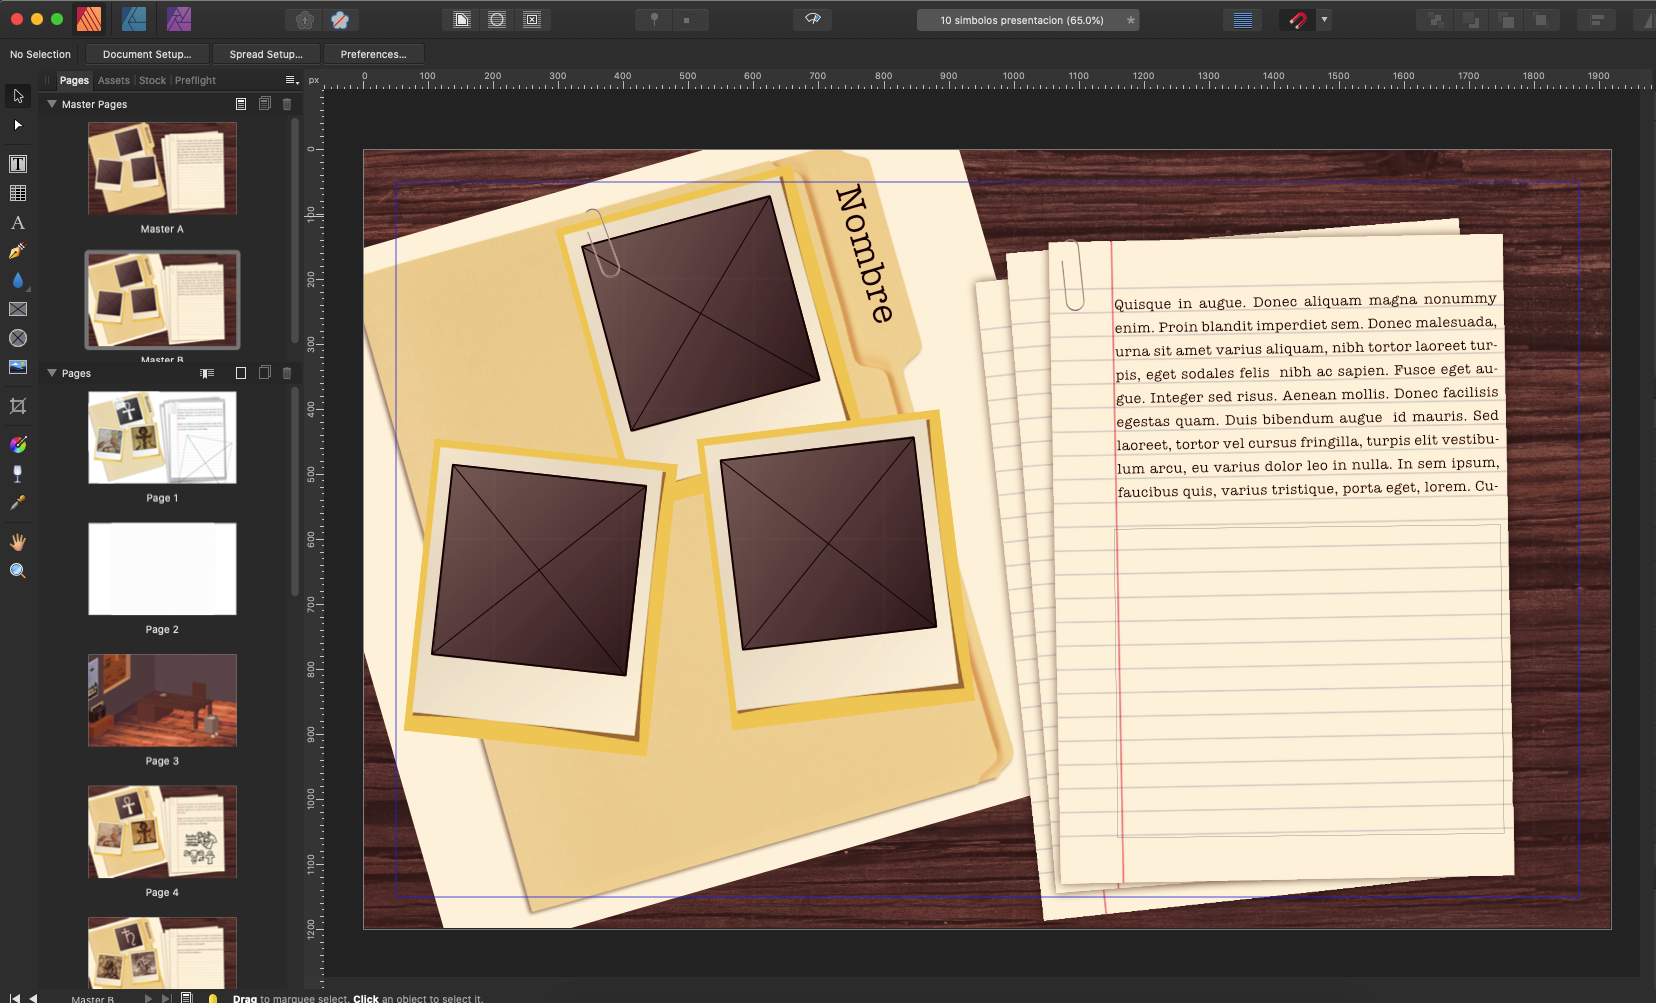
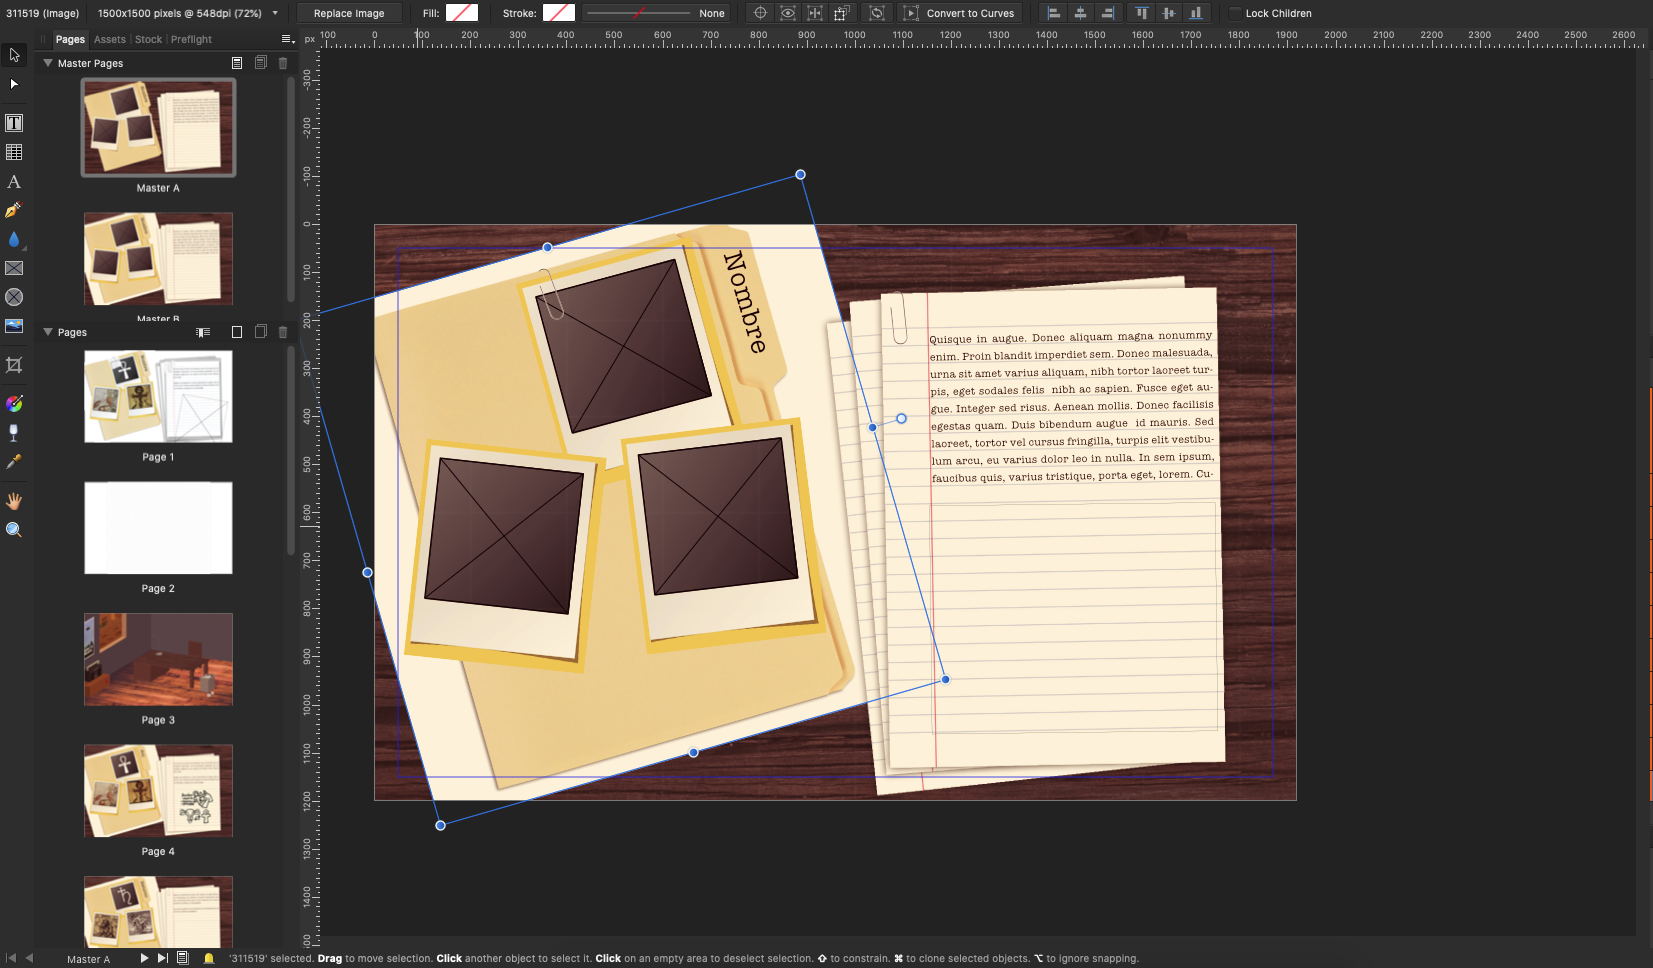
Hello there! Been enjoying Publisher so much, all my work is done fast and with great quality. However I encountered a very serious bug that will destroy hours of effort in no time, it goes as the following: Here we have the following master page: I've made masks around every object like the paperclips, the folder, the pages. Then, I decide to duplicate the master page: After duplicating it, the duplicate removes the masks of objects, usually at random. The mask I made remains but like a dummy, un-cheking it and checking it again in the layers panel does nothing. Plus, this very same issue is applied to the original master page as well: Sometimes an object will disappear but will remain in the layers panel, not even showing in the resource manager tool. Has anybody else encountered this issue? Hours and hours of work can go down the drain with this issue.
-
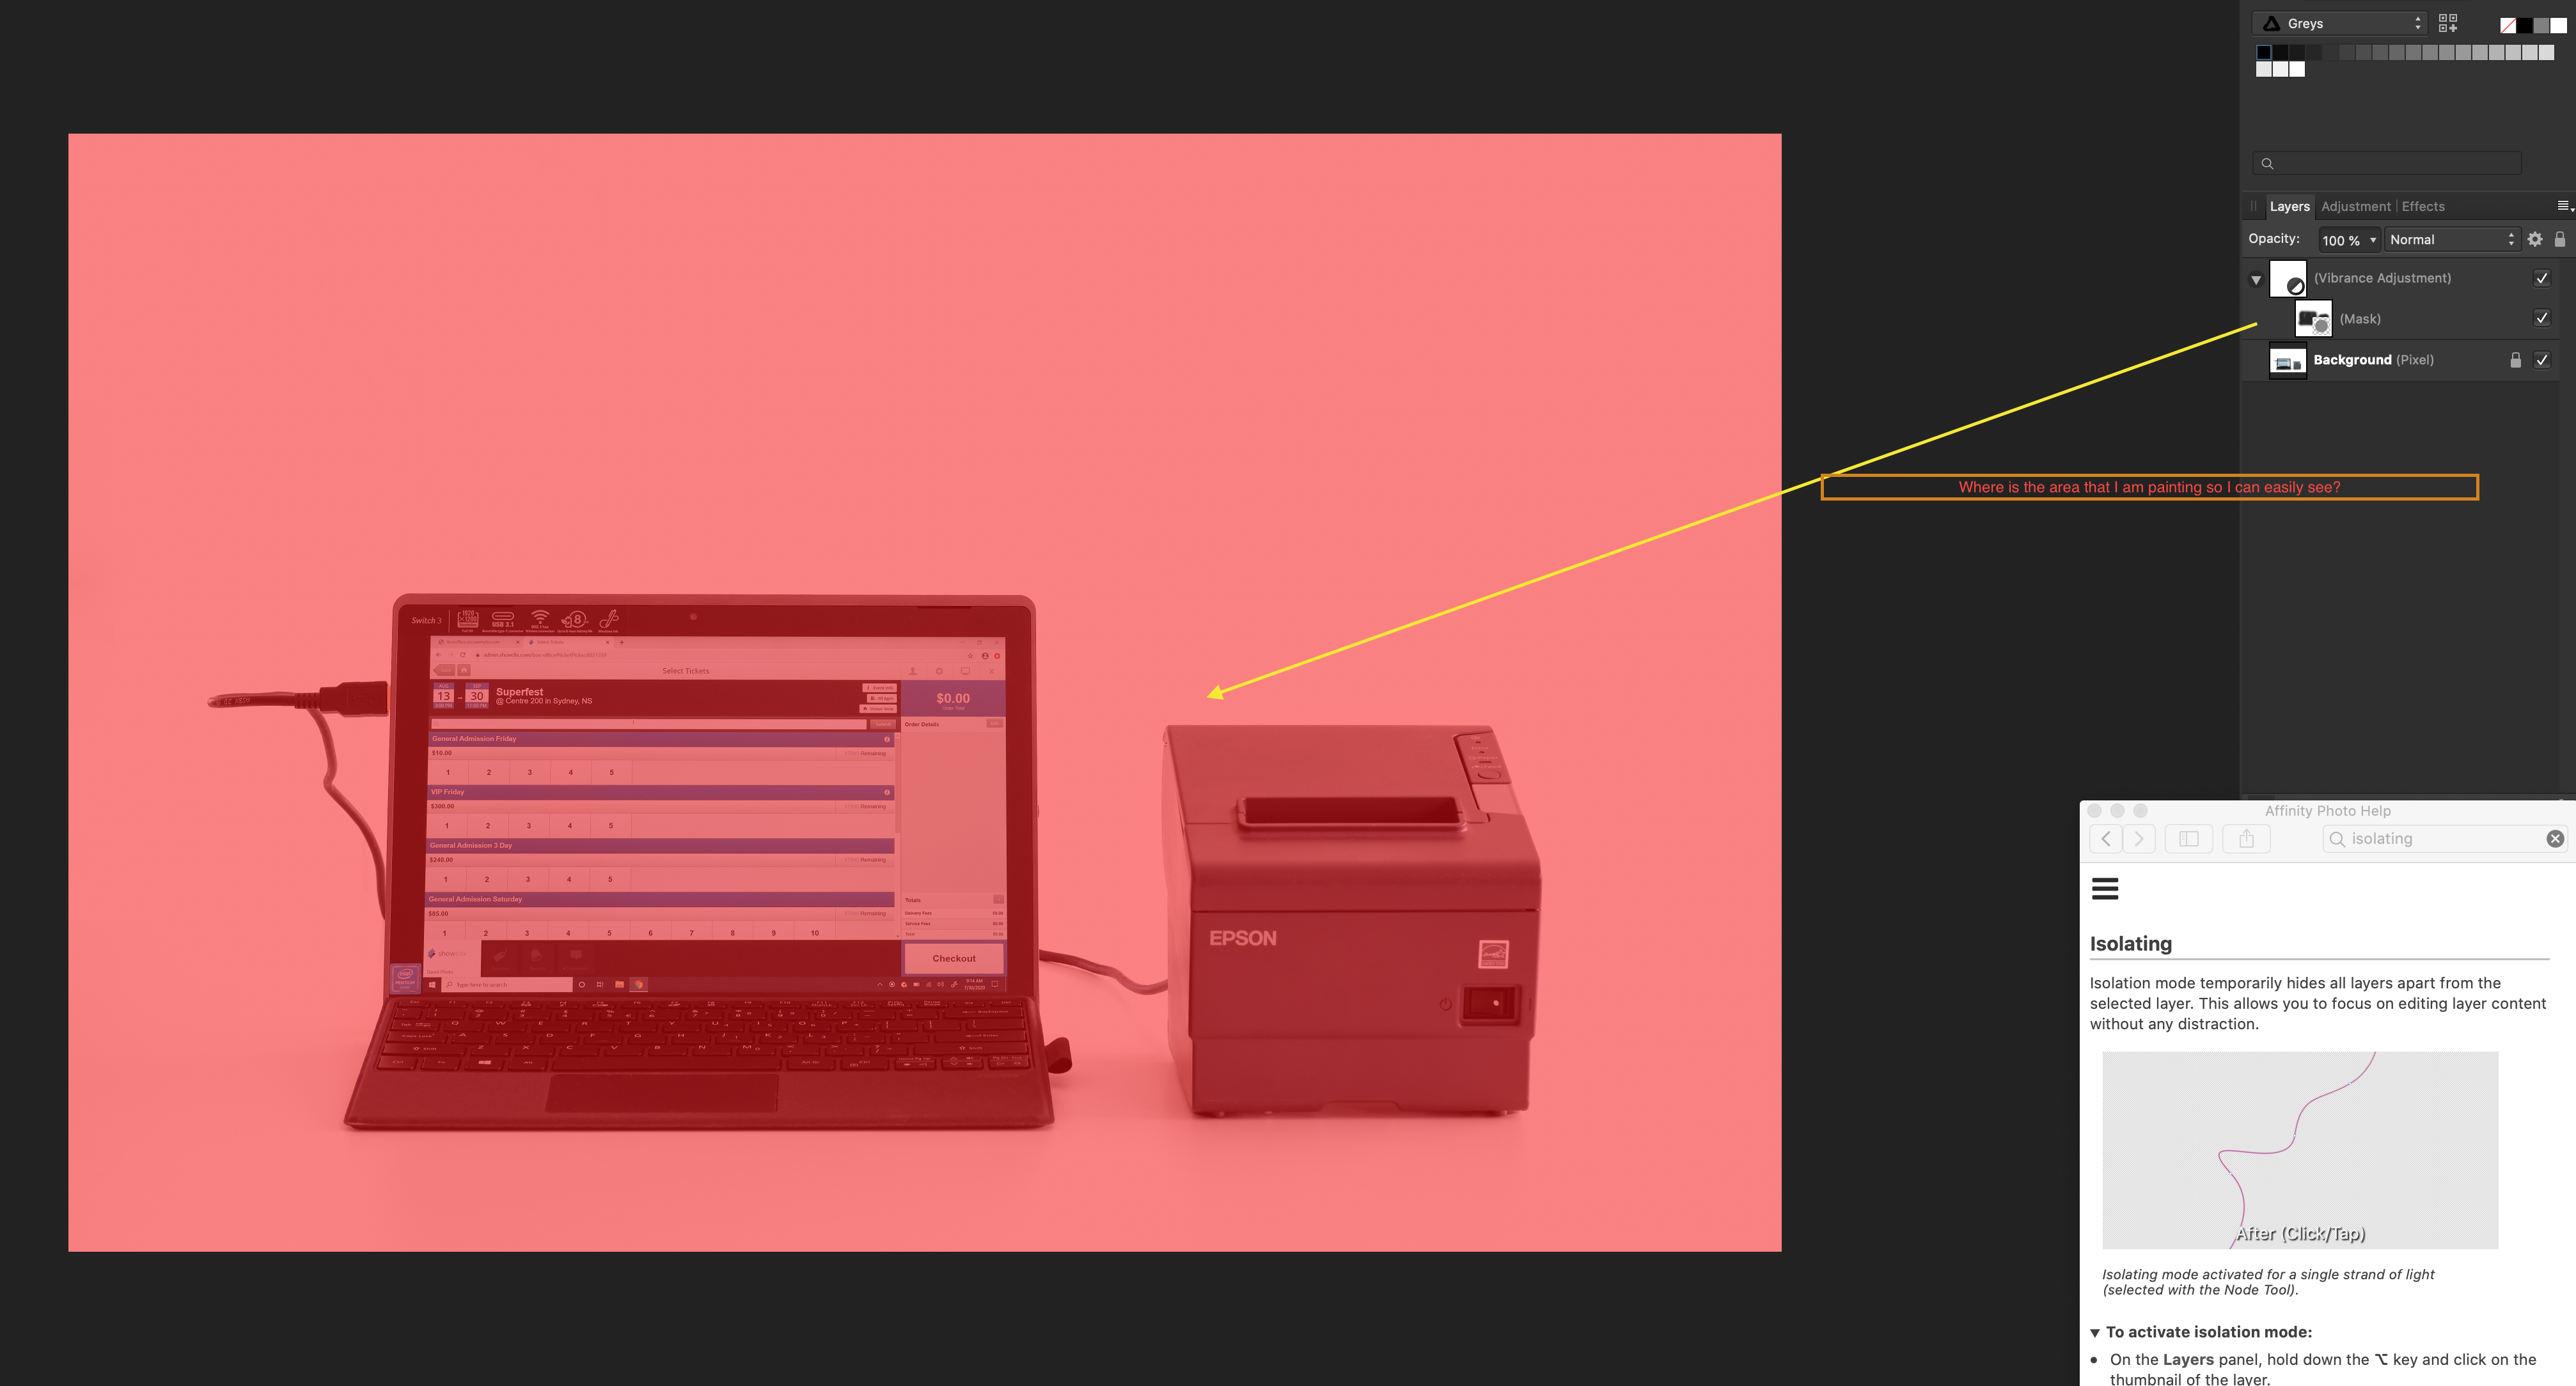
 Coming from photoshop here..... In this image I added a saturation layer, completely desaturated and I want to paint it back in on the computer hardware. When I press "Q" the mask is just fully red. I cannot actually see my paint marks to be more accurate? How the hell do I see this!?
-
 How can I turn my curve into a selection so that I can continue working with it? Or is this function not yet available?
 -
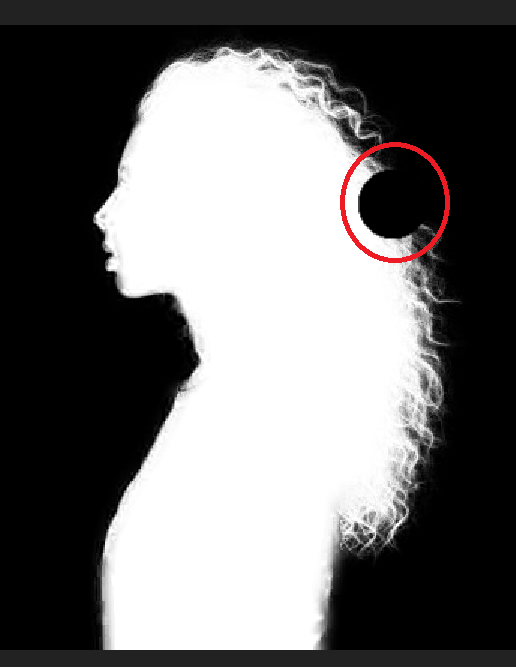
 Hello Affinity Users Group - I am using Affinity Photo to make a panorama of a mountain scene. I used the brush selection tool to select the sky, at the end of which I used the "Refine" option to improve the details of the boundary between mountain and sky. When I was finished, the boundary between mountain and sky, as delineated by the "marching ants," looked quite good, and at that point I made a mask based on that selection. I was expecting the marching-ant boundary to be perfectly binary, with pure black on one side and pure white on the other. However, when I take a close look at the white-black boundary of the mask, it is not very clean. That is, the white part of the mask near the boundary has a number of gray pixels (within a width of 20-50 pixels or so), and the same is true for the black part of the mask near the boundary. The result is that the mask near the boundary is "leaky." One way to clean this up is to use the brush tool to clean up this "noise," painting white on one side and black on the other. However, my panorama is large, and the white-black boundary has a lot of structure, so a manual repair using the brush tool would be quite tedious and time consuming. Can anyone shed some light as to why I get this leaky boundary, and can you recommend an efficient way of cleaning it up? Thank you.
 -
 Hi folks. I searched for this question in the forums but couldn't find it. I have a masked layer and I am trying to use a brush to add more to the layer (ie. I want to reveal more of the item that is being masked). When I use a brush with the color black, it erases more of the basked object, rather than revealing it. What am I doing wrong?
-
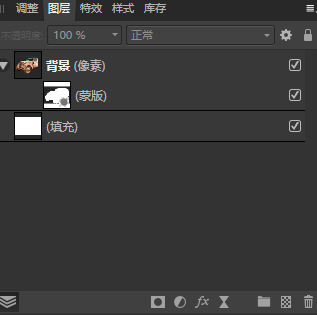
 Although I have posted this under other topics before,but I think it should be a bug. When I wanted to use photo for image matting, I found some problems. I selected the part of an image that I wanted to keep, then I clicked on the mask button in the layers palette and moved the whole thing around a bit. I found some remnants of the original image on the edge of the image rectangle. I then realized that this was caused by placing the mask background in white and filling only the currently visible area with black. This is a problem not only for photo and Windows platforms, but also for design and the ios platforms.
 -
 Hi there I´am trying to erase part of a mask using the brush in overlay blend mode. It suposse that if the mask is un black and white and the brush in overlay mode, when the brush pass over a white part of the mask, it should not affect whites, but it does. How can I fix this?
-
 Hello, When I select a layer and try to apply a mask or an adjustment from the layer's panel buttons for that layer, it creates a mask for all the layers bellow, not only for the select layer. I think it should create a mask for that specific layer selected (the parent layer). To do that I have to grab the new layer mask created and put, manually, under the selected layer. Is this normal? Am I missing some configuration?
 -
 Hello everyone Hello Support and Dev Team Would like to know if it is planned to make the Dodge and burn tools to also work on mask (of all type). It is sometime very helpful for white fringes removal during when removing BG. Well until then, Blessings y'All !
 -
I have installed the new 1.7.2. and have opened the last file working on..... did see only grey place until I have unchecked all layers with MASKs! Mask totally do not work! Please how can I quickly return to previous version, this is a TOTAL SHOW STOPPER! Thanks Jindra
-
When I wanted to use photo for image matting, I found some problems. I selected the part of an image that I wanted to keep, then I clicked on the mask button in the layers palette and moved the whole thing around a bit. I found some remnants of the original image on the edge of the image rectangle. I then realized that this was caused by placing the mask background in white and filling only the currently visible area with black. This is a problem not only for photo and Windows platforms, but also for design and the ios platforms. Of course, I can do this by creating a mask with a black background and then making the selection white, but is it really necessary to go to all that trouble? I mean, it should be natural to set the mask background to black by default when doing this, just like photoshop did. Here are some screenshots of the problem.
-
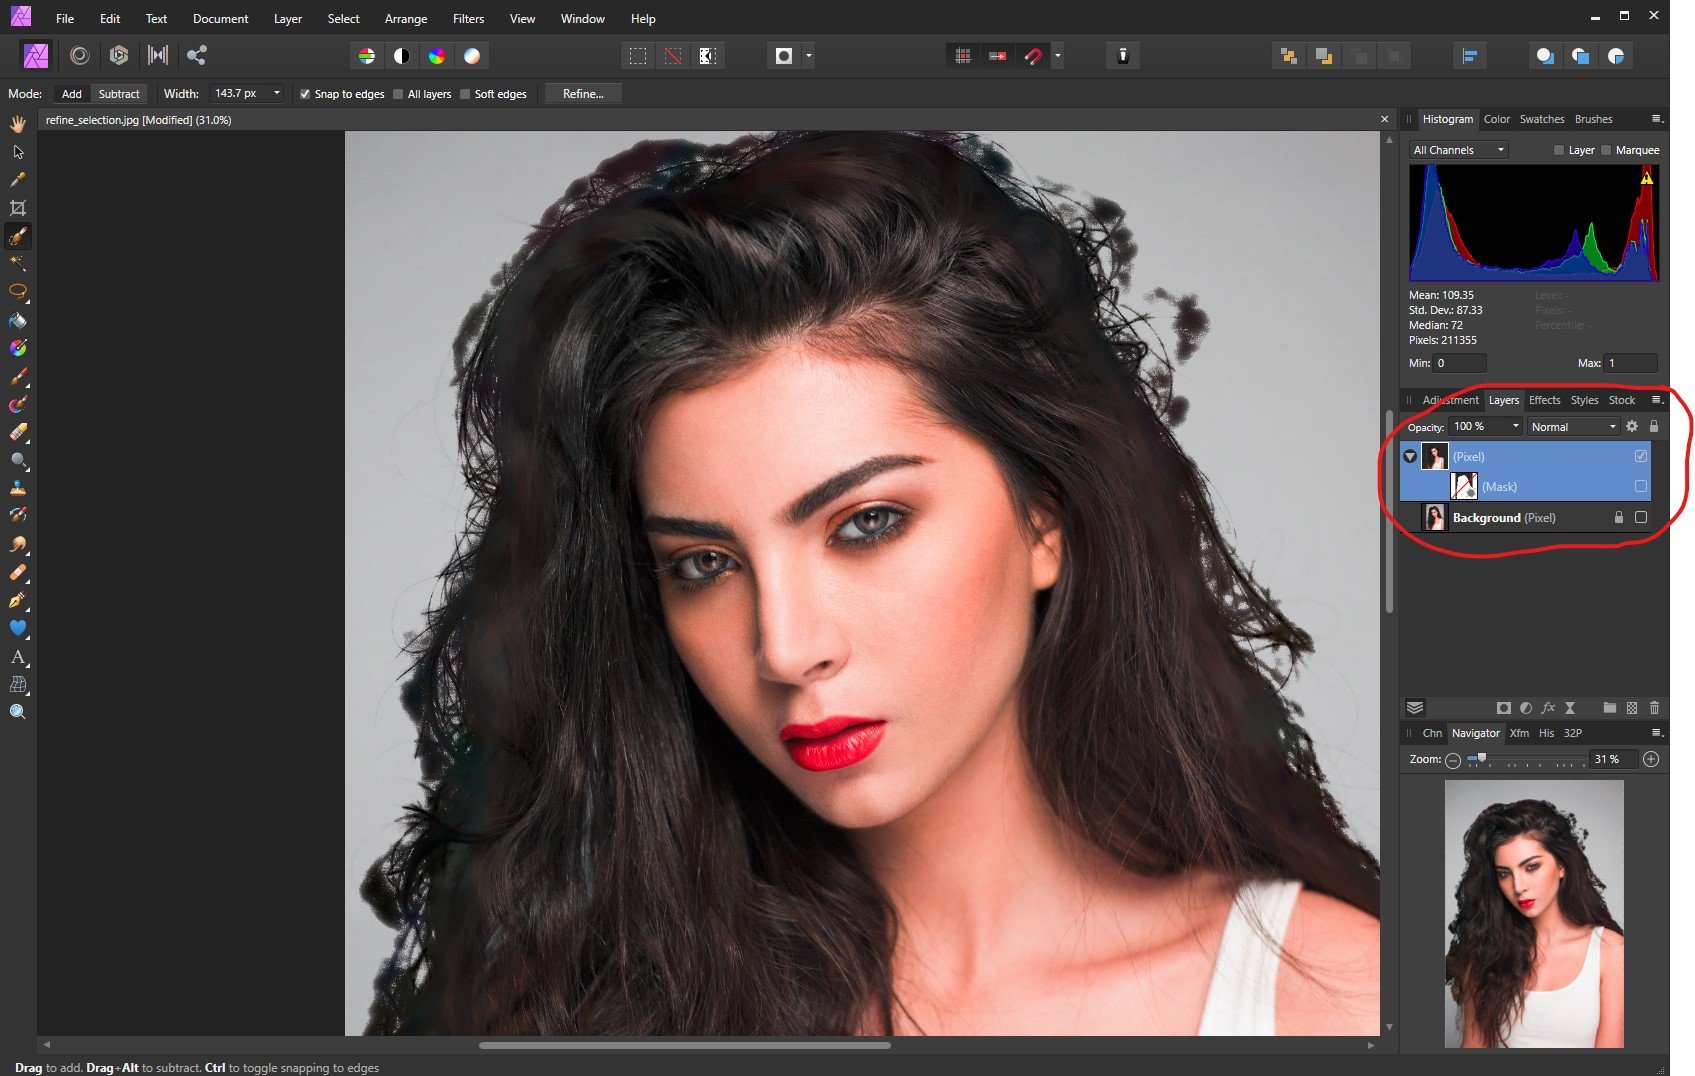
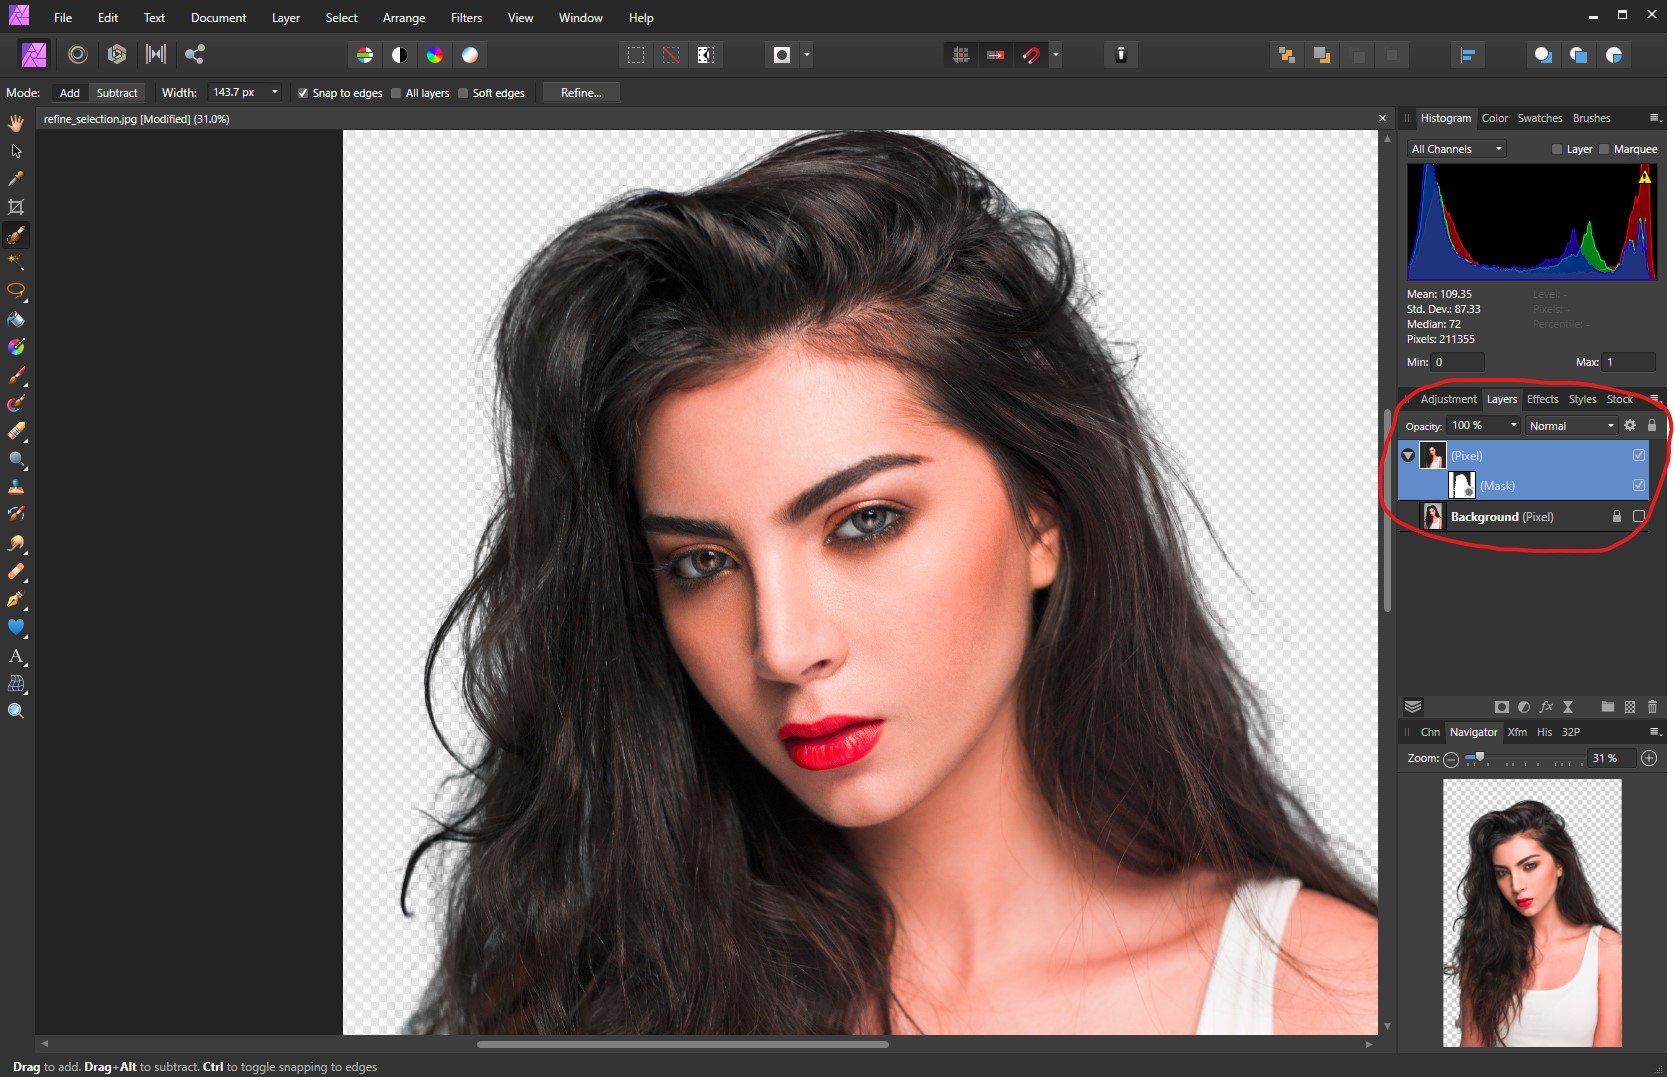
 Hi folks, I am doing the exercises in the Affinity Photo Workbook and am doing the selection exercise. When i selected the girl, and did the refine selection and then copy to new layer with mask, everything seems fine, until I turn off the mask. When I do there are black splotches all around her hair where i refined the selection. See attached screen grabs. Thanks!
-
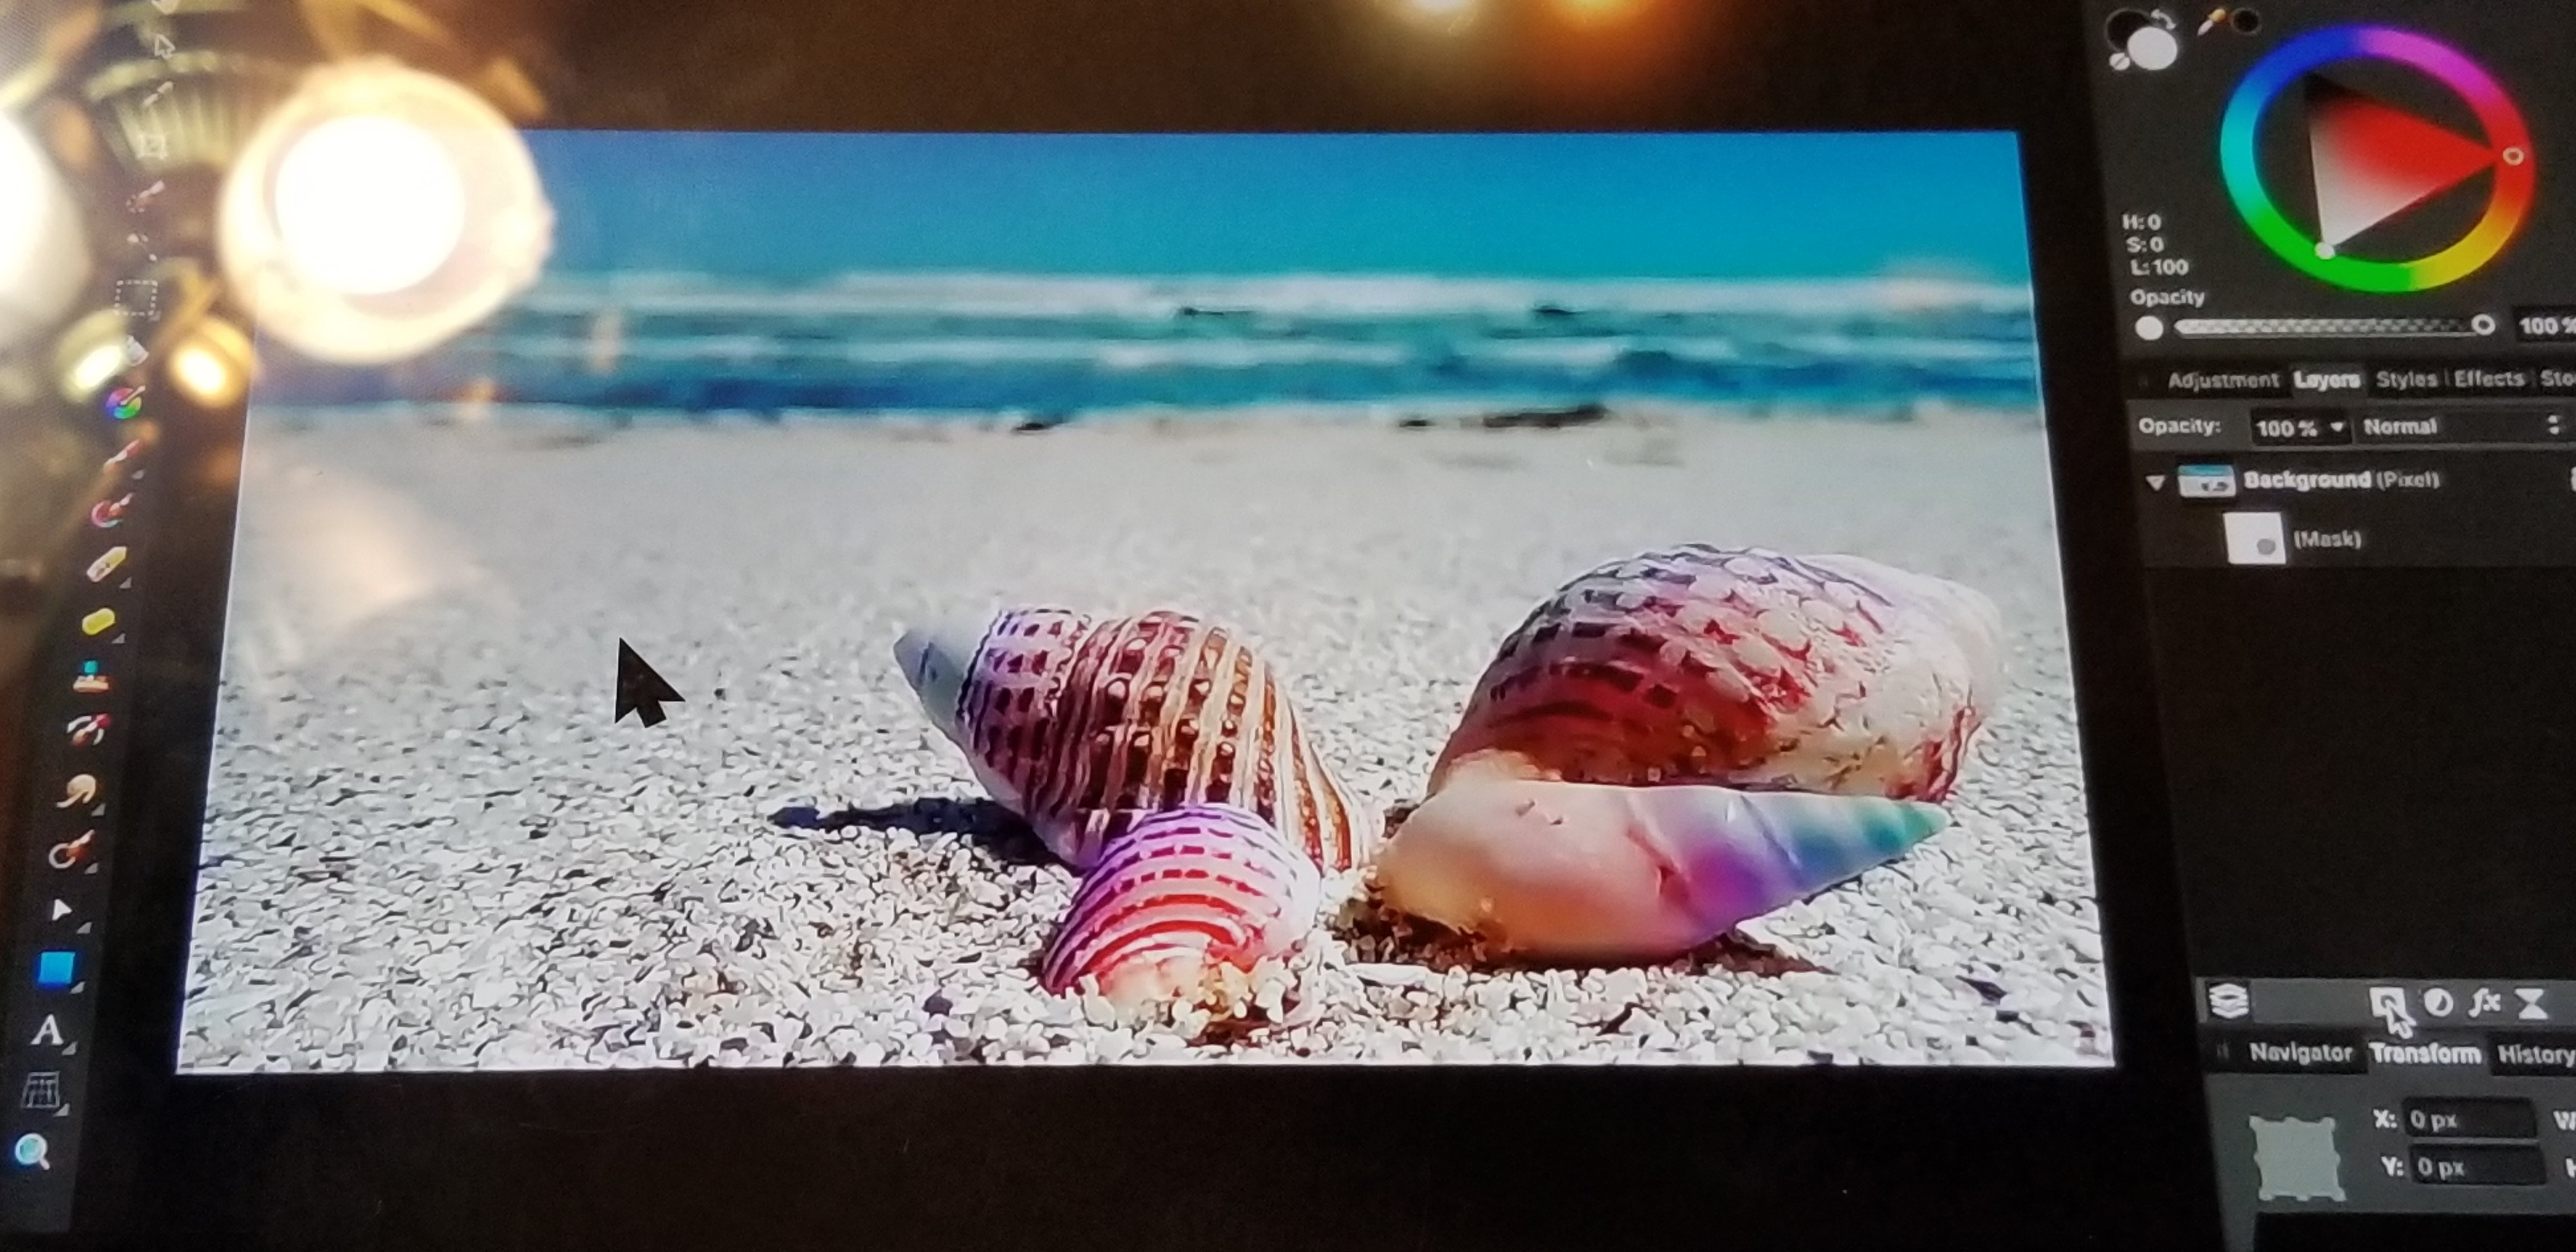
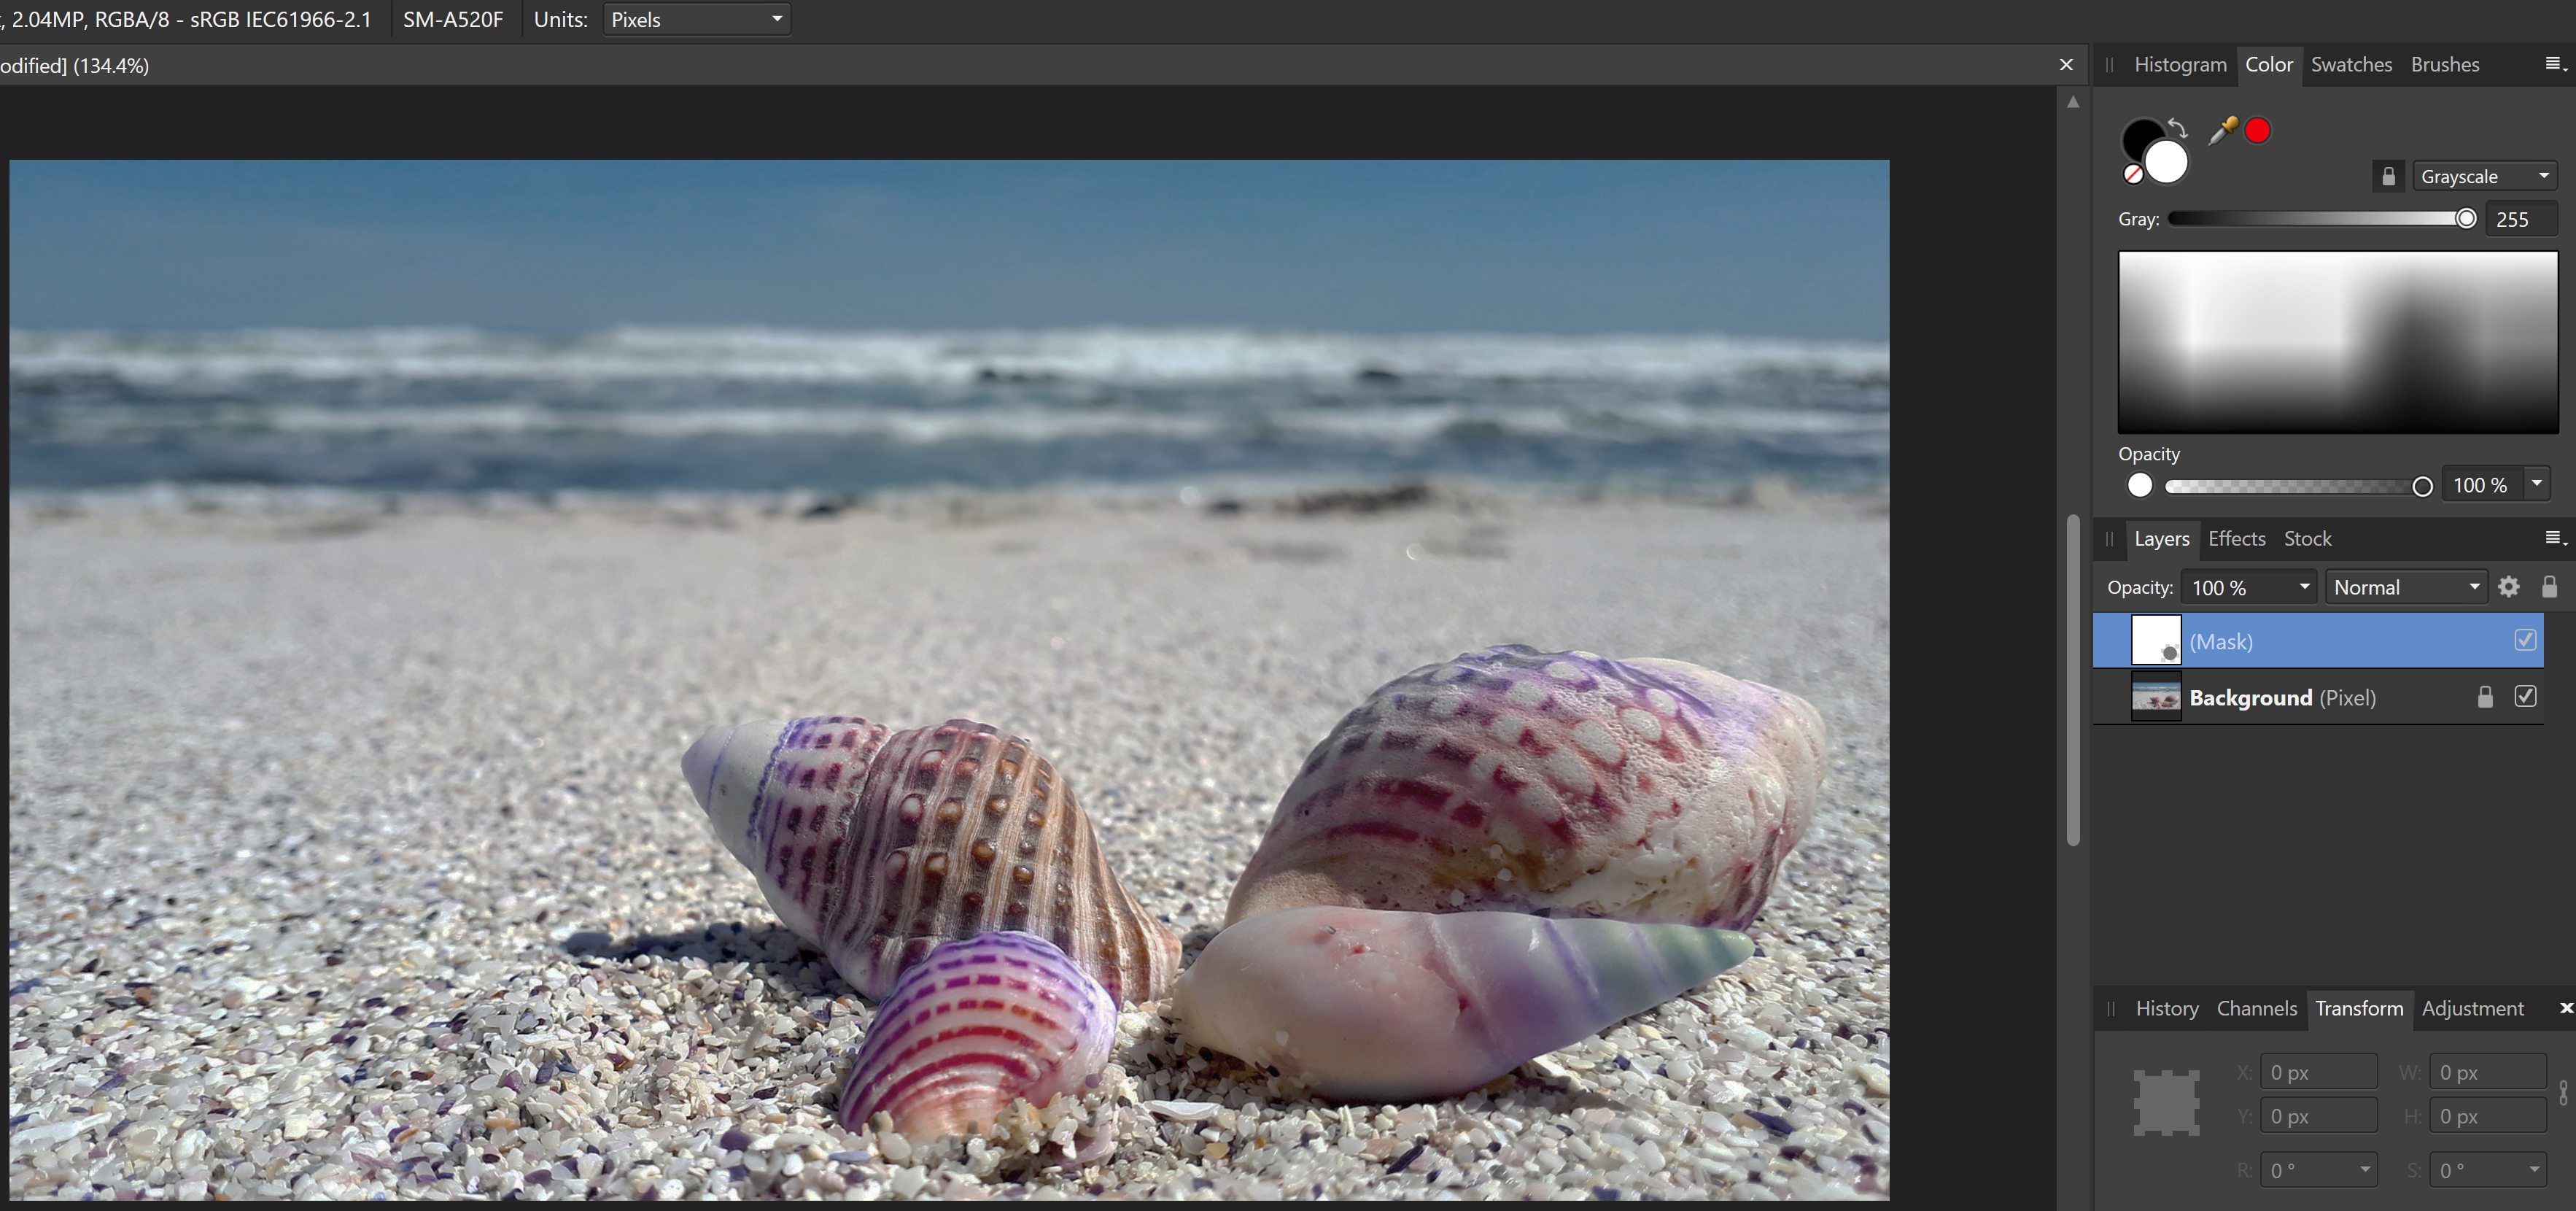
 I'm following "Affinity Photo Tutorial For Beginners - Top 10 Things Beginners Want to Know". When video instructs me to "apply a mask to a photo" by selecting the Mask Icon the mask layer appears below (and indented) the Background layer. However, when I select Mask Icon the mask layer appears above Background as a separate layer. Attachment 1 - Photo of tutorial screen Attachment 2 - Image of my screen in Affinity Photo on laptop
-
 Hello all! I'm currently facing an issue when exporting one file with some masks (grayscale gradients) as SVG. All these masks are rendered, in the resulting SVG, on the full image size (not only the curve it should apply to). The problem appears with Photo, Designer and Publisher. I've attached to this post the .afphoto version (source) and .svg file (export target). Could someone help me find out if I'm making a mistake, if it's a known limitation of the exporter or a bug? Thanks a lot for your help. Logo.afphoto SVG Result.svg
 -
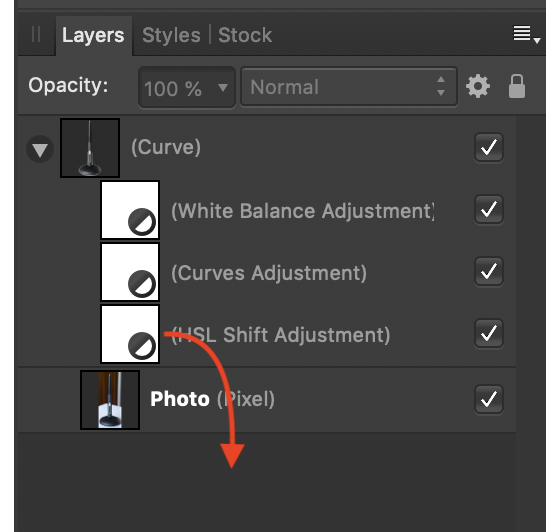
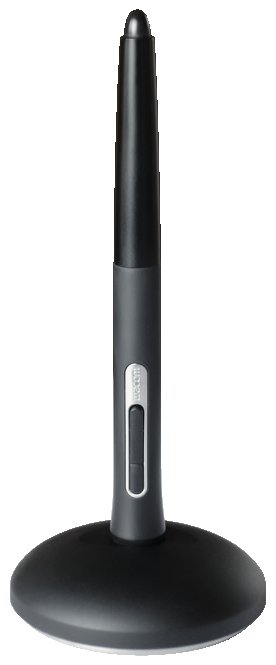
Hi, when I export my graphic to jpg, the masked picture has pixelated contour (no antialiasing). The probleme comes, when adjustment layers are applied on the path object only. When you move some of my adjustment layers to the pixel layer instead, the probleme is solved and the contour looks nice after export. In my opinion this is bug and it should not mater, on which object adjustments are applied in such case. Affinity Publisher 1.8.3 Wacom-pen.afpub
-
To speed up workflow, I'd like to request a color behavior change when selecting masks. When selecting a mask, please change foreground/background colors to Black and White. When selecting back onto a pixel or image layer, revert to selected colors. This is a Photoshop behavior I miss very much and I didn't realize how much I missed it as I've spent a LOT of time trying to figure out why my mask wasn't working only to realize I was painting on the mask with a color rather than black/grey/white. Also Thanks for your consideration
- 12 replies
-
- 2
-

-
- suggestion
- masking
- (and 2 more)
-
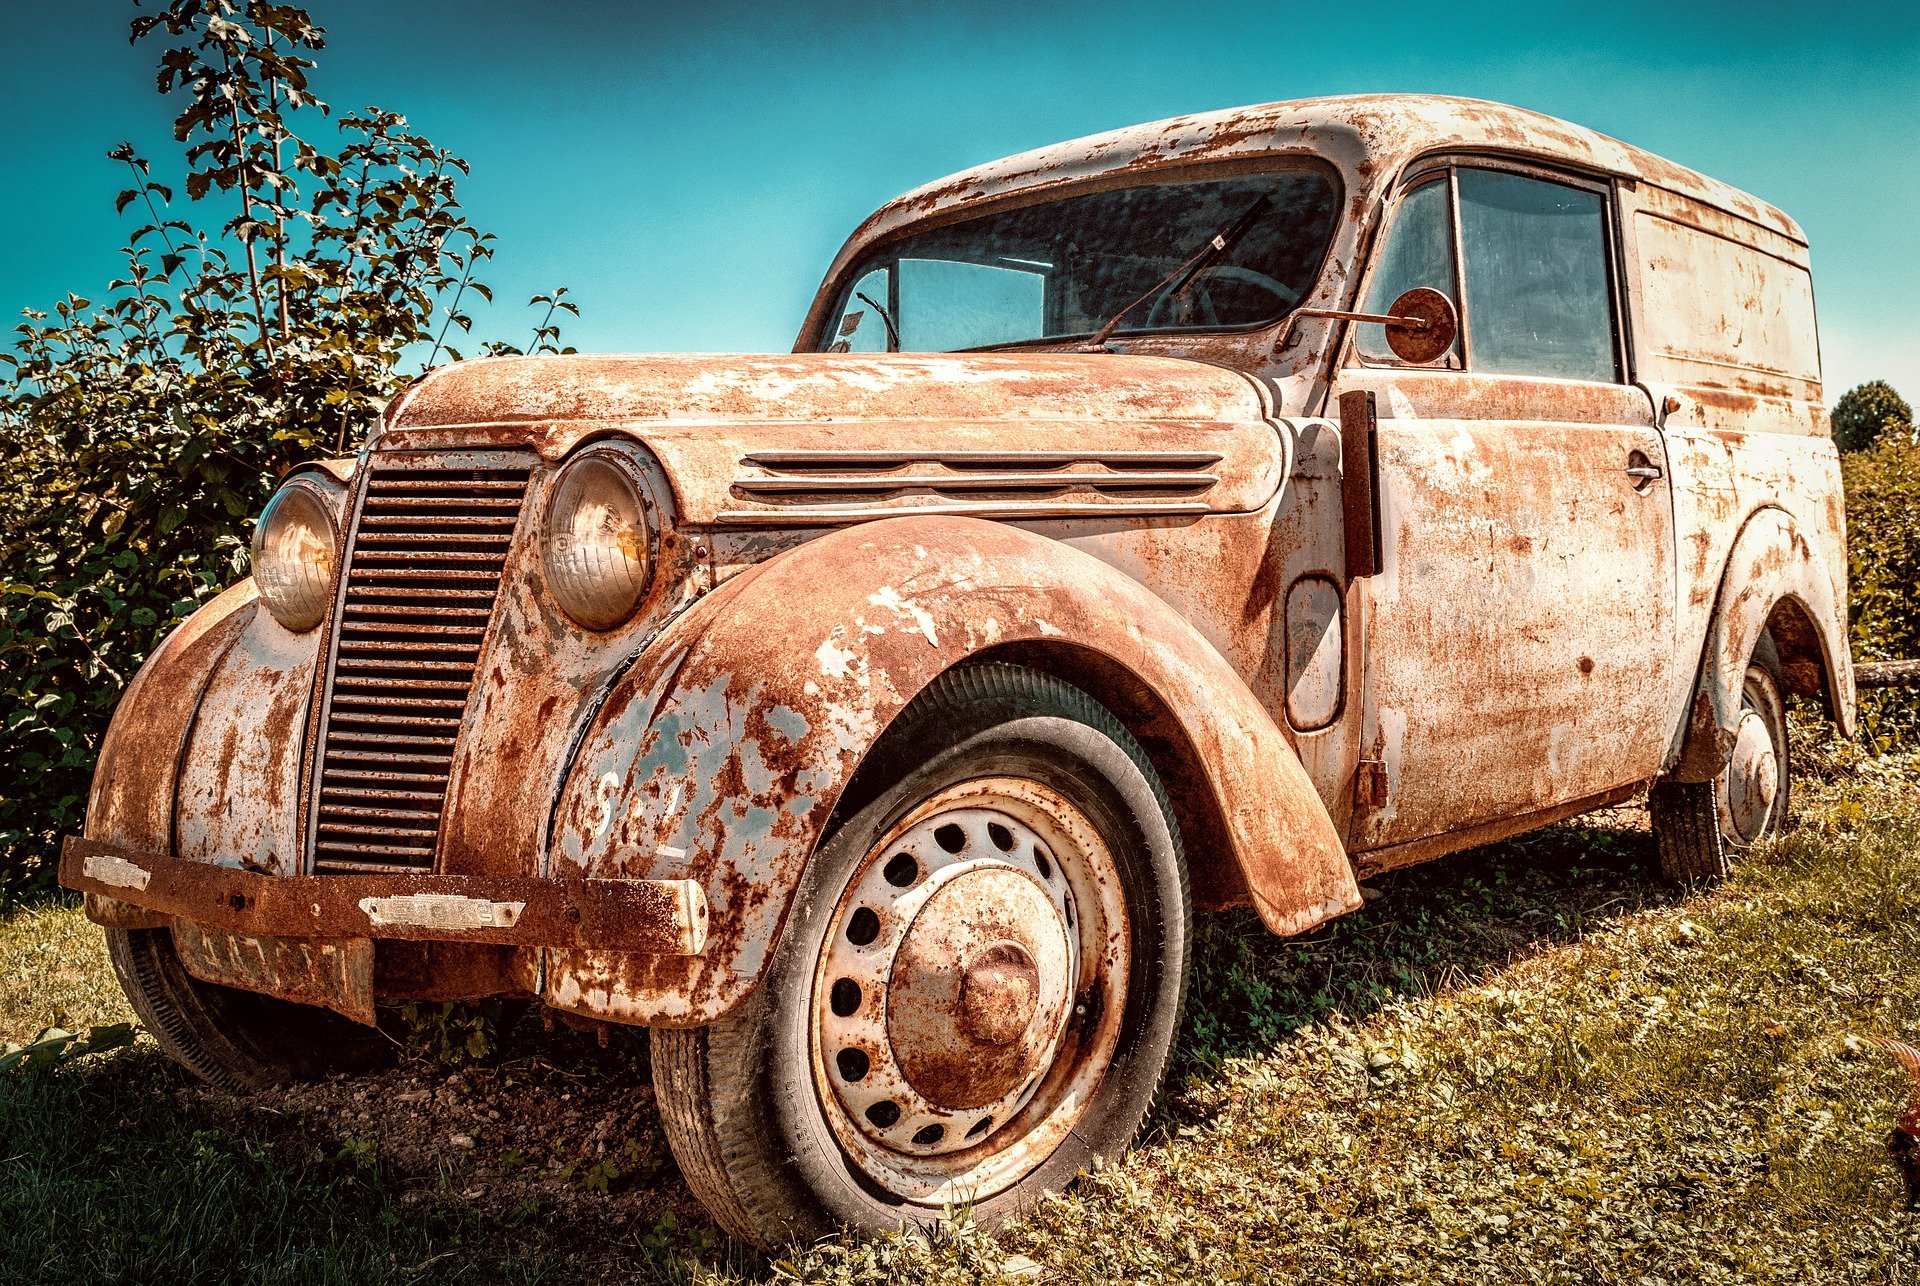
 Hi all, I have simple stupid beginner question - black and white mask work for me quite well (white solid, black transparent). But I would like use a picture as mask - grey color semitransparent - darker grey - more transparent, brighter gray less transparent. Unfortunately, in case I use the picture as a mask, it doesnt work. Only pictures with 100% black and white works. Which way should I go to reach my goal? Thank you. As an attachment is example - I want these lines to be more/less transparent according to the cake picture (named background)...its just test. example.afphoto
 -
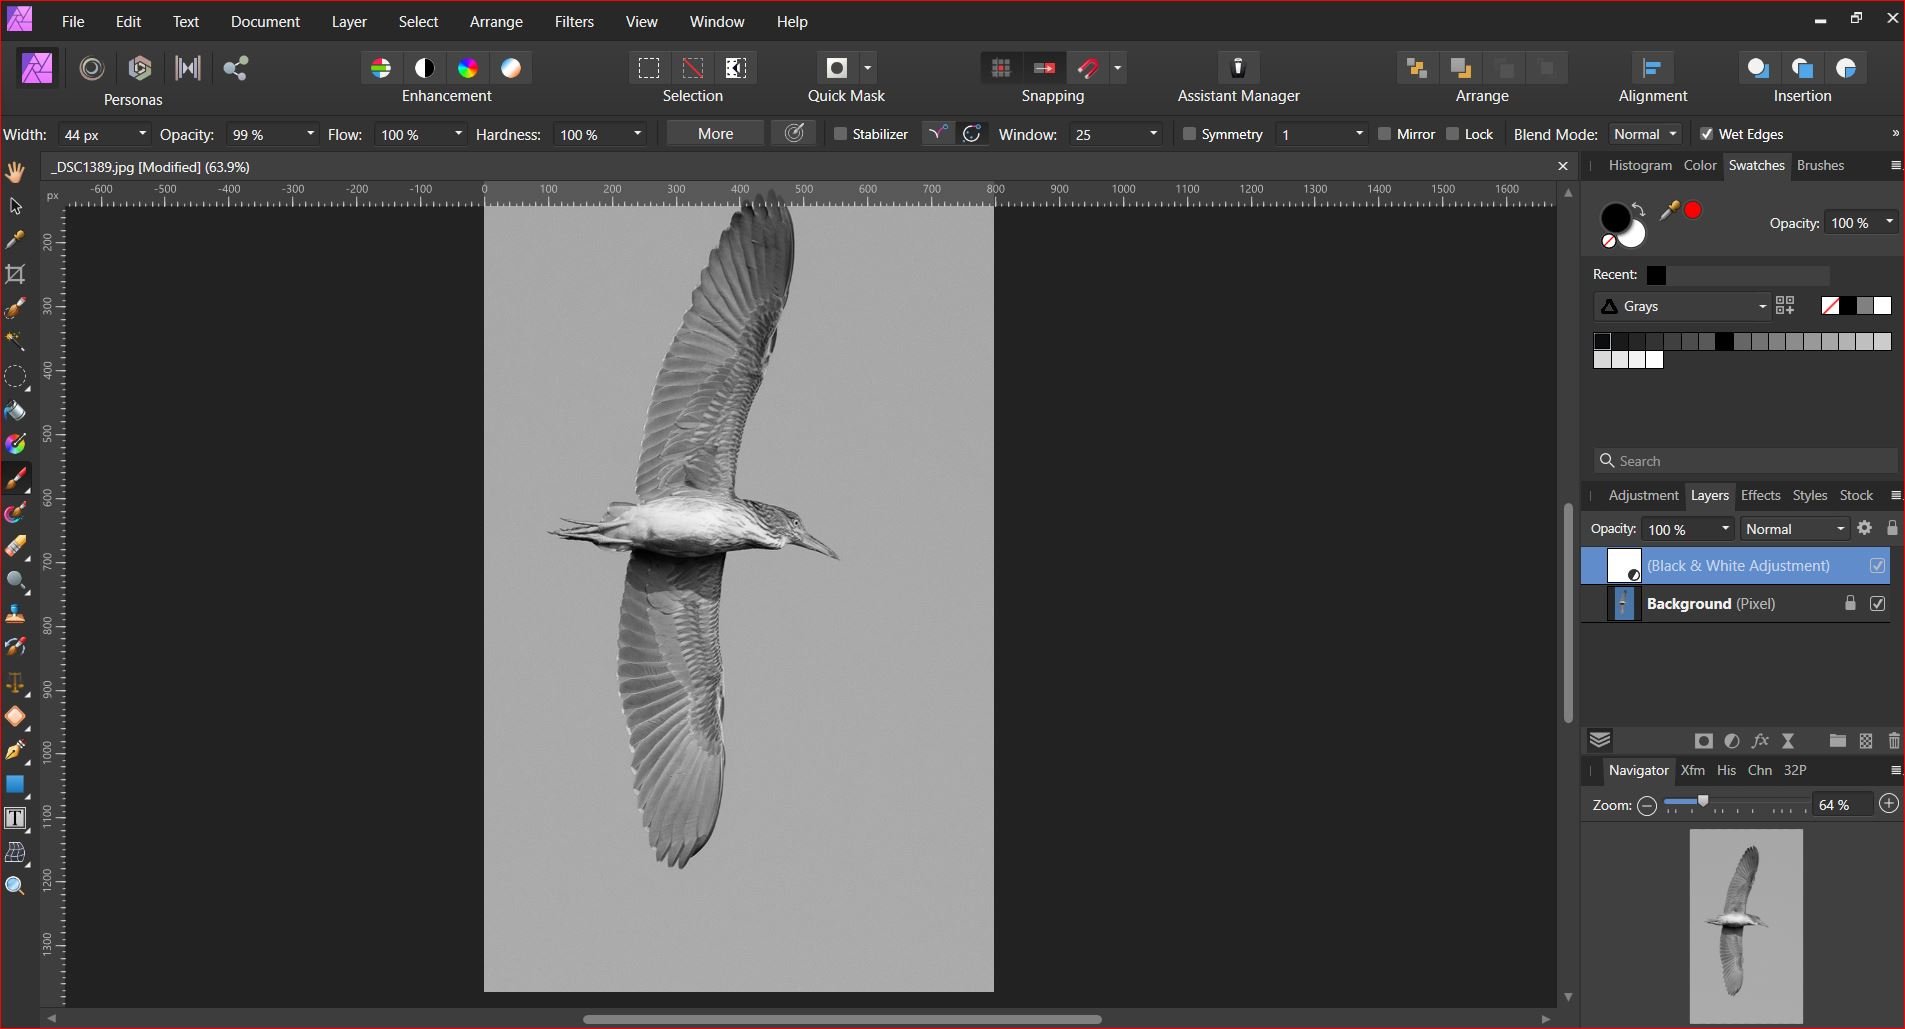
 When trying to paint with Paint Brush Tool on the Adjustment layer it does not paint Screen shot enclosed. No impact of the mask painting on the adjustment layer
-
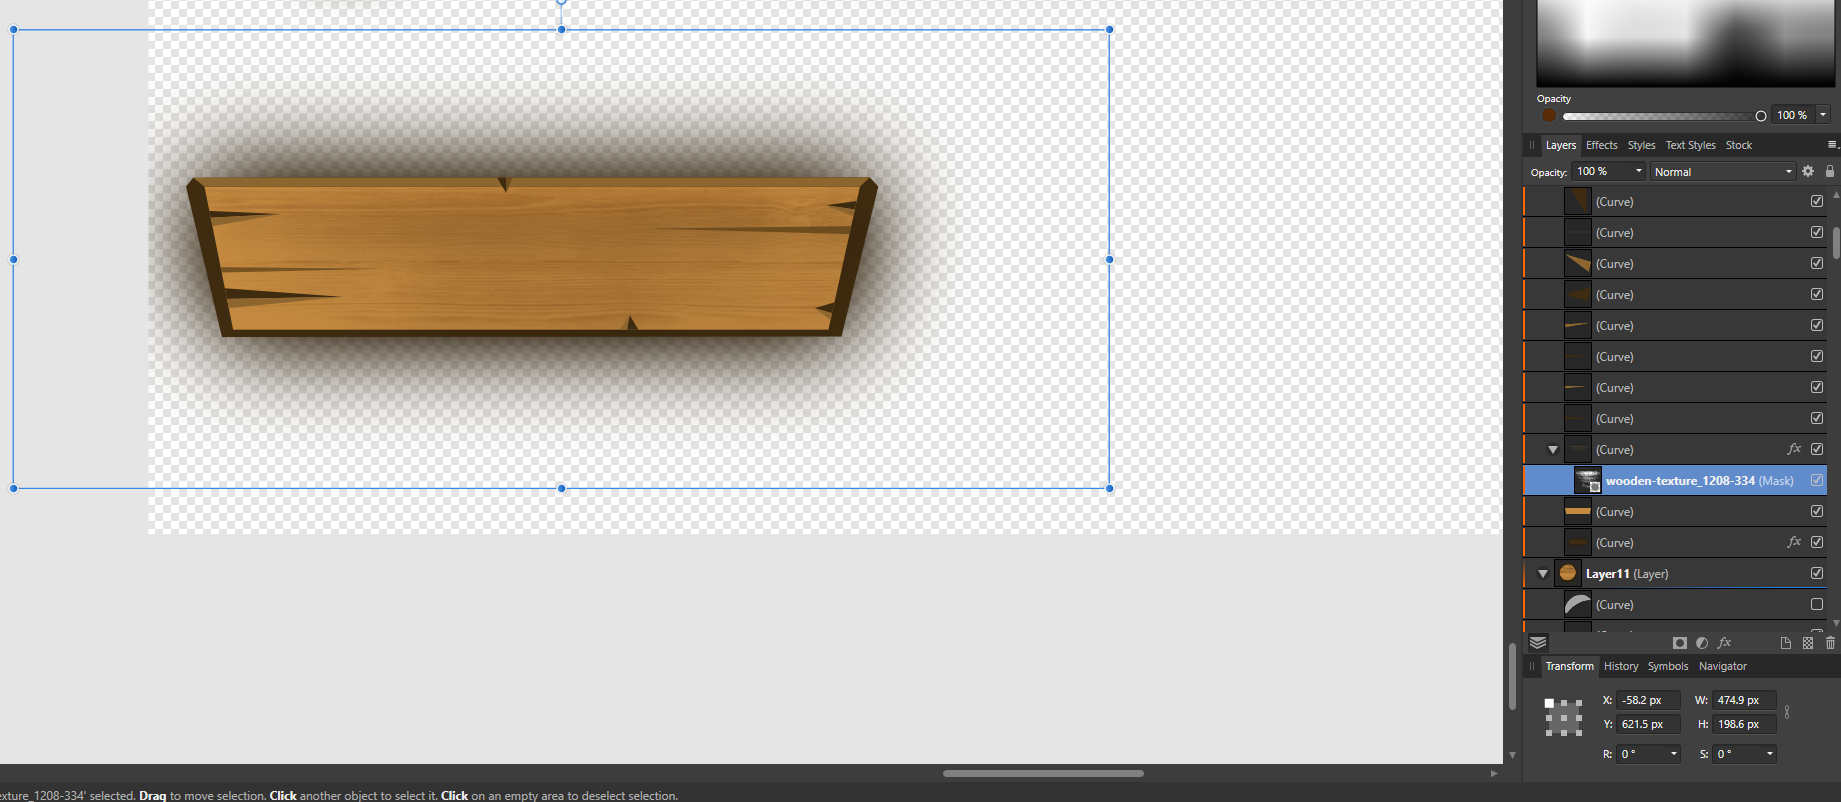
 Hello, I've got multiple symbols where masks are being used to add texture but every so often I'll be working on another part of the document and the mask will move to a huge position far off screen which I then have to find and move back to the correct position. This keeps happening and I so far haven't found a way to reproduce it reliably. See below screenshots on what I mean. Has anyone else had this issue and is there a way to fix it? If not can I log a bug? What I start with: What randomly happens: Thanks for your help.
.png.960e319b19e5d319156f05a74c734adb.png)


.png.9bc55760b39eafe7846d26fa52d718d5.png)