Search the Community
Showing results for tags 'Mask'.
-
 Easy use of the turbulence tool. In this easy Affinity Photo tutorial, I use the turbulence tool to create a perm or Afro hairstyle. This Photo Manipulation is number 44 in my Powerful tools of Affinity series and is shown in desktop and iPad. https://youtu.be/mjngeQCl1cg #turbulence #liquify #livefilter #mask #photomanipulation #madeinaffinity #affinityphoto #affinityserif #tutorial #photomanipulation #graphicdesign #affinity #digitallyfearless #affinityguides
-
Hello, I need to create a mask image but with a border colored, also the image need to be dynamic so my client can change it but keep the mask.. But when I try to put it with the program I use for web development, it's not working. I know that I am making something wrong with the design part. This is the final result I am trying to achieve with elementor : this is the form of the mask : but when I export it in svg or png I get this : or that if I put a pixel mask : please someone have any idea ? :)
-
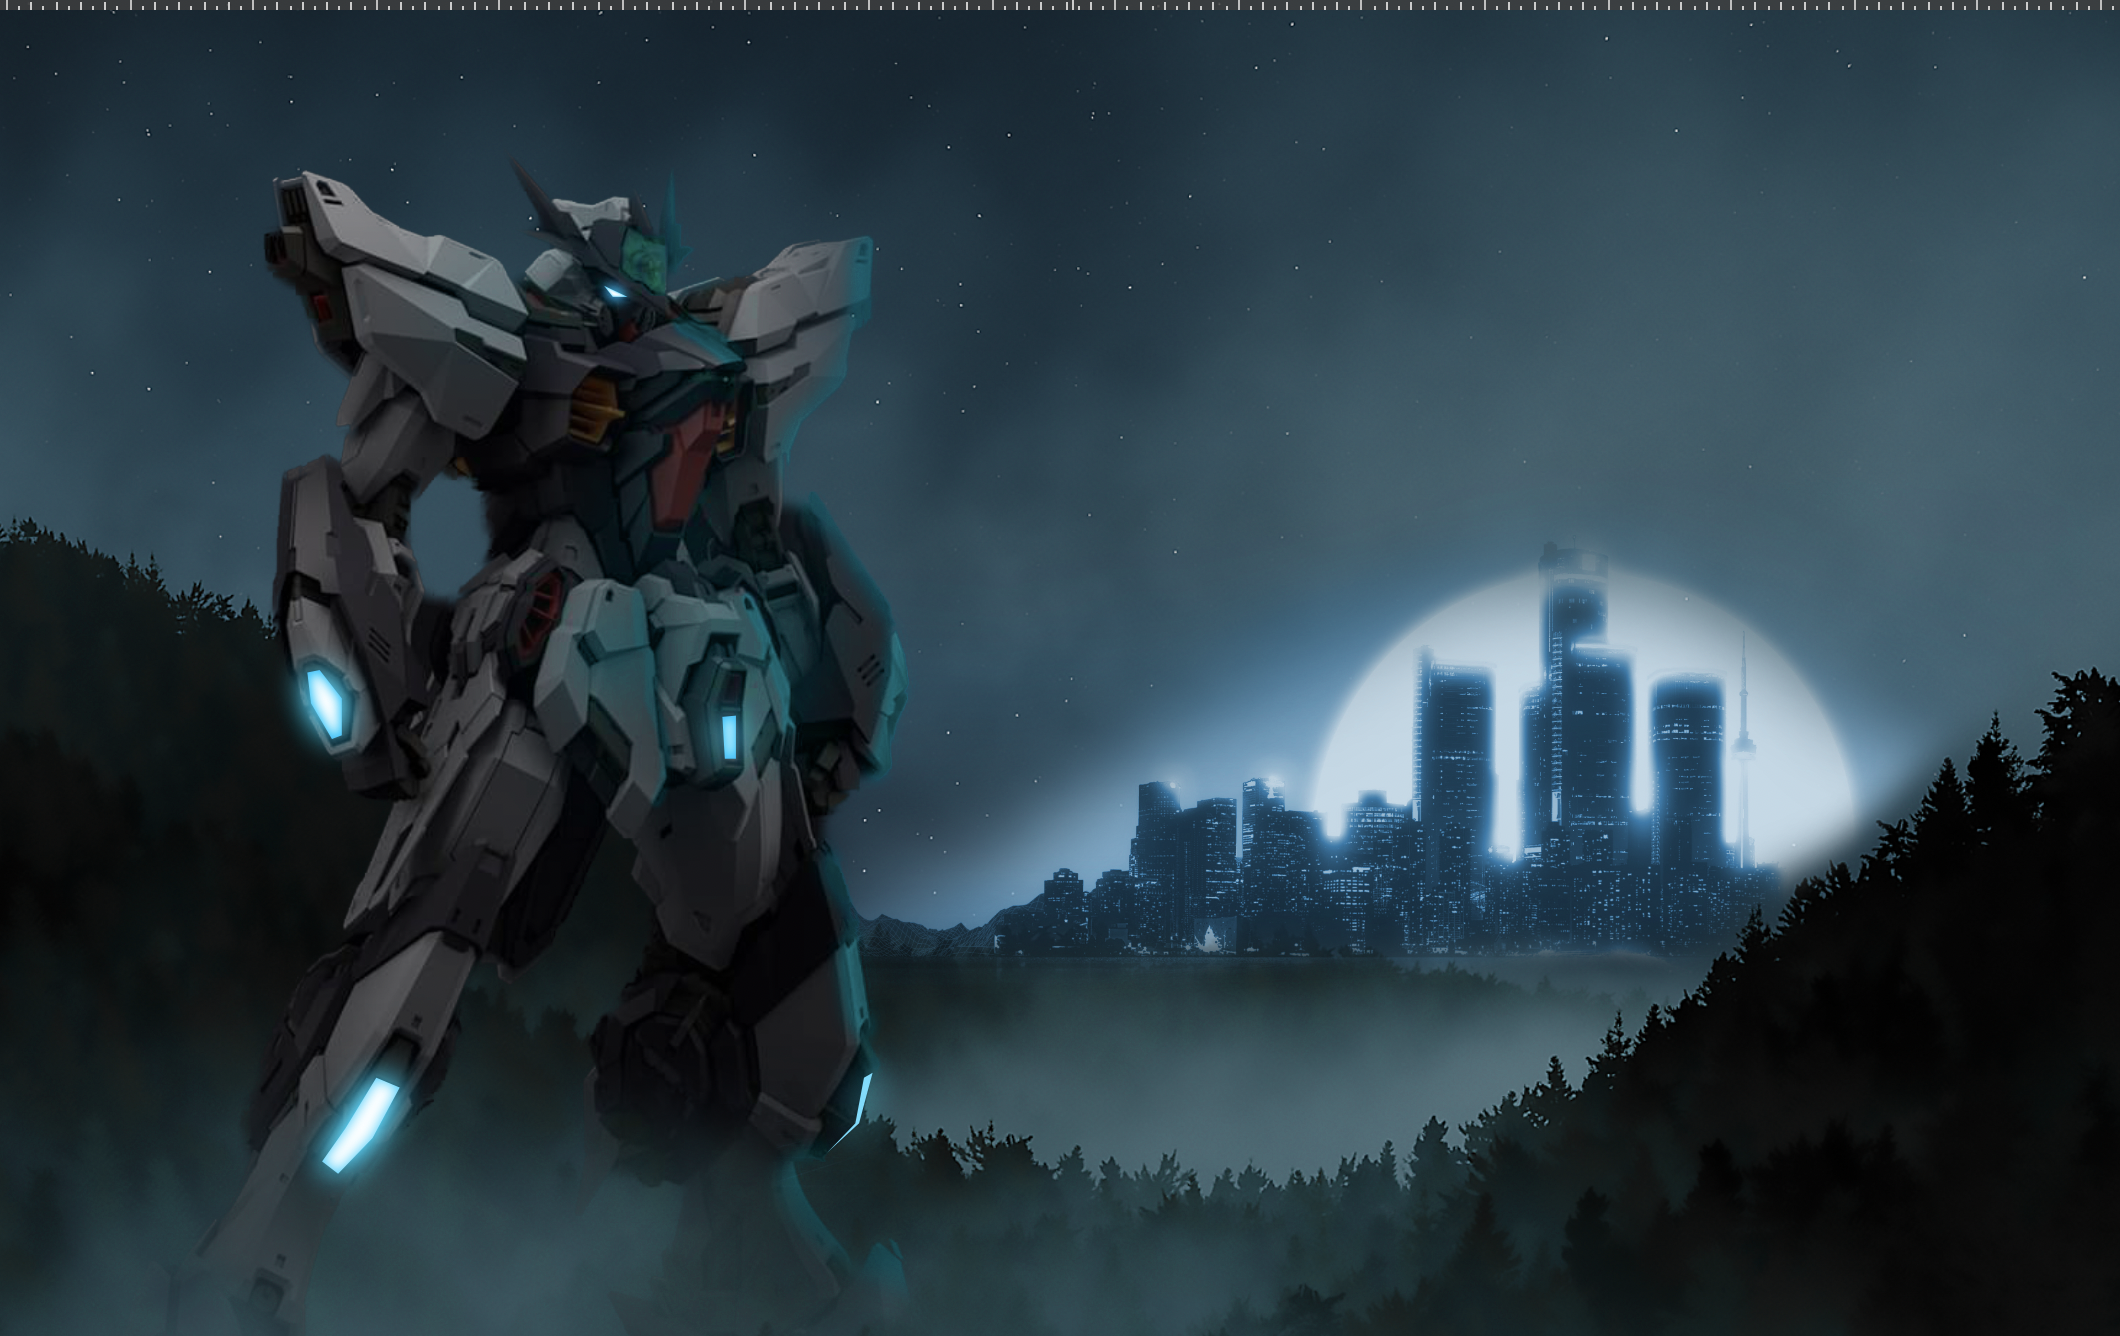
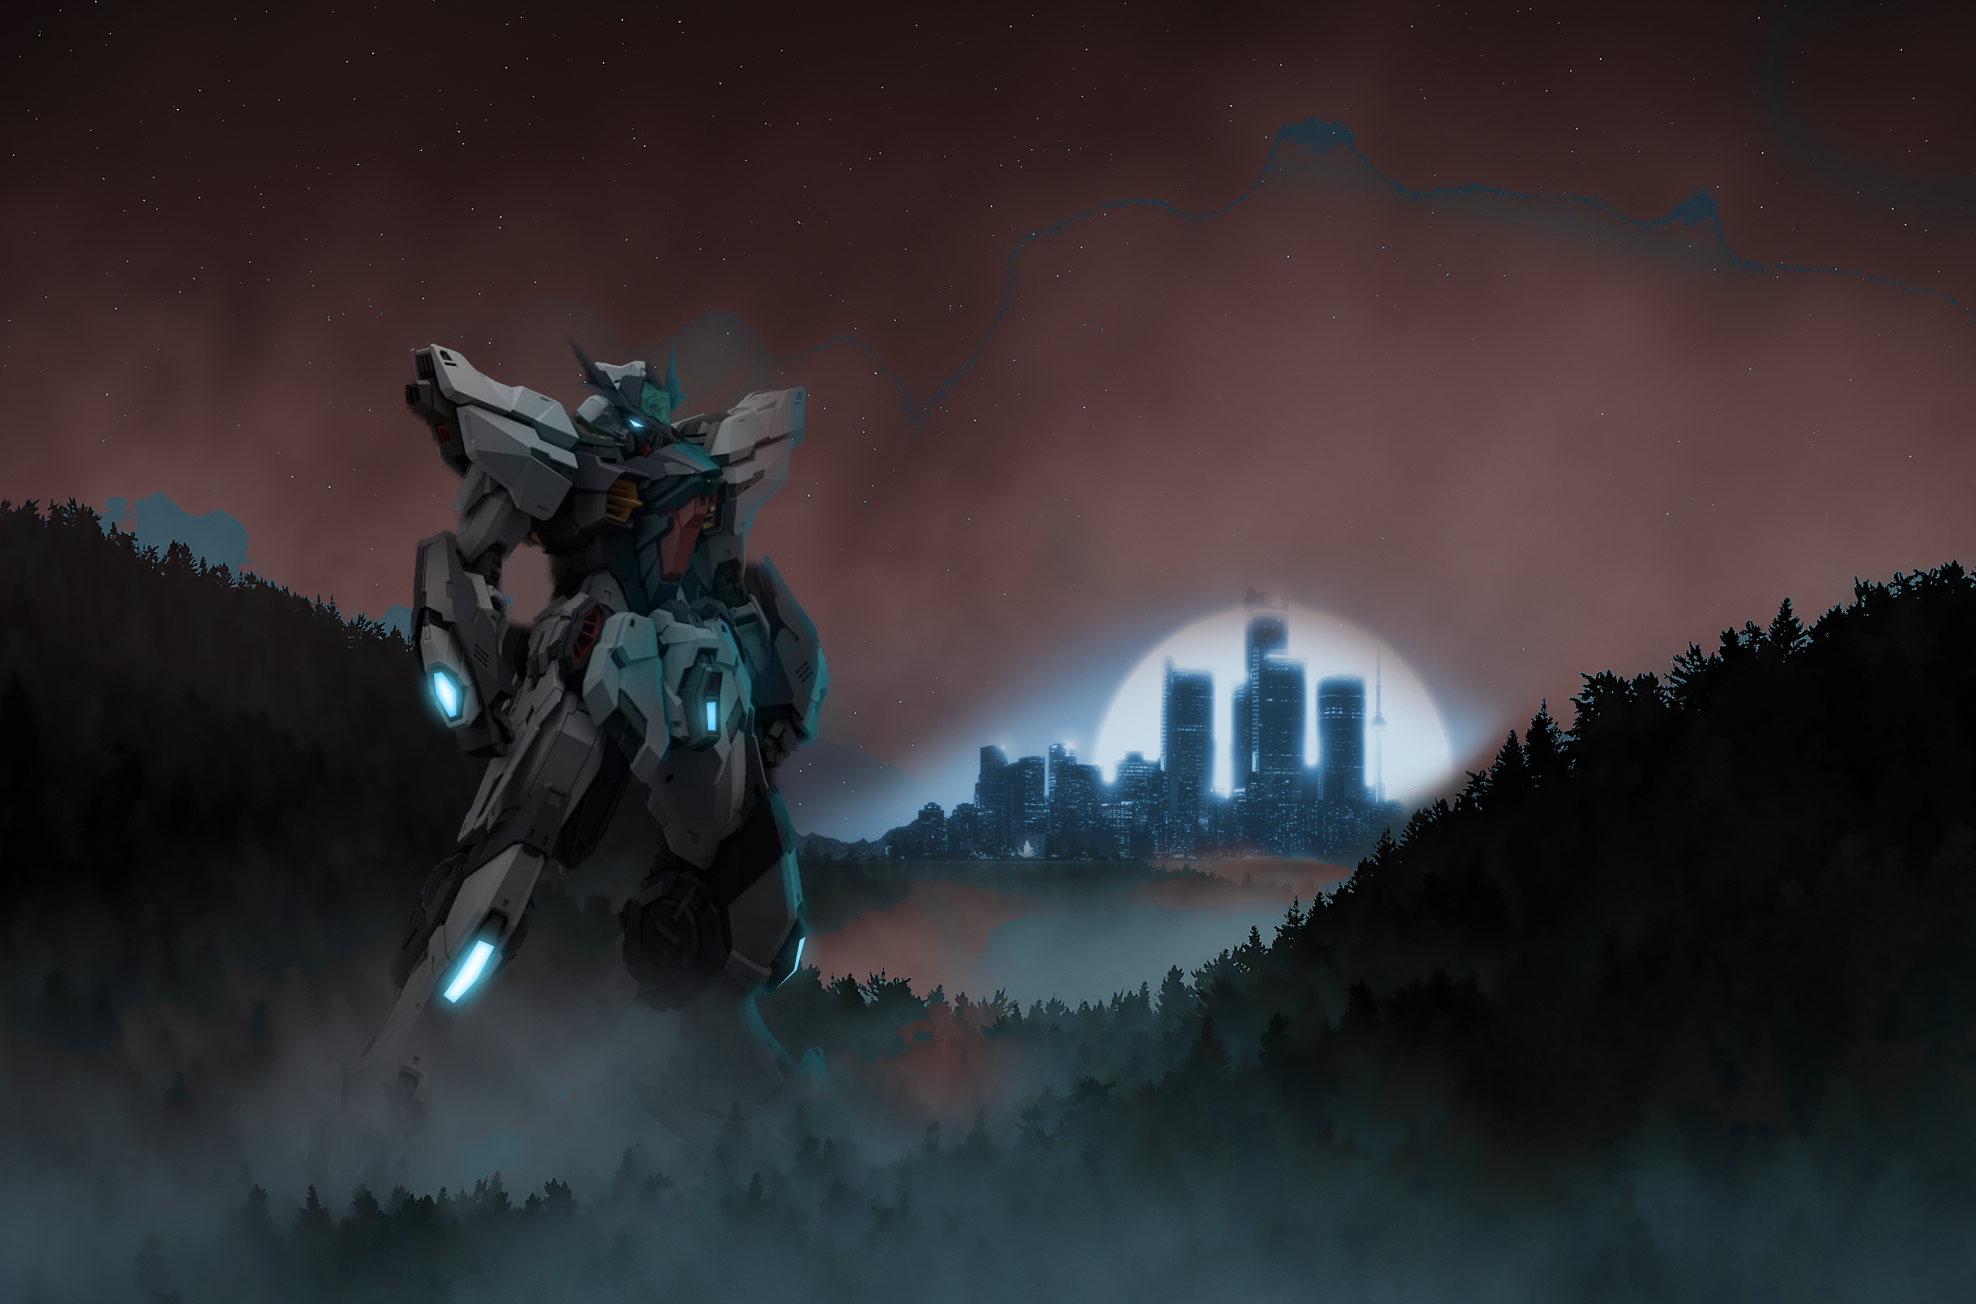
 Hi! After 3 years I finally decided to open up Affinity Photo and start to practice (I mainly use Designer and Publisher). There are a couple of road bumps that I cant seem to find the answer too. I am familiar with the brush tool and the basics such as keeping the colours black and white when you are blending to remove or add. My issues come when I am trying to add artificial light or highlights using the brush tool. In the example below, I have a Mech in a forest with the city in the back. I was able to blend them in, but I am having troubles adding the highlights from the city onto the edges of the mech and trees. It allows me to paint with any colour but they seem to be very dark. I have no control over the vibrance of the highlight or the contrast. I only have control over colour and opacity. Could it because whatever i am paining on a mech that already has adjustment? I usually add highlights at the end in Photoshop! Q1: If I wanted to add a very thin or thick glow / highlight on the mech from the city, how would I do that? Q2: Recolouring seems to have this obvious separation where the blends happened. How to fix? (blue shows through red) Q3: When I am changing the exposure, shadows or light on the mech it selects the entire project even though I specifically click the single masked mech. I then have to copy the adjustment and paste to group only the mech. Is there a fast way of only selecting mech and not the forest? Hope someone has an answer! Also, great community and great software. I've been more than satisfied for the last 3 years and I rarely have to come on here to look for solutions. :)
-
Masks can't snap to their parent, the masked layer. In the attached file, in the layer "Problem Here" there is an ellipse as mask; it's not possible to snap this ellipse to the rectangle it's masking. Snapping Problem.afdesign
-
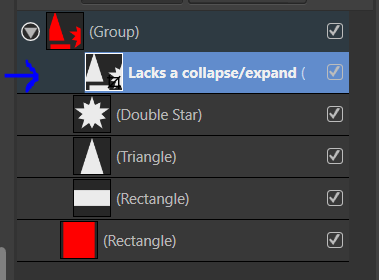
 When a group/layer with children is used as a mask, it doesn't have a button to expand/collapse, so I have to right click on it, scroll, and press "Expand Selection" Bug.afdesign
-
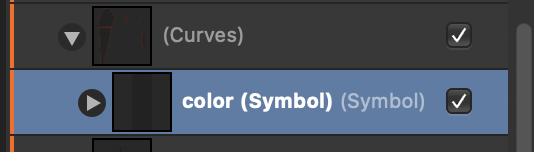
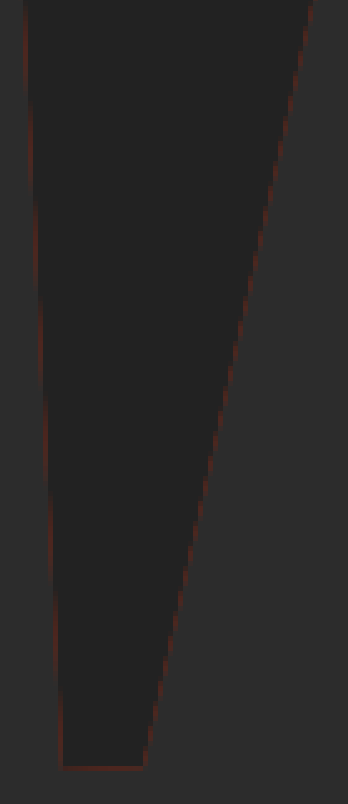
Masked shape is not completely overflow main object. Using square as masked object produces 1px outline from mask background. 1) create mask with red background 2) use a square with darker color square as a symbol masked by object above (Curve) 2) observe outline of 1px, this is background from mask (Curves), better is visible on dark canvas But it should be filled up by one color.
-
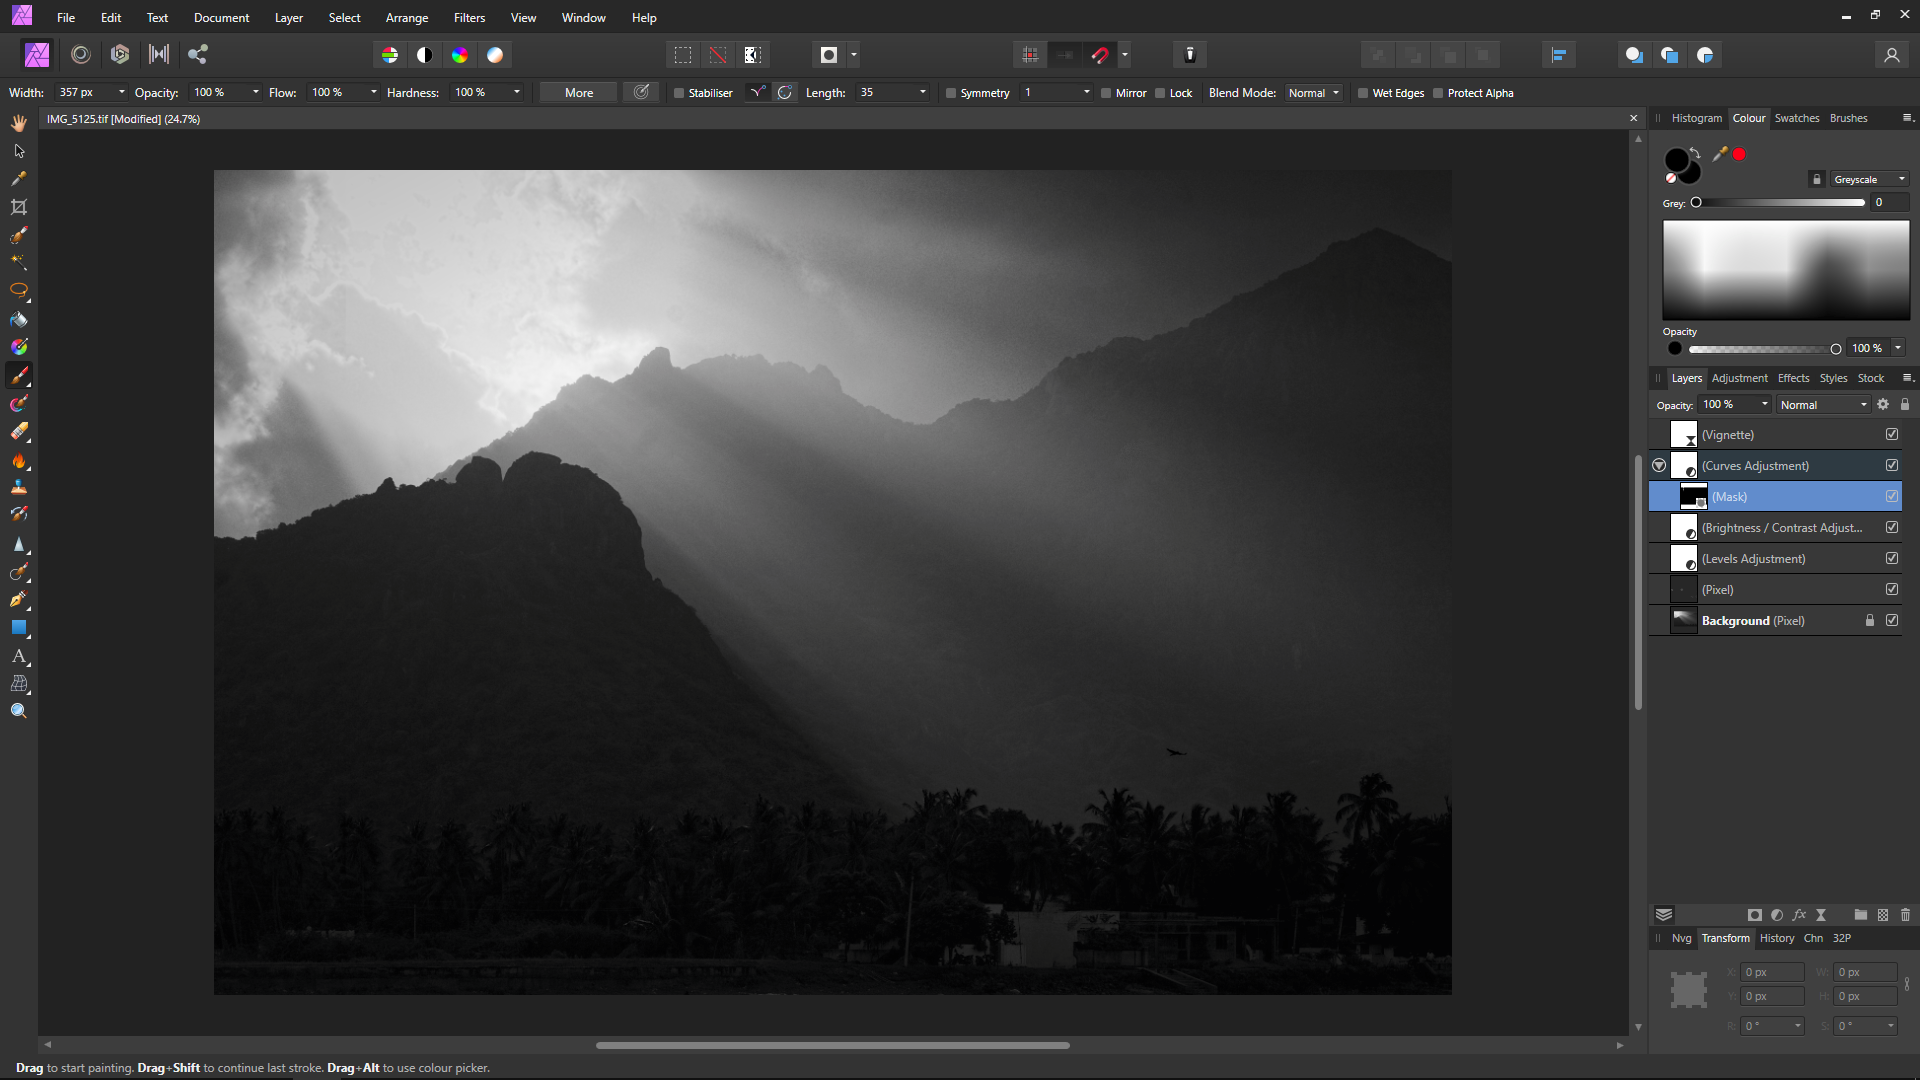
 I am using ver 1.10.4 on a Mac, this is my first attempt to create a mask and do some layer adjustments. I was looking through all the videos and couldn't find one that discussed working on backgrounds - that seemed to relate to this image. I'm just trying to clean up the background so it isn't too distracting and can be used for white space. I was able to use the selection to to cut out the couple. I am attaching the afphoto version. Any suggestions? I am coming from years of using photoshop. Really am loving Affinity's interface, just having a hard time finding everything I need! DL-shoot-4199.afphoto
 -
 Hi everyone, I still wish there were destructive filters (instead of only live ones). But the reason to this post is to find an efficient way to alter a mask layer using filters. Indeed, a trick I often used to do on Photoshop (but also Krita) is to sharpen a mask layer using brightness/contrast or curve filters. As a mask layer is a greyscale pixel matrix, this should be totally possible. A sample of what a curve on a mask layer could produce : I tried to add a filter under a mask layer - it is possible but nothing happens. However, I've just been trying a dynamic filter (blur, sharpen) and it works on a mask layer ! But unfortunately we can't merge the filter it, so we couldn't re-edit the mask layer afterwards with a pencil. It looks like basic filters on mask layer is a feature not implemented, I wish it was ! Especially as it goes along with the dynamic filter working.
-
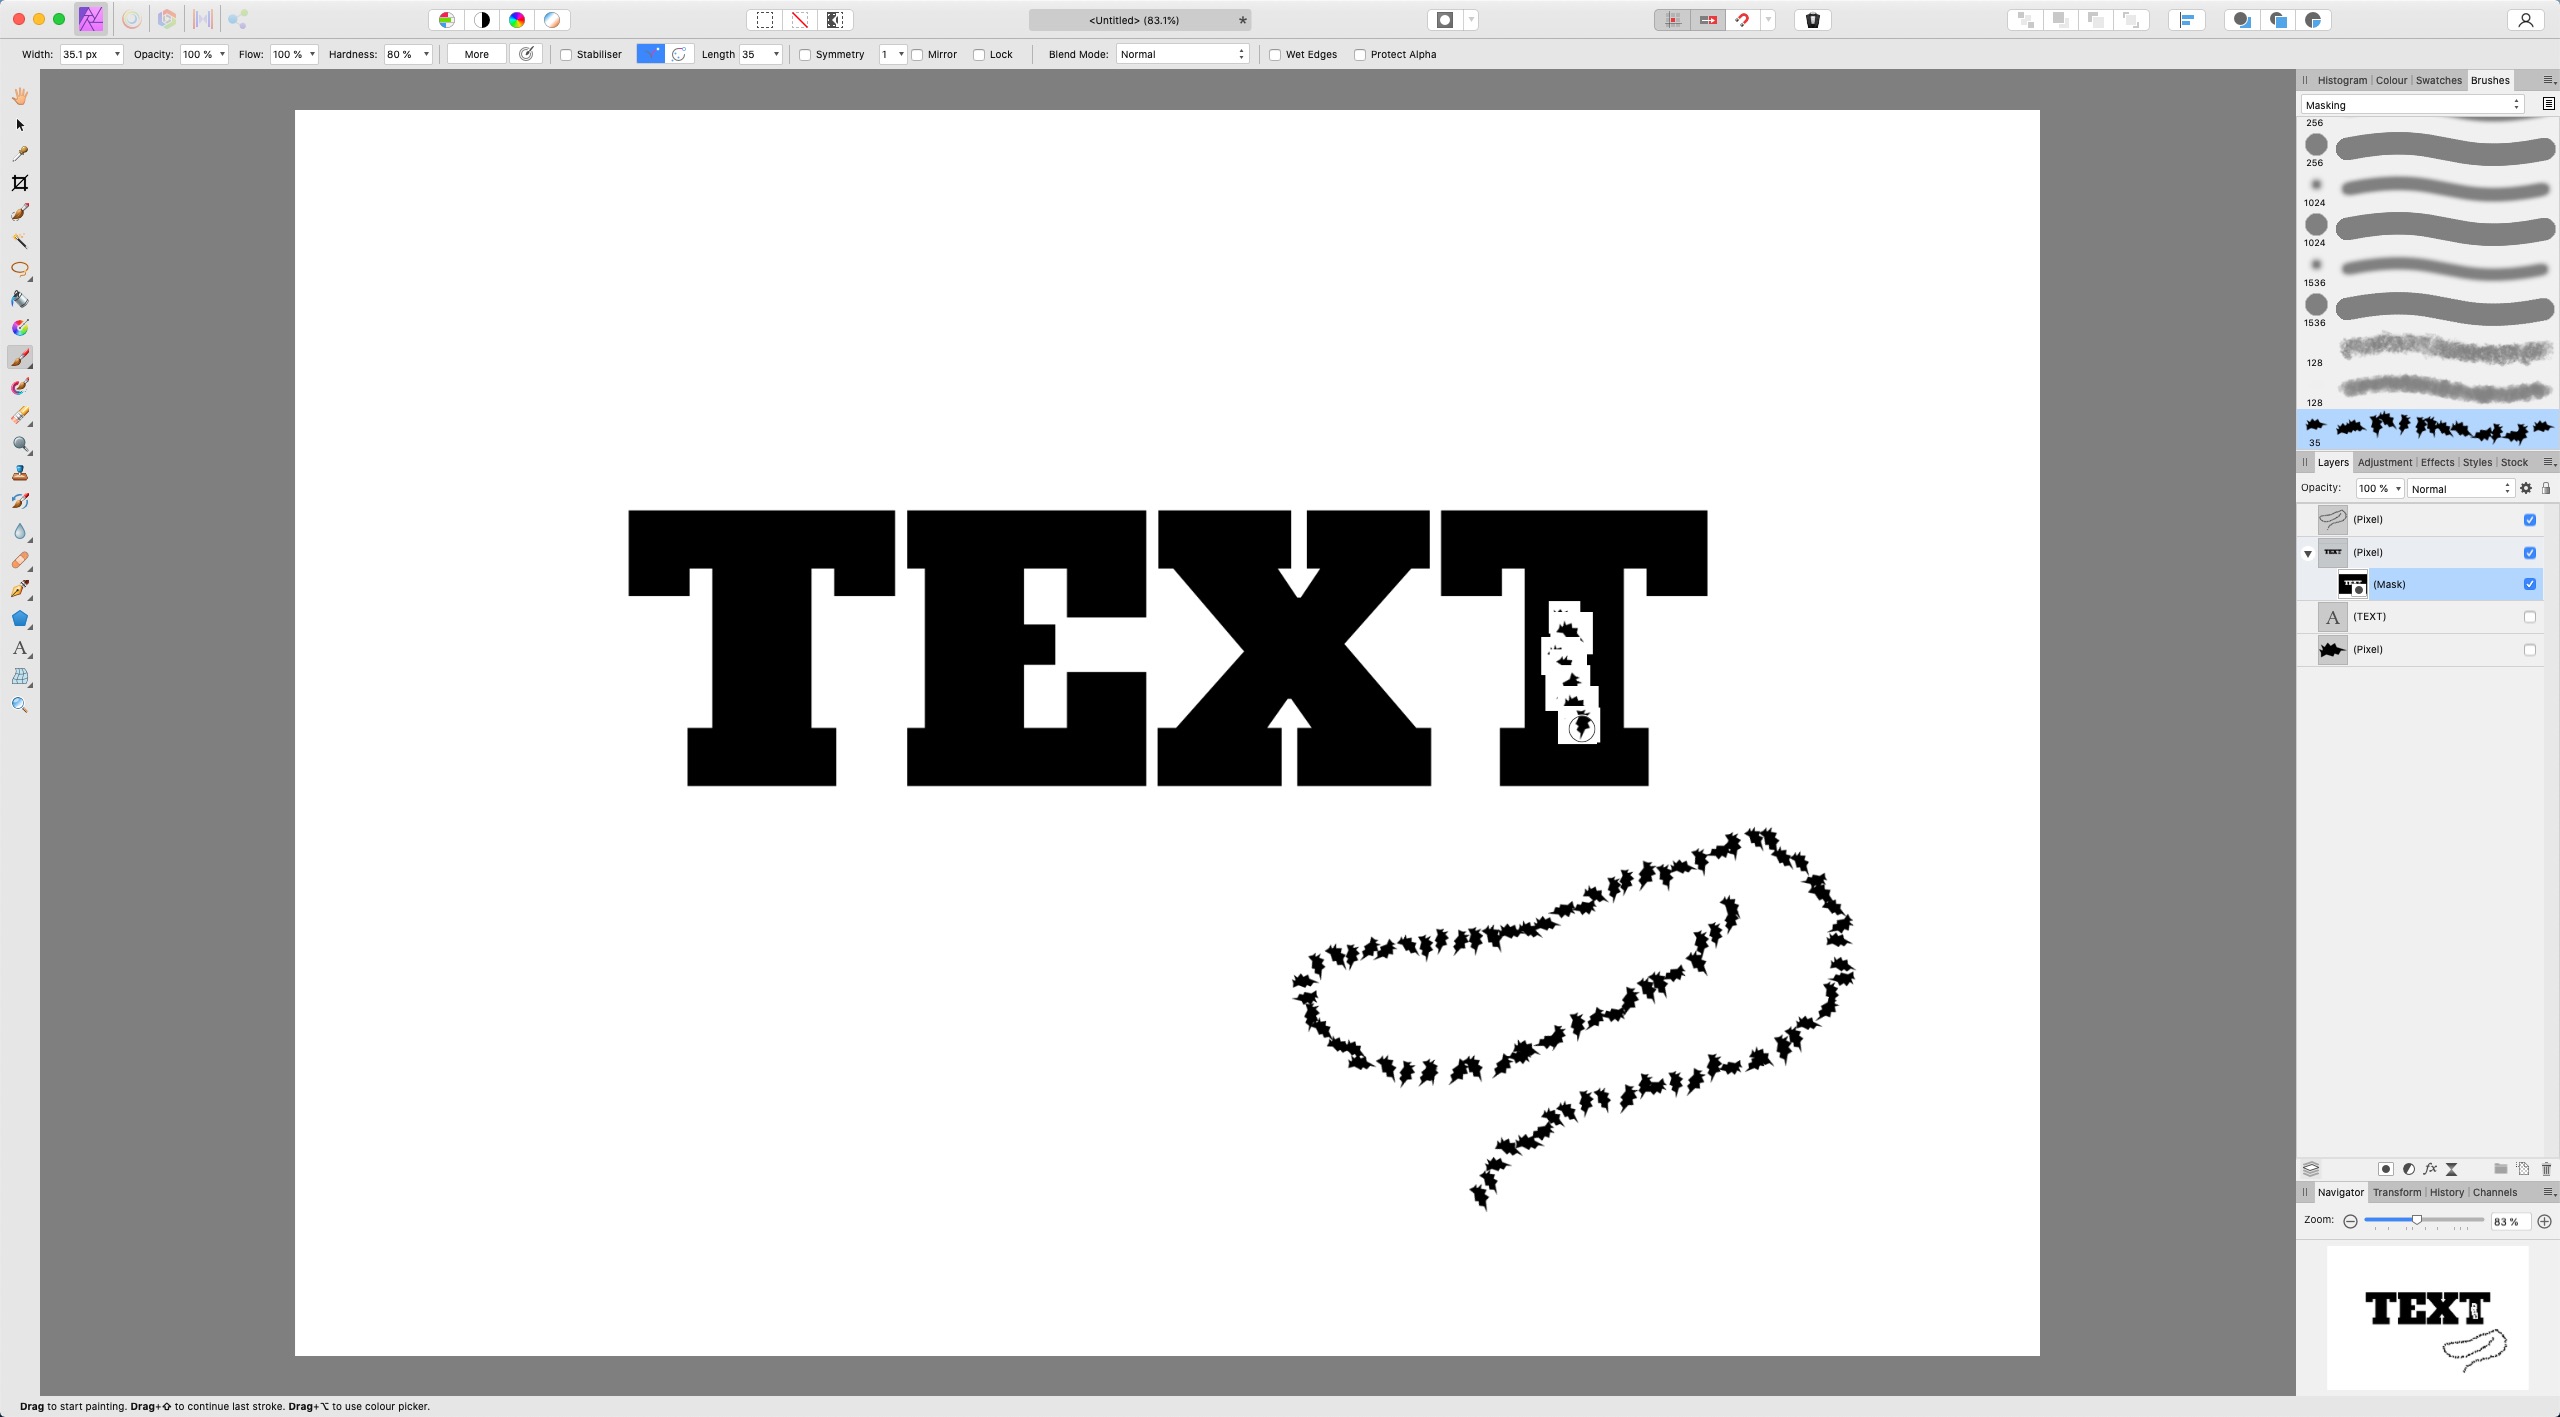
Hi, This is a method of creating a completely non-destructive mask that allows you to use a normal layer as a mask, and do with it everything you can do with a normal layer, without any restrictions. You can also use a group as a mask! Everything you put in this group automatically becomes a mask, and you can mix them together in Multiply mode, for example. This way a mask can be a composite of multiple layers of any type (raster, vector, color, grayscale). This gives full creative freedom! This non-destructive mask method, created with two layer settings, Blend Ranges and Erase Blend mode. This method creates a mask from any Layer type, in a non-destructive way, keeping the original intact. And also apply Live Filters, and Adjustments. 1. Select the layer that should be the mask2. Change its curve in Blend Ranges3. Change its blend mode to Erase Creating a Mask Mask_1.mp4 Creating a Composite Mask Mask_2.mp4 Using an image as a Mask Mask_3.mp4 Creating a Composite Mask using different layer types Mask_4.mp4 Applying the Live Filter Mask_5.mp4 An alternative method using Procedural Texture
-
 Hi, I imported an image, cropped it. Then applied curves adjustment with a mask to apply the adjustment on a specific area. I re-cropped the photograph to include more area. The adjustment layer is incorrectly applied on the newly accommodated area, because it was never included in the mask. So when I'm cropping out, the adjustment is automatically getting applied to the accomodated area. Steps to reproduce: Step 1 : Import image Step 2: Crop the image Step 3: Create an adjustment layer with a mask Step 4: Edit the adjustment layer Step 5: Re-crop to include more area Step 6: Check if the adjustment layer is not applied on the additional area included in Step 5 I want the mask to remain the same and not allow the adjustment layer in the newly accommodated area. Any help or directions in this regard is appreciated. Edit: If I select the mask and paint black over the unapplied area, the adjustment layers vanishes from that region. But are there any other ways to do this automatically when we expand the crop? Regards Gokul
-
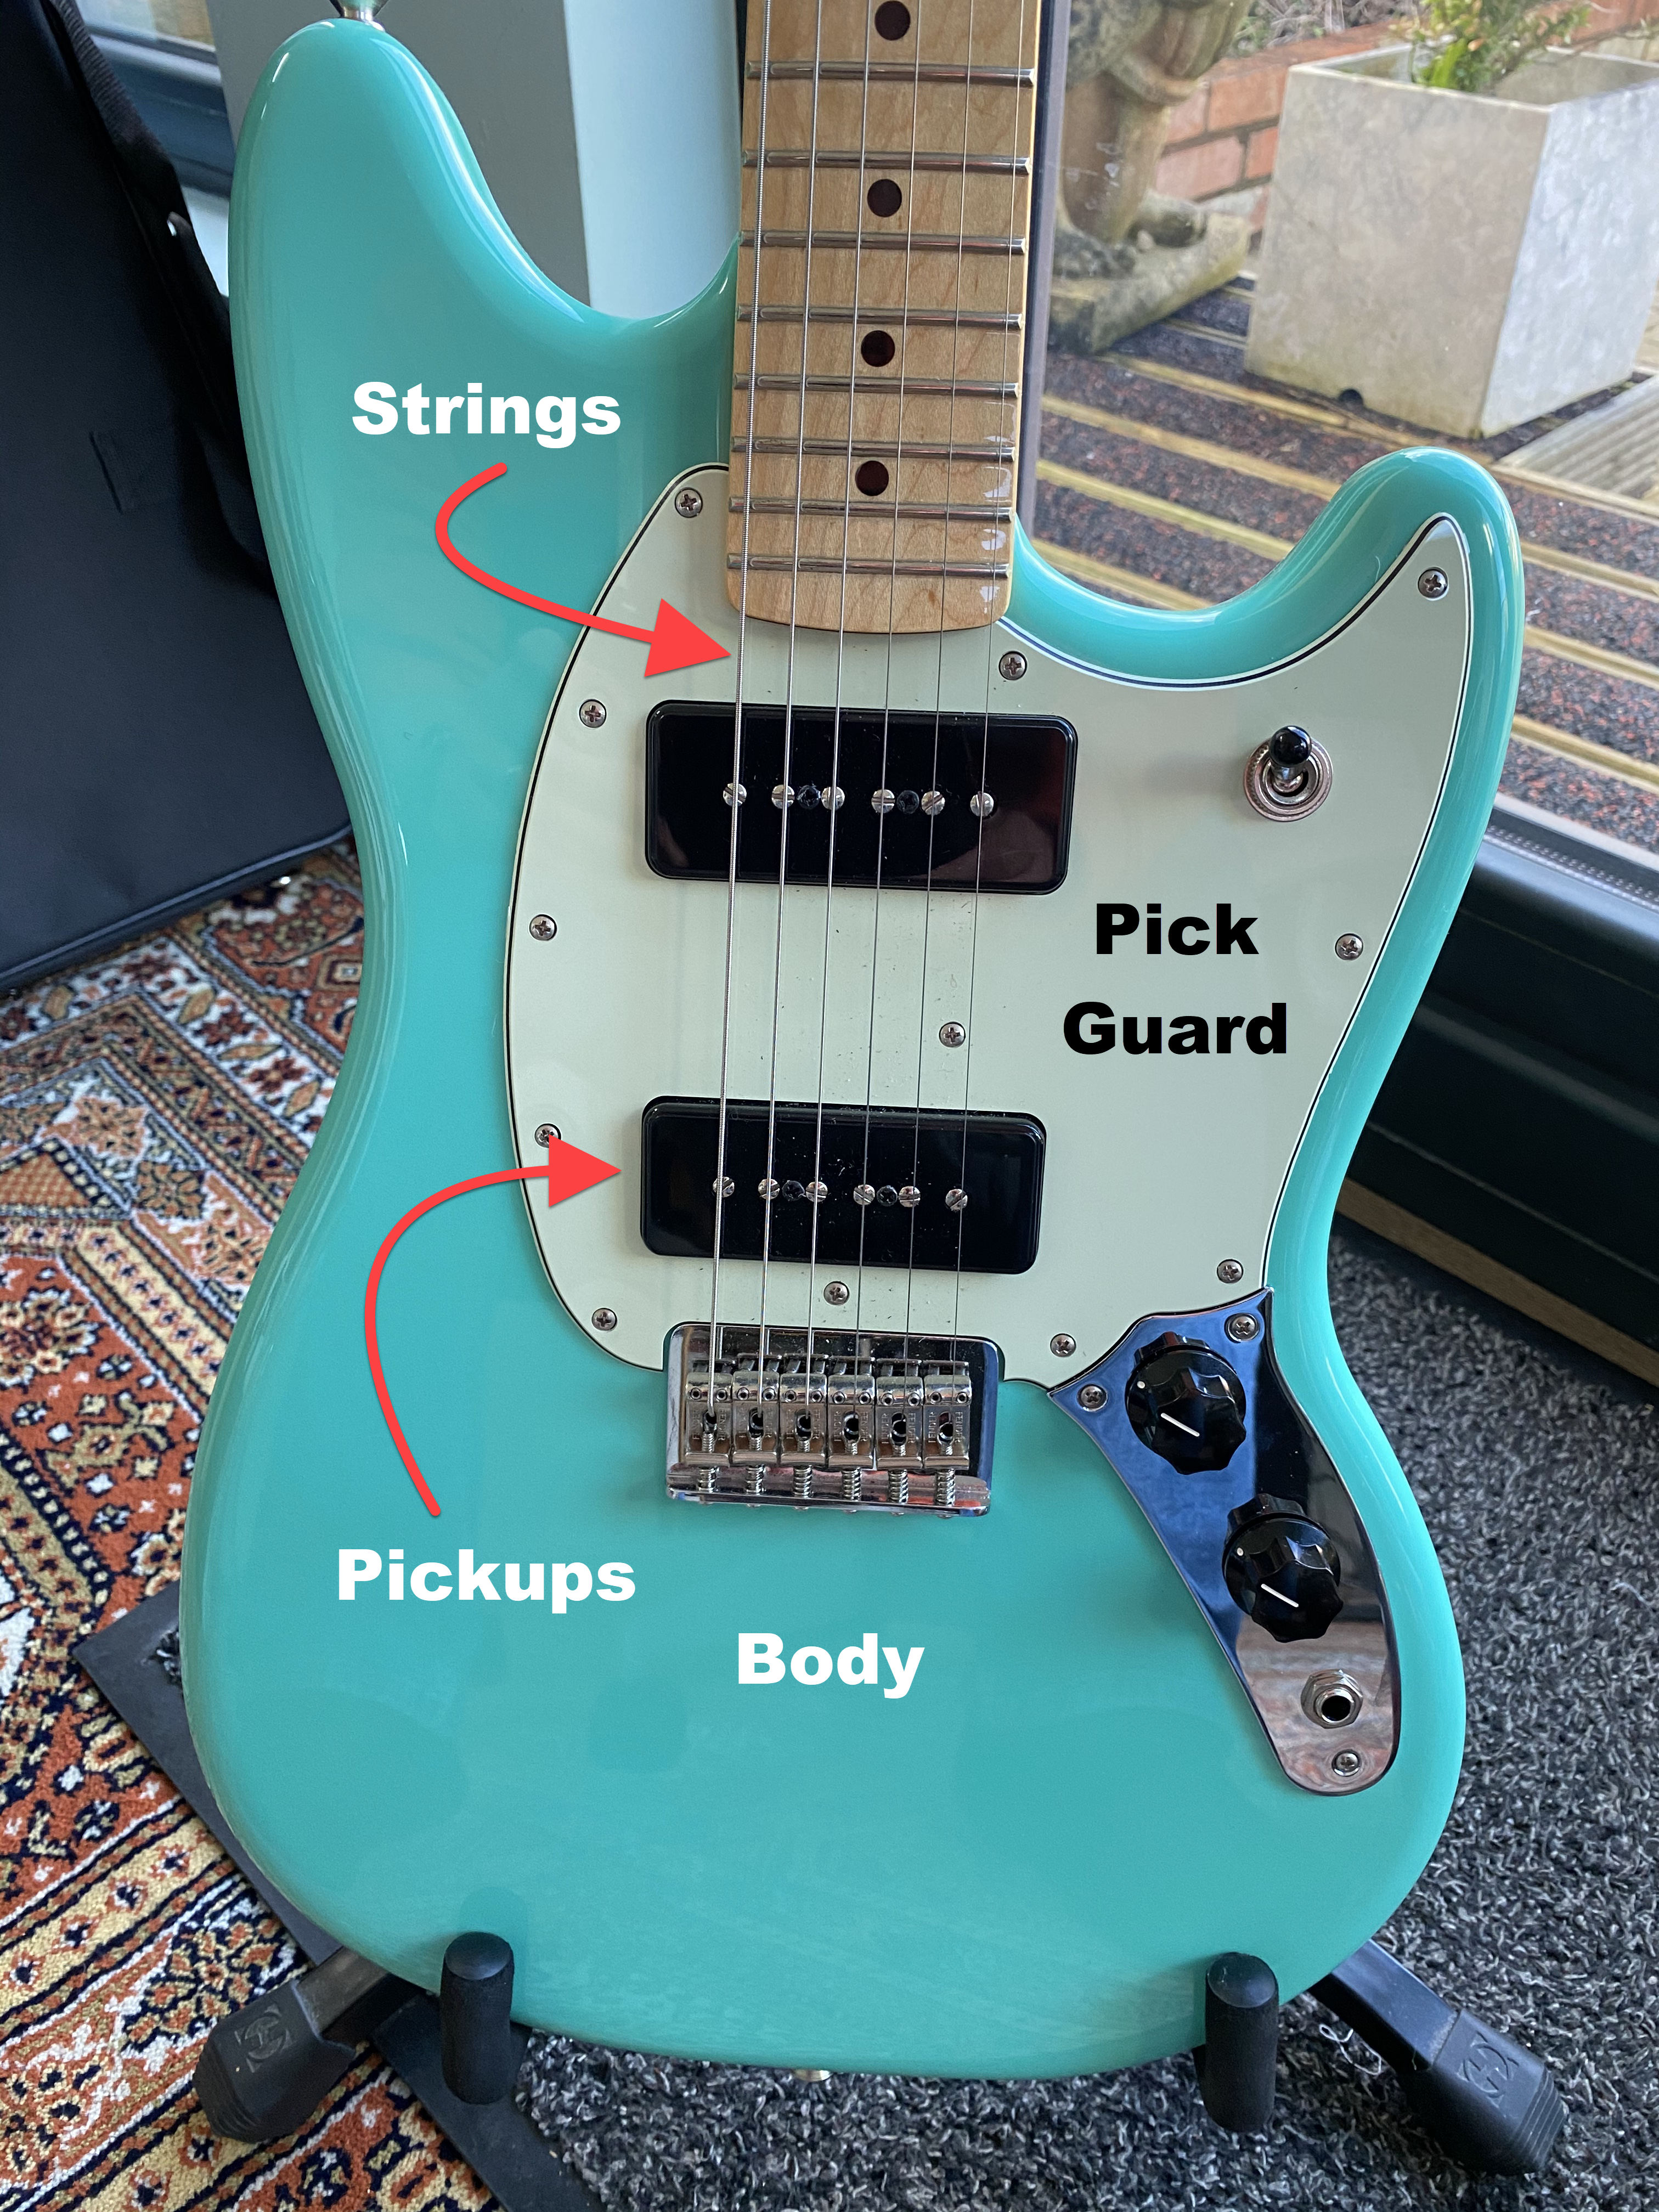
 I want to design the pick guard of this guitar. It sits on the body, surrounds the pickups and is under the strings. Is there anyway I can break this image apart, edit the pickguard (re-colour) and then re-assemble?
-
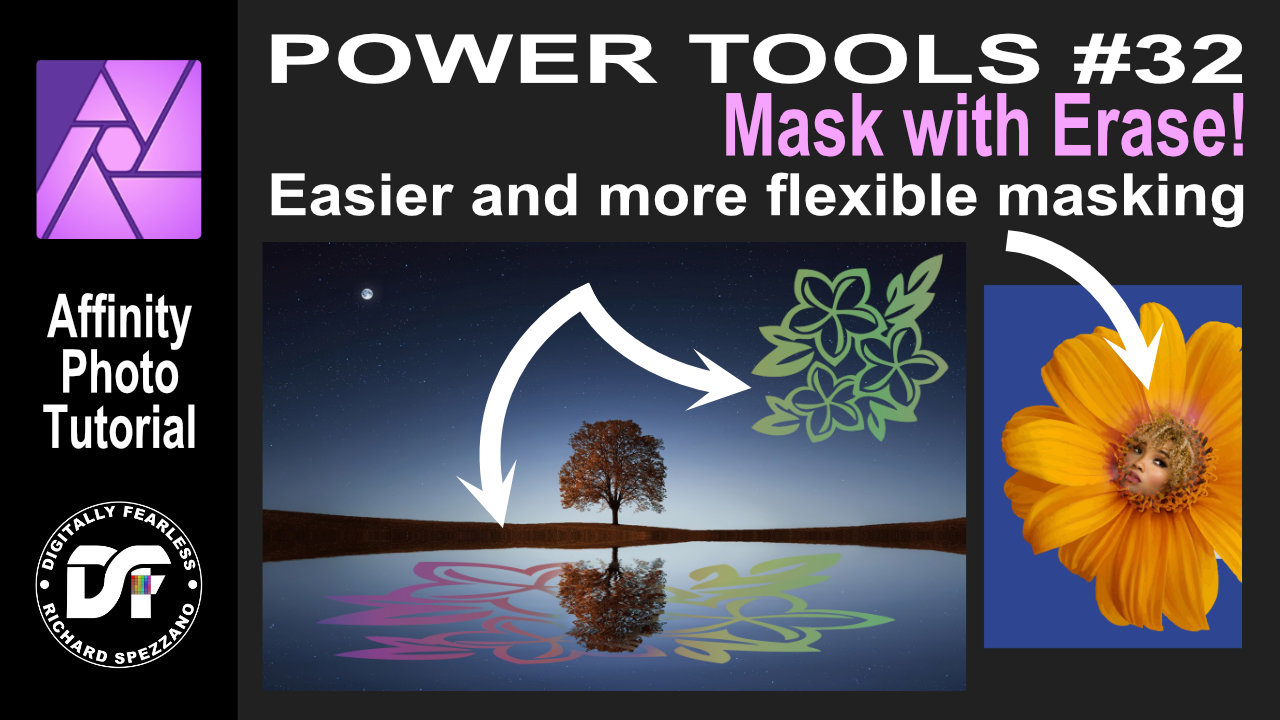
iPad and Desktop. Easier and more flexible masking | Affinity Photo Tutorial Power tools 32. This tutorial uses erase blend mode, gradient, & fill layer. There are two versions of this tutorial. IDesktop version: https://youtu.be/sA5T4ysswfY iPad version: https://youtu.be/YTx0S1BucYg
-
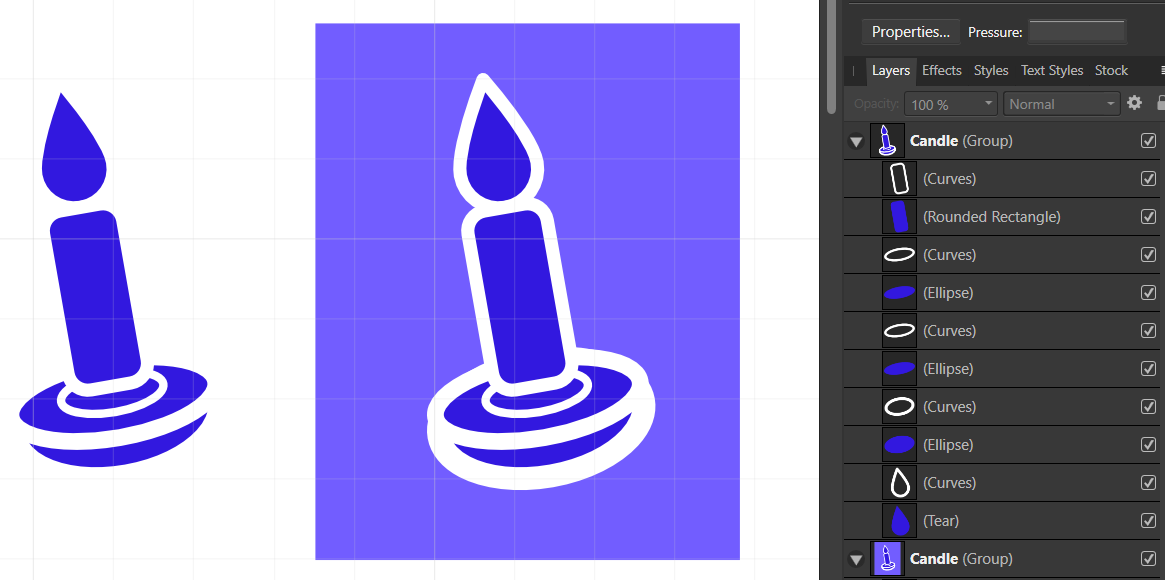
 I have designed myself into a corner that I can't figure out how to escape. I made a candle shape with thick lines that overlap in such a way that they obscure underlying shapes. It looks great with a white background, but I actually want the white lines to be transparent in the final export. I have tried expand stroke, but that just separates the white lines from the underlying shapes and using those as "cookie cutters" still doesn't yield what I want. Conceptually, a "flatten all to new curve" would do what I want (assuming I could specify to ignore white). I tried some fx masking, but still couldn't get there. Any thoughts on how to leave only the visible blue shapes in a new object?
-
 I was working with the new version and wanted to mask some objects from layer, but nothing is happening. I could only work with the gum.. This is happening in Photo. This was shit, I see that Alpha protect was set on..... hmmm then its not working ofcourse.... So dismiss this error report. ((fixet) 1481508784_photo.exe2021_08.25-14_43_16_01.mp4
 -
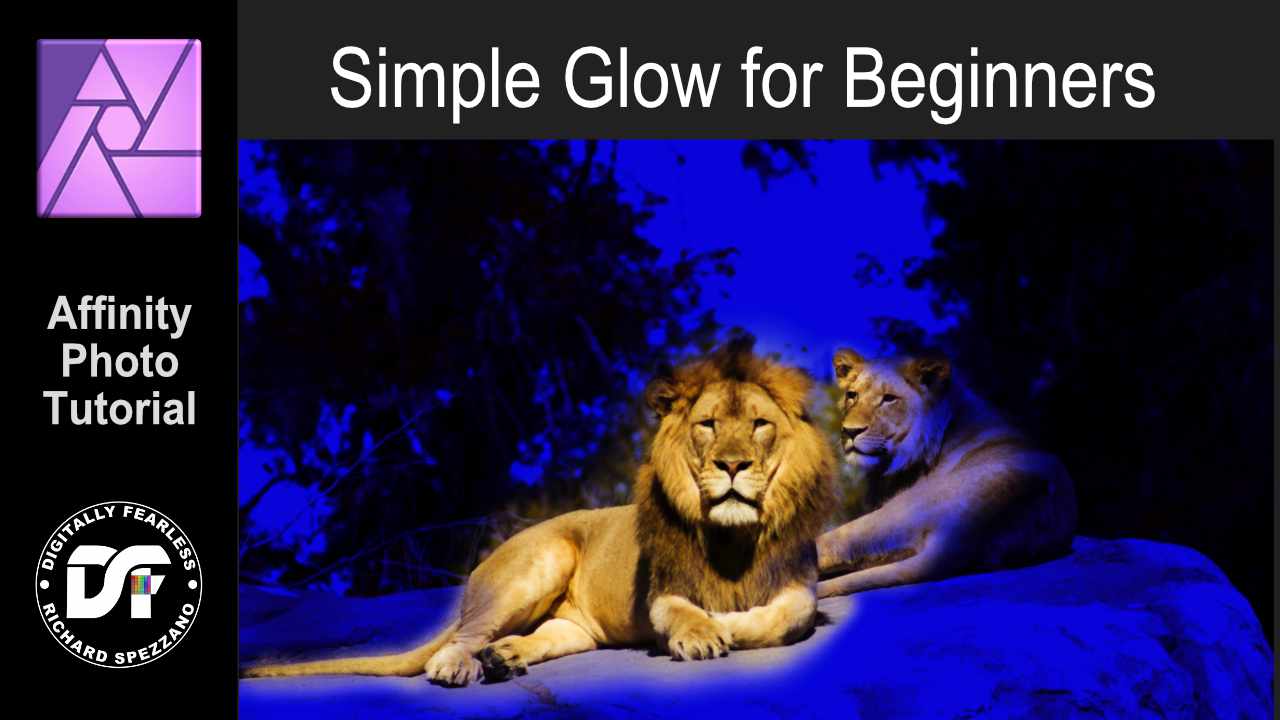
A simple glow - photo manipulation for beginners. Affinity Photo tutorial. This is for those just starting out in Affinity Photo. I kept the video short and there is so much more to improve the look of the photo, but I just wanted to give you a start. It uses layer fill, HSL, masks and blending modes. https://youtu.be/lsX9UW_rMps
-
 Hello, often I am using the same layer, e.g. a Text, in multiple instances in the project. I may use it as a mask multiple times for layering effects on it and use have the original as a base as well. Currently I make multiple copies of that layer. But if I want to then edit that layer, e.g. change font, I have to do it in every copy of it separately. That is time-consuming for Text layers, and borderline unusable for pixel layers. I wonder how others deal with this workflow. Is there something like Linked layers or Instances or Symbols that we find in Affinity Designer? Can we create a live instance of a layer to use as a mask alongside the original?
 -
 With metal hardware acceleration activated on an Apple Silicon Mac with Retina display, using a masked gradation curve inside a layer containing transparent areas, the transparency seems to be reduced on parts of that layer, even if the gradation curves mask doesn't should alter anything in that area. This problem only appears, if an image is present in the background. Without having a background image, the wrong transparency alteration does not happen. This seems to be a bug in metal hardware acceleration, because deactivating it solves the problem.
 -
 Hi guys, I am missing permanently a slider based/non destructive possibility to blur masks. E.g. by "Gaussian Blur" of "Effects" tab. Please don't get it wrong I have some emotional moments in the video, that's only because I'd like to prefer AP over Ps, but due to things of that, I can currently not do a full switch to AP. Video (unlisted) should explain
 -
 Hi all, I'm playing around with doing some various exposure HDR with AP and am in the Tone Mapping Persona. I have a spot (the moon actually) in an image and have outlined it with an elliptical mask....the trouble is, it is marked the mask like a typical quick mask with red...I cannot see under that red to be able to see what the adjustments are doing there. I've tried hitting the "m" button to see if that would turn the mask highlighting on/off....didn't work. Any suggestions out there as that I can't find much in the way of documentation or YT videos showing use of the mask on the Tone Mapping Persona.... Thank you in advance, cayenne
 -
 Hi, The linked resources are a great feature in Affinity, but there is any way how I can use that linked resource as a mask for another layer/group? Or link that B&W image in my file (somewhere), and then link(as layer linking) its luminosity to another layer - as a mask or something? I am just trying to move my render composition workflow to Affinity, and linked resources are great, but I have rendered alpha masks and z-depth channels. And would be nice to have them linked and working. Thanks in advance of any suggestion, cheers!
 -
I created a custom brush using New Brush from Selection. It's fine if i paint on a regular pixel layer but if I use it on a mask, it paints as a block with the shape inside, almost like it's been inverted. Steps I used to create the brush: Create a new pixel layer Create an outline with the freehand lasso Fill selection with black Brush Panel > New Brush from Selection (both with an active selection and without) Edited brush dynamics (also tried without editing) AP: 1.9.3 Mac:
-
Today I wanted to work on a new Image, where I use severe mask, but what I try to get working with a mask using the paintbrush its not working. See the screen movie. photo.exe_2021_04.09_-_13_01_32_02.mp4
-
Is there a possibility to unlink a mask from the pixel layer? In Photoshop it's a simple click on the chain between pixel layer and mask. Can this somehow done also in AP? I know, I easily can place the Buzzard layer above the clouds and for that get rid of the mask on the cloud layer. But what, if that's not possible and an unlinking pixel and mask is needed? Appreciate any help and hints. How_to_Unlink_Mask_from_Layer.mov
-
 I was working with Adjustment Layer masks, and wanted to see before and after changes. I tried different key and mouse combos and right-clicking on the mask thumbnail, and no options to disable the mask for the Adjustment Layer, or to delete it. Could the ability to disable (or even delete) the layer mask be added. Seems pretty useful, since very frequently we like to contrast before and after changes are made. I know a child/clipped layer mask could be added, which, being a separate layer, can be turned off and on to see before and after changes. But it seems redundant to child/clip a layer mask to an adjustment layer that has a mask already built in. On the layer mask subject, Alt/Option clicking the thumbnail on both types of mask (separate layer & adjustment layer) brings up the mask detail view so you can see what your mask looks like, but you have to click another layer to exit that view. Minor nuisance, I suppose, but if I want to keep editing that mask, I have to click out then reselect it. Maybe just clicking the same layer anywhere other than the mask thumbnail could exit that view, or using the Esc key.
 -
 What's the difference between Mask Layer and another one(the one with the crop icon) technically in this case? The another one can be a pixel layer. In that case, they seems to be no difference each other. I've been using them without knowing the difference whole time. But I like to know the difference to explain the layer system to other users.


.png.859c452686736c4d9051fa6527c2ce1d.png)
.png.f7d52b02379c70591b575d85dbf73451.png)