Search the Community
Showing results for tags 'Levels'.
-
 Hi Folks, Just curious if these are going to be added in? Cheers! John
 -
Hi, could it be possible to add some button for Leves adjustments eg. "Auto" or "Max" or "Auto-Max" which would move Black and White Level (separately) to the max till there is Zero value on the histogram. It is hard to check from the histogram the Zero values not to loose information. Sometimes it would be very useful ;) Thanks Jindra
-
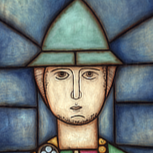
Hi gang, here we go again. I drew this when I was 10. A year before my 1979 Kmart Christmas illustration, recently posted here, I created this similar scene for the cover of my school’s Holiday Activity booklet. Again, among my sketches & drawings was an old printout. Recoloring my Kmart illustration motivated me to retouch this for one reason: the faded booklet contains puzzles, poems, essays and drawings from my old classmates, some of whom are Facebook friends. My plan is to mildly retouch all 12 pages and PDF it as a gift to my grade school buddies. I think they’ll get a kick outa this blast from the past with their 5th grade contributions.

-
 I use level adjustments all the time. In the Photoshop levels adjustment there are the input settings and gamma setting at the top but at the bottom there are also output settings. I do use all of them at different times. Is there a way to adjust the output settings in Photo similar to how they would be adjusted in PS? I'm fine if it requires a different adjustment layer, although it would be great if it was located inside the levels adjustment. Cheers! Jeff
 -
 Hello all I was trying to adjust levels as i did on PS, example minute 2:40 of the video https://www.youtube.com/watch?v=7PNLdQvJEhg but i cannot adjust on red/green/blue, when i try to do it change to Master channel, is there another way to do it? Second question: Is it possible to adjust levels by selecting black/white pixel? Many thanks in advance
 -
Sometimes the historgram in the "Levels" panel does not show up (area remains empty/black). After closing the panel and re-opening it the histogram is available again. This behaviour occours sometimes, but is not reliable reproducable. Known bug?
-
 As some users in the beta forum said before, the Gamma Slider in the Levels Adjustment ist not working in this version.
 -
 In Affinity Photo, Levels should have Clip black and Clip white sliders. It's very useful when you need the image in a certain range, especially when creating textures for 3D work.
 -
 Hi, in diesem Affinity Photo Tutorial zeige ich aus der Serie Foto Optimierung wie man das Foto verbessern kann. Hier geht es nicht um große Effekte, sondern um viele kleine Verbesserungen, die dann hoffentlich für ein besseres Ergebnis sorgen. Es geht um eine Gegenlichtaufnahme mit Lens Flare. Ich benutze hier das HDR-Verfahren. Ohne die noch folgende HDR Persona. Viel Spaß wünscht Euch Euer Jack In this Affinity Photo Tutorial, I show you from my serie photo optimization how to improve a photo. There are no great effects, but many details which hopefully improve the result. This is a photo against the sun with lens flare. I use the HDR method. Without the upcoming HDR Persona Have fun your Jack Foto / photo: eigenes / self made Link to YouTube Tutorial
- 4 replies
-
- 1
-

-
- Affinity Photo
- HDR
- (and 5 more)
-
While I'm just getting to grips with Affinity, and this may already exist, the biggest stumbling block I've hit is not being able to select the white or black levels from the image itself as you can in Photoshop - as in, being able to hit that furtherest white option, and then flicking on the part of the image you want to be 'pure' white. Not being able to instantly select the background as white when what I'm mostly doing is making the background of an image white for product photography is really jarring. It's not enough to turn me away from the product, entirely because I can't afford any Adobe products, but it's definitely turned me away from using Affinity Photo for any photo I have with a white background at the moment. I would definitely rather see the final product with that level of precision in the levels adjustment layer than without it.
-
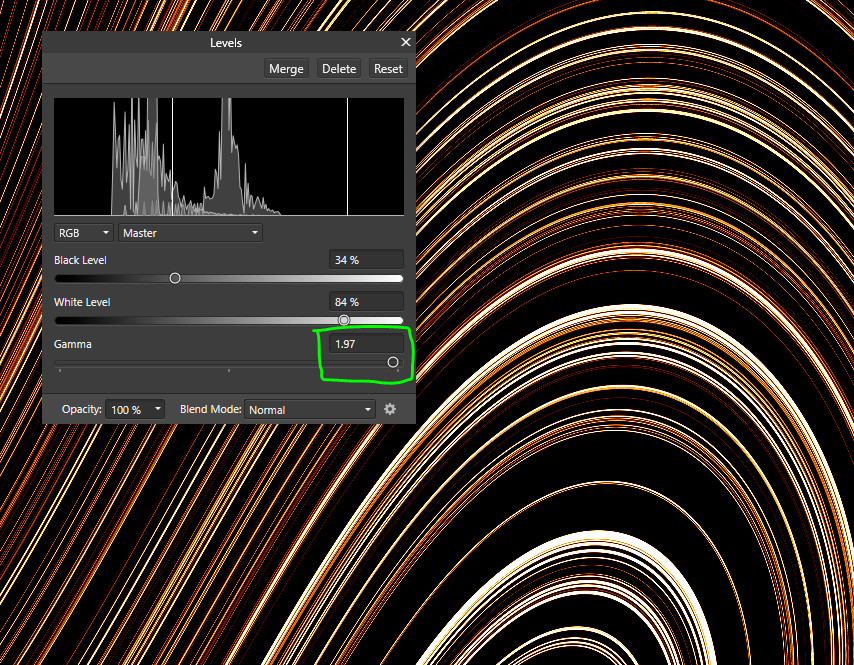
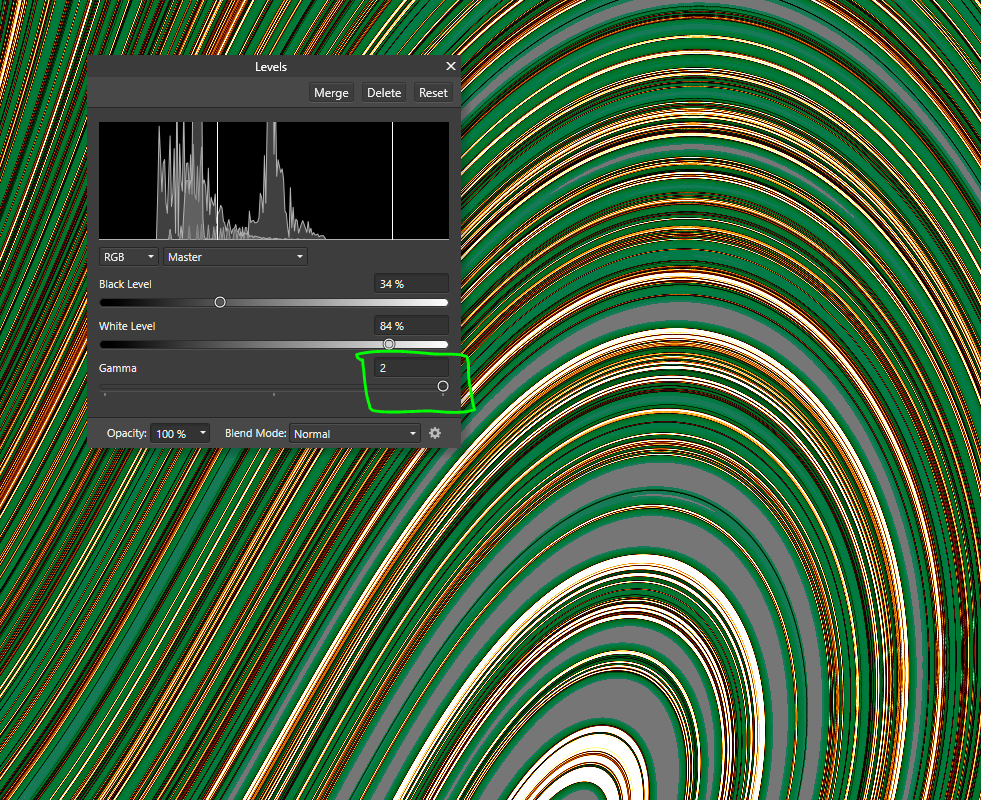
When the Levels adjustment's Gamma parameter is set to maximum (2), extremely incorrect and undesirable results occur. Refer to attached images.
-
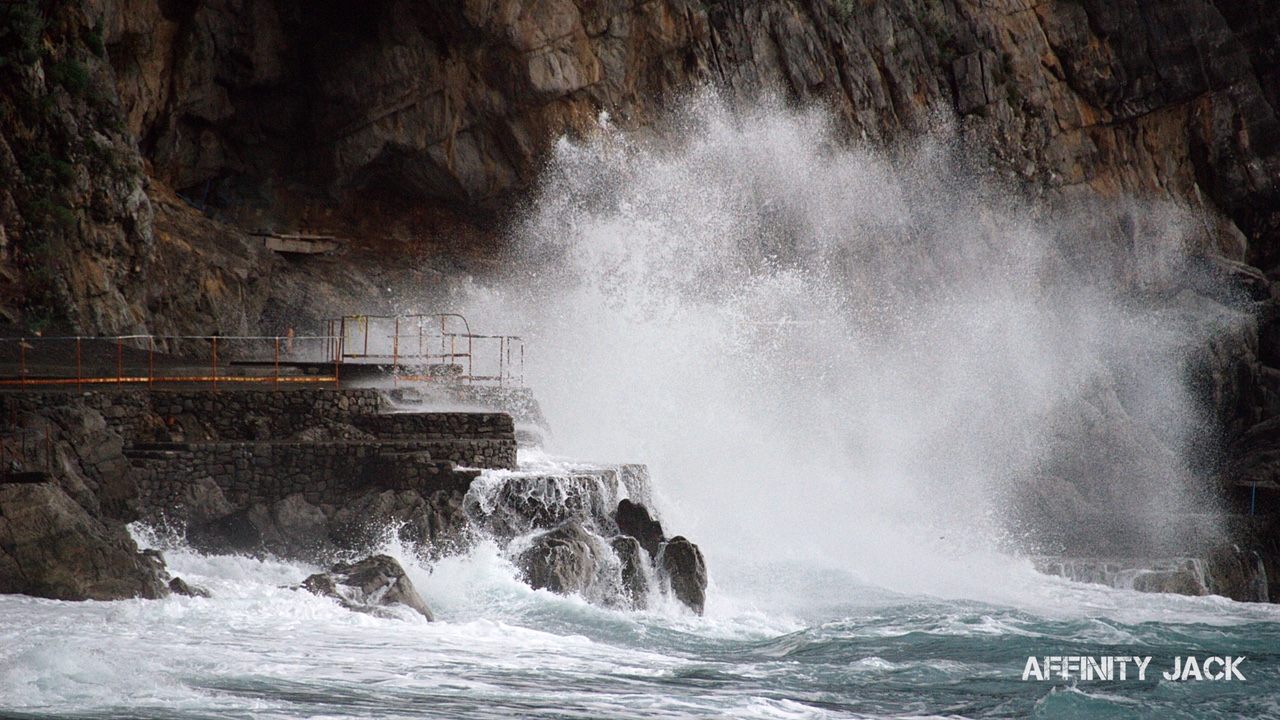
Hi, in diesem Affinity Photo Tutorial zeige ich aus der Serie Affinity Photo Foto Optimierung wie man das Foto "Lichtstrahlen See" verbessern kann. Hier geht es nicht um große Effekte, sondern um viele kleine Verbesserungen, die dann hoffentlich für ein besseres Ergebnis sorgen. Viel Spaß Euer Jack Hi, In this Affinity Photo Tutorial, I show you from my serie photo optimization how to improve a photo. There are no great effects, but many details which hopefully improve the result. Have fun Your jack Foto / photo: eigenes / self made Link to YouTube-Tutorial
- 2 replies
-
- 1
-
-
- Affinity Photo
- Foto Optimierung
- (and 4 more)
-
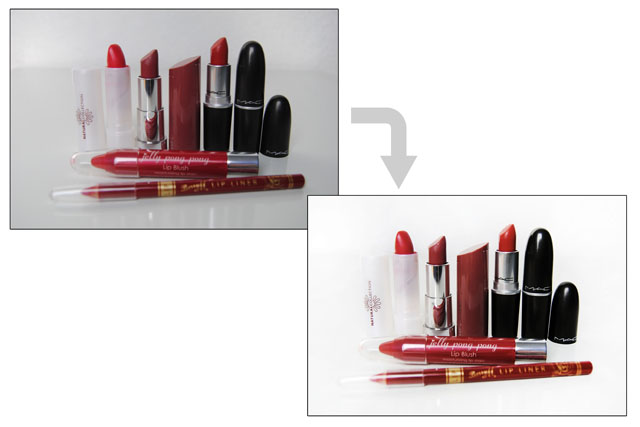
 I need to edit product pictures taken on white background in my photo studio so the white background is 100% white. I usually do this in Photoshop with the levels panel. I use the eyedropper inside the Ps levels panel and click in the picture on the white background. Ps changes the levels automatically so the white background becomes 100% white. This functionality I need in Affinity Photo but the levels panel has no eyedropper. Sliding the levels pointers doesn't give me a pure white background. I need a way to tell where the white pixels are that need to become pure white. Is there another workaround I can use to adapt the pictures from my photo studio so white becomes pure white? Thanks for helping me out.
-
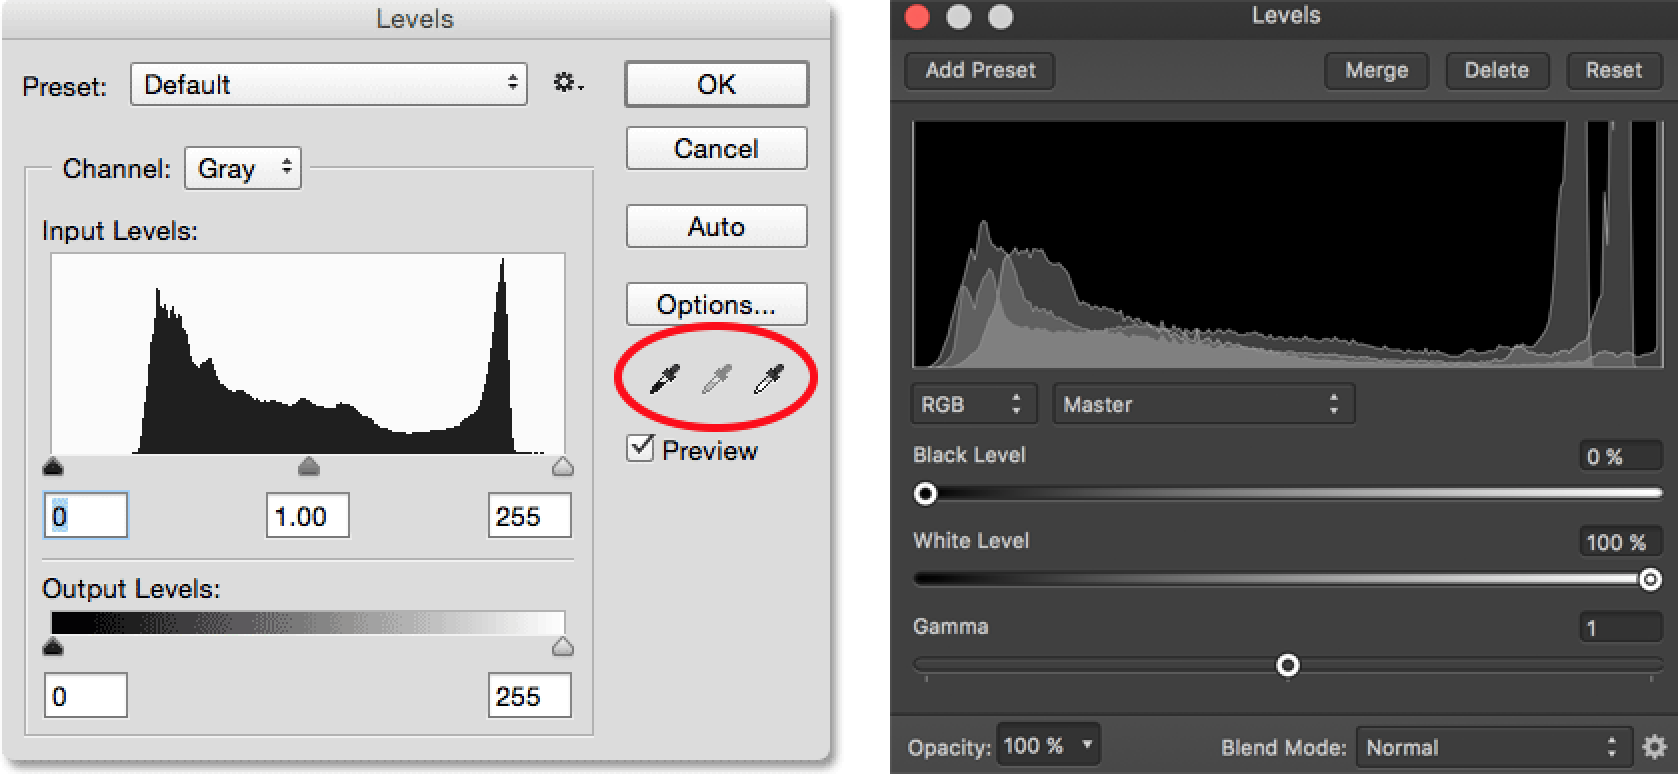
 Hi there, I read that on Levels adjustment, Gamma is for midtones, white is for highlights and black is for shadows. But in photoshop, there is a place to input values (two boxes) on output levels(inside levels adjustments). I didn't find that in Affinity photo's levels adjustment. Where should I put the values placed in output levels in affinity photo? (I was trying out some effects I learned via youtube videos, but I don't know on what to do with the value they put in output levels area) Thanks in advance
 -
 I appreciate the increased functionality of the second beta, but was dissapointed that the auto funtions were removed. Why remove functionality? Yes, the increased functionality is useful to sophisticated users, but even being modestly sophisticated I found the auto levels, contrast, white point convenient and superior to that which Photos was able to do. Wouldn't it be easy to add them back?
 -
 Hi, Just starting out evaluating the AP trial against my current editor (PS CS6). Very impressed so far; hugely impressed with your work. I primarily use Curves and Levels adjustment masks in my work. Using a Levels adjustment mask in PS CS6 and adjusting the Black and White levels, I can see a full-image clipping indication mask if I hold down ALT while adjusting. This is a really helpful tool. Is there an equivalent for this in AP? I tried holding down ALT while adjusting black/white sliders but there was no effect. I also tried the other modifier keys (Shift, Cmd etc), but also no effect. I'm using AP Trial v1.3.5 on a late 2012 Mac Mini running OS X 10.10.5. Many thanks, Matt
 -
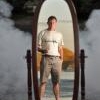
Hallo, obwohl ich immer noch kein Internet habe... Ein neues Tutorial auf YouTube. Wie man ein unterbelichtetes (versautes) Foto doch noch retten kann. Dazu wird im Modul "Develop Persona" gearbeitet. Das funktioniert am besten mit Fotos im RAW-Format, aber auch mit JPG. Viel Spaß dabei Euer Jack Bauer Hello, although I still have no Internet... A new YouTube Tutorial. How to rescue an underexposed (waste) photo. That works well with RAW-Files, but also with JPG. Have fun with the video. Bye Jack Bauer
- 5 replies
-
- 3
-
-
- Affinity Photo
- Tutorial
- (and 8 more)
-
 After finding out that doing a levels adjustment opened a new layer, and I needed to toggle back to the background layer for the clone stamp tool to work I tried that and it worked fine. I then opened another image and went through the process again, levels adjustment, toggle to background, clone stamp tool. I then tried the Liquify Persona and when I dragged I could see the squares changing but the picture didn't change. I clicked on "apply" and left that and went back to "photo persona" and tried the burn tool. That didn't show any changes either even when I toggled between the layers. I then went to 'history' and saw all the adjustments I had made 'in theory' but the image hadn't changed. I clicked command-Z a few times and then saw the zoom option and changed the zoom to 100% from 125% [it was a small file]. Suddenly all my adjustments happened all at once, the liquify and all the burning I had attempted showed on the image. After that the burn tool worked like it should and I could see the adjustments as I was making them. My iMac is two weeks old so I don't think there is a speed issue there.
 -
Instead of the auto levels being a filter for one time use, I'd like to see this as an adjustment setting within the Levels (along side default, darken and lighten), it would be nice to have it as a starting point to then adjust and tweak like any other adjustment level layer.
- 1 reply
-
- 2
-
-
- levels
- auto levels
- (and 1 more)
-
 Hi, In Adobe Camera Raw you could hold down Alt (I think) when adjusting exposure etc and it would show in blue and red if any part of the image was getting over exposed. Can you do that in Affinity Photo?
 -
One feature I really miss in Affinity Photo is the ability to change levels for each channel. Currently the levels adjustment only allows to change the levels white/black/gamma globally for all channels. Most other image editors allow to switch to the red/green/blue channel and adjust each channel's level individually. This is already possible with the curves in Affinity Photo. I would also like to see a usability improvement for the way one switches between these channels. Currently (in curves), I have to click onto the drop-down menu, choose a channel, and click again. It would be much easier and faster to just have four buttons on the top of the histogram, one for global curves adjustment, and one for each channel. And finally, if these could be activated by a shortcut, then it would be perfect. For comparison: In PS there is a drop-down menu, but at least it can be switched quickly with Ctrl+1, Ctrl+2 etc. In Photoline channels can be switched by buttons. Anyway, most importantly, the levels adjustments should have the ability to edit each channel's level individually. The aforementioned usability improvements would be a great addition.
-
Suggestions: - While using the Levels adjustment, why not have the histogram react to changes in real time. It isn't much use without reflecting change. This is one of the most used features in any photo editor. - Cmd/Opt key click on layer, to create marquee selection based on visible/masked pixels - Pen tool needs ability to subtract nodes with Cmd or Opt keys - Maybe incorporate the Color/Tonal Range Selection into the Wand - option click between layers to identify/assign which adjustments are attached to which layer. Currently, You have to drag the adjustment just below the layer to have it packed in a folder in the layers list. -One strange thing I noticed, when you add a gaussian blur with before after shown… In the radius amount box, "Shift-up arrow" gives you increments by 10px. "option-up arrow" gives you 0.1px increments. But if you drag the slider slightly using the mouse you can get a very, very subtle blur less than 0.1px, but no amount is shown. Having the even finer adjustment is great, but difficult to do using the mouse. Maybe an extra modifier key for finer than 0.1px would be nice. Like: - The Speed! This program is quick. - Live modes - Before and after view slider.
-
Did some basic editing with a DNG file, cropped and hit enter, and the levels went out of whack. There was no undo so I closed without saving. At least the edits didn't lock in. I had the option to not save changes when closing. Thanks for this alternative. I'm with you 100%. I've only tried Affinity Photo Beta this once and look forward to spending time with it at a later date. Waiting for Windows 7 version...let's go! Nikon D3s DNG file exported from LR Edited with Affinity in ProPhoto-16 bit MBP, Retina 15.4", 2.2 GHz, 7i Graphics-Intel Iris Pro 1536 MB Yosemite 10.10.2