Search the Community
Showing results for tags 'Grid'.
-
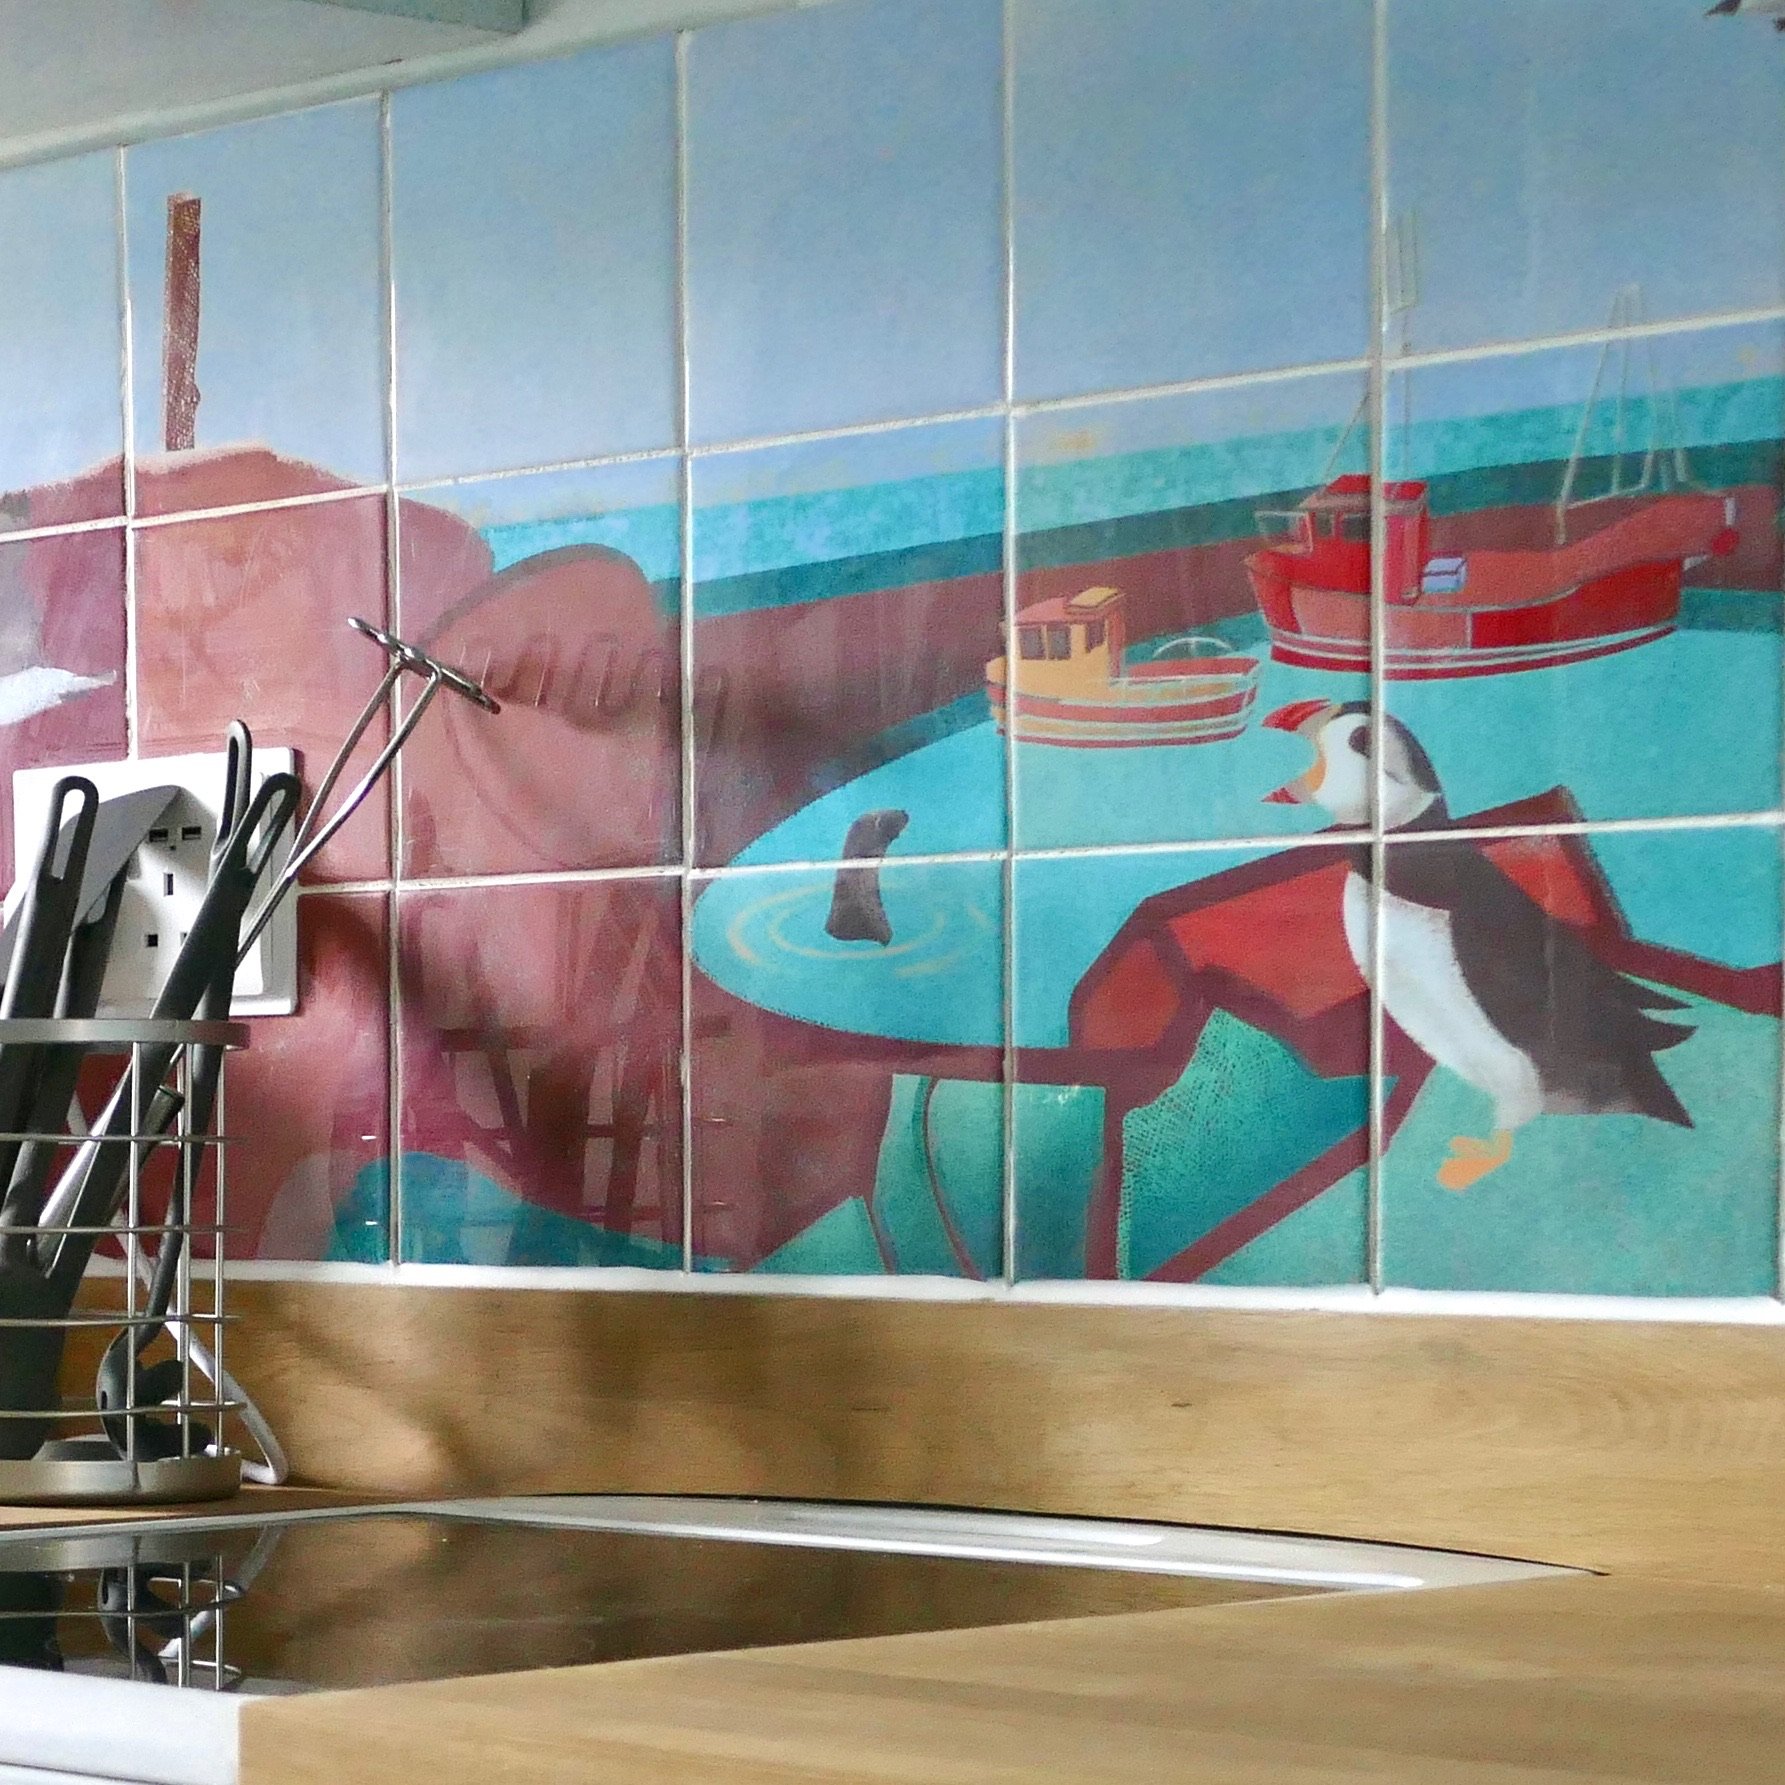
 I’m new to Affinity Designer. Last year I created a kitchen tile splash back using Procreate and Photoshop. This year I’m planning a larger bathroom tile mural. I think it would be more manageable file wise to do it in Affinity Designer with vectors. My main question is, can I start out with a grid which will be easy to print as separate pages at the end? Create a measured by inch/cm grid and then slice? Is it possible to do rectangles eg 8x10” or will I need to find square ceramic tiles for this? I created the separate elements in Procreate then assembled the large mural image in Photoshop last time. Then it was a big old pfaff to break it up again into the specific tile size. My version of Photoshop didn’t allow me to slice it up in the programme. I think I ended up using this online tool https://pinetools.com/split-image I could divide the image up at the end again but the main disadvantage is that I won’t know where the breaks between tiles will be. It will be levelling up if I can sketch the layout around the tiles to start with. I suspect you also lose image quality splitting images using a free online tool. Also I’m a bit confused about vector brushes. If I use vector brushes, will my image be scalable, so my initial file size could be say 1/10 of the wall? Or should I create a file to start with which is actually the size of the bathroom wall? It seems like some people are saying that the vector brushes aren’t truly vectors and go pixelated when enlarged.
-
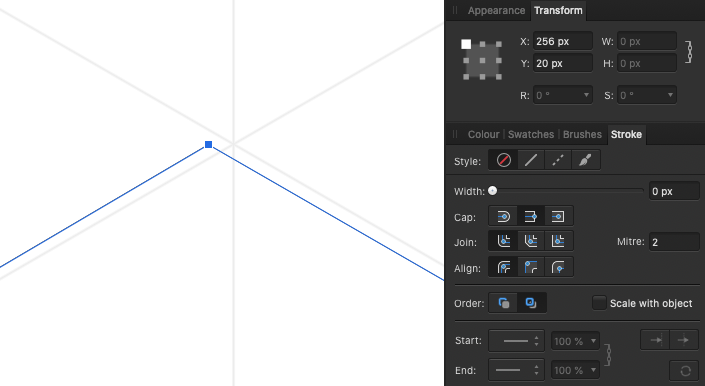
 Hello all, I've been trying for the past few hours to snap a curve to a grid using 1.10.19 of Designer on iPad. I'm fully aware of the separate snapping menu for the pen tool as well as the snapping menu but for the life of me I can't get a node to snap to where a horizontal and vertical lines of the grid meet. In the snapping menu I have snapping enabled and am not forcing pixel alignment. Snap to grid is turned on and I've tried both high and low levels of tolerance. I'm not trying to snap the node to other things as noted in this video https://www.youtube.com/watch?v=hntb-PMGUEA and I've read these threads: https://forum.affinity.serif.com/index.php?/topic/149534-asking-for-tips-about-snapping-with-curve-nodes-in-designer/&tab=comments#comment-835695 or https://forum.affinity.serif.com/index.php?/topic/62713-cannot-snap-curve-nodes-to-grid-in-designer/&tab=comments#comment-325078 https://forum.affinity.serif.com/index.php?/topic/102450-tutorial-for-node-functions/&tab=comments#comment-549935 I just need a node to snap to where horizontal and vertical lines of the grid intersect!. Could someone please tell me how to do this?
 -
 I want to export my results with grid or guide line. Are you under development or already having that functions? In detail, In Affinity designer, grid and guideline managers exist. Therefore, I want my illustration export png or other file with grid and guideline. So, this maximizes my client's understanding of the design configuration of my illustrations.
-
 Hello, This post is related to the one linked below, but I wonder if it's different enough to warrant a new post. If I have an image that features multiple aligned squares (with spaces between), is there an efficient way to slice and export them? For example, if I want to export the flashcards (attached as an example) individually, I can create guides that divide them up, but then I can't slice the guides. I could manually slice each (snapping to guides), but with larger grids that is very time consuming. I could use the technique of creating multiple boxes and bmp-filling them (in the linked post), but it was a lot of work to get the image to line up accurately. I could also create multiple boxes, then post the image individually into each and slice them, but again that is very time-consuming. If there's no way to do this quickly in Affinity, fair enough (there are lots of competing feature requests), but am I missing something simple? I'm a teacher, so spend a lot of time manually cutting out flashcards for online work! stcasefs.jfif
 -
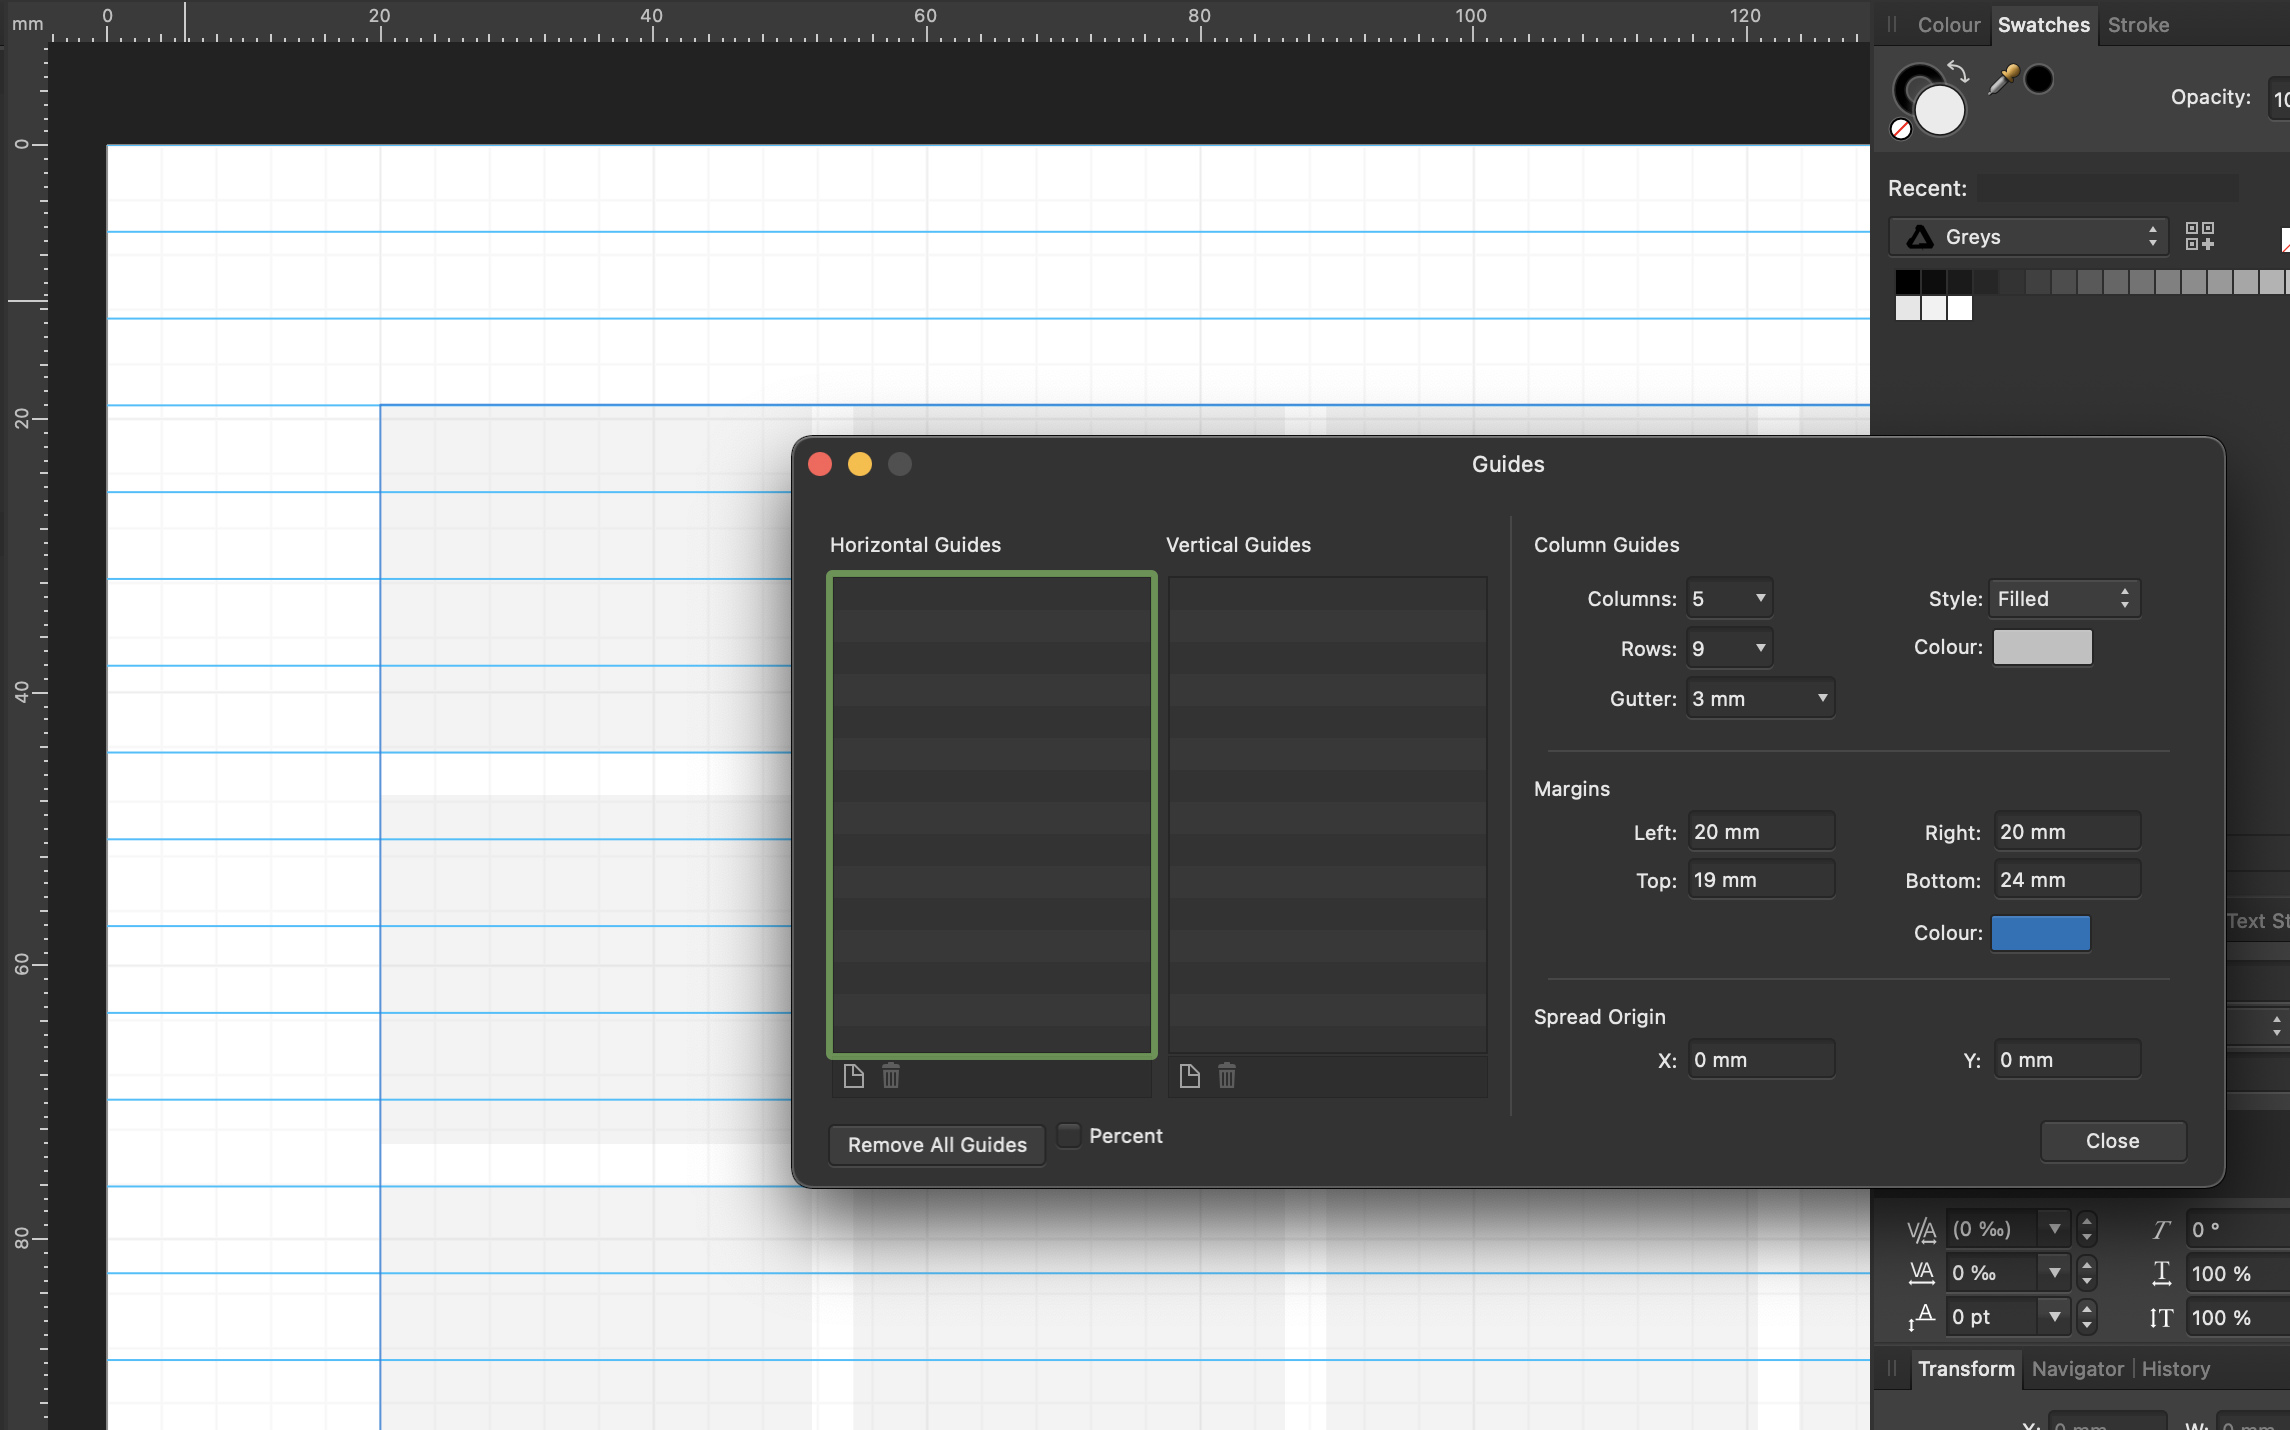
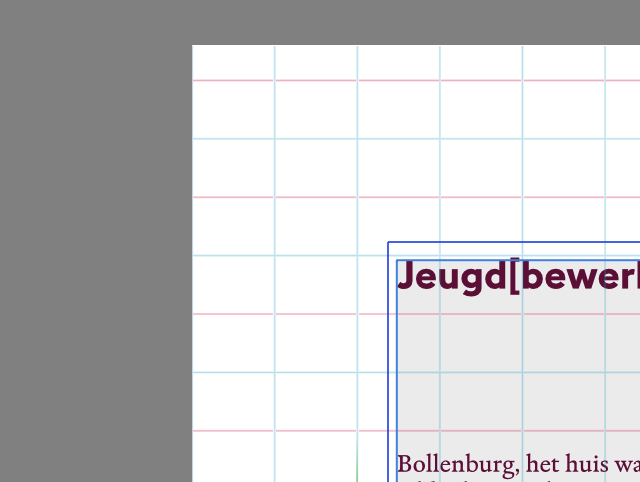
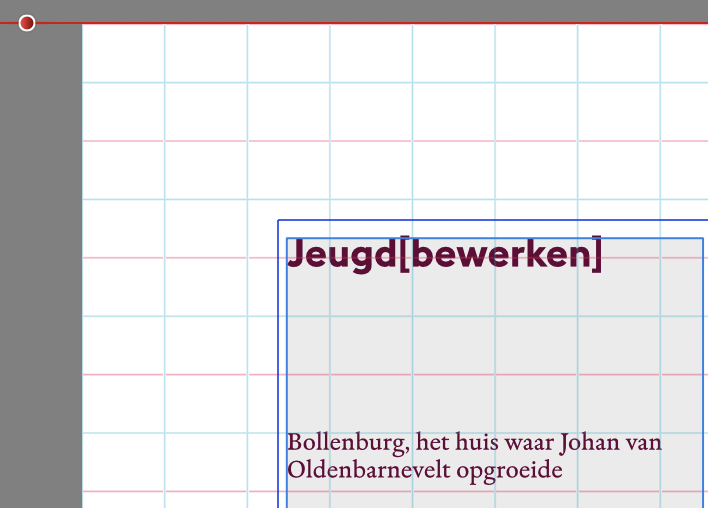
 Hej! Hope you're doing well. I do not often make any documents, but I want them to look nice. And that's why I like the approach like Publisher do when you can set document structure. I read some articles about the topic and they said that I should set some basic things like number of columns, number of rows and size (hight) of the line. And most of the articles shows me as an example a picture where the height of the line is exact hight of the column/row spacing. But... I just can get that to be precise! Okay, I set up margins to fit line hight, but still can get rows to fit height of the line! There's screenshot attached — that's how I try to fit A4 paper. Anyway, is there, maybe, some secrete knowledge to set up the grid that will look nice in most of cases?
-
 I think this is better in an own thread. All the best, Chris
 -
 When scrolling up down, the grid scrolls too? See screenshots
-
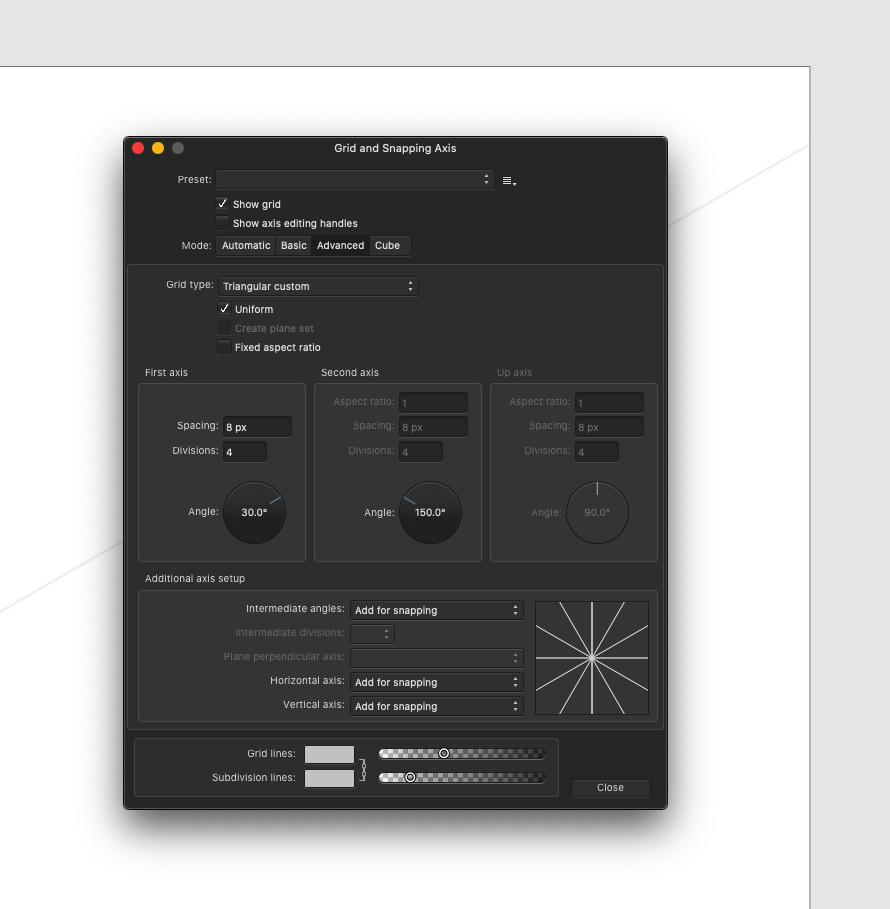
 On normal grids we can set the divisions of each grid unit to have sub-units in the main units with lighter grid-lines. However, how can we do the same for isometric grids? The division fields in the grid settings don't seem to chang anything, so not sure what that is for, but I would expect that to be for the subdivision of each grid unit. [ see video ] How to divide the isometric grid into more detailed sub-units (without changing the main unit-size)? Subdivision-Iso.mp4
 -
Hey! l use grids a lot but it seems that the iPad versions don't have the same options for them. Why? I am missing especially the hexagonal grids. Just opened a file done in the Windows app using a hexagonal grid there and it only shows a horizontal triangular grid which is confusing. It behaves strangely too – when rotating the canvas the grid doesn't seen to be locked to the drawing. Hope you will add this in the future! Chris
-
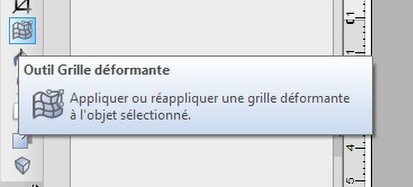
 serait-il possible de retrouver l'outil "grille déformante" comme dans Page Plus. Il manque aussi dans Affinity Designer
 -
 I use Affinity Designer's isometric grid feature quite a lot for drawings and find it's incredibly helpful how I can modify it so well, but is there a way I can create a vanishing point grid layout in designer? Even if this isn't a feature right now, does anyone have any tips for how I could achieve this, please? Would be greatly appreciated!
 -
 Hi, I'm fairly new to Affinity Designer. I've mostly used Inkscape. I'm trying to use it to create Isometric tiles for a game. My Document units is set to pixels. When I use the Preset 64x32 Isometric grid, I had expected that the resulting tiles would be 64px by 32px. But when I draw a tile with the pen tool, it is much larger. So I played with the settings for the Isometric 2:1 setting until the tile reads 64x32px. However, now when I go to export a single tile, the dimensions are one or more pixels larger. What is the proper way, if there is a way to do this, to setup a 2:1 Isometric grid that exports to 64x32px exactly for each tile? Also, tiles should not bleed over top of each other. When I check in Pixel View, it looks like adjacent tiles will bleed into each other with Anti-Aliased pixels. Is there a way to prevent this? Thanks.
 -
 I just got Affinity Designer several days ago. I remember being able to show the grids. I am not sure what i did, as I am not able to figure out why it wasn't showing anymore on the canvas. I have set "show grid", pressed ctrl+', and also ticked the checkbox for "show grid" on the Grid and Axis Manager, still nothing. Please help, here are some of the screeshot. Thank you
-
 I have some text that I snapped to an isometric grid. Now I want to make that text horizontal again. How do I do that? I can't seem to get it off the isometric grid even if I create a flat grid. Win 7, Aff Designer 1.8.5.703
 -
 Greetings, I think we need to have an overlay while editing the footage in the edit screen. This would allow us to know where the center of the frame is at all time, that that would help us with tracking subjects on the video also on that now adding a tracking feature would be amazing! (DIY til this is added is me putting some tape with a bread crumb on it 😆)
 -
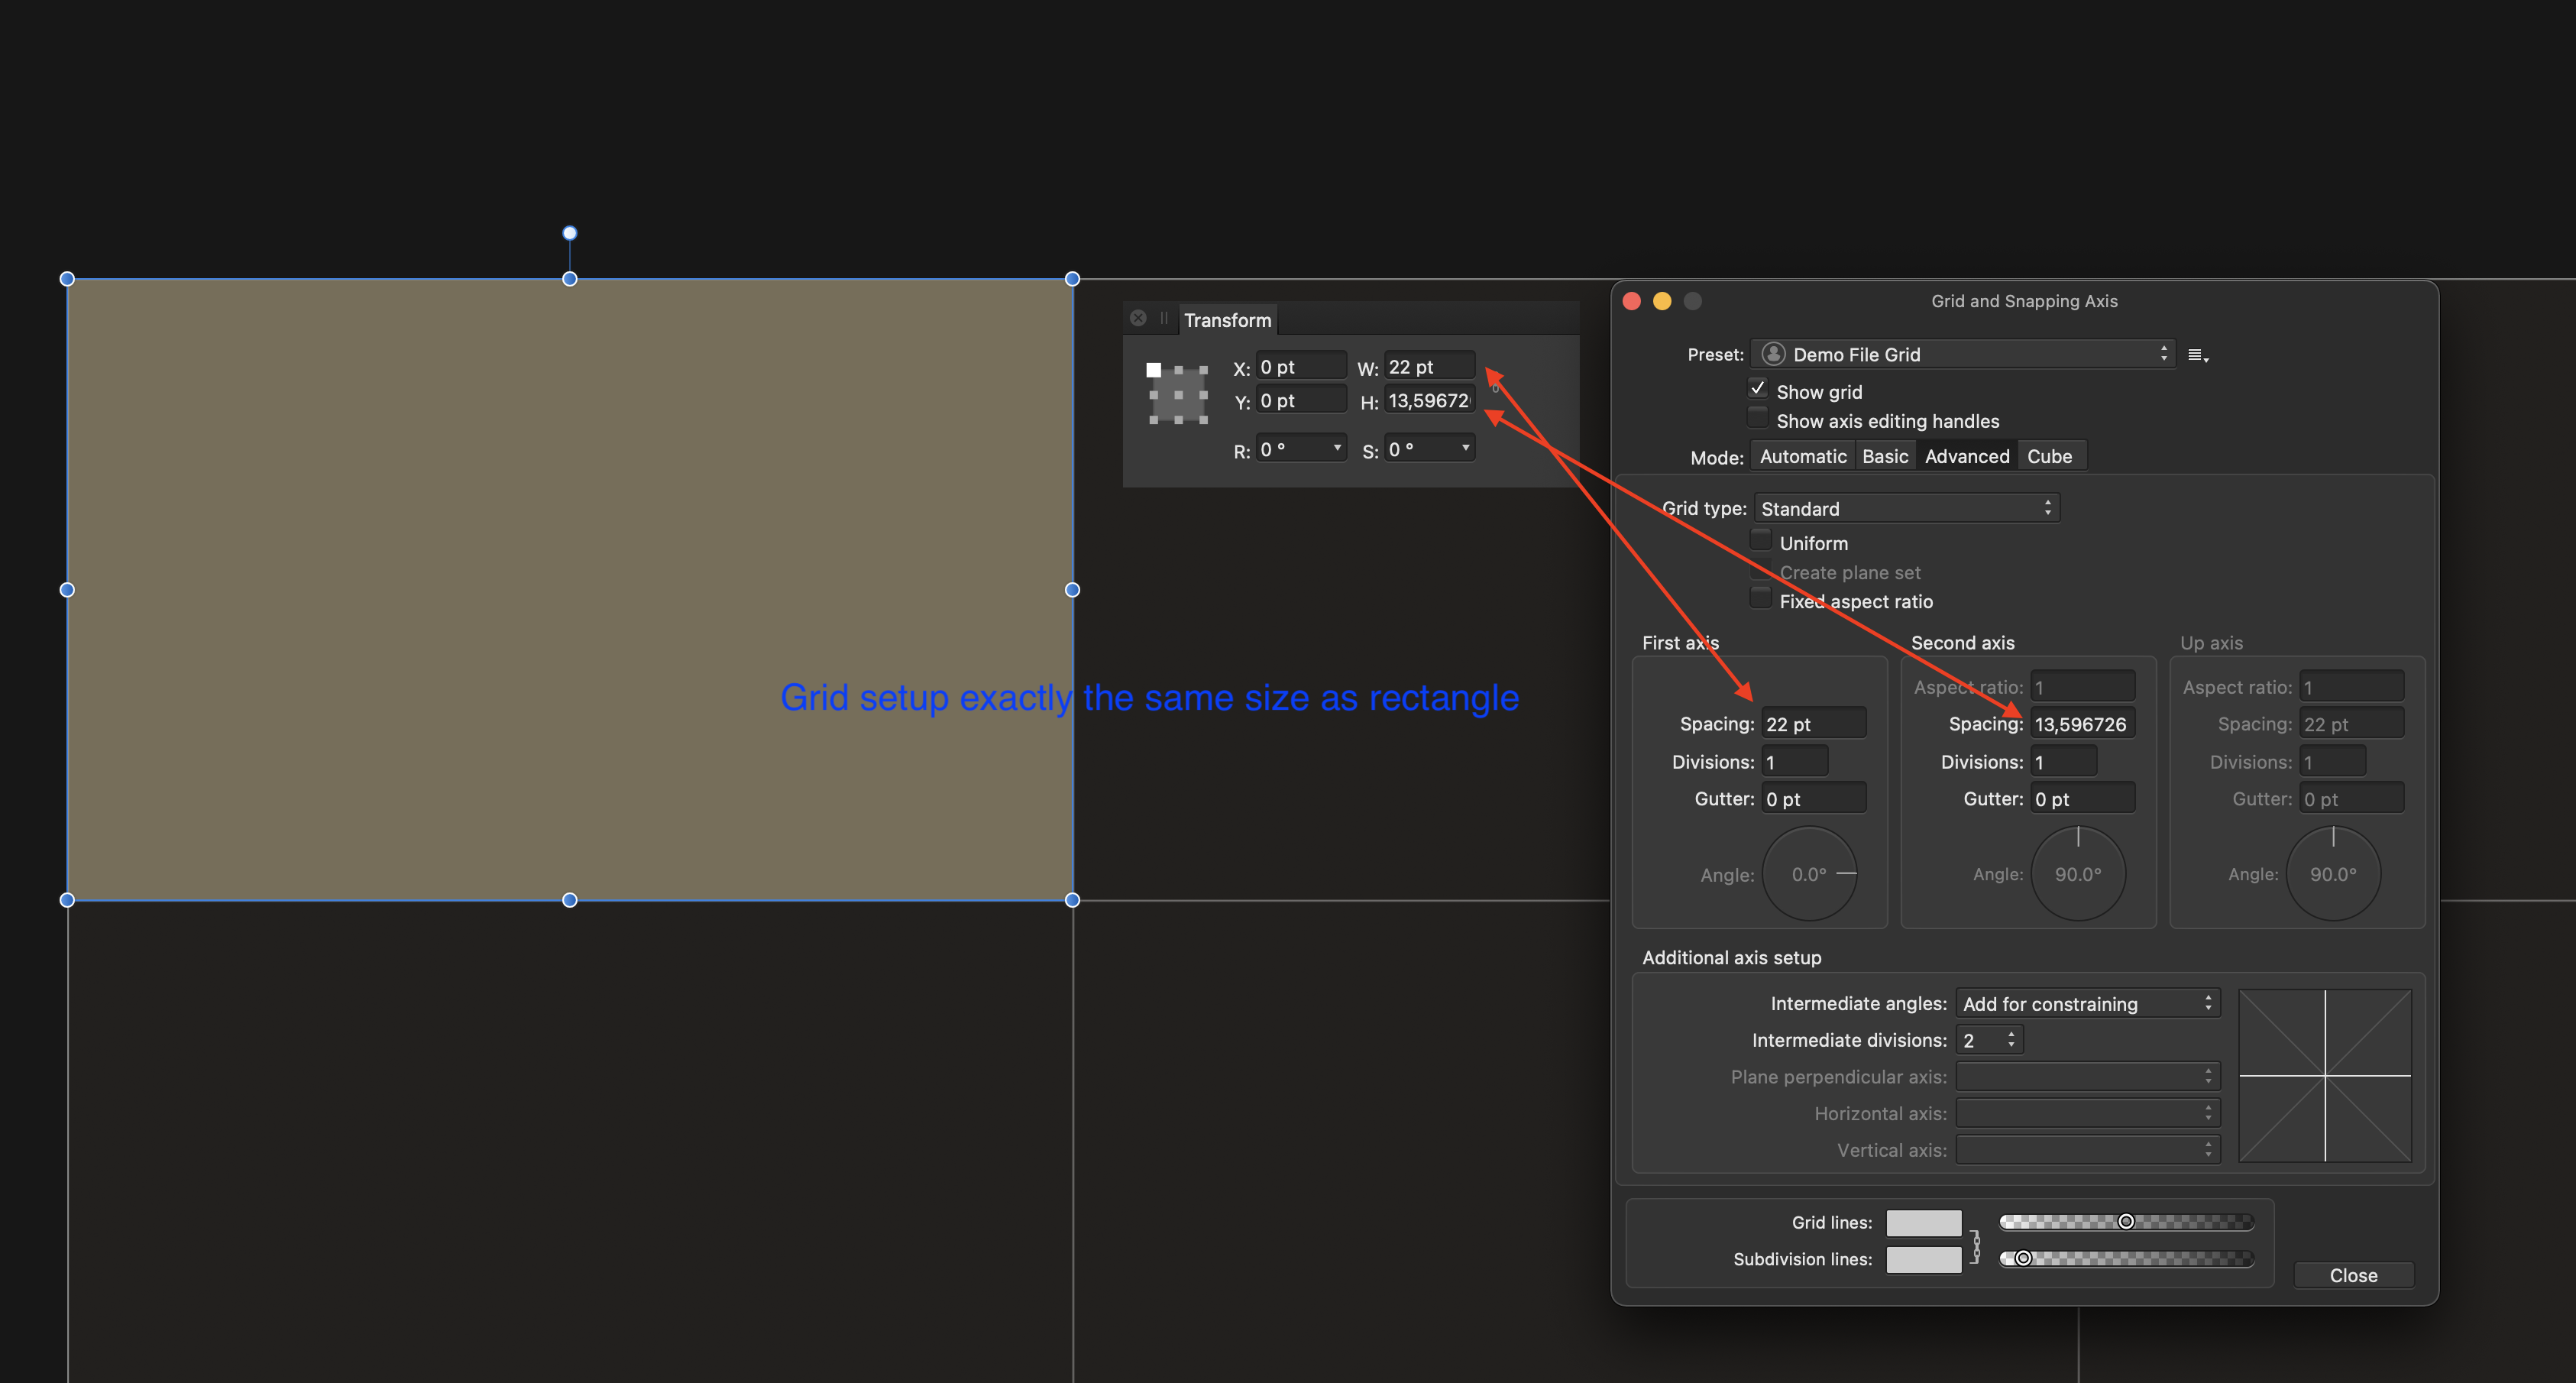
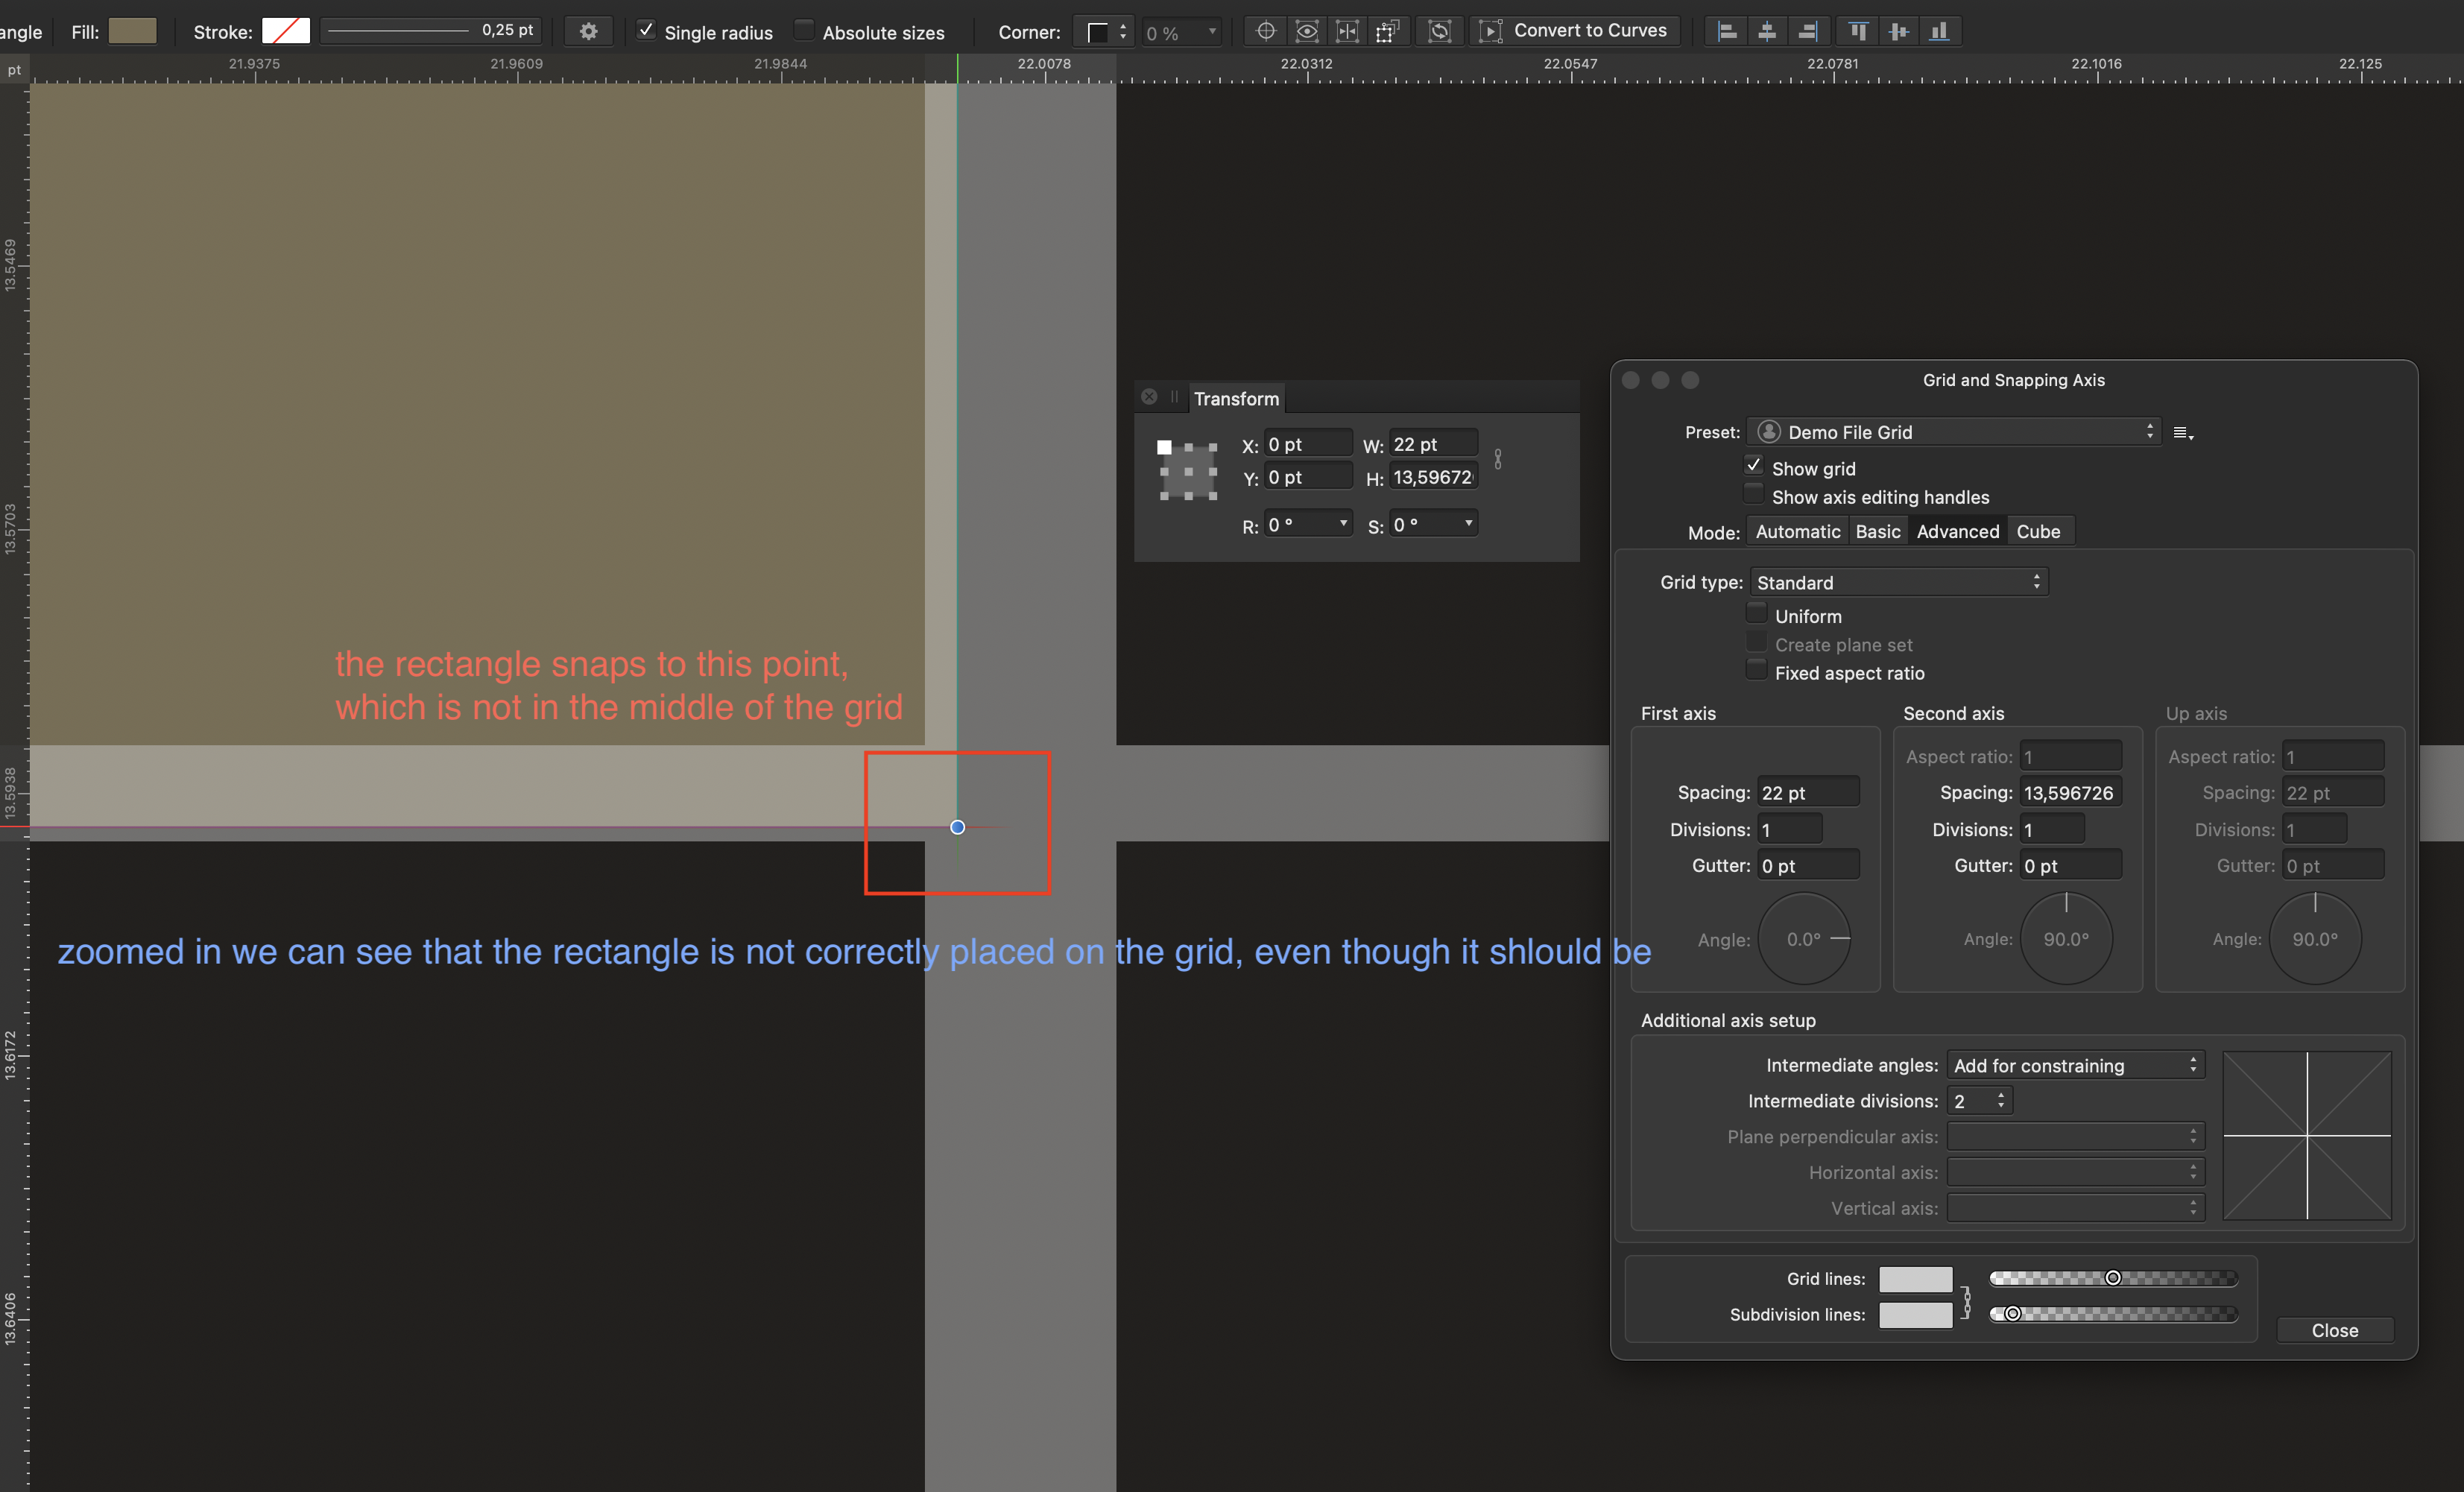
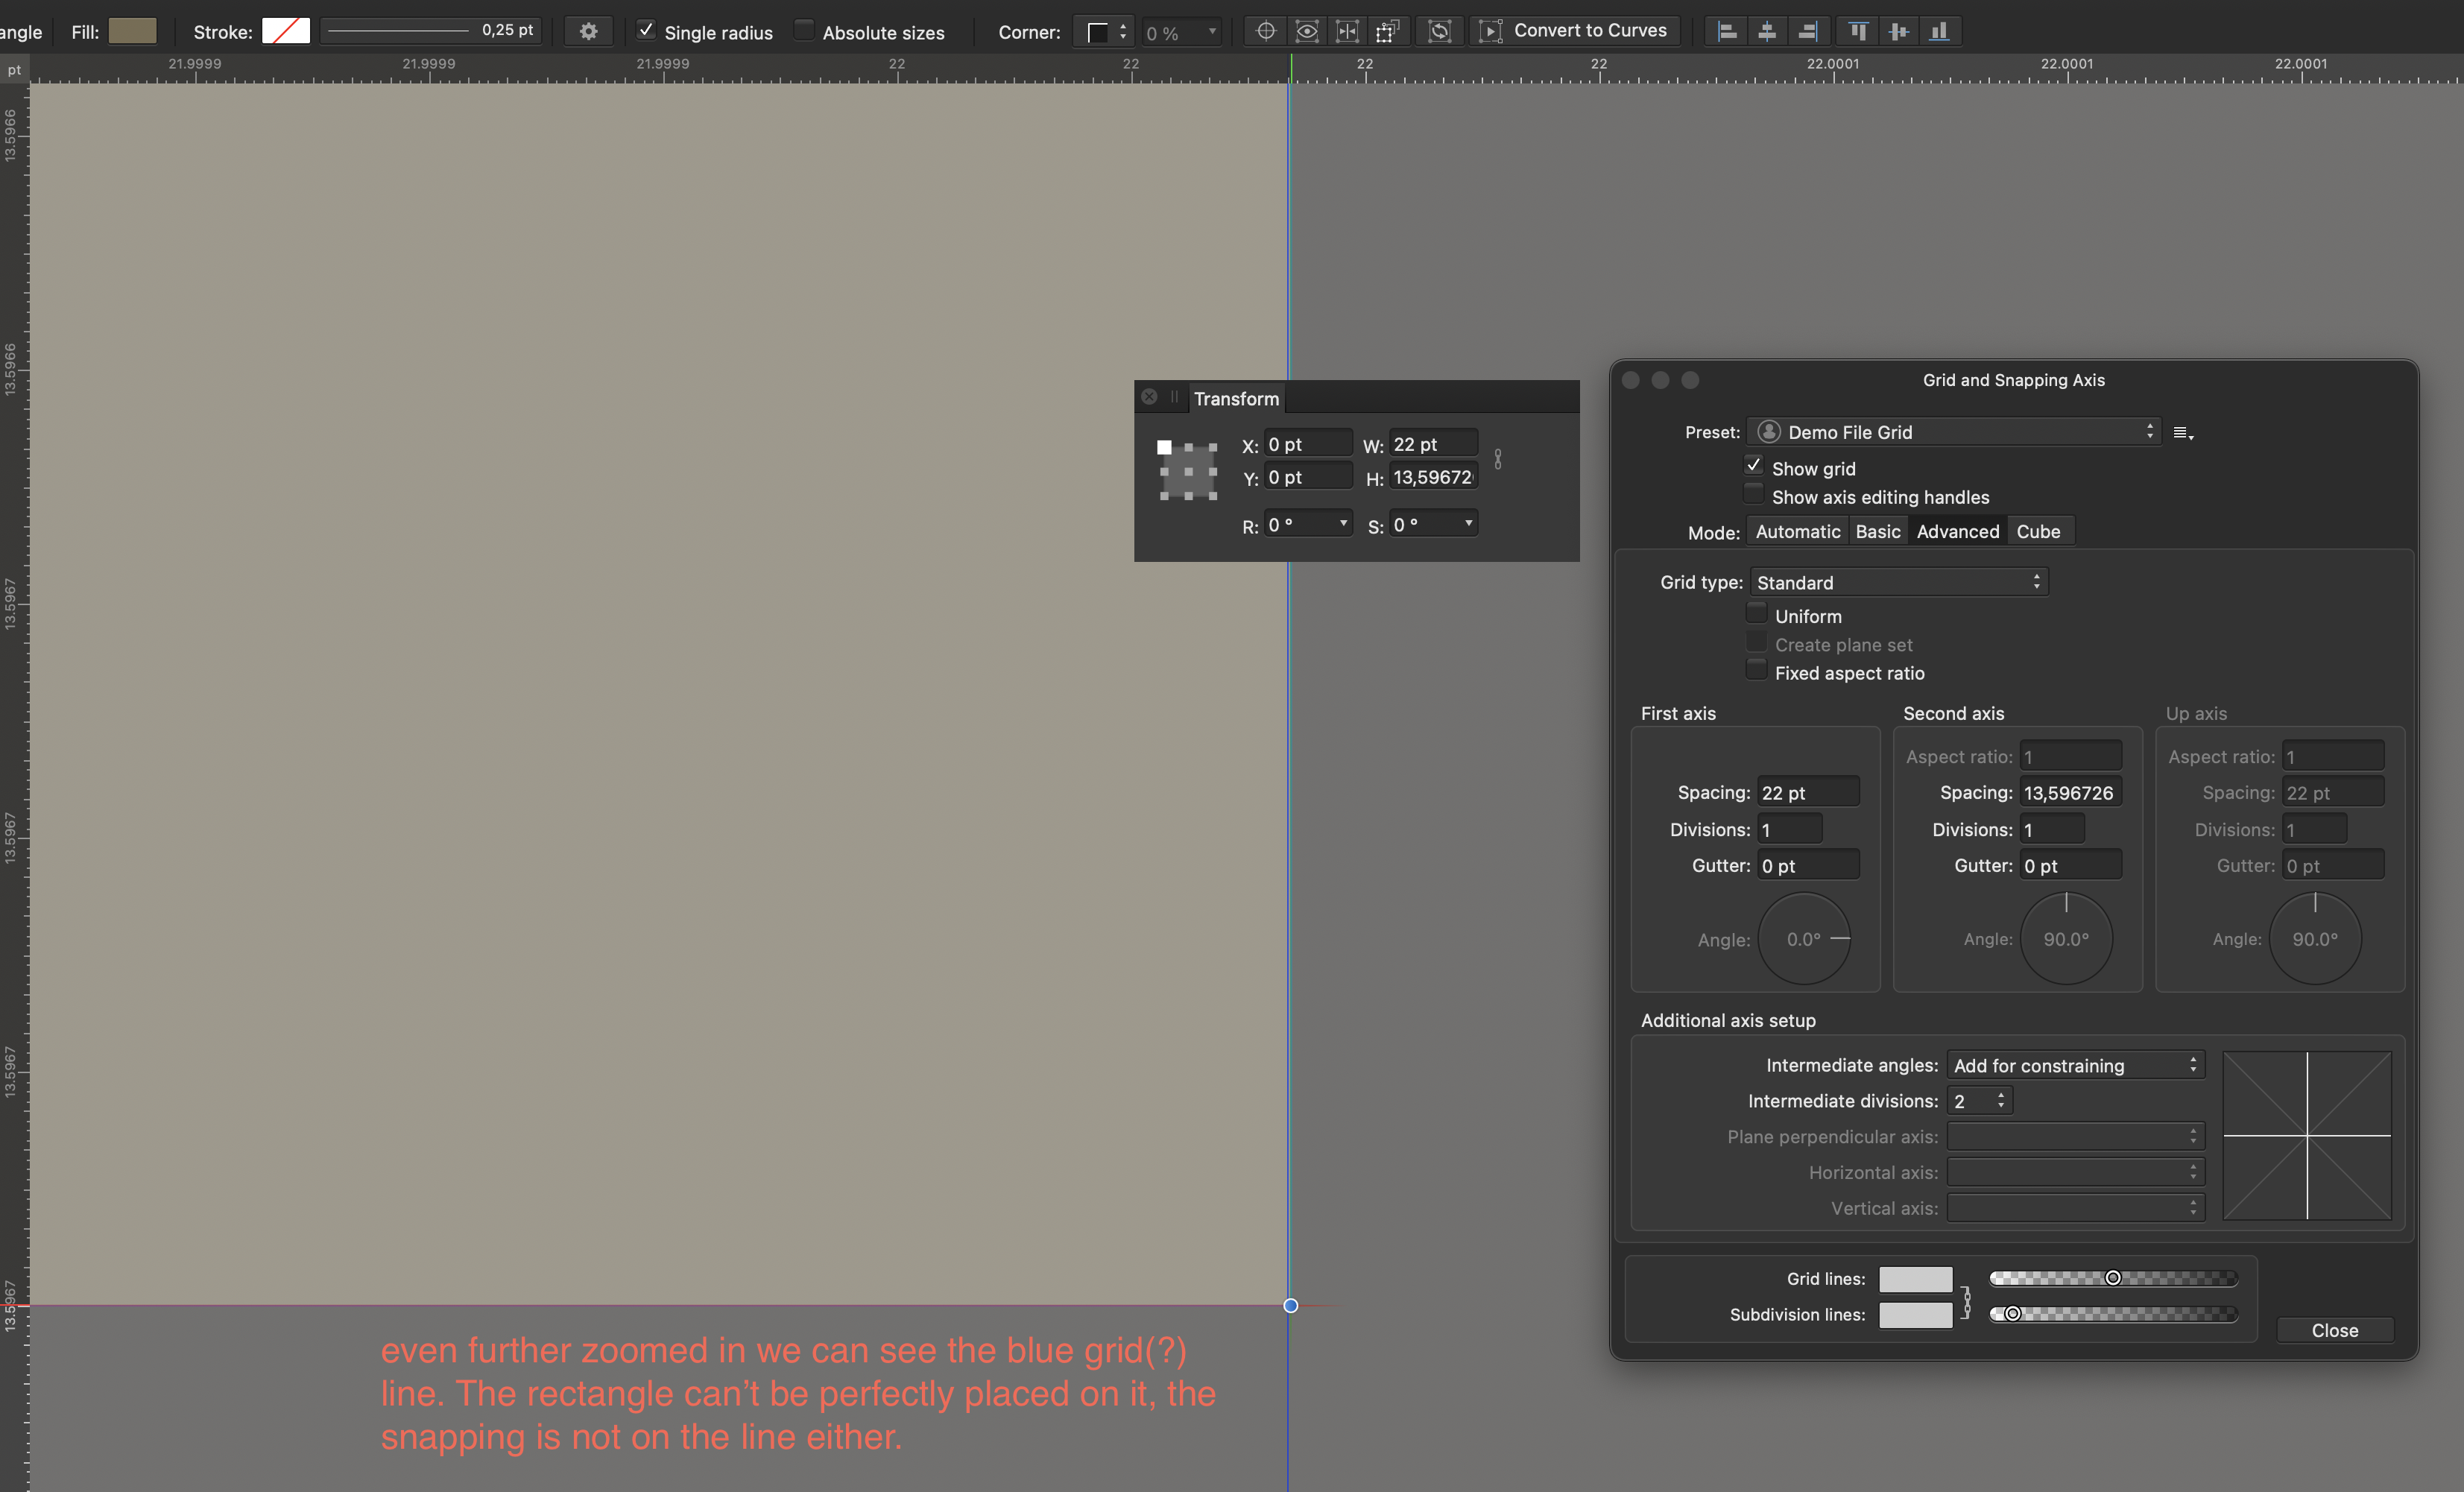
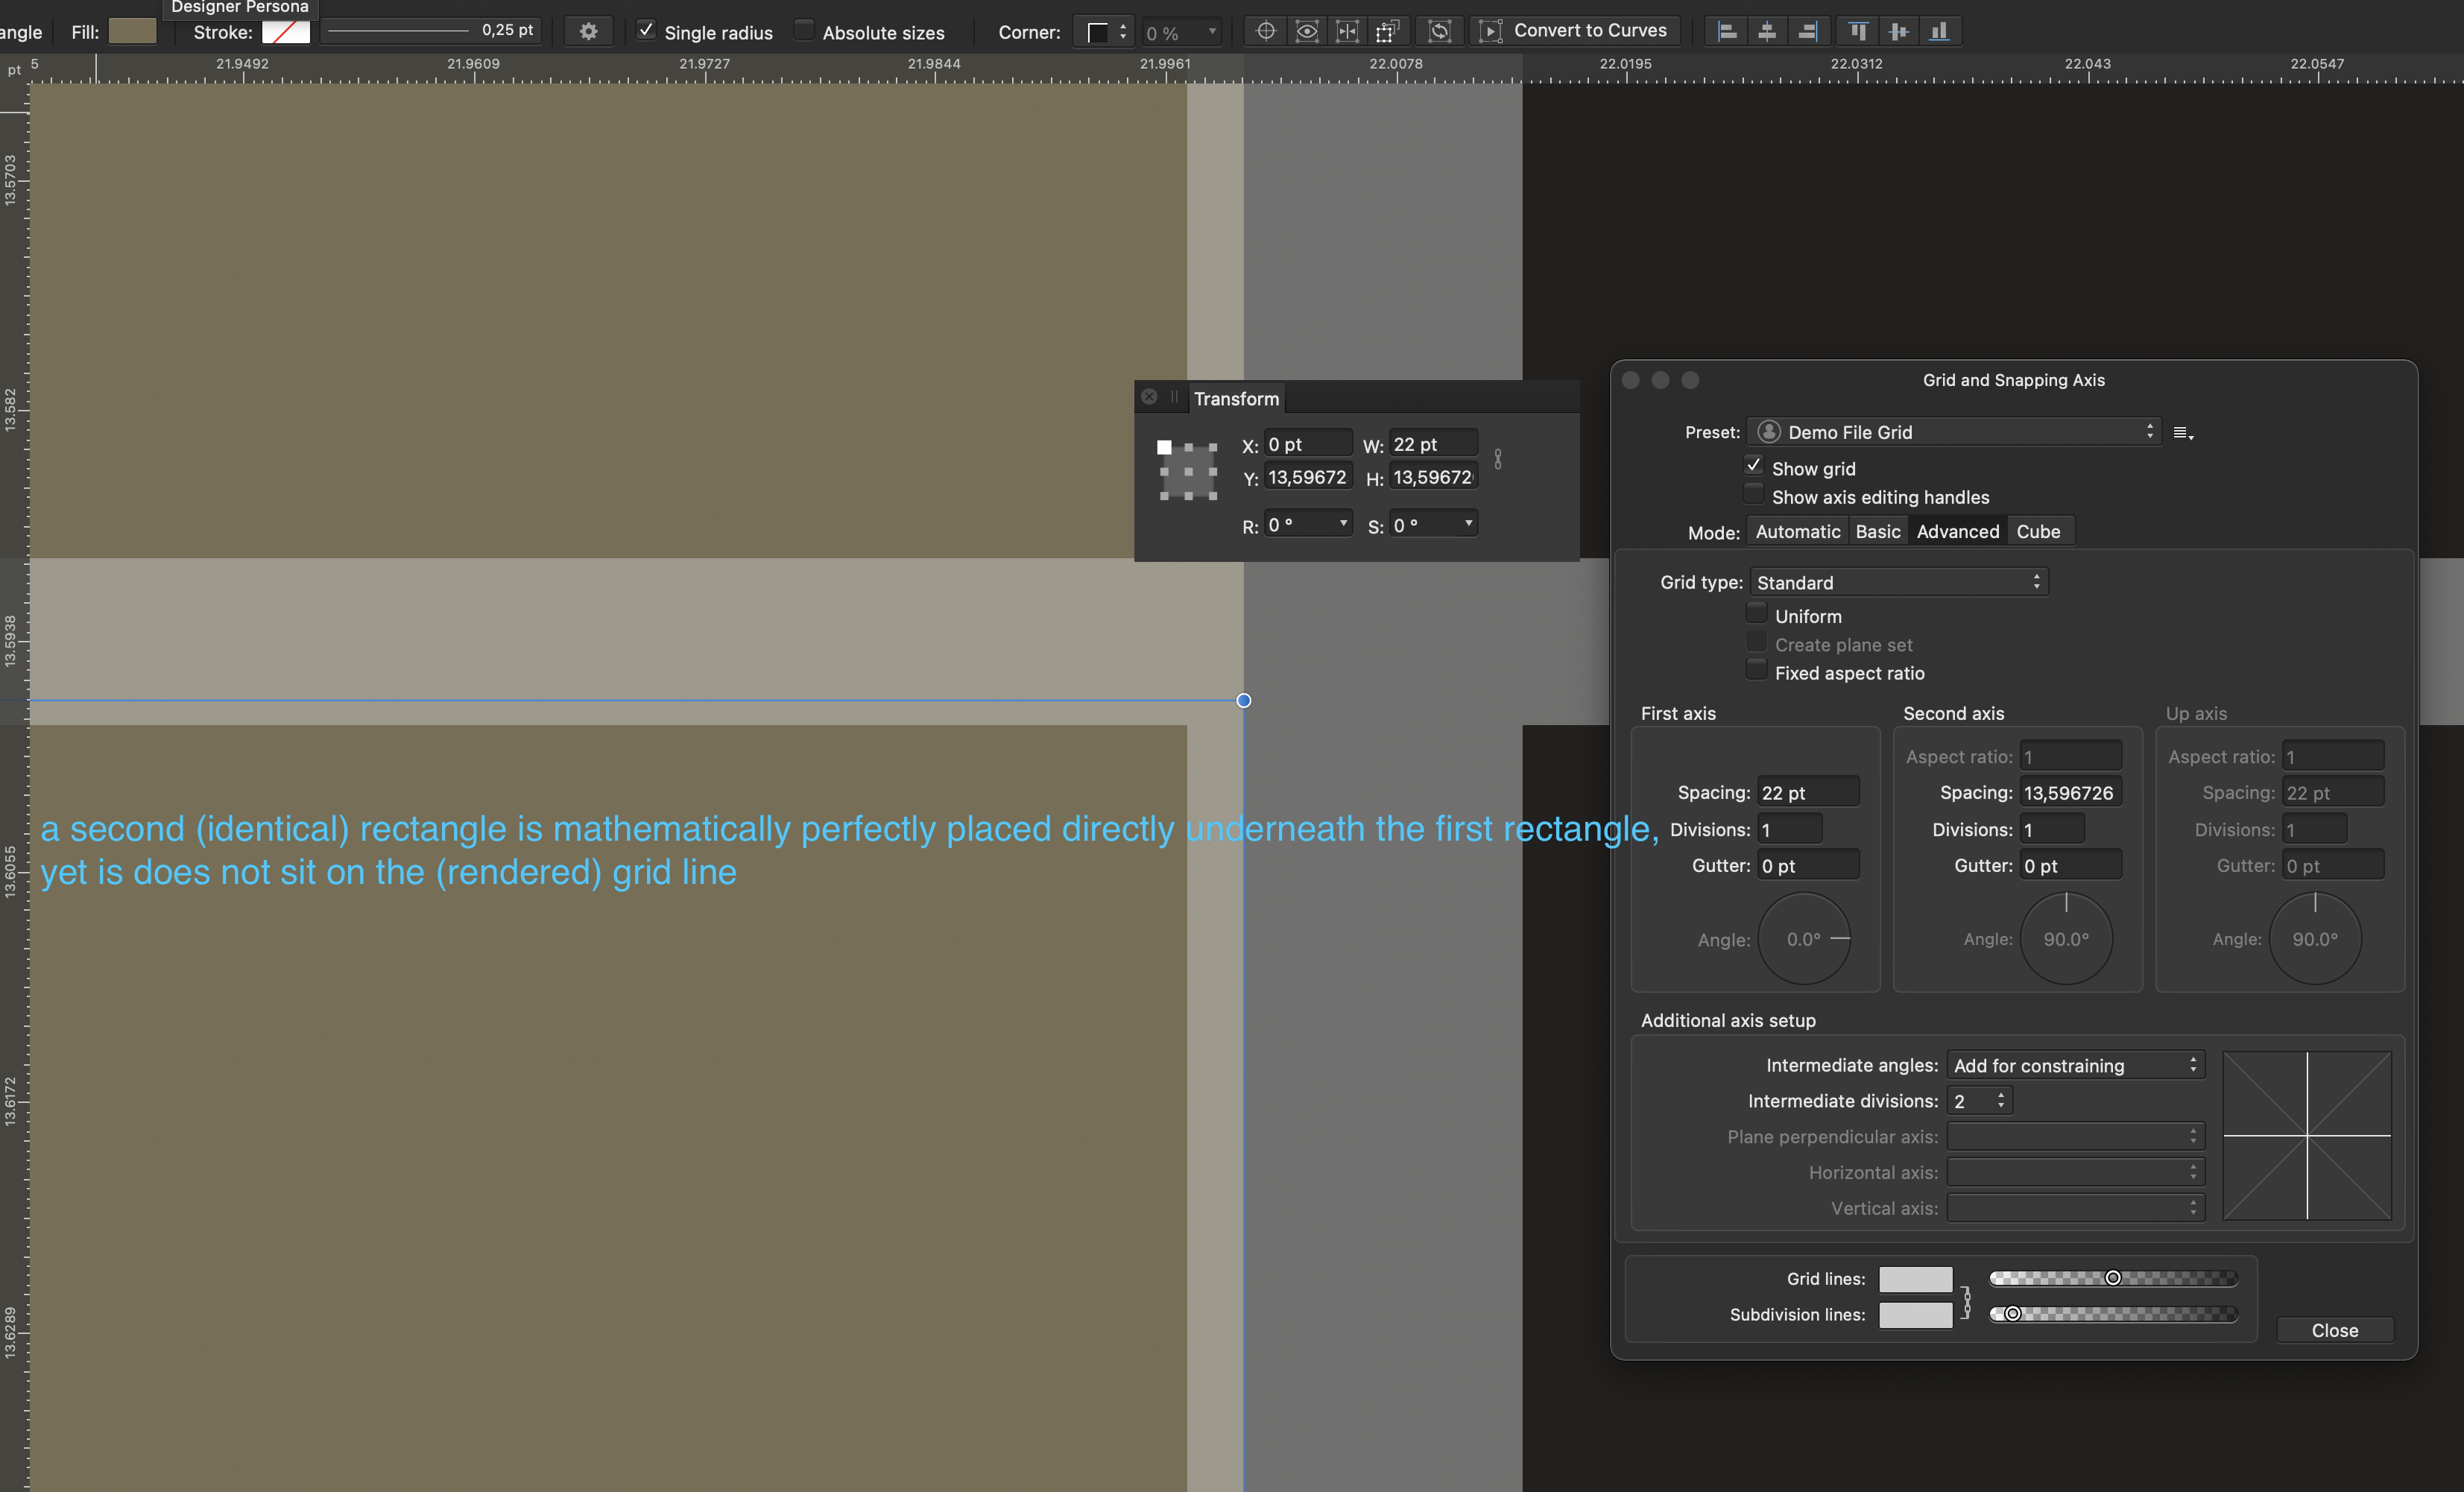
Hello everybody, before I start to decribe my problem I want to say thanks, that it is possible at all to work with such precision, it does really make a difference to the quality of the work I produce and it's exactly the reason why I switched to working with the Affinity Apps! Now here's the problem: I am currently working with a high-precision document where the decimal places for unit types are set to level 6. In this document I have created a rectangular grid, which is also finely calculated with 6 decimal places. If I now want to align objects to this grid, I run into a problem with the rendering of the grid. The objects do not snap in the middle of the grid line, but somewhere on the side of the line. However, this becomes visible only at an extreme magnification. The problem is, if I place objects with the size of a grid unit directly underneath each other, at some point they will no longer lie on the grid, because this minimal shift causes the objects to protrude further and further beyond the grid lines. On top of that some other questions arise. When I zoom to the maximum magnification everywitng I created turns white but what I believe to be the actual grid line (I did not create any guide lines) becomes visible in blue (however this is only true for the vertical grid line). Yet it is not possible to align objecty perfectly with this grid line either. And as you can see the grid lines don't have the same width.This is not really an issue if the objects snap correctly but it looks like it could be related to this problem. In used Metal as a render engine. I also tried OpenGL, but the problem was not solved. I attached some screenshots (sorry for the ugly colored text) and a demo file so you can recreate the problem. So that leaves me with the question, is there anything I can do? If not it would be very important for me to have this problem fixed, since my work depends on this. Thanks in advance. Luca My setup: macOS 11.0.1 MacBook Pro (15 Inch, 2019) Processor: 2,6 GHz 6-Core Intel Core i7 RAM: 16 GB 2400 MHz DDR4 Grafics: Radeon Pro 555X 4 GB Affinity Publisher 1.8.6 (also checked on 1.9.0.857) Demo File.afpub
-
 As a creator of hex maps, I have tried to make the triangle grids work for lining up hexes, but the snapping ability of the triangles to line up hexes is clumsy and I must manually eyeball lining up the next vertical column of hexes to nest against the other columns of hexes. I have been able to re-import previously created hex grids that I spent hours lining up perfectly, then locking that group. But it would be fantastically useful if hexes could be an option in the grid and axis manager tool of Affinity Designer.
-
Hello, bonjour à tous est-ce si compliqué de réintroduire l'outil "grille de déformation" comme dans PagePlus ???
-
 Can anyone help me? Finding this hard to understand. Affinity_Publisher_Grid_Baseline_Question.mov
 -
Hi, I am working on a pixel art design, and need to use a pixel grid (just a grid with 1px), but de grid is not working under 4px size. It is normal? I am making anything wrong? Thanks in advance RPReplay_Final1586418326.mov
-
Dear Serif team, it's me again. I still can not fulfil my tutorial for pixel art in the pixel persona, because now after your update 1.8.2 the grid and axes are not working. Please feel free to see my screen video: I wanted to create a grid for pixel art, and it is not working. What a strange behaviour. Thanks in advance Sincerely Anke Goldbach Bildschirmvideo_aufnehmen_2020-03-24_um_15_52_01.mov
-
 I watched this video - how is she getting the transparency on top level objects? She seems to add an object as a solid colour on top of another solid colour but then does something that makes the top object show the grid underneath it. How are is she doing that? She never seems to touch the opacity slider for example, she seems to do something quickly that makes a top object show the grid underneath.
 -
 The features can edit what we need with any size
 -
 Hello, How can I make the artboard snap to the keypoint on the grid ? Please see the video attached. Thank you, Hossein artboard-snap.mp4
 -
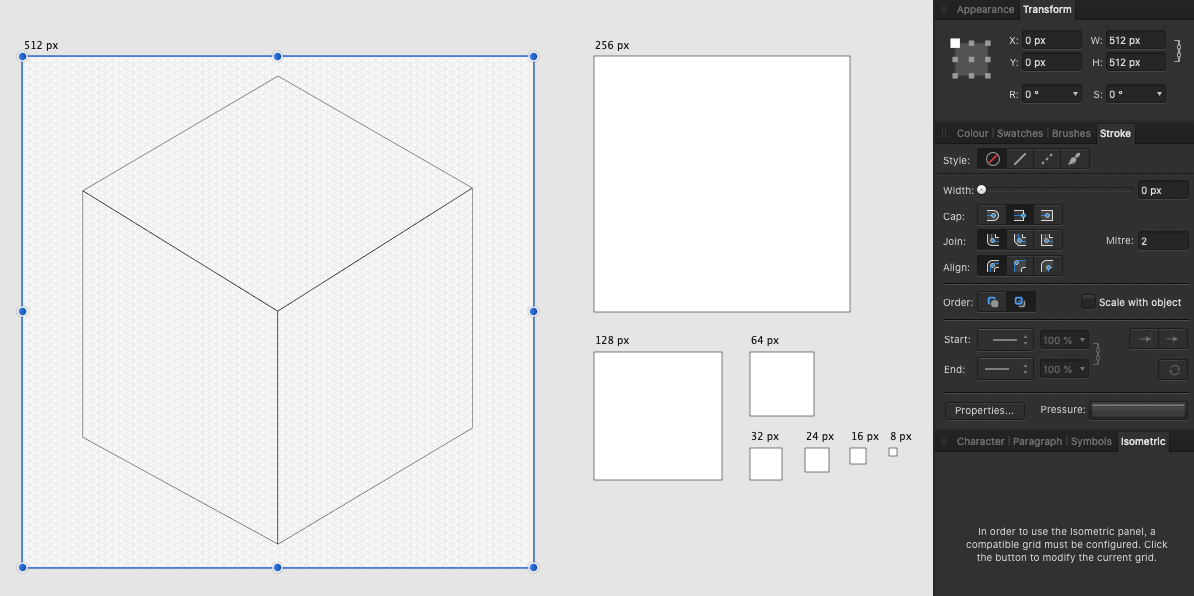
I'm designing an icon library that requires isometric grid. The Affinity Designer grid tool is awesome but… it apparently has a bug. If you look at the video you can see that the math used to calculate the grid position is not working properly, which makes me misplace every point which will end up in blurry icons. Is this something you guys can fix quickly? This is a huge blocker. Have a look at the video and screenshots. The Artboard is correctly set to 512px, so that's not the issue. Screen_Recording_2020-07-10_at_13_02_07.mov