Search the Community
Showing results for tags 'Grid'.
-
 Hi, If I use a grid adjusted to my requirements in designer and place content in it, can I also print the grid lines in black. Thanks
 -
 Text in an independent panel using a text style that has "Align to Baseline Grid" selected but does not align to the baseline. The text frame panel has "Use baseline grid" not selectable. How do I fix this?
 -
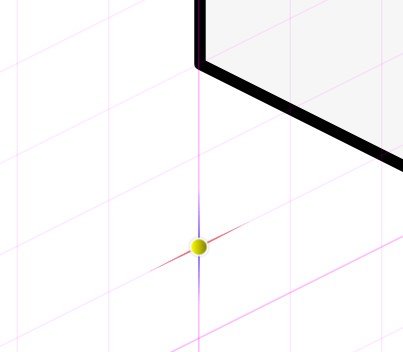
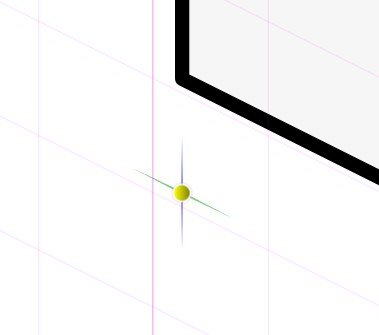
Hello, I wanted to use the isometric grid system, however the snapping is not aligned properly. Is there something that I should do ? Please watch the video to see the behavior. Thank you isometric-grid.mp4
-
I am making maps for RPGs and would like to be able to print the grid.
-
I cant set the grid size larger than 0.853” on Standard mode.
-
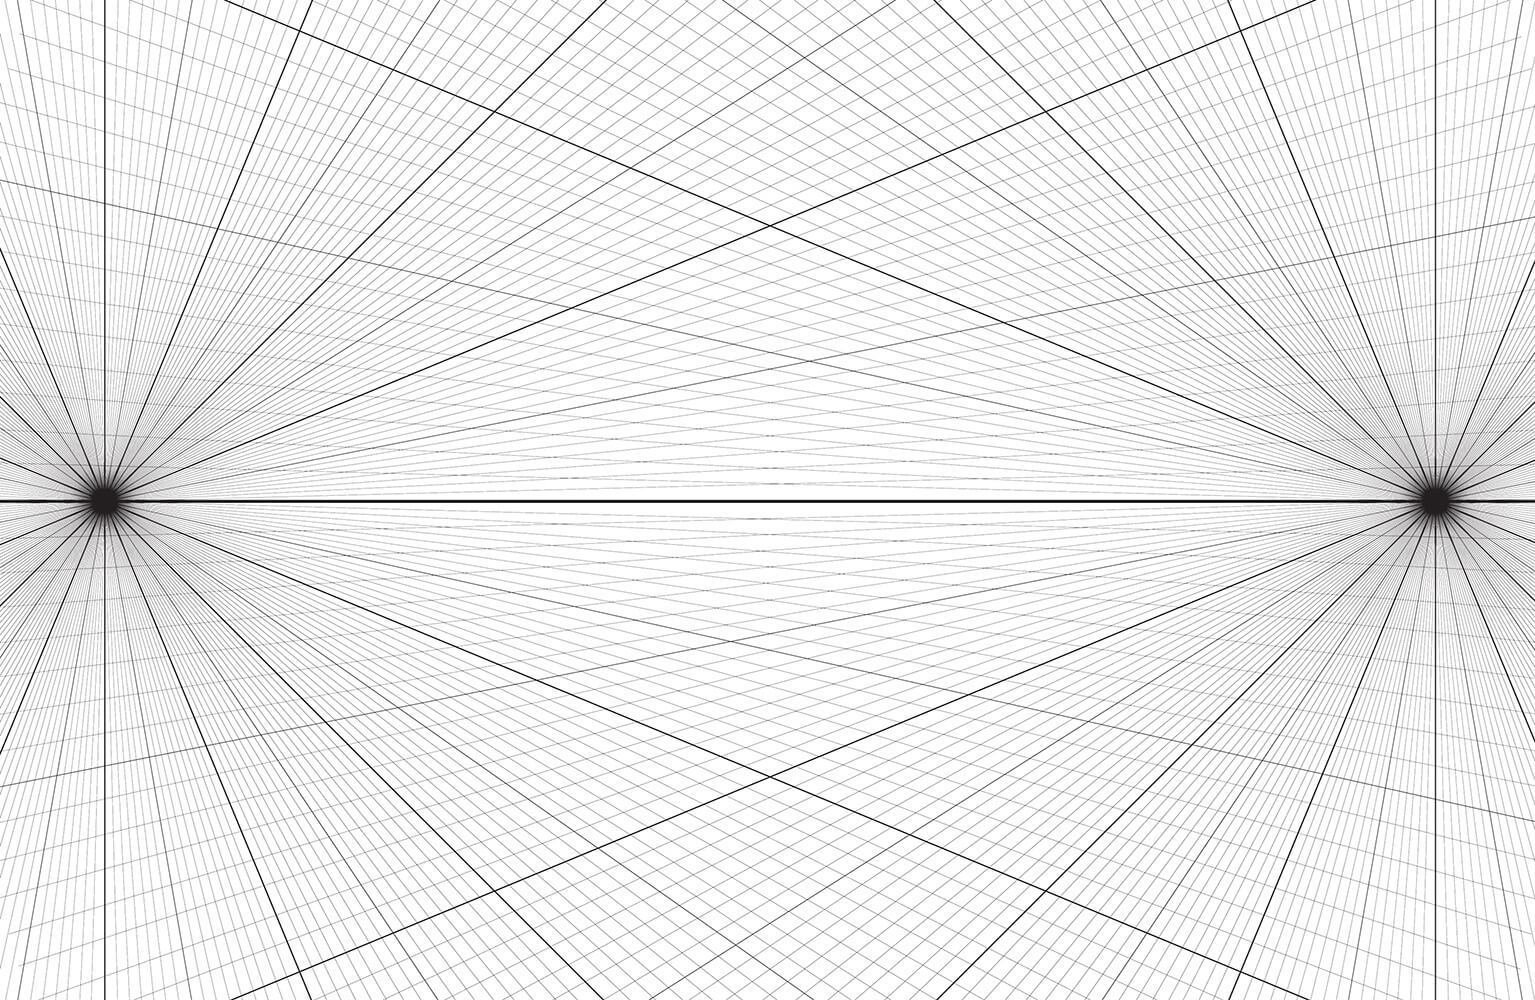
 I couldn't find a good or efficient way of creating a Central Perspective or a 2 Point Perspective Design, in Affinity Designer. I think the implementation of a new Grid Type would be the best solution (I included 2 pictures to give an example of what the grids would look like).
-
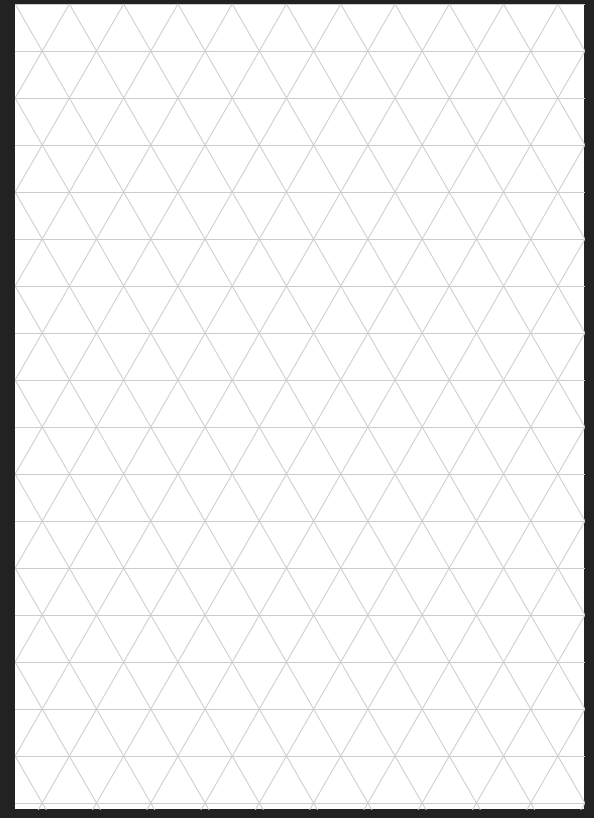
 So I want to make a random triangular pattern in photo but so far I haven't found an efficient way of going it. My target is something similar to the below image but the colours are randomly selected within a range. If possible I would also like the overall colour gradient to get darker down the page. (I know this is more of a designer job but I don't have this software at current and I can't find a way to do it in there either) So far I have found that I can create a triangular grid using induvidual triangle shapes made with the pen tool that I've replicated using a horizontal triangular grid (see below) as a guide. I could colour them manually but this would be far too slow. Thanks for any help!
-
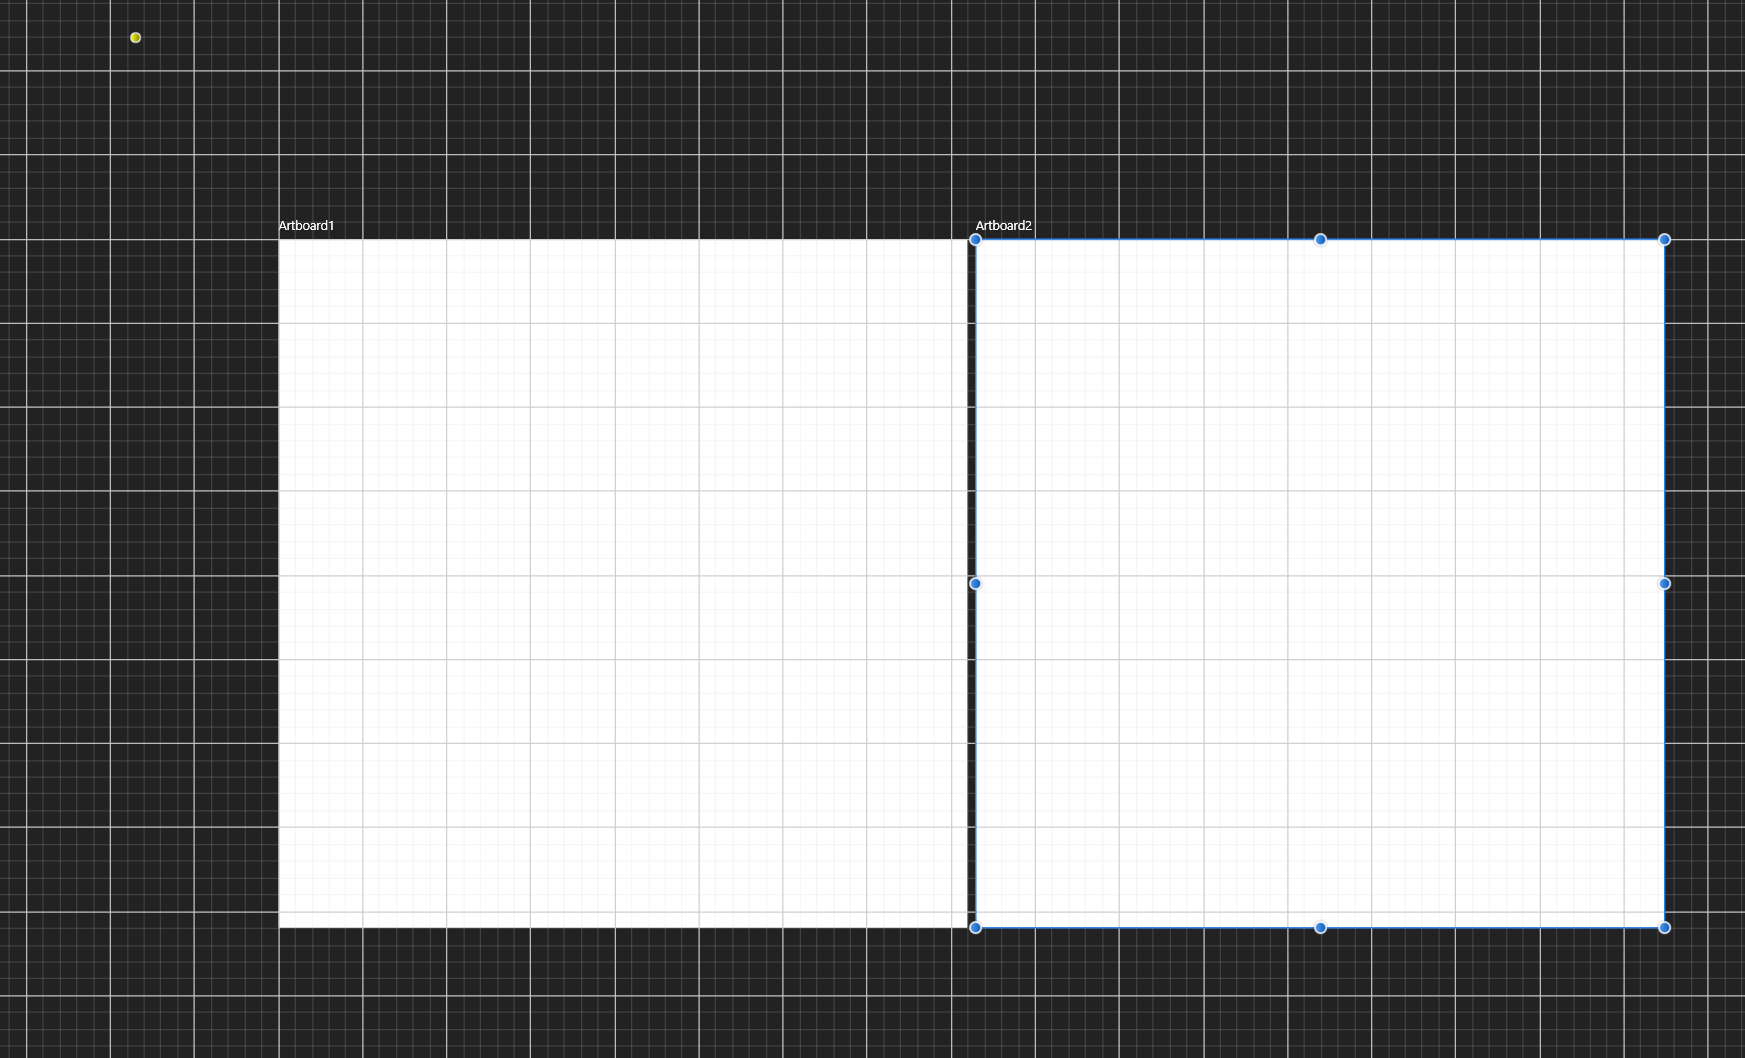
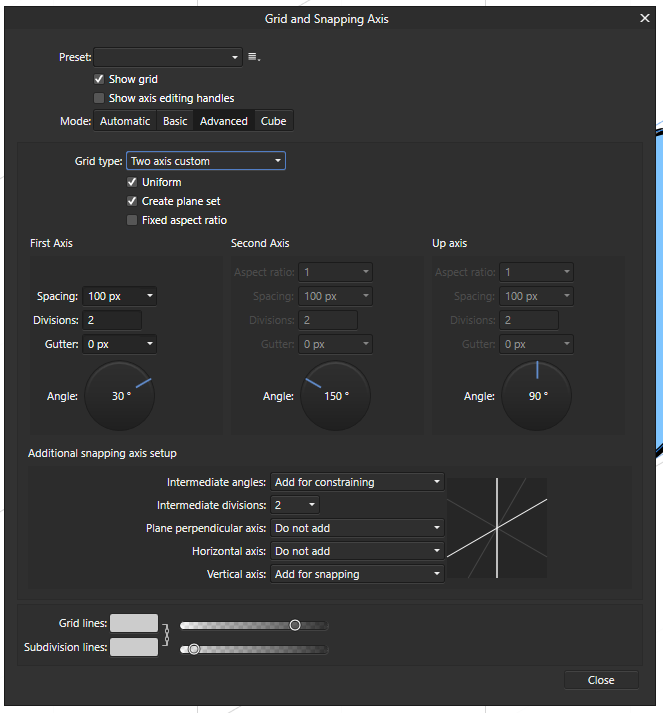
 Version: Noticed in 1.7, but also reproduced in 1.8.0.486 (latest beta) Bug: Points are snapped to a different grid than what is displayed when using multiple artboards Steps to reproduce: Create a new document Create two Artboards In View > Grid and Axis Manager, create a two-axis custom grid in the second artboard with angles other than 0 and 90 degrees Notice that points aren't snapped to the grid displayed
-
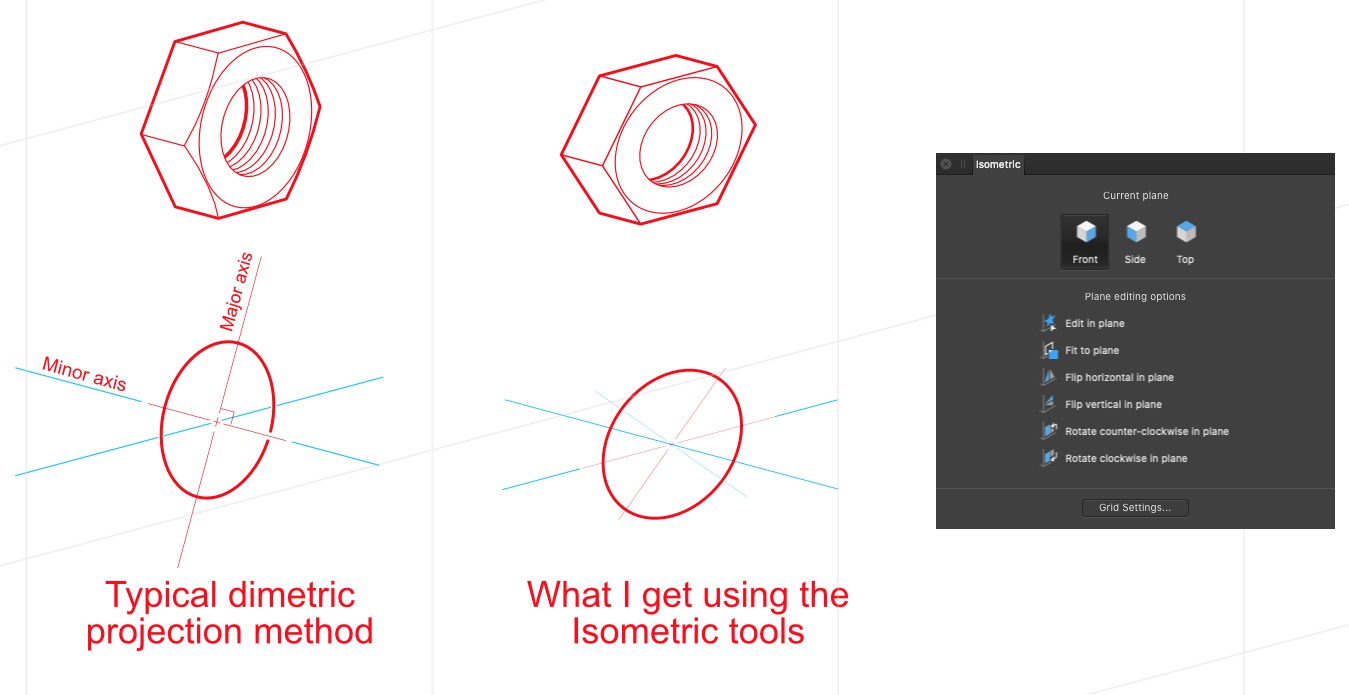
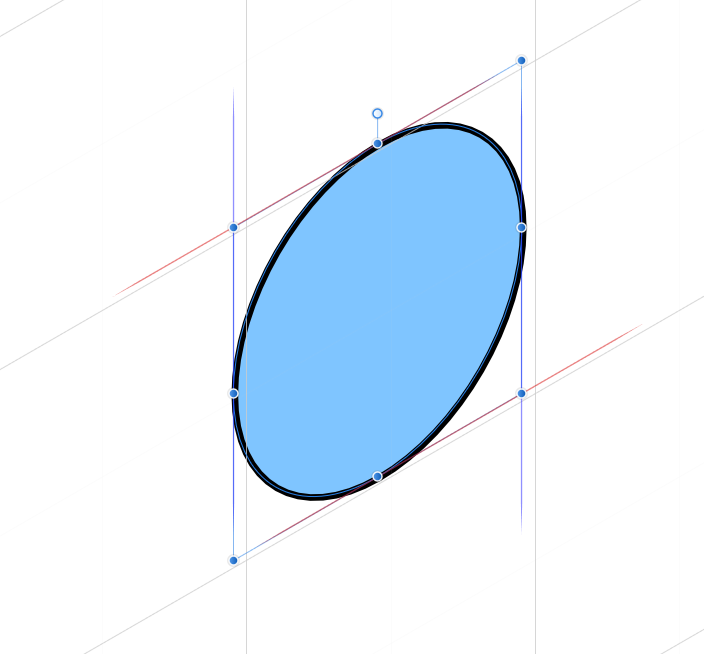
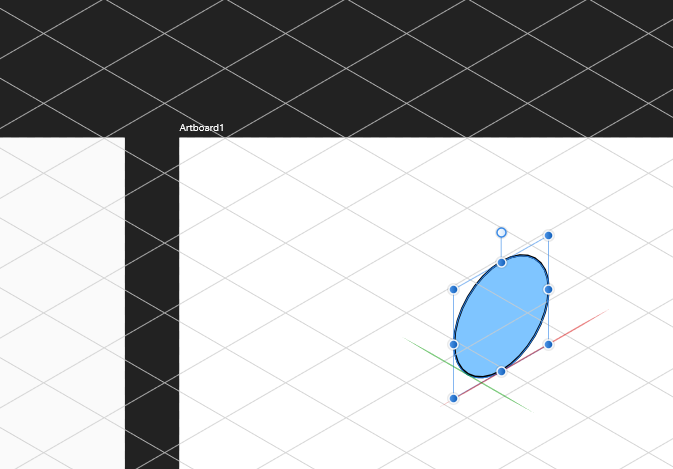
 Sorry if this has been discussed before. As a "traditional" technical illustrator, i.e. I learned on a drawing board, I am confused about how the isometric tools are supposed to work. I understand the basics but am confused with the results. I am using a 15° x 15° dimetric here. Traditional illustration states that with an ON AXIS ellipse the minor axis should be at a 15° angle (parallel with the drawing plane) with the major axis perpendicular to the minor axis. When I use the isometric tool this does not happen. (see the attachment please). There is some skewing or somewhat perspective type of adjustments being made here that is not making sense to me. Perhaps there is someone out there with a similar background as myself that could please explain to me the expectation of this tool? Note: In the attached example the image on the right started as a 2D image, I then used the Fit to plane command to create the final position.
-
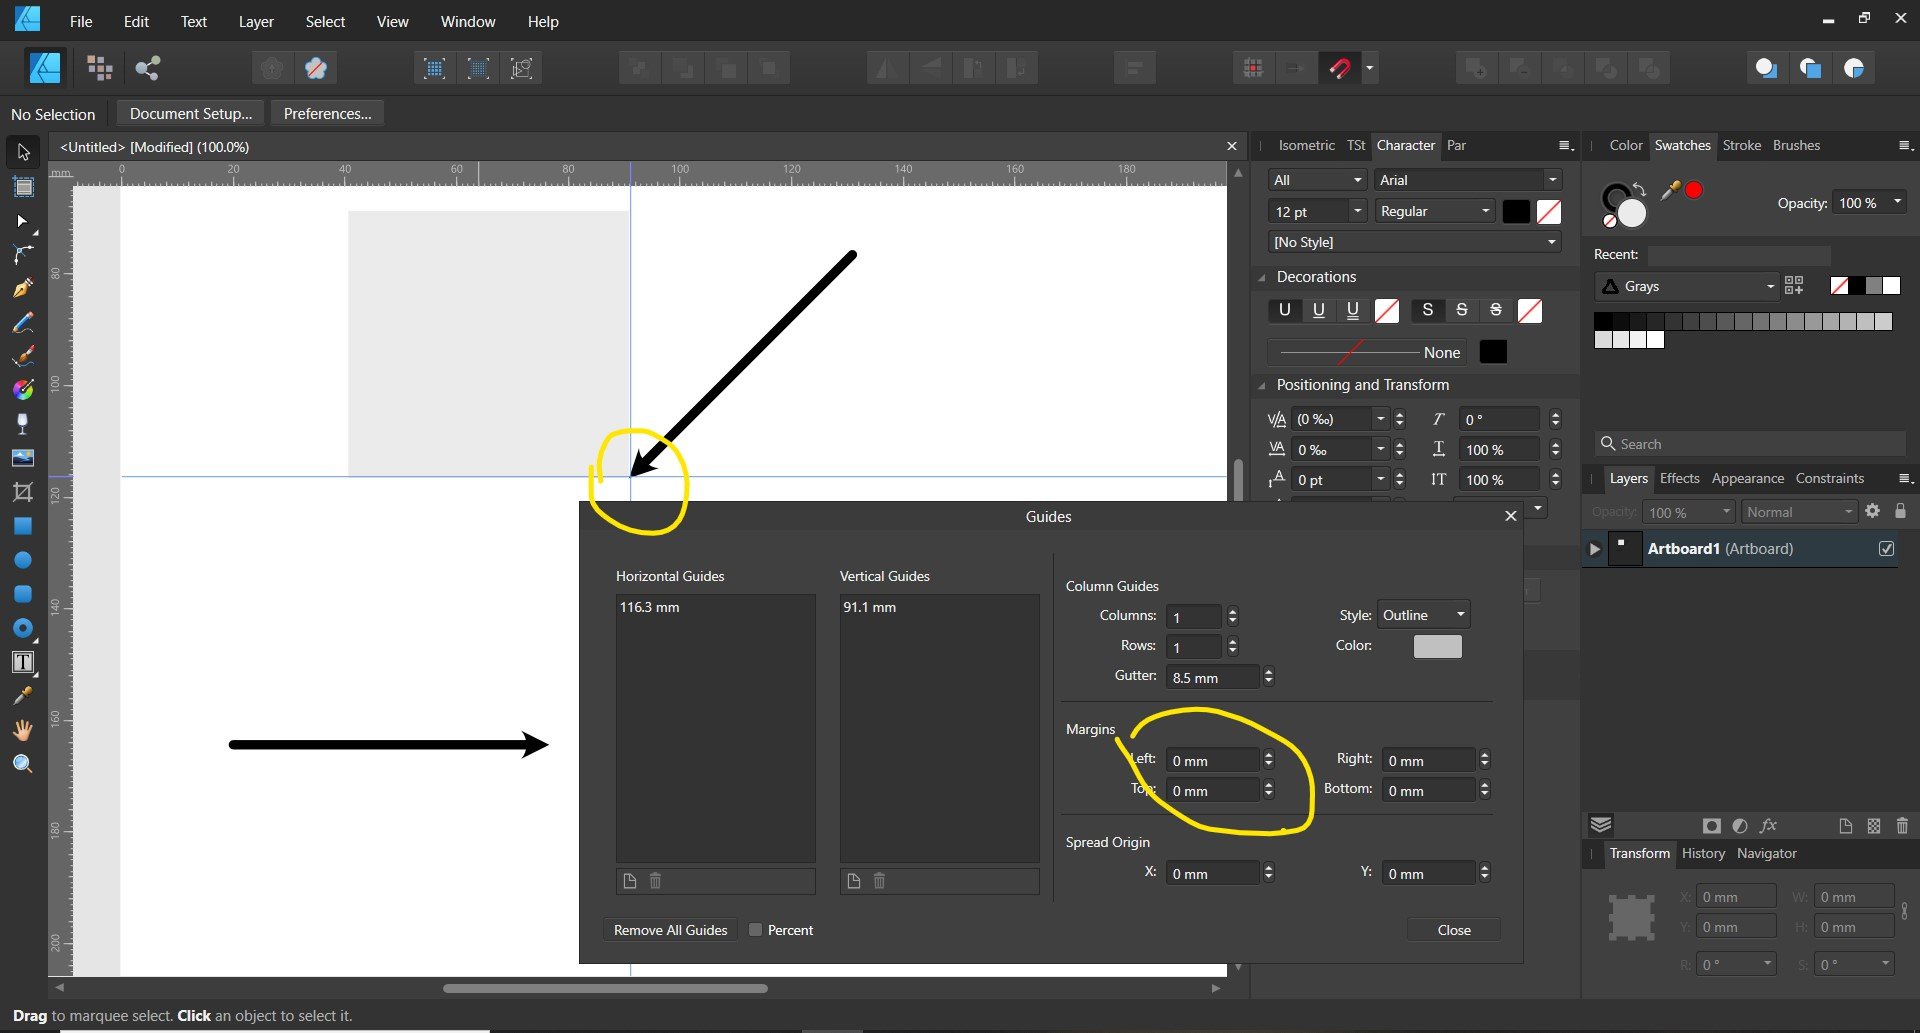
 I cannot set a margin when I open my artboard, I have to set it prior when I create a document. Plus, I cannot right-click to delete, duplicate, power-duplicate a guide. Please fix this bug
-
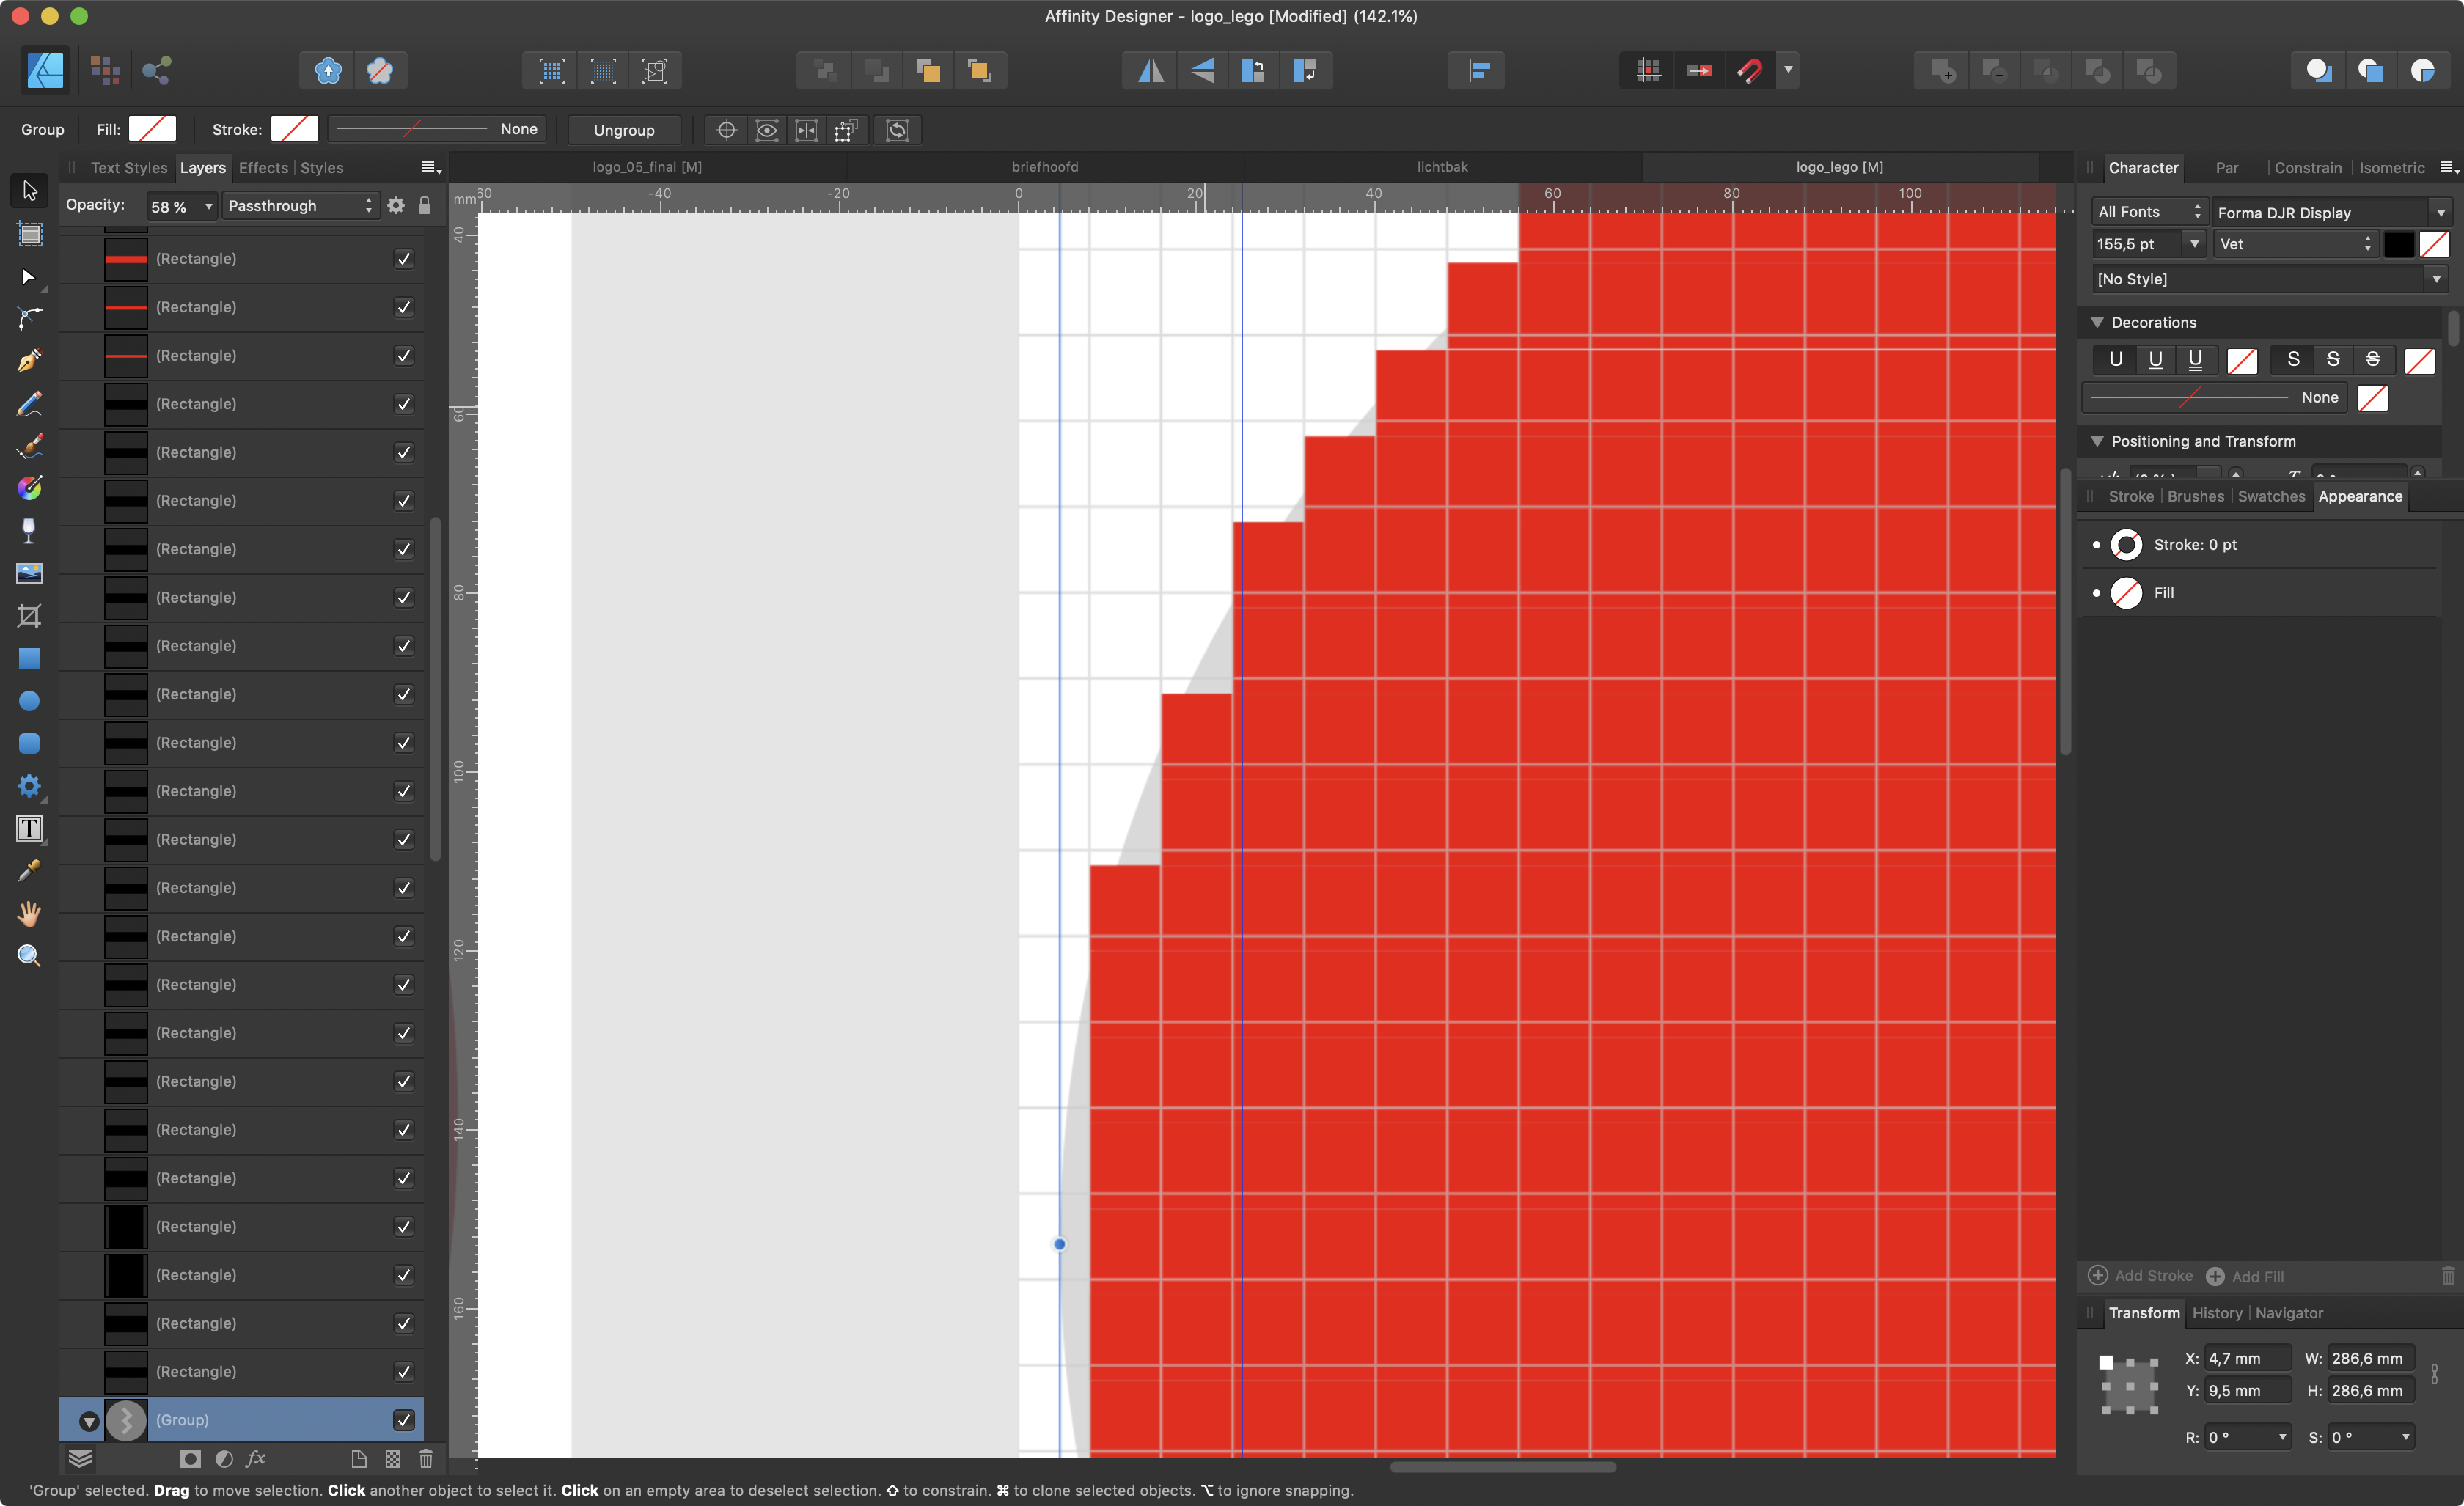
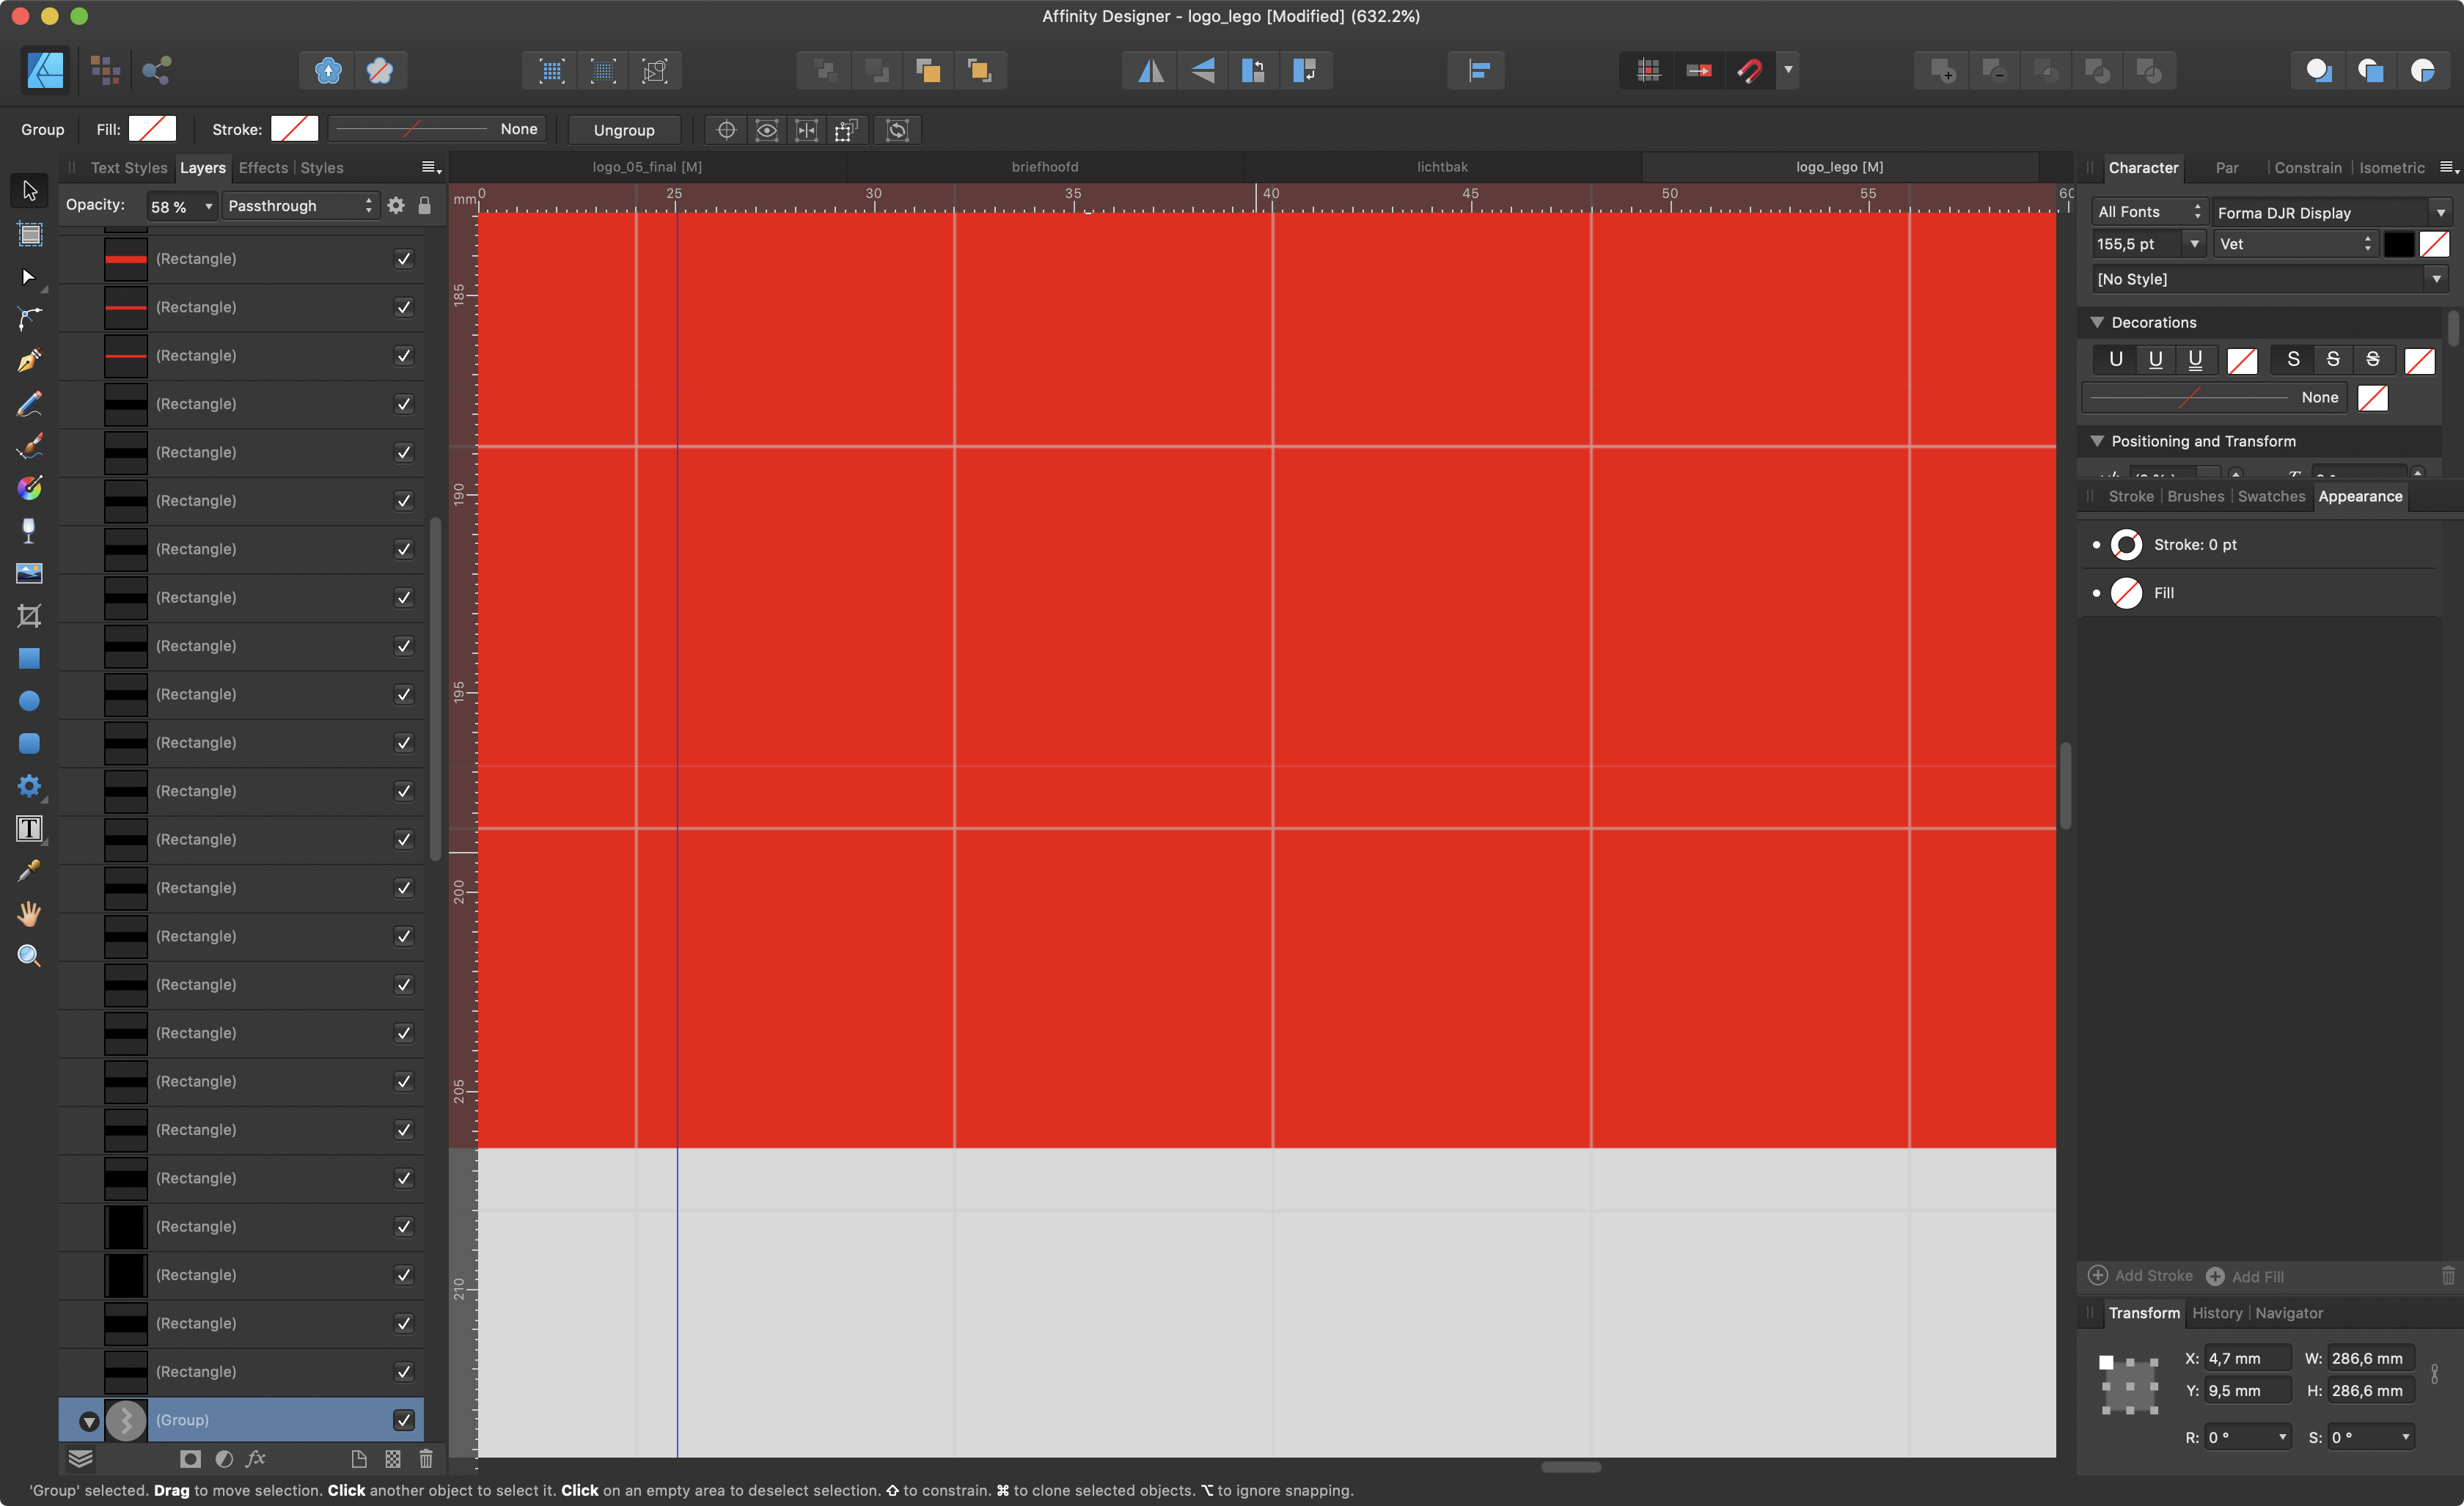
In affinty designer the grid is moving all over the place. In some cases it is displayed right in mos cases it is not. When scrolling or zooming the grid lines appear on the wrong place. See screenshots, all the 'blocks' are aligned to the grid, all screenshots from the same (unaltered) document. Only one is right. Thanks, Dries
-
 Is it possible to export the grid lines generated by the grid manager without having to manually place lines on each and every segment of it?
- 4 replies
-
- 1
-

-
- affinity designer
- grid
- (and 1 more)
-

Grid snapping doesn't match the displayed grid
sirojuntle posted a topic in V1 Bugs found on Windows
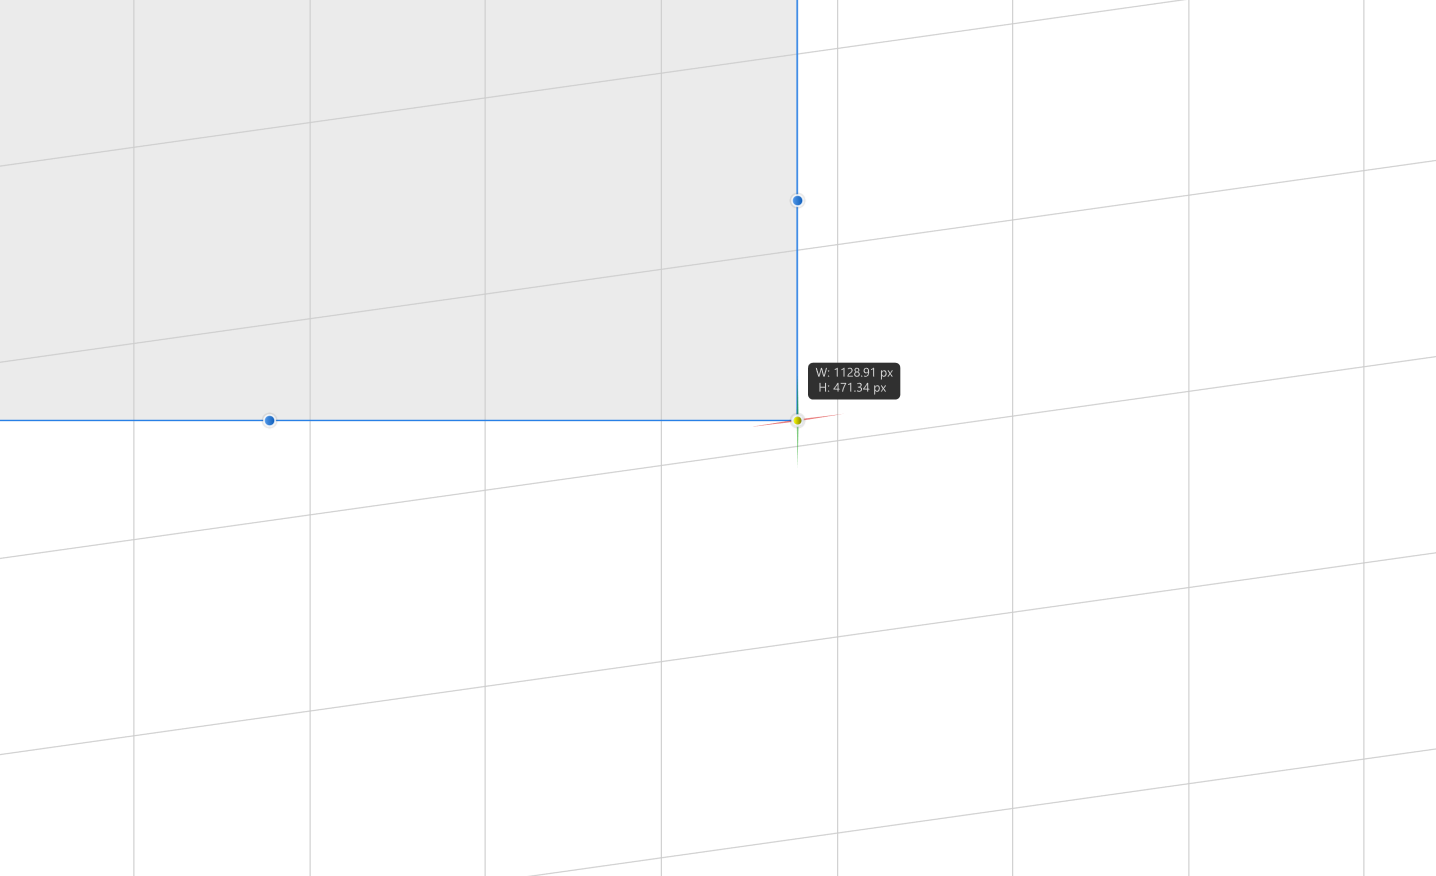
If the displayed grid axis doesn't match with the artboard 0,0 coordinates, so the snapping helper doesn't match with the displayed grid, but with some invisible grid supposedly matching the artboard 0,0 coord. Attached files will illustrate the issue better. Original topic created here, but I'm considering a bug:
-
edit: Affinity Designer on Desktop (Windows) /edited The objects are snapping, but with an offset in relation of the real grid. Attached image will illustrate it better. I tested with new documents it works fine, but in the current one which I'm working with, it has broke. There is someway to reset it? I'm working with multiple artboards, if it is relevant. I could find this case on the forum, Thanks
-
The snapping works fine and corrects itself to 0,0 of the artboard, but the visual grid doesn't transform. Added some pics for clarification
-
 I want to export my results with grid or guide line. Are you under development or already having that functions? In detail, In Affinity designer, grid and guideline managers exist. Therefore, I want my illustration export png or other file with grid and guideline. So, this maximizes my client's understanding of the design configuration of my illustrations.
-
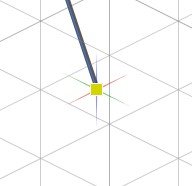
Hello, i have been playing a lot with grid manager lately. but i couldn't figure out, if i create a simple grid, how can i keep only one directional lines. here i am NOT talking about dividing the complete art board into "some number" of rows and column. i want unidirectional lines "either horizontal or vertical" with a provided space "custom space, lets say 88px" is there any way to achieve it right now? if not, any workaround or feature request would be greatly appreciated how can i create lines like in this pic ...
-
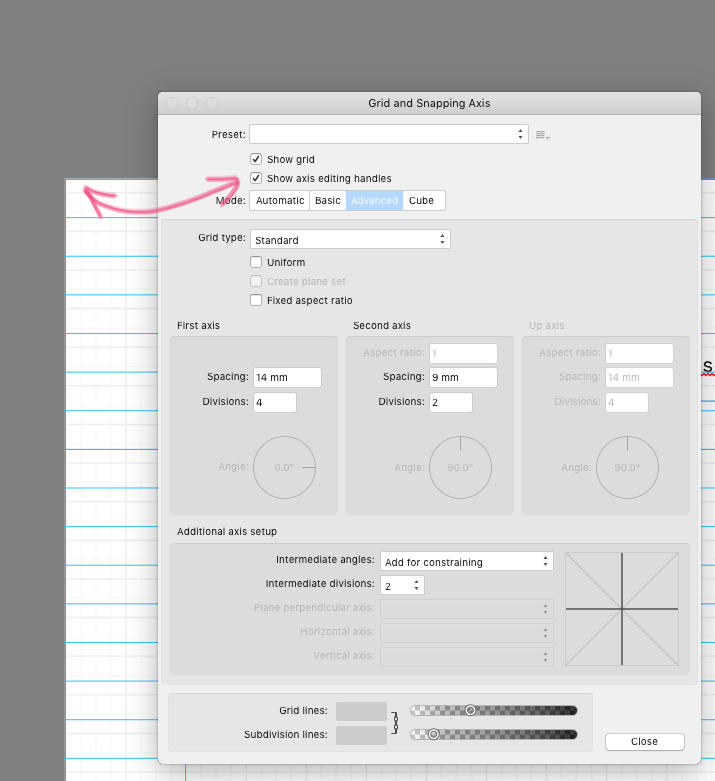
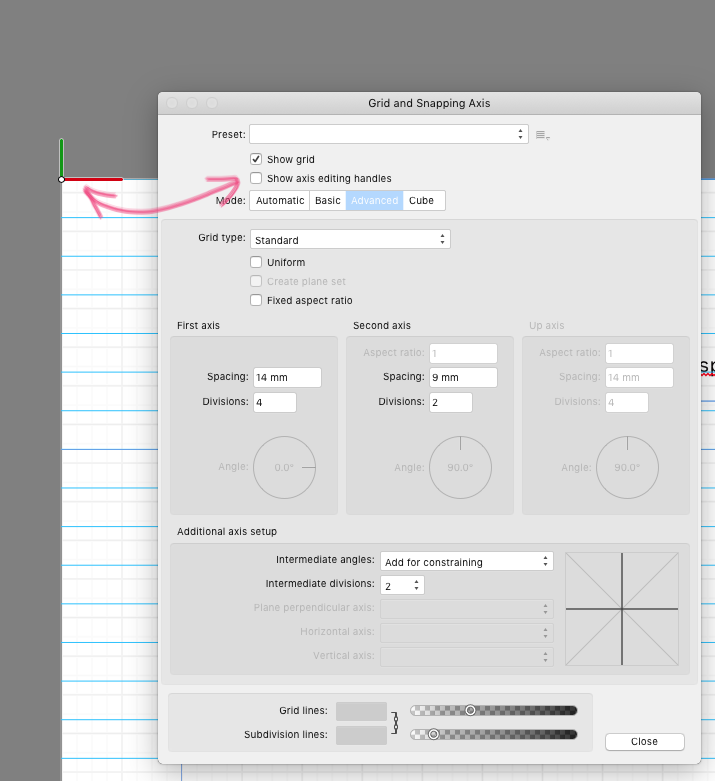
Axis editing handles are displayed opposite from what is chosen (Publisher v1.7.1). See attached images. When 'Show axis editing handles' is checked -- the handles are not there. When 'Show axis editing handles' is unchecked -- handles are visible. Expected behaviour would be the opposite, of course. Also, one can notice that the grid (gray) is off, not aligned with the handle or page corner. That is another issue, always happening here when non-uniform grids are used, but already reported elsewhere. Perhaps this issue is sorted out in the newest beta? I did not have time to check...
-
 Affinity Designer already has a grid and axis manager, to select diferente types of grids, like isometric, dimetric, …. Also it also has the isometric panel, that change planes to edit or fit objects in a given plane. A new option of grid could be developed to do perspective drawings, like on paper with One Point Perspective or Two Point Perspective, that uses vanishing points to create the illusion of depth in an drawing. And probably using a similar organization of isometric drawings. This use of the geometry in the grid and panel, would be very useful for to make this type of drawings. Now, we need to create lines to achieve this, and it is not practical or productive. Does anyone also finds this useful? Cheers
 -
 I've jus got this insane idea - what if making changes to isometric grid would affect already created iso objects? Want artwork to be at slighty different angle? Change iso grid properties, click "apply to all" or something and BAM - everything on isometric grid gets translated to reflect new projection.
 -
 I downloaded the trial version 30 minutes ago and already love it. I do have a question, when manipulating shapes by handles with snap to grid turned on I noticed the handles themselves don't snap to grid, is there a way to enable this or is it not implemented? I want to use the program for my CNC machine and some parts need to be extremely accurate and so I would really like the ability to have the handles snap to grid if possible. I am an Adobe refuge. Have Photoshop and Illustrator pre subscription but as I upgrade my Mac's OS they are loosing functionality and on the next upgrade I am told they both will cease to function.
 -
I just updated to v1.7.1 on iOS (I am running the iOS v13 beta2) and noticed a bug when zooming. Zoom / pan and rotate work fine until you turn on the grid and show it. After it is shown if you zoom out to full page and trying zoom in, the white background is clipped and it is hard to see the page. The first photo is zoomed way in and is fine. When I turn on the grid I get the second image when zoomed in. Turning off the show grid doesn’t fix it until you go back to the document browser then back into the document.
-
 Hi, I am having issues with grid snapping in isometric view with a second artboard Create a new document Type: Web, Page Preset WXGA (1280 x 800, 16:10), Create Artboard Checked. Enable Snapping, choose only Snap to Grid. In Isometric studio, click Modify Grid... Choose Preset: Isometric 64x32 Pixel Isometric (with Planes) In Isometric Studio, Current plane choose Top With the rectangle tool draw a rectangle. the rectangle snaps to the isometric gridlines, as expected. If Front or Side plane is chosen, and a rectangle is drawn, snap to those grids also works as expected. Choose the Artboard tool and click on Insert Artboard in the context menu. On the new artboard, repeat steps #3 to #6, except the drawn rectangle does not snap to the gridlines anymore. I have attached a sample file (see below the images) with the issue, created with the above steps. Can anyone confirm they are getting the same behaviour? Second Artboard Iso Grid Snap.afdesign
-
 I'm having some trouble and am a little confused due to how rulers and grids work. It seems the background grid and some rulers only appear when i select the artboard itself... I'd like to also have the grid and rulers visible when I select an object within this artboard. I've heard of the fact there are some guide managers which can be applied to the artboard or the document itself, but I'm not sure if this is what will solve my problem. My problem may have been occurred after duplicating an artboard. Any help would be appreciated.
 -
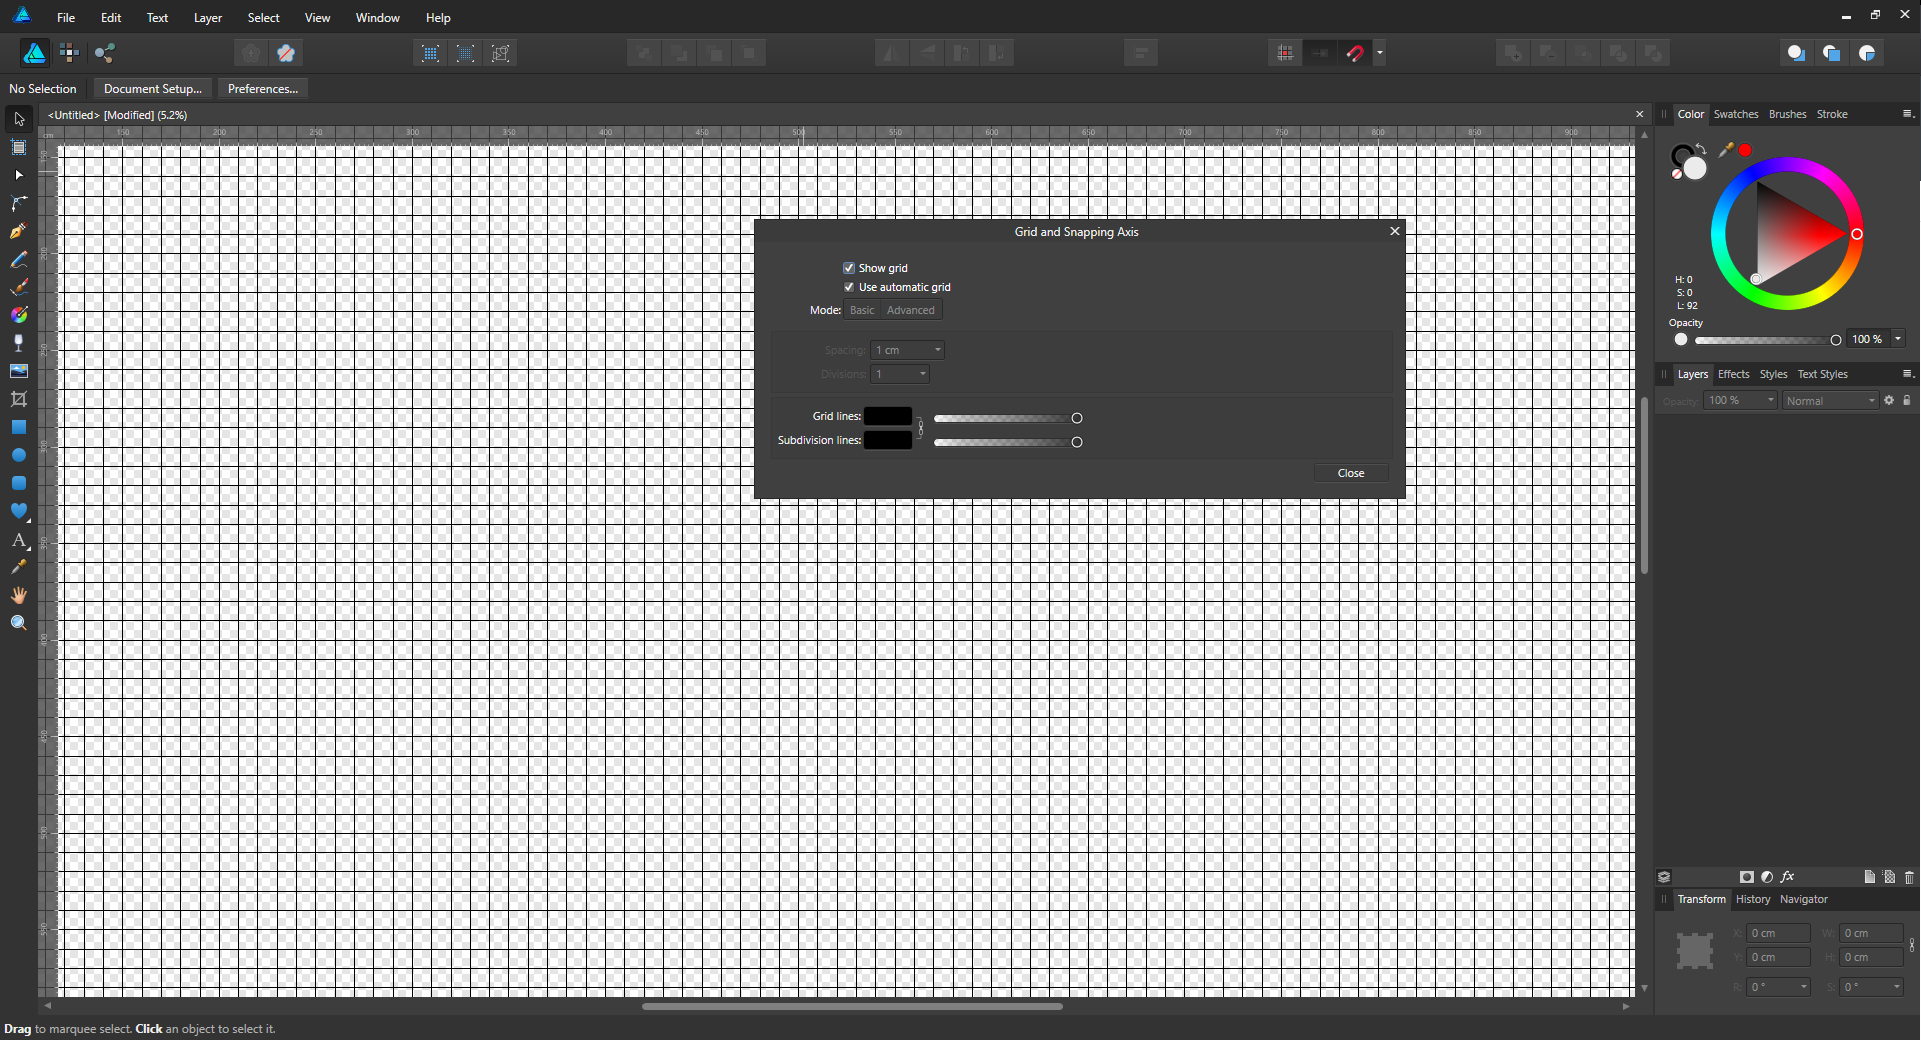
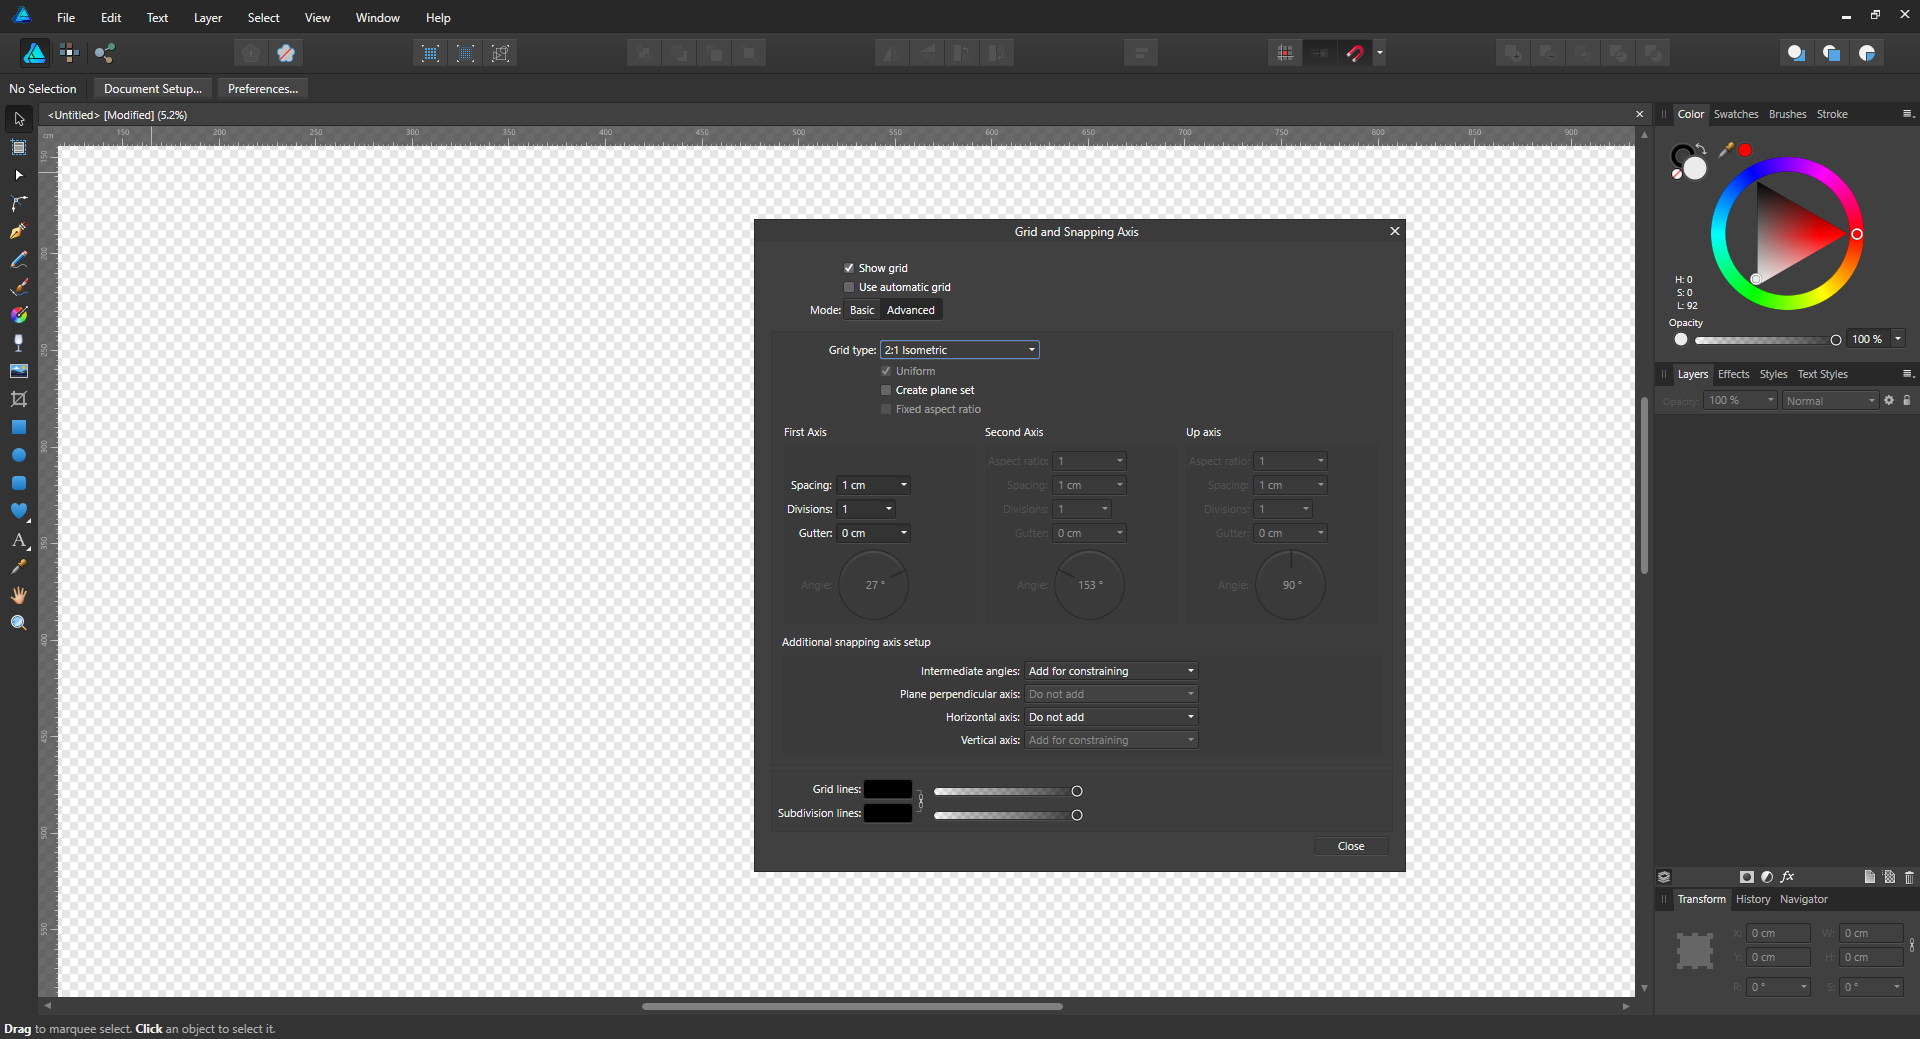
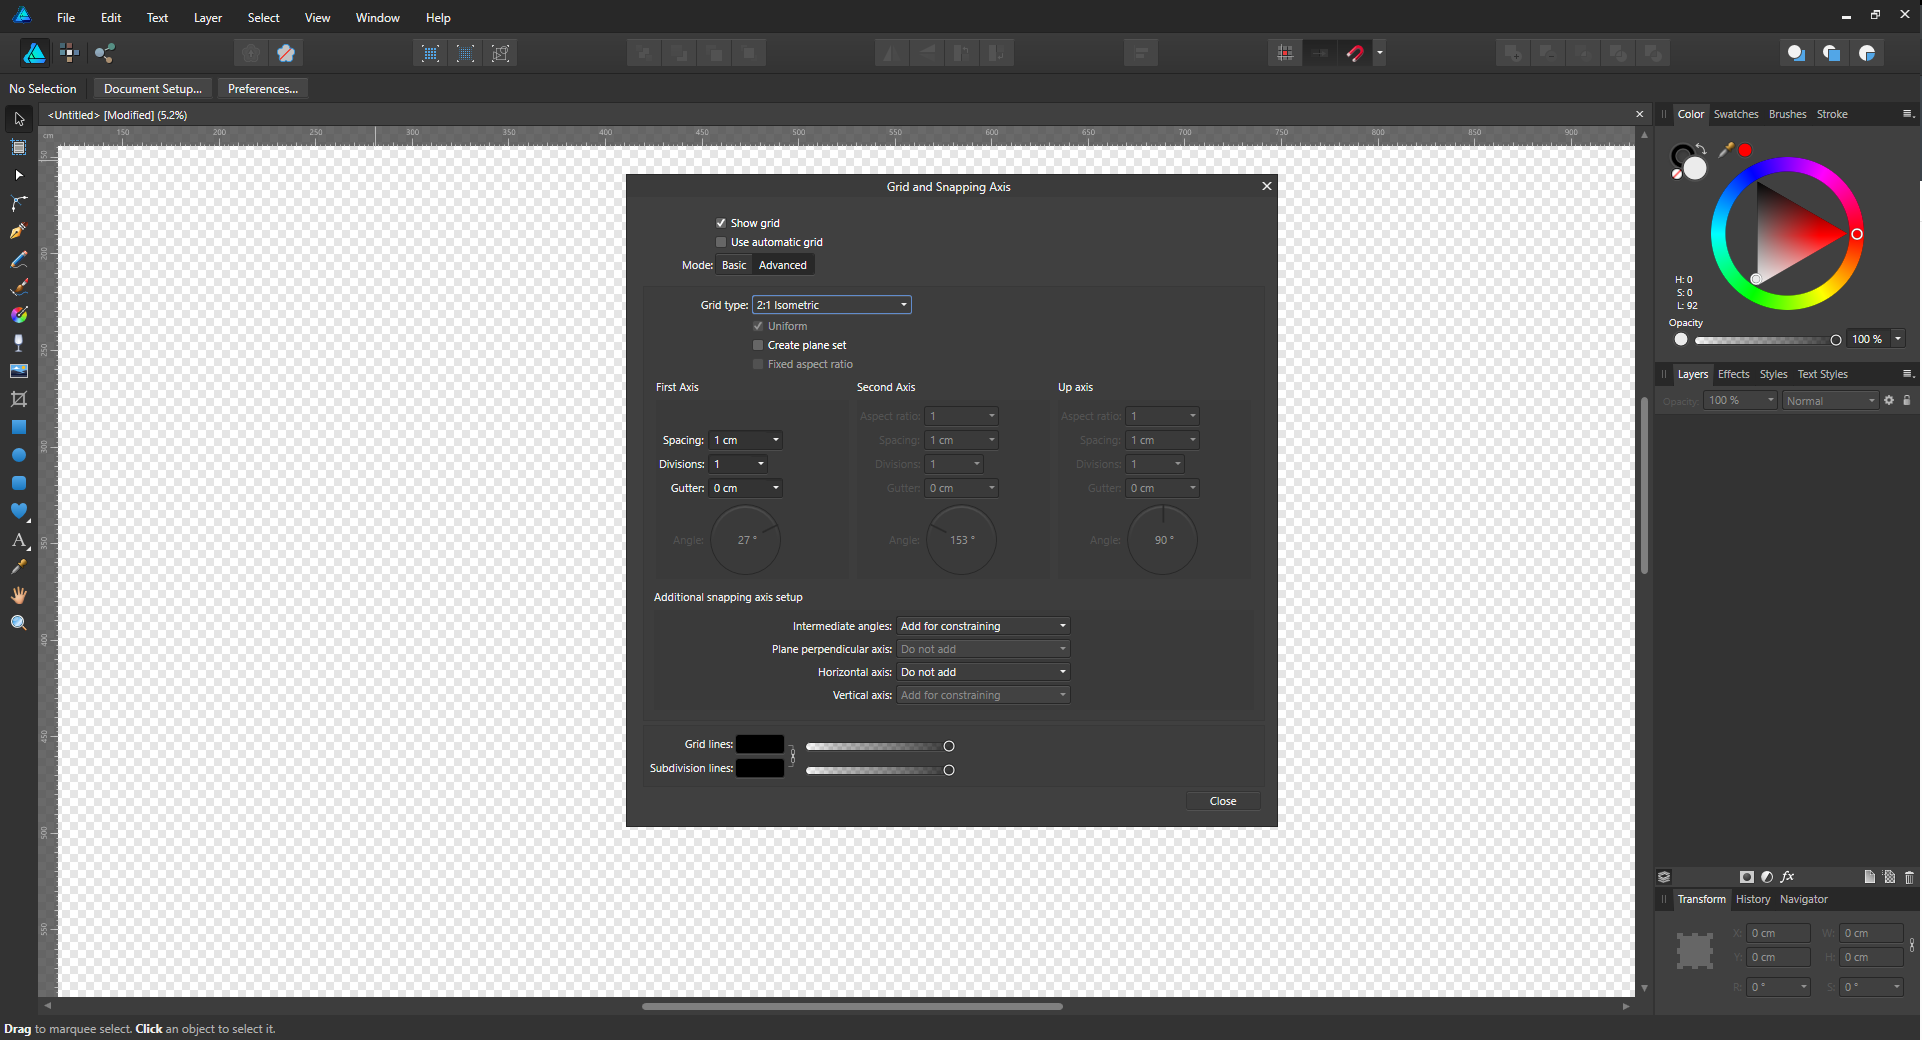
 Greetings Community! I have to work on an isometric design. I've learned that AD offers custom grid lines, so I wanted to explore these. When I go to "View" --> "Grid and Axis Manager..." and have "Show grid" & "Use automatic grid" checked, I see the standart grid being visible. Nice. However, when I uncheck "Use automatic grid" and choose "Mode: Advanced", the grid goes invisible and no matter what grid type I select, I don't get back any grid / visual feedback. I followed a youtuber doing this and he got instant results, based on the Grid type. I can't see why it wouldn't work for me. What did I miss? Cheers!