Search the Community
Showing results for tags 'Fill'.
-
 I'd like the inside the map outline to be yellow. How do I do that? I'm working in Designer.
-
 I searched the site and faq without luck. I have an outlined font that I want to fill the whitespace with a gradient. I tried converting the typed text to curves and it appears to have made a single bezier line through the entire glyph (take a C and put a line on the surrounding the inner continuing to the outer edge and then close the C to an O keeping the lines). So, it's treating the text strokes as fill-able but not the whitespace. The attached how do I fill outlineed font with a gradient.pdf shows it well Is there an way without converting to bitmaps (yuck)? Thanks❗️
 -
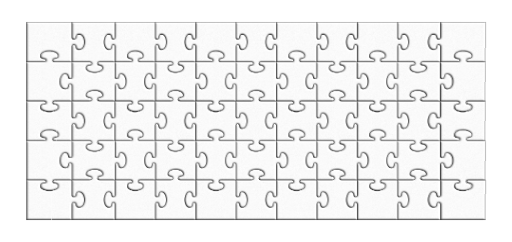
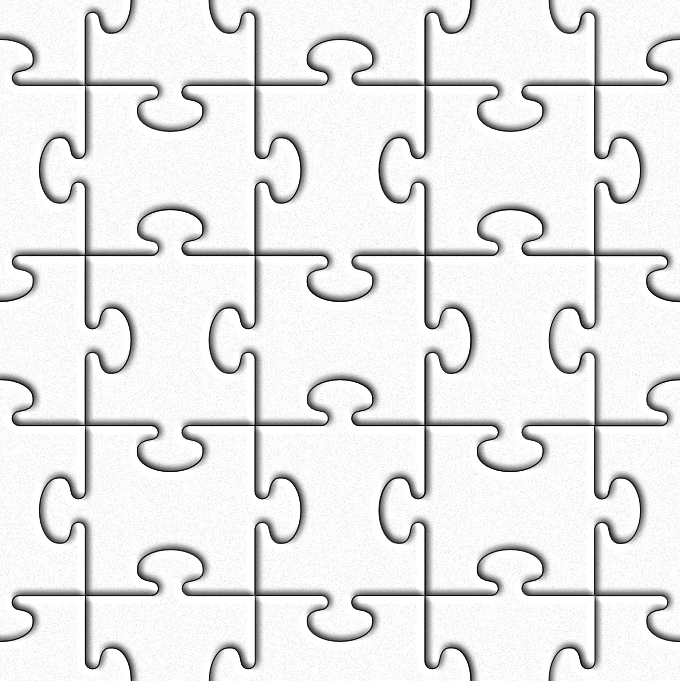
I have made a seamless puzzle pattern, brushes and styles. Enjoy, like and share.. :) Source design: puzzle pattern.afdesign Brushes: Top puzzle brush: Second from the top puzzle brush: Third from the top puzzle brush: Bottom puzzle brush: Zip puzzle brushes (afbrushes): Puzzle Brush.afbrushes.zip Puzzle style (Zip): puzzle.afstyles.zip Seamless Puzzle pattern fill: ---------------------------------------- Updated Tuesday, January 26, 2016 12:56 PM ----------------------------------------- Another puzzle source: puzzle pattern 2.afdesign --------------------------------------------------------------------------------------------------------------------------------------------- Best Regards, William Mabey Tuesday, January 26, 2016 10:46 AM Please share... ヅ
-
 Forgive me if this has already been answered. I looked but couldn't find the answer. Is it possible to do a tileable fill with Affinity Photo? I've seen references to doing it in designer but not photo. I did a bitmap fill using the gradient tool but it doesn't tile the bitmap, it just extends the edges which is not very useful (for me anyway). Thanks
 -
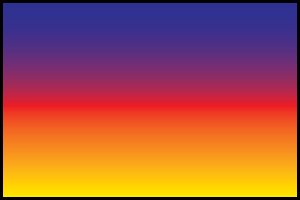
 Hi - I've been tinkering with Publisher and want to leave the current program I use, but am stuck on what's probably a simple solution. I'm trying to fill a rectangle and want the fill to transition horizontally like in the attachment, but I can only get it to vertically, blue on left, red in middle, yellow on right. I'm sure there's something very simple I'm missing, but I can't figure it out. In the program I currently use, there's an "angle" adjust to rotate the fill to any orientation I want. Thanks!
-
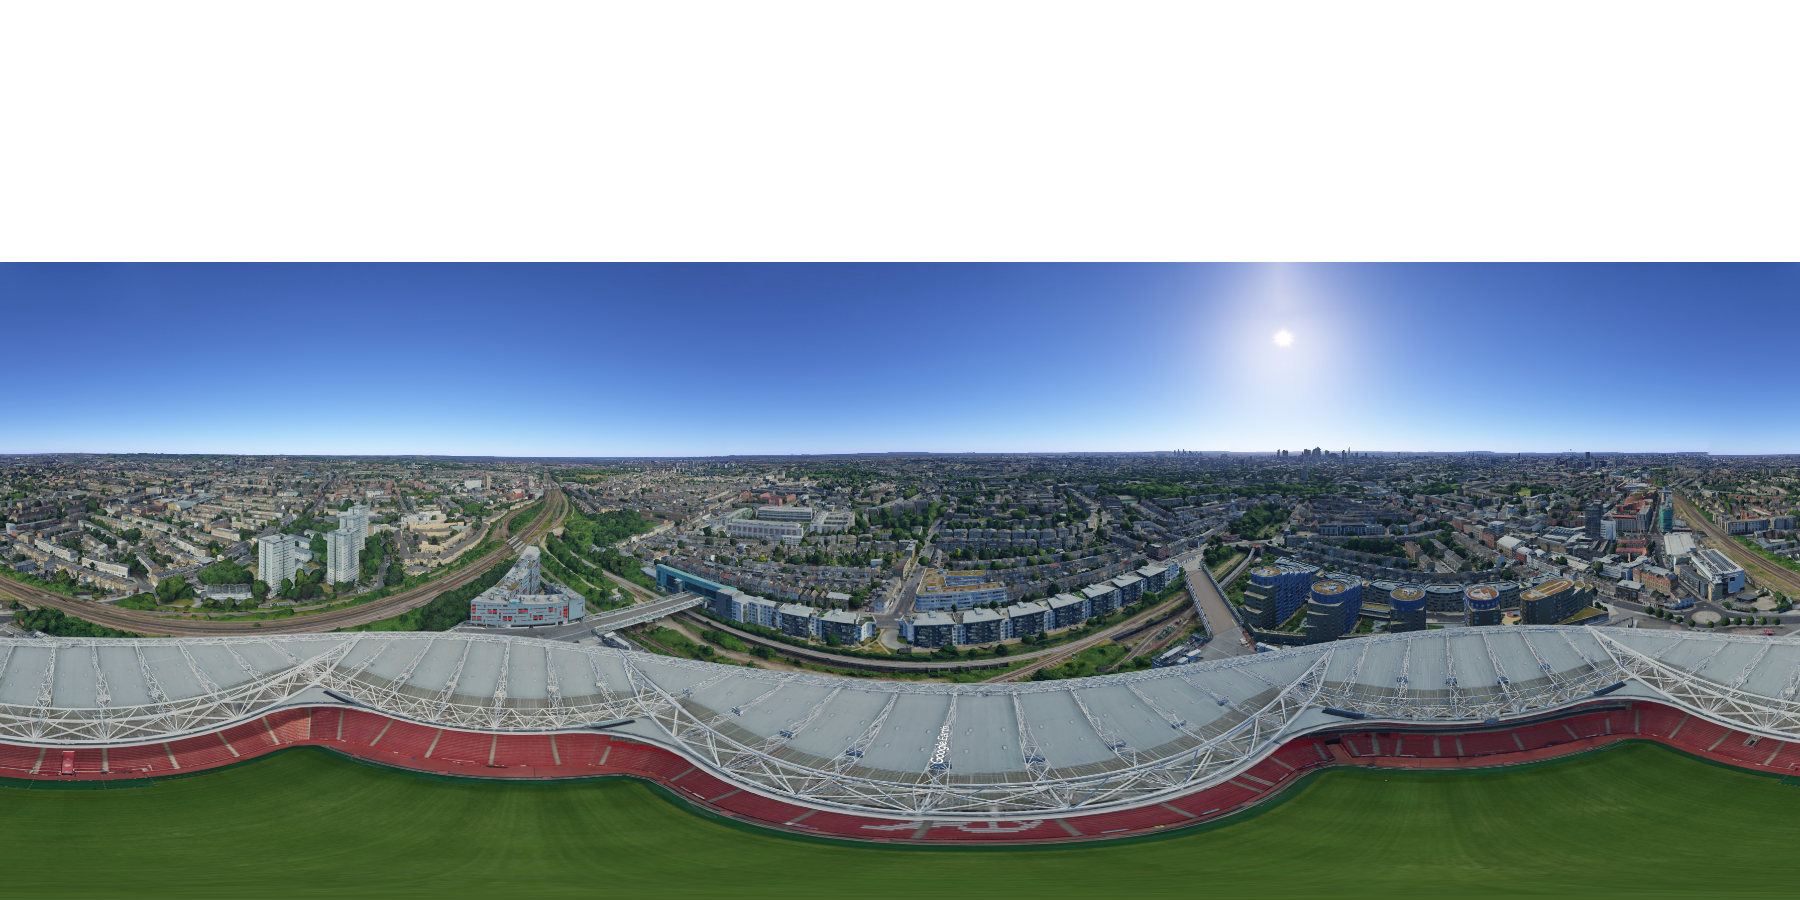
 I was wondering at how I'd be able to recreate the content aware fill (on photoshop) shown in this video (at 1:45). Does affinity have something like this? I've tried using the inpainting brush tool, but could not really achieve a good result on a panorama I'm working on with AP (attached).
-
Hello, an somebody tell me why when I try to fill a shape it fills outside of the lines? (Like in the image)
-
 After update to 1.7.2, Fill paint with transparent color doesn't work. (It works propery on 1.7.1, and this bug occurs on MacOS also.) I very often use this function, so I'm very discouraged. I degradee software version to 1.7.1 . I strongly want serif company to fix this bug.
-
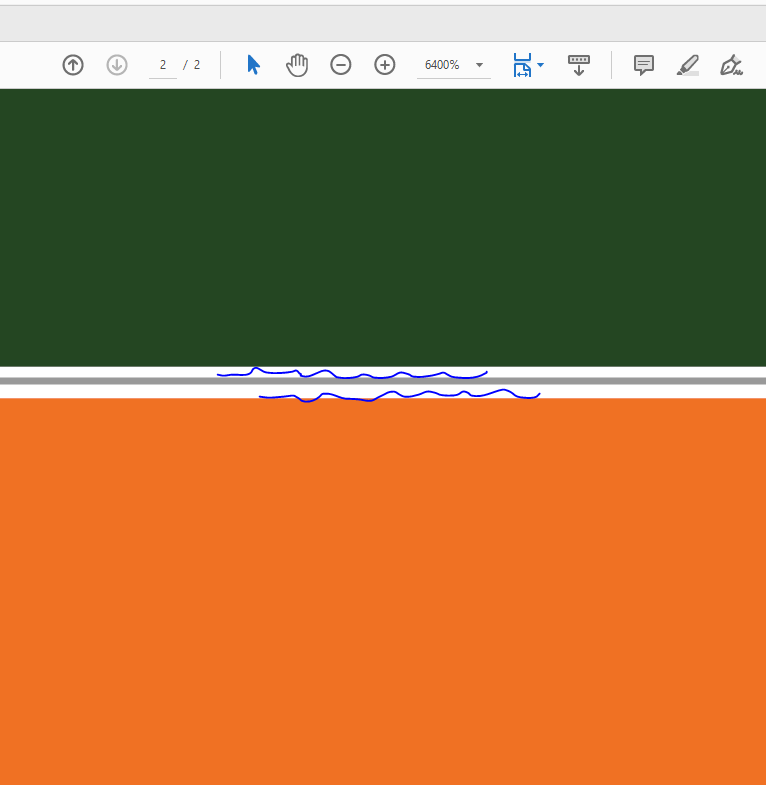
 Dear forum, I have an annyoing issue with using artboards in Affinity designer: In pixel mode, as well as in pdf exports, I get a very small, but noticeable white or light-coloured edge on my objects. This is only noticeable in affinity on zooms of 10000% but easily noticeable in pdfs on lower zoom levels (See scrawly annotated attachement). I already tried adjusting the contour, deselecting any effects, as well as playing around with edge or radius options. This for me makes artboards completely useless, as in print outputs (where I normally use them) this issue is fatal. I hope that anyone could suggest any hints! Thank you very much!
-
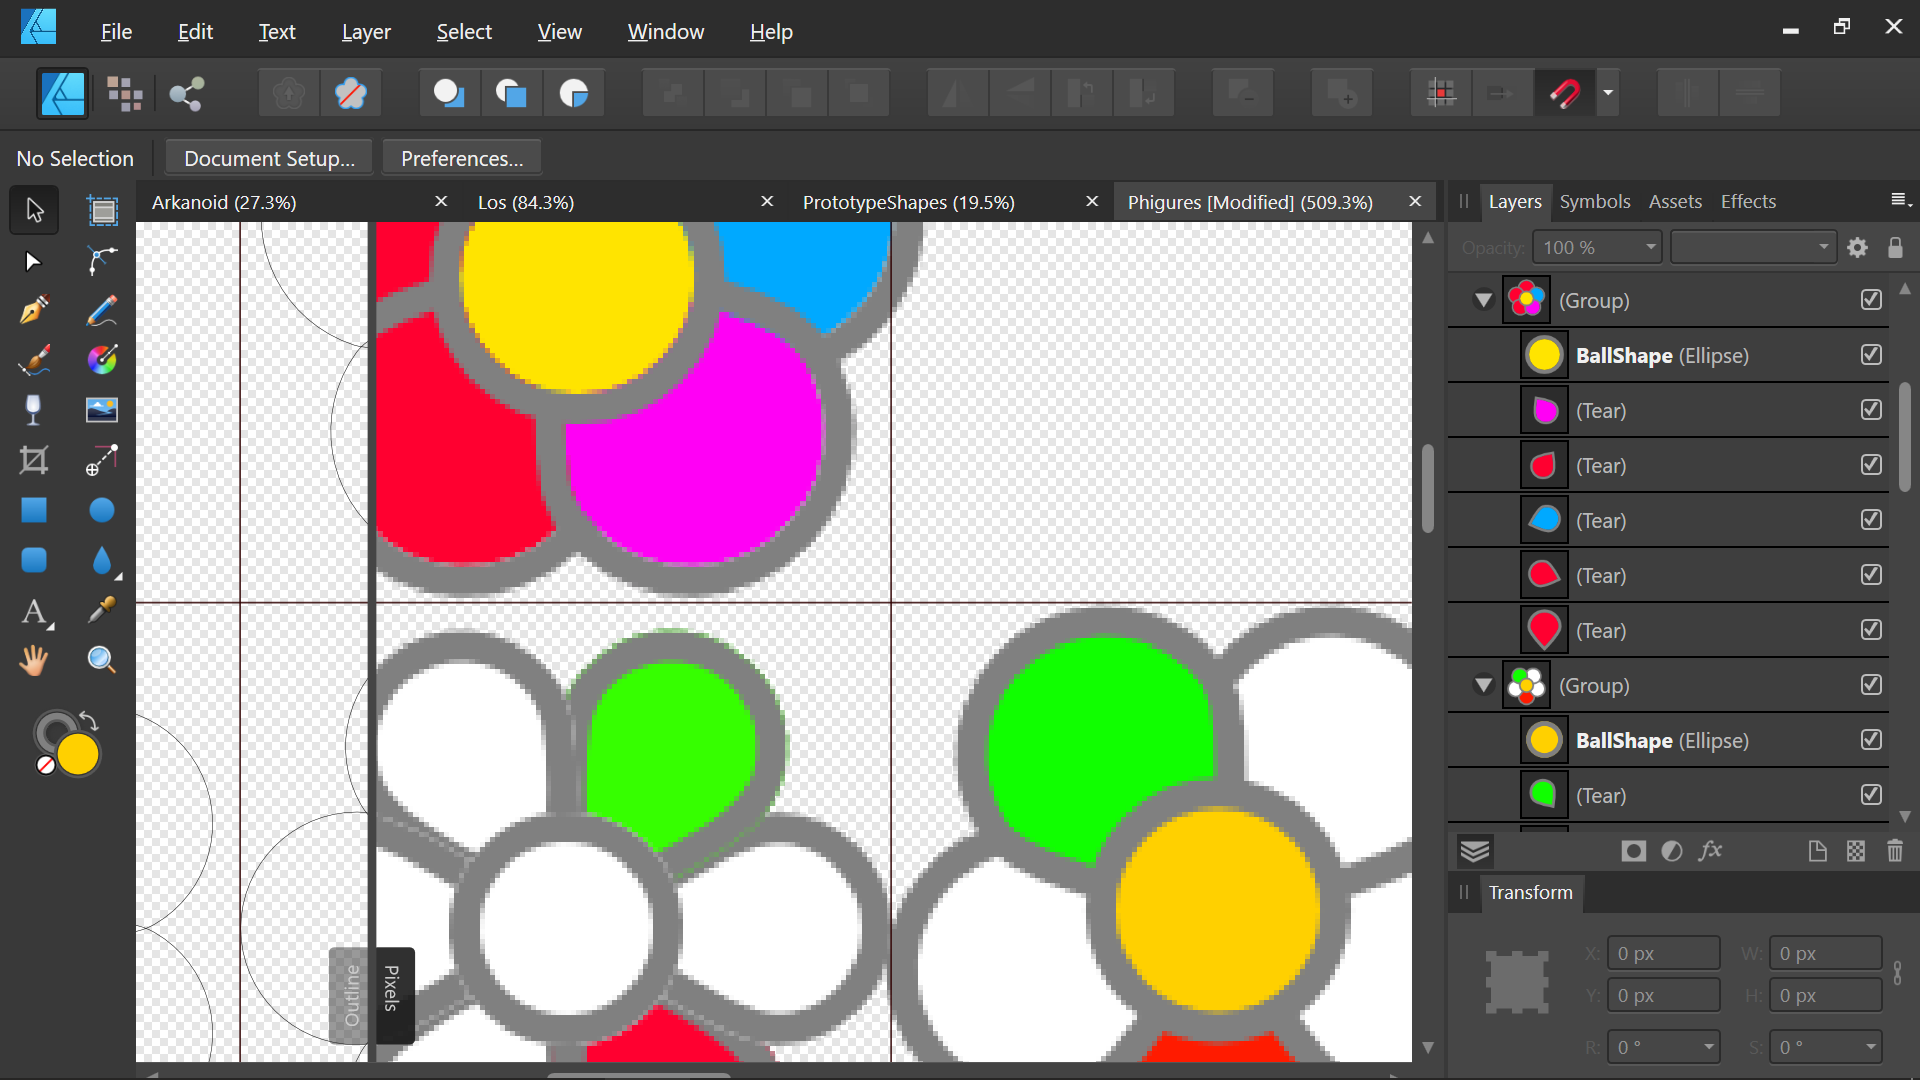
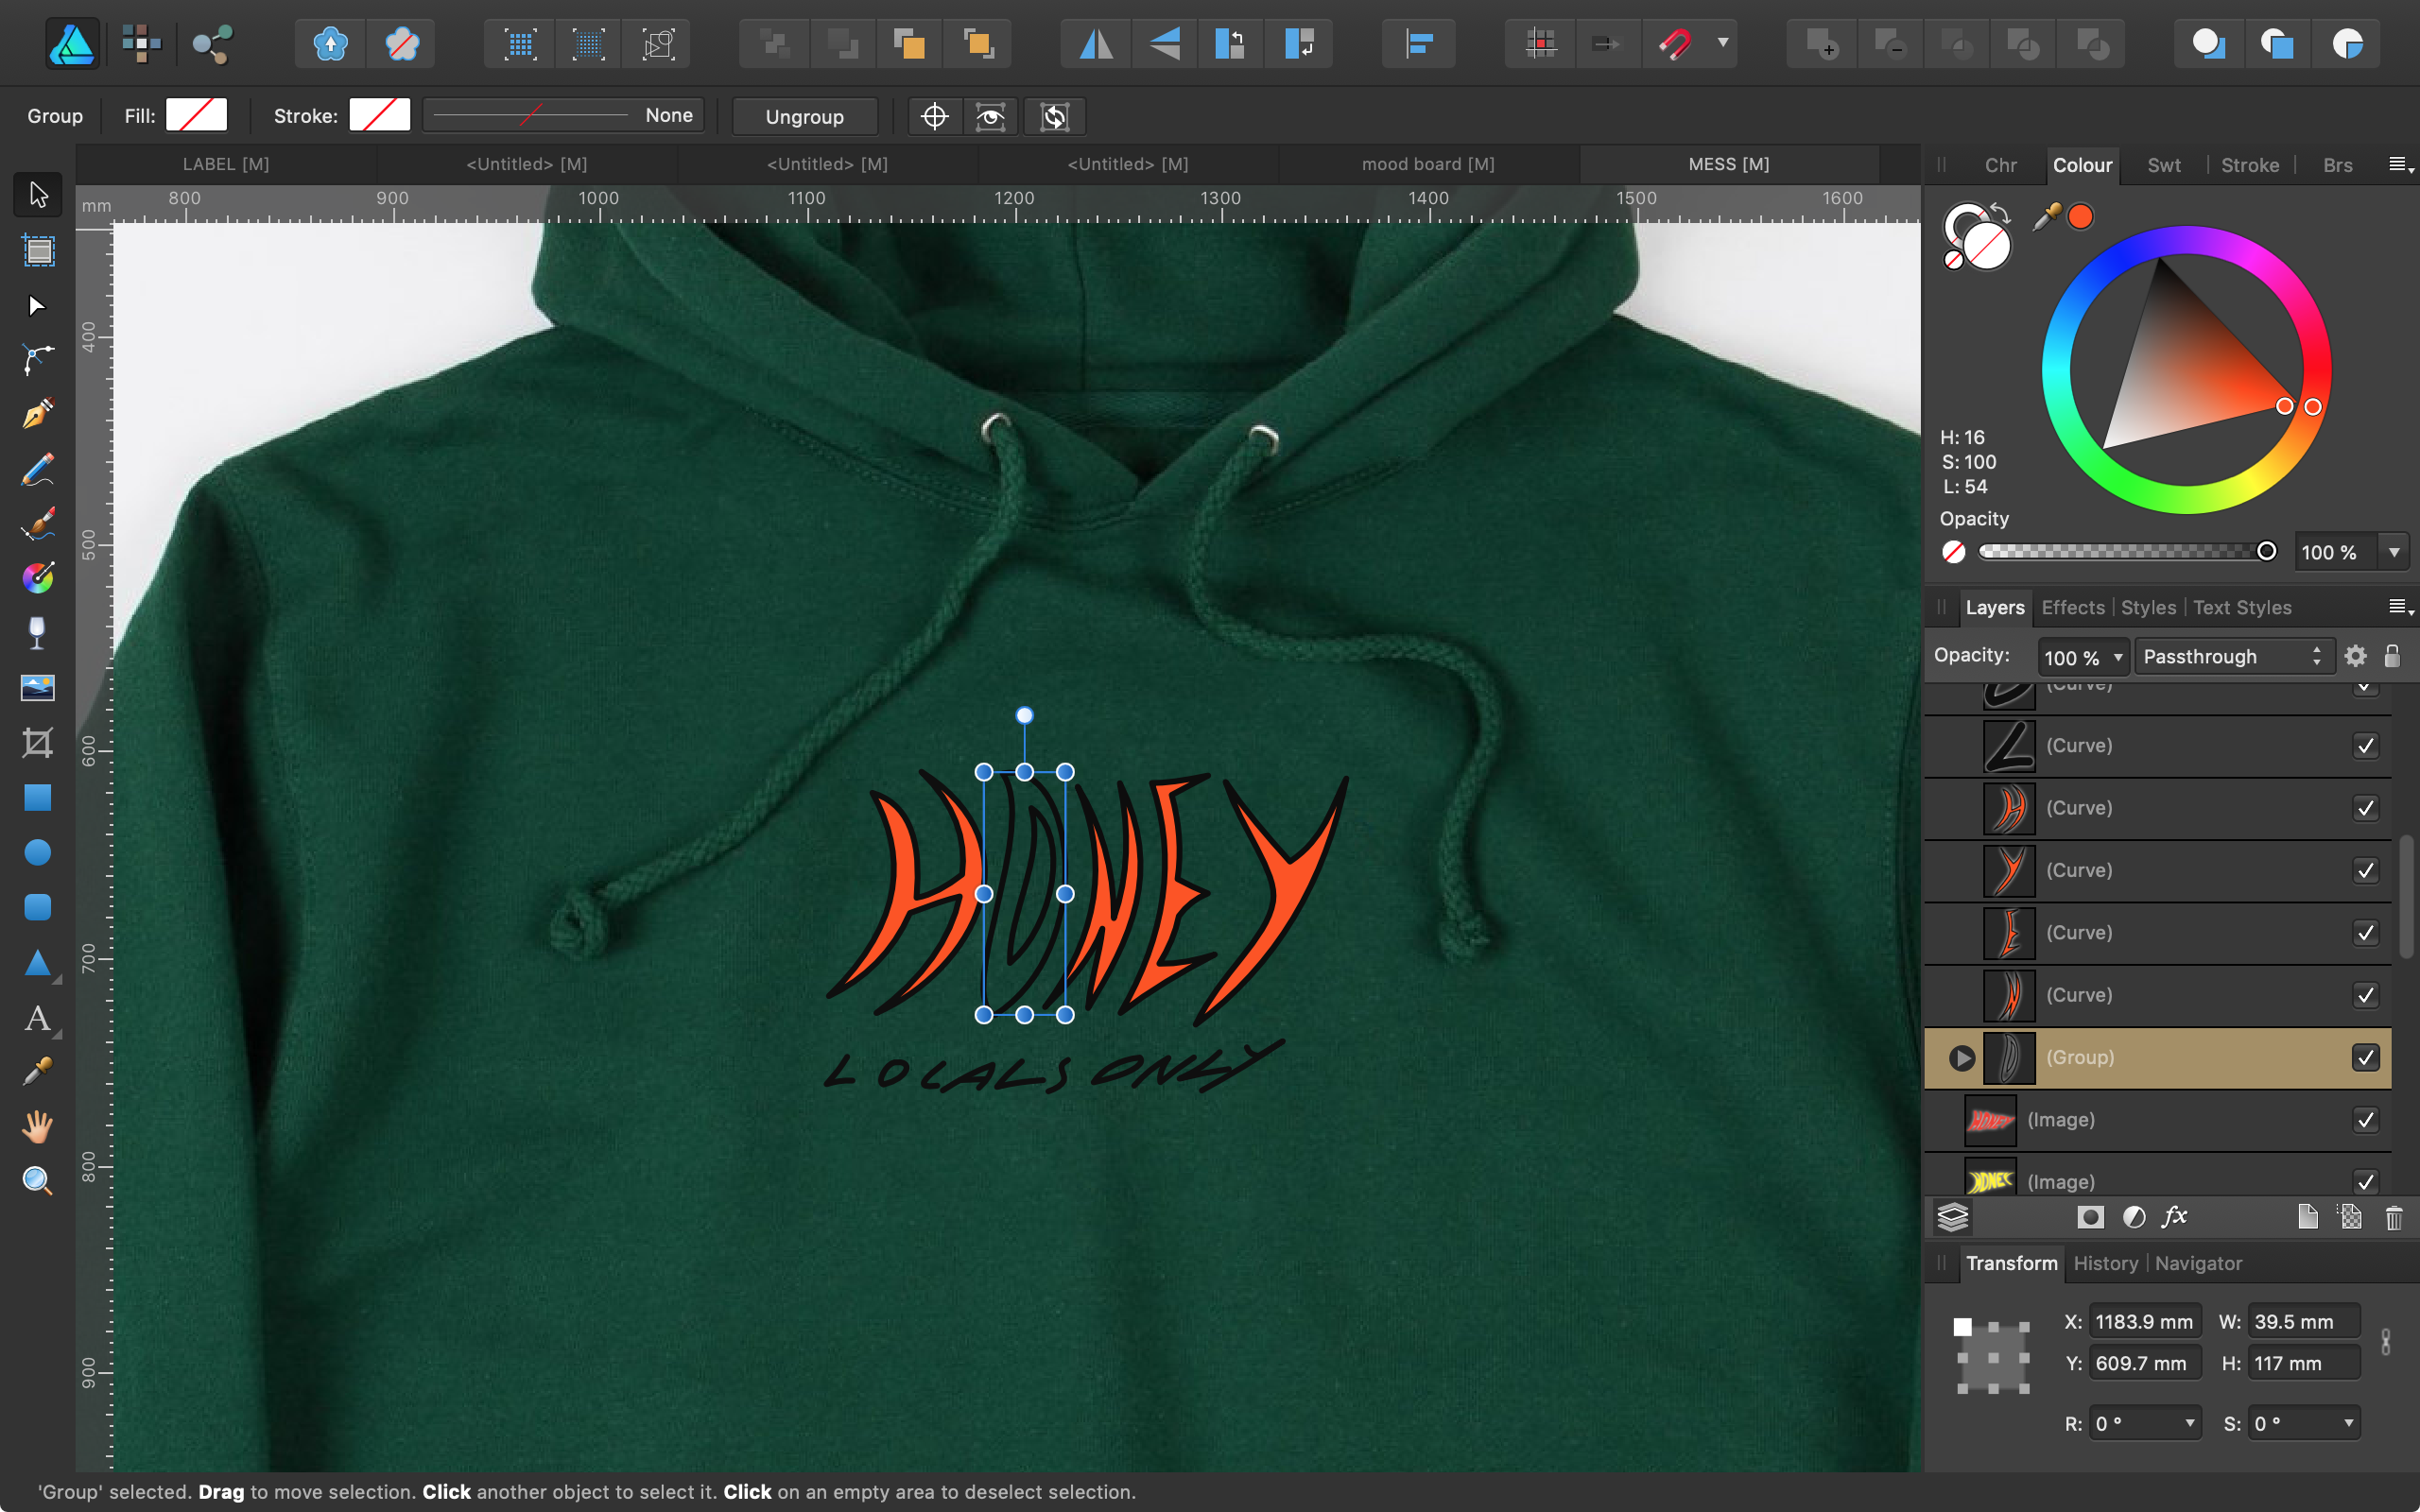
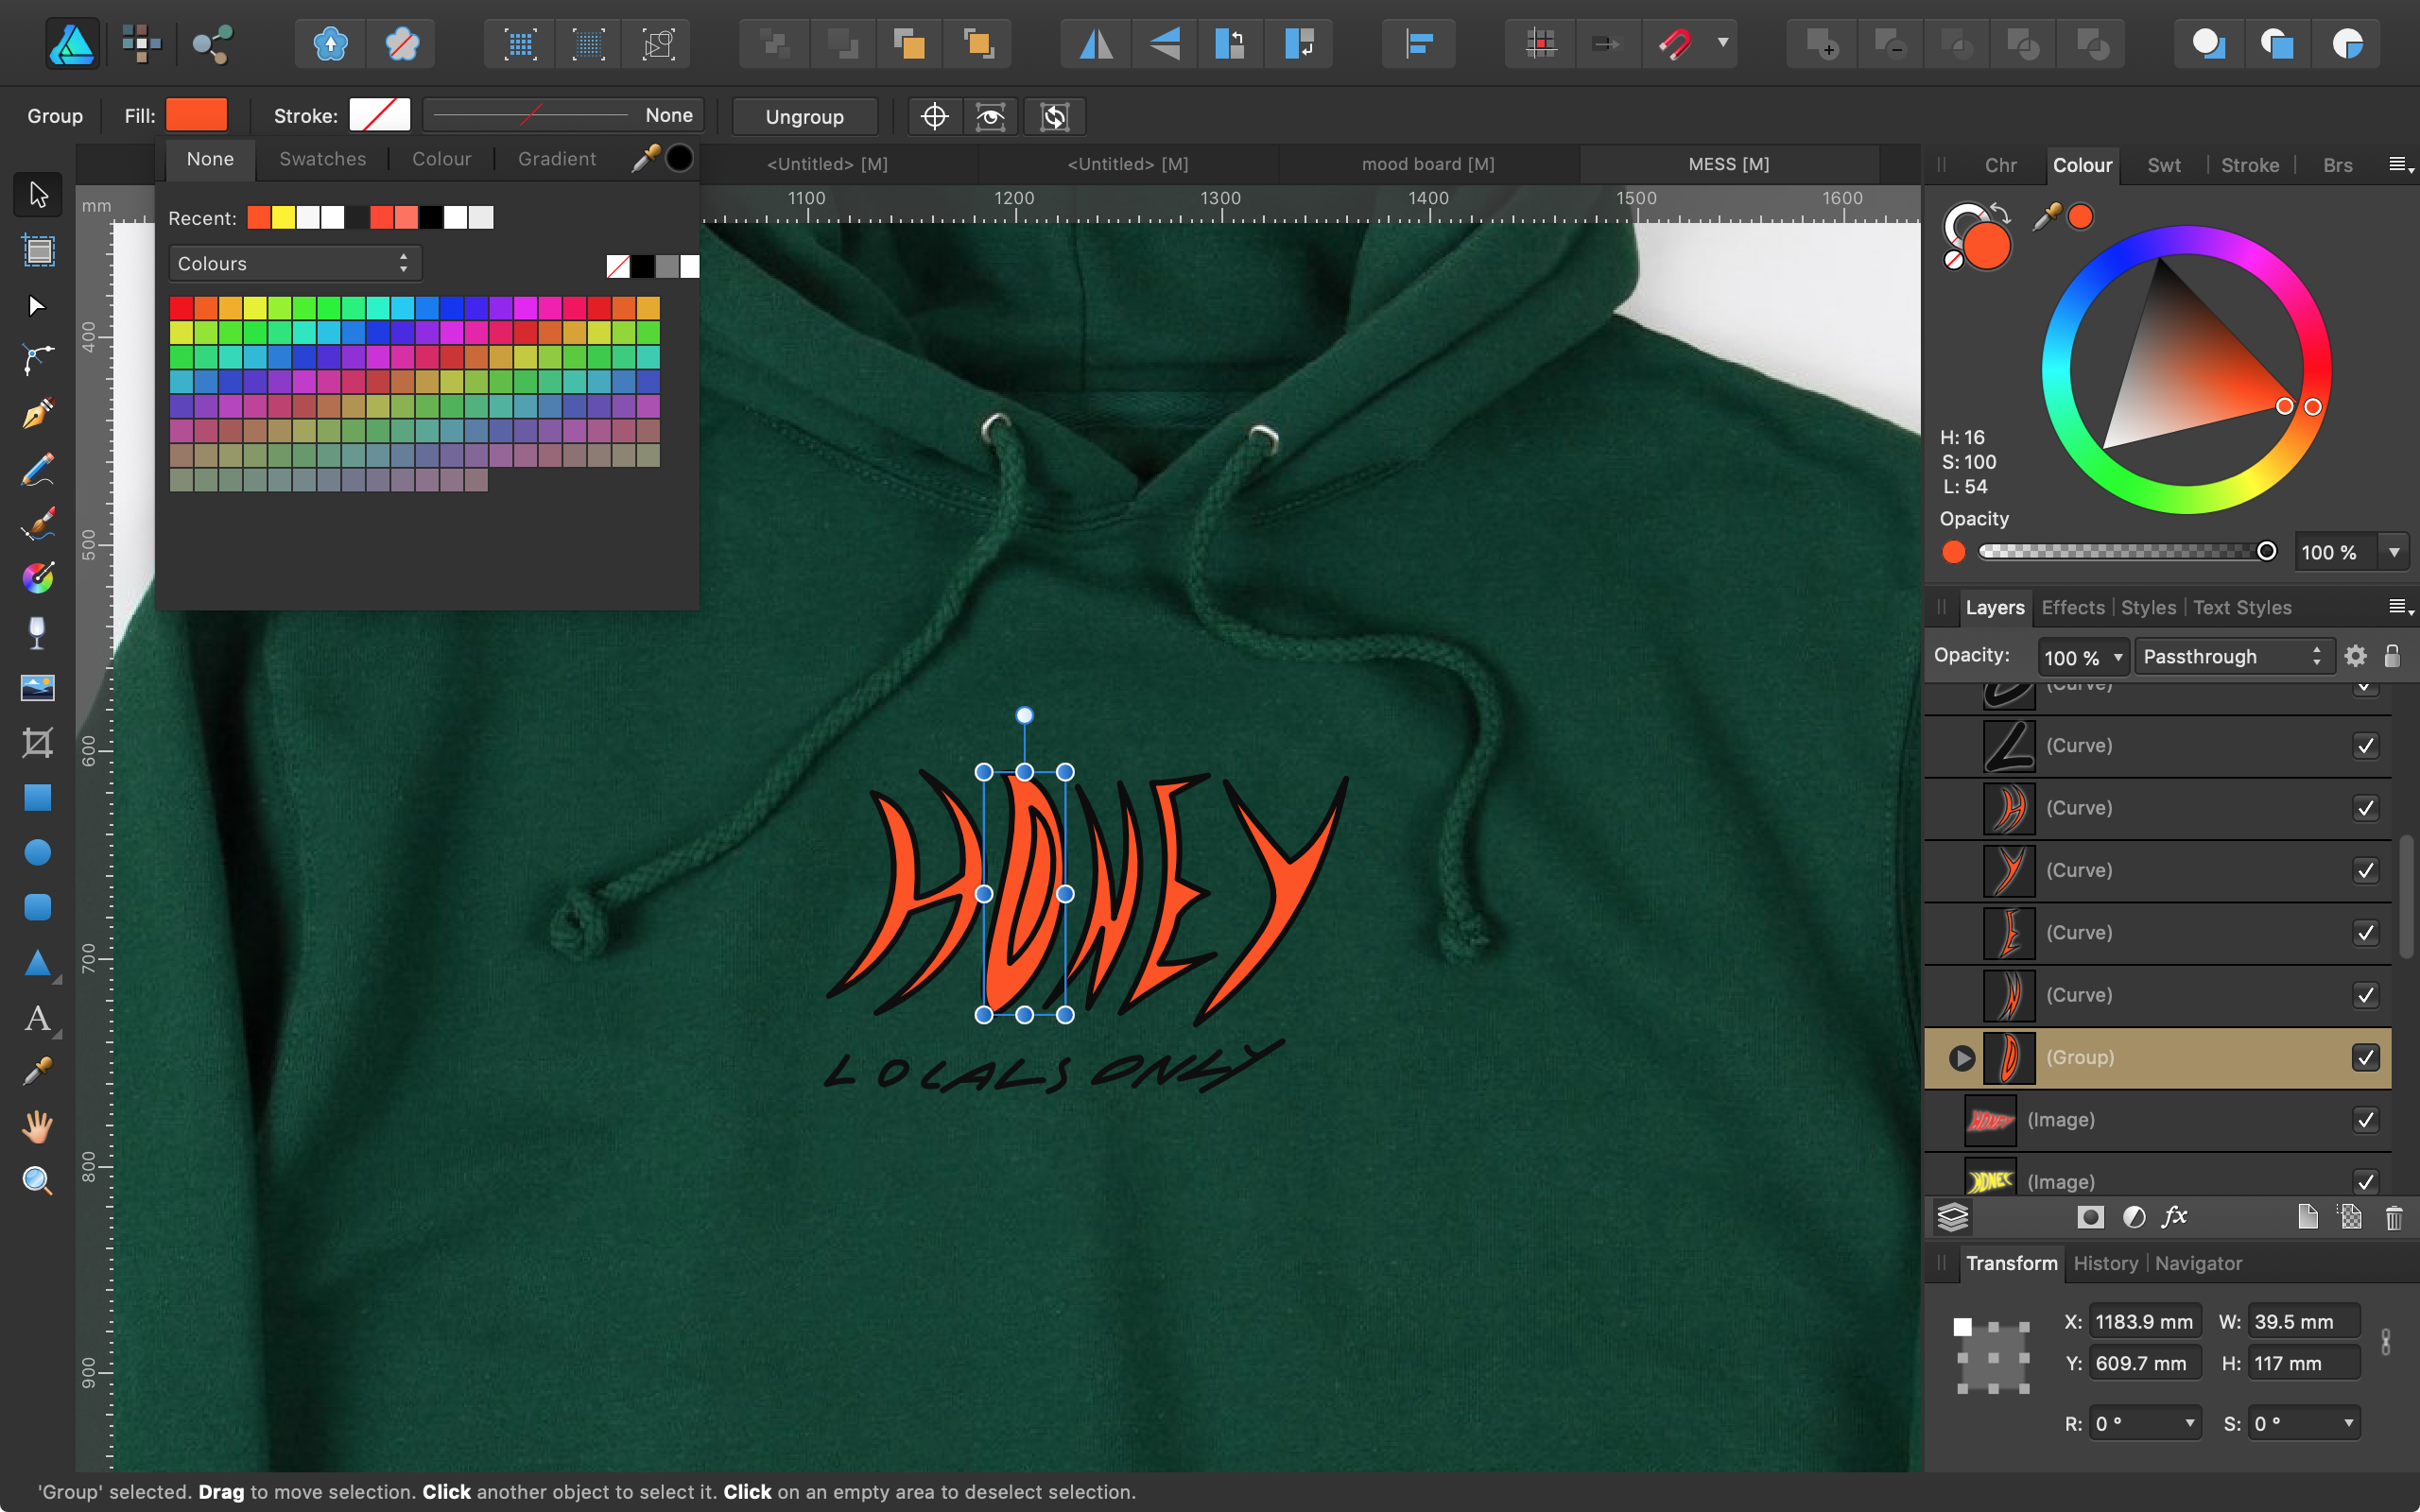
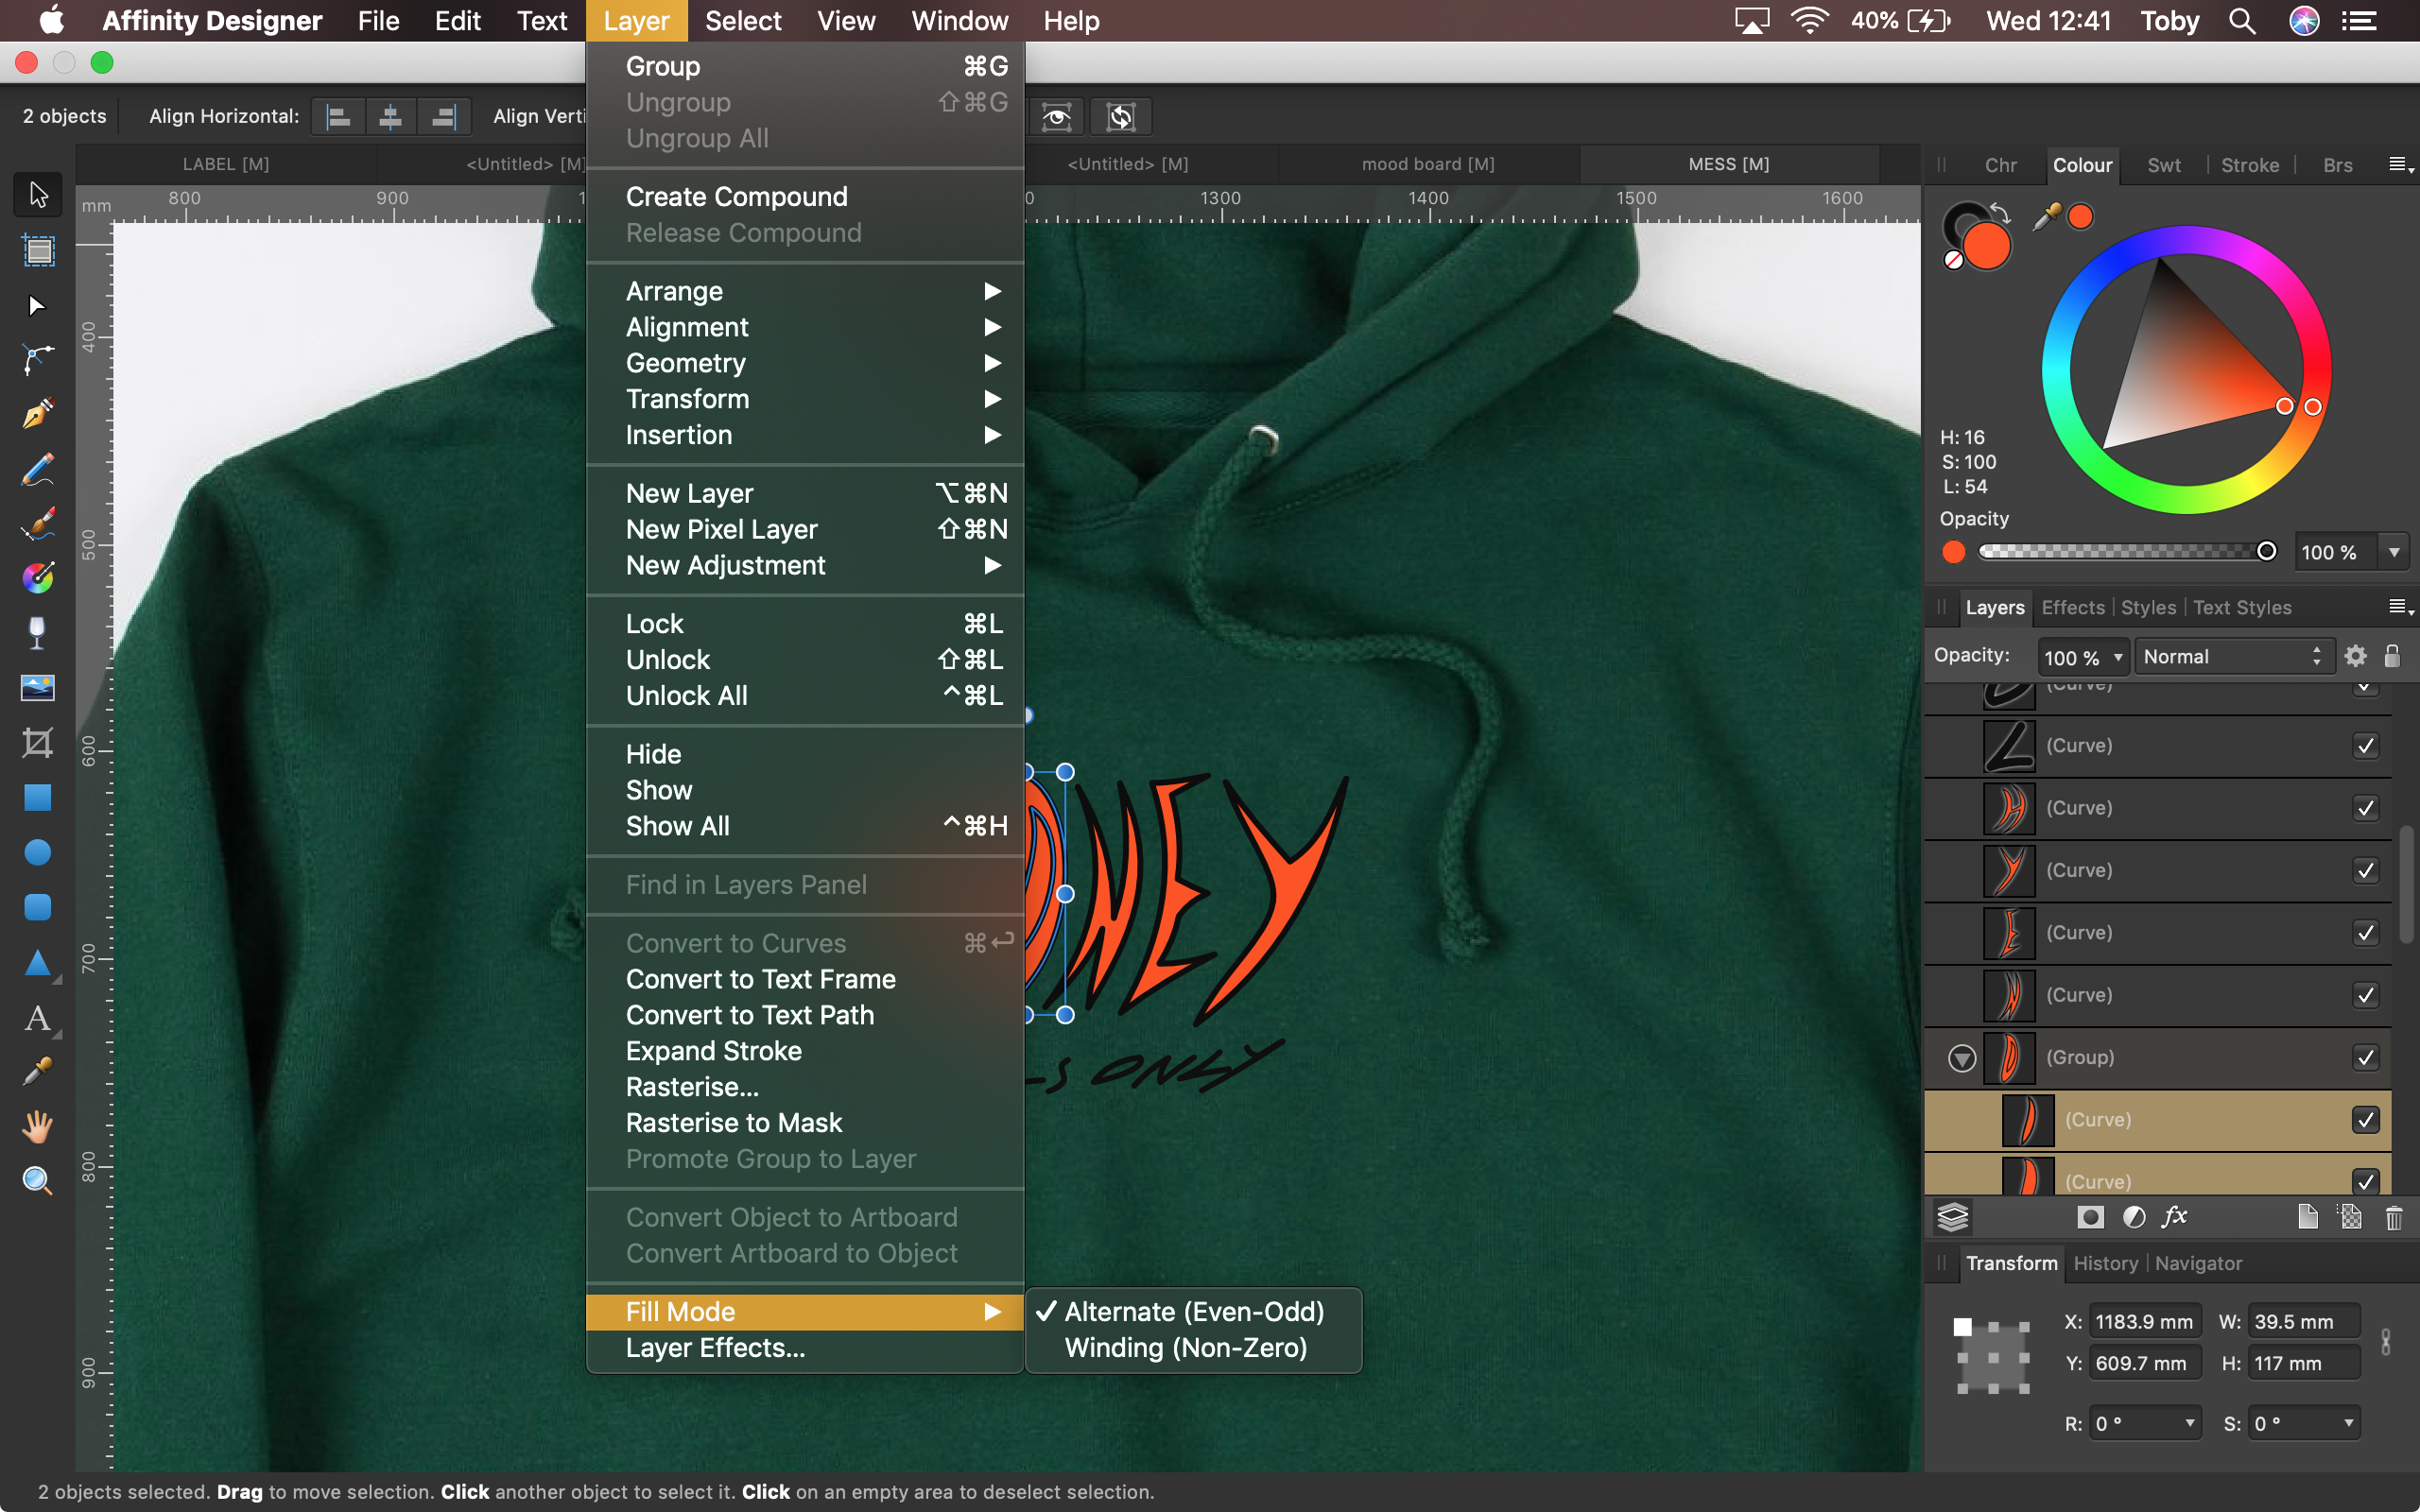
 Hi, I'm trying to fill a capital 'O' without filling in the middle of it. As seen in the attached screenshots. I found a post with the same issue, there they were told to select the individual curve layers rather than the group, and then change the fill mode in the layers menu to "Alternative (Even-Odd)". However, I tried this and it didn't seem to work. Is there something I'm doing wrong or something else that might work? Cheers
-
Four image pano, very long time to create pano, same long time to complete render, cropping, extremely slow, save, long spinning ball, finally saved. Reopen to fill small areas of transparency, crash iPad Pro (3rd gen) 12.5”, 1T, 6GB iOS 12.4 Sony a7r3, 70-200 G lens {%22app_name%22:%22Photo iPad%22,%22timestamp%22:%222019-08-20 21:34:56.67 -0700%22,%22app_version%22:%221.7.2%22,%22slice_uui.zip {%22app_name%22:%22Photo iPad%22,%22timestamp%22:%222019-08-20 21:49:56.31 -0700%22,%22app_version%22:%221.7.2%22,%22slice_uui.zip
-
 In Affinity Publisher v1.7.1, cannot remove or change rectangle fill after converting to text frame — there is no UI to do this, and the fill is permanent. Have to delete and recreate the work. Steps: 1) Select rectangle tool and draw a rectangle, 2) In the colour palette, set a noticeable fill colour, 3) Choose Layer > Convert to Text Frame, 4) adjust the same controls that were used in step 2 to choose a fill colour. Result: the fill colour of the box no longer changes (the newly selected colour is applied to text added). 30mins search and experimentation did not yield any place in the UI that would allow the rectangle fill to be changed (if its present but well hidden, then this is also a UI bug). Expected: either a) rectangle fill is removed when converted to text frame, or b) all colour selection palettes allow target for change within text frame to be selected, out of text (selection) or frame itself. (Presumed same for all types of shape, and for stroke as well.)
 -
 It was very easy to preserve the transparency of a layer in PSD. But in Affinity Photo, I cannot figure it out. I have a semi transparent layer with black art in it in varying degrees of transparency. I want to fill the layer but preserve the transparency in oder to change the colour of the art. Cannot figure that out. Thought it would be very simple. Thanks for your help. Rob
- 9 replies
-
- 1
-

-
- transparency
- fill
- (and 1 more)
-
 The numerical transparency values for the fill in the table are missing...
-
 When two or more shapes are alligned (from anchor to anchor), and these shapes have no stroke, it results in a transparent edge instead of no edge. See Example. Each of the triangles here are perfectly alligned from point to point, which should leave no space between shapes. The stroke is set to no colour, and the weight set to none, so I would imagine that the 'fill' should take up 100% of each shape. However, it seems that the stroke (which shouldnt exist), stil takes up a fraction of the shape, and allows the background to show through ever so slightly. The obvious way to get around this is to slightly overlap each shape - as you can see, there are quite a lot in the above, so this would be impractical. Is there any obvious way to get around this? Apologies, this question has probably been asked before, but I was finding it dificult converting this question to a searchable term.
-
 Hi, Affinity Designer newbie here, using desktop version on an iMac. I've opened a couple of the sample Designer files to see how they work and everything looks fairly familiar, or at least intuitive. One thing that's puzzled me is the fill colour in the background blue in the sample file 'Prison of Arts'. It's a dark blue colour, but has a slight graininess to it, rather like adding noise in Photoshop. A new rectangle, filled with a colour also takes on this graininess. I quite like the effect, but can't replicate it in a new file - nor can I turn it off in the sample file 'Prison of Arts'. I've explored settings, effects and all sorts, but can't find how to add or turn off the effect - any help gratefully received. Screenshot at 200% scale attached.
-
 I apologise if I'm missing something obvious, I've searched through the Affinity Photo online manual and the help forum and not found anything. Every graphics app I've used until Affinity has supported using multiple layers to constrain fills from the flood fill (paint bucket) tool - think of scanning in a line drawing, putting it on an upper layer, setting to multiply and using the line art to constrain fills on a layer or layers below. (I'm talking all pixel layers, BTW, no vector stuff). The flood fill tool has a control for tolerance and toggle for non/contiguous but no control to respond to single or multiple layers. Is there another way of doing this or is the feature not yet present?
 -
 I finally give up. How do you stroke something? I drew a rectangle with the marquee tool and want to stroke that line. I do it all the time in Photoshop, but I cannot find a way to do it in Affinity. I also can't find any instructions or tutorials online. There seems to be help for what to do with the stroke after you have it, but I need to create it in the first place. I have the same question for filling the selection. thank you
 -
.thumb.png.c1e412a4e3384d171b58a9b378322141.png) If you align stroke other then to middle while rendering there will be some graphic artifacts. Fill color will show up there it should not. Or there will be transperent gap between stroke and fill. That makes stroke alignment feature unusable for quality export graphic. Is there a way to fix this?
If you align stroke other then to middle while rendering there will be some graphic artifacts. Fill color will show up there it should not. Or there will be transperent gap between stroke and fill. That makes stroke alignment feature unusable for quality export graphic. Is there a way to fix this?
-
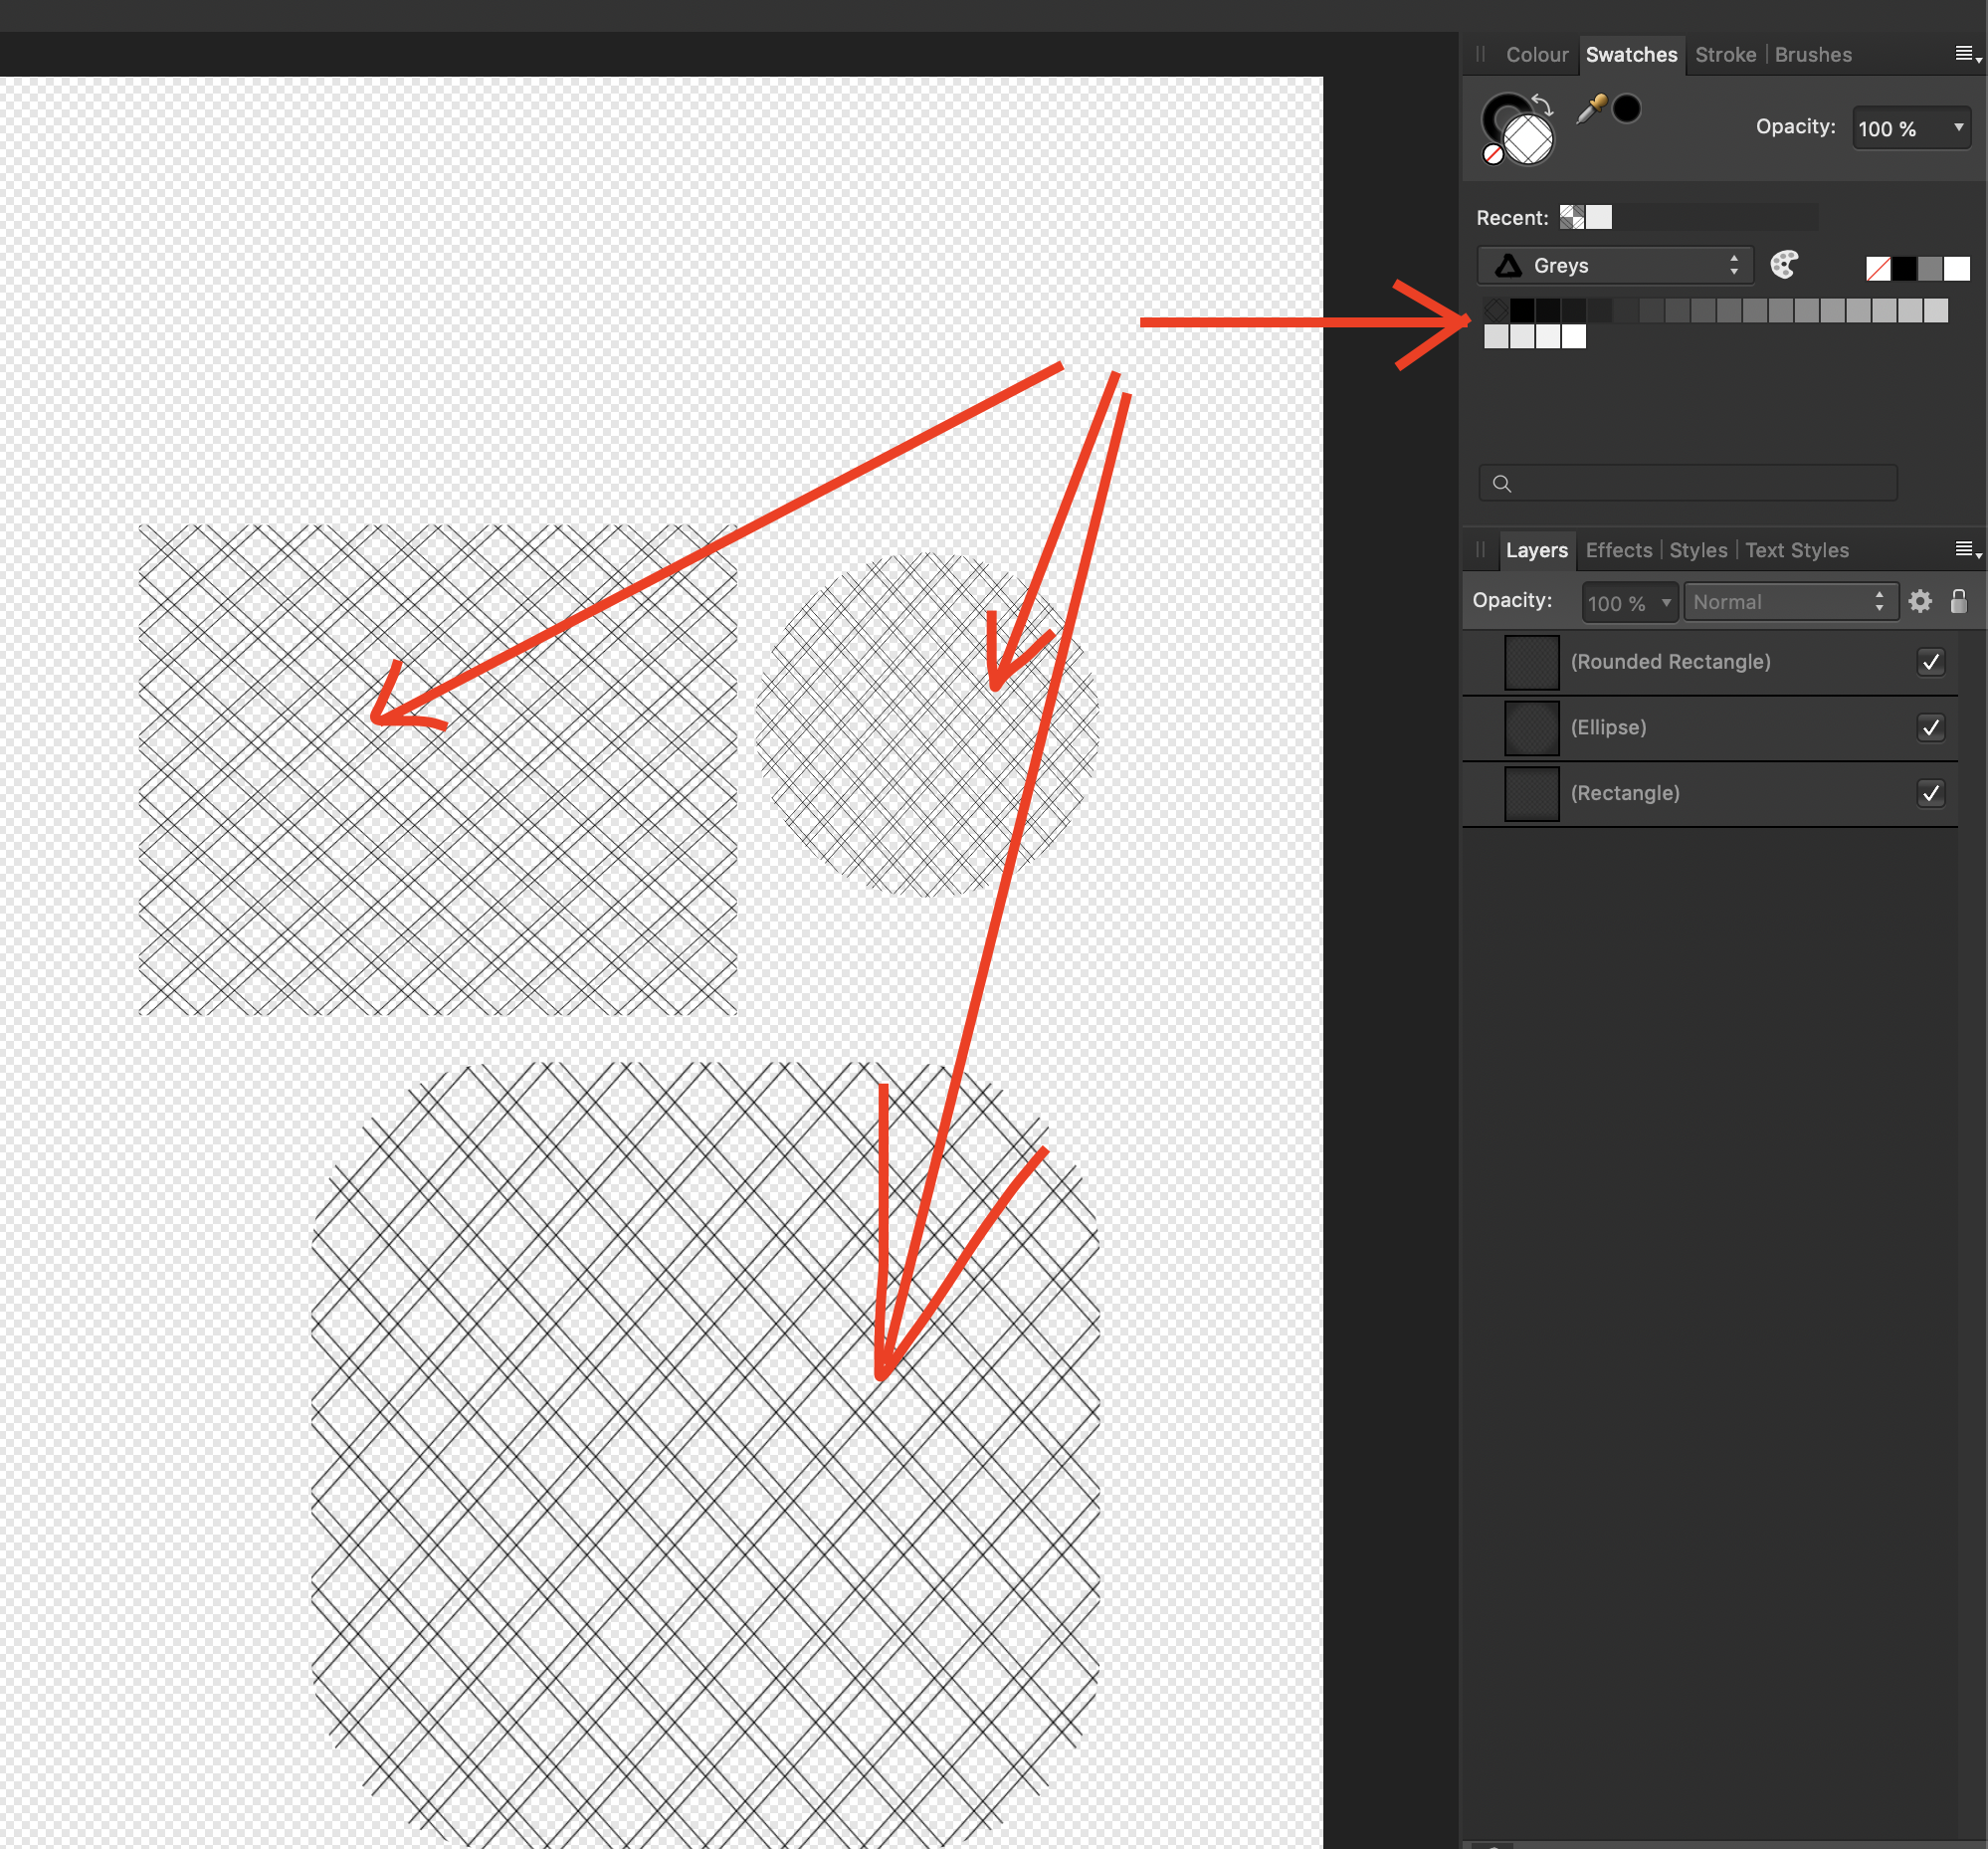
Sorry if it's duplicate post. It would be nice to have a pattern fill feature with a few patterns to start with instead of gradient tool and bitmap fill. Also quickly create patterns by drawing a square on your shapes and save them to swatch library. Or..at least if you save gradient fill with a bitmap image, and reapply that fill on another shape to get the same size of the pattern. See the image, they all get a different size.
-
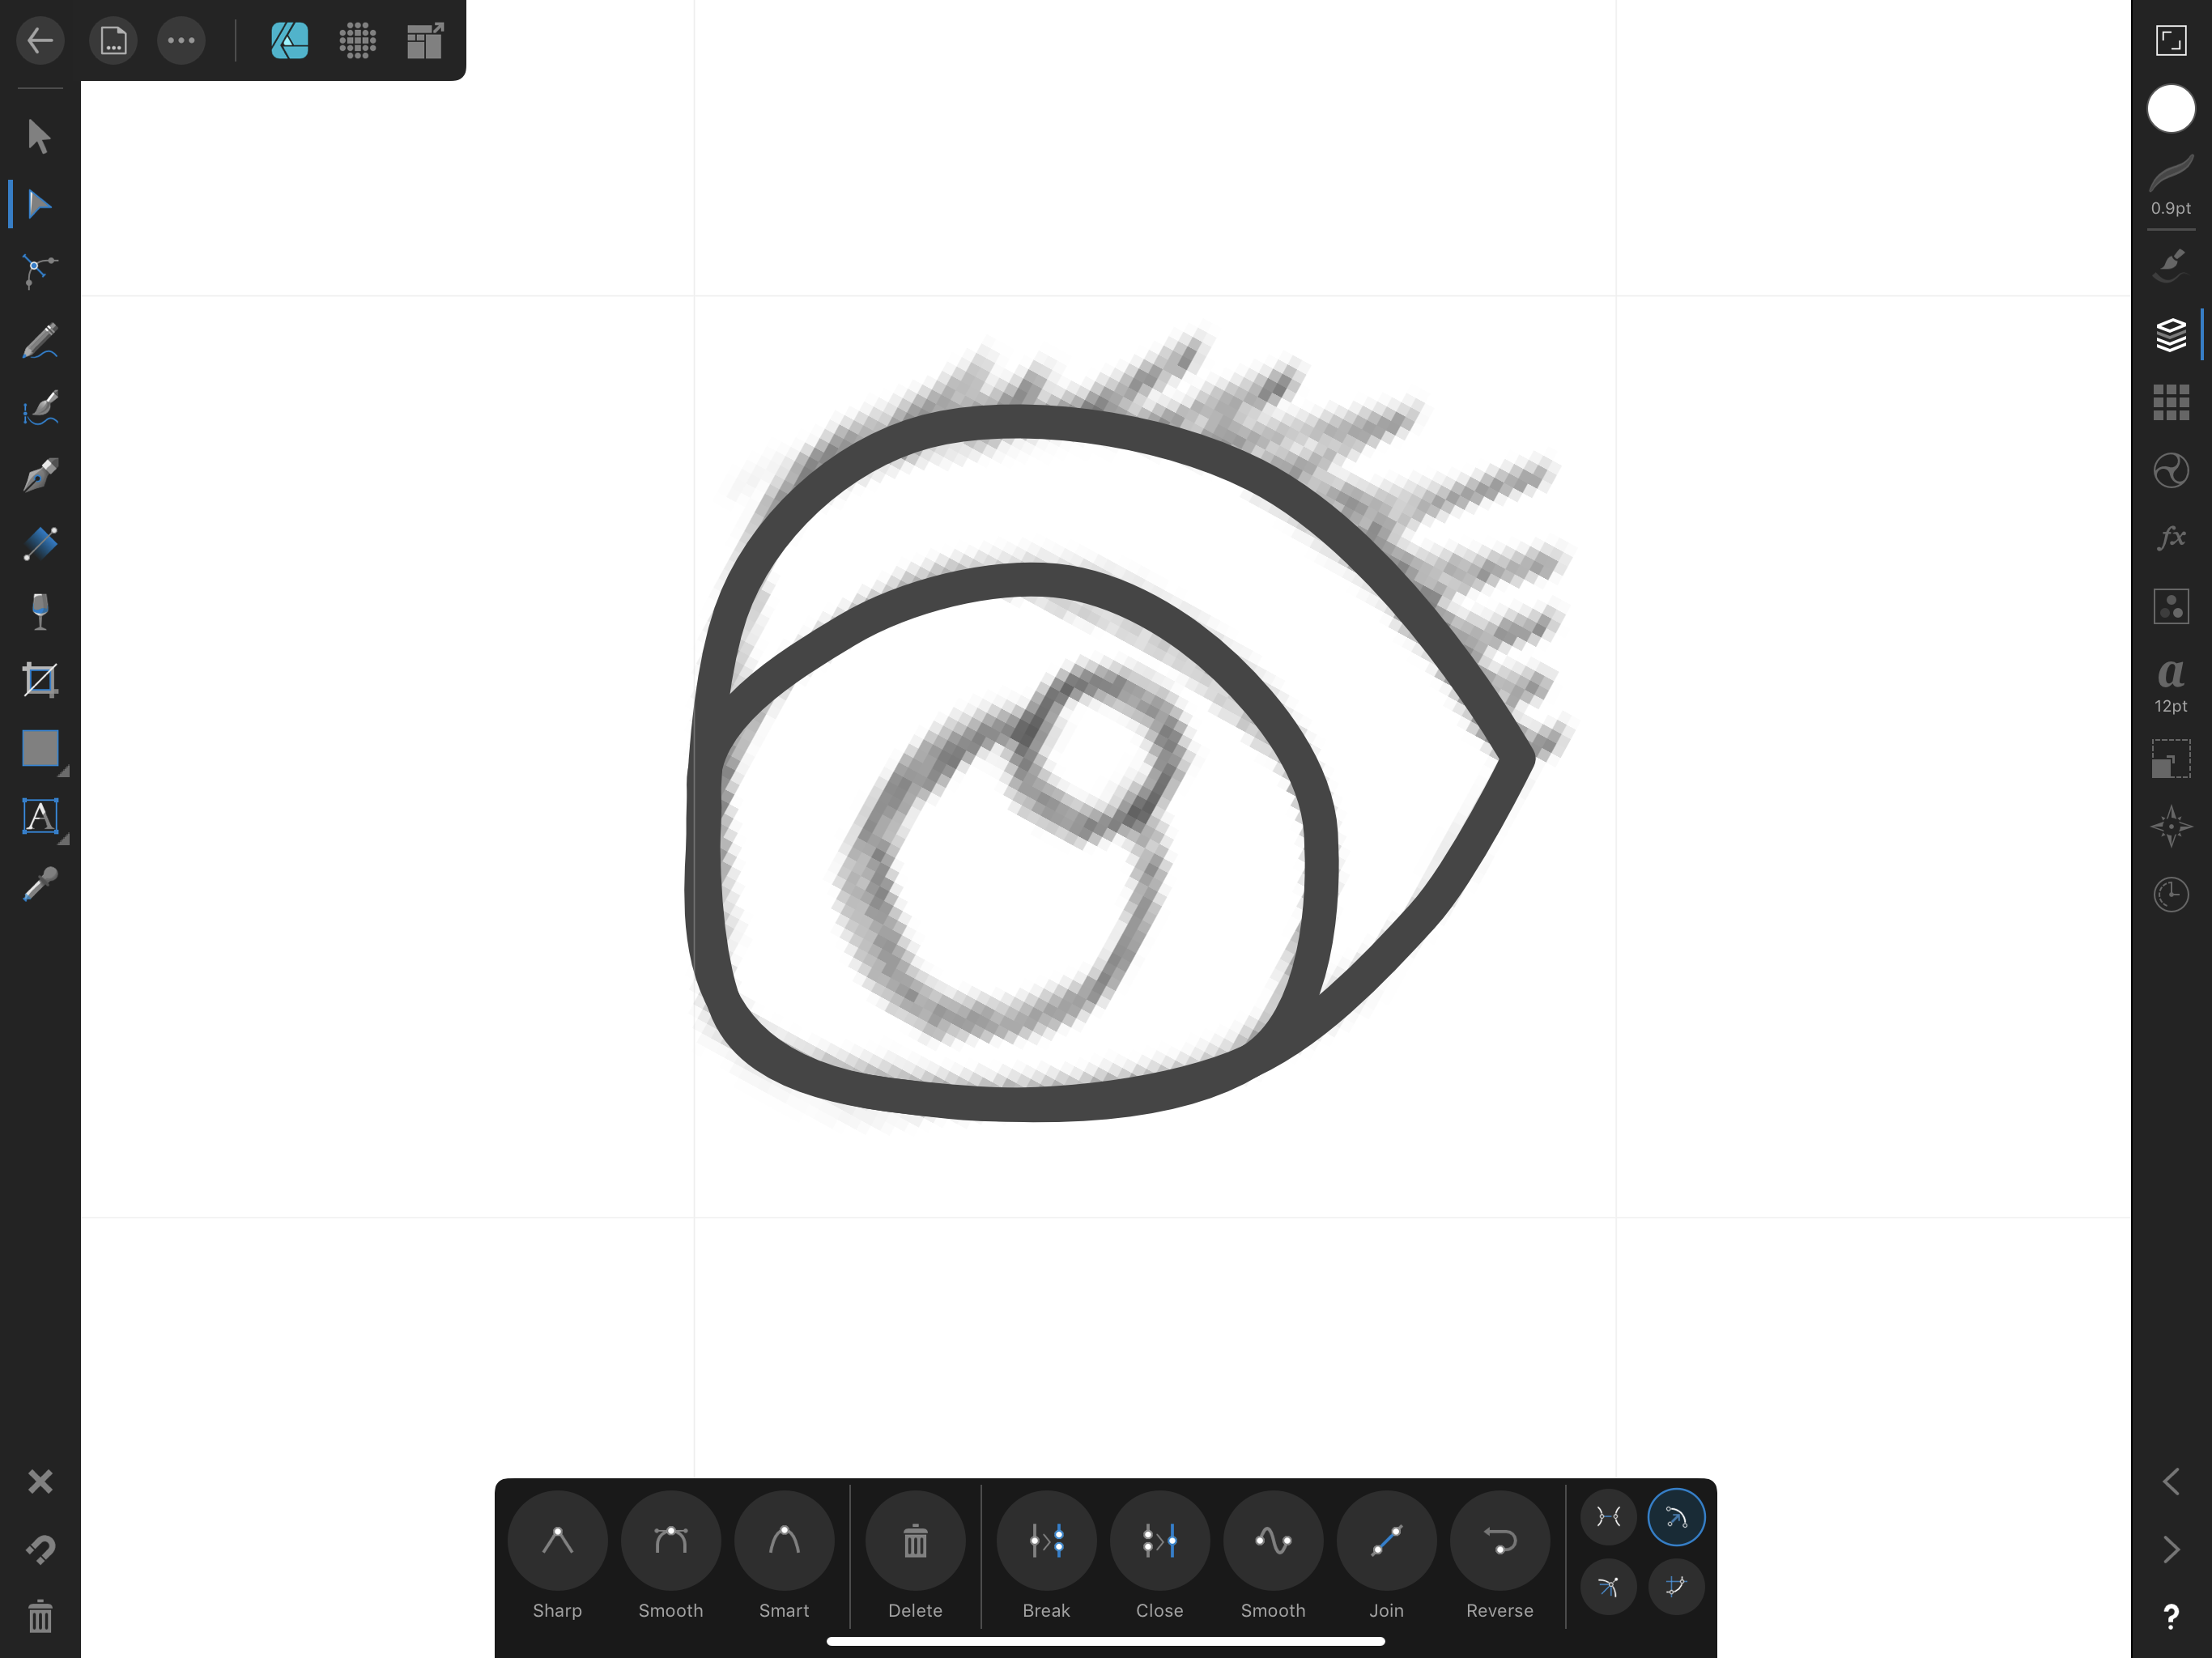
 I'm just starting out in Affinity Designer for iPad, and I'm trying to perform a pretty simple fill operation on this eye that I've drawn (see attached). I come from an Illustrator background and it's incredibly simple to do in there. Basically, I've drawn the outer shape of the eye, and added a line through it. I'd like to fill in below that dividing line with one color, and use white above it (as you'd expect for an eye). The problem is, I can't seem to fill in the eye color without creating another complete shape that overlaps the outer shape along the bottom and left sides of the eye. I can work around it like that, but it's tedious and would definitely end up taking forever on more elaborate illustrations. Surely there's some way to fill in color without completely overlapping lines all the time, right?
-
 https://www.useloom.com/share/05cafbf1cd084a988ffda991f3d8c119 In my document, at first the pencil tool took about a minute to render what it was drawing, I thought it had crashed. Now it seems to have sorted itself and draws in real time but still strips out the fill when drawing. Doesn't matter if a stroke is selected as well or not, it always strips out the fill. I only want to draw with a fill so this seems buggy. As the video shows this also happens in a new document.
 -
 At my current job we use Corel Draw in our graphic design department. I have switched to Affinity Designer and Photo for my personal work and these are my 5 features I use very often in Corel that I would love to see added. 1. Boundary Tool - Have a print/cut Roland printer and this tool is essential when creating a cut line around multiple objects. 2. Envelope Tool - Use this quite often for text effects. Converting to curves and manipulating from there works alright but Corel leaves the enveloped object still as text and can be still edited. 3. Flood Fill Tool - I'm able to replicate this using boolean operations but involves way more steps and occasionally will end up with odd quirks and unwanted results. 4. Blend Tool - I believe I have seen this is coming on the roadmap so hopefully soon 5. Raster to Vector Tracing - Also seen this is coming. Currently using Inkscape for this feature and then exporting/importing into Designer All this being said Designer is still one of the best applications I have used. How great this application already is has me very excited for future updates and enhancements.
 -
 As the thread title implies, the colorpicker behaves strange when trying to pick up a color near it's invokation from a fill color panel. It mostly refuses there then to pick up a color under the loupe, see here ... BTW, AFAI have seen this odd behavior is equally among all tools of the Affinity line!


.png.73fd1d8efefe1d16063d2112b409ac01.png)