Search the Community
Showing results for tags 'Fill'.
-
 Can't make a selection for a mask from a pen path tool. Somethings if I click Command on the pen path I get a selection, marching ants, but most of the time it doesn't happen. Why not?.
 -
 Hi There, I have just bought Affinity Designer and am just learning to use the tools. I have previously used Illustrator and am finding the transition relatively straightforward and really like the programme. One thing I used to be able to do in illustrator was to drag and drop an image into the swatches tab and then use that image as a tile fill to create prints/patterns (useful when designing clothing). I also used clipping masks for similar effect. Do either of these functions exist in designer or would I need to purchase Photo as well? Many thanks
 -
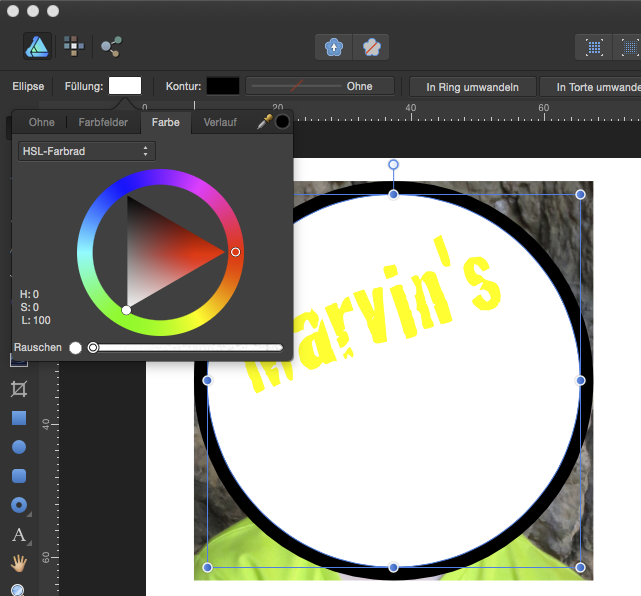
 I'd like to fill a circle with a bitmap image. The forums told to use the gradient fill on the shape an select bitmap. Unfortunately I don't have the bitmap option (I have the german version activated, but there is nothing similar) in my Affinity Designer 1.4. How can I do that? Is it as Alternative possible to cut a circle out of a bitmap with the geometry tool? In the attached File I'd like to place the bitmap in the inner white circle to get a button with the image and a black border. Before I draw that in InkScape or before in CorelDraw, but I'd like to switch to Affinity ... marvins.afdesign
-
 Hi! I realize this likely seems like a very basic question, but I can't seem to solve it. I want to use the fill tool to fill in several objects with white, that are currently black. Here's the flow I would expect: 1) Select Fill tool 2) Select the color I want to fill in the objects (actually, I'd look for an eye dropper tool but I haven't seen one, but since all I want is pure white, the eye-dropper isn't important at the moment) 3) Click on the object I want to make white 4) See the object change to white Instead, what seems to be happening is, at step 3, the White that I had configured changes to Black (the color of the object), so I need to repeat step 2 again. I have many objects to fill, so the extra clicks are somewhat annoying. What am I missing here? :) Bonus: Is there an eye-dropper-type tool?
 -
Hey, something i'm terribly missing (and that I use a lot in Illustrator) is the expand stroke function. This lets you convert a stroke of any object into a fill. Sometimes this handy in logo's (because sometimes the strokes are not scaled proportionally and your logo is ruined when scaling). thanks! benjamin
-
 Hello! So, I've been working on designing the interface of an app I'm looking forward to create and I've ran into some problems. The first one is every time I go to move a layer to a higher position, it gets turned into a folder with the layer above it. Is there a way to move layers up and down, without grouping layers? I'd like to reorder them in the way they show up on the page... ( 1, 2, 3, 4, 5, 6) Thanks! Also, I was wondering if there's a way to add a stroke/ fill to an image that I placed. I'm not sure what they call the image, but it has no background.. It's like just the symbol I want, but without the white background. Is there a way to add stroke? Thanks!! Riley
 -
 I'm trying to create a low-poly picture in AP, and can't figure out how to draw my polygon mesh, fill it with the colors I want, and then make the mesh itself disappear. I've been sampling from the layer below that contains the actual image, and then using that color to fill in the polygon of the layer above. My problem is, that when I do this I can't separate the fill color from my drawn polygons, but without the drawn polygons I can't fill. Any tips would be appreciated on this.
 -
Hi all. I included this in a thread in the bug-report area, but it really belongs here. I think consolidating the fill controls into a single panel would clarify their use for users. Currently, an object's fill control presents a series of tabs that offer conflicting functions. The tabs represent different types of fills and are exclusive of each other; therefore I submit that these fill types should be offered in a drop-down list and not as tabs. When the user selects a fill type, the panel can display the appropriate set of controls in the panel and the appropriate on-canvas controls (like gradient angle), which currently do not appear at all when using the Fill control panel for an object. Also, the current panel for gradients can be improved by indicating to the user that he needs to click on those circles to set colors and properties, and indicating which of the controls pertain to the selected control point and which pertain to the entire gradient. A colored highlight makes the current selection more clear than simply having a bigger circle and smaller circle (and that size difference isn't even shown on first use of the panel; I assume this is a bug). Users should be able to right-click in that gradient display to insert, delete, copy, or paste control points. Currently it doesn't seem that there's any way to determine where a new one will be inserted. All of the current buttons, except Delete, suffer from major ambiguity: If I press Insert, where will the new point go? If I copy one, how do I paste it? Or does Copy here actually mean Duplicate? Without some hint, however, I don't think users would ever guess that they could add more control points. And then a bunch of Affinity's work would go to waste. I vote for putting a label below the gradient display instead of the buttons, instructing users to right-click to add or manipulate control points. It's more clear, and space-efficient to boot. And finally, I had no idea what "stop" meant. I guessed it was some kind of option for determining what should happen beyond the end of the gradient, but of course the functions offered by those buttons didn't seem to make sense in that context. In any similar type of editor, I see "control point" used more than any other term. I think the flexibility of Designer's fill function is remarkable! Some revision of the UI will help users find it and take advantage of something that Affinity clearly put quite a bit of effort into.
-
 I posted the lack of an angle control as a bug originally, but I'm cross-posting here after getting more information: When I set the fill for an object, I use the Fill control provided in the toolbar and its dedicated tab for gradients. I would not expect to go hunting around for a separate tool for this and drag an additional effect onto an object, when fill is an intrinsic property of an object and controls are already provided for it. If the controls for a property are deemed too complicated or difficult to implement in the control panel, I would expect on-screen controls to appear when I select that property (in this case, the Fill color well) from the object's property panel or toolbar. The current design, aside from looking like it suffers from a major omission, leaves the user wondering if he's applying a separate effect to the object. I suspect this will be even more problematic if Designer offers multiple fills on the same object (which I saw in the feature roadmap). I urge Affinity to eliminate the fill control from the Tools palette and integrate its function into the Fill control on the properties toolbar that appears for an object. Not only is this much more intuitive for the user, but it allows you to enable or disable the control as appropriate for the type of object selected, and to cause it to disappear when no object is selected. As it stands, it makes no sense for the Gradient and Transparency tools to be enabled when nothing is selected. Gavin
 -
 Hello! I just began on this new application and I have absolutely no idea what I am doing. I am sure that when I get some fundamental basics out of the way, I can refer to other tutorials for further detail. This may sound stupid, but I cannot figure out how to fill color into the objects I create or how to properly snap loose points together. Those are the only two things I have run into trouble with so far. Does anybody have a link to a basic tutorial or a reply on how to find and use the fill tool?
 -
 Hi folks, I have created a path from six cloned paths to form something like six-sided puzzle-piece (see attachment) Now I want to fill this puzzle-piece but it only fills out the 'tounges' of the piece and not everything that is surrounded by the path. I am sure this behaviour has something to do with the way I created the puzzle-piece - in combining multiple simple not-closed paths into a single closed path. But how do I get my path to be handled as a closed path and be filled like the way I want it to be filled? Thanx in advance Rasmus Streckenteile_cut.svg
 -
 Do this: 1. Launch AP. 2. New document. 3. Choose the Paint Brush and a color. 4. >> Note it says: "The assistant has added a new raster layer" 5. Close without saving. 6. New document. 7. Choose the Flood Fill tool (paint bucket) and a color. 8. Click on the page. 9. >> NOTHING HAPPENS. It does not make logical sense to me why the Assistant would assist me in auto creating a pixel layer for the Paint Brush tool but refuse to create a pixel layer when I click the Flood Fill tool on the canvas. Can someone explain the logic to me? If there is no sound logic behind it, I am inclined to submit a new feature request. (Keep in mind I am comparing my experience to Photoshop, where I don't need an assistant to create a paintable layer because a paintable layer appears automatically in Photoshop.) Thanks.
- 10 replies
-
- 1
-

-
- photo
- paint brush
- (and 6 more)
-
In Photoshop, if I sketch a rectangle (or any other shape, or use the Pen tool to create one) then give it a fill and a stroke, if I then choose Layer > Layer Style > Color Overylay, it affects only the FILL not the STROKE. But if I do the same in Affinity Photo (AP), the Color Overlay affects the FILL and the STROKE. It would be very useful if a new feature could be added to AP's Layer Effects dialog such that I can choose if the effect will work on the FILL or the STROKE or BOTH. Thanks.
-
 Hi friends, I have found that when I am using the vector brushes in AD, I cannot take the fill off. It seems that I have managed to do it once in while, but due to pure chance or trial and mistake, I would beg you to give me the ncessary info, in order that I may have control over this tool. Thank you so much in advance. Rosa
 -
 I do most of my drawing in Adobe Ideas on my iPad, which creates compound vector shapes, which I then use the Live Paint feature in Illustrator to fill in. It makes colouring extremely quick and easy. Is there already, or is there a planned equivalent for Affinity? It's basically the only thing stopping me from making the switch from Illustrator to this, as it's a really nice app otherwise. Many thanks!
- 51 replies
-
- 8
-
-

-
- paint bucket
- bucket
- (and 1 more)
-
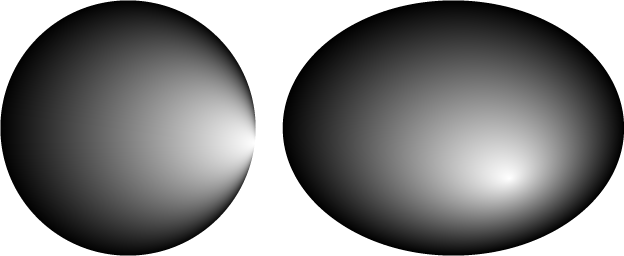
Hello, everybody, I'm curious when the radial gradient direction & distance features will be coming to AD. This is a feature I use of Illustrator's gradient tool all the time. I've attached examples of the tool's results, for those reading this who are unfamiliar with the effect. In Adobe's UI, the feature is implemented via the software's Gradient Annotator, either by dragging the small dot just past a radial/elliptical gradient's origin, or by clicking with the gradient tool on a radial gradient, somewhere away from the Gradient Annotator. Anyway, especially for applying realistic lighting effects to rounded objects, this feature simply is a must-have. In the mean time, anybody who knows an AD-native technique for applying (a reasonable facsimile of) such an effect in AD, I'd be happy to hear your suggestions. Until then, I'm going to be ⌘-tabbing a lot, in order to make and mask raster fills when I'd really rather be using vector. Thanks in advance! —Russ Johnson Murfreesboro, TN
-
 Is an appearance "function" be available that allows for multiple strokes, fills, be added to an object? or am I missing this feature somewhere? Thanks
 -
 It would be mighty cool if Affinity supported independent blend modes for Fills vs Strokes (including hopefully multiple Fills and Strokes in the future).
 -
 Sorry if this is a basic question or has been answered before, but I really couldn't figure it out. How do you fill a space between three or more concurrent curves? Say you have three lines which form a triangle, how can you fill the formed triangle with a colour? See my example: I drew the circle, joined the respective opposite marks and I have obtained those polygons that I filled. My approach was to redraw the formed polygons using the pen tool and then filling them, but there must be some other way. Or if I want to fill the curvilinear triangles that are formed with the circle - how do I do that? Thank you. desen_modular.svg
 -
hi there, another problem I came across is the editing of masks. want to make a layer partially visible by simply filling it black first and then drawing into the mask using a brush. using the combination shift-F5 only seems to work for normal layers, but not for masks. is there some kind of "mask mode" that I have to enter? thanks again, robert
-
 I know of the shortcut to "Fill" and then chose a color from there, I think there should be one for filling with foreground and background to work faster with masking
 -
 Hi, I was wondering if I'm not doing something right...I've tried using the flood fill and gradient fill and I get no color. I would like to start with a basic layer and color it. I'm new to affinity so i didn't know if I missed something. Thanks
 -
I was playing with the Bitmap Fill, which is buried within the Gradient Fill type Pop-up menu. This doesn't make too much sense as a Bitmap is not a type of Fill Gradient.... Perhaps a better place is as another tab under the Move tool's Fill pop-up palette from the toolbar across the top:
-
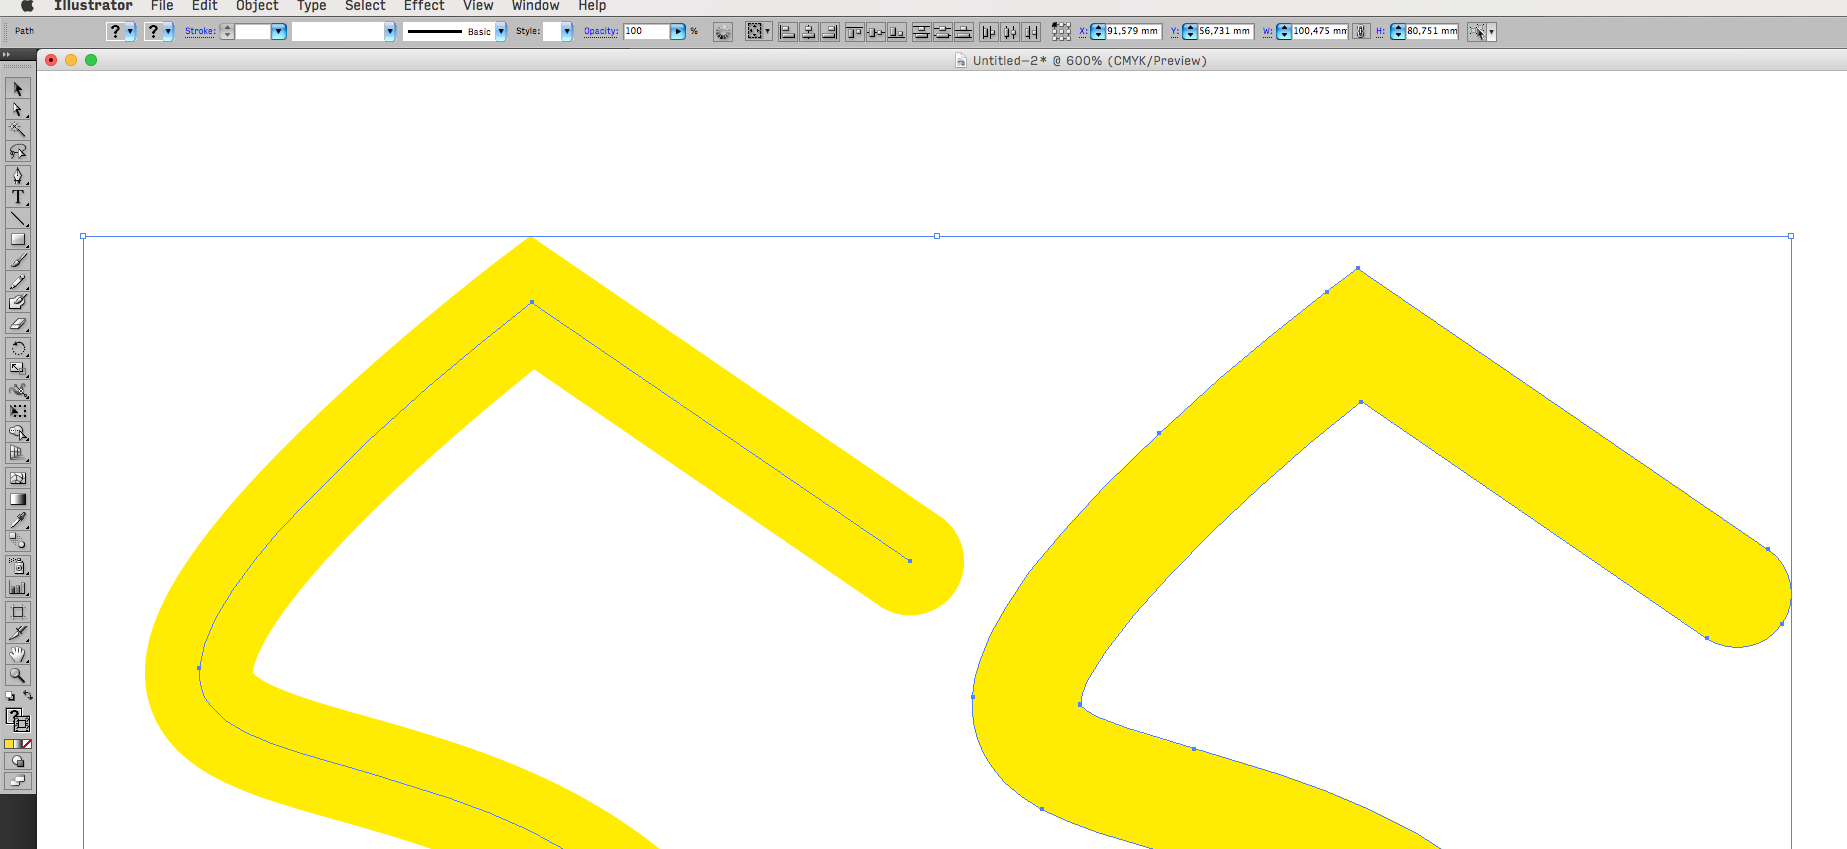
 Hi I have Just bought affinity to replace illustrator and i am loving it but i am still trying to figure out how to do certain things. I have started to create a ad for new balance as a project for college i traced the shoe using the pen tool but i didn't close the shapes i just started new lines. Is there a way of colouring the shapes or will i have to close each line and make a shape. the attachment might make this make more sense. Thanks Untitled.afdesign
 -
This one just covering the basics of the fill tool, also covering using a repeating texture with a bitmap fill...