Search the Community
Showing results for tags 'Eyedropper'.
-
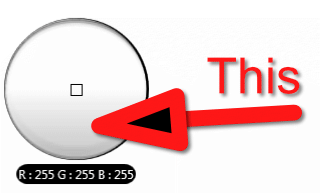
 The magnifier of the eyedropper tool has a grey gradient in the lower half, which I find really distracting when trying to sample colours. It passes right through the reticle! Any chance you'd consider removing it? Thanks.
- 1 reply
-
- 1
-

-
- eyedropper
- magnifier
- (and 2 more)
-
I’ve tried to get the sampler tool, and it beat me. I hope this panel and experience using this tool gets a refresh and become WAY more intuitive. I have a sampler point on screen and that thing WILL NOT disappear!
-
 When zooming while using the eyedropper, the magnifying glass still uses the old zoom. I do this when the eyedropper isn't precise enough. I've version 1.5.0.28 When zooming while using the eyedropper, the magnifying glass still uses the old zoom.
 -
 I've read there's a "new color picker" (eyedropper) in AD 1.5 (source). That's really great news. ...but i don't see any improvements to that thing. And i can't find more information about it. How to use the new one? What's the hot key? Why there are no details about it?
- 11 replies
-
- 1
-
-
- color picker
- eyedropper
- (and 1 more)
-
 I got really used to a similar feature in Sketch – when the color picker is activated, all the guides and gridlines are automatically hidden. When you click and pick a color, they reappear. That's a little touch, but it makes picking colors quicker and error-proof. I'd love to see a similar feature implemented in AD. :)
 -
 Hi, I just wondered if there is a shortcut for selecting the eyedropper. I'm kind of used to the double click of a colour and then selecting another like in Adobe Illustrator. The behaviour in AD appears to be to click and drag on the eyedropper. It may be me but I find it a bit convoluted. Also is there a way to copy one object's style attributes and paste to another, rather than creating a style first and then clicking on it. I'll apologise now if I've missed something glaringly obvious, I usually do!
 -
 Hi Everyone, In AP, do we have an Eyedropper tool like we do in PS? In photoshop if I'm retouching i can select the brush tool and then press and hold Alt/Option to quickly bring up the eyedropper tool. Once i release the key it goes back to the tool i was using. Is this available on AP because i can't find it. Thanks!
 -
Please for the love of God, allow for "i" to be the eyedropper shortcut! Doesn't seem like too much to ask. Great job guys on the latest betas.
-
 Hi everyone, I'm new to the forum and this is my first post here. As a graphic designer with more than 15 years of experience and someone who's been looking for an alternative to Adobe products, I've been testing Affinity Designer Beta for a while and I'm really amazed what can be achieved with such great input from users and by developers who listen! Right now I use Affinity Designer Beta along with Adobe Illustrator, testing, comparing, trying to achieve similar goals using both. It is great that developers from Affinity are not trying to make a copy of Adobe products and finding mostly better solutions with users in mind, but there are times, when I'm really in a hurry and I'm forced to do certain things in Illustrator. There are things that slowing me down A LOT in Designer, and the major one is colour picking. Right now I just cannot find any other way then: - selecting an object - moving cursor to the top right corner - grabbing a colour picker - choosing a colour - moving cursor to the top right corner again - and then finally selecting it. All this takes far too much time for such simple operation, so I gave it a lot of thought, and came up with something that I believe will work great. First of all, what's needed is a one button shortcut for the Colour Picker tool like the "i" in Illustrator, and then we can use the loupe from Designer to create even better experience and this is how it could look like: - select Colour Picker tool via one button shortcut, then - pick a colour from any object by just clicking on it - OR - HOLD on any object for 2 seconds to change the cursor to LOUPE for more precise colour selection! - boom! And now the most obvious thing - if you don't have any object selected, this action will just choose a colour which will be selected when new object is created, but when you DO have an object selected, this action will APPLY the colour you've just chosen to the already selected object. Advantages: much fewer moves and clicks, less distracting and keeps you focused on what you're currently working on, intuitive and when gives more control by using loupe for precise colour selection without any additional clicks or moves. All this would speed up everything tremendously! If this or something similar has been already discussed, or if there is any solution to that which is already implemented and I simply don't know about it, please let me know. I wonder what you all think about it! Best Regards!!!
 -
 I've picked a color from my image to utilize in my swatches, but the big selector bubbles do not go away. Is there a trick to making this happen?
-
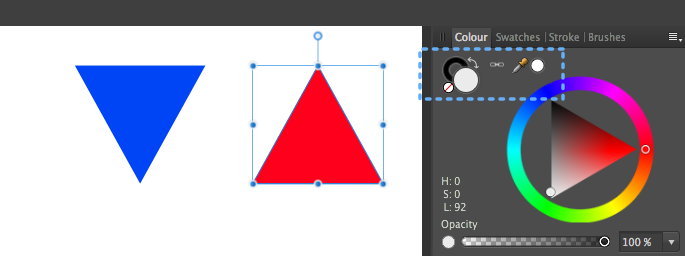
 Hi there, I thought about improvements of the colour picking system, particularly about the eyedropper. I must admit that it’s quite comfortable to select a colour and have it available in a separate inkwell (the small circle right to the eyedropper symbol). On the other hand there's always the need for a second click to apply this color. And it’s very cumbersome to try out different colors on an active shape by picking those colours one after another from the environment of that shape in a complex piece. So what about a linked or “live” eyedropper (see my mockup)? – I would imagine to have it work this way. First you select your desired shape, and when the link button is engaged, the small circle to the right of the eyedropper is linked to the fill / stroke selector on the left. When “fill” is selected for example, you can take the eyedropper to the piece you are working on and whatever colour you are sampling by hovering over the canvas is immediately applied to the fill selector and to the active shape’s fill. Just as it happens when we use the colour wheel or sliders. (For instance, we could drag the eyedropper to the blue triangle in my screen shot and apply the blue fill immediately to the highlighted red one.) Now it would be very embarrasing if there is still a method to achieve this … but if there’s none, this would be my proposal … ;) Cheers, Alex
-
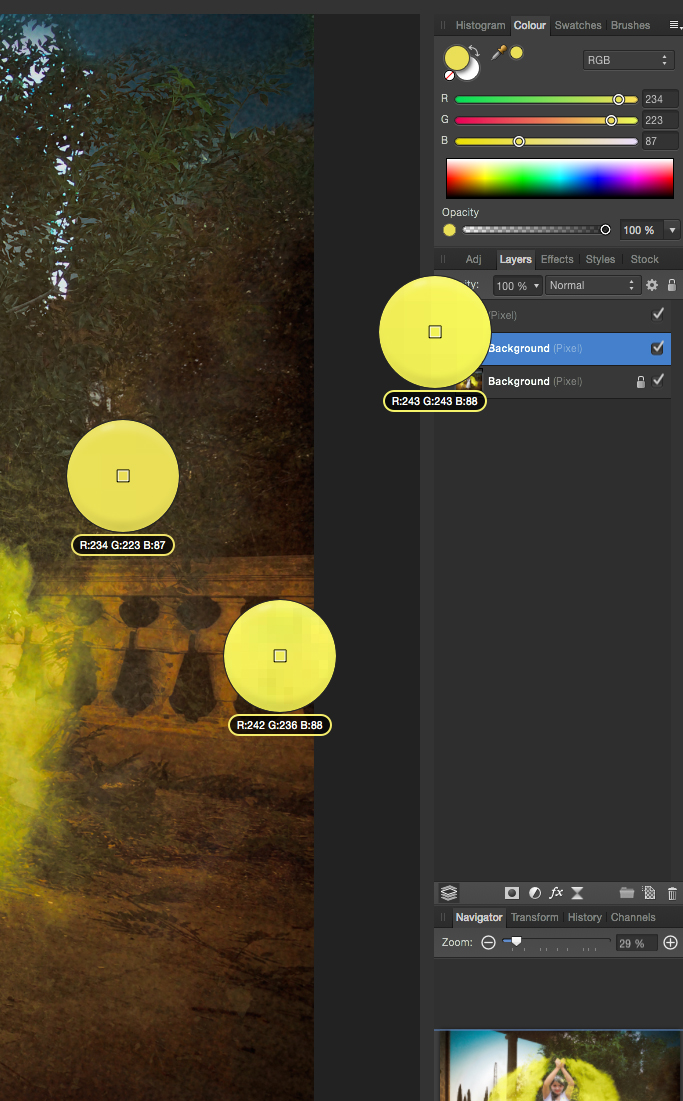
 Hi - apologies if this answered elsewhere but I couldn't see it. I use the eyedropper tool to sample colours (usually 5*5 pixels) to check on skin tones, and convert these values to CMYK to compare to established skin tone colour values. Being red-green colour blind, this is vital for me! Is this a procedure within Affinity, or at least one that can be imitated? Howard
 -
 This is a weird one. I only include it because it just isn't the way it should be. I wasn't able to reproduce it in MAS. It only happens in Separated Mode. I had loaded a .jpg into AD because I wanted to use the same color in a project. I drug the eyedropper across the screen and it left a trail behind it changing the color of everything it flew over. I also found that the brush tool, if the brush size is over a certain amount does it also. In the attached video it first shows the magnifier of the eyedropper as it passes over the jpg and even areas that are just the blank AD screen show the change. Releasing the mouse button erases the trail. Then I switch to the Brush tool, without pressing the mouse button. It starts with a brush that is 60.5 px and doesn't leave a trail. Then the brush enlarges to 69.5 and it leaves a trail. The trail stays on the screen. Switching to another tool erases the trail. I found that when zoomed to 150% it left a trail when the brush got bigger than 41 px. The more I zoom the smaller the brush size needs to be to leave a trail, with a 500% zoom it does it with a 12.5 px brush. On my screen the brush size has to be a circle of about 1/2 inch to cause it. Anything smaller there isn't a trail, anything larger there is a trail. Any ideas? 27" iMac late 2009 Yosemite AD Beta 1.0.202013
 -
 Any plans for a vector eyedropper similar to the pixel eyedropper with the option key? Very useful tool...