Search the Community
Showing results for tags 'Develop Persona'.
-
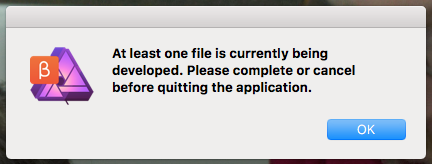
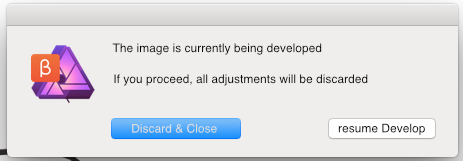
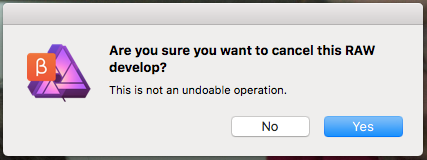
 I'd like to raise awareness to an issue that's bothering me (and apparently a few others) for over a month now. At first I hoped that my muscle-memory would get used to it; but a few hundred raw photos later, it's still as annoying as the first day. I'm referring to the way one can exit/quit/cancel development: it's very counter-intuitive. - It's totally understandable that one cannot proceed editing the image, if it hasn't been developed first. - It's also understandable that the adjustments in the develop persona, cannot be retained, unless the image gets developed. here are the quirks and some workarounds: - If develop persona were implemented as a modal, the Esc key should allow one to... escape. - If develop persona is not a modal and is a window/tab then Cmd+W and Cmd+Q should both allow you to close the document just like pressing the Cancel or X button (of the tab). The current message box when pressing Cmd+Q/W, is not meaningful: it's merely stating that you have to click elsewhere to cancel/close/quit. Why all the hoops and loops? This is particularly inconvenient when having dozens of develop personas open and you decide it's time to quit the application (or close them all). What could had been done with Cmd+Q is now mouse gymnastics! You have to close every develop persona individually, with the mouse, before you can quit the application. - The cancel button, and the X button, shouldn't act differently: As it is, the X button never asks for confirmation, whereas Cancel always does! - when you haven't made any adjustment in the develop persona, canceling should not ask for confirmation. It should be performed silently. - The confirmation should be rephrased. The yes no buttons are not very helpful. Yes, I want to cancel? Yes I understand? Yes I want the file saved? Yes I want it developed? If it were a rare occuring dialog, it would be okay to have and read all the text to know the meaning of Yes/No, but I see this dialog more often than I am asked to save a file, and I guess others too; so the buttons have to be as self-explanatory as possible; or the text as short as possible. eg. "Discard Changes?" Yes/No An example (not the most thought out apparently) follows - it shows two self-explanatory options: "Cancel & Discard" and "resume developing". It could had been "Discard Changes" and "do not discard" or it could even had been 3 buttons such as "Discard Changes", "resume"/"return" and "develop and Save as...", but you get my drift: it needs rephrasing. - Pressing the Esc key while the confirmation is displayed, should work (currently it does nothing). Hope this helps :) -Fotis Now that I got it out of the system,I have to say that I've started to really appreciating the Serif raw engine (and its speed) compared to other raw develop options!!!!
-
My first go with a RAW file, .NEF, from an approved camera. It opened in Develop Persona, I got fantastic results from adjustments, and I love the workspace. But I can't find the 'commit' button, so the program won't allow me to leave the persona for any other one, nor can I save my adjustments. Well and truly a stuck beginner. What am I overlooking (probably the obvious)?
-
 Using the up and down arrows or the mouse wheel to adjust the exposure in the Develop Persona results in a change of 1, which is far too coarse to be useful.
 -
 Hi so i opened a raw file and it did not open the deveop persona icon. heres my file. I still can't access the persona icon.. with a raw or a jpeg file. Please help. and i do not see the 6 file extensions for the photos app in my preferences. please please help.. this is very frustrating for me. thanks. norm heres my raw file attached
 -
Question on Develop persona and overlays: 1) There doesn't seem to be a way to rename an overlay. I'd like to do that and I'm either missing it or would suggest it as a feature request. 2) is there a way, when editing an overlay, to show the mask with a hot key? Say I have three overlays and jump between them. I go back to one of the overlays and want to see the red mask area again. Can I do that? 3) Toggle on/off overlay. Is this possible? I can cut the opacity to zero but would love a checkbox to turn off an overlay. Thanks in advance, Peter G.
-
 Hi I notice the image quality drops after I converted the raw image in develop persona. Please advise how to get it resolve . I will be able to upload the images(42mb) for reference if necessary. Thanks and regards, Ekoh
 -
 Hi, I have three RAWs with exactly the same content but different exposures. Now I want to cut the same area in all three images before going to Photo Persona. How is this possible?
 -
 Noticed its not possible to name the brush or gradient overlays when added. Would be good to know what overlay is doing what on the images.
-
- 2
-

-
- develop
- develop persona
- (and 1 more)
-
 Hello, I have been having problems with RAW photos becoming very pixelated after I push the "develop" button and move into the "photo persona". My photos look good while I am editing them in the develop persona, but as soon as I develop them, the image quality changes for the worst. I also experimented with not doing any edits at all when first opening a RAW image and just pushing "develop" and still got a pixelated photo when Affinity reloaded into Photo Persona. I checked what the pixels were in "change image size" under document and noticed that the images were only coming out at 96 pixels. Trying to resize to 300 pixels while in photo persona did not improve the photos. I did not see any edit options in "Develop Persona" for choosing image size or pixel quality. Im guessing there must be something I can do in Develop P to keep the quality of my photos? I am getting much better end results by just shooting in high quality JPEG and not going through the develop persona, through I know this shouldnt be the case- my RAW images look good when I first open them or when i open them on Preview. Help?
 -
 Hallo, obwohl ich immer noch kein Internet habe... Ein neues Tutorial auf YouTube. Wie man ein unterbelichtetes (versautes) Foto doch noch retten kann. Dazu wird im Modul "Develop Persona" gearbeitet. Das funktioniert am besten mit Fotos im RAW-Format, aber auch mit JPG. Viel Spaß dabei Euer Jack Bauer Hello, although I still have no Internet... A new YouTube Tutorial. How to rescue an underexposed (waste) photo. That works well with RAW-Files, but also with JPG. Have fun with the video. Bye Jack Bauer
- 5 replies
-
- 3
-
-
- Affinity Photo
- Tutorial
- (and 8 more)
-
 How to increase Grid line thickness - Affinity Photo The Grid lines are too thin for me. In Develop Persona I Show Grid and the open Grid and Axis Manager but I don't see a way to increase Grid line thickness. Can this be done and how?
 -
Guides in the Develop Persona - Affinity Photo They would be most helpful when using such things as Lens Correction for example. Aligning horizons or with any horizontal or vertical object would be an example use.
-
I'd like to use Guides for Lens Correction in Develop Persona in Affinity Photo How can I Enable Guides in Develop Persona? I enable View>Show Rulers and then View>Show Guides. There is no Move Tool to drag a Guide out. There is no View>Guides Manager.
-
I first encountered this a few weeks ago, but was not too bothered since it can be fixed using filters in Photo. However, the more I revisit the issue, the more it seems not right - it just should not happen and what's the point of having a function in Develop if it does not transfer to Photo? Here's the issue: I developed a NEF of a swan in Develop. Part of the image was not as sharp as I would have liked but going to the Details tab was great! However, when I switch to Photo, the sharpening is lost. Screen shots can be seen at https://www.dropbox.com/sh/d1robjl0hvnhgln/AABEGmL9pXxvaVSuk3_22eW1a?dl=0 PS: I may not have bothered posting this, but the Forum has been very quiet lately - maybe a couple of updates (RAW engine and Print UI ;)) and good to go???
-
Hi there I'm having the first look on the software, and till now look great. fast, things are easy to find, preset ready to go. That's good. Now, what I've notice is that the develop persona have some great capabilities, (like the easy to generate mask) that I cannot find the the photo persona. What I'm not sure if the develop is just a RAW editor to use before go to the standard or is a tool I can use later. If I might suggest, what it could be a great use (and not just a clone of photoshop) it will be to include a full editor of raw file fully integrated with the software. Just to explain, what is the main defect of the photoshop in raw file (using camera raw), is that first you set thing, then you enter photoshop. If you want to extract dark areas and lighter areas you have to open twice the image. Now, your masking system help, but still not having the full software doesn't make a real difference. To give you a clear example: I'm a architect photographer. Most of my works require manual HDR (shooting an interior with natural light can go easily with +2/-2 EV pics; while taking picture of a huge window could require a full bracket from +2EV to -8EV), but most of the time one single RAW file can do the job. As I mention, in the photoshop camera raw system, the best way to do it is the open twice (or 3 time) the image, place them one on top of the other, and then use the full photoshop (not just the camera raw) to set the masks. That means I'm working on a raster image and I've lost most of the RAW properties. Another tool that is mandatory my field is the lens correction. And this is the main clash with the camera raw system. To use I need a good tool (by the way, you definitely need to insert a guide-grid in the lens correction tool, or it is totally useless), so I end up to use a third party plugin (PTlens). Depending on the image I have 2 workflow: either i correct the lens distortion as first step, either as the last one (especially when I have 4-5 layer of different exposure images, doing the lens correction on all the layer became a very slow process). As it is now, I found no "lens correction tool" inside the software, that is basically the same mistake of the camera raw software. What I'm suggesting is to have a full integrated RAW system (basically how Aperture works), which allows you full edit a RAW preserving the RAW potential and parameter or, the possibility to go back to the RAW edit in any moment. Having the "first I set something - then I open and I set something else" system is totally pointless and makes RAW files useless. Hope this help to develop your software, I saw great potential, but still need many touches.
-
Overall it's a cool way to innovate the camera raw module from Photoshop. I have three issues so far however. First, I'm not sure why when I press Return, the image becomes extremely over exposed. The more I press it, the more exposure. If it's a hotkey, I don't think it should be on the Return key. Second, the undo feature does not work. There needs to be a way to undo (command Z) rather than having to mouse to the sliders. Third, when I adjusted the shadows and brought them up (brighter shadows) the colors became muddy. I know it's not the photo because when I preform the same action in Lightroom this does not happen. I am working with a raw file so I'm not sure what's going on but it feels like I'm working with a JPG.