Search the Community
Showing results for tags 'Brush'.
-
One really annoying bug (feature??) in Affinity Designer on ipad is the constant return of the brush size indicator in the middle of the screen. Every time I pan or zoom or rotate the canvas while using the brush tools it is shown, which is just very distracting and annoying. The only time this needs to be visible is whan I change the brush size, otherwise there is no logical reason for it being there.
-
I draw with a pen and keyboard in affnity photo.I want to use sortcut for change brushs,macros.
-
 How do I change the brush size with the keyboard + mouse? In PS I often use SHIFT + ALT and drag my mouse. Is this possible? Have only a trackpad so that would be a nice feature! Thanks
 -
Here is the custom smoke brush I promised in my Custom Smoke Brush Video. Free to use as you like. If you create one of your own I would like for you to post it to this thread and share with the rest of the community. Let fill the room with smoke ;) Don't know how to make your own? Well watch my free Video Tutorial Thanks cheers and use responsibly :P Smoke brush 3 demo.afbrushes.zip
- 17 replies
-
- 15
-

-

-
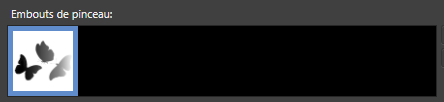
 Hello, I did a dispersal effect with butterflies and it worked (lucky guess). I wanted to do the same with triangular figures made by myself, then exported on PNG files before being integrated as a picture brush. This time it doesn't work like with butterflies : I have a transparent square around my brush that prevents me from making the dispersion effect on the white mask (no problem for the black mask). I notice when I compare the butterfly's brush and the triangles' one a difference in "brush tip", the image is not displayed in the same way, yet I don't know how I did the first time to get my butterfly brush correctly. Do you know how to correctly set up the "brush tip" to make the transparency square of the brush disappear ? Pictures : Menu with the brush tip that causes the square of transparency : "Brush tip" image of the butterfly (without the transparency square). A test image to show you the difference between the butterfly brush and the triangle brush when I do the dispersion effect on two squares of different colours :
-
Hi there, Photo opens up with the last brush used as the current brush. Unfortunately, that brush isn't visible in the Brushes menu tab as it's buried in whichever brush group it came from. There's no way that I can see to "highlight current brush in Brushes menu." Instead, I have to try to remember the name of the brush and where it came from. Not optimal when I'm trying to figure out which brushes I like and want to put into my own brush folder. Is there a way to identify the current brush in the Brushes menu? Thank you, Alec
-
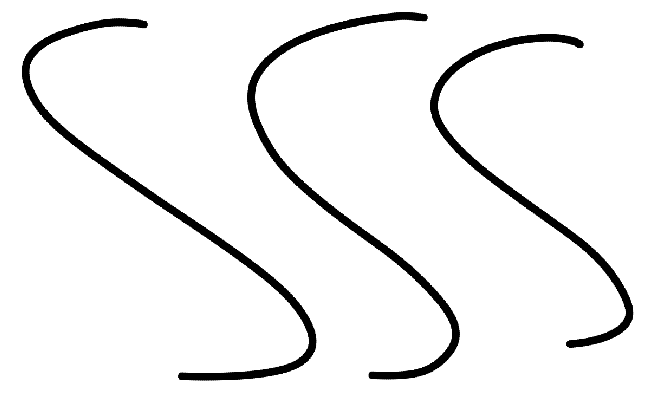
 Hi there!, Could somebody help me please, I've tried messing around with the settings on the brush tool to get tappered lines. I use a mouse to draw and when I do in affinity photo I get this; but When I draw in "Fire Alpaca" I get this; In fire alpaca I have, stablizer set to 38 and have "Force pressure on both ends" checked. What do I have to change to get the tapered effect in photo? I've changed the settings to this but still no luck; Please could someone help
-
 Hi, I was wondering if it's possible to use pressure and tilt simultaneously for controlling brush size? I currently have set up my brush to use tilt for controlling the size, and when I need pressure I turn on the 'force pressure' button, that way I can switch back and forth. However, in Procreate it is possible to use pressure and tilt simultaneously for controlling brush size, so was wondering if Affinity could as well? If not, is there possibly a shortcut or gesture that can be set up for the 'force pressure' button? Louis
 -
Hello there! Is there an option to show name of the brush? I have a lot of brushes and it is pain to understand what brush it is..
-
 I started off writing this as a question because I couldn't work it out, but a few times I accidentally got it to work although I couldn't work out how I had done it. (Affinity Designer Desktop v1.8.5, Windows 10). After much fiddling around I have worked out how to make it repeatable. (Admins: please feel free to move this to a better place in the forum if there is one). This is useful if you use a tablet and want to draw vector brush strokes in a mask in pressure mode, see the effect as you draw them and be able to edit them afterwards. Here is the explanation - there are three important steps which are not obvious but omitting them will leave you without editable vectors in the mask: Select the layer or group you want to add the mask to. I'll call this layer A. Click the Layer Mask button to add a pixel mask (even though we are in Designer Persona). This serves no actual purpose except that if it doesn't exist, this method doesn't work. Draw a vector brush or pen stroke (this creates its own layer above layer A). Create a group with this single curve (or more if you want to); the point is, it must be a group. Lets call this M (for mask) Make sure the group is open (i.e. click the triangle so that it points down and you can see the vector curve(s) in the group). Drag the Group M into the mask position of layer A. The vectors in group M are now a mask and the curves are individually visible and editable. A black 100% density stoke reveals anything below Layer A. Select the vector brush (or pen or pencil) tool and click on a curve in group M (select a curve in the group, not the group itself) in the layers window. No points in that vector curve should be selected because this will just extend that curve, unless that is what you want to do. Draw a new vector curve and it will be added to the curves in group M; i.e new brush strokes add vector masks in real-time. You can delete the pixel mask layer created in step 2. I have tried to record a video of the process (the context menu for the layers window doesn't show up in the recording but the actions were creating a group and later, deleting some of the vectors). Affinity Designer 2020-12-02 11-43-09.mp4 Note: if you don't create the pixel mask (step 2), group the brush stroke (step 4) or have the mask group open (step 5) when you drag it to the mask position (in step 6), you get the vector curves as a mask but you can't edit the individual curves or add any others. You can only do that if you drag the mask back out so that they become an editable group again and then re-drag to the mask position.
 -
 Hi all, New to AD and I've been searching for some information on brushes and the scaling vector artwork in designer. I am working on a piece that may need to get printed much larger than initially thought. So far I have avoided any graphic brushes, but I have some elements where this would come in really handy! If I have a piece that started out as letter size, but now will be printed around 30x40in (or thereabouts) how can I ensure that the brushes I use to make some elements remain sharp and are not pixelated? Can I create vector elements and create a vector based brush? Instead of a png image use a svg (or other vector format)? I ask because in the past with AI (which I switched from) I created a jitter brush with my shape and painted along a path to sort of randomize some of the elements I placed. It was a fast way of filling certain similar areas in my piece. Thanks for any pointers and help with this?
 -
Who likes to play with snow? :) This are the two brushes I made and normally use (light snow and heavy snow) when I want to get that winter look. You can also check how I made the brushes and how to use them is this tutorial: https://www.youtube.com/watch?v=IlxXqCCx9AM Hope you enjoy them, Pedro Snow Brushes.afbrushes.zip
- 9 replies
-
- 26
-
-
-
- affinity photo
- snow
- (and 1 more)
-
 The Protect Alpha option is hidden on small screens. It is very counterproductive to have to click the arrow each time in order to reach it (My screen is a Wacom Cintiq 13 HD touch). Sometimes I also forget that it is selected since it is hidden. Please make more space so that it isn't hidden or convert some of the options to icons (eg lock, mirror, symmetry). I ignored this for months but it really disrupts my process. The padding on some of the percentage selectors could be less to make space. Eg Opacity, flow, hardness all have pace to the right of the percentage. Thanks.
-
Hello, the stroke is very laggy on some brushes (gouaches…) on my Windows machines. What is strange is that given the same canvas resolution on my iPad pro (2018) and MacMini (2018) there is no perceptible lag with se same brushes (& sizes). Is there missing optimization on the Windows version or this a limitation of the renderer on Windows (compared to Metal) ? Demo video (lag @ 0:35) Canvas : print A3 300dpi Window 10 Laptop 32GB RAM : CPU: Intel(R) Core(TM) i7-8750H CPU @ 2.20GHz, 2201 Mhz, 6 Core(s), 12 Logical Processor(s) GPU: NVIDIA GeForce GTX 1070 with Max-Q Design Screen res: 1920 x 1080 x 60 hertz Windows 10 Desktop 32GB RAM: CPU : Intel(R) Core(TM) i7-4770K CPU @ 3.50GHz, 3501 Mhz, 4 Core(s), 8 Logical Processor(s) GPU: NVIDIA GeForce GTX 1070 Ti Screen res: 3840 x 2160 x 59 hertz
-
Each time I zoom in / out on my A4 canvas I have some delay for the first paint brush input (both with wacom tablet and mouse). I don't have this problem on Affinity Photo. (Same config, same brush, same canvas) With smaller canvas it's better but I also feel the slight delay. I tried with OpenGL and Metal to see differences but it's the same for both renderer. laggypaintbrush.mov
-
 It's what the topic title says, the further you zoom in, the slower the brushes becomes. If you're zoomed way out brushes perform between well to acceptable, depending on their complexity. As you keep zooming in, the performance drops further and further until they're unusable. This is true even for basic round brushes, but it's more noticeable in complex brushes, such as Frankentoon's. I've also noticed it's worse if you're drawing over vector shapes, which is the whole point of these brushes. See the video for a visual reference. iPad Pro 9.7" with latest version of iOS 12.4 and Affinity Designer 1.7.1. I've tested and this also happens on Windows, the more you zoom the worse the brushes perform. But on Windows, especially on a desktop machine, the sheer processor power masks the issue. Thanks! RPReplay_Final1565346075.mp4
 -
 I'm pretty conversant with the Brush Editor, but I'm finding I can't actually access it for the brush I'm currently working with in it's current state. Example: To access the Brush Editor, I have to click on a specific brush in the window. If I customize that brush a bit, say, lowering opacity to 50%, then decide I need to add some scatter to it, I can't just call up the Brush Editor window. I have to go back to the Brushes panel, select the brush, and make the scatter edit. Doing so resets the opacity to the original setting, which can get frustrating. Is there a way to access the Brush Editor on the fly?
 -
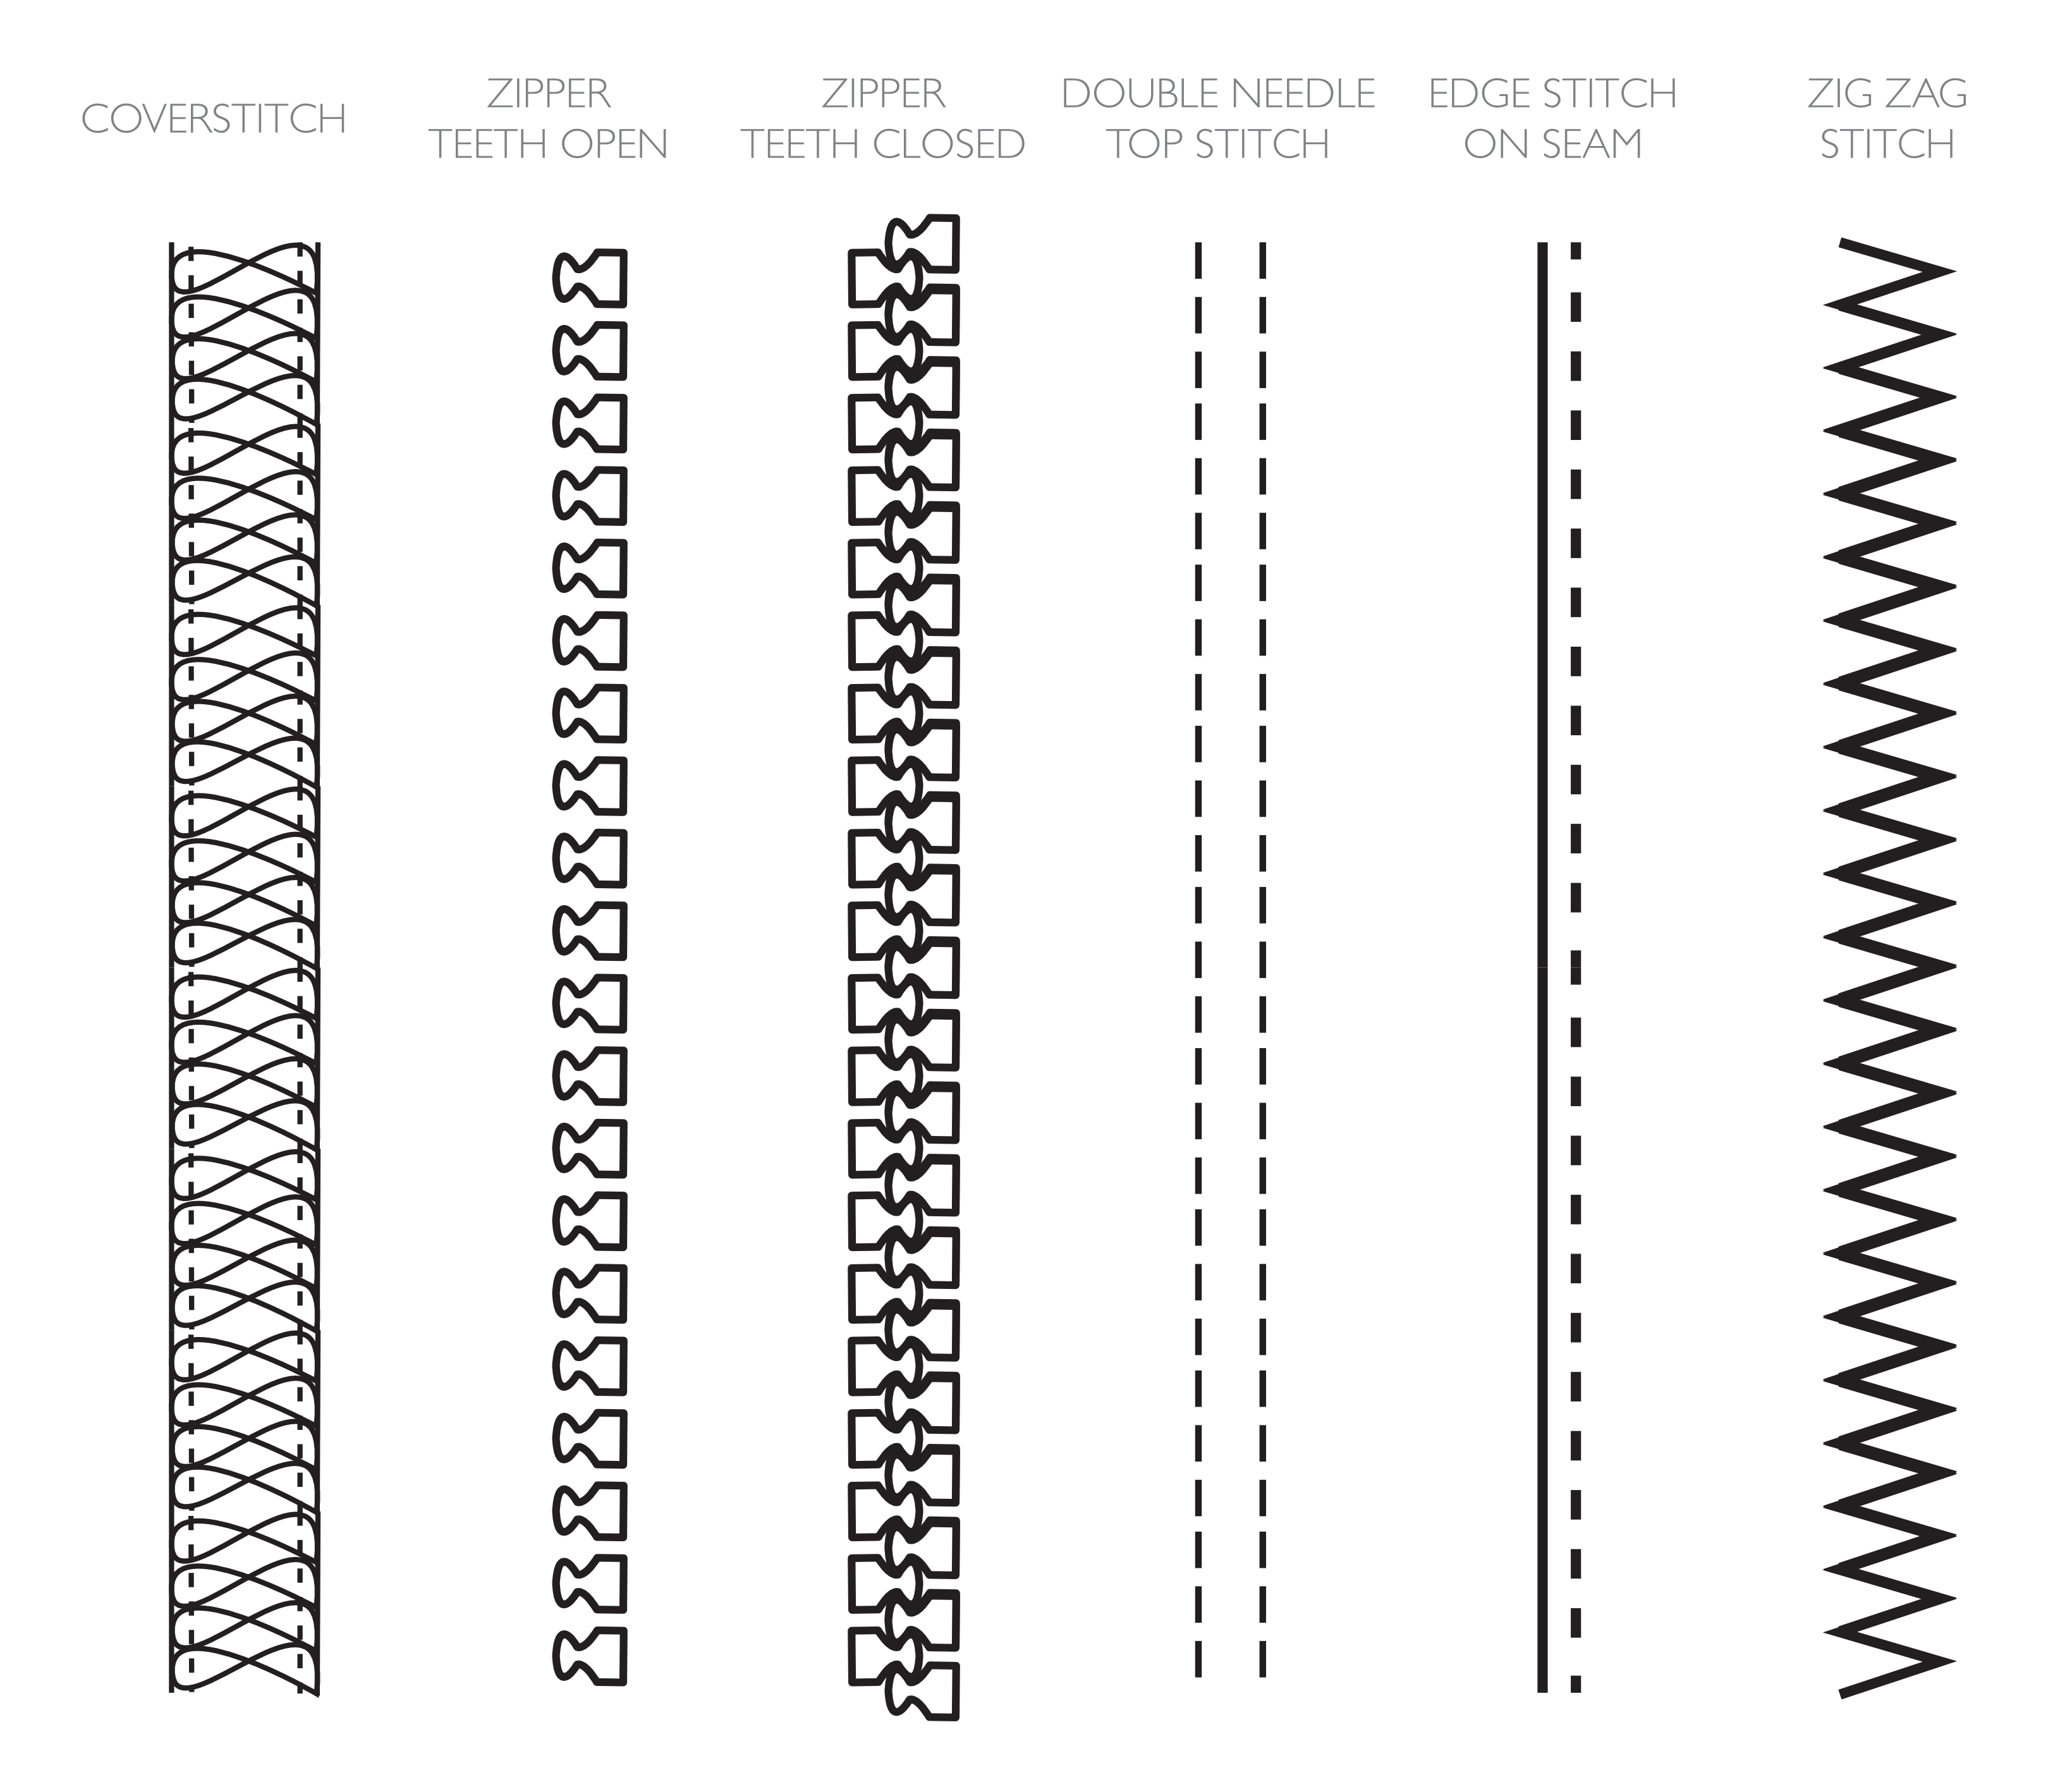
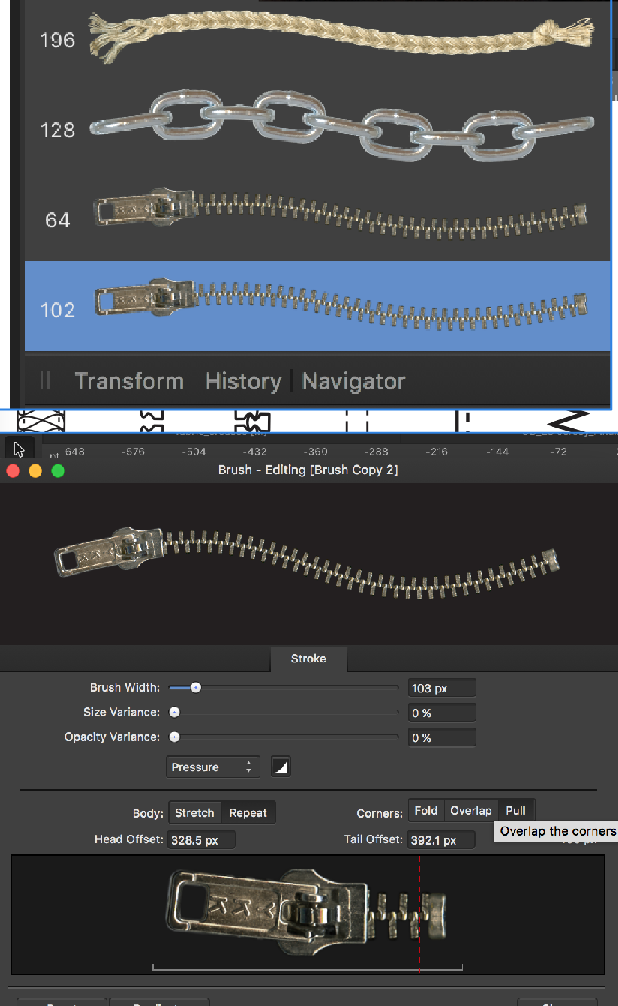
Hey Guys, I'm a fashion design student and I switched from Adobe Illustrator to Affinity Desginer. I don't want to use AD just for drawings but for technical drawings too. My problem: in Illustrator I had brushes for zippers and stitches. Everytime I drew a straight line I could change the brush into a zipper or a stitch but for AD there is nothing like this pre made brushes available (or haven't found it yet). So, is it possible that someone can explain me how I make this brushes in AD or it would be nice if someone do it for me I attached you the ad file with the pre made shapes This is how they look Thank you in advance Fashion Brushes.afdesign
-
I made a stroke with a brush in pixel persona. Do I find afterwards which brush I used ? Where?
-
 There is no indication, either in the brush selection list, or even in a brush properties UI, which brush is selected/ in use. Please add this support. I have to keep manual notes and screenshots of what brush I'm using. Would also be a great feature to be able to assign a color, like you can do to a layer, to a brush.
 -
 How do I make this brush copy the background image? Or turn it into a selection mask? I can research the method but son't know what steps to take or what its called. Thanks
 -
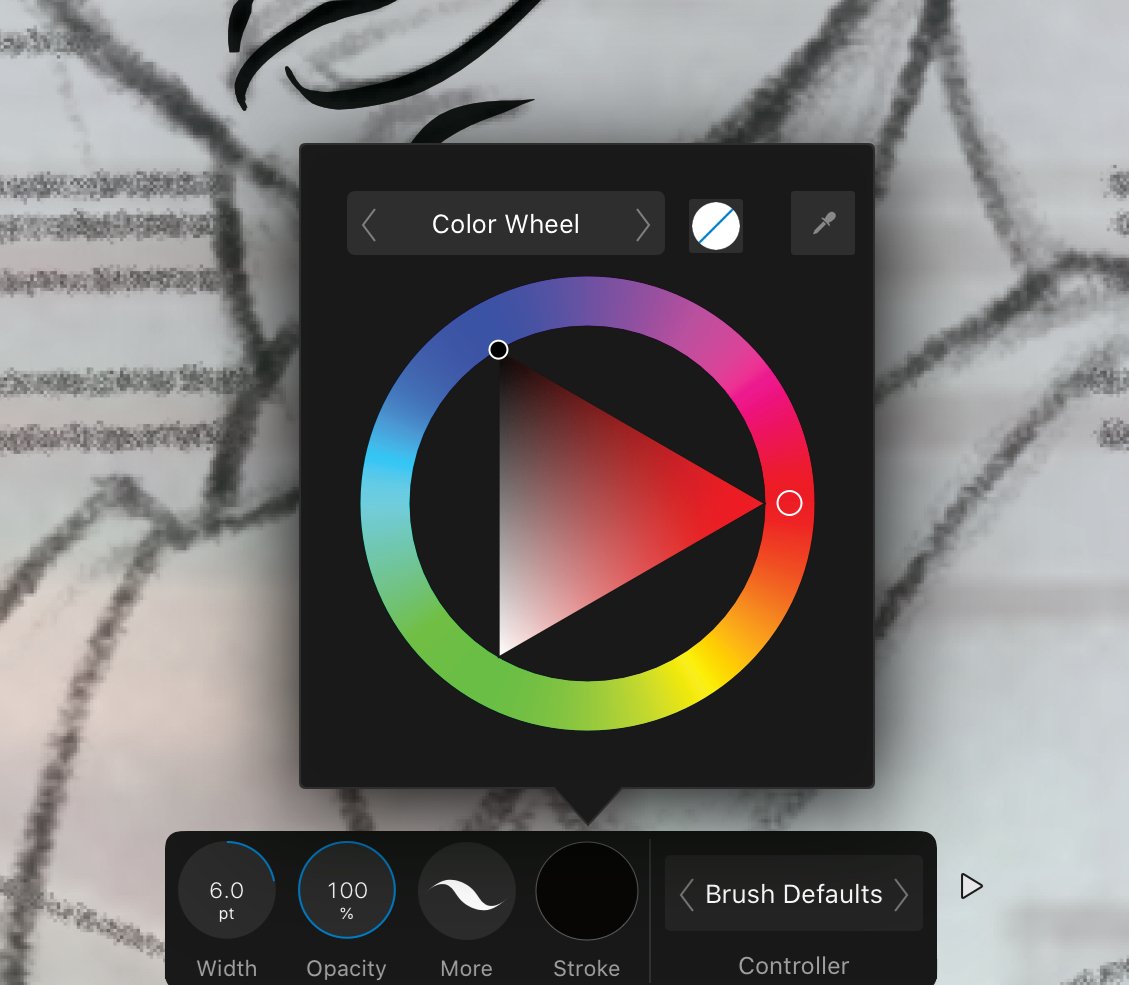
 Want to use a vector brush? Want to use a specific color with your vector brush? Want to use a specific color that you carefully created and saved to your Swatches library? Too bad! Please add the ability to choose swatches within the color menus of the vector brush and pencil tools. Thanks!
-
 Hi, Does anyone know of a tutorial around on creating image brushes?... One similar to the preset clothing zipper brush? I.e. as in the image supplied. I've had a hunt around for some help on this but no joy finding anything. Cheers guys, H
-
A hotkey / modifier (like pan or zooming) for flow control would be a great addition to the software.
-
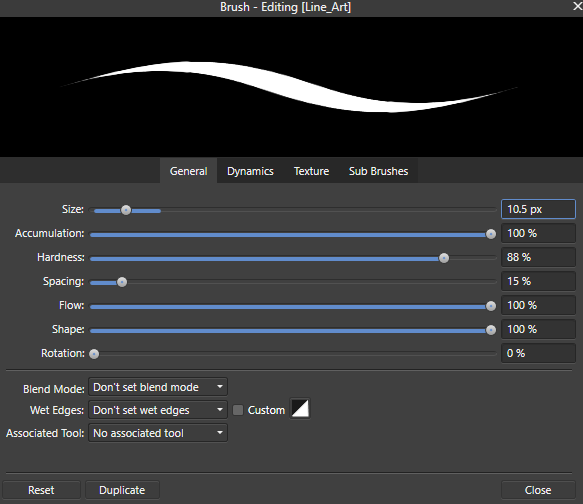
Hi, I would like to see an option for the preview in the brush panel to show the brush texture at a decent scale as shown below, rather than show how the brush appears when stroked. This is because many brushes are designed to be used as stamps rather than dragging them, and it's hard to select this kind of brush from the current panel. I own Designer, but as a CS6 user, I find this is a barrier to entry regarding Paint. Thanks, Epi