Search the Community
Showing results for tags 'Blur'.
-
i created these shapes in AD and then raterized in AP. I can't blur them, and I also couldn't use the flood fill tool on them. I am trying to blur that small gradient so that it blends in more to the background. This shape that I am blurring is a clone of the group below. When raterizing, it looks like the whole group was converted to a layer. The blur tool does work however, when trying to blur the shape outside of it's lines (works when dragging the blur tool from the shape to the white. Affinity Blur.mp4
-
 Layer Blending Modes and Blur Effect Hi, …I just have a question regarding Layer Blending Modes and a Blur Effect. Is there a trick for applying a Blur, delimited by a vector object (Object A) located in the foreground, on a background (Background B) located behind?… The idea is to be able to move Object A over the entire surface of Background B, always with this quality of Blur which then applies to Background B. The solution, one-off and much less flexible, is to create a new Group (Group C), duplicate Background B in this group, apply a mask to it with Object A and a “Gaussian Blur” layer effect. But, if we move this Group C, it will no longer be aligned with Background B!…
 -
 What am I missing? I drew the image below, copied the layer, then merged down tried different settings of pixel alignment, same blurry result (copied and merged the image ten times, to make the blurring obvious. In my workflow I frequently draw on new layers that are later merged down so I would like to find a way to have no blurring, I get lost in the layers when there are too many)
-
 There is no blur if Preserve Alpha is activated. The live filter is also not non-destructive. If the filter gets reopened by double click, the checkbox for Preserve alpha is no longer there. FYC: The YT video link is set to hidden. The video explains it all:
- 7 replies
-
- 1
-

-
- blur
- gaussian blur
- (and 2 more)
-
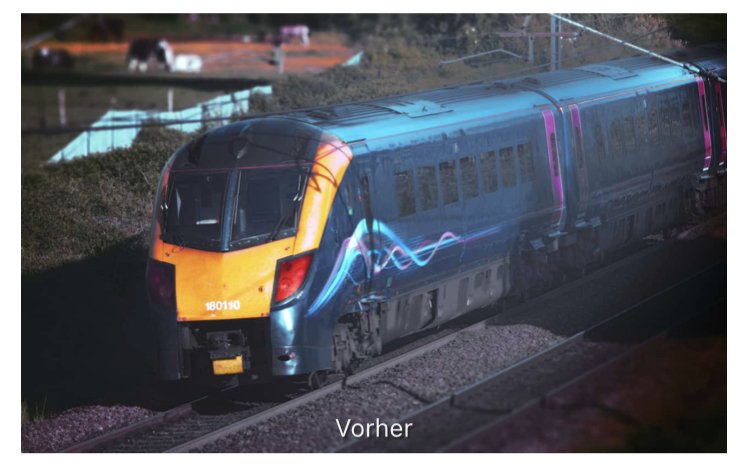
 Whilst trying to rescue a photo taken at a low light event, I was researching this solution and found that Photoshop has a filter called 'shake reduction' to tackle this very problem. There is also a manual solution in Photoshop by using the 'Ruler Tool' to determine the angle and radius of the blur. The last step is to use a filter called 'Smart Sharpen' where these measurements are entered followed by some fine tuning of the image. Here is the link to the YouTube video explaining these steps: You can probably guess my question; Does Affinity Photo have equivalent tools to these Photoshop tools or is there a different route to achieving the same end result in AP?
 -
Hi all, Is there an average blur feature on the iPad affinity software? I use a lot on compositing, would anyone recommend another way to get the mean color of an image? Thanks in advance! -jd
-
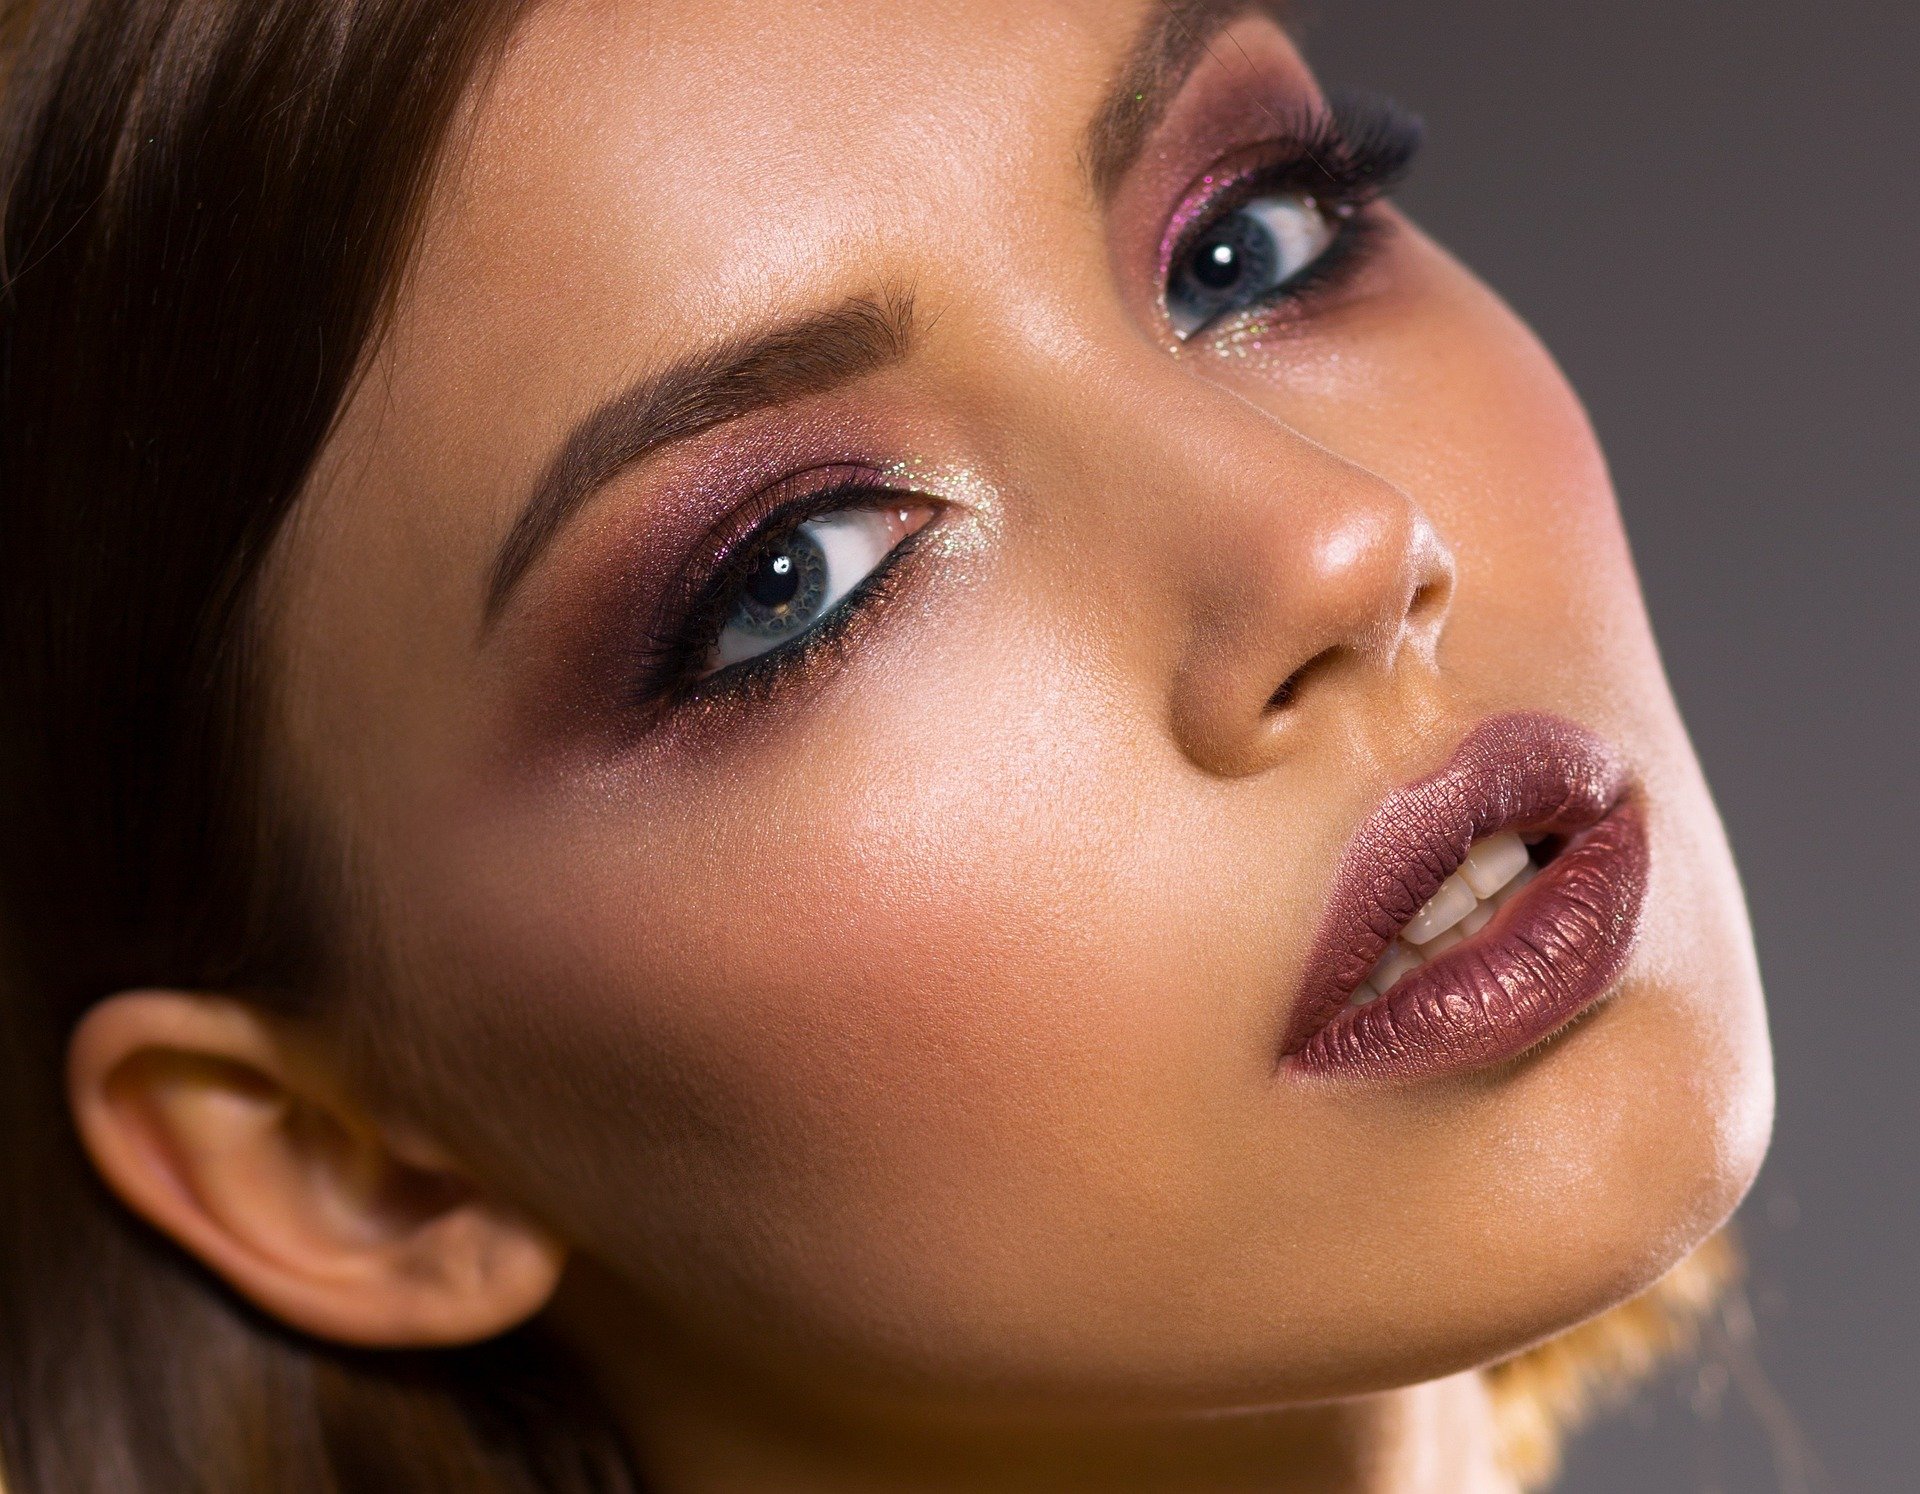
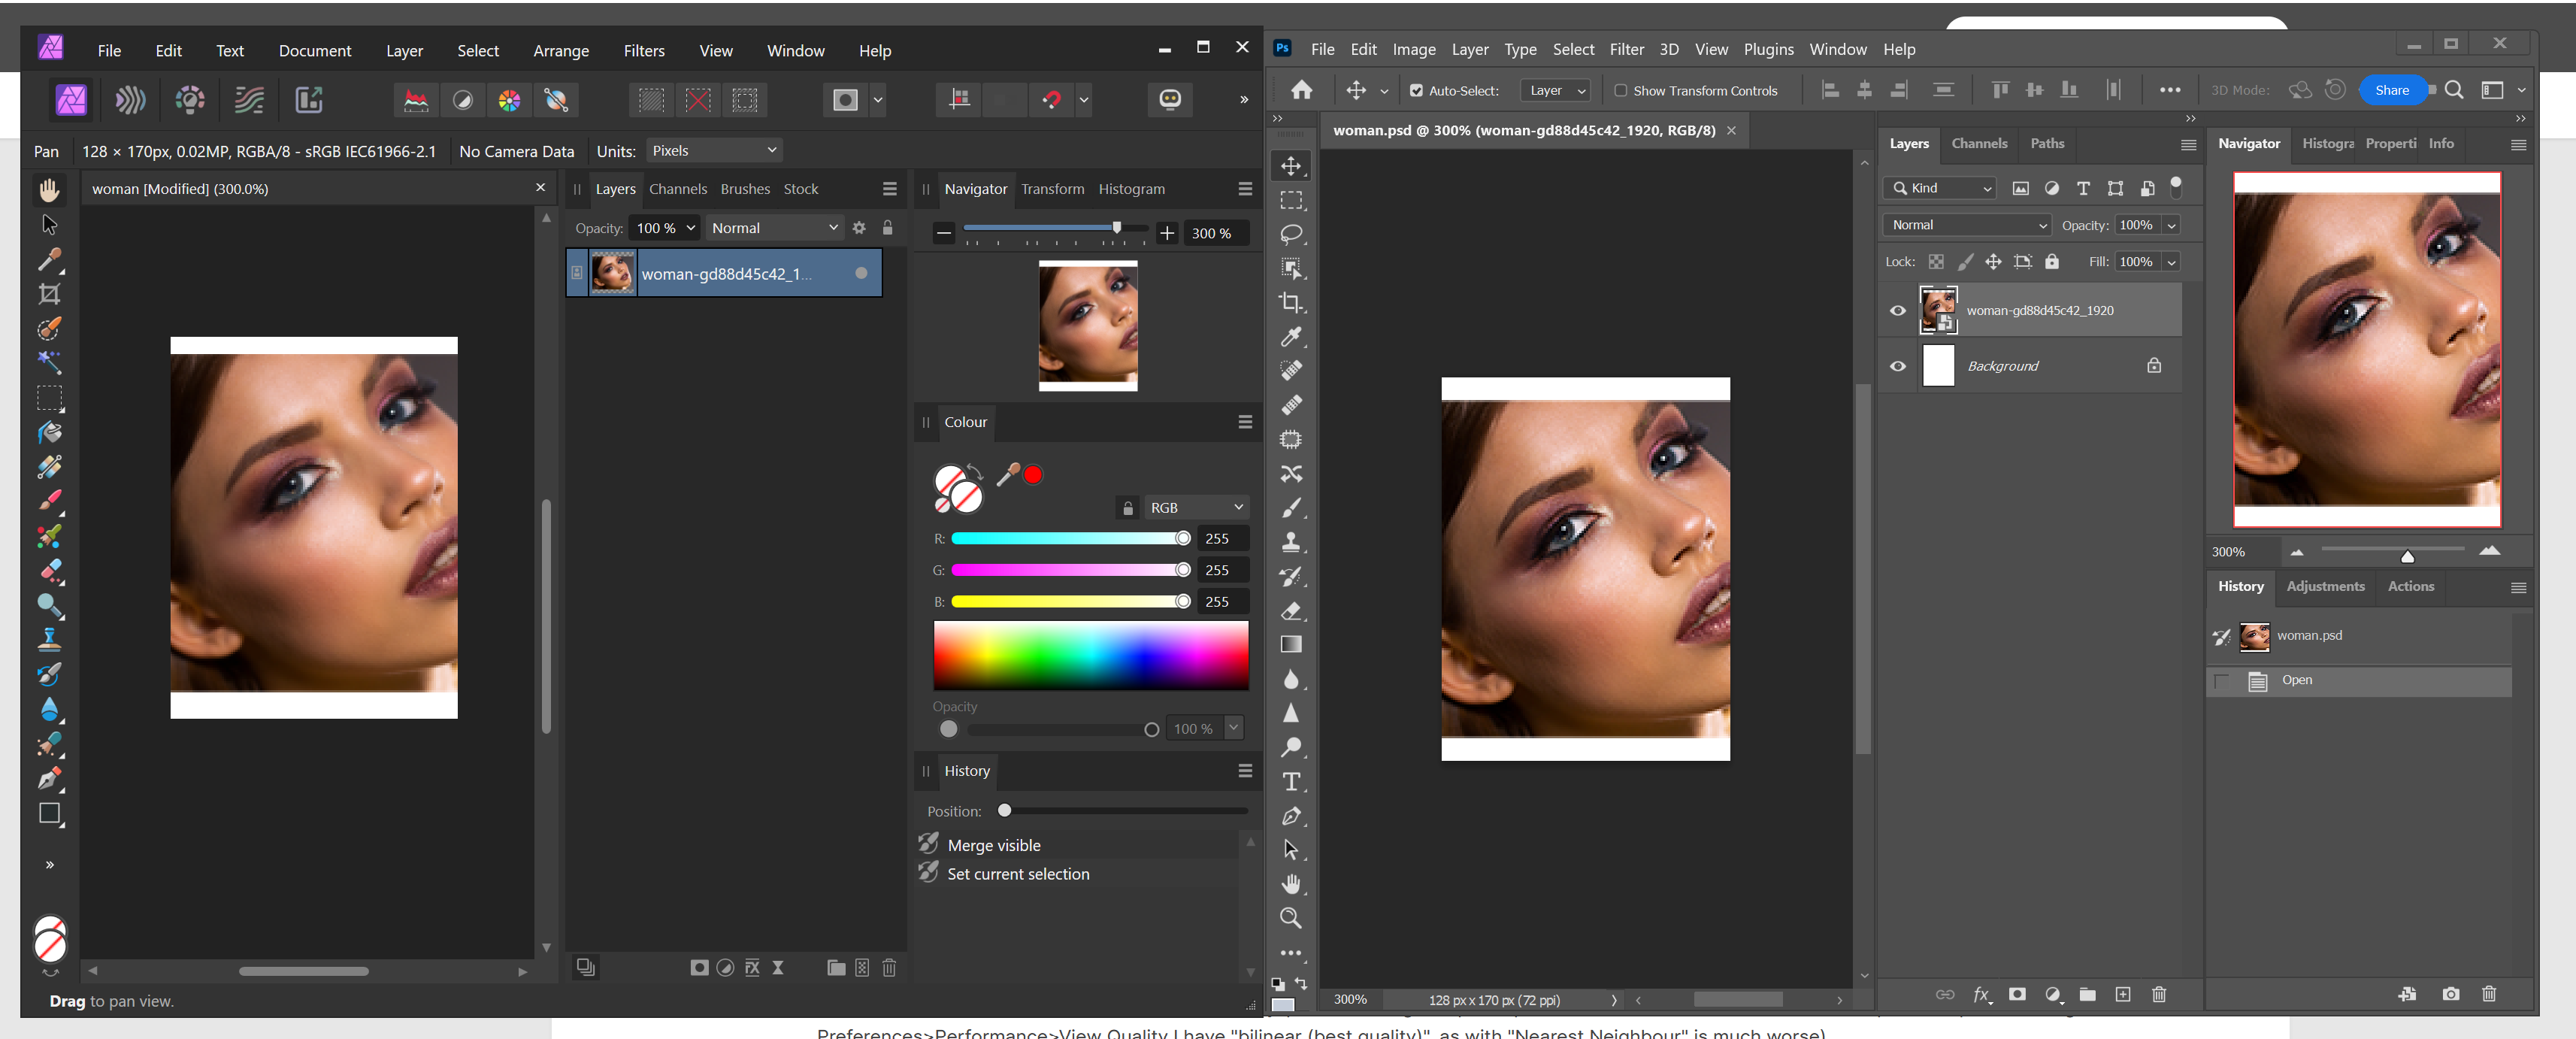
Hi! I am very new to Affinity. I have searched in the forum but didn't find anything similar, so I don't know... maybe it is only happening to me. I created a new file of 127px width, 180 px height, with 72 dpi. My test is small because I found the problem with that one, but it happens with other sizes. Drag the woman image so it is a new layer (linked). I then resize that layer (the layer, not the document) to a 10% width with Transform panel. You can see how the image gets pixelated, or some would say blurry (depending on the zoom level!). This is not happening in Photoshop, which looks fine. This problem is NOT happening in Affinity Designer, nor Publisher. This is a problem, cause you can not work in a blurry-pixelated image in "photo persona". I don't know if there are other options to preview images (in Preferences>Performance>View Quality I have "bilinear (best quality)", as with "Nearest Neighbour" is much worse). Exporting as JPG through "File>Export" Resample: Bicubic Quality 100% gets same blurrines-pixelation. Resample: Lanczos 3 Non-separable, which seems the best Quality 100% gets better. I think is even better than photoshop, at least with this small export size. Ok, then I change to "export persona" and the image in the monitor looks as expected! But exporting it gets same results as before. You can check and try with the attached elements (woman photo is free, on Pixabay: https://pixabay.com/photos/woman-portrait-face-skin-make-up-3096664/ I downloaded the 1920px option). Thank you! Edit: I have uploaded a new image: a screen capture of Affinity Photo vs Photoshop. woman.psd woman.afphoto
-
 Hi There, I have been using Photo for a while now.. Every single time I open a RAW photo and develop it appears to be blurry and unsharp. I am 100% sure that the photo is sharp, when I go to the export screen it appears even more blurry and unsharp. Exported images are sharp tho. But at this point I feel like I cannot be sure that it is indeed sharp inside Affinity Photo. Is this problem familiar and is there a fix for this? Sincerely, Roel
 -
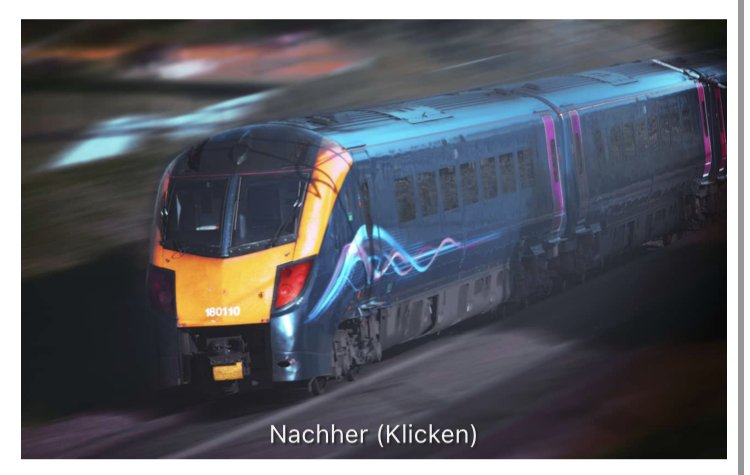
 hello, can you tell me how to get a partial motion blur effect on my pictures (like on the picture)? Does Affinity have something similar to the photoship „path blur“ tool? thanks alot greetings patrick
-
 Good Morning, I have been looking for a way to create a Gaussian blur gradient. That is to say slightly blurred on one end of an object and progressively becoming more blurred toward the other end of the object. Specifically a shadow of an object (pole) composted into a photo. I have been told that there is a way to accomplish this in PhotoShop using a channel selection and applying a gradient to the selection. Is this possible with Affinity Photo? If so how. Thank you. Paul, Ocala, Florida, USA
 -
 Sharpening by Blurring This procedure originated from Dan Margulis and I found it described in The Creative Digital Darkroom by Katrin Eismann and Sean Duggan (Page 387). It utilizes two copies of the original file which are transformed, one into a Light Edges and the other into a Dark Edges image. These are then stacked onto the original with appropriate blending modes to create a final sharpened image. The original used Photoshop. I have translated it as far as I can into Affinity Photo procedures. 1. First, create two new tabbed-copies of the background image. Photoshop allows you to to do this as a recordable command. In Photo I used the following: Edit > Copy (Control-A, Control-V) (or Command-A, Command-V) Edit> New from Clipboard. Edit> New from Clipboard. This creates two new tabs, each with a copy of the original image. 2. Create the Light Edges On the first extra image, duplicate (Ctrl/Cmd -J) the Background Layer twice Select the Middle Layer Apply a Gaussian Blur Filter (Filter > Blur > Gaussian Blur) with radius 1.5. Change the Blend Mode to Darken. Select the Topmost Layer and set the Blend Mode to Difference. Flatten the Image (Document > Flatten). Duplicate the single layer and set the Blend Mode to Screen. Duplicate this top layer again. Flatten the Image. Rename this layer to Light Edges. The result will be a very dark image with fine light lines corresponding to the edges. 3. Create the Dark Edges On the other extra image, duplicate the background layer twice. Select the Middle Layer. Apply a Gaussian Blur Filter (Filter > Blur > Gaussian Blur) with radius 2. Change the Blend Mode to Lighten. Select the Topmost Layer and change the Blend Mode to Difference. Flatten the image. Invert the image (Ctrl/Cmnd-I). Duplicate this background layer. Change the Blend Mode to Multiply. Duplicate this layer again. Flatten the image. Change the Layer Name to Dark Edges The result will be a very light image with fine dark lines corresponding to the edges. 4. Bring it all together Select the Dark Edges image and Copy (Ctrl/Cmd-C). Select the original image and Paste (Ctrl/Cmd-V). Set the Blend Mode to Multiply. Select the Light Edges image and Copy (Ctrl/Cmd-C). Select the original image and Paste (Ctrl/Cmd-V). Set the Blend Mode to Screen. I have created two macros to perform the Light Edge and Dark edge manipulations of stages two and three. Although Photo will quite happily create a macro that copies and pastes layers between documents, it records the actual layers present at the time of the recording, not the command to perform the copy. To apply these to a document, you need to manually go through the steps in stage one to create the two copies. Then Apply the Light Edges macro to one of these tabs and the Dark Edges macro to the other tab. Finally manually go through the steps in stage four. Dark Edges.afmacro Light Edges.afmacro John
 -
Hi guys, I am missing permanently a slider based/non destructive possibility to blur masks. E.g. by "Gaussian Blur" of "Effects" tab. Please don't get it wrong I have some emotional moments in the video, that's only because I'd like to prefer AP over Ps, but due to things of that, I can currently not do a full switch to AP. Video (unlisted) should explain
-
 Hi, newbi here. got affinity photo in my 2020 MacBook Air m1. when using Inpainting or any other Healing tools even though I choose the brush hardness, opacity, flow to 100 I'm getting blurred edges ! only in clone tool I'm getting hard edges. I was wondering if there is away around it or I'm missing something ?
-
 When using the frequency separation dialogue, it would be great to be able to chose the type of blur to apply: Gaussian, Median or Bilateral, since each as a different effect on the edges. Thank you
- 8 replies
-
- 3
-
-
- feature request
- frequency separation
- (and 1 more)
-
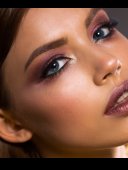
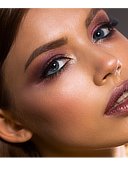
 Hi everyone, i recently started using this amazing app, and i am sorry if i am not using the corrects words to describe what i am trying to say.. Trying to apply a Blur filter (Gaussian for example) to a layer (where i’ve done what you see in the first attached picture), once i raise the radius of Gaussian Blur, the highlights are too strong again (i’ve attached two more screenshots showing the before-after effect). Could you please help me to understand why how to avoid it? Thank you very Regards, Mattia
-
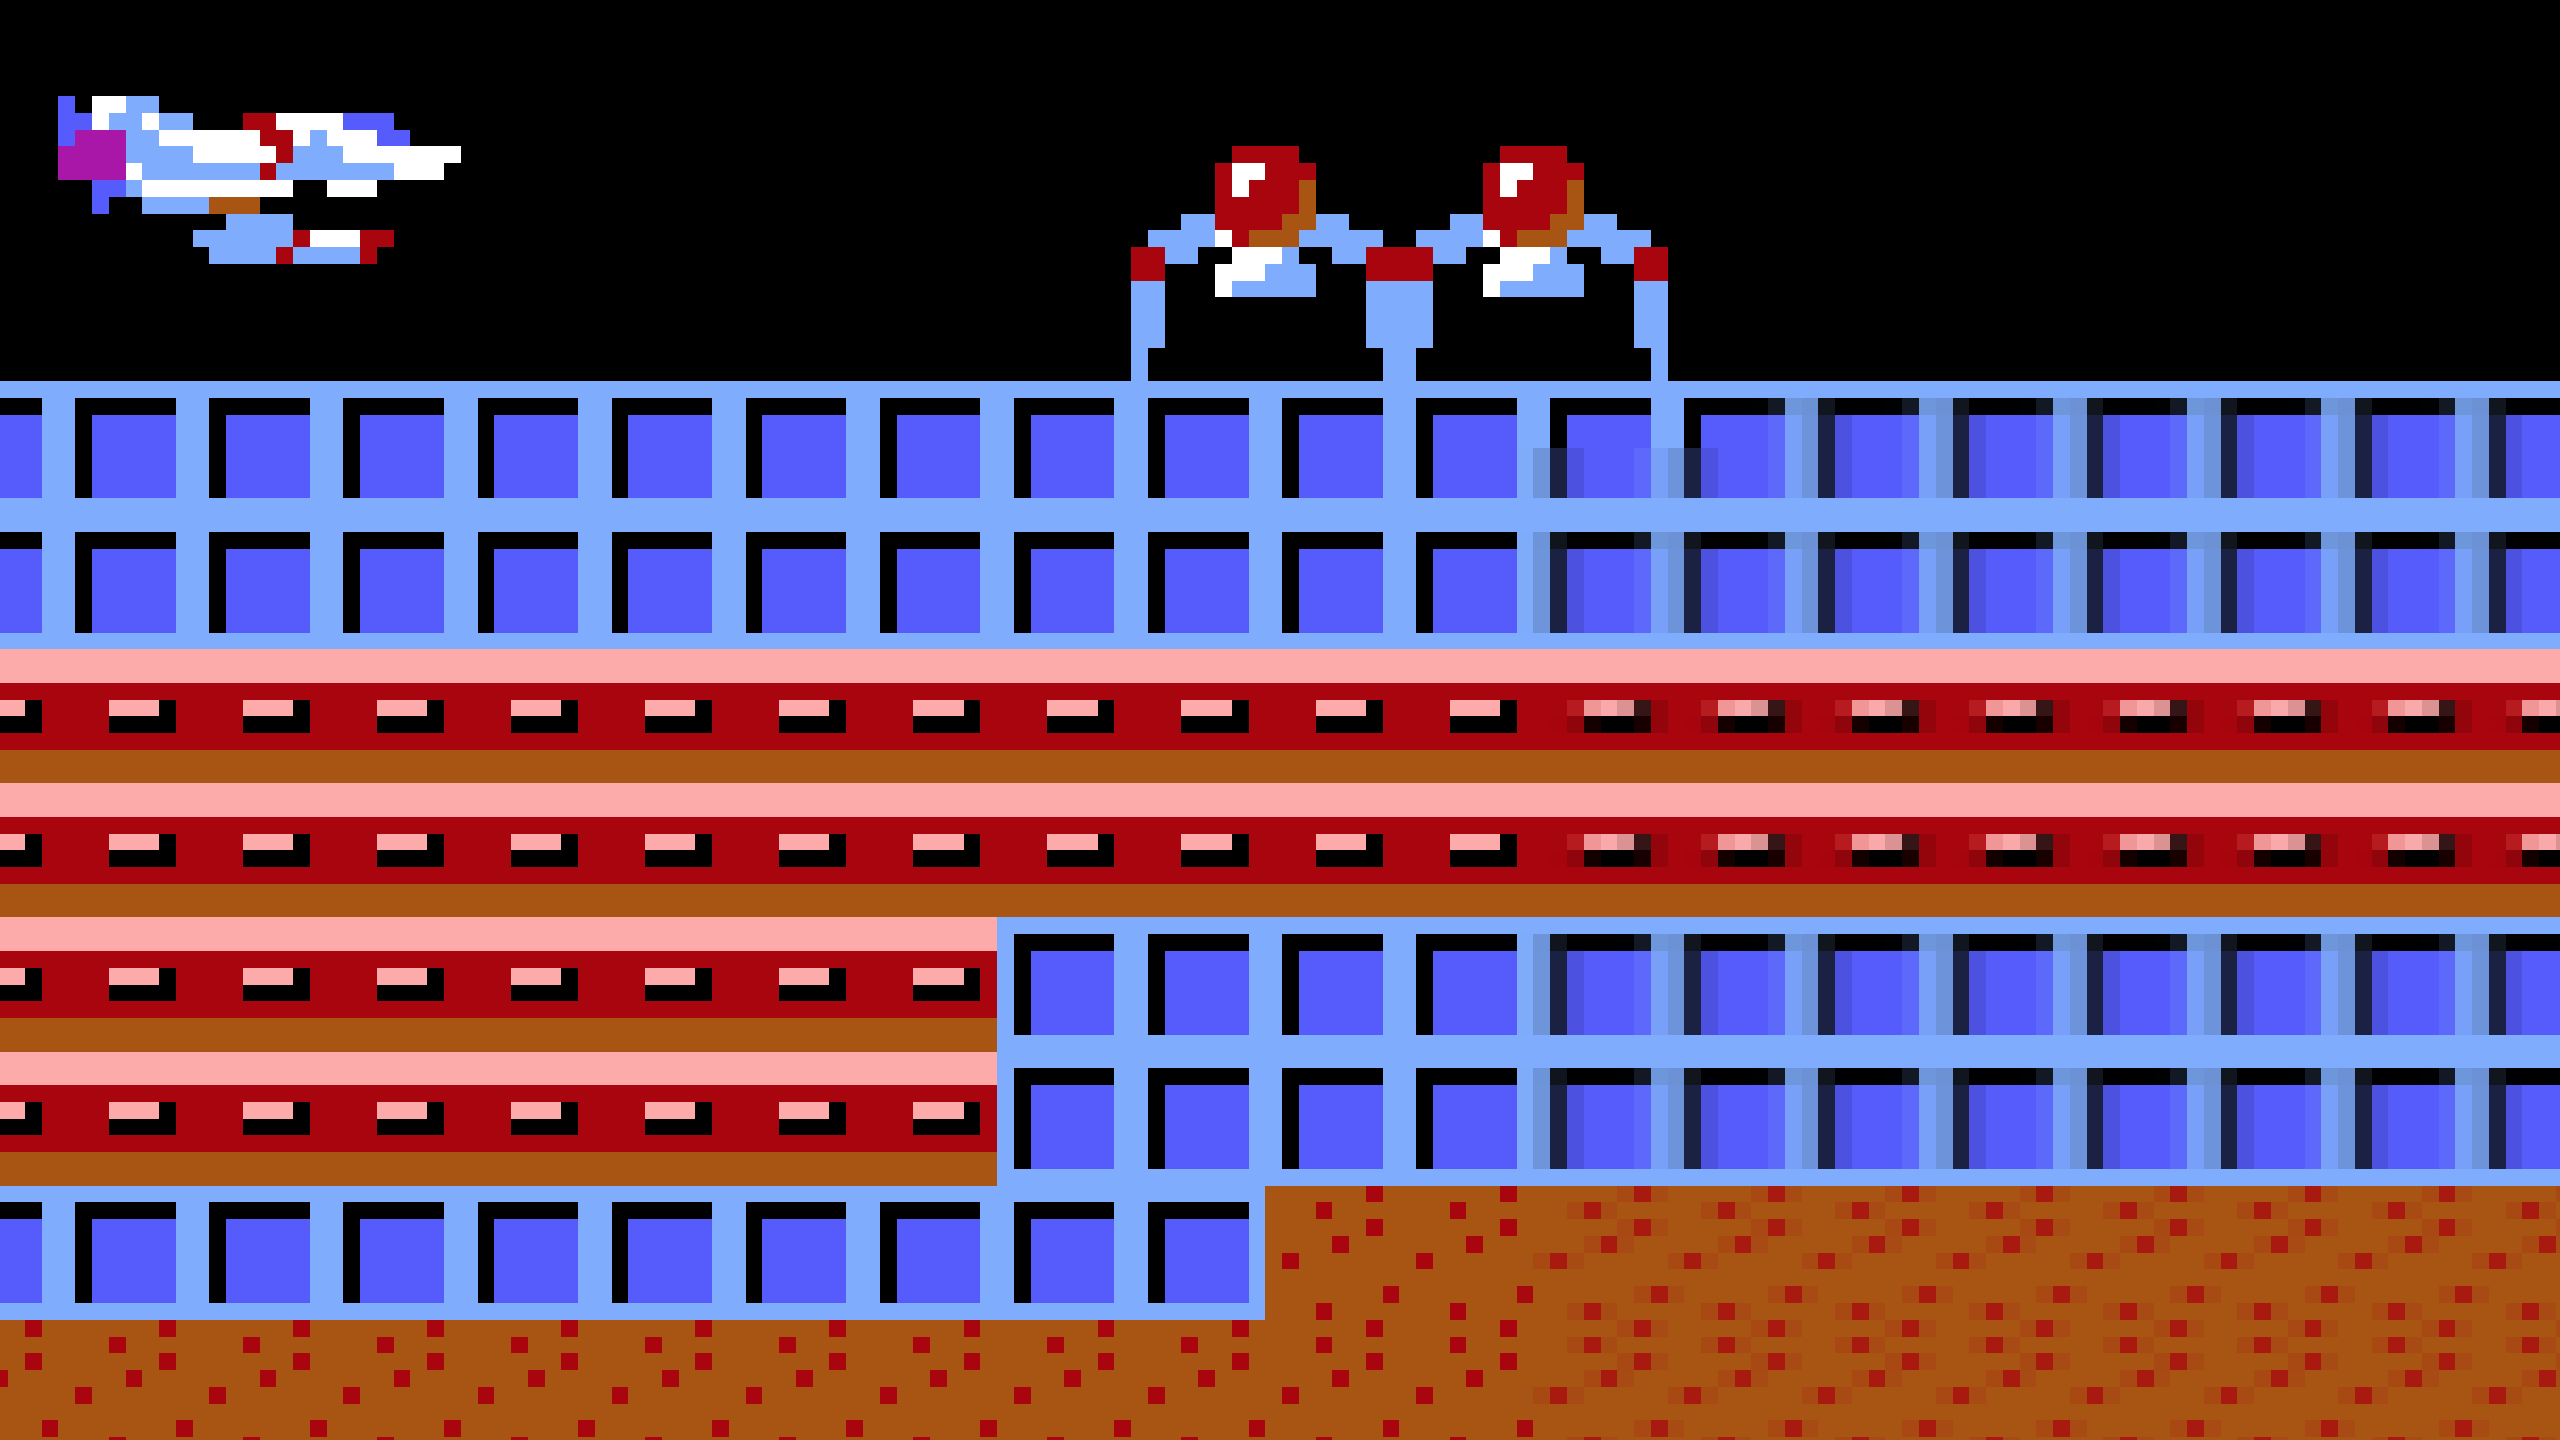
 I've been piecing together a large image of the first level of the Sierra/GameArts video game "Thexder" from many screenshots. I open each screenshot PNG in Photo, crop off the bottom game UI, copy the image, close it, and paste that copied content into my main document. As I paste these shots into my primary document, the sharp solid colors in the image start to degrade at their edges, in ways you would see if you resampled an image to scale it. I am NOT scaling anything. Sometimes it's REALLY bad upon pasting a new chunk of image into the main document. In THIS specific case, it seems that undoing the paste, zooming WAY out in the document, and pasting again results in a correct paste (this time it pastes in at the top left corner of my document, where as before it pasted where I was working). Moving layers around shows the color shifts happening as part of rendering the layers on screen, but merging down, etc, will eventually start to show that the edges of hard color borders are "smudged" with slight color shifts. Anyone who plans to use Affinity Photo to create pixel art should beware. This could be especially problematic when changing between set palettes and full-color. It also has me wondering how much degradation is going on all the time. How much blur is Affinity Photo adding to everyone's images while they're working on them, unsuspectingly? I only noticed this because of working at the pixel level, zoomed in at them, and knowing the explicit limit of 16-colors in these screenshots (the game only shows 16 colors from an MCGA palette). My main document is a regular Affinity Photo document. I am importing PNG images from Boxer (DOSBox shell in Mac OS) which are 320x200. I've attached an image showing what's happening. I have zoomed way in so that you can see the individual pixels (very important with pixel art). The left side of the image shows sharper content while the right side has areas that have been through layer movement and merging down. One edge even turned partially transparent. EDIT: It seems to be getting progressively worse as I extend my canvas to the right and downward, as the older content to the upper left does not seem degraded.
-
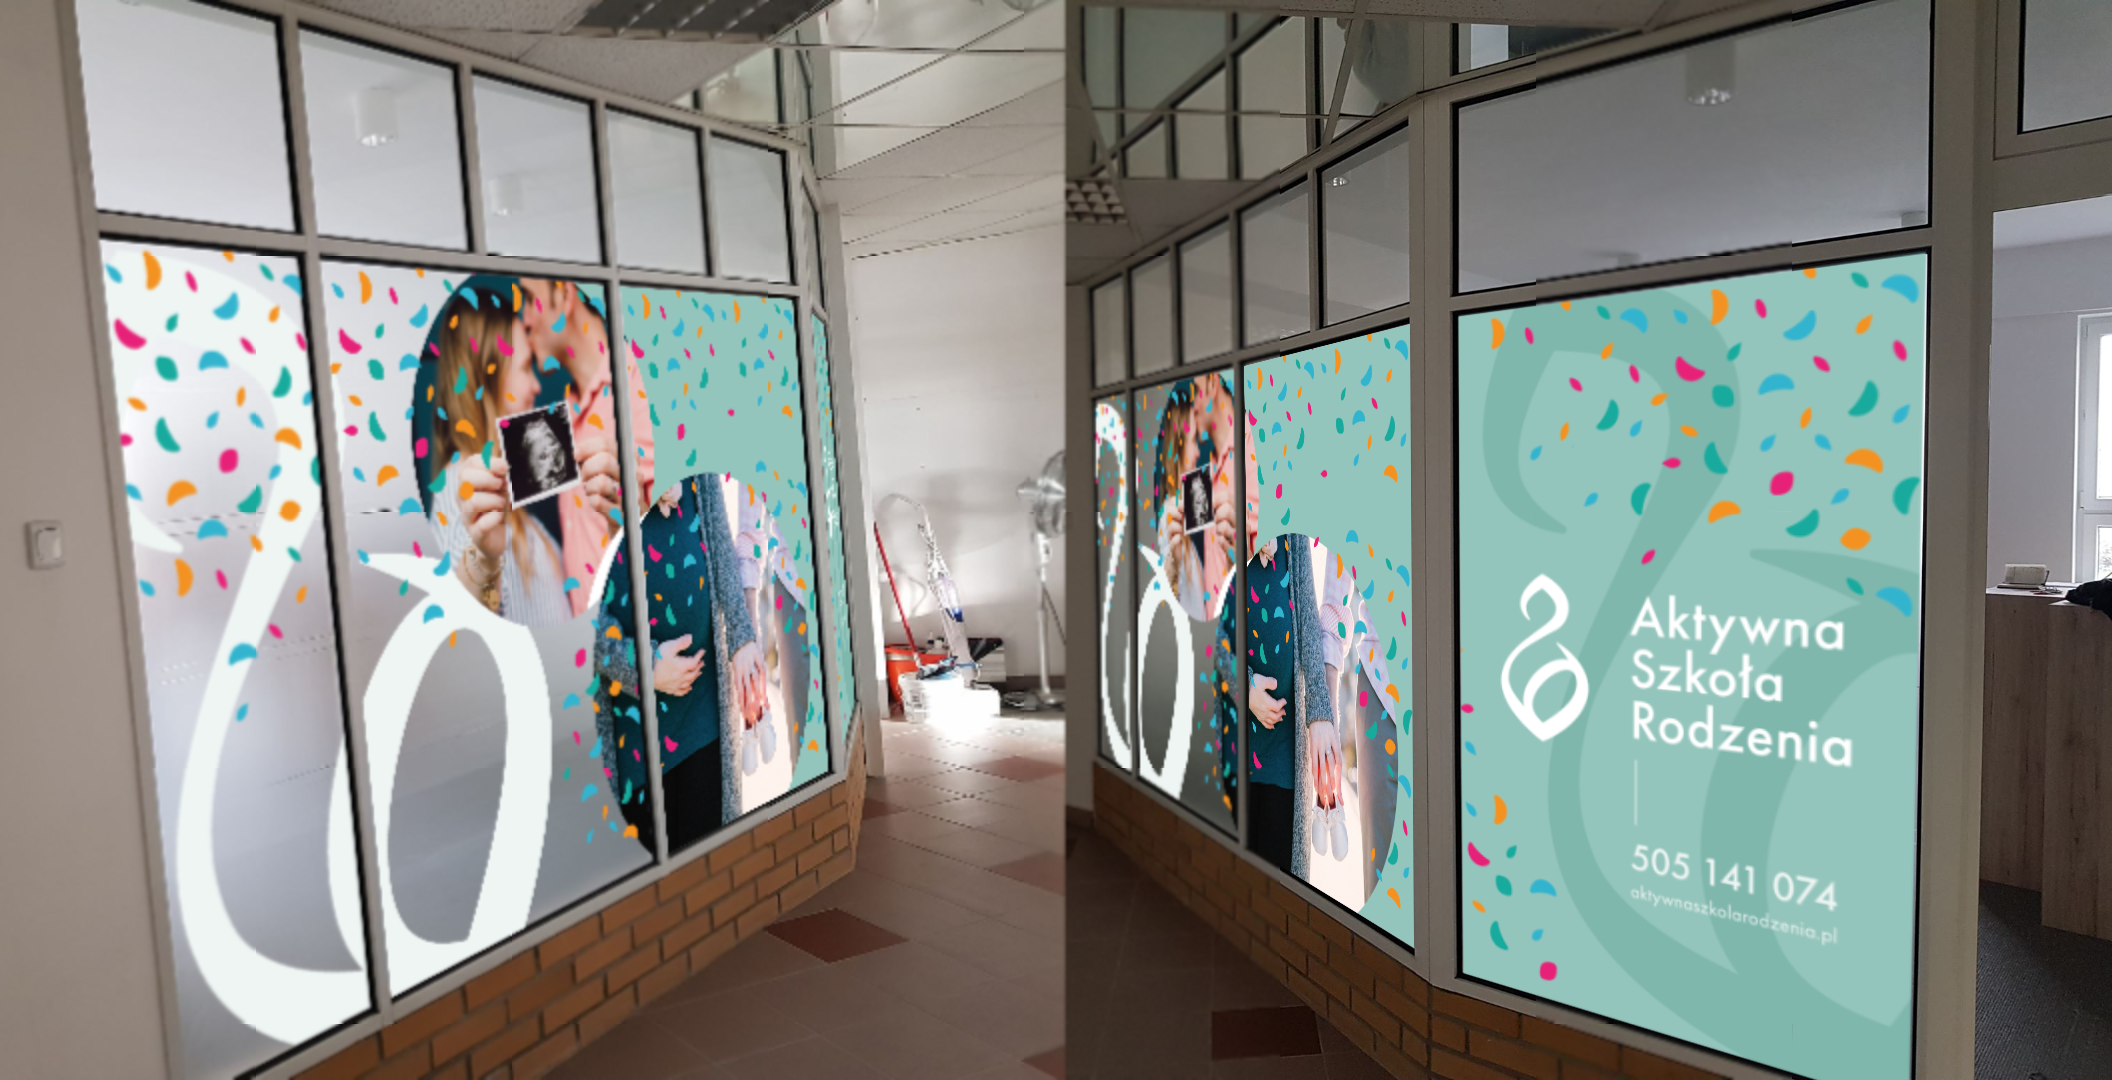
 Hi Walt, following some discussion under "Absolute beginner" here is an example of what I've come across. "Sample Squiggle" was a blank document, in which I made a random squiggle in black with the pixel tool. I then copied and pasted it (using Cmd C and Cmd V), and used the Move tool to slide the copied version away downwardss from the original. If you enlarge it to, say, 3,000% you will clearly see a mid-grey artefact attached somewhat unpredicatbly to the shape of the original. Less obvious is a very pale grey artifact, usually on the opposite side of the line. Some bits of the line are not affected at all, so far as I can see. I found three levels of grey. I would copy from my diagram, but in pasting it into a document you could see I would be corrupting it anyway, which would be confusing. But if you care to believe me I will say that I usually get more complicated blurring than this. I've put up the original diagram, renamed as "Wiring x", and at position 57 on the scale at the bottom of the page, and about half way between top and bottom there is a box with the legend 'Na 7' in it. The box is made of two black one-pixel-width lines, with the space between them filled with pink. A similar box, with the legend 'Na 5' is to be found at 47 on the bottom scale and a bit above the middle vertically; it show no sign of blurring. I can't say for certain whether this is something which I copied without the paste problem, or something I made from scratch. But this is what Na 7 looked like originally. The pattern of artefacts is similar, but different. The letter 'N' has artefaacts on both sides of its legs and of its diagonal. You will see that the original single-pixel line is still there in my 'Squiggle' example, but it has been lost in the Na 7 example. Interestingly, when I opened the diagram the squiggle vanished. Luckily I had saved it! Best regards, Tony. Wiring_x.afphoto Sample squiggle.afphoto
 -
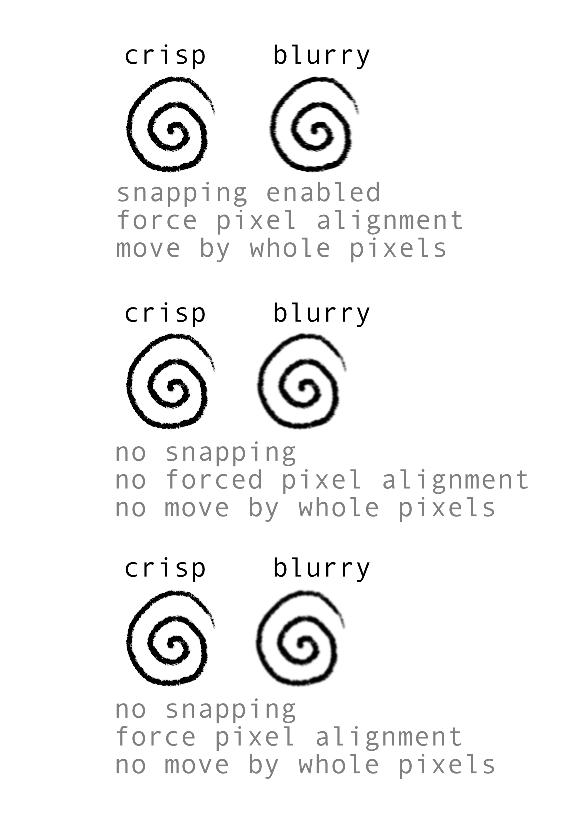
 Hello. I’m struggling with transforming selected areas of designs in Affinity Photo. When changing the size of a selected object, even a little bit, the edges of the selected object become considerably blurred with an “anti alias” look to them. Same thing occurs when rotating a selected object to a new angle, even without changing its size. This ruins the original integrity of the selected object, changing crisp-looking edges to blurred. Trying to fix the blurring by hand afterwords is a huge interruption to workflow. In Snapping Manager, I already have “Force pixel alignment” checked and “Move by whole pixels” unchecked. This seems to prevent the blurring problem when simply moving a selected object. But otherwise transforming selected objects still creates the blur. Hopefully there’s a setting I’m just not aware of to prevent this from happening. Could someone please let me know?
 -
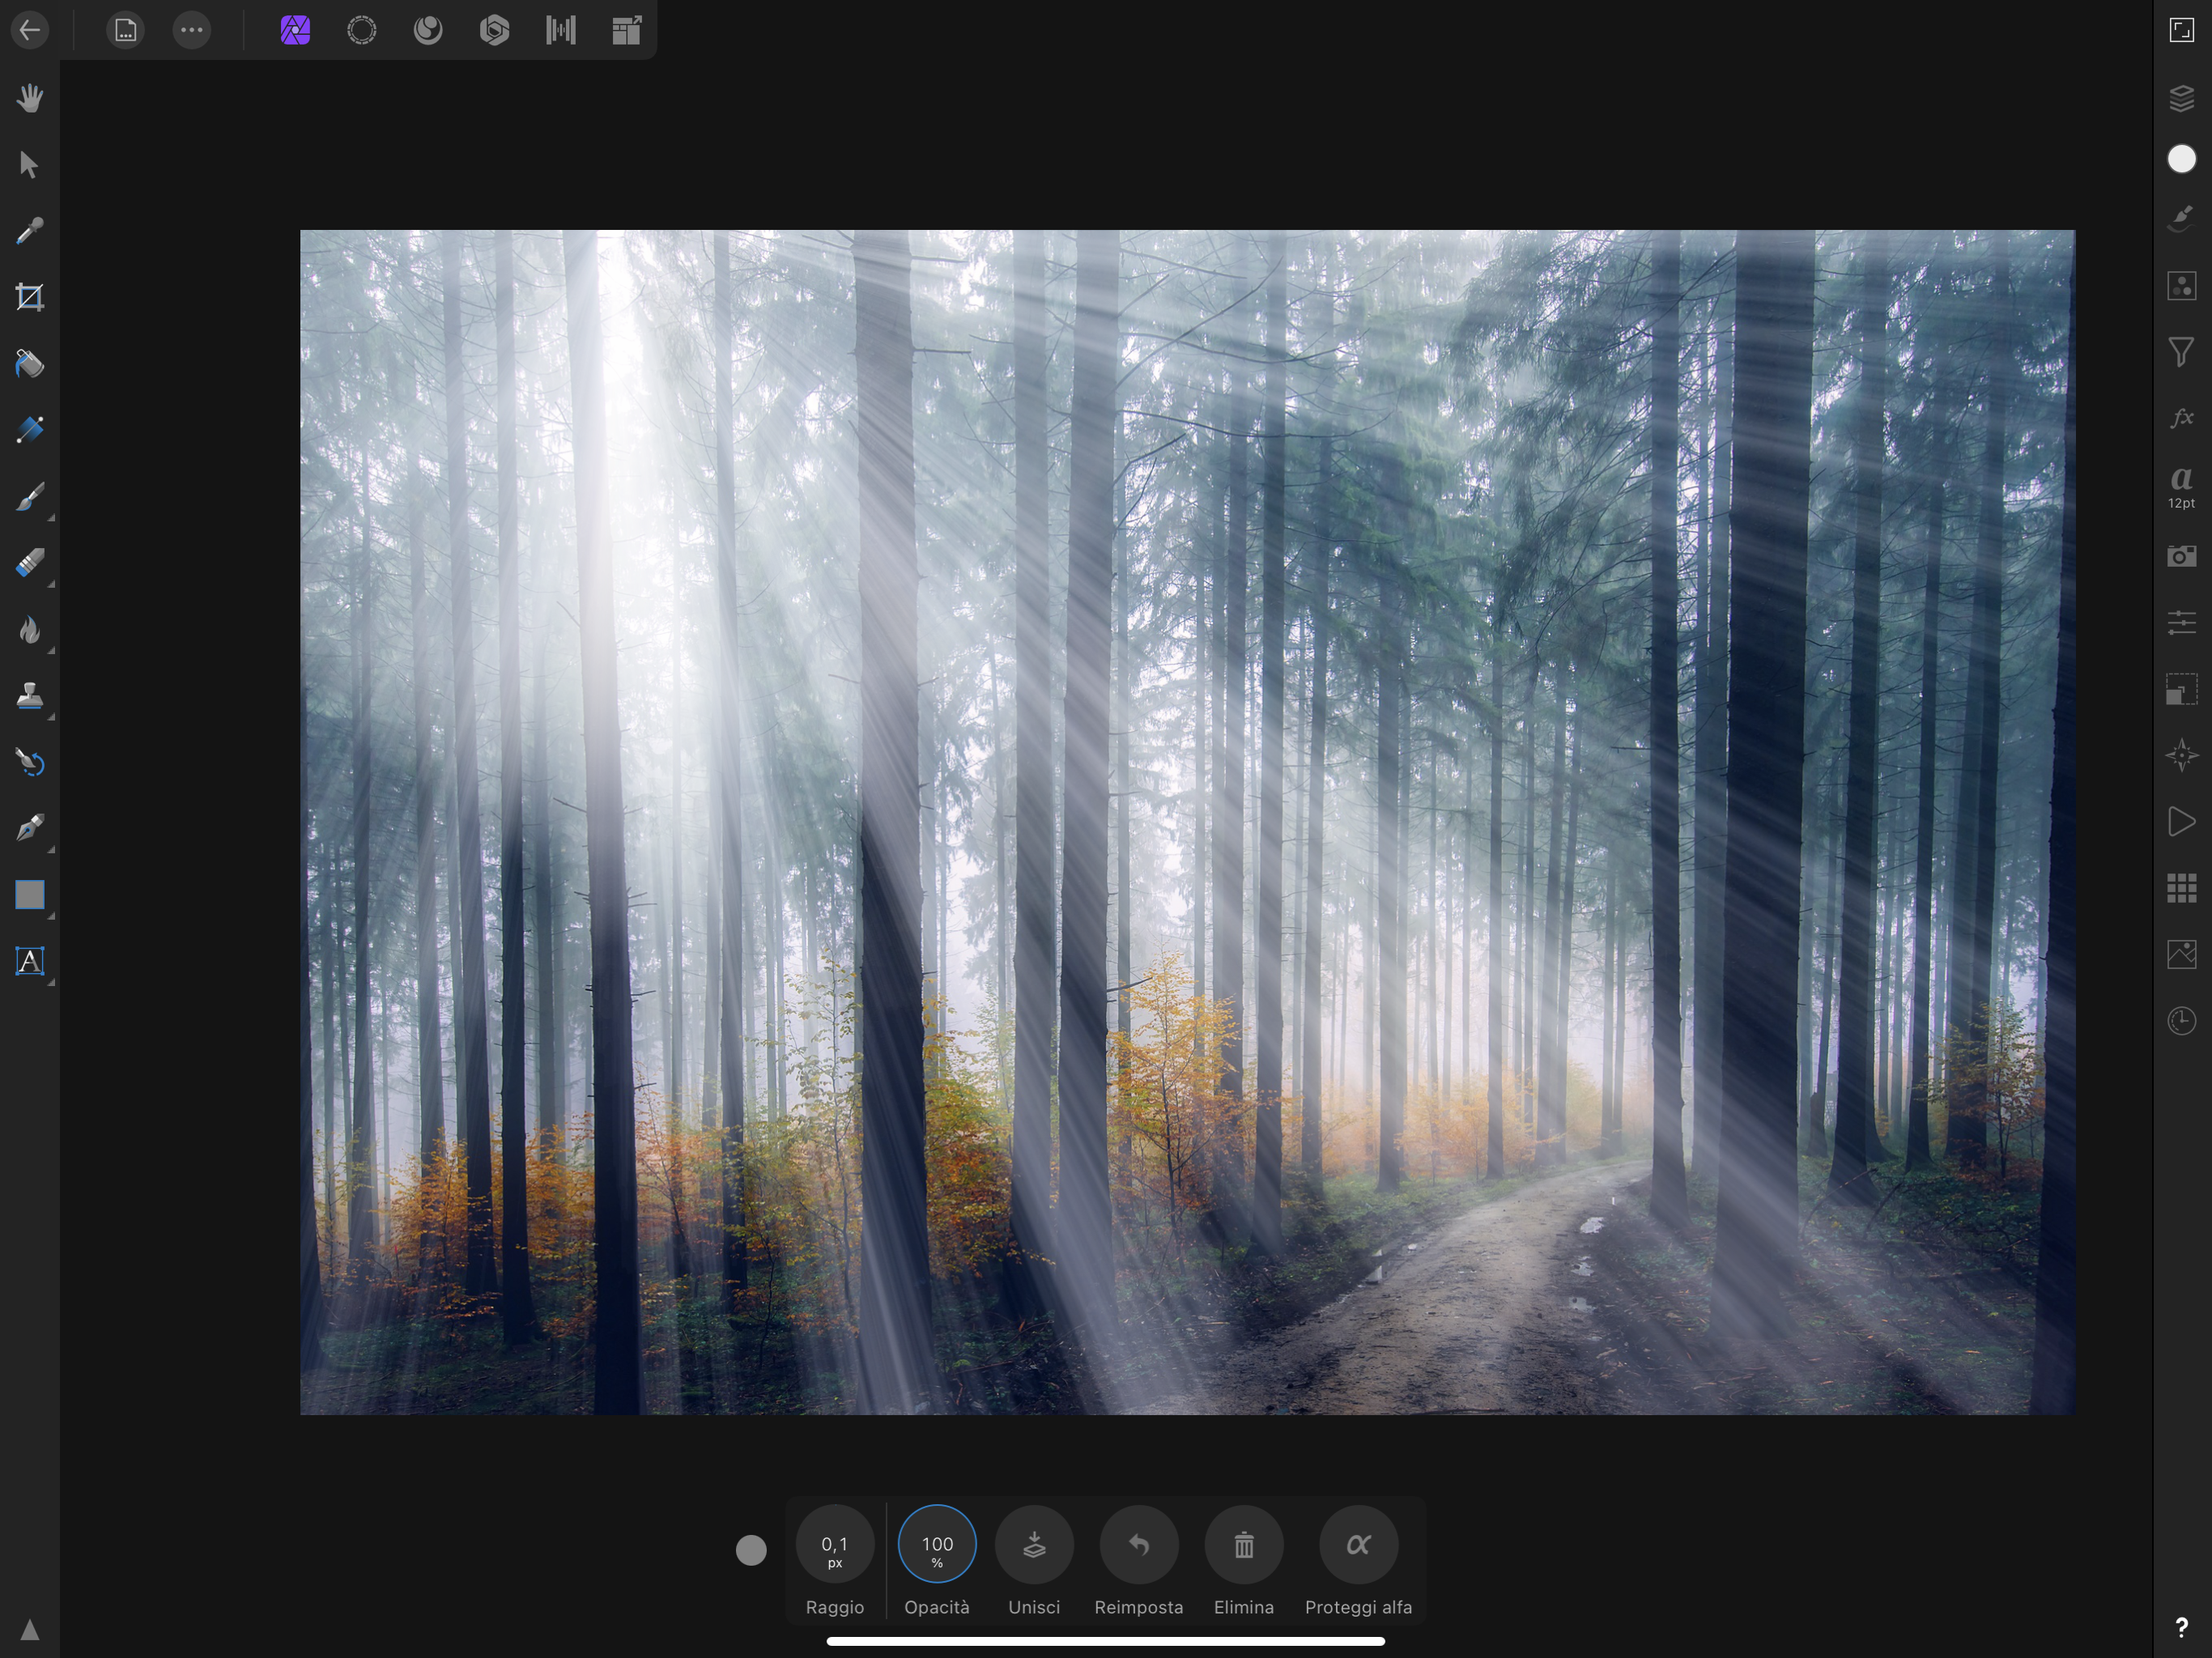
 Hello, I have been wondering and trying to get a constant Blur around the sharp edges of a photo. I found tutorials for Photoshop but I couldn't figure out how to apply that on Affinity Photo. It used to be that the live filter layers could be edited by creating a mask but that worked really bad to not anyway and I am wondering if there is a way to have the outlines of a photo extremely blurred, so that it fades away? Thanks.
 -
 I am trying to add a drop shadow to a layer. In the Layer Effects window I check Outer Shadow. When I try to move the radius slider Gaussian Blur gets checked. Now when I move the slider the edges of the layer shape are blurred along with the shadow. Is there a way to apply a drop shadow without blurring the layer shape?
 -
Hi, Please take a look at this video much better than I'll ever be able to explain : to keep it short : blending, as in photoshop, is badly implemented, making these weird dark in-between transitions. Thanks in advance.
-
Hi team. I hope you guys are safe and well during all of this COVID-19 chaos! I have a quick question regarding Affinity Photo for iPad. When I draw, the screen seems to blur or lower in resolution as soon as my Apple Pencil touches the screen, and then it smooths out again when I lift it. I did a screen recording to show what I mean, here's the link (be sure to watch in HD): https://www.youtube.com/watch?v=vSQTuxV0E34 Why does this happen? It's subtle, but it can be a bit disruptive when doing finer detailed line-art, as I can't always see the smaller areas in as much detail while drawing. An example is the finer hatched lines in the video, which become quite unclear as soon as I put the Apple Pencil down. I seems to happen less when I'm quite zoomed in, but I tend to prefer working a bit more zoomed out so that I can see more of the content I'm drawing while I'm drawing, and not get lost in the details. Thanks in advance!
-
Hi, I'm having a problems with live filter perspective. After I made few live filters perspective there is a quality problem while I zoom/export/move etc. Even the same files are different in export. So it is not a problem of linked (placed) file. I hope you can see this video and it is helpful: https://drive.google.com/open?id=1AJB719uyg9oW_iKr2D9oPxRvHijTW9sg
-
Copying scanned linework from one document to another. Just copy paste a few times, and then merging the layers down. The image gets blurred more and more each time I merge the layer down. Is there something I can do to prevent this from happening? I work with black & white pencil drawings a lot, and need to preserve the gritty feel of the lines.
-
 Affinity Photo Tutorial | In this video, We will learn, How to apply a blur effect on any photo background like the Expensive DSLR Camera effect. #affinitytuts #affinityphoto #blureffect
-
- 1
-
-
- background
- blur
- (and 4 more)