Search the Community
Showing results for tags 'Bleed'.
-
 In the attachment, is it important for the white page (author bio) to be taken up to the bleed when the previous page is? If so, I am unable to make it bigger, as I think it has to do with the master file. I had another option to insert a new white rectangle and then drag that over. Is that OK? If I just leave it as it is, will that be a problem?
-
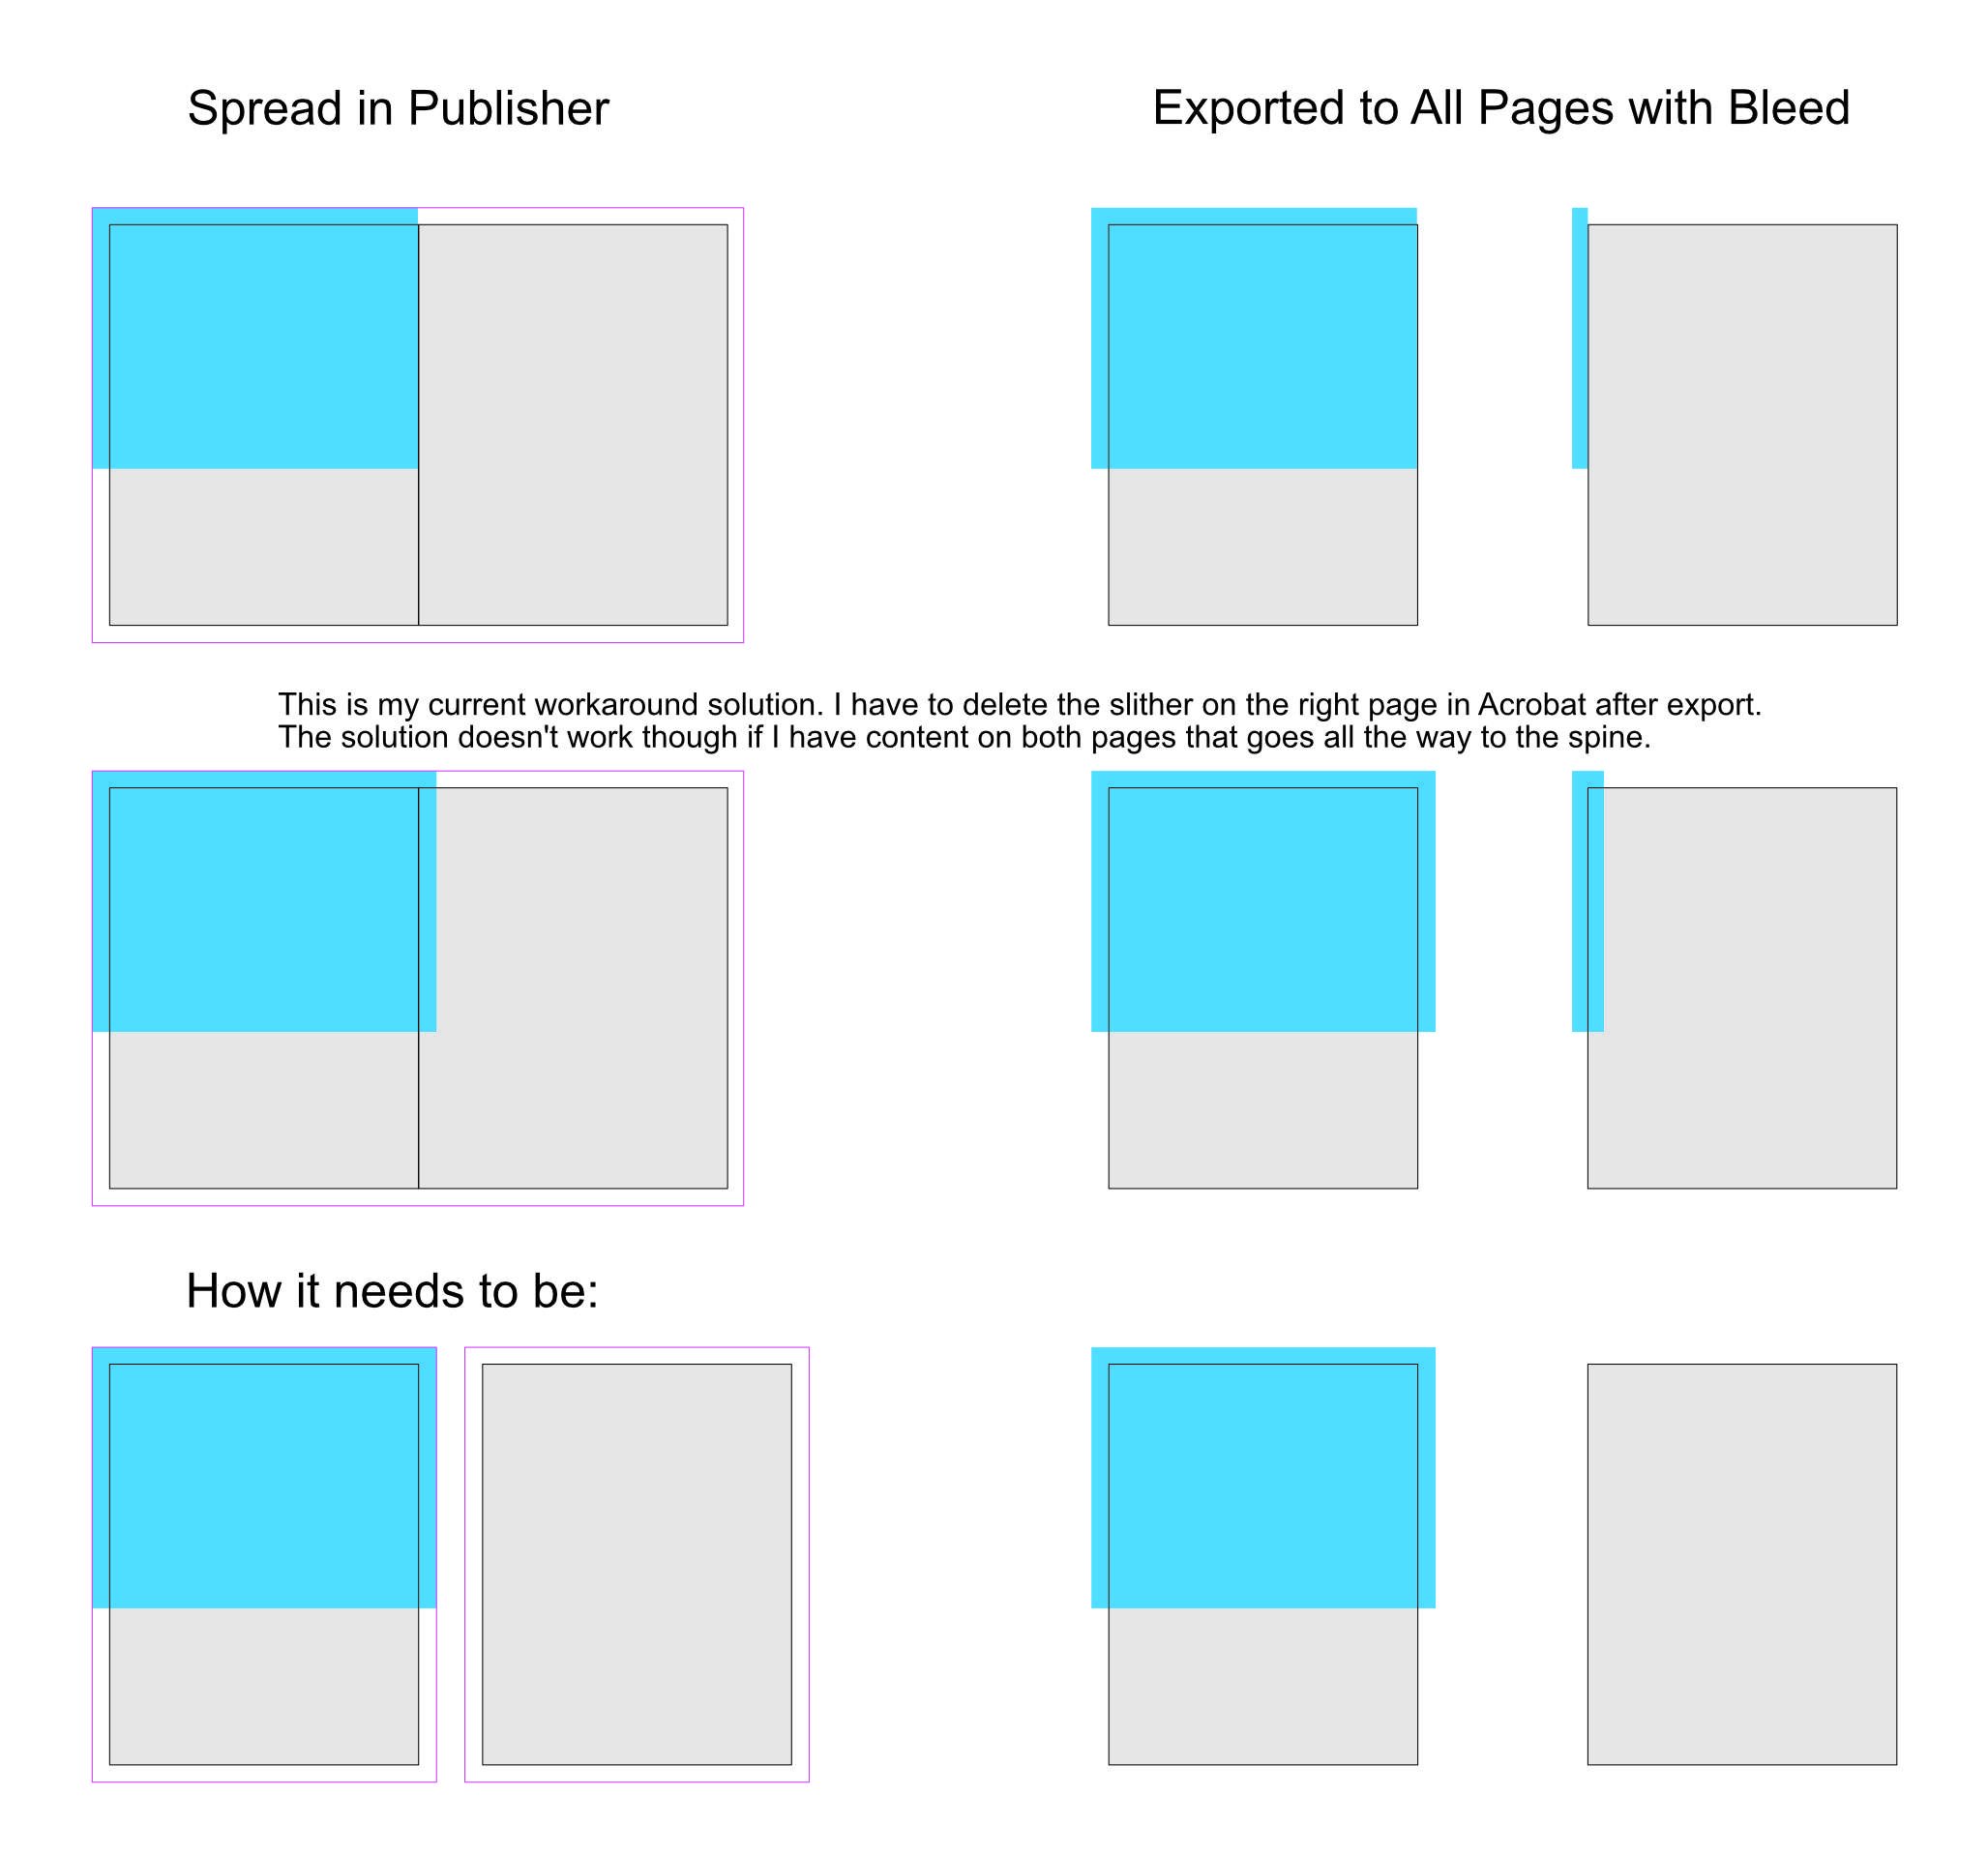
 I am designing a book that will be spiral-bound and therefore loose-leaf printed. Consequently the print PDF needs to be exported to 'All pages' (instead of spreads). When I set the inner bleed in the document settings and then export the PDF to all pages the inner bleed on the pages ends up being the page content of the facing page. If I have e.g. an image that goes all the way to the spine I have to stretch that image into the facing page in order to create an inner bleed for that page. I need to be able to seperate the spread in order to create proper bleed for the pages … in inDesign this known as 'Allow Document Pages to Shuffle'. Have I missed something in Publisher or is this indeed not possible in the current version? I have attached an image to illustrate the issue.
-
I have set up a document with bleed and designed master pages so that photos are larger than page size for printing and cropping. However, when I export for print, those bleeds do not show (photo is cut exactly to the crop marks). (See two attached JPGs) However, when I move those photos from master pages to individual pages, bleed is exported. Am I missing something or is this a beta-version bug? Kind regards, Christoph
-
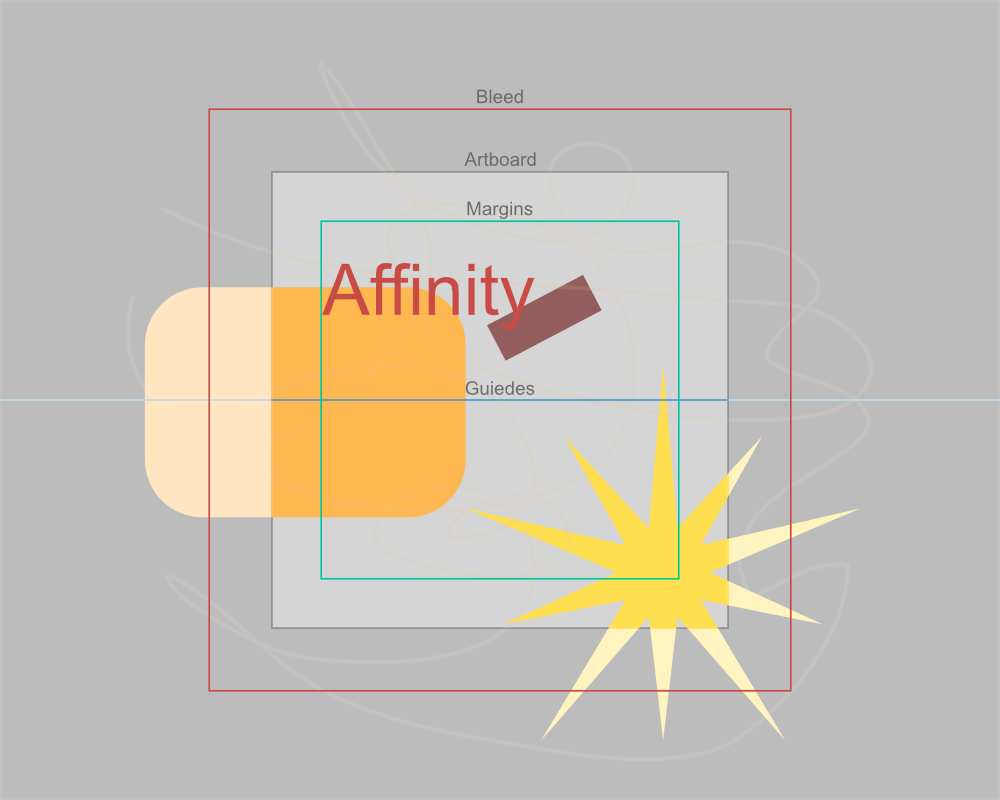
 I love to work with artboards in Designer to create Flyers and other design elements all in one document. Designer also offers Bleed for artboards, which is great when creating PDFs for printing. One thing is a bit annoying though: Designer will not show the elements within the bleed area. It will indicate the bleed edges, but not show anything outside of the artboard but within the bleed area. This sometimes makes it hard to see how the final output will look like. Perhaps adding an option to the viewing settings to enable this? Thanks!
 -
 I'm not doing something right, it's maybe a bug or a preference I need to activate, but when I make a background on Affinity Designer with Bleed, it does export fine to a Print Format showing the bleed area, but when directly imported the Designer File to Affinity Publisher, it imports it trimmed to the page format and disregards the bleed area. Anything else I can do differently to fix this? I'm on V2. Thank you so much in advance.
 -
I created a document and forgot to add a bleed. Is there a way of adding a bleed after a document has already been created? I’m trying to prevent doing a cut and paste to a new document if possible. thanks!
-
 Hi, I stumbled upon something unexpected and want to check if anyone has a solution for it. I have a Designer V2 file that I'm trying to export to PDF. I have 10 artboards but only want to export 5 of them to PDF. The file is configured with a 3 mm bleed for all the artboards. When I select the 5 artboards and try to export by using either "selection only" or "selection area" the option to export including bleed is unavailable. If I try to export just 1 artboard the "include bleed" option is available. As is if I try and export the all the artboards. Is there a way to export just some artboards with bleed? Thanks for the help. Eduardo
 -
 Hi everyone, First post - I'm hoping to be able to lay out a B1 print sheet with designs montaged onto this sheet. What I'm looking for is a simple way to select any of the placed artworks and to apply tick marks to the trim size of the artwork and not of the sheet. I.e - place a PDF at trim size, apply ticks, reselect the pdf and expand to the bleed box size. Possible? If not, all suggestions will be most welcome, Thanks! I know this is possible in Ad*be InD*sign using the 'Cropmarks' script, fingers crossed for something similar in Designer or Publisher...
 -
I see that it can create a document with a bleed but how do I add or adjust it after the document is created?
-
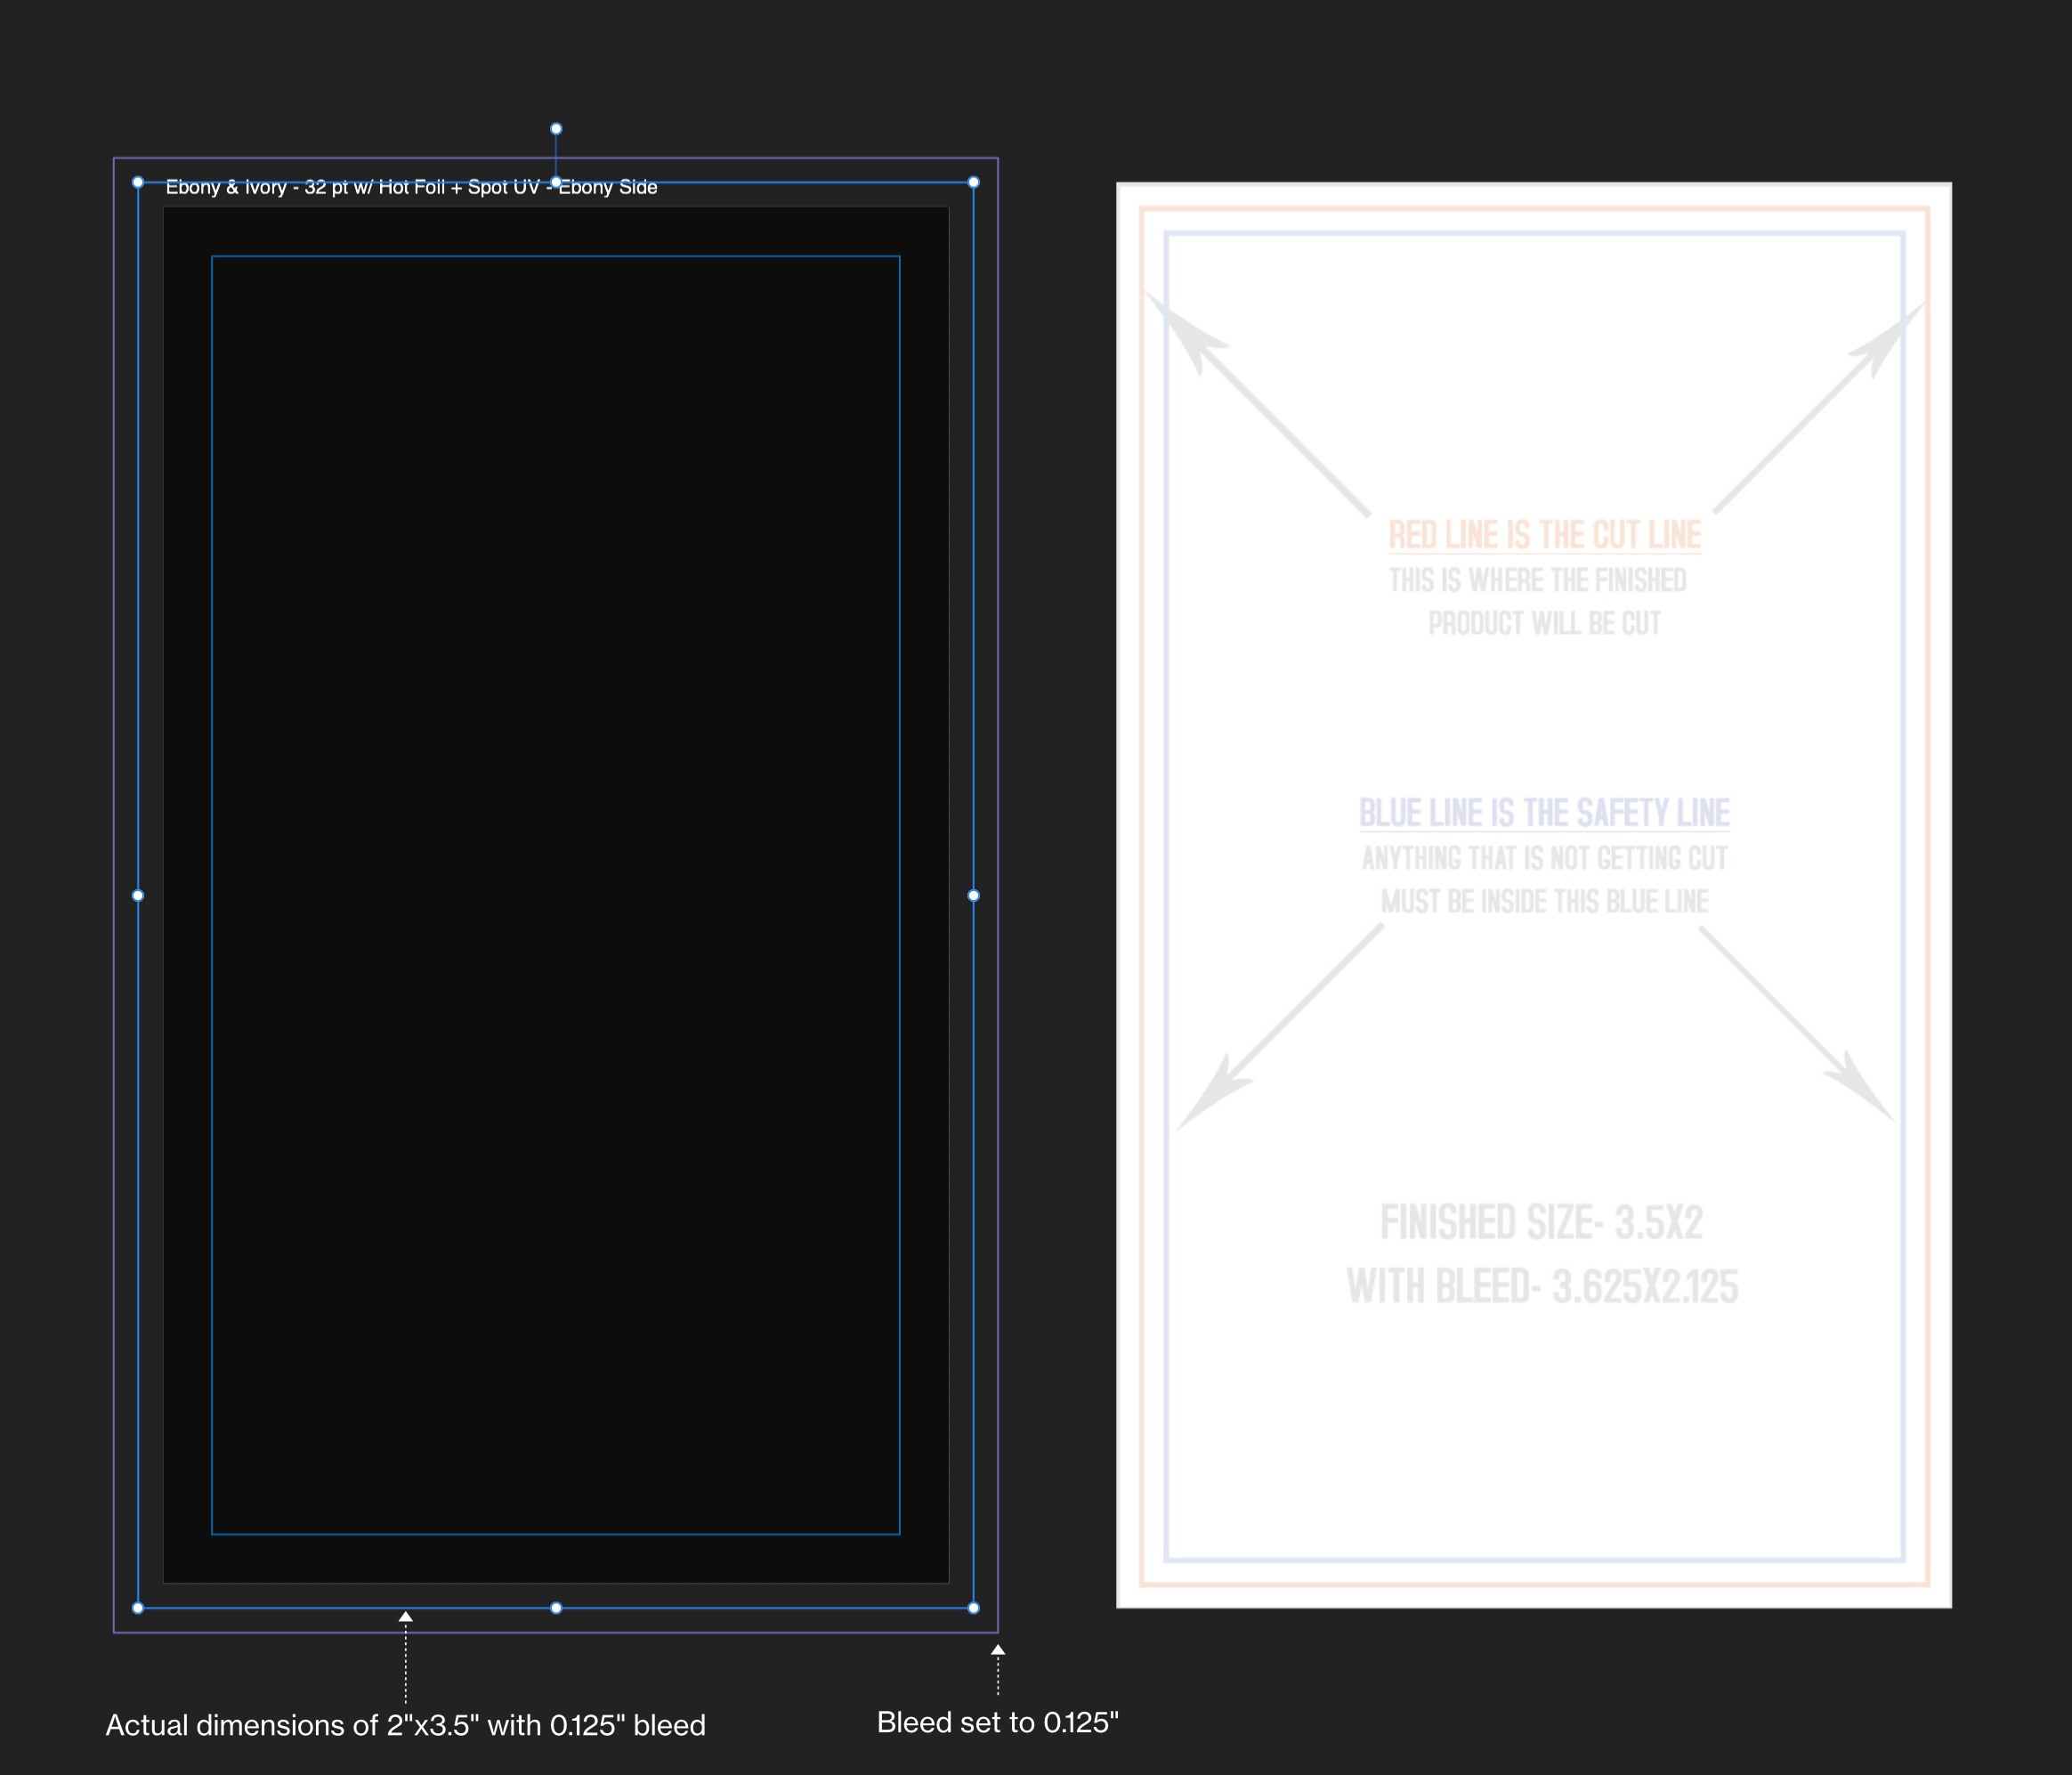
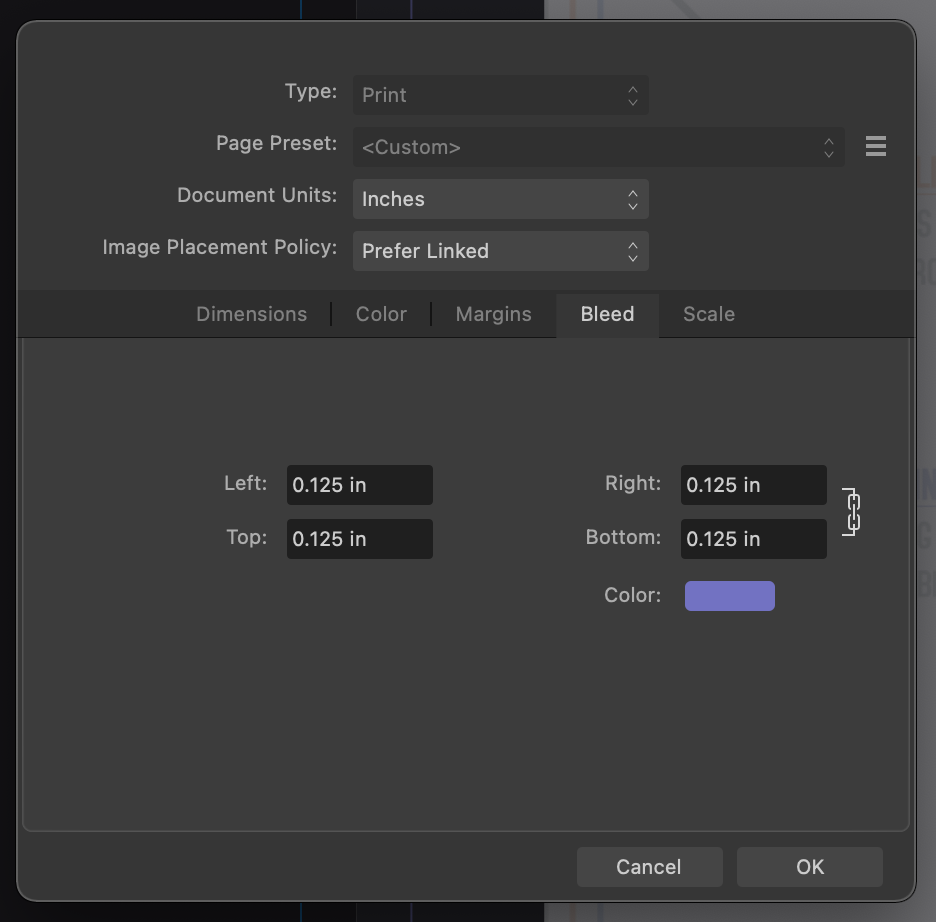
 Hey Affinity Designer aficionados! Hoping to get some help here as this issue is driving me nutso today! I'm trying to setup a 2"x3.5" print file with 0.125" Bleed. The issue that I am running into is that both the Bleed and the Margins are showing twice their size when displayed. When I create a rectangle of 2.125"x3.625" to account for the 0.125" Bleed, the dimensions do not match as shown in attachments. Can anyone advise what the issue is and or how to resolve this? Many thanks in advance for taking the time to look into this. Hang Tag Designs - Bleed + Margin Issue.afdesign
-
 Hello everyone, I would like to cover one of our shop windows with decals applied to the back. In the print specifications, there is a trim margin (3mm) and a safety distance (3 mm), so a total of 6 mm. Since you can only print up to 1.30 m in width, I have created several artboards in Affinity Designer and simply added the 3 mm trim margin in white. However, in the final print, it did not quite fit with overlapping fonts, even if you cannot see it from a further distance. What is the best way to handle this in practice, so that it looks seamlessly perfect when fonts/logos/images span across several window sections (decals)? Thank you very much!
-
Hi there. I have produced a single-page booklet with all-around a bleed (3 mm). When I turn the document into facing-pages the inner-bleed on the right page overlaps the left page. How can i avoid this? Or is it a shortcoming? Is there a possibility of ignoring the inner-bleed only? Thank you for an answer. Cheers, /Paolo
-
 Here is an example how it it could look like. Its really needed to see what we are exporting and work with. Really needed for 2+ artboards works.
-
 Hi! I can see the bleed margins, but i can't see the content when i'm trying to edit it. I only see the bleed content in the pdf. Is there any way i can see the bleed content? Thank you.
 -
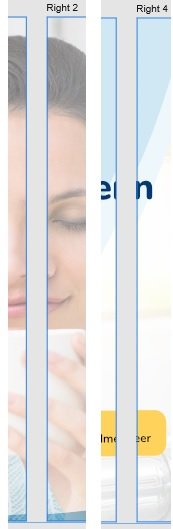
 Steps to reproduce: Create a document with the following settings: An even number of pages, for example 4 Facing pages, starting on the right Some amount of bleed, for example 3mm Edit the default Master A to have a green rectangle object covering the whole page, including bleeds Create a Master B, do the same as above, but with a red rectangle, for easy visual reference Apply Master A to pages 1 and 4 Apply Master B to pages 2 and 3 Move the page 3 to page 1 position, this immediately breaks the bleed on page 4 For a reference on the above, see the attached Publisher.mp4 video. Next steps: Export the file as PDF with the following settings: Preset: PDF/X1-a:2003 (I think any preset will work, but this get the job done fast) Include bleed Export Area: All Pages Open the PDF created on Acrobat Pro (or any other PDF software that can show bleeds) Page 1 is OK Page 2 rightmost bleed will be a red object, green was expected Page 3 leftmost bleed will be green, red was expected Page 4 rightmost bleed will be empty If using Acrobat Pro, will be able to edit the objects You'll notice the bleeds really are trimmed For example, there's no green object below the red strip in page 2 For a reference on the above, see the attached Acrobat.mp4 video. Thanks! Publisher.mp4 Acrobat.mp4
 -
The bleed of linked documents(afdesign) is shown incorrectly. I thought I saw this report somewhere before but I can not find.
-
 It's quite a while since I last posted anything, and my notes indicate that I had thought this problem had been fixed. In my document, I use facing pages and have bleed round the outer, top and bottom but NO BLEED in the inner. However, when I export pages to PDF and ask for bleed, Publisher ADDS bleed in the inner (gutter). Obviously, this is a disaster when I come to print out signatures as there is a big white stripe (that was NOT there in the original) stuck in between the left-hand page and the right-hand page. Does anyone know how I can avoid this? I had also hoped that printing, say pages 1 through 36, as a Booklet would give me the signature I wanted but, even though I can enter that in the Publisher dialog, Publisher ignores the page range and attempts to print the entire file as a Booklet. I have a 324 page book that I am trying to print in nine signatures. There seems to be two sensible options but problems with both. If Publisher could print a page range as a Booklet, I'd be home and dry. Alternatively, if Publisher could export without adding Bleed that is NOT there then (since my PDF software can do imposition) I'd be home and dry. I've struggled with this problem for almost five years and not yet found a solution. Ideas welcome. Thanks, Robin
 -
Bleed Inner 0 Outer 0.125 Top 0.125 Bottom 0.125 When exporting to PDF, the inner edges look all screwed up. It's taking graphics from right side inner and putting it in left side inner and graphics from left side into right side. Just place an image on right page to the inner edge and export to PDF, then look at the left page and right page.
-
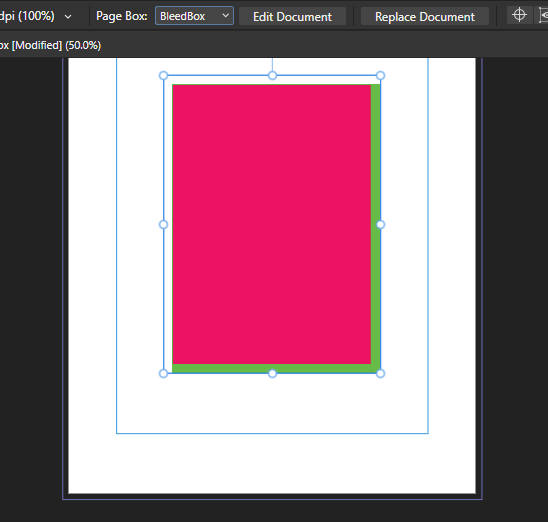
 If you attempt to data merge PDF files into an Image frame, it doesn't work correctly if PDF has a trim box defined - all content outside of the Trim Box gets cut. Just to clear things up - Crop Box is used to define which areas of the PDF are cut out. Trim Box defines the cut area for the physical blade cutting, after the document was printed. The content between Trim Box and Crop Box, the bleed area, is supposed to be shown and printed. However, AP cuts all the bleed area out, making it impossible to place a PDFs via Data Merge correctly without altering all of them. Currently I have to delete trim box entirely for data merge to place PDFs correctly, but this shouldn't be required.
 -
When a child Master is used on the document, the right side bleed of the parent Master on PDF export will be cut off. master sample.pdf master sample.afpub
-
 I am new, so please be patient. I need to export with crop marks. I have read other threads that instruct to export to .pdf, select MORE, and select INCLUDE BLEED AND PRINTERS MARKS. However, I do not have that option. Mine only says INCLUDE BLEED. If I choose that option, there are no crop marks on the exported file. Very frustrating. I am able to print the source file with bleed and crop marks, but the export dialogue does not have the option. Any help would be wonderful!
 -
 Hello, I'm having recently some trouble with bleeds. I'm a newbie to graphic stuff, I've created a poster and now i need to print it and cut off the edges, so there are no white borders around it. In the document setup, I've set the bleeds to be 3mm on each side. When exporting, I've added all the crop marks and all the stuff, but when I export it to the final pdf file, the bleed marks are 3mm away from the poster, not in it actually (please see attachements, and the bleed is much bigger just to notice the difference). I want Affinity Designer to put the bleed marks in the actual poster, so there will be part of the image cut off. Unfortunately, I can't set bleed with minus at the beginning. Could anyone please help me? Thank you. A lot. Mike ostrava4.pdf
 -
 Affinity Designer Version 1.7.1.1 iPad Pro 12,9 inch first generation, iOS 12.3.1 I added screen recordings for clarity. Problem 1: Margin and bleed not working for artboards Margins and bleed work perfect for documents that do not use artboards, but when I convert it to an artboard using "Insert Artboard" it stops working. Same goes for creating a document and enabling the option "Create Artboard". Bleed still shows, but changing the values for Left, Right, Top or Bottom doesn't change the bleed. When opening the menu again the values are back to what they were before using "Insert Artboard". Margins also don't work, it goes back to Left 0.0 Right 0.0 Top 0.0 and Bottom 0.0. Trying to change this makes it immediately jump back to 0.0. margin_bleed_artboard.MP4 Problem 2: "Check Spelling While Typing" option is always on when loading any document check_spelling_while_typing.MP4 Problem 3: Limited selection of presets for inserting artboards in an open document It looks like the artboard presets of the category "Device". However, the bottom four options are also missing: Kindle Fire HD 7, Kindle Fire HD 8.9, Galaxy S5 and Surface Pro 2. There is an option missing for selecting the category like when creating a new document. It seems that this simply has been overlooked. insert_artboard.MP4
 -
 Hi, This is perhaps a bit of a newbie question, so I apologise in advance but I can't find the answer in the forums. I am creating an A4 document to design a tri-fold lealfet in Affinity Designer. I set the document size as A4 landscape with 25mm bleed lines all round BUT I can't see the bleed lines in my workspace and in fact, according to the ruler the document is exactly A4 size with no bleed lines. When i export as PDF there are no bleed lines either What am I doing wrong ? Is there a tutorial specifically to set out a document from start so it can be properly set up to then be sent to a printer ? Thanks in advance PS: I am not hugely knowledgeable about graphic design / print so any help welcome. OBH leaflet inside.afdesign OBH leaflet outside.afdesign
 -
 Hello Affinity members, I am creating assets for a game in Affinity Designer 1.7.3.481. For that I am using isometric 2:1 grid. In the editor everything looks fine. But after I export it, the resulting PNG has a strange outline or shadow around it. Please see picture attached. This is a 512x256 PNG, the outline is there no matter the export resolution. How do I get rid of this? It looks awful in the game. EDIT: I downloaded latest Affinity Designer version and the problem persists.