Search the Community
Showing results for tags 'Affinity'.
-
 Hi, Affinity Team. I have a suggestion for a program of Affinity series. A program of Animation frame by frame. I'd love to that idea. I hope you like! Yours sincerely, Lucas.
 -
My latest set of FREEBIES! 300 DPI A4 sized PNG with Transparency JPG Commercial Use POD included All create in Photo only Enjoy! https://affinity.graphics/resources/65

-
I've brought this up a few times on the forums, but (and I'm getting desperate here) pleeeease add Dissolve to the Blend Modes list for layers and brushes - pretty pretty please! The tedious workarounds to achieve this effect simply aren't the same, and not nearly as effective. Dissolve is the easiest way to turn any, otherwise normal, brush into an amazing textural experience, and was one of the most used features for me in Photoshop. Dissolve played such a big role in my work that I've had to adapt my style completely after switching to Affinity, and I miss it dearly. I even took the time to record this little screen recording I'm working on to show why it works so well in Photoshop (just watch at 2x speed to save time): https://youtu.be/pywfxxuXaCc All I used in the video was a plain old, run-of-the-mill soft/feathered brush, but with Dissolve set as the blend mode. As you can see, it instantly becomes a magnificent texturing machine which has SO many practical applications, especially in creating digital illustrations. I've also seen it used excessively by some really big names in the creative industry, such as Matt Taylor (http://www.matttaylor.co.uk) and Studio Muti (https://studiomuti.co.za), just to name two heavy-hitters. I can't imagine it being very difficult to add another blend mode to the list, and I've been checking for new beta's daily hoping that dissolve made the list of added features. Please add it, for me, for others, and even for this poor, misunderstood zombie dude who would have been lacking a lot of gritty shading if I had painted him in Affinity without dissolve.
- 1 reply
-
- 5
-

-

-
- blend mode
- affinity
- (and 6 more)
-
 Following an AP tutorial I have created my own swatches. I use 5 colours palette that to my judgment correspond well to what i see in the original (template) image. If this is not a case, the 5 colour palette by AP is incorrect, I create a swatch again with a higher number of colors and make my selection to limit them to again 5. When color grading with 5 colours I add 5 colours from the swatch palette very carefully by ensuring that the Location value on color grading scale matches the Lightness (L) value of the color an indicated in a window for color picker. When I copy the colour palette from the swatch and apply it to my own image the result is different as regards tonality. Some additional adjustments are needed to match my image with the template. However, it is almost never the same. Is it what correct? Using swatches for color grading does not guarantee that the image that is edited will match the template and there might be differences?
 -
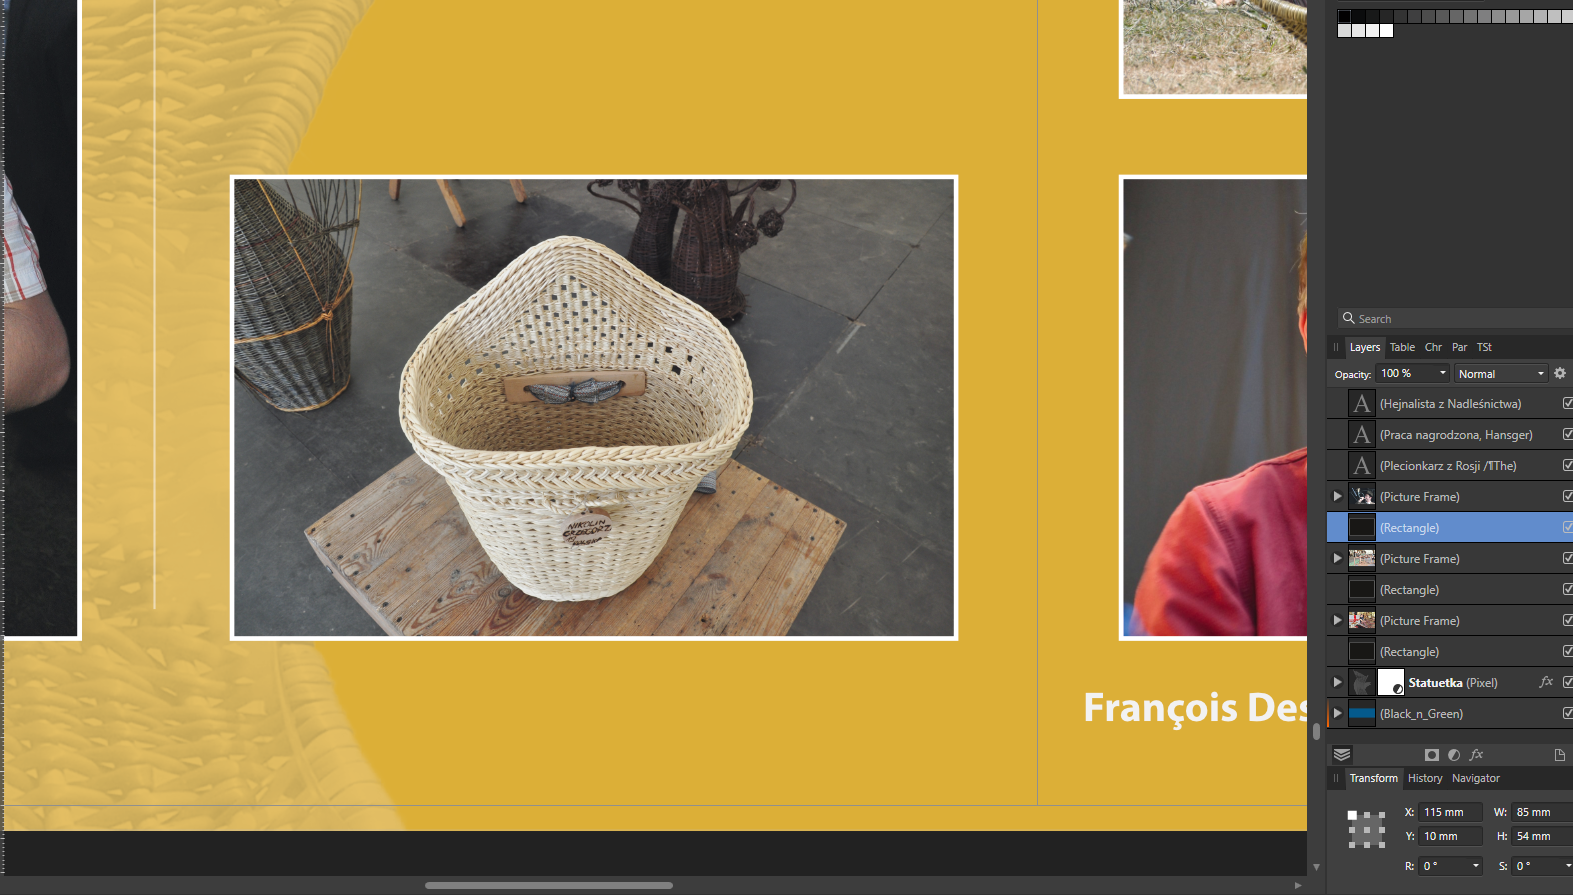
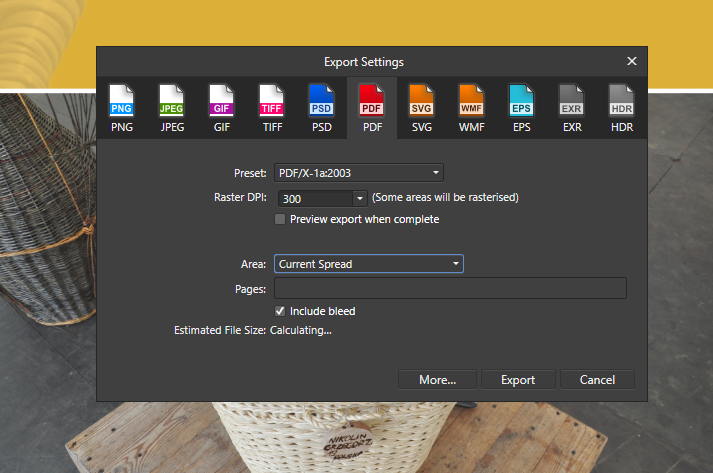
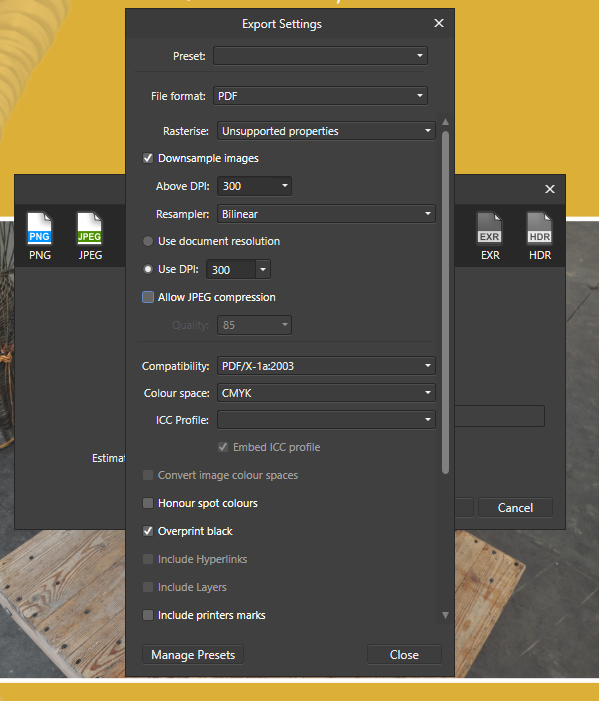
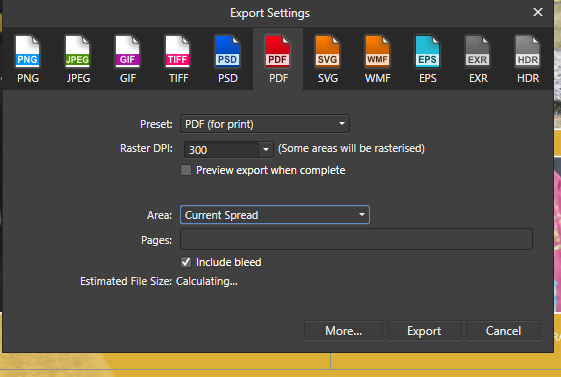
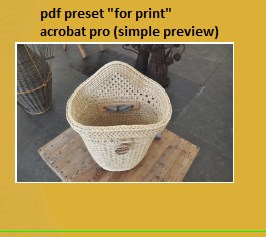
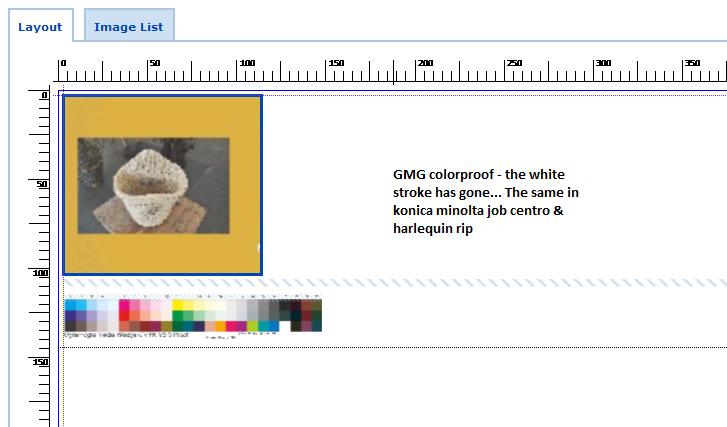
Hello, I found very frustrating problem in publisher ;/ What I did and what happend? I am creating a photo album with pictures. Each photo is placed in picture frame and under that, I placed a black rectangle with white stroke (to give a photo nice, white frame). When exporting to .tiff everythings fine. But I need to export it to pdf (I usually choose pdf x1). The white stroke disappears (even in basic preview in acrobat pro). When I choose pdf preset to "pdf for print", the white stroke appears, but when I open that file on proofing printer software/ print on digital printer/ offset printer (just prepress software or even desktop printer), the white dissapears. As I remember in beta I had a problem when I placed white text over photos in pdf (tiff was fine) (it disappeared in the same way). I'm attaching every steps described above + .afpub file. Are you working on that? white_problem.afpub
-
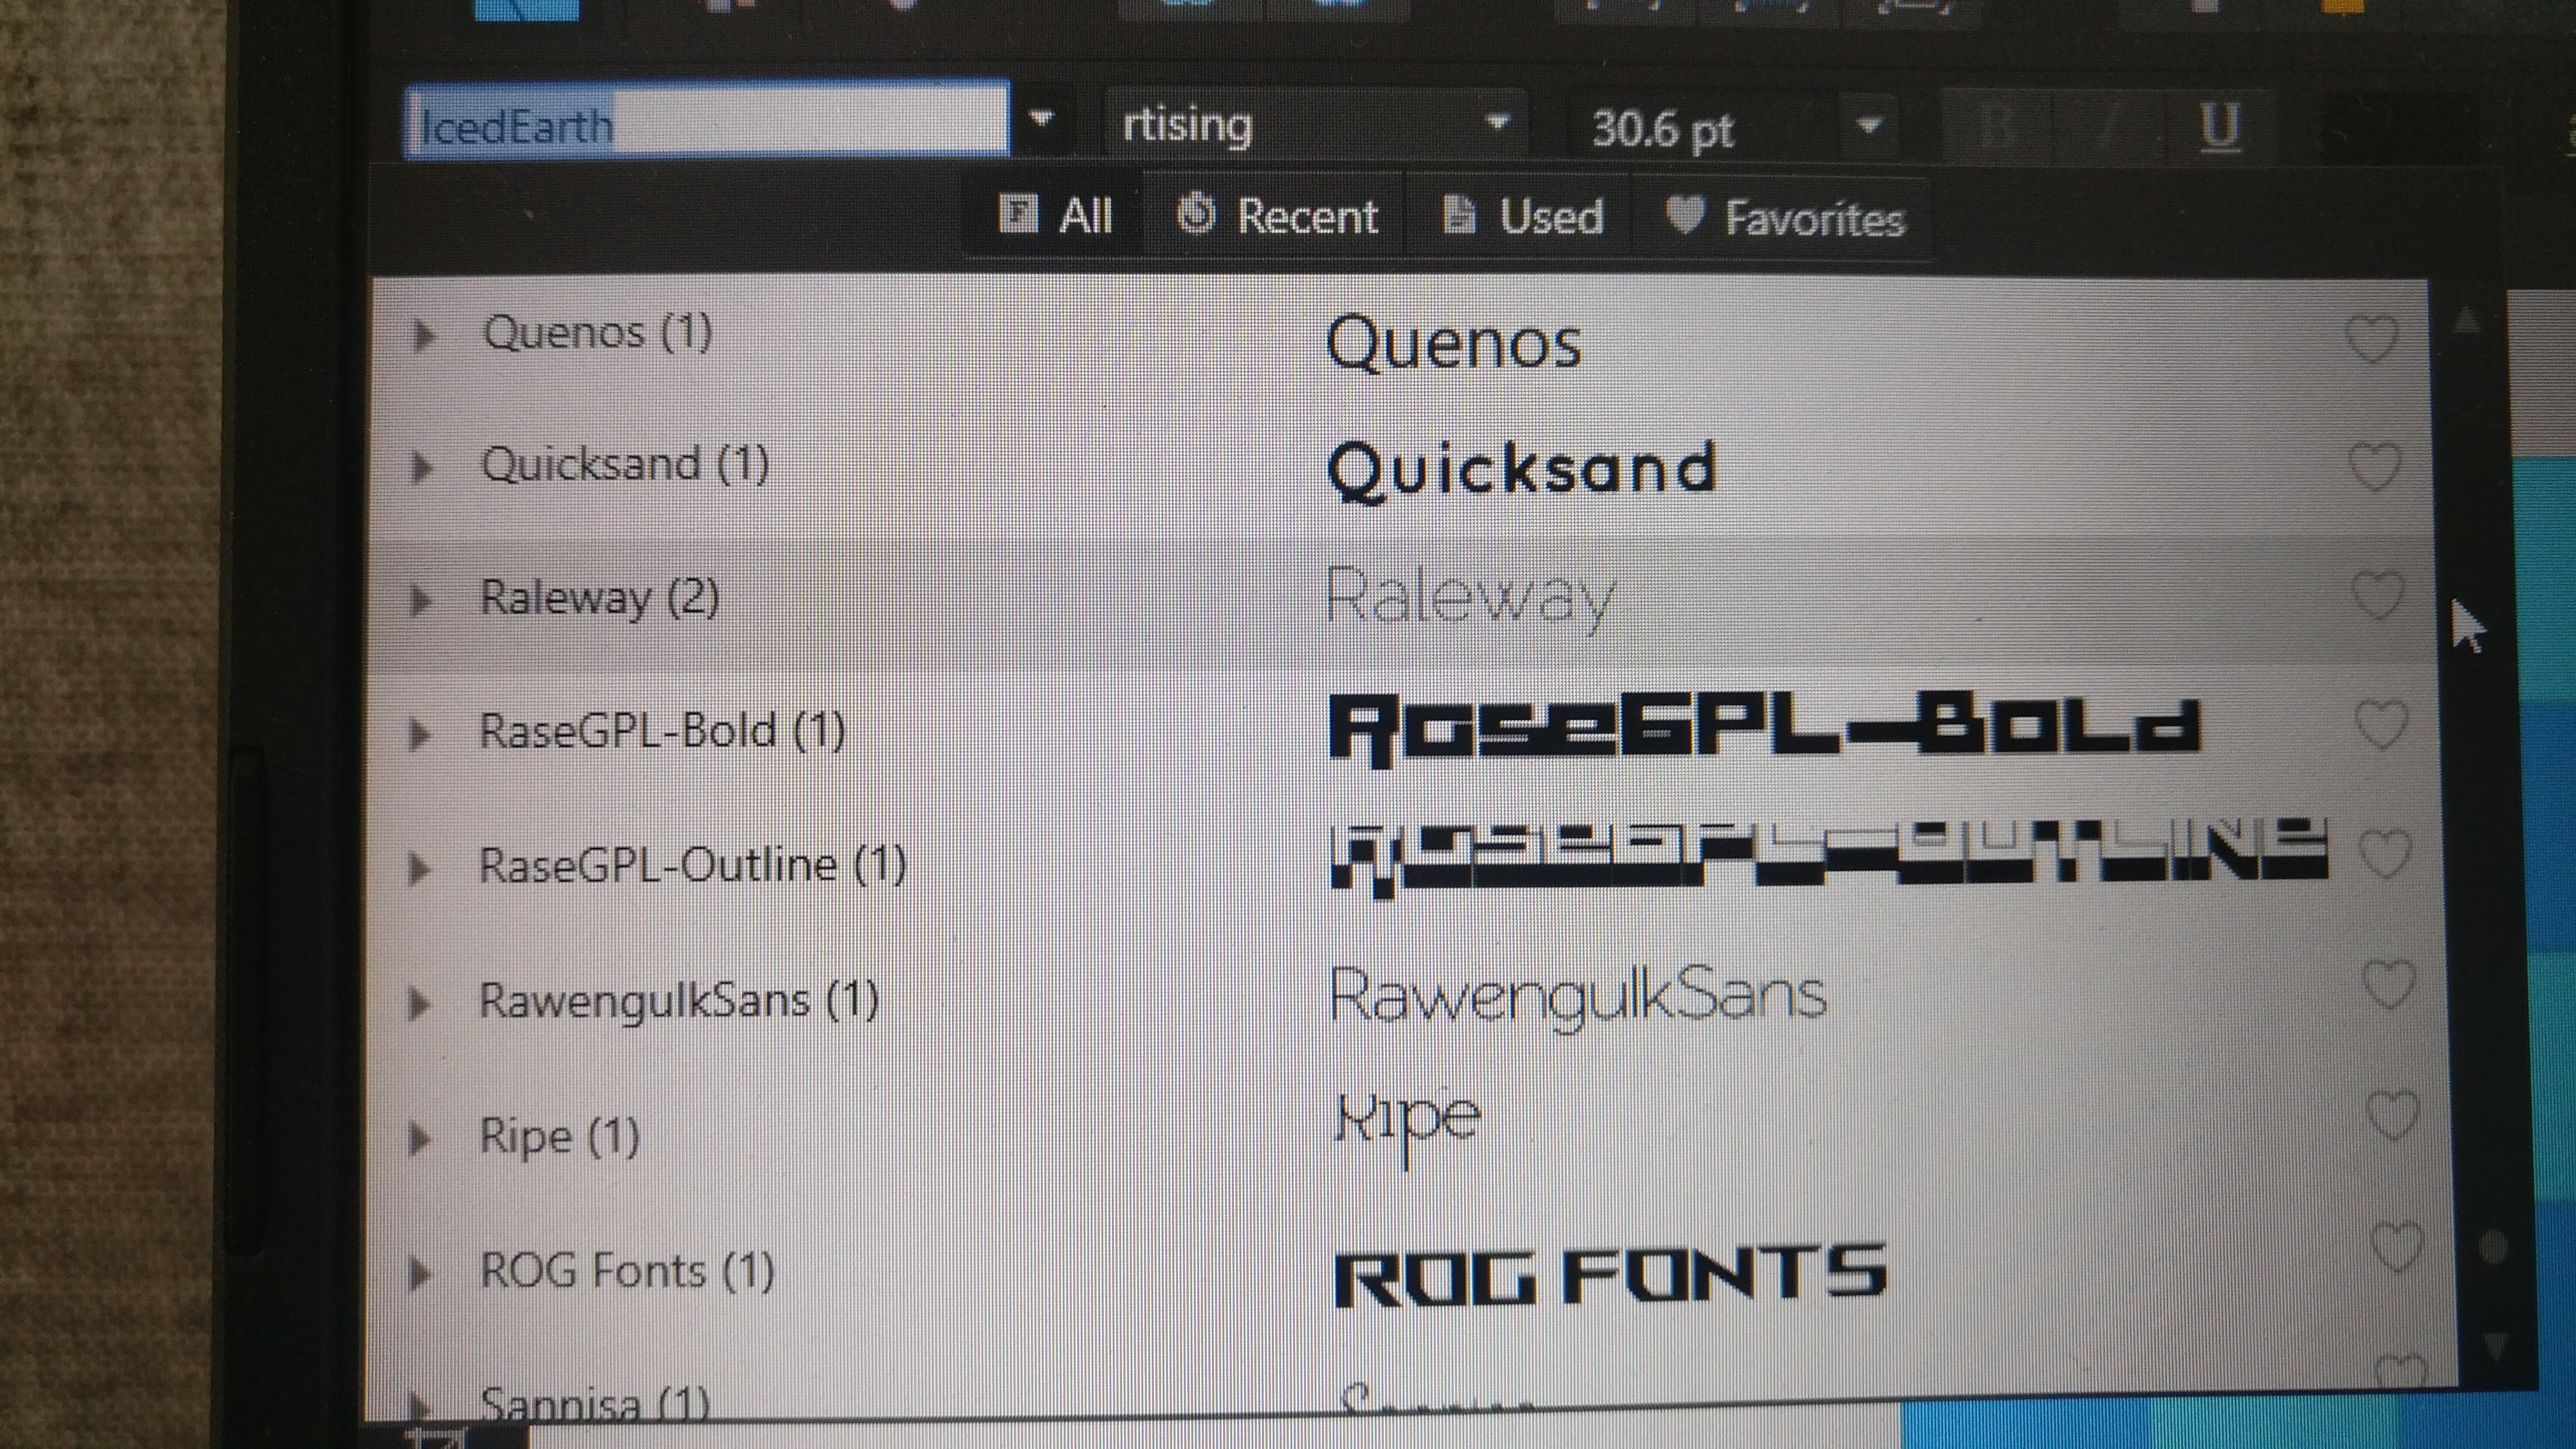
 Hi, I have a big issue about installed font not showing. this is the first time I am facing this issue I have a total of 4216 fonts installed and most of them are not visible in affinity designer, photo, and publisher here is fonts installed and this is showing in affinity Please solve this issue as fast as you can PG_ROOF RUNNERS_ACTIVE.TTF PG_ROOF RUNNERS_ACTIVE_IT.TTF PG_ROOF RUNNERS_ACTIVE_0.TTF PG_ROOF RUNNERS_ACTIVE_BOLD-IT.TTF
-
I've been experiencing a number of app freezes on my iMac while creating a custom brush for a project this morning. Creating a new brush is easy, but as soon as I start changing the values of the "Size" and/or "Spacing" (although I haven't even tried changing other options) in the brush editor, I get the spinning rainbow wheel. I hoped that the app was just processing the request to change those values (and taking a bit longer than usual), but it ultimately froze up completely, resulting in me having to Force Quit Photo. Upon reopening, I tried it again, and the same thing happened over and over again. All I created was a standard Round brush, and when trying to change the values in the brush editor, I experienced app freezes every time, without fail. Entering the value is not an issue, but pressing 'tab' to enter the next value section, or simply clicking in the next box with my mouse results in a total freeze.
-
Hi folks, I’m new to AF for iPad having used AF desktop for a while now. I'm having some issues with certain adjustments. I wanted to make a curves adjustment on an image today but when I went to the adjustments menu and selected curves it didn’t give me any further options. There is no context menu or anything ?! Cheers Mark
-
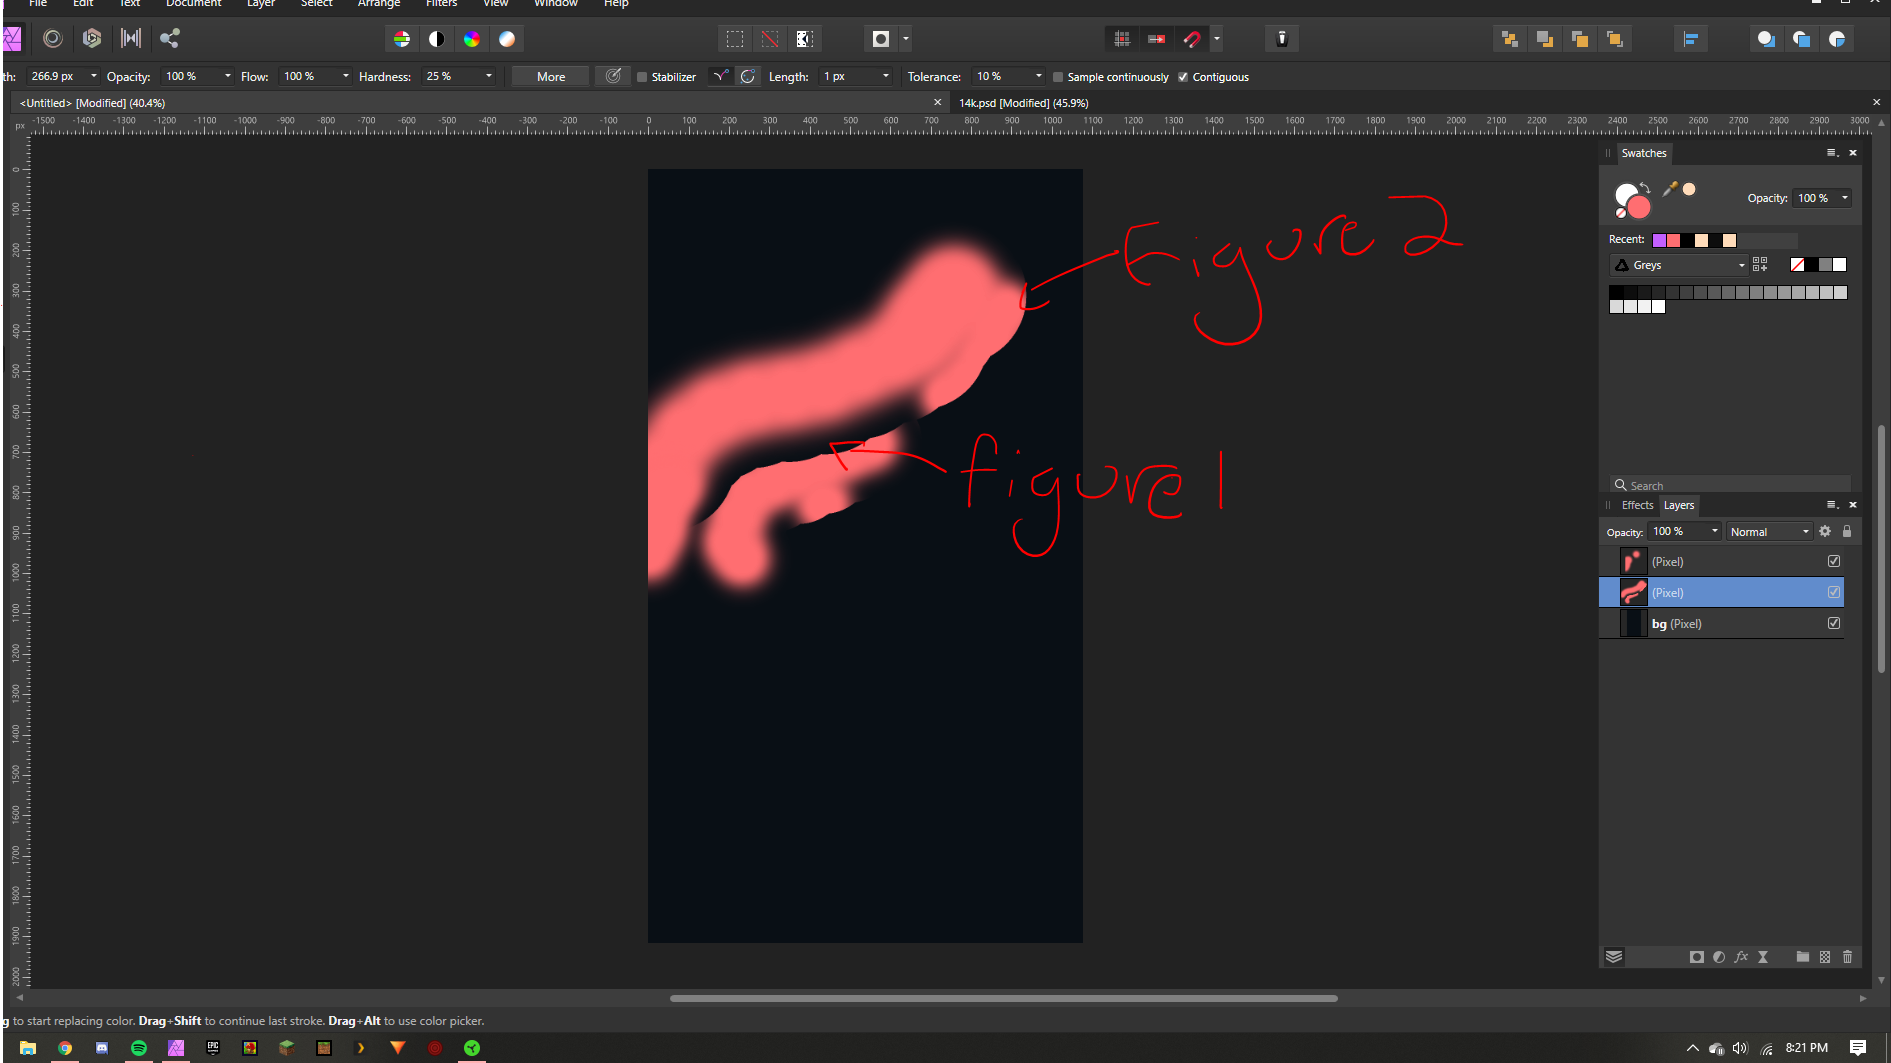
 My brush (default brush) doesnt blend with itself, if I use the brush outside the radius of a previous stroke it acts as if there was a wall preventing it from layering over (figure 1). If I stay within the border of the previous stroke, it keeps the "ink" from going past its edge/border (figure 2). Is there a way to turn this off, its extremely irritating because I have to make a new layer for each stroke to bypass this. Help!
-
Hello, i have been playing a lot with grid manager lately. but i couldn't figure out, if i create a simple grid, how can i keep only one directional lines. here i am NOT talking about dividing the complete art board into "some number" of rows and column. i want unidirectional lines "either horizontal or vertical" with a provided space "custom space, lets say 88px" is there any way to achieve it right now? if not, any workaround or feature request would be greatly appreciated how can i create lines like in this pic ...
-
 I cannot figure out how to COMPLETELY turn snapping of for the Polygonal Lasso tool. It's difficult to describe so I've included images. Basically, if I turn all snapping off in Photoshop I can Lasso select between pixels which is truly free selecting. When I try this in Affinity Photo it snaps by pixel, there is no "between the pixels". Please refer to the images to see what I'm trying to say. I need Affinity to stop snapping to pixels and let me select the way Photoshop does.
-
 When using a raster brush that has 'wet edges' enabled, it often automatically disables the wet edges when you switch to another tool (like the eraser) and then back to the brush again. It's not a big issue, but it would be really great if the brushes retained the wet edges setting to save the hassle of manually checking it again after using another tool. For some reason this doesn't always happen, but I thought it might be worth mentioning as a lot of the more 'intricate' custom brushes use wet edges for textures and effects. Similarly, and I appologise as I've mentioned this before, it would be awesome to have a dissolve blend mode for brushes and layers as it's incredibly useful for creating gritty textures and bitmap effects - it's also especially useful for setting work up for screen printing as the dissolve blend mode removes all anti-aliasing. I know there are workarounds for this, but the dissolve blend mode is a small addition to the blend modes list that would completely remove the need to spend time finding different ways of achieving a similar effect. I've seen it mentioned a few times in the forums, so hopefully it will be considered.
 -
A lot of users, myself included, often create custom brushes and assets to use with Affinity Apps. With the release of Affinity Publisher (especially with StudioLink) I find it quite tedious to install the newly created brushes and assets individually into every app since I do switch between them quite regularly and need all my tools available. It would be really nice that when you install/delete assets and brushes in any one of the Affinity apps that they are automatically loaded/available/updated in the other apps. Example scenario: As an illustrator, I often create new custom brushes for projects. If I created a custom raster brush in Photo, but then needed to switch to Designer for vector work, I'd need to open Photo, save the brush, open Designer and then load the new brush in the Pixel Persona. Then when I switch to Publisher for layout, I would need to switch to the Photo Persona via StudioLink and reload the brush there too if I wanted to do a few finishing touch-ups. If I then made a few small tweaks to the brush, perhaps some small improvements (such as tweaking the pressure curve for the size jitter), I would need to repeat the entire process all over again. The same goes for Assets, and more. It can quickly become very time consuming. It would be incredibly useful to have a universal folder where the brushes/assets are stored so that they automatically update across the board when you customise or add them. Obviously this wouldn't be applicable on iPad, but I think it would be incredibly innovative and useful on desktop, and a huge time saver in anyone's workflow. That way you'd only need to load, say, a raster brush once in Photo, and then automatically have it available in Designer's Pixel Persona and Publisher's Photo Persona. Same goes for vector brushes, assets, macros, swatches, styles, etc.
-
 Hi, I'm new to the Affinity family of products, having bought Affinity Photo. Is it possible to get a poster but only with the standard size of paper in my printer with any of Affinity's programs? In Corel Draw: I was able to stitch the tiles together after printing, to make the poster. Which of your programs is closest to the overall functionality of Corel Draw? I'd like to switch over to Affinity. Is there a way to see a comparison of all three programs, as they seam to have overlapping features? I'd like to see especially what makes Designer and Publisher unique from each other (differences) but also Photo.
 -
 Hey everyone! Please consider including saving and loading the studio layout to and from file (windows, toolbar content, tools position and content) for Designer, Photo and Publisher. This would speed up things when - using the software on multiple Macs - having the layout set back by an update (e.g. 1.7) - going from a beta version to the store version It took me about 45 minutes to setup the UI for Affinity Publisher, including Designer and Photo persona, on two Macs. Also, I think the Designer and Photo personas of Publisher should read the UI layout of Designer and Photo. Best wishes, Shu
 -
Not a bug per-se, but there's a configuration error in Affinity Designer and Photo's raster brush settings while using "Velocity" to control brush size. I noticed this with previous versions and thought it might be addressed in 1.7, but unfortunately it's not. Using velocity to control the brush size is meant to change the brush size depending on the speed at which you draw. Think gel-pen - the quicker you draw, the thinner the line is, and the slower you draw, the thicker the line is. As it stands, in Affinity, it's more of a slow gradual build up in size regardless of the speed at which you draw - sometimes it doesn't really do anything at all to the size. Procreate's 'Gel Pen' brush is a great example of this, and so is ArtStudio Pro's brushes with velocity enabled. Clip Studio Paint also has it, which I used to demo the feature so that you can better understand what I mean. I've uploaded a quick screen recording of this to YouTube to better show what I mean (below). I've boosted the 'velocity' jitter significantly in CSP just to make it obvious, and I've maxed it out in Designer, but it isn't doing much. The velocity feature is super awesome for getting a digital brush to feel and behave 100% like a real ink pen. Would love to see this realised/fixed in a future update.
-
Affinity staring getting sluggish yesterday when selecting text or element boxes. The time between selection and activation can be 2 or 3 seconds. It just showed up with no reason. Nothing new was added to the system (which is all SSD). Rebooting provides no relief. The Affinity file size is only 241 mb so that shouldn't be a problem. I also have open MS Word (copy and pasting to Affinity). I occasionally open Photoshop CC 2019 and ON1 to work on a photo to be placed but they are closed when the processing is done and I have been doing this for the last 10 days without any negative effect. Memory use according to Task Manager seems fine (8 gb on system). I really like Affinity and I'm testing it by complying a 100 page cookbook for someone. Final size is an estimated 110 pages and I'm about half-way so more potential sluggishness is a concern. Anyone else seeing this?
-
 So I installed Publisher on both my laptop and PC and in neither instance does Publisher find the other two apps. While I can understand, sort of, why I does not find the apps on the PC since I do not have them installed in the default C: directories that is not the case with the laptop. Please advise as to what I might have done wrong in the installation. The laptop has been upgraded to 1.7 versions of all the apps. Thank in advance, Beq
 -
 Hey! Just wanted to get answer to this simple question, as there is a 20% discount now and I don't wanna miss it. If you buy any Affinity product after the trial, is it linked to you somehow? Maybe through an email or something? Or is it just linked to the PC? I am asking this because I plan on getting a new one soon and I certainly don't wanna buy Affinity license twice. Thanks in advance.
 -
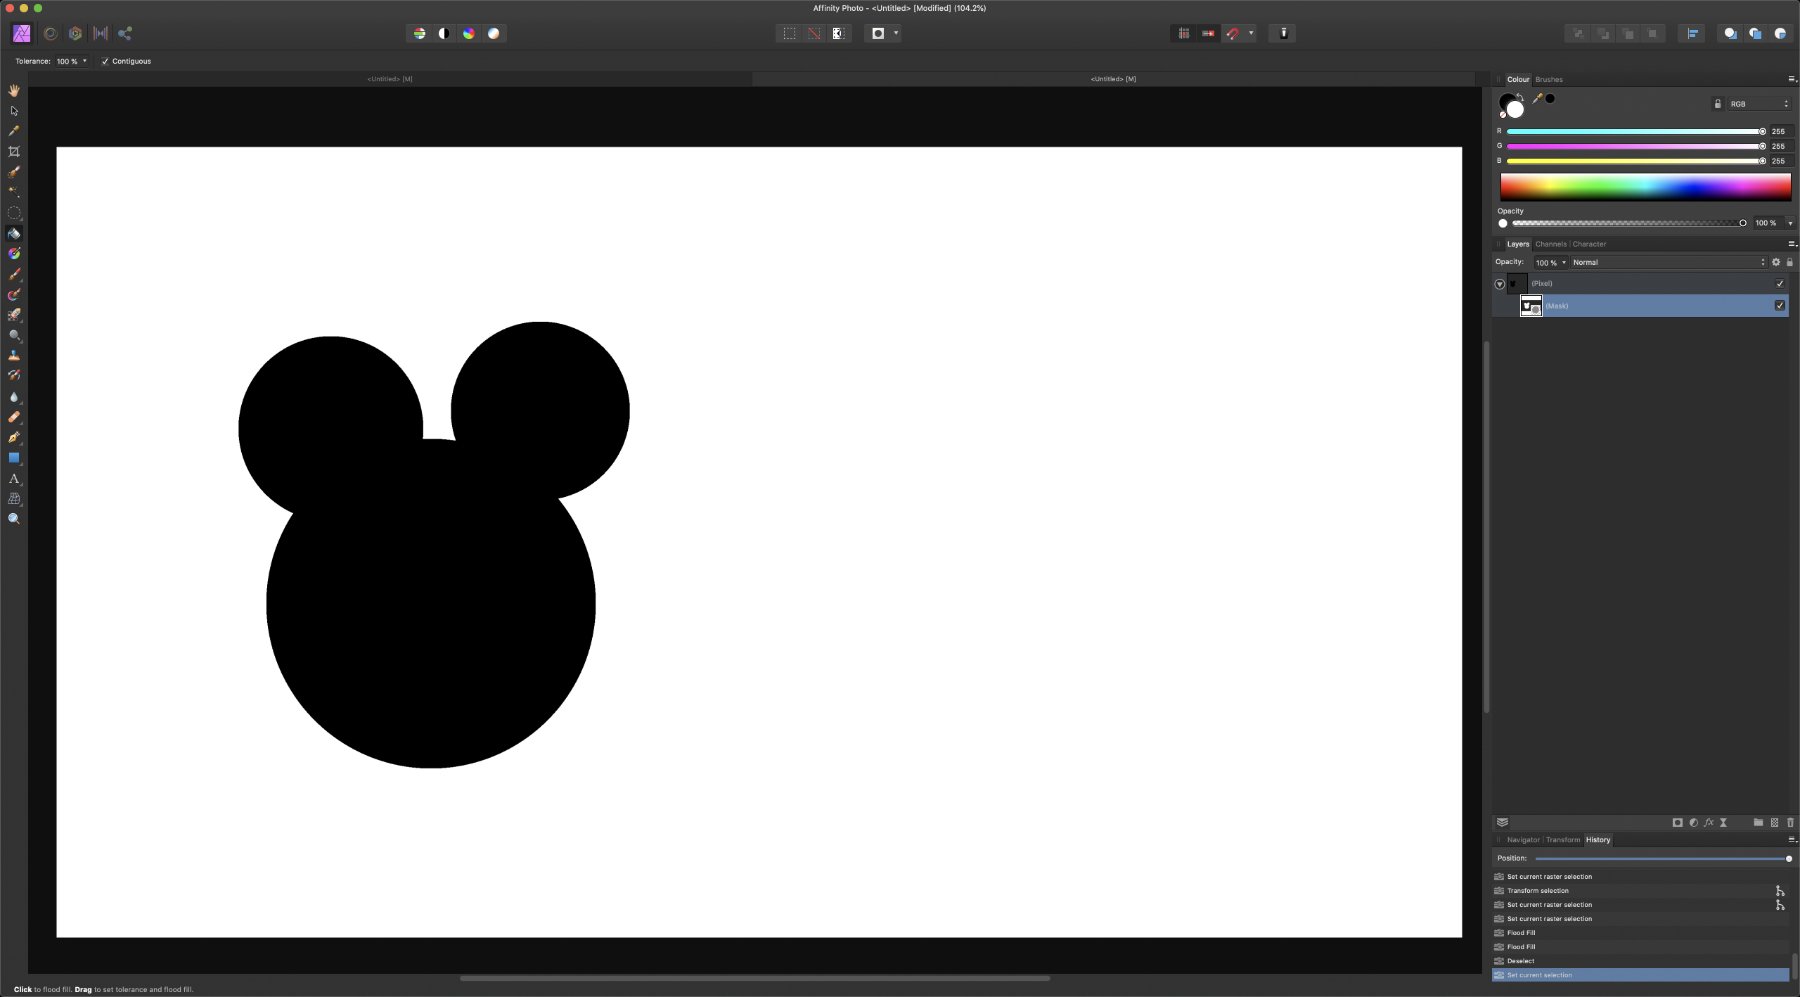
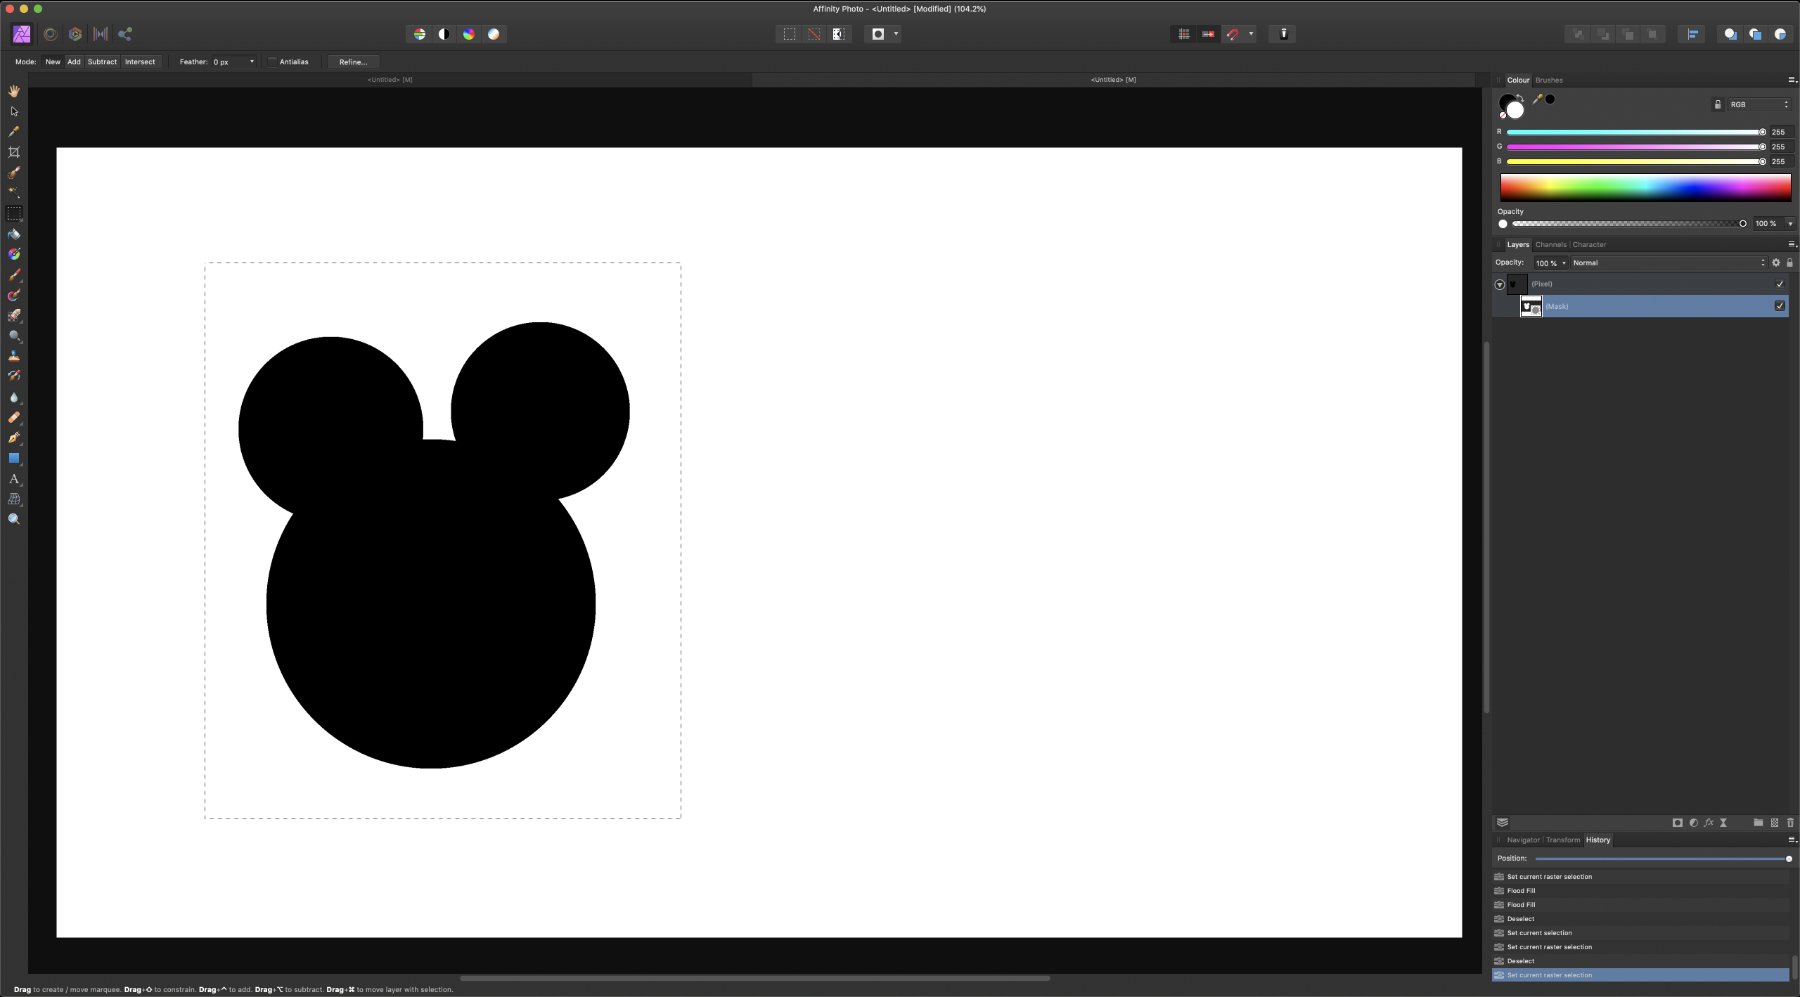
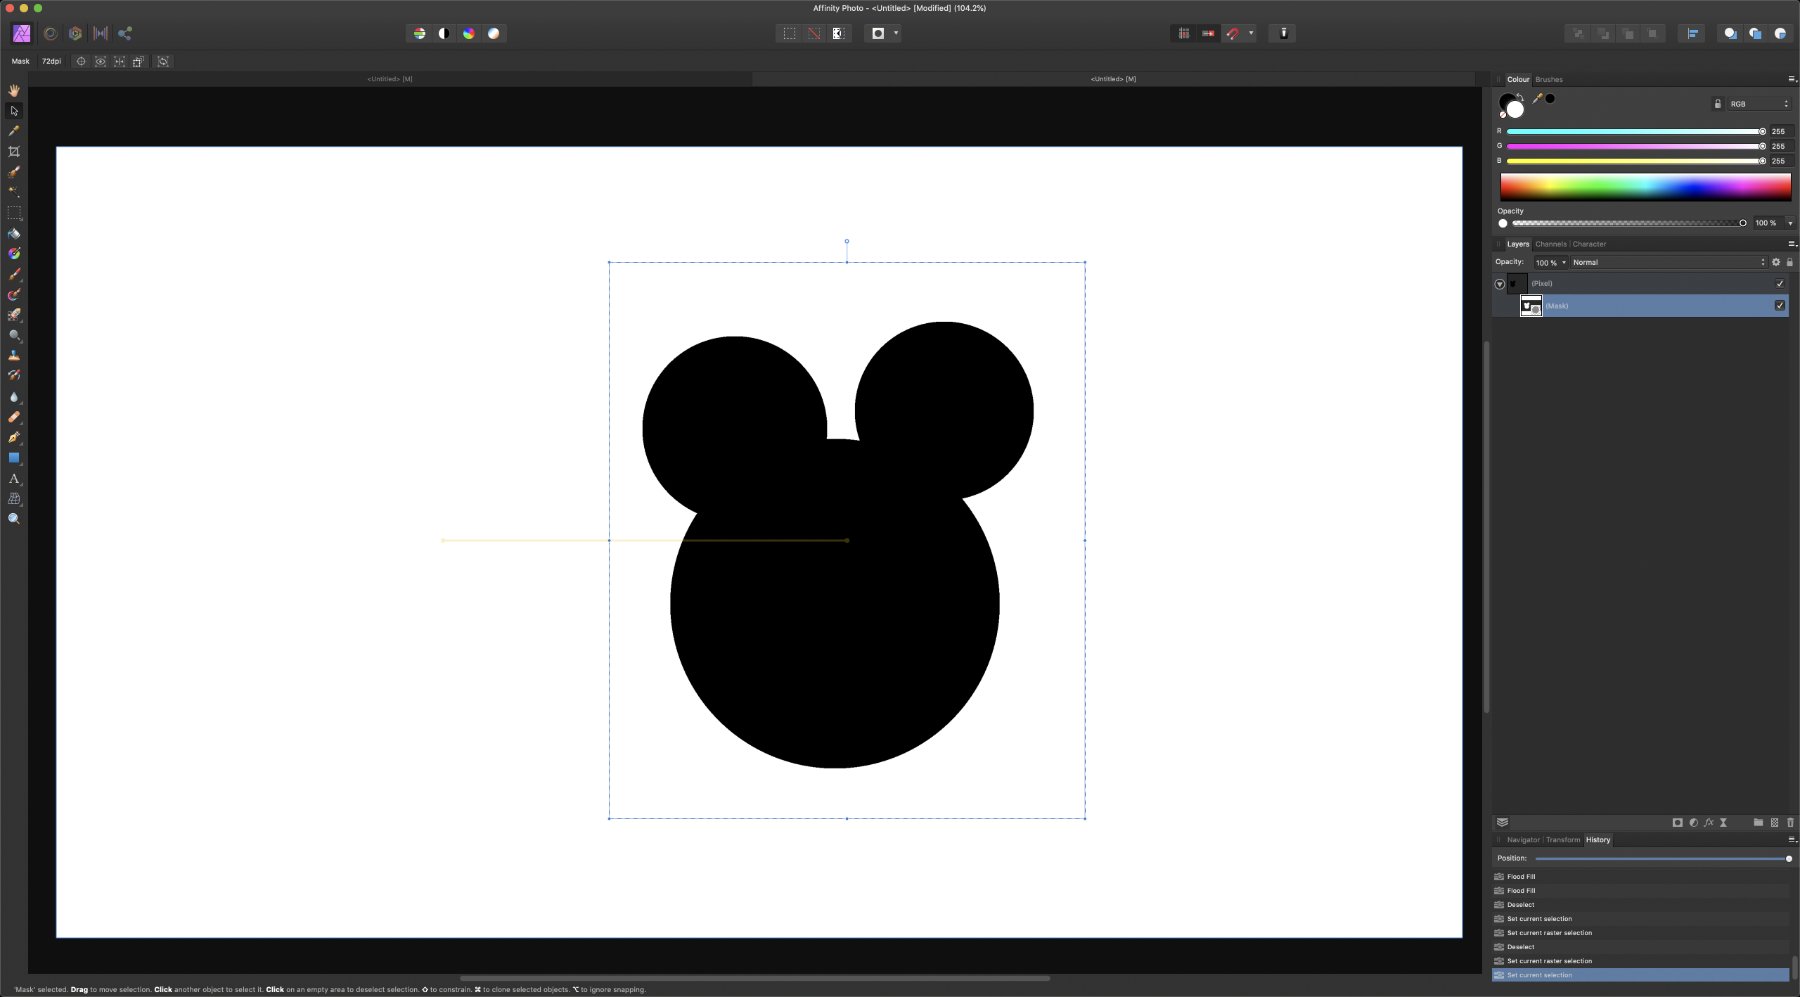
 Hi guys, I would like to do some simple operations into my masking Affinity Photo, but I can't manage to do it. My project is a simple black filled pixel layer with a mask on it.I would like to duplicate an area selected of this mask with the marquee tool to another part of this same mask. But I can't find a way to do it, the "Drag + Command" operation doesn't seem to work (the selection is moving but isn't duplicated). It is just me or am I doing it wrong ? Thank you !
-
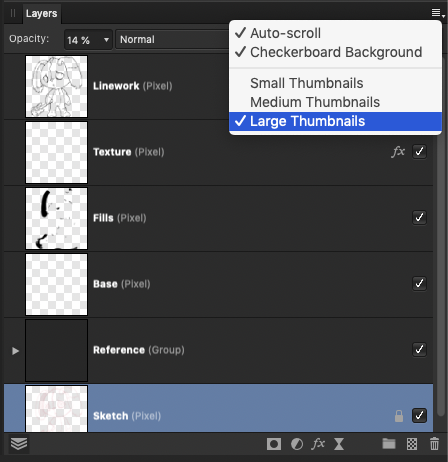
Hi guys. Not a train smash, but I noticed that when setting the layers panel display to "Medium Thumbnails" or "Large Thumbnails" the layer preview and layer title becomes blurry/pixelated - see attachment. By default the layers panel display is set to "Small Thumbnails" and that looks perfect, it's only when choosing a bigger display that thinks start looking a bit odd - same thing in Designer.
-
 I'm not sure if this is a bug on the Affinity (or Adobe's?) suite, or something else I'm not understanding. I'm betting on something I don't understand so I'd like to hear a word from someone knowledgeable in fonts. I've noticed the character leading default value is smaller and variable in all Affinity apps, while on Adobe with value is larger and fixed. On Adobe's software, no matter what font you choose, you will always get the same default leading value for a certain font size. Let's always use 18 pt for clarity sake. So in Adobe you'll always have a (21.6 pt) character leading value for a 18 pt font size, regardless of the font chosen. On Affinity for a 18 pt font size the leading will normally be (18 pt) too, but this value varies with the font chosen. I've only seen it going higher than (18 pt), but normally just a few decimal points. For example some fonts have a leading of (18.6 pt), others (18.4 pt). I have noticed an outlier though, Gabriola has a huge (30.6 pt) leading. For what it's worth, the Affinity values seem a lot closer to what I'm seeing in LibreOffice, for example Gabriola has a huge leading value in both. I'm not sure what to make of this... anyone knowledgeable in fonts can help me understand what's going on? Thanks!
 -
Is there a way to change the way that the brush panel interface displays brushes within Affinity's desktop software? For instance, currently it's a list with the large brush previews by default, but could I view them as just icons, or even a list with smaller previews? And is there a way to view the brush names along with the previews? The reason I'm asking is, having the brushes as icons (like in PS) helps with efficiency as I don't need to scroll through a list to find the brush I need. Similarly, having the title display with the brush in a list (like on the iPad versions of Affinity), would be handy as sometimes the previews can look similar but look different when being used. That way I can check the title of the brush I choose to make sure it's the right one. Let me know!
-
Completely useless update. I have A LOT OF FILES with multiple artboards. Usually, I export my designs on PDF (because of the compatibility, most people has AI), and, with the update, there's no separation between the artboards. All you got is one single page with all the arboards on it, no separated pages, one by each one of the artboards. So, a really nice software is now ruined with an unnecessary update.
-
 https://youtu.be/YqrDl8k8tTg Is their a youbrew code for inserting YouTube video links ? Regards Rob