Search the Community
Showing results for tags 'Affinity photo'.
-
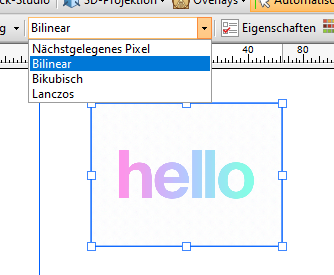
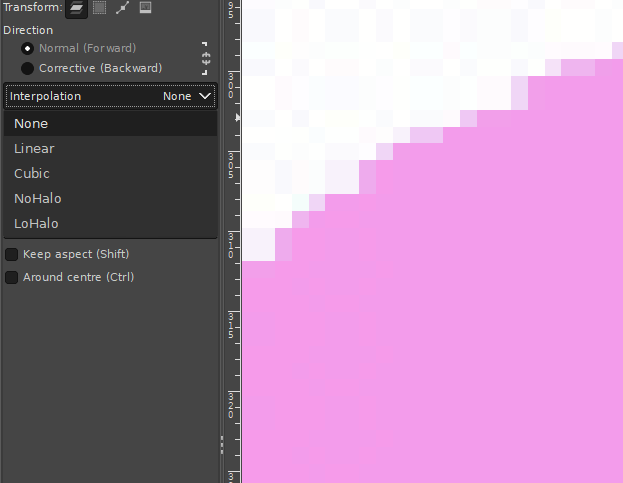
 Hi, I know there was already a topic like this. But always, when I try to resize pixel art or old graphics (low resolution), it always destroys my work and creates blurred edges. Affinity Photo has a tool named Pixel Tool, and in Serif 2.3, they added a pixel grid. And I think Affinity can be good software for editing pixel art graphics, but having the ability to change interpolation during resizing would significantly enhance its capabilities in this regard. I do not want to rescale the whole document, I want to rescale one or two elements in the document. Like Draw Plus 😎 (bugged version with immutable german language as default): or like Gimp:
- 5 replies
-
- 1
-

-
- 2.3
- affinity photo
- (and 5 more)
-
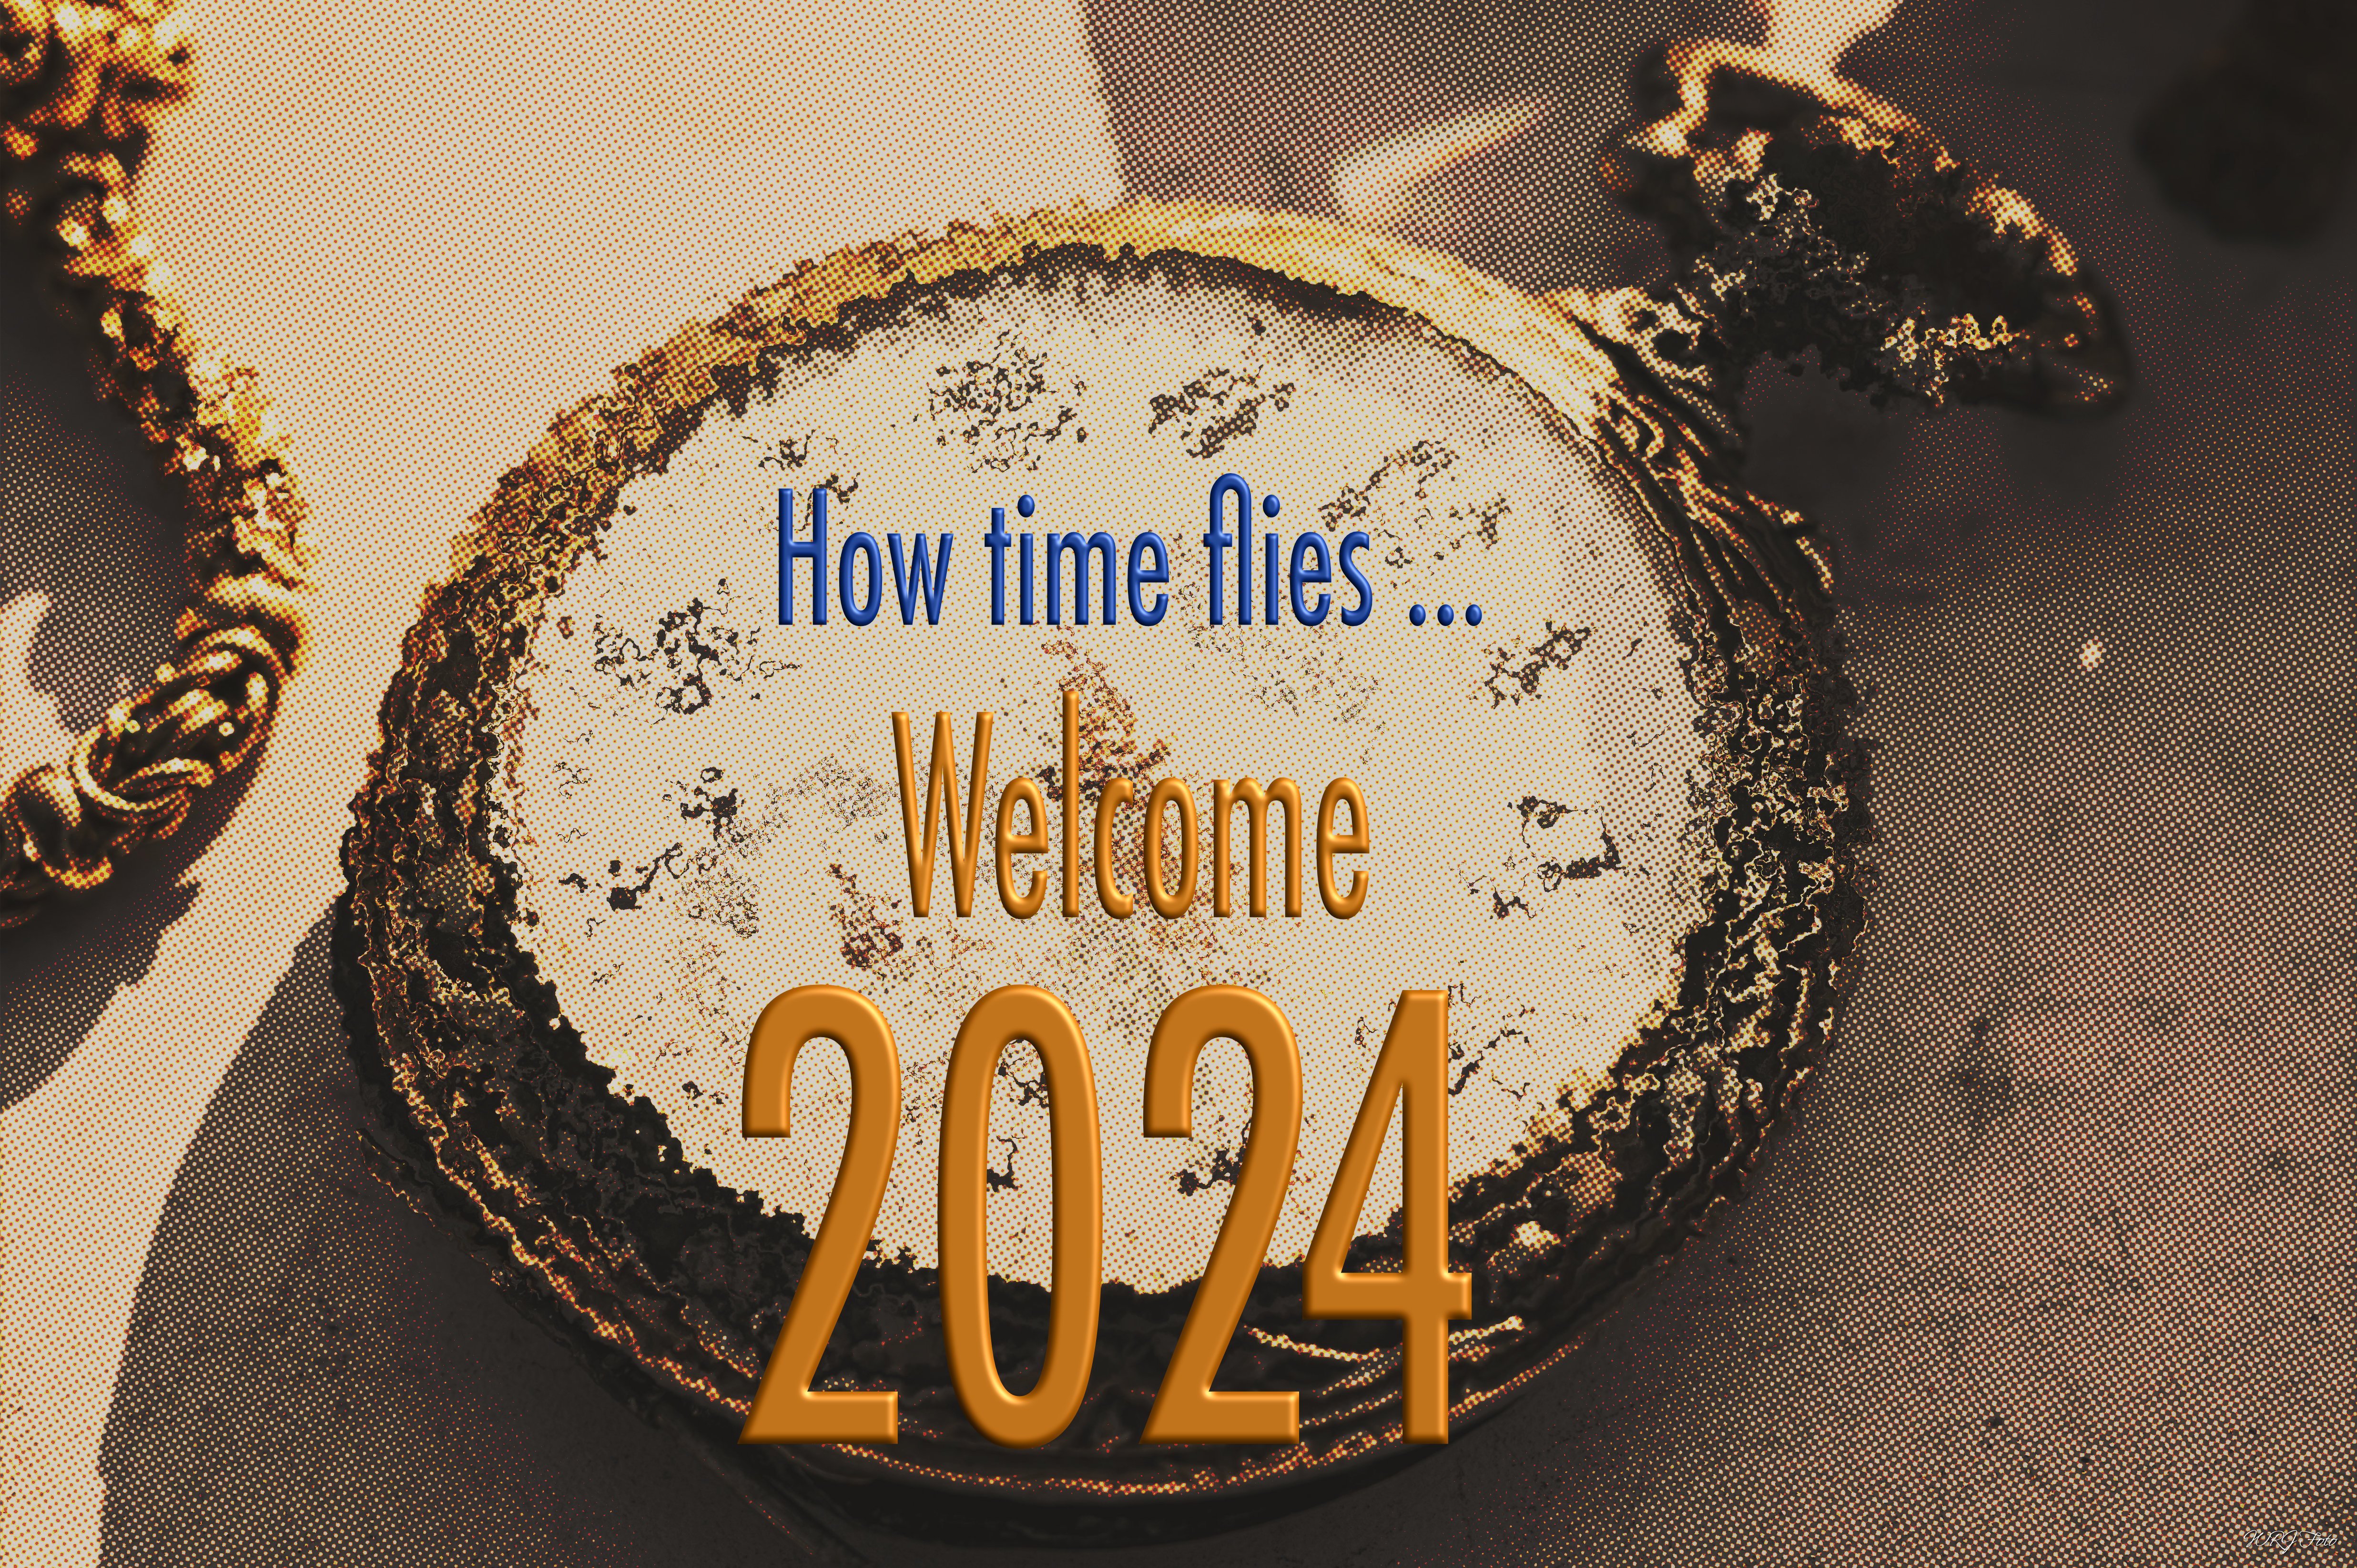
Greetings to the new year to all. ps: the picture of the clock is from pixabay, the rest is affinity photo pure …
-
Original black and white image is "Stonethwaite Bridge, Borrowdale, Cumberland, from a soft ground etching by William Green, 1809," now in the public domain, courtesy of the British Library. The bluebird and cardinal, who is actually bright red in my original jpg, are regulars from my garden. They join me in wishing everybody a much happier 2024!!
-
Remembering some of my works on 2023. Happy New Year Recap2023_03.mp4
-
 Is there any way to copy an area from an image type layer? In the example below I set a selection and using copy&paste. instead of copying the area it duplicates the whole layer. I know that I can rasterise it and then copy&paste, but why not copy directly from an "image"? cucumber.mp4
 -
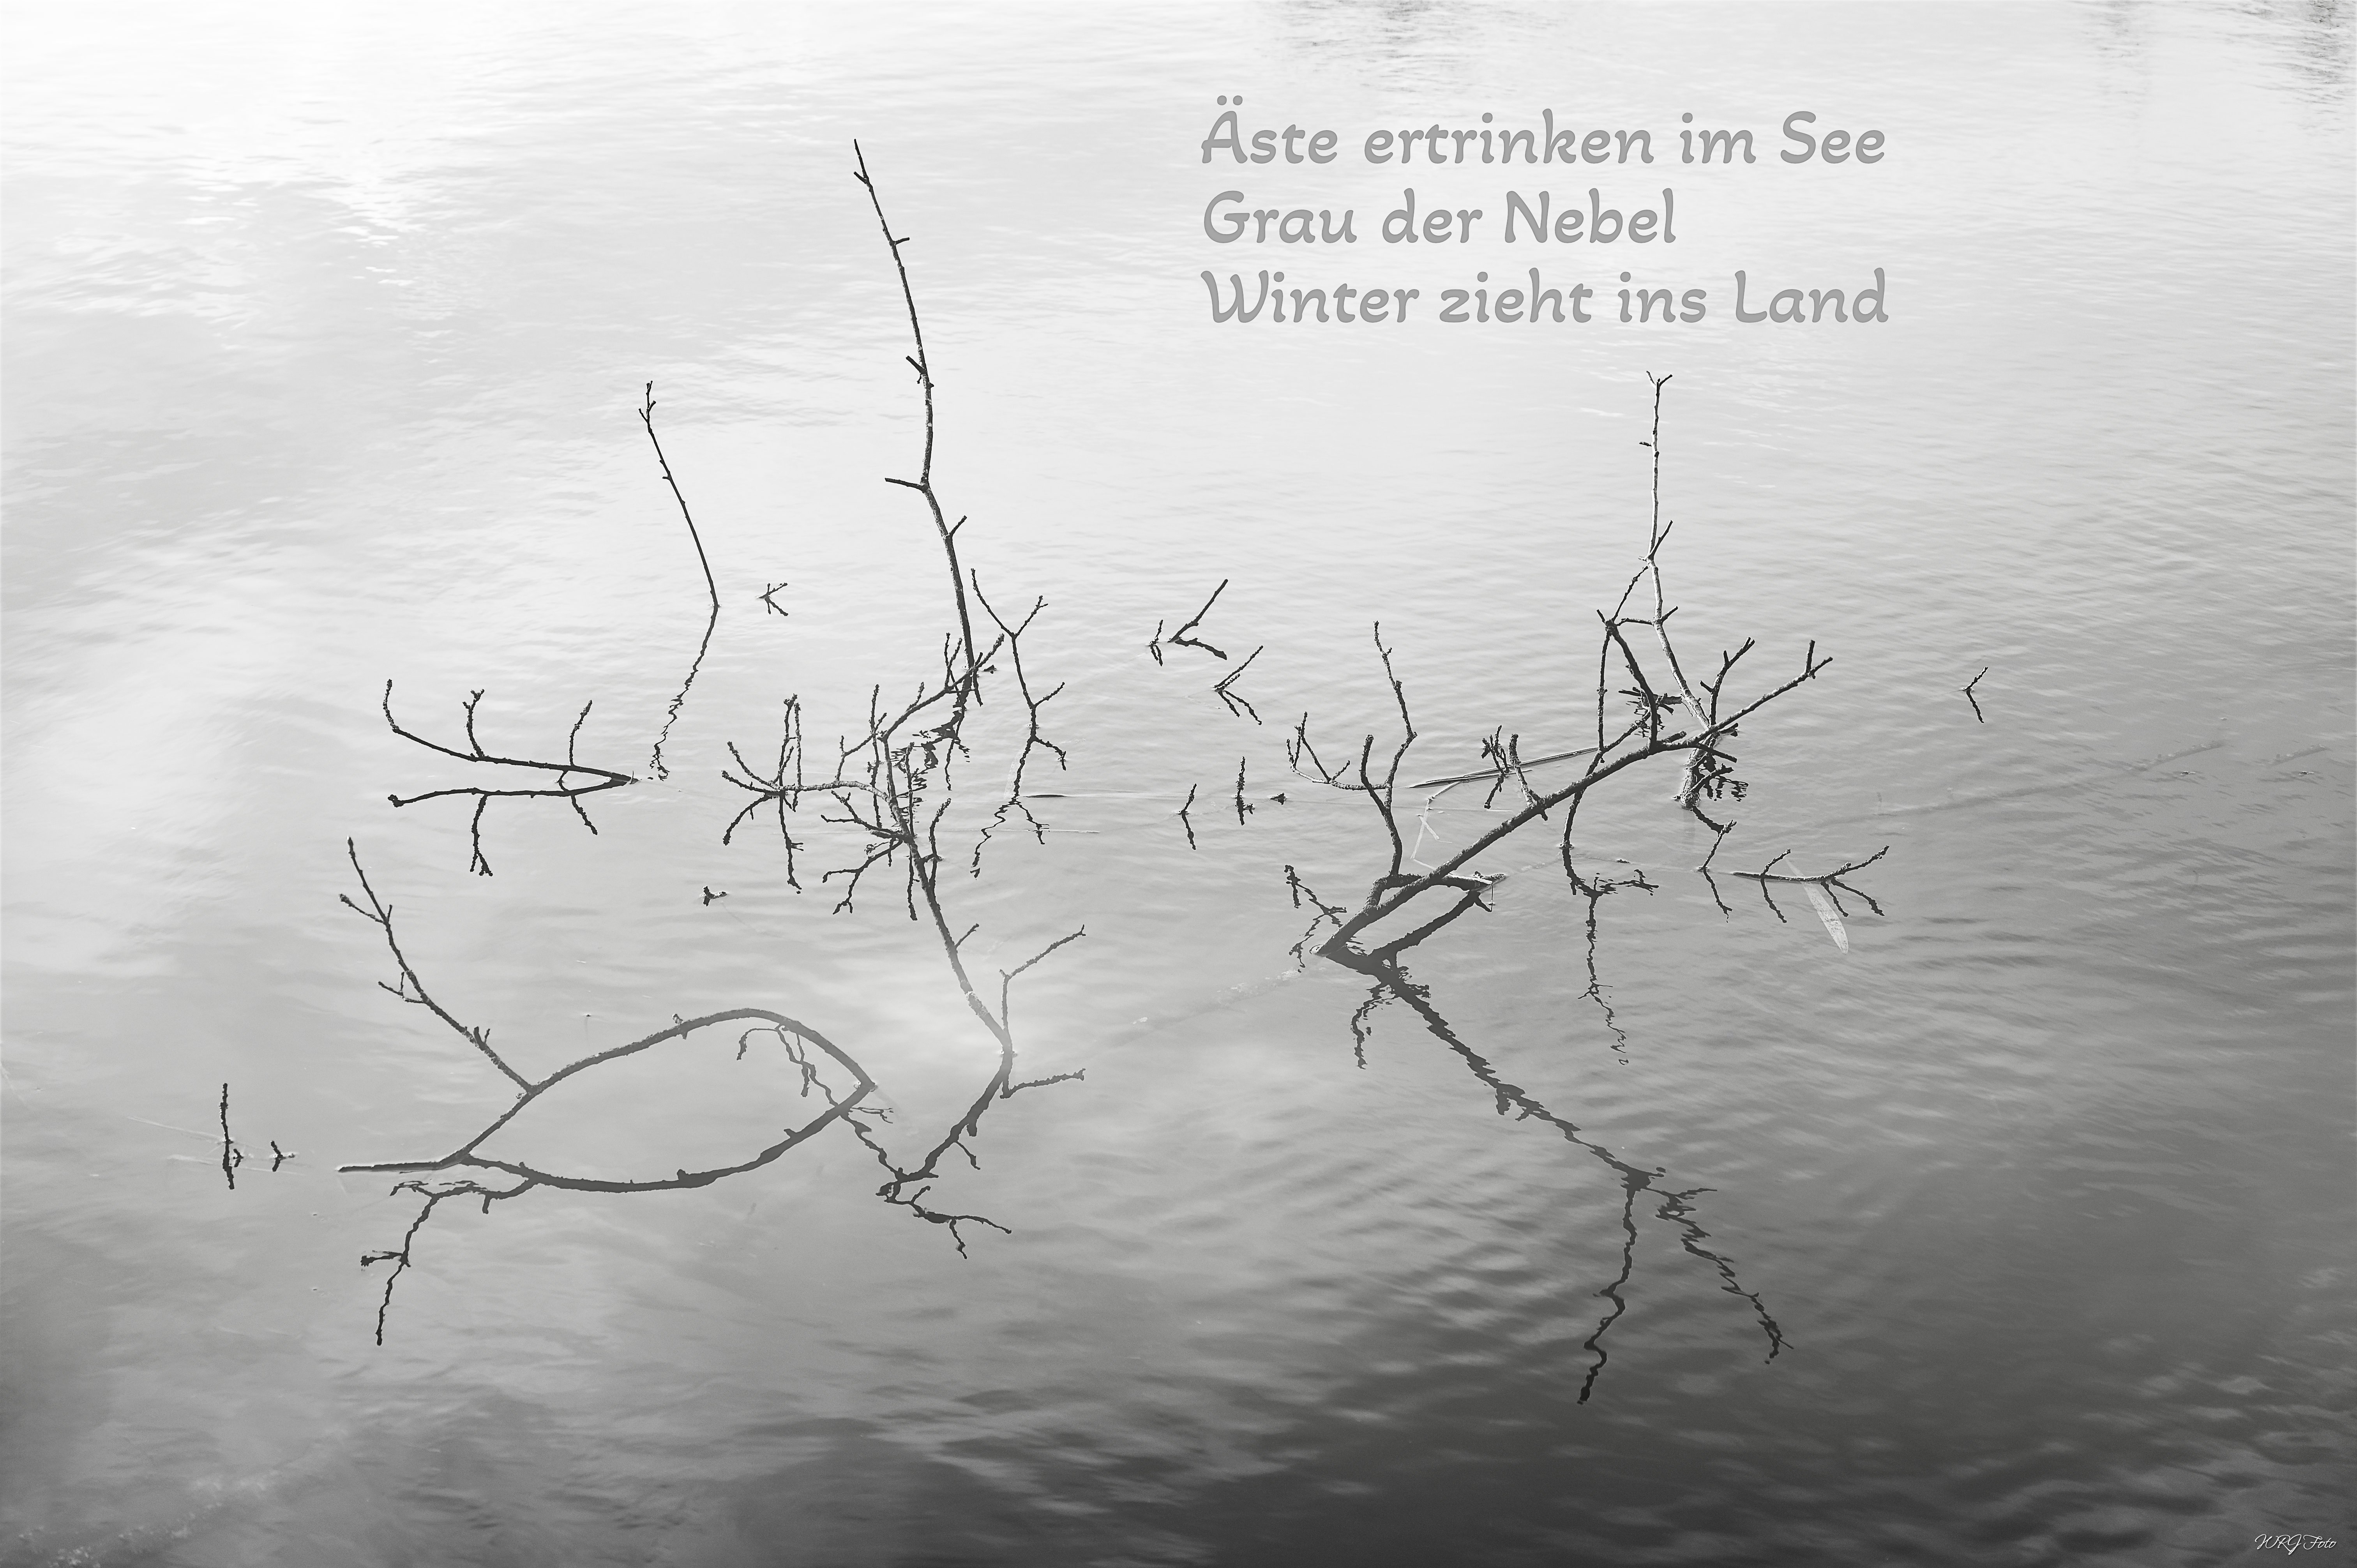
Created with my Nikon z6II and Affinity Photo. translation by deepl Branches drown in the lake Grey the fog Winter moves into the land
-

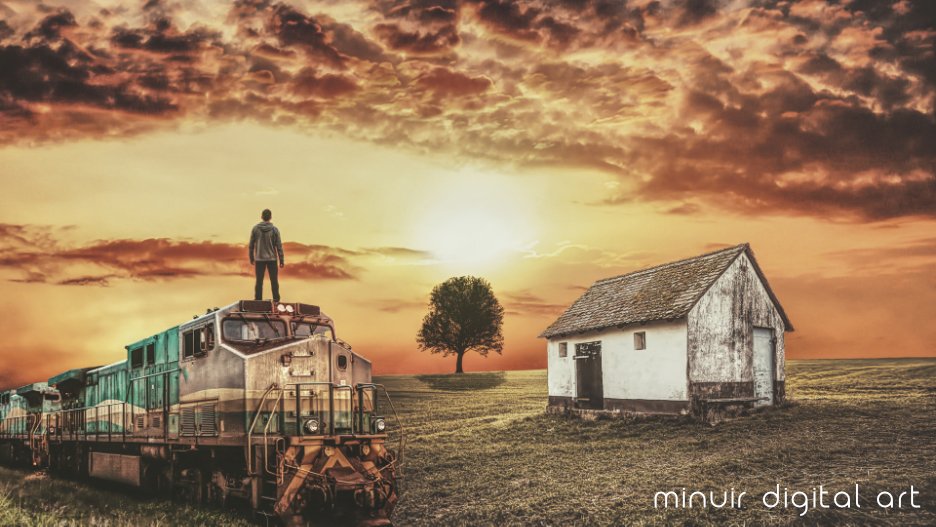
affinity photo Affinity Photo Manipulation - Train To Nowhere
minuir posted a topic in Share your work
Sometimes I imagine that a strange but beautiful place will come out if I take the train to the end. This time, I worked such images by photo manipulation with affinity photo. "Train To Nowhere" speed art : https://www.youtube.com/watch?v=vnQEilRQsjo
-
- 1
-
-
- minuir
- digital art
- (and 2 more)
-
AI generated images combined and adjusted.
-
I wish everyone a happy and peaceful Christmas.
-
New forum member here. Just wanted to share some art, specifically an alternative movie poster I drew recently. I enjoy the hand-drawn and painted film poster aesthetic of days gone by. This poster is inspired by the tremendous poster by British illustrator Paul Shipper and so includes a few nods to his wonderful work. It is completely hand-drawn in Affinity Photo. I had been experimenting with other apps (Procreate, Photoshop, Pixelmator Pro et al) and have found that Affinity Photo fits my needs and wants. I had a quick look at the forum and didn't see much hand-drawn raster art so thought I would share. Have included a couple of detail images as well. Chris www.theartofadventure.net
-
 Hi in this affinity photo tutorial I show how to photograph St. Peter's Basilica at night and then edit it. The challenge is the big difference between light and shadow. The colors are adjusted slightly and people are removed. I wish you inspiration and a merry christmas. Ciao Jack
 -
Freehand (analog) airbrush on canvas, Affinity Photo: pallet manipulation and saturation, Affinity Designer: enhancement of skin texture with the Gradient tool to edit bitmap textures and brushes. (work in progress as of Dec 2023) (3D version created in Plasticity 3D)
-
- 1
-
-
- affinity photo
- affinity designer
- (and 1 more)
-
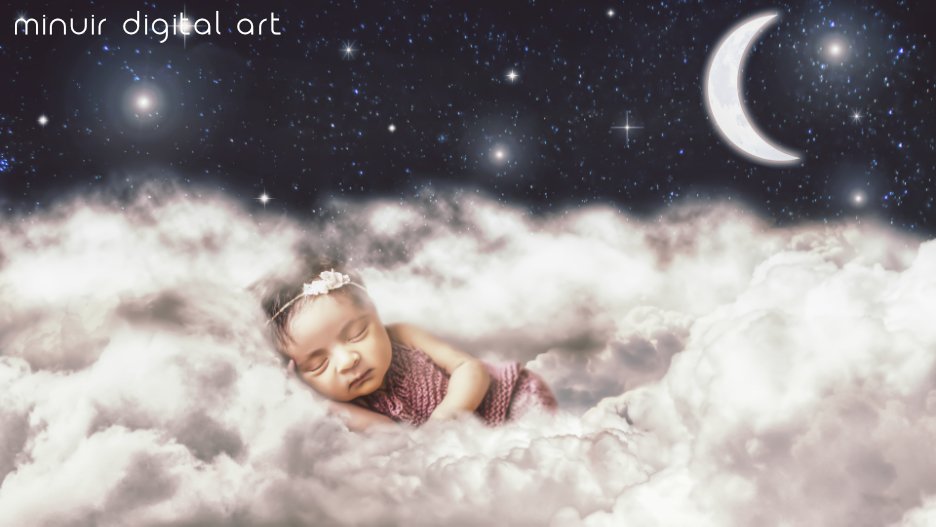
affinity photo Affinity Photo Manipulation - Peace Love & Sleep
minuir posted a topic in Share your work
A lot of children died recently in natural disasters and wars and it's a very sad and tragic news. I hope the children will rest in peace also I pray that no more children die. "Peace Love & Sleep" speed art : https://www.youtube.com/watch?v=GCQFwAWC4FY
- 2 replies
-
- 5
-
-
- minuir
- digital art
- (and 2 more)
-
With a major assist from a black and white drawing of Ancient Windsor Castle in the British Library's collection of images in the public domain (watercolour brushes), plus a Jixipix plugin, plus some Pixabay images of snow, a bow, and some spruce (selection brush tool), I wish each and every person at Serif — who has/have been so indefatigable at giving us our lovely V.3 this year — a blessed and happy Christmas! A more elegant group of professionals could not be found! My thanks and best wishes also go to the many Forum members who have so kindly devoted so much of their time and intellect over the past years to answering thousands of "how do I ..." questions from other Forum members. Not to mention my own. I have learned from those answers more than I ever imagined when first I found Affinity Photo, and later Designer and Publisher a few years ago. A special thanks goes to @MikeTO for his extraordinary gift to us all of his Publisher manual. It is a Herculean effort and so very appreciated, I am sure, by many of us. So thank you, everybody, and may we all pray for peace on Earth in 2024! P.S. The bow in my jpg is actually a clear red. Not sure why the uploaded version is this rather off-putting burnt sienna. The spruce looks rather sick and tired too. Oh, well. Not Photo's fault.
- 3 replies
-
- 12
-
-

-
A4 design collage Xmas wrapping paper created and assembled in AP for 2 year old Gt Granddaughter to be photocopied to A3. 2 fonts used. Background created in Filter Forge. Santa from Pixabay
-
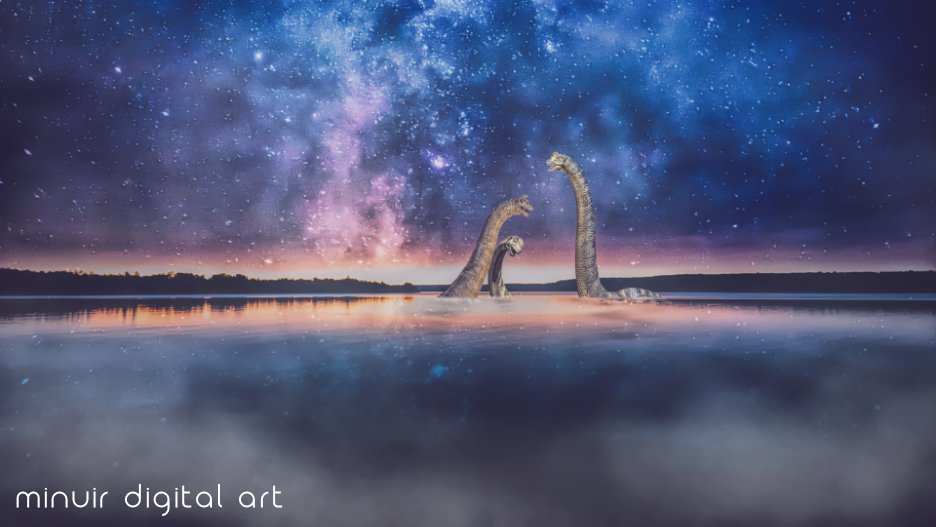
I heard recently that people are starting to explore Loch Ness in Scotland again. So this time, I made an image of the curiosity about Loch Ness with Dinosaur Family. "Dinosaur Lake" speed art : https://www.youtube.com/watch?v=IRSNWsTmaZ4
-
- 1
-
-
- minuir
- digital art
- (and 2 more)
-
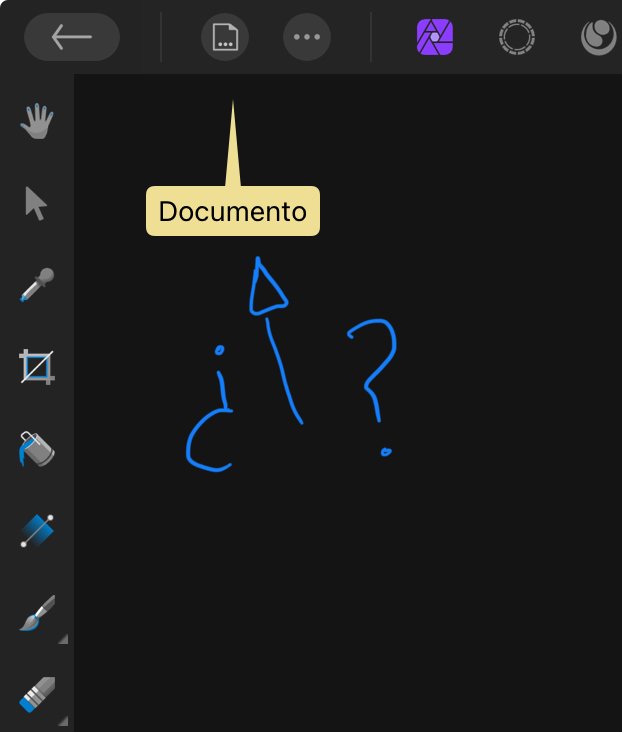
Hello! I think that in Affinity Photo it is in "Show guides" but really when I press the context menu disappears and "Document" appears Where can I show the rules in Affinity Photo? Why aren't they shown to me? Thank you!
-
Hi, in this Affinity Photo Tutorial I show how to photograph and edit a small waterfall. The waterfall is small and romantic, but at the same time mystically located in the Lost Place. Since it is only a small waterfall, it obviously has to be processed differently than a large one (there will also be a tutorial on this). I wish you fun and inspiration with this video. Ciao Jack
-
- 2
-
-
- affinity photo
- tutorial
- (and 4 more)
-
 I tried searching in help, youtube and here in the forums. I don't know if I'm searching wrong. Can any one please help on how to fill with foreground color in the ipad app as we do in the desktop one. I need to select some areas and fill them with the selected foreground color for my work but I'm not able to find the option for it.
 -
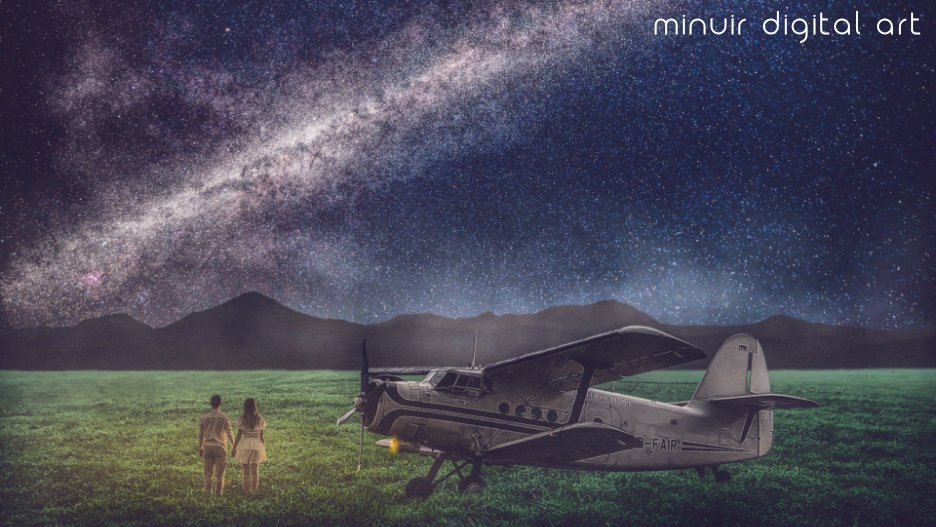
I really want to see the real milky way but I know that I can't because I live in the city. So I made the milky way in this photo manipulation~ "The Milky Way" speed art : https://www.youtube.com/watch?v=MaqGLzg0-Xc
-
- 3
-
-
- minuir
- digital art
- (and 2 more)
-
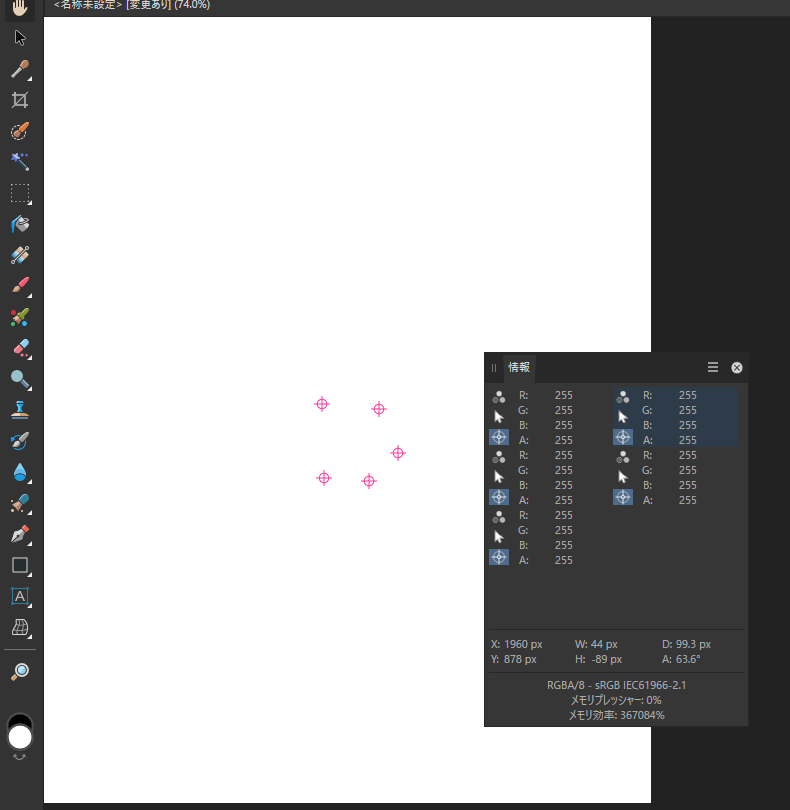
 While color correcting using the info panel in Affinity photo, I always set up 3 point samplers at a time. They are placed on the colors that correspond to black, white and gray on the image. Although Affinity Photo allows multiple points to be placed at will, it's so hard to find the differences among each ones on the info panel. I think it would be much easier if each sampling position were just marked with a sequential number such as 1234. Please consider.
-
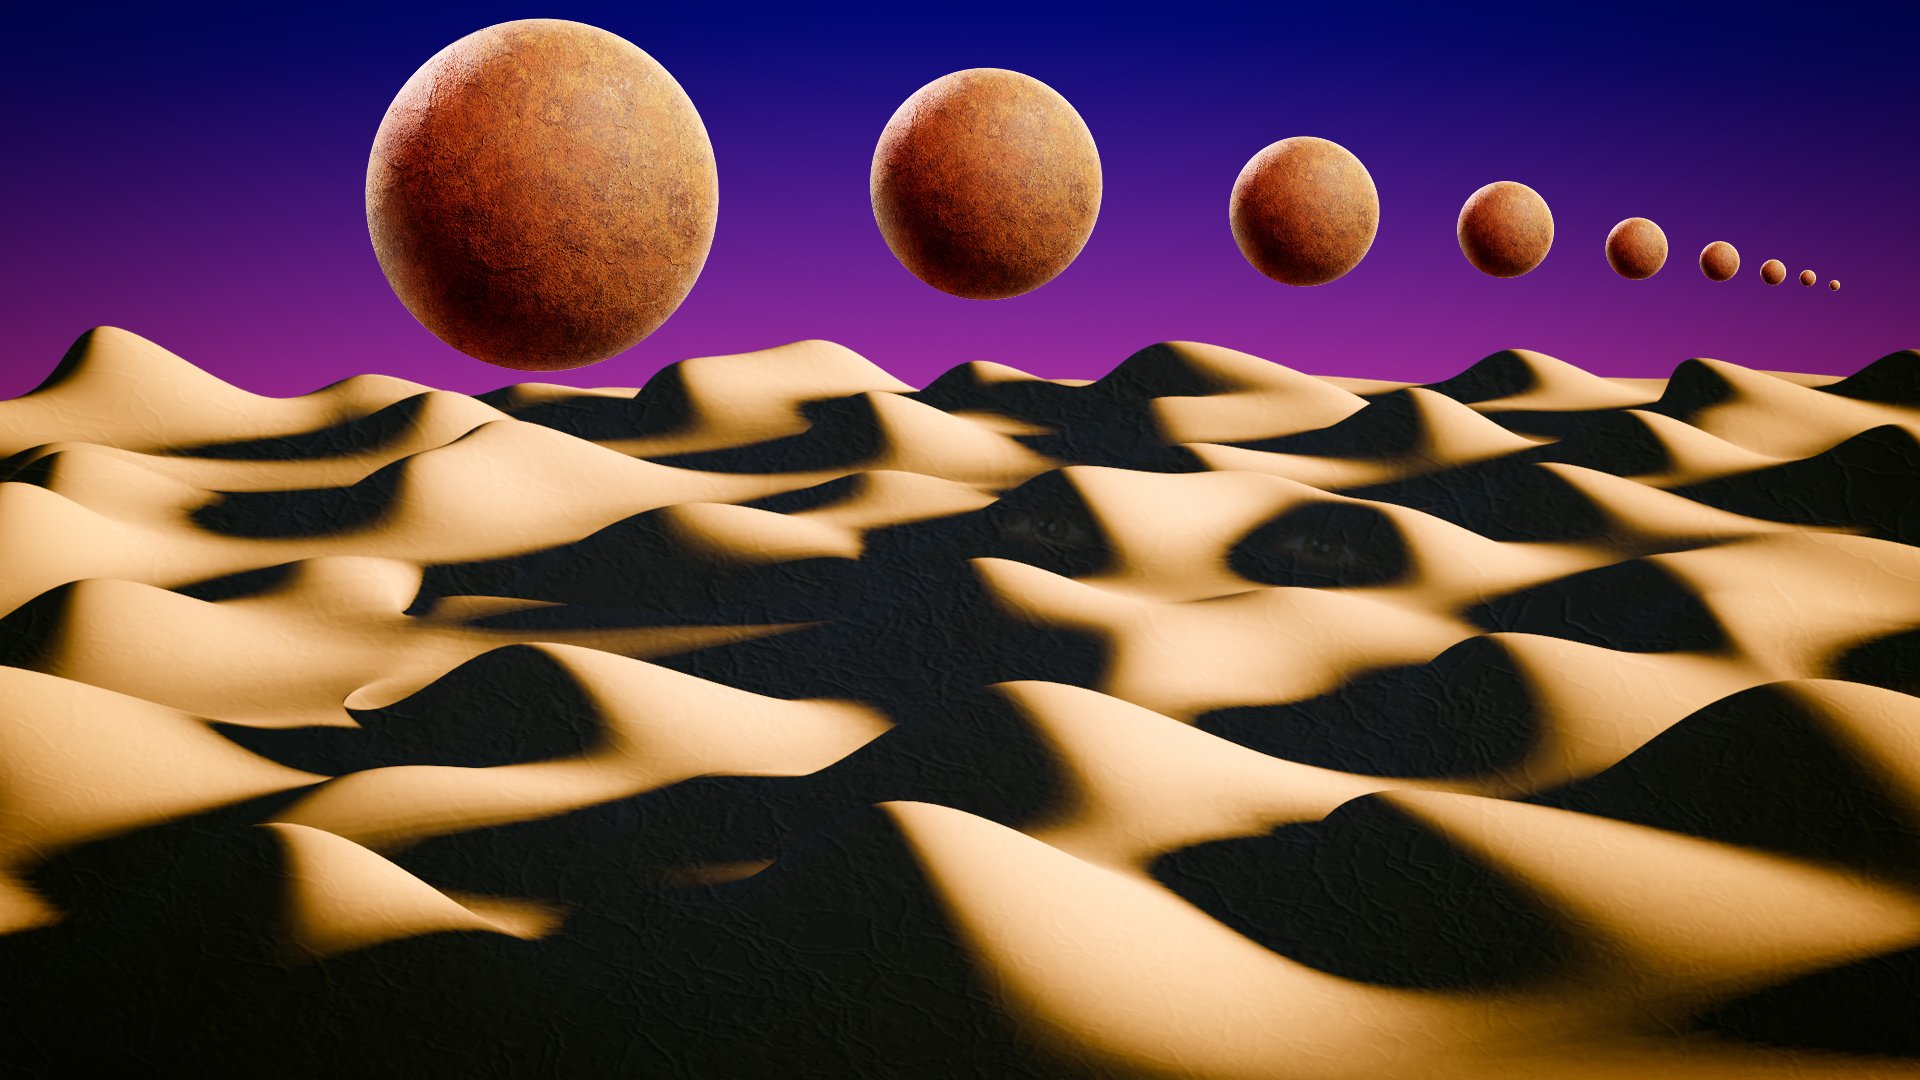
I'm trying to get my arms around Blender 3D, which is what I used to create the sand dunes in the attached image. I am confused and completely overwhelmed by Blender, navigation, render passes, etc. The desert isn't overly convincing, but it's the best I could do with my newbie, rudimentary skills (or perhaps I should say, the lack thereof). I brought exported desert scene into Affinity Photo, where I did the rest of the work. Haha, anyway, I thought I'd post this and see if anyone has any sage advice on coming up to speed with Blender.
-
Hi, in this Affinity Photo V2 tutorial, I show how you can correct a failed white balance with correspondingly incorrect colors. Another main content is the brightening of shadows with two different methods. Other processing techniques are also shown. I wish you fun and inspiration. Ciao Jack
-
- 2
-
-
- affinity photo
- white balance
- (and 7 more)
-
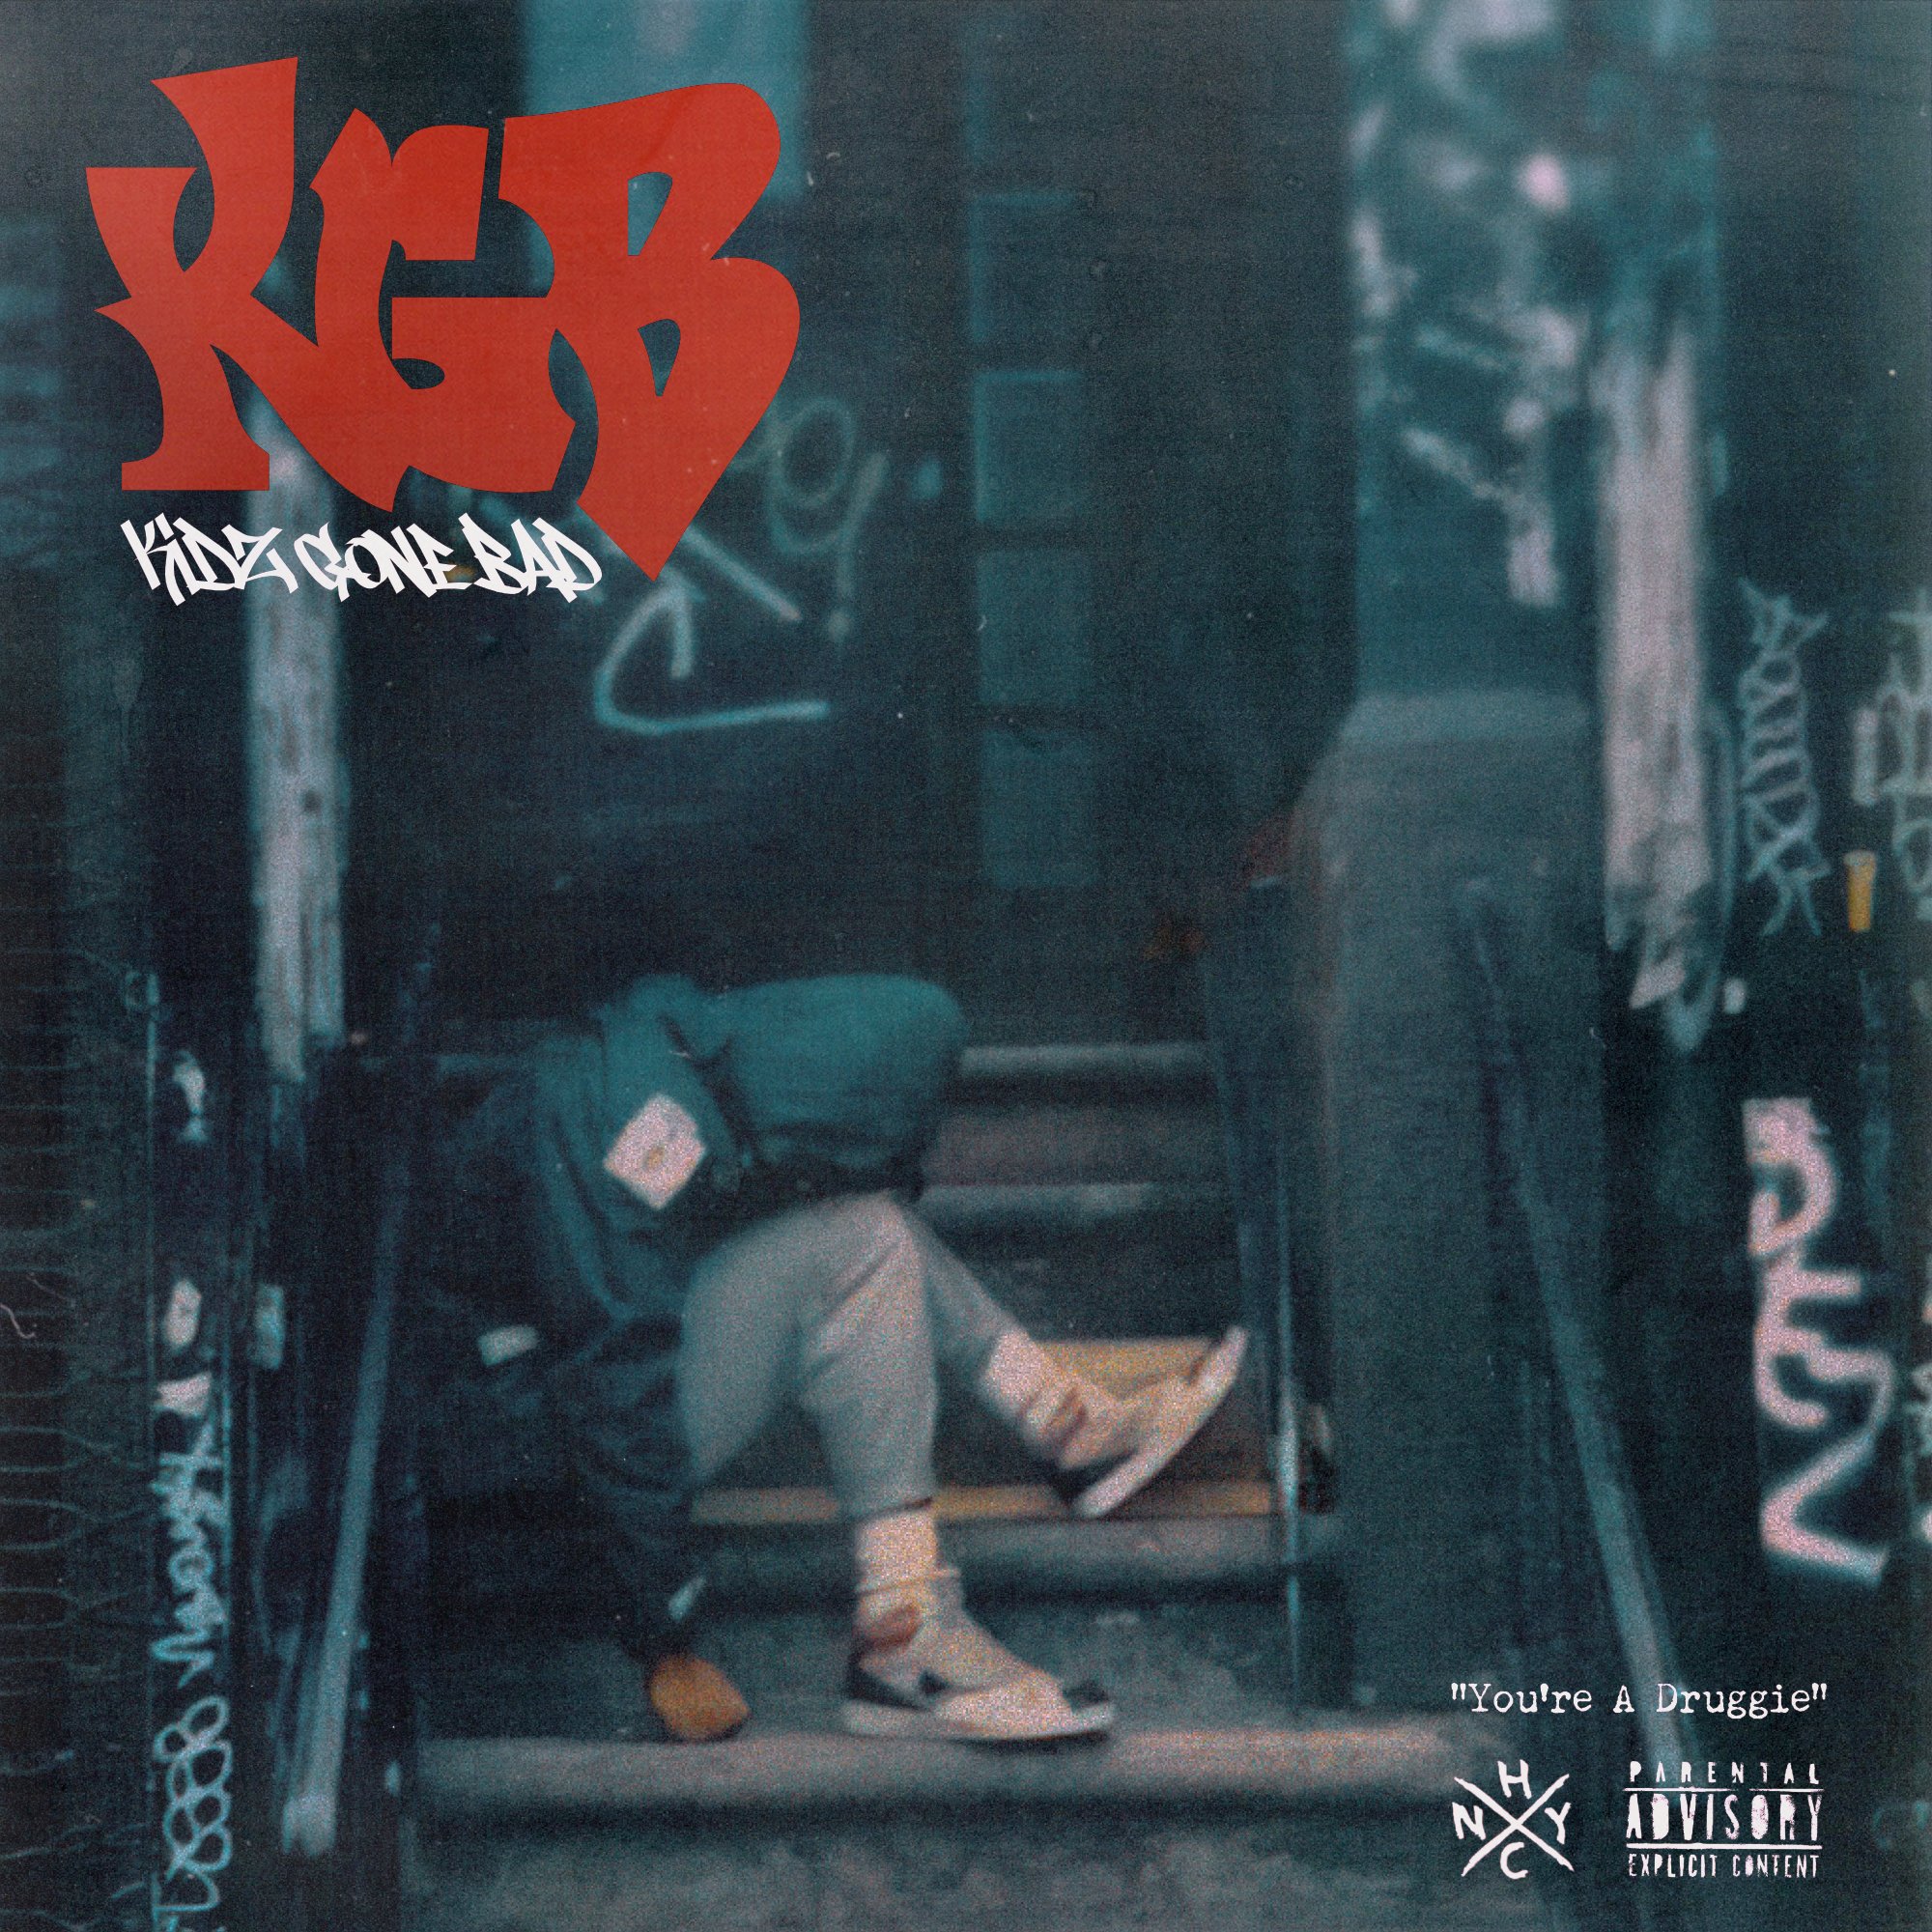
Put these images together for my dad’s (on bass) old thrash band from the 80s/90s. A lost casette uploaded by the guitarist. I used old common photos from old skool NYHC flyers, enhanced them and added textures. full album here with the original casette sleve:
-
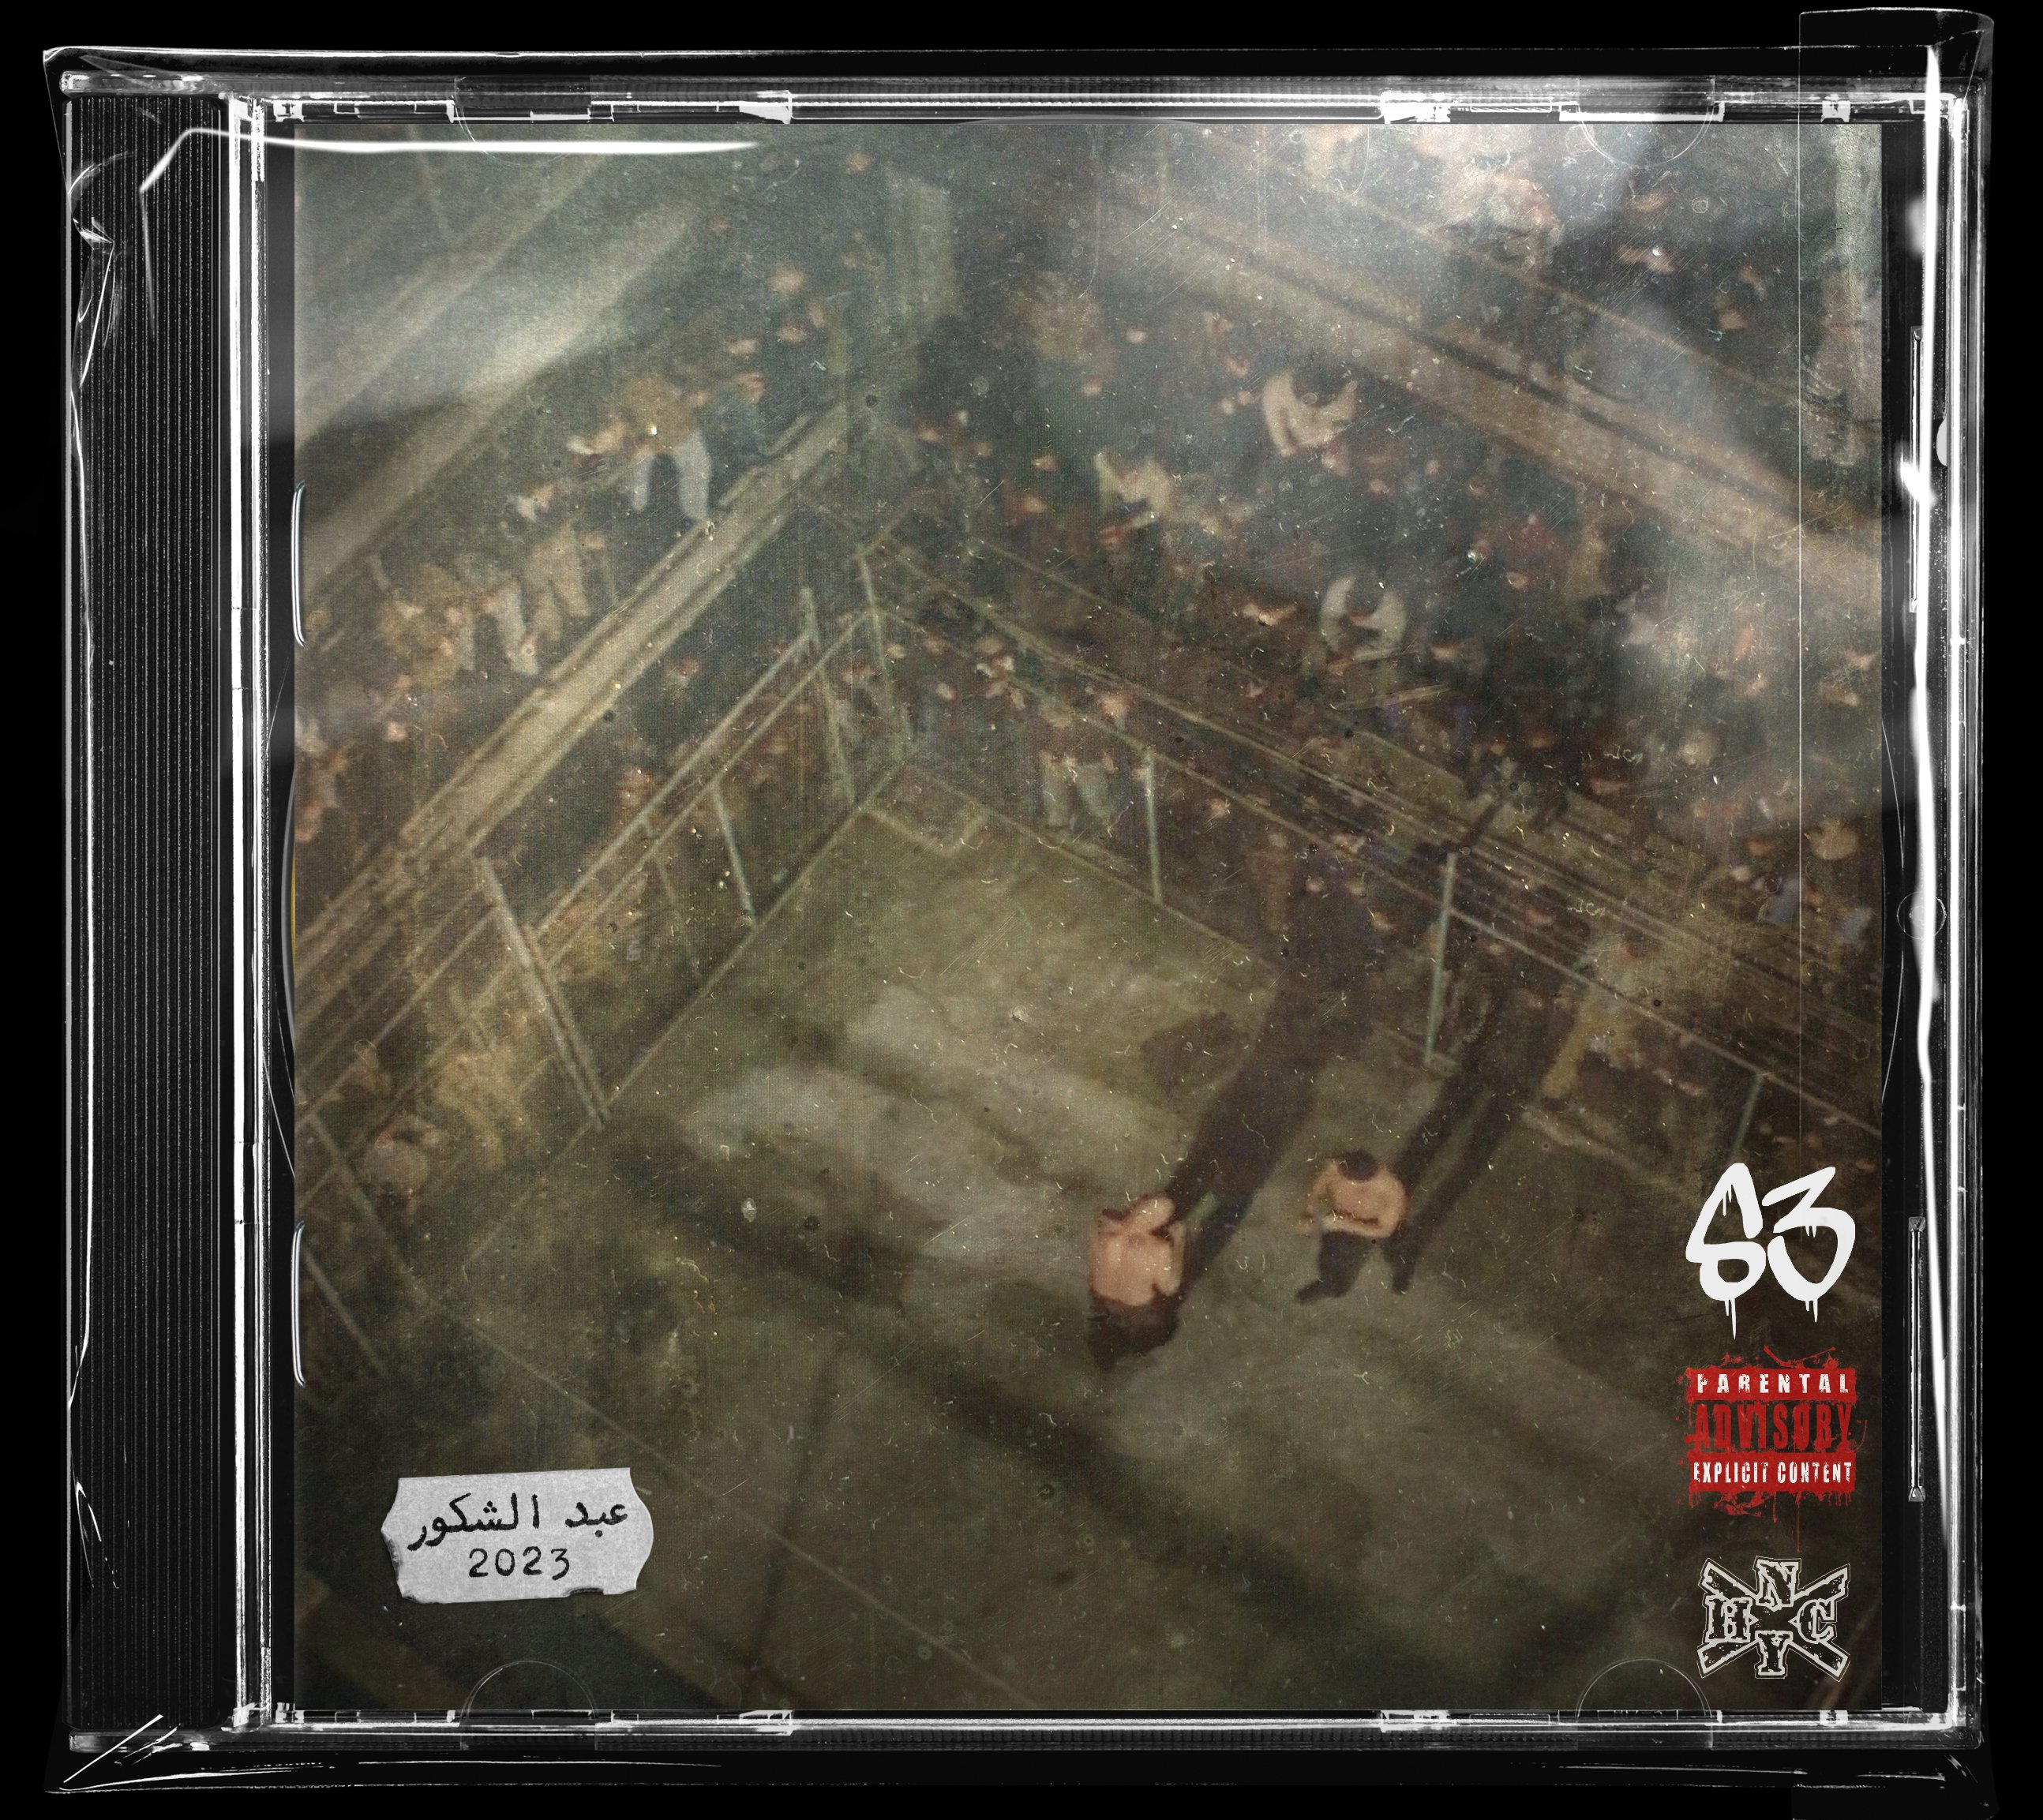
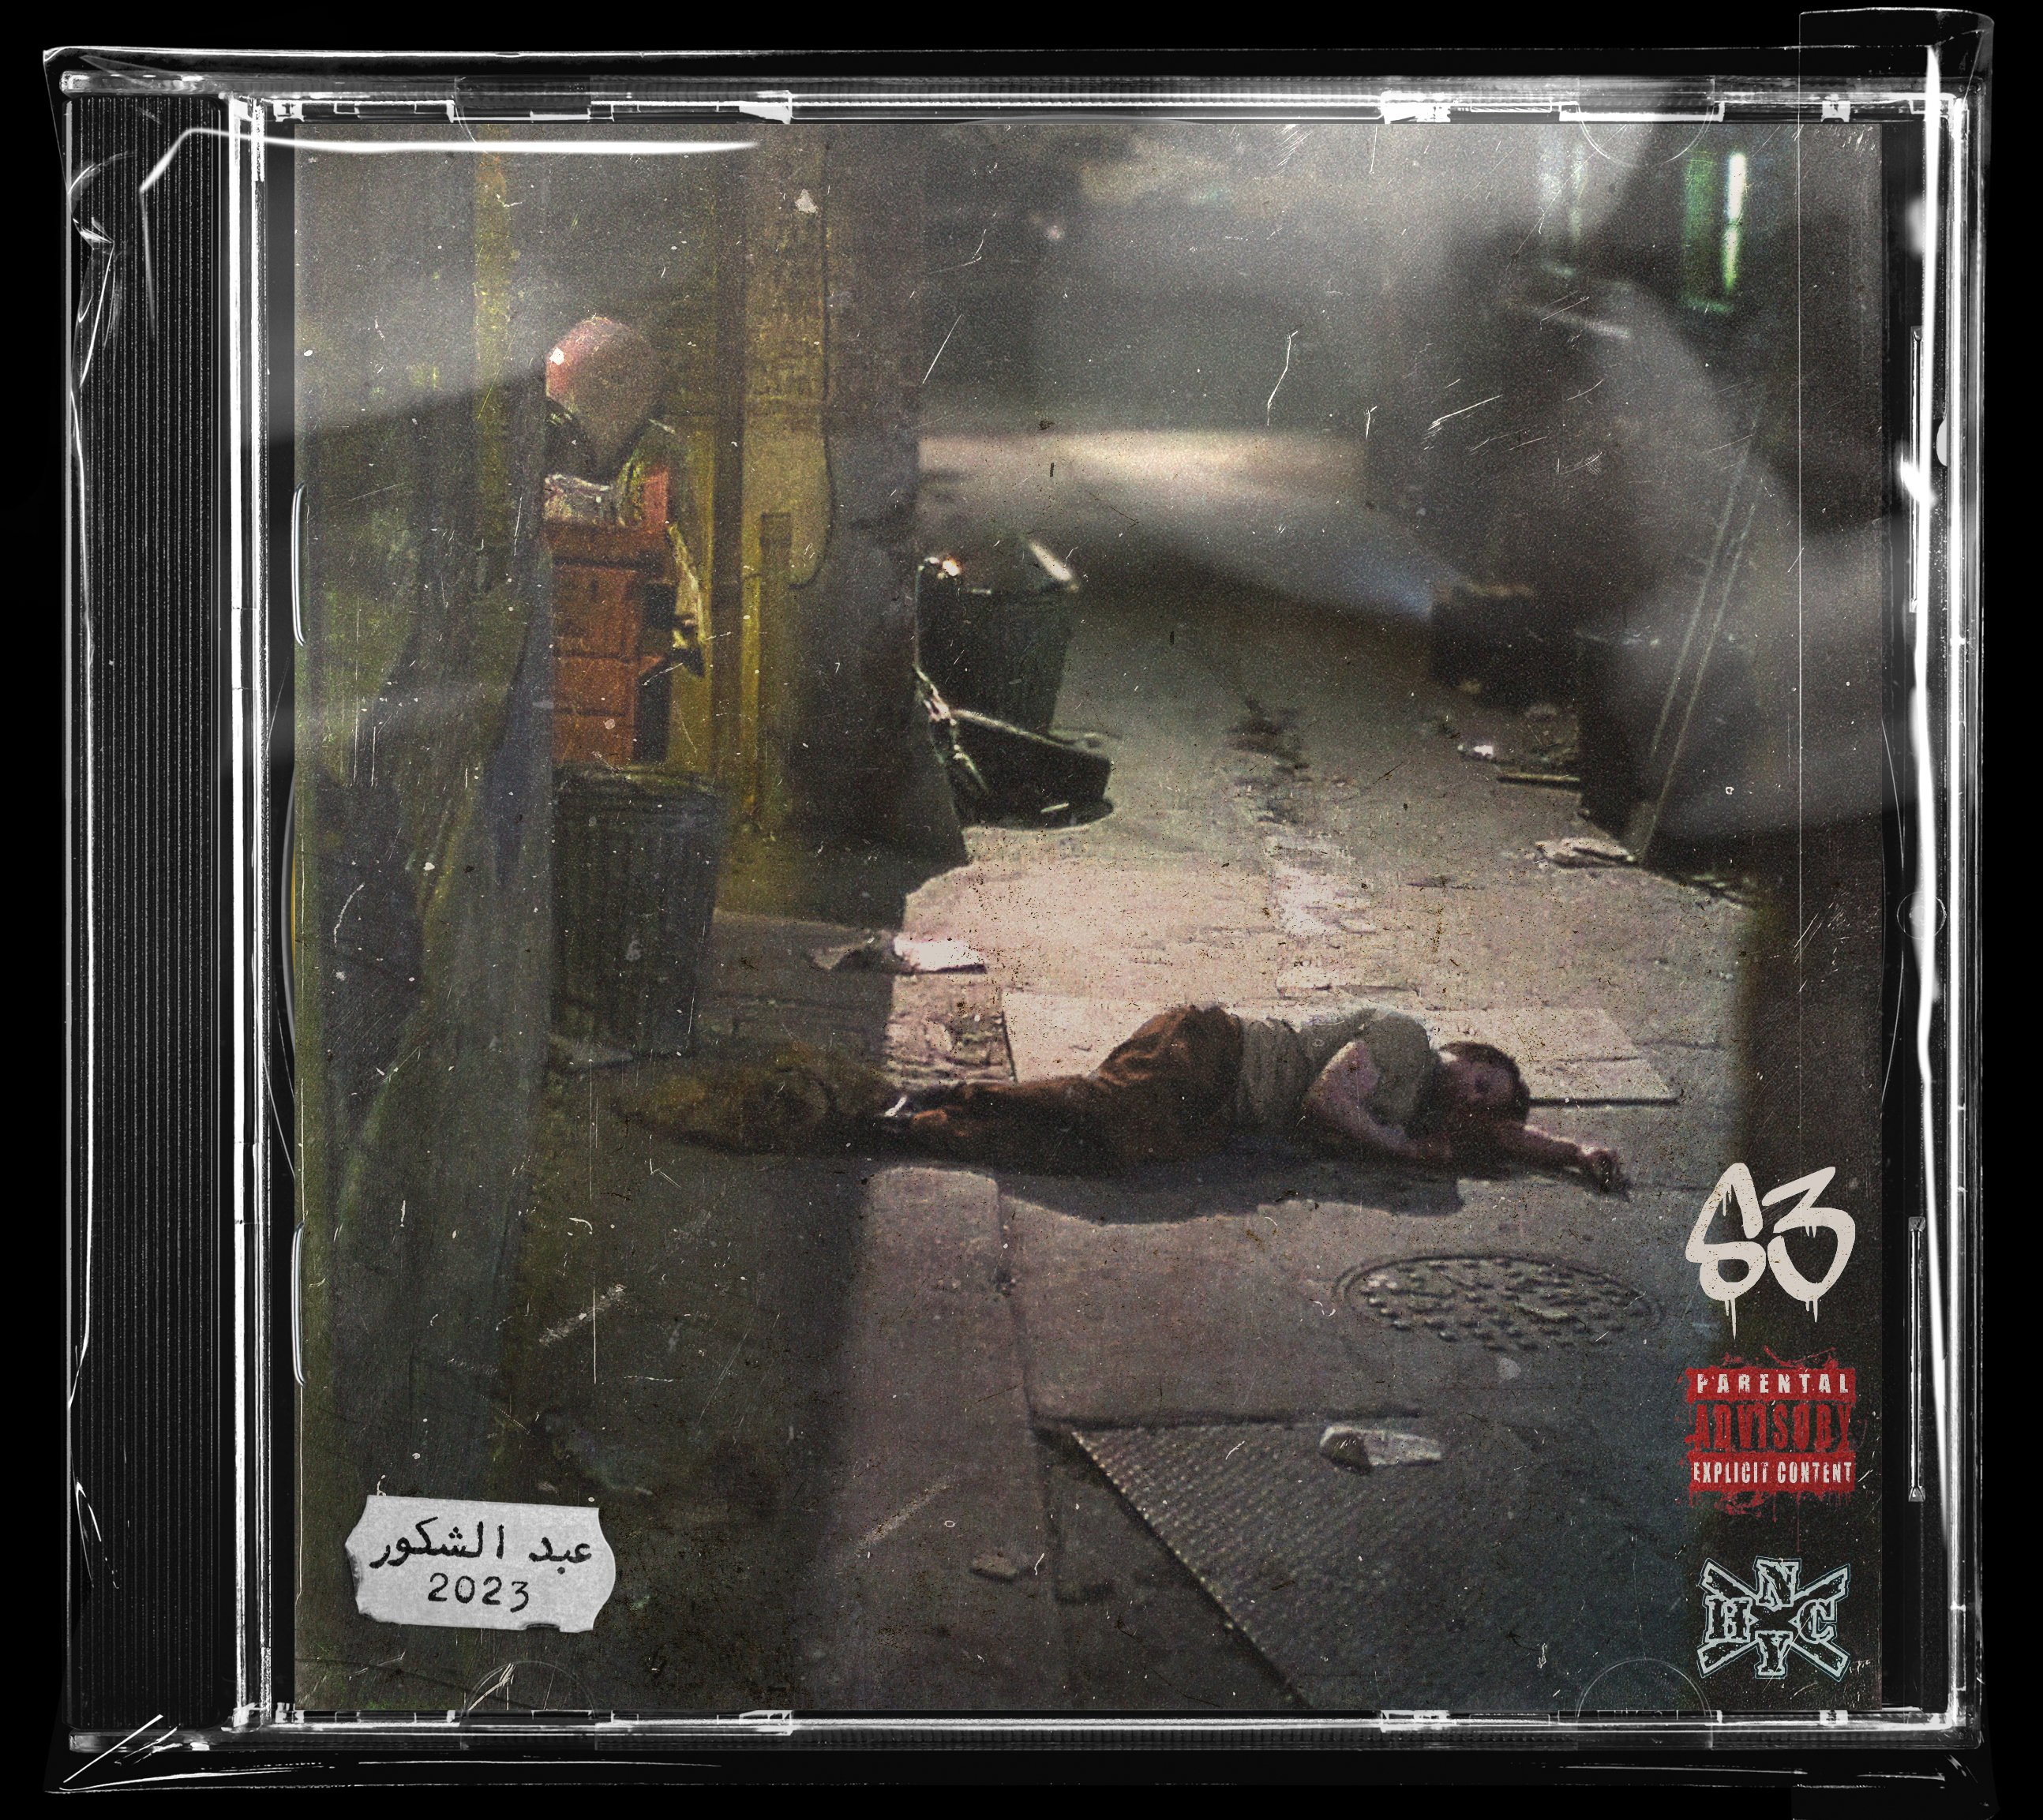
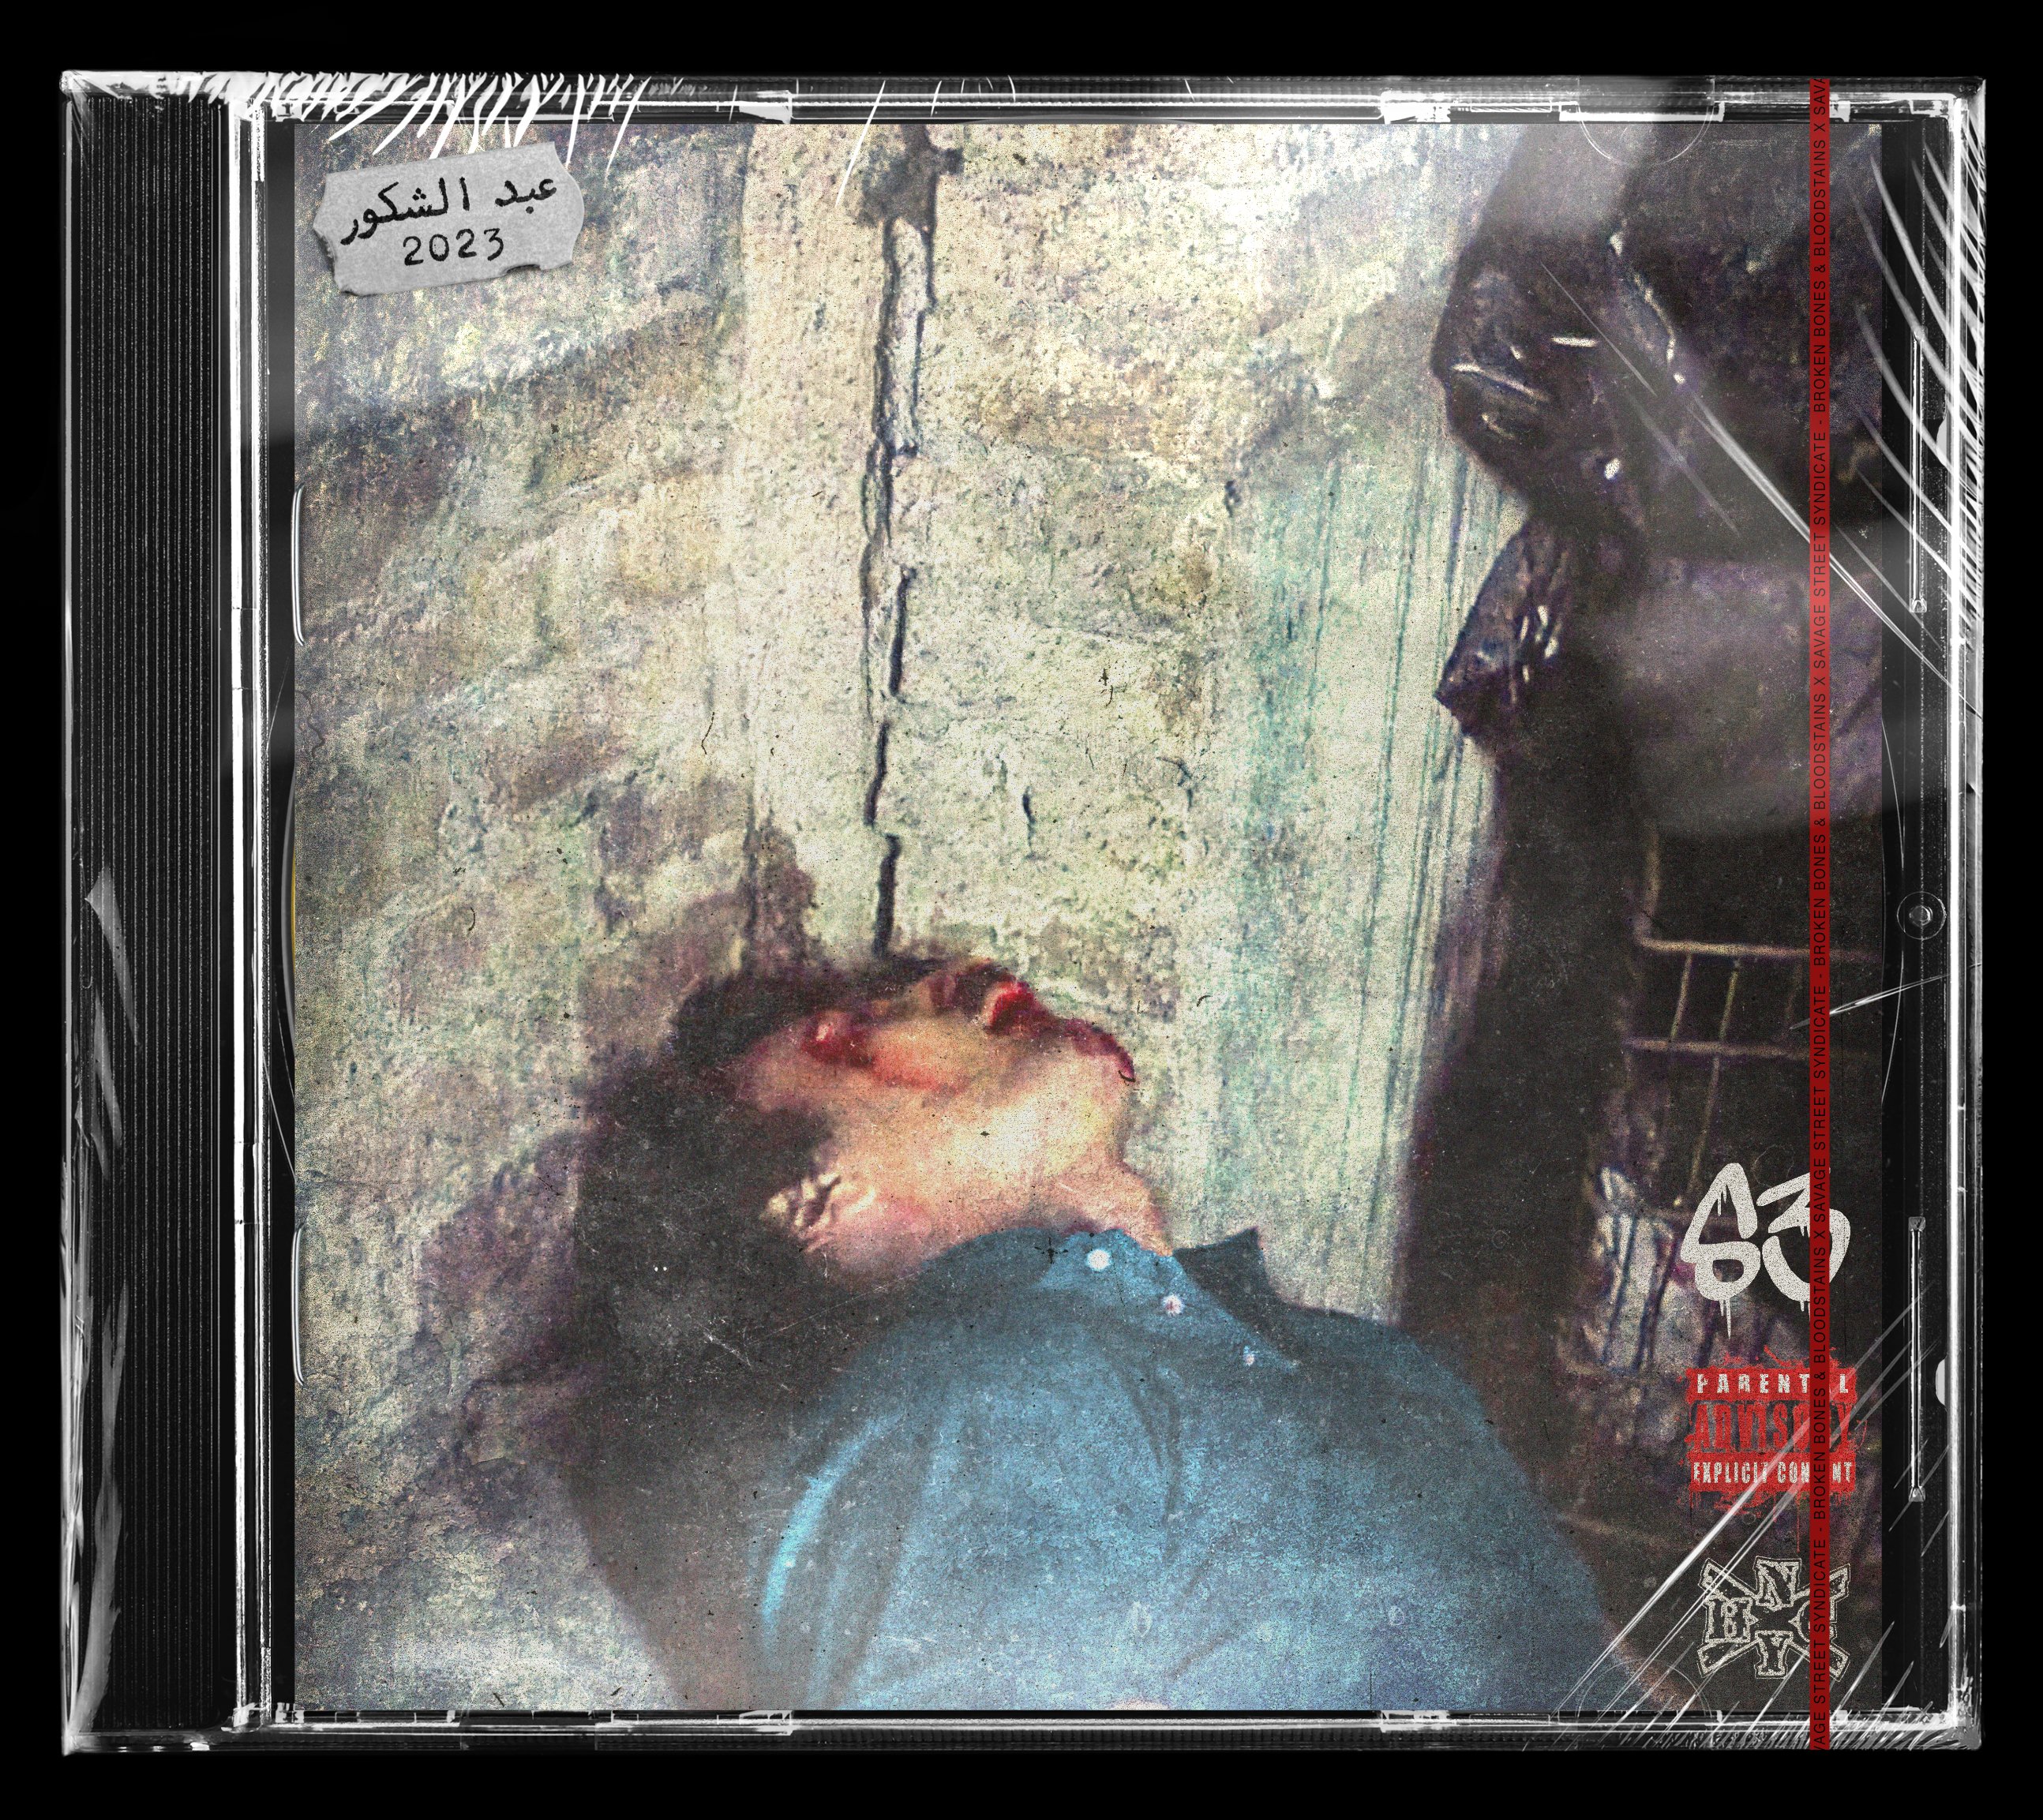
Quick designs using enhanced and edited screenshots from the films Barfly (1987) and Hard Times (1975). I also used Chat GPT for the band name and album titles and track list/bandmembers/record label (not included). And threw them all into mockups. Savage Street Syndicate (S3) – Savage Resurgance (Screenshot from Hard Times) Savage Street Syndicate (S3) – Scars of Vengeance (Screenshot from Barfly) Savage Street Syndicate (S3) – Broken Bones & Bloodstains (Screenshot from Barfly)


.thumb.jpg.02ba769a6966a1cba8182a17b854112e.jpg)


.jpg.232f100a55e3166de3f330a42879e8b2.jpg)