Search the Community
Showing results for tags 'Affinity photo'.
-
I'm trying to get my arms around Blender 3D, which is what I used to create the sand dunes in the attached image. I am confused and completely overwhelmed by Blender, navigation, render passes, etc. The desert isn't overly convincing, but it's the best I could do with my newbie, rudimentary skills (or perhaps I should say, the lack thereof). I brought exported desert scene into Affinity Photo, where I did the rest of the work. Haha, anyway, I thought I'd post this and see if anyone has any sage advice on coming up to speed with Blender.

-

Apply Raster Brush to Path
ChristiduToit posted a topic in Feedback for Affinity Photo V1 on Desktop
Having the ability to apply a raster brush to a path would be such a welcome feature, even if the path is not editable after applying the brush effect. In many cases there are obscure shapes or angled lines that are difficult to draw freehand, and in those cases it would be great to be able to use the pen tool, but still retain the same texture and style of the raster brush you were using, as if you drew the stroke by hand. I know you can apply vector brushes in AD, but I mostly use the raster brushes in AP to sketch. Furthermore, the brushes in AD are stretched along the path, where in AP it would be great to rather have the ability to make it look like the stroke was drawn as if you were using the brush tool. I’ve recently been drawing out a lot architectural interiors for clients using a drawing tablet in Photo, and have really missed the ‘apply brush to path’ feature from Photoshop - would really speed things up and improve the end results! I’ve seen a few mentions of this online, but wasn’t sure if it was logged as a feature request yet, so here you go.- 11 replies
-
- 6
-

-
- affinity photo
- brush
- (and 3 more)
-
3-4 Years ago my Nephew and I decided it would be funny to create an animated series based on some weird cockroach drawings he did as a child that he called 'COCs'😅. We came up with some characters and story lines and the name C.O.C SQUAD (Combat Orientated Cockroaches). It's based on early 90s action movies and cartoons and went through quite a few different art styles and approaches until we found what worked. The movies Showdown In Little Tokyo and Hard Target were particularly influential. The characters were designed in Affinity Designer and Affinity Photo. There were then exported to various pieces of animation software. We recently launched a Kickstarter to try and get some funding to finish the first episode in a reasonable amount of time (It's half done). I would love to know what you guys think of it. More info available at https://www.cocsquad.com/
- 2 replies
-
- 6
-
-

-
- animation
- affinity photo
- (and 1 more)
-
 I have 2 copies of a newspaper article, one day apart. Both copies are damaged (the originals were damaged then scanned). Each copy from separate dates were identical articles, but each has different bits of text illegible. I'd like to overlay day 2 copy over day 1 copy to see if I can get more info out of both images. Besides being faint, the copies are a bit out of square, so I have to make them un-wavy as well. I'm a newb with Photo. All I can figure is I need to make layers, and put each version into a separate layer, but after that??? Or is it like taking the two images and doing some sort of HDR transform?? I have no idea. Should I post both of the images, so you can see what I'm trying to do? Thanks!
 -
 Hi, in this Affinity Photo V2 tutorial, I show how you can correct a failed white balance with correspondingly incorrect colors. Another main content is the brightening of shadows with two different methods. Other processing techniques are also shown. I wish you fun and inspiration. Ciao Jack
-
- 2
-
-
- affinity photo
- white balance
- (and 7 more)
-
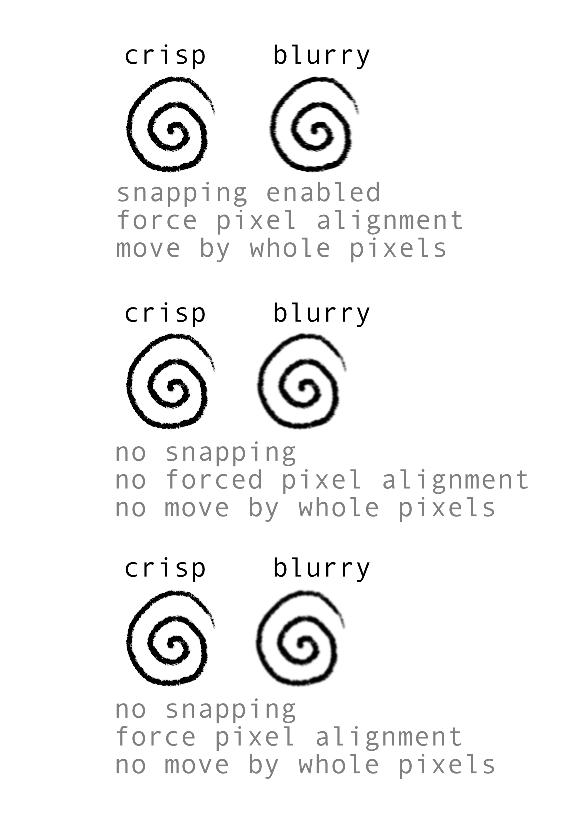
 What am I missing? I drew the image below, copied the layer, then merged down tried different settings of pixel alignment, same blurry result (copied and merged the image ten times, to make the blurring obvious. In my workflow I frequently draw on new layers that are later merged down so I would like to find a way to have no blurring, I get lost in the layers when there are too many)
-
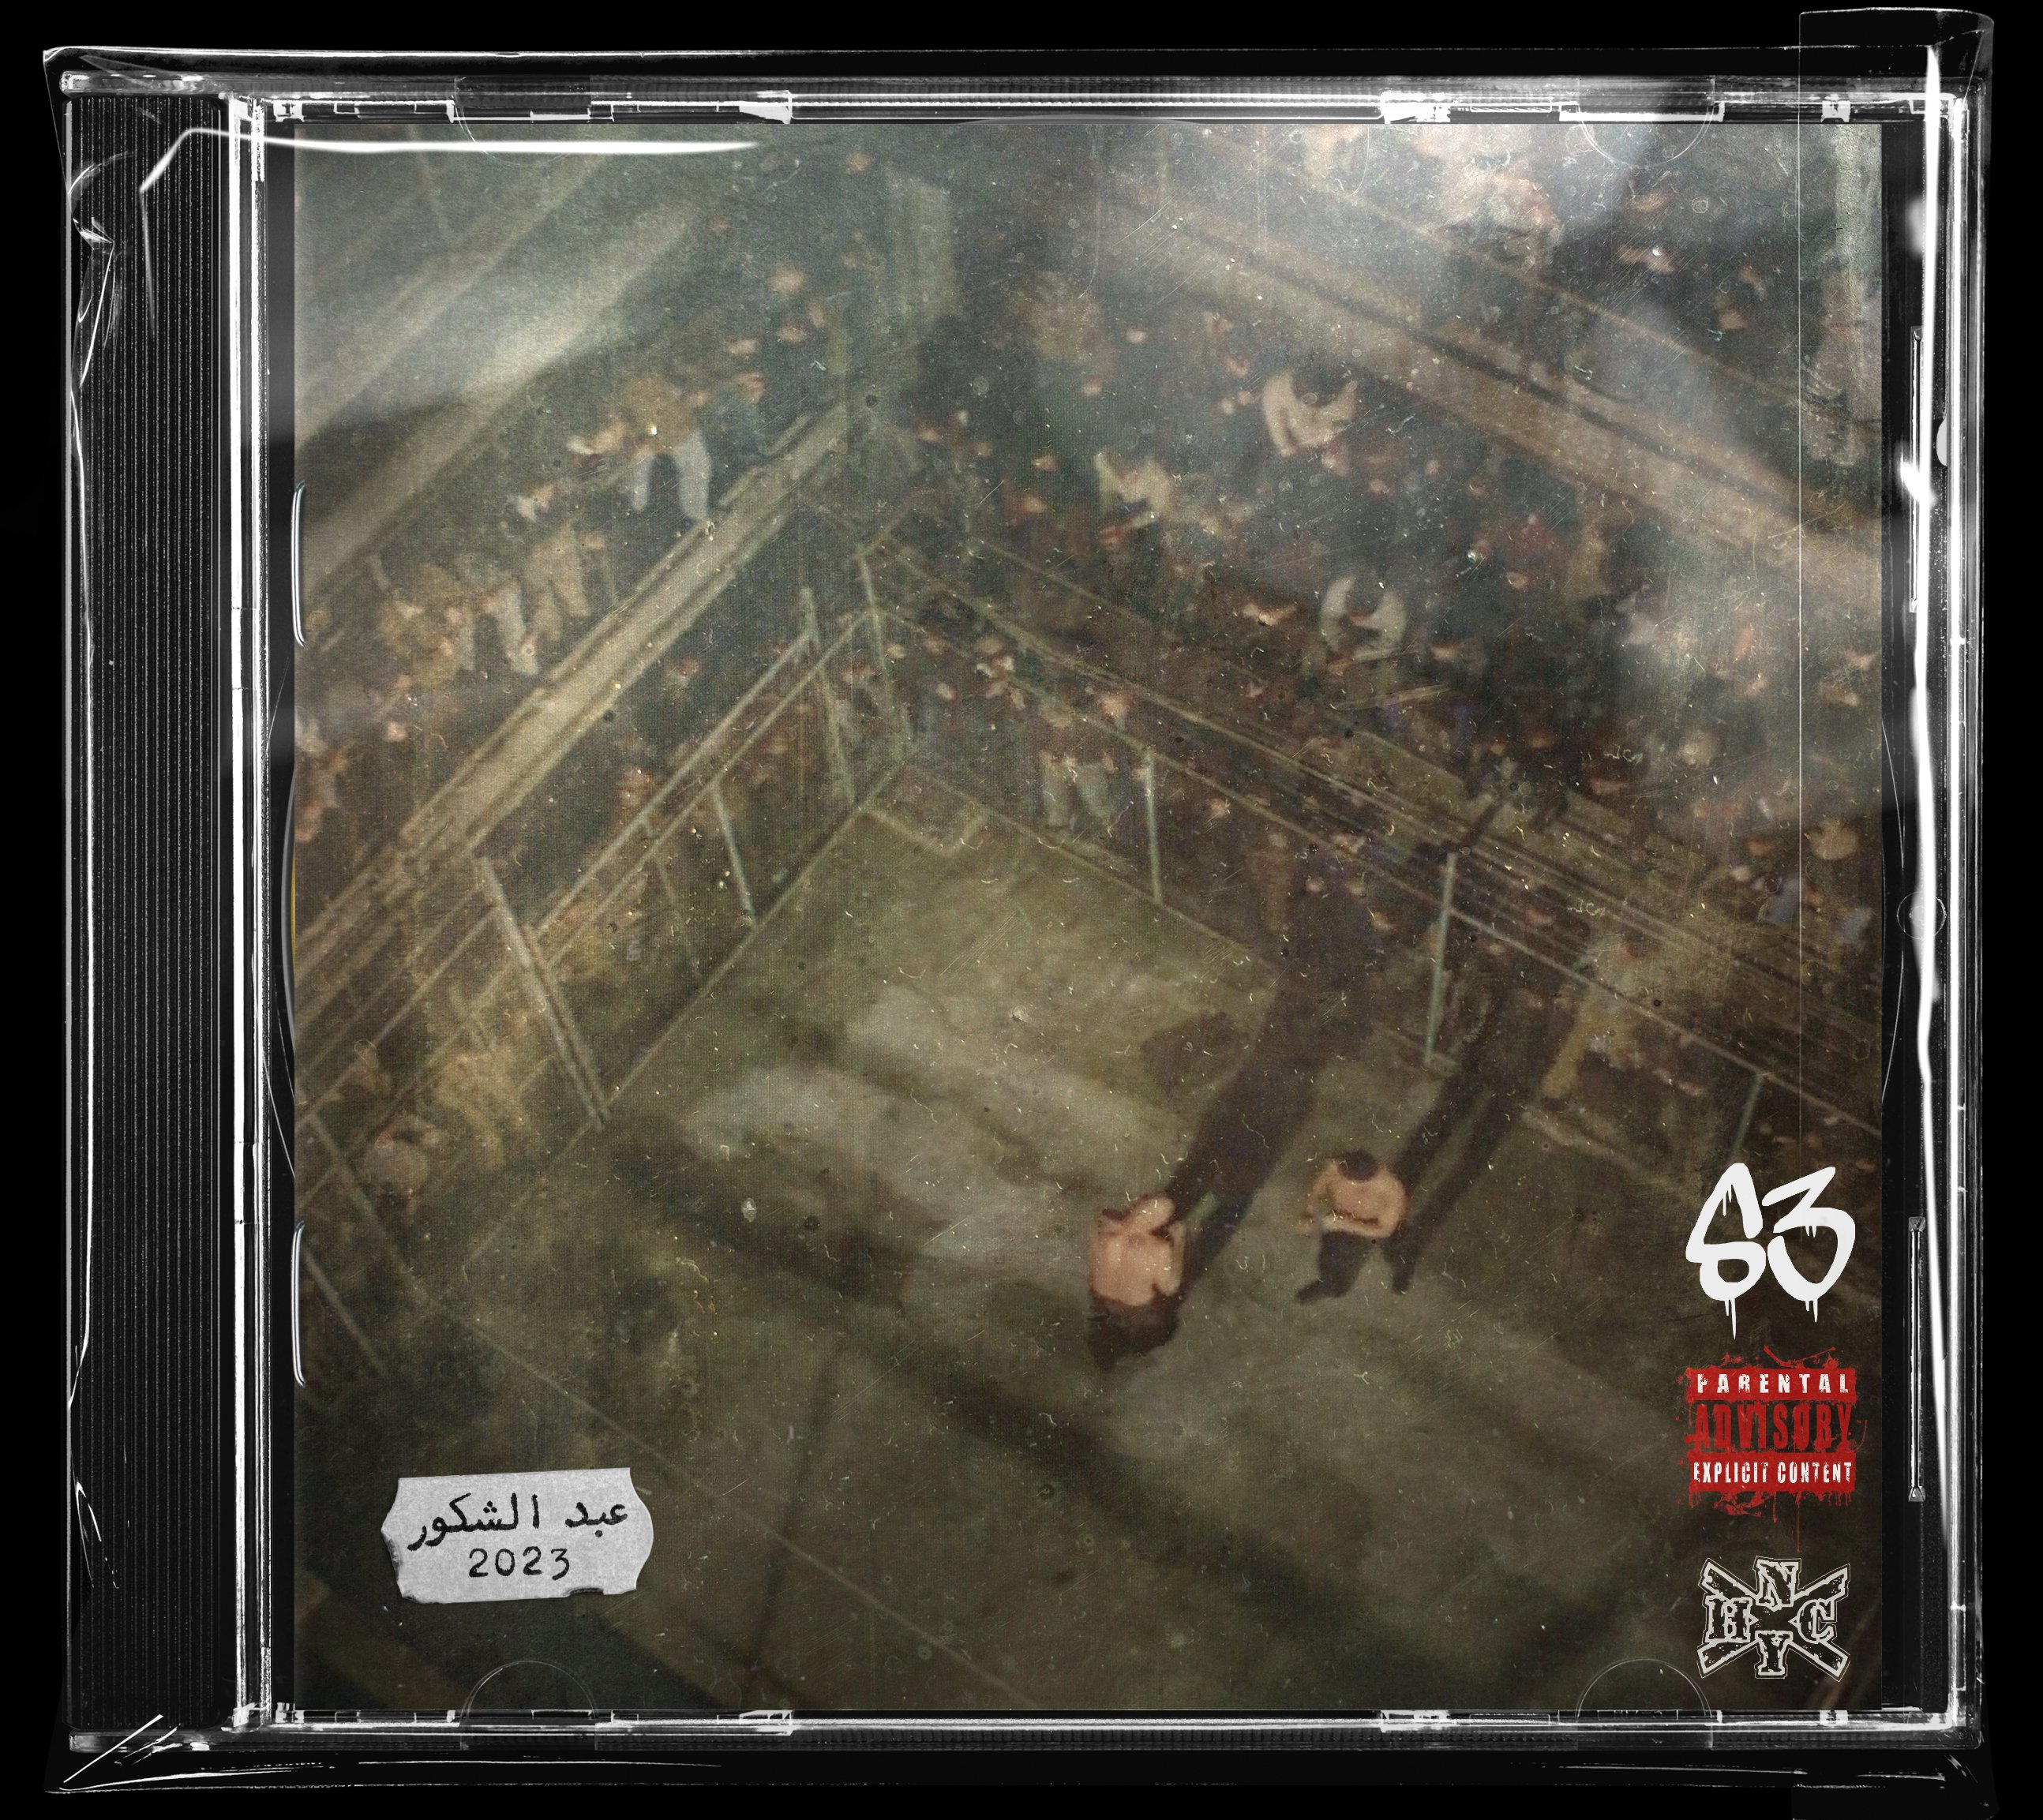
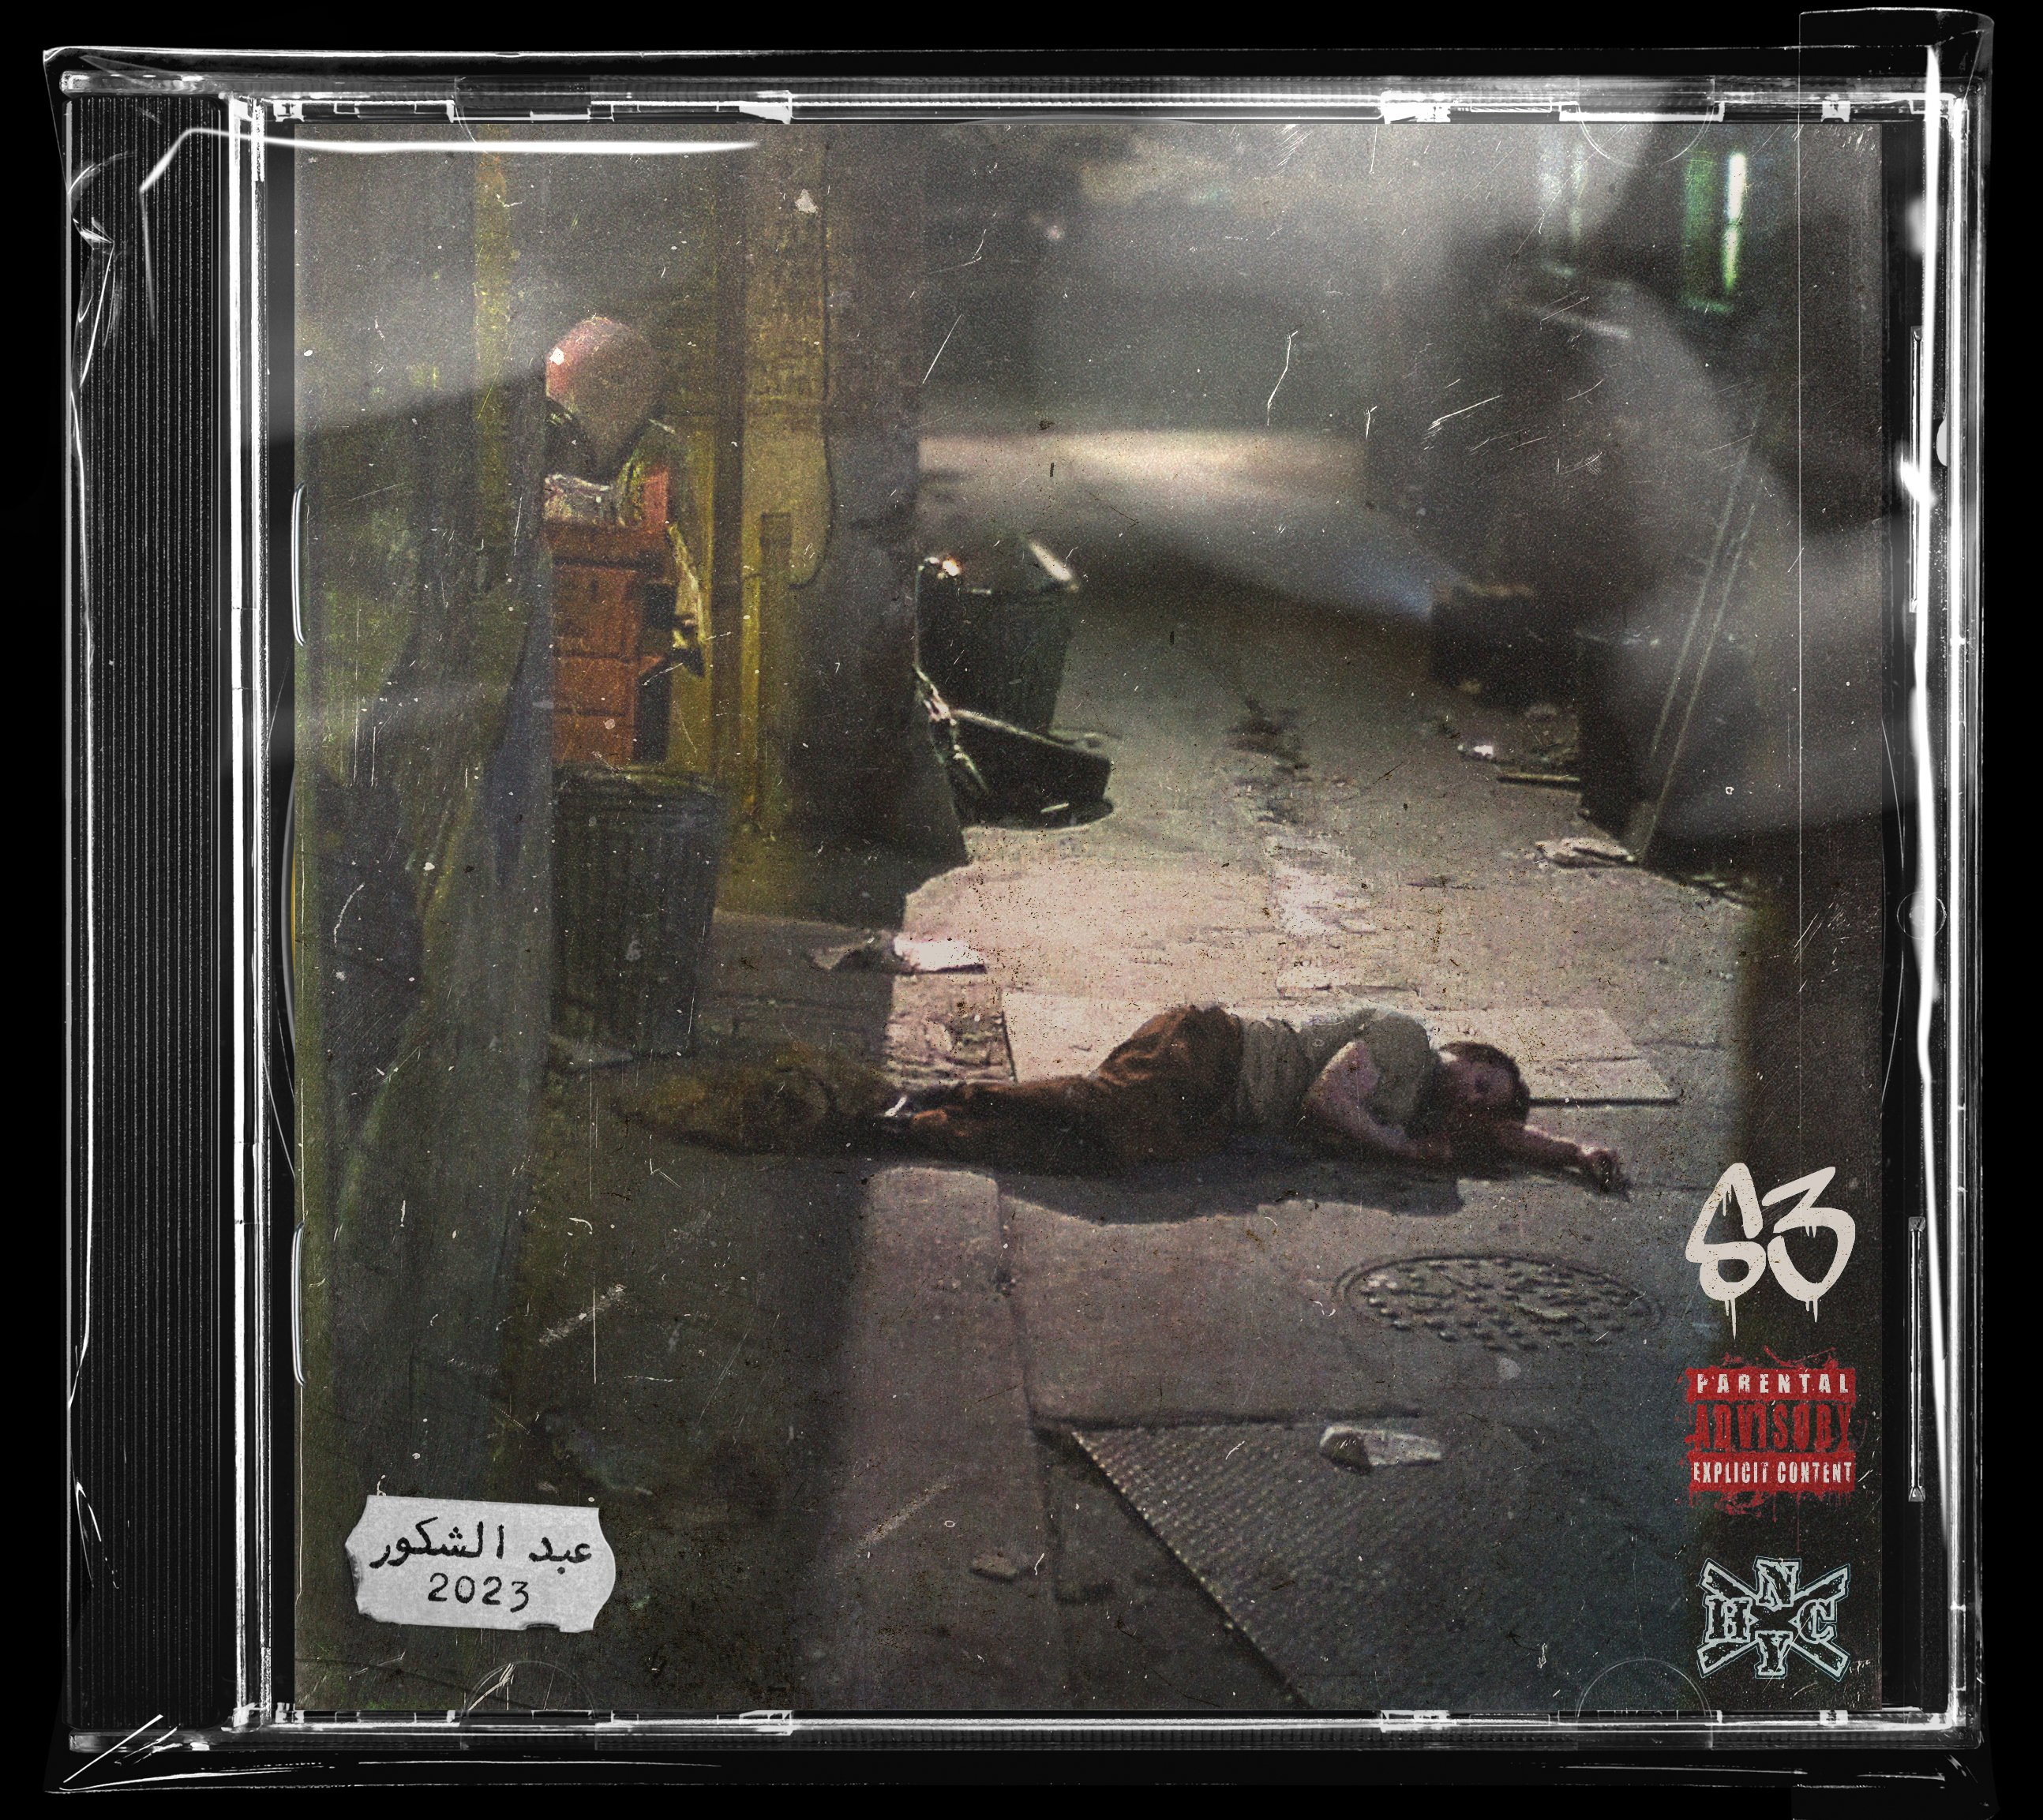
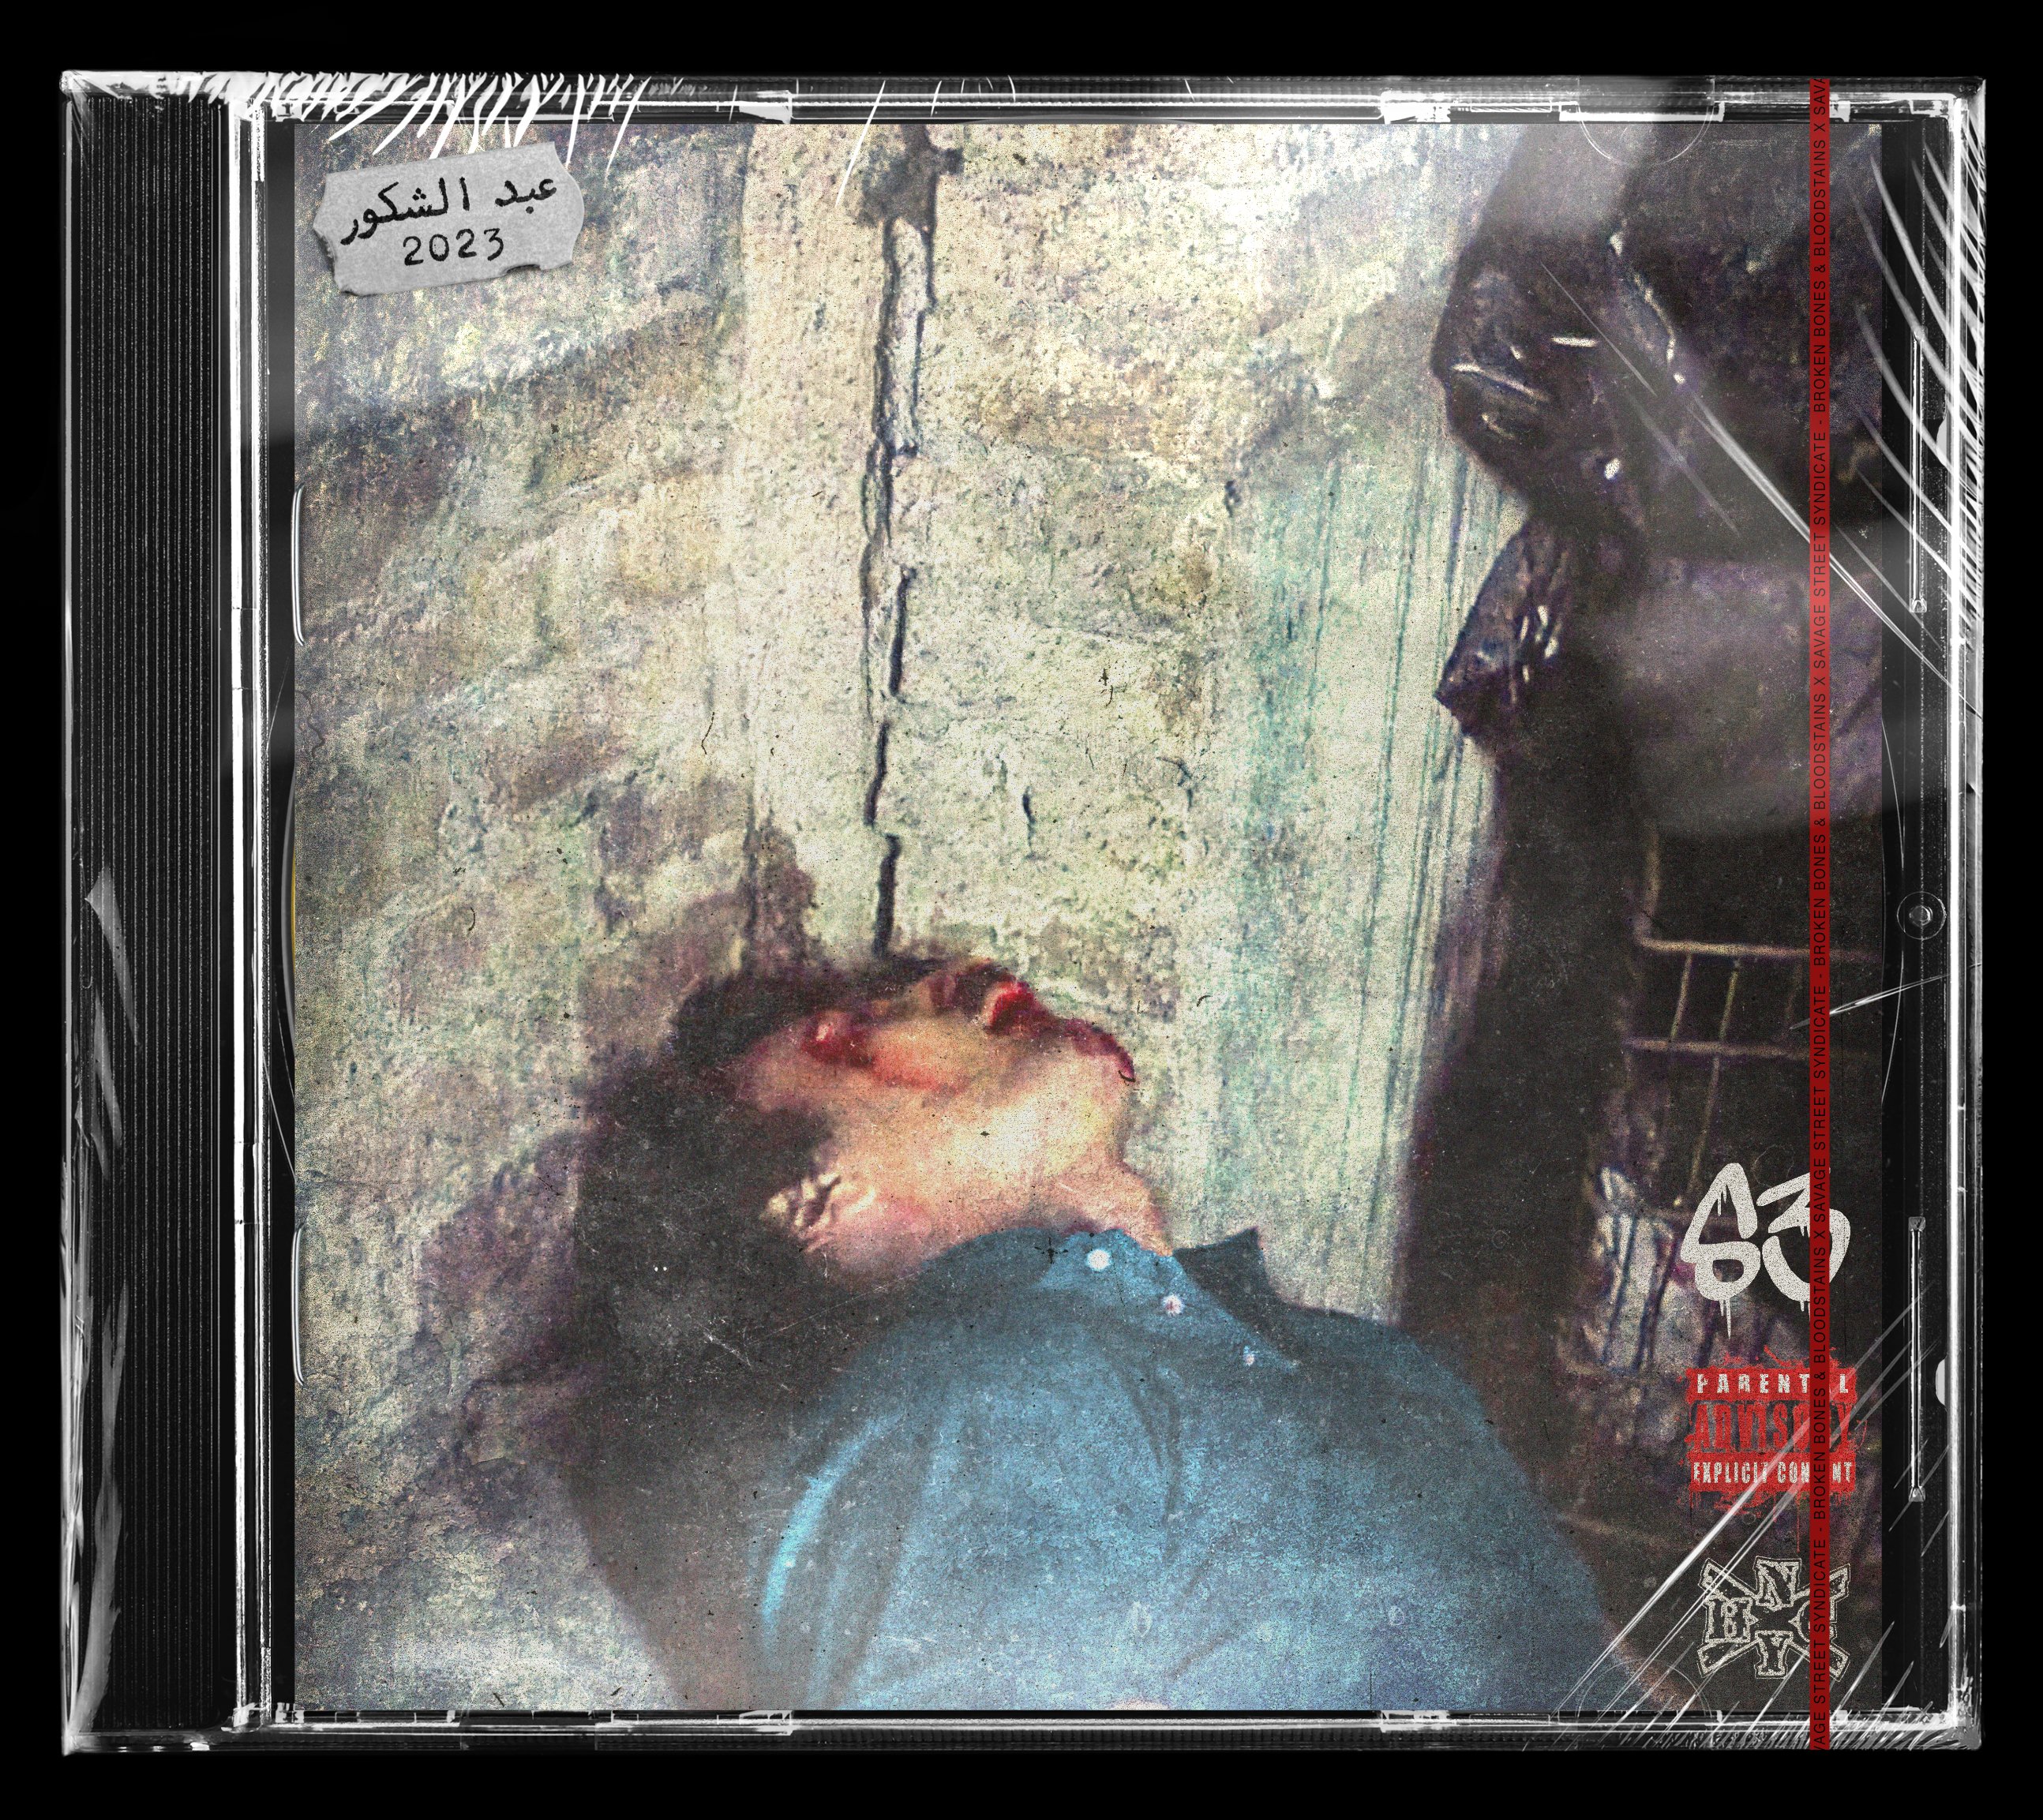
Put these images together for my dad’s (on bass) old thrash band from the 80s/90s. A lost casette uploaded by the guitarist. I used old common photos from old skool NYHC flyers, enhanced them and added textures. full album here with the original casette sleve:
-
Quick designs using enhanced and edited screenshots from the films Barfly (1987) and Hard Times (1975). I also used Chat GPT for the band name and album titles and track list/bandmembers/record label (not included). And threw them all into mockups. Savage Street Syndicate (S3) – Savage Resurgance (Screenshot from Hard Times) Savage Street Syndicate (S3) – Scars of Vengeance (Screenshot from Barfly) Savage Street Syndicate (S3) – Broken Bones & Bloodstains (Screenshot from Barfly)
-
 So, I've noticed in Affinity Photo 2 that when the color picker selects a color it will select a different hue, resulting in inconsistent coloring. I've got a video below, but basically, by sampling one color then sampling the sampled color I can get a rainbow. The project file is included if you want to check it out. Thanks! ColorPickerMalfunction.mp4 ColorPickerMalfunction.afphoto
-
 I have a bunch of images (let's say 3120x1440) and I need to crop a section within them. In some of them need to crop more than one "part" (let's say 480x680px) and save as individual file, and sometimes these "parts" are in different sizes (let's say 320x890, 240x60, etc.). I tried to use the Preset in the crop tool but what it does is create a crop-box in the correct shape and correct aspect-ratio but not the correct pixel size. Is there a way I can load a shape in the exact size I need so that I simply need to position it onto the current image rather than having to manually enter the pixel size all the time?
 -

affinity photo Affinity Photo Manipulation - An Ordinary Day
minuir posted a topic in Share your work
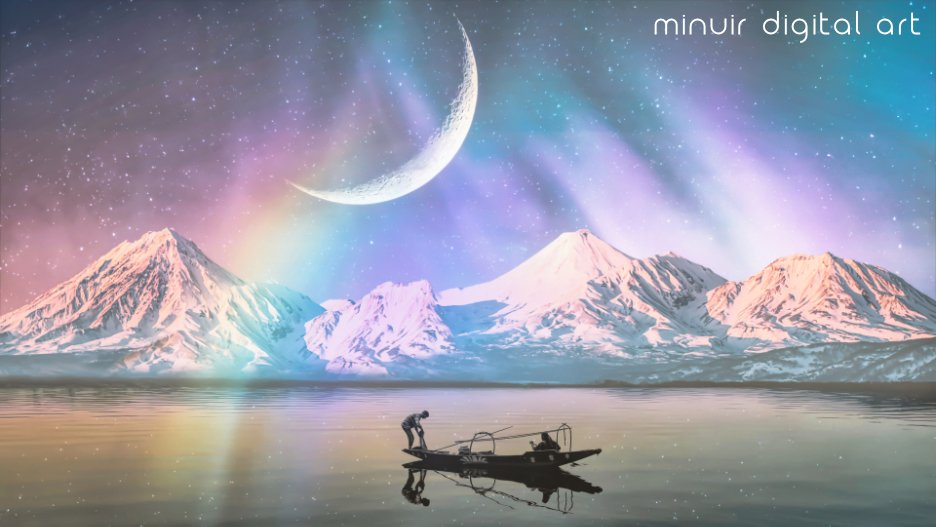
Sometimes, I think an ordinary day that was nothing special is the happiest and most precious day. This photo manipulation artwork expressed that kind of feeling. "An Ordinary Day" speed art : https://www.youtube.com/watch?v=ipP8g5NAl-Y
-
- 4
-
-
- minuir
- digital art
- (and 2 more)
-
 there is no possiblity use swatches in gradients? and way when i change swatch also gradients change. Also gradient it seems cannot be global?
 -
 I have many asset libraries and looking for an easy way to compare contents, is it possible to extract thumbnails from asset libraries?
 -
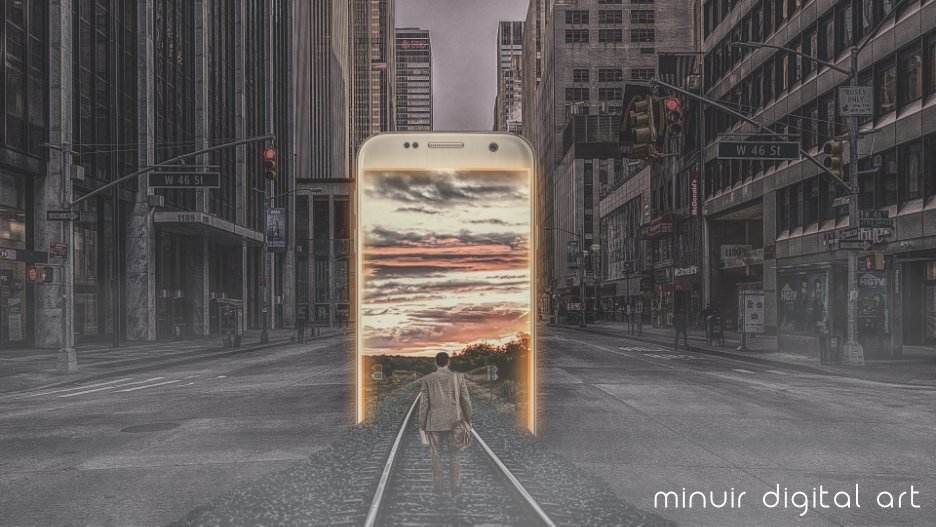
I have lived in the city all my life, but sometimes I really want to escape from the city. But I can't do that yet so I just expressed it into a photo manipulation speed art. "Escape from the City" speed art : https://www.youtube.com/watch?v=PXrpXbm5h4I
-
- 2
-
-
- minuir
- digital art
- (and 2 more)
-
-
- 4
-
-
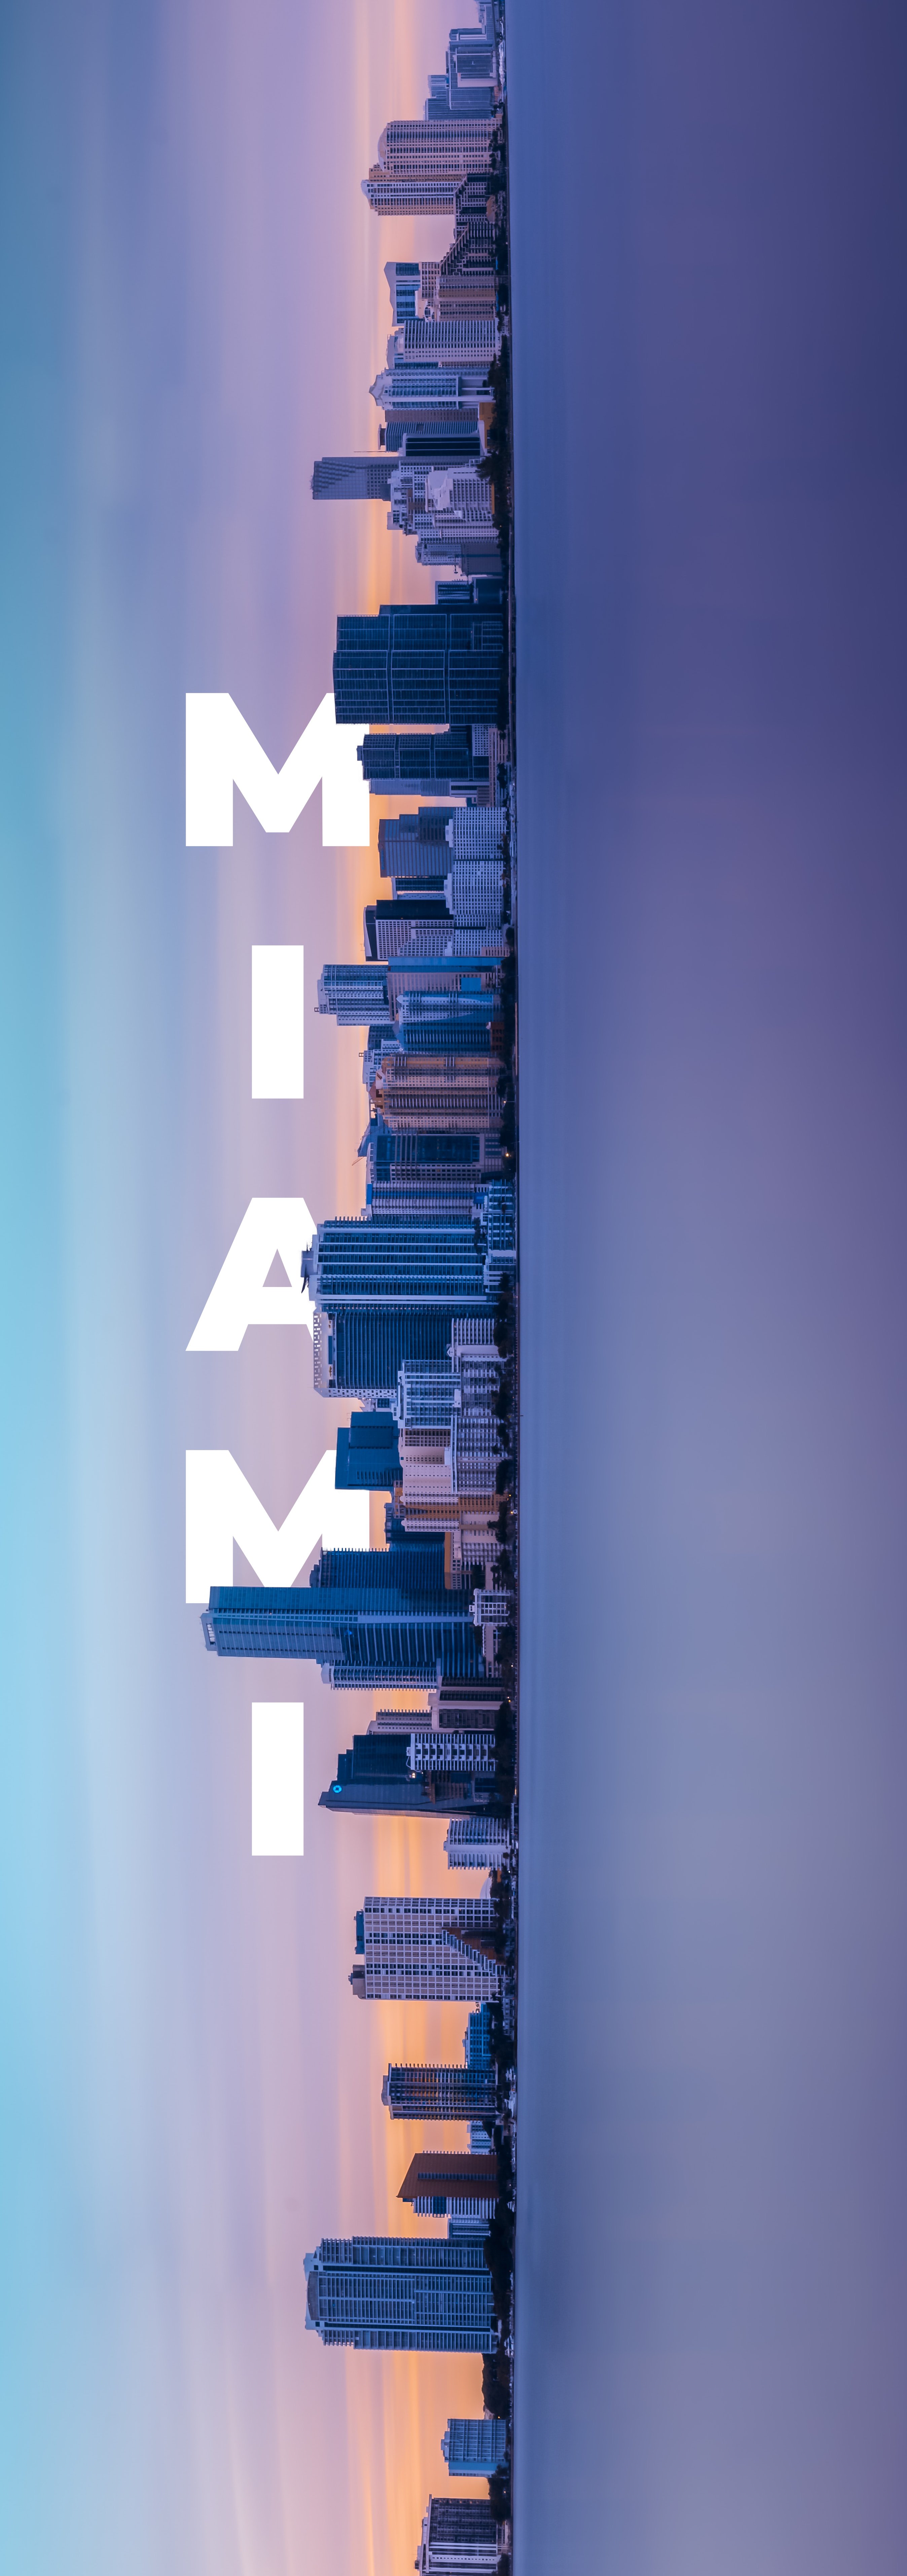
- skyline
- vertical text
- (and 1 more)
-
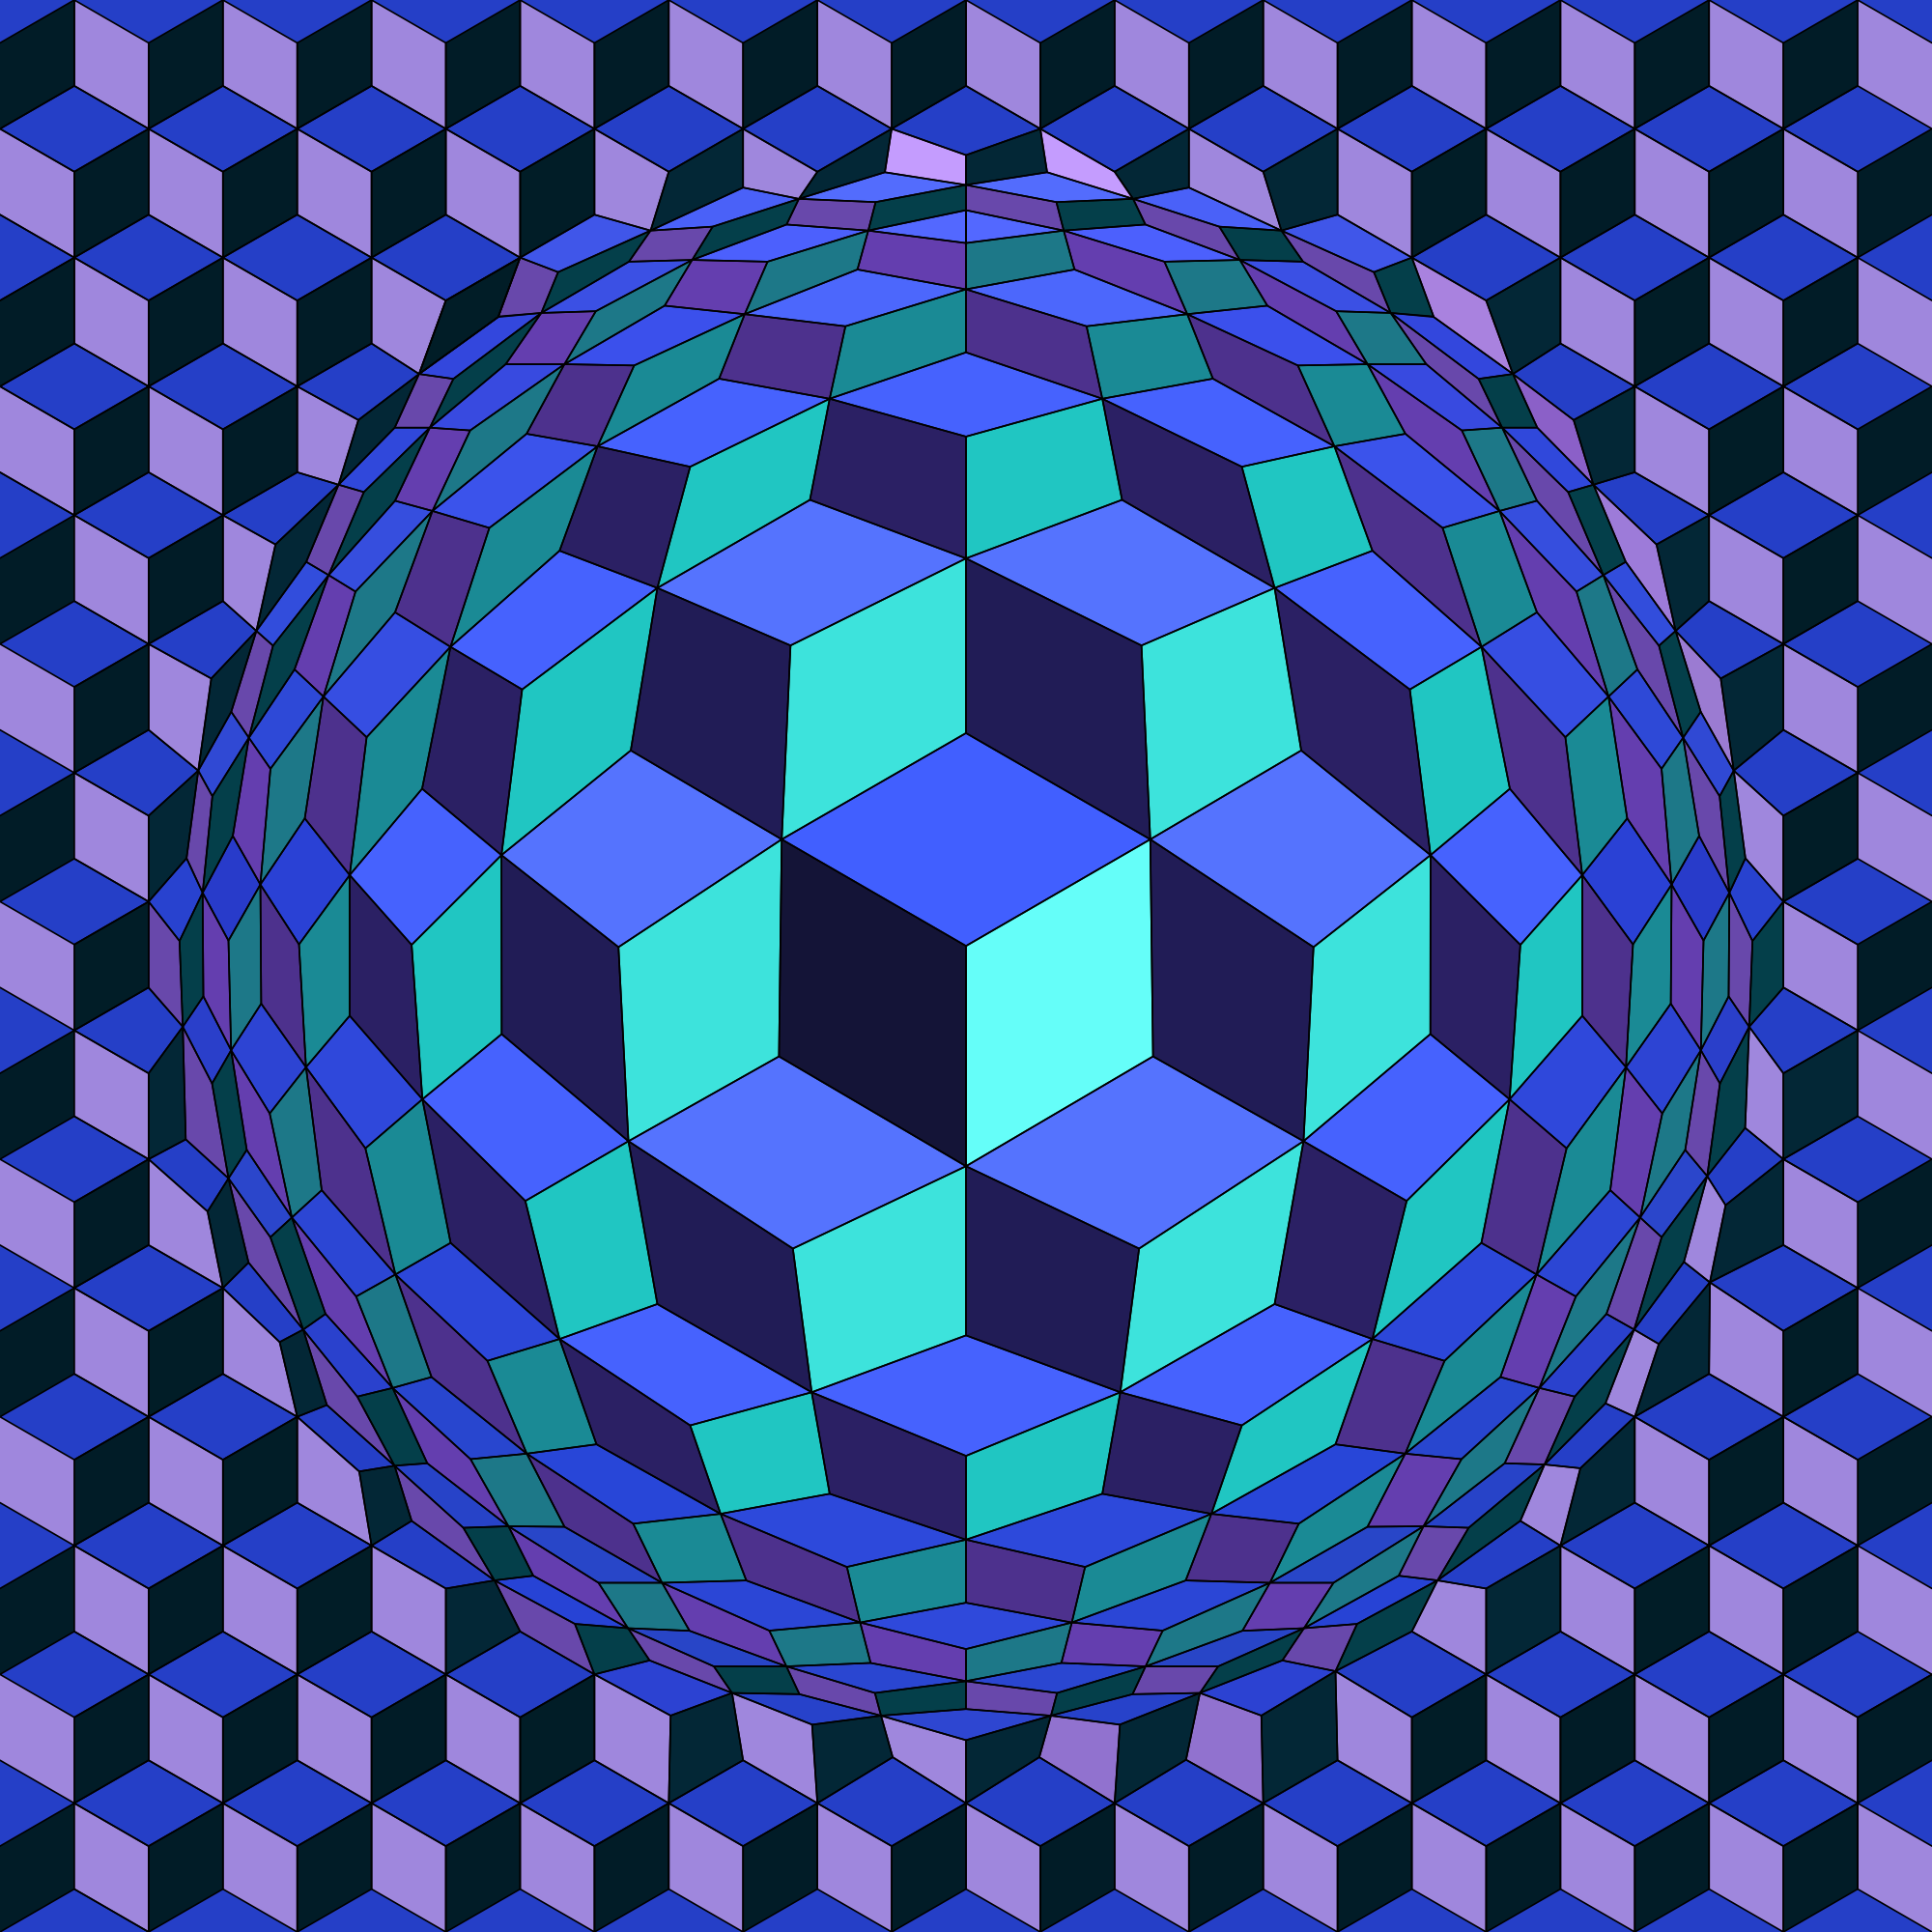
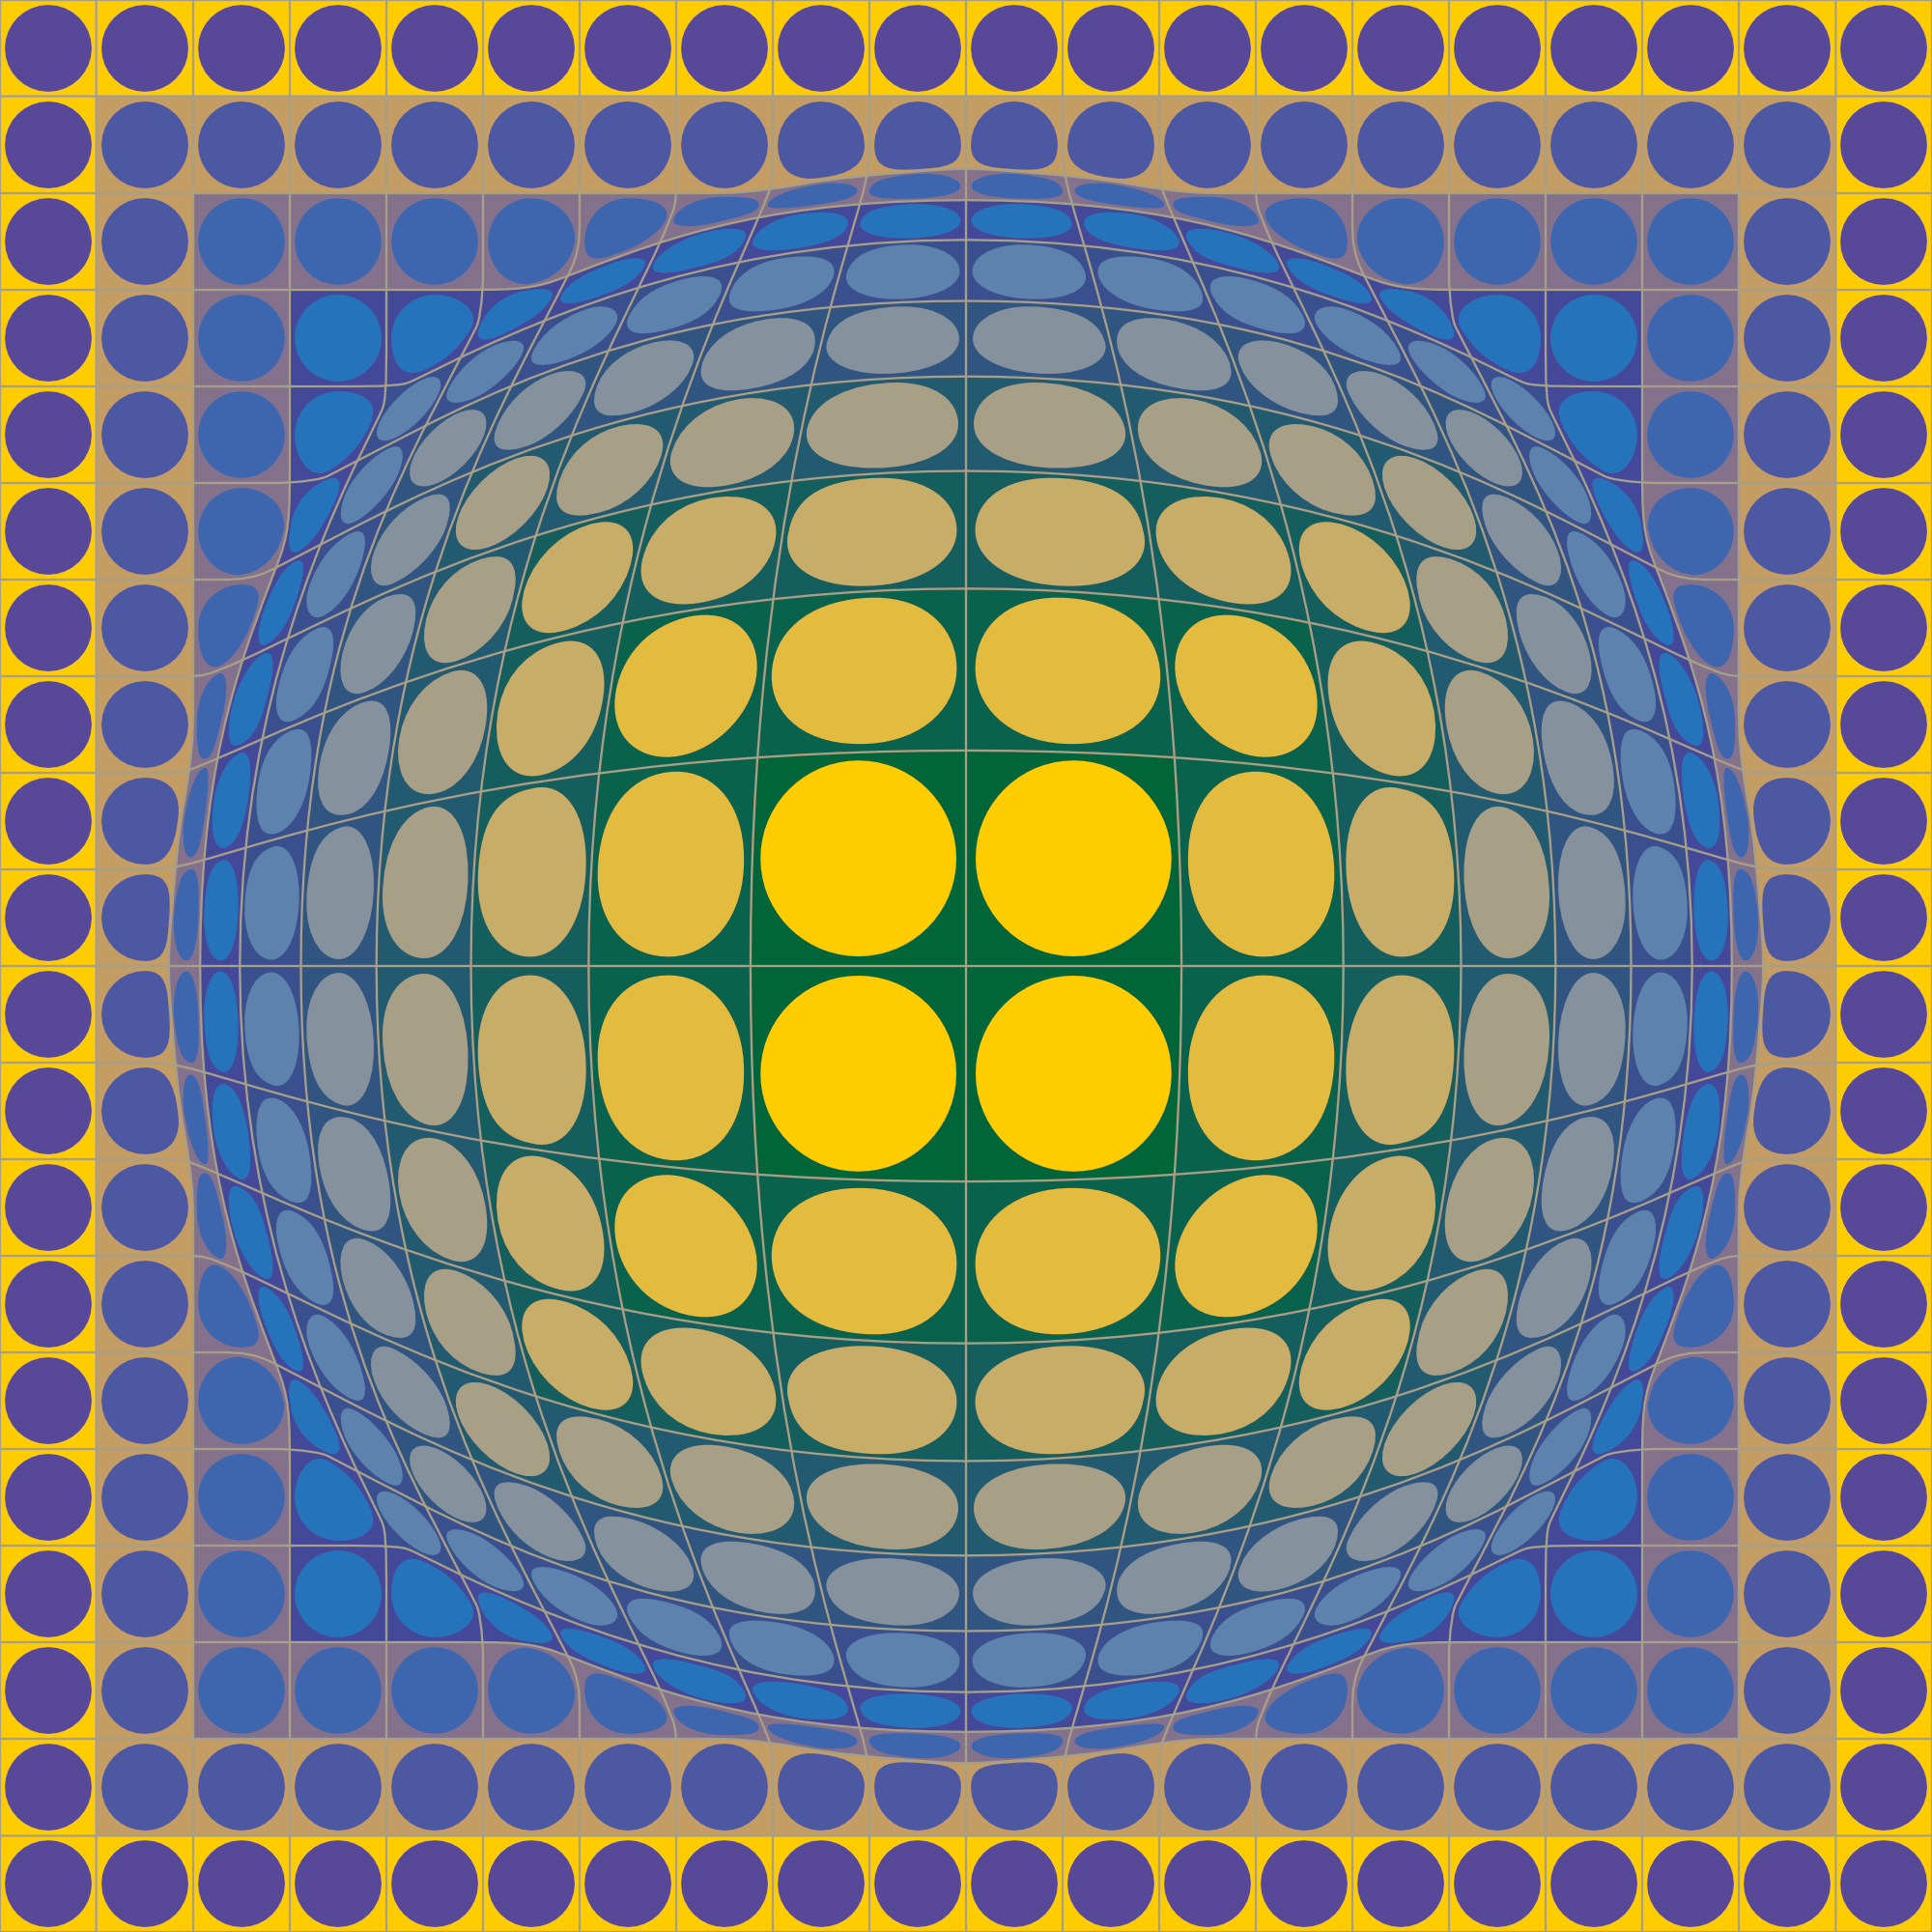
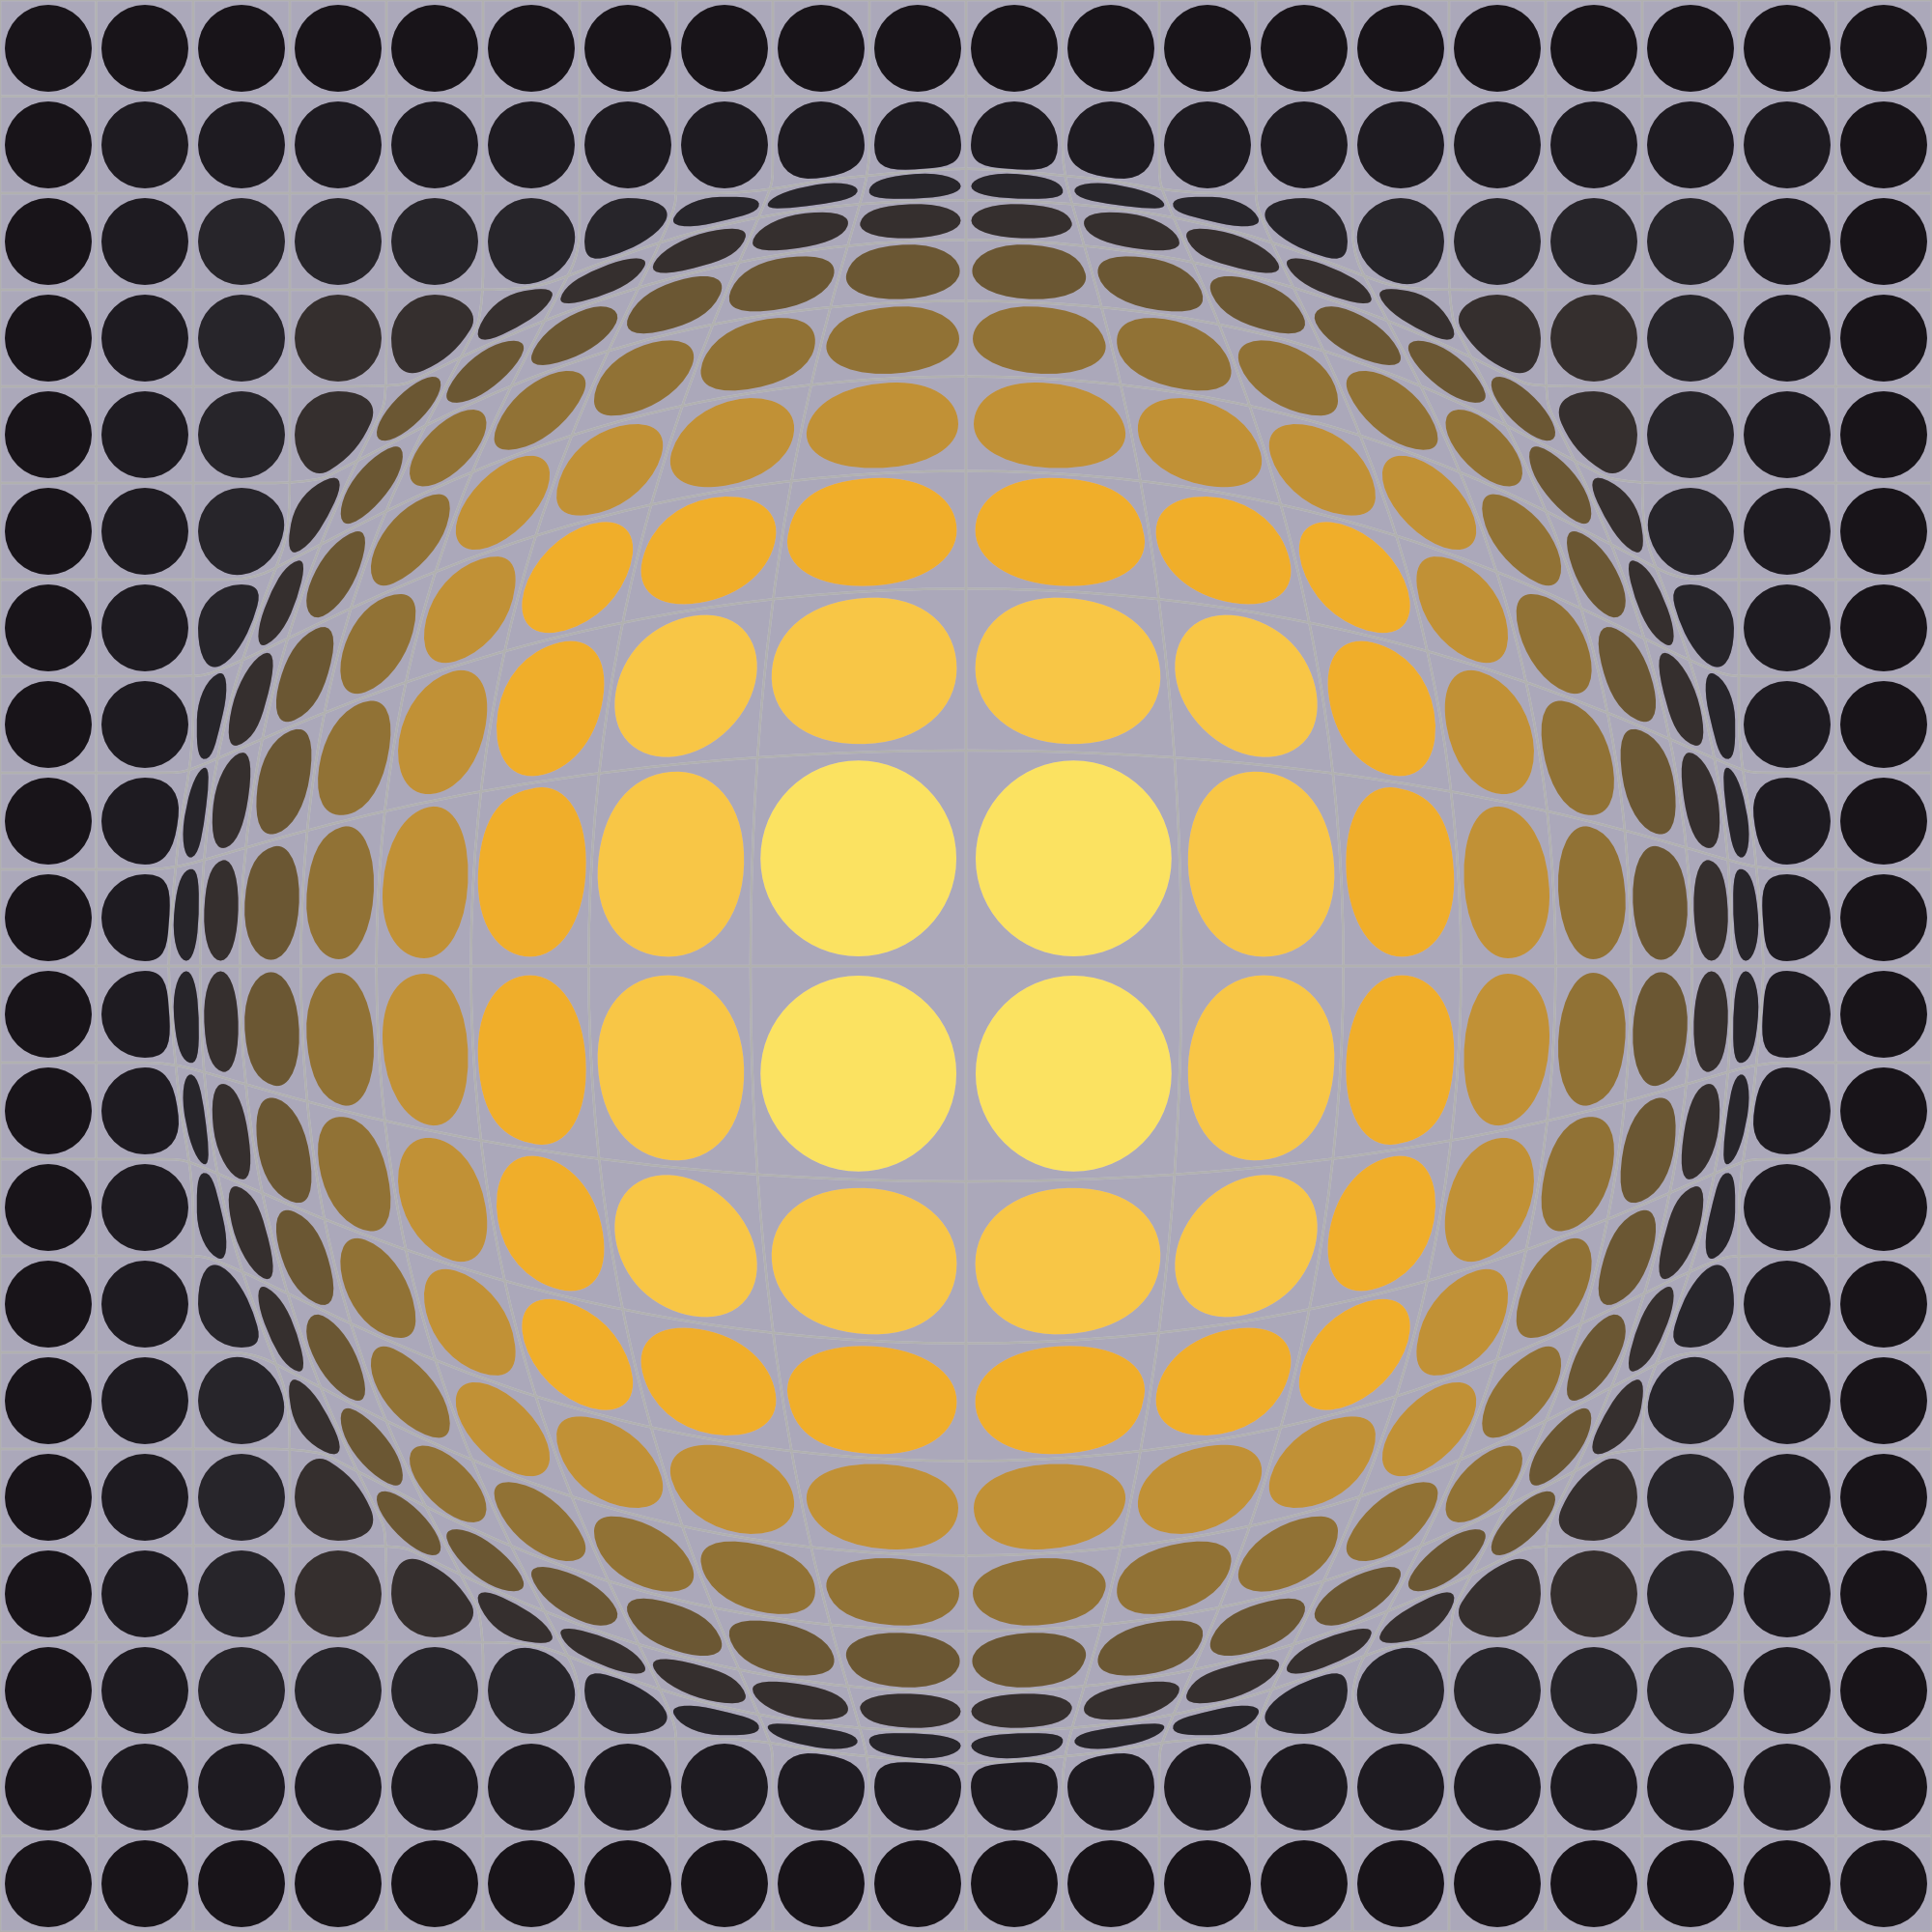
Some reproductions of works of art with the associated vector files: it's up to you to make them your own and recolor them to your liking (according to the color of your living room)... The new duplication functions in AD 2.2.1 were very effective!... Quelques reproductions d'œuvres d'art avec les fichiers vectoriels associés : à vous de les approprier et de les recoloriser à votre convenance (selon la couleur de votre salon)... Les nouvelles fonction de duplication d'AD 2.2.1 ont été très efficaces !... Jacqueline Schafer Hipster Nr3 I Love you (2015).afdesign Jean Allemand Composition bleue Lot 79.afdesign Liberté Égalité Fraternité Obey Shepard Fairey.afdesign Victor Vasarely Cheyt-Ond (1986).afdesign Victor Vasarely Domo (1989).afdesign Victor Vasarely LIKE_01.afdesign Victor Vasarely LIKE_02.afdesign Victor Vasarely LIKE_03.afdesign Victor Vasarely USA-EG (1986).afdesign Victor Vasarely Vega-WA I (1968).afdesign Yvaral (Jean-Pierre) Progression Plychrome (1971) Wallpaper.afdesign Yvaral (Jean-Pierre) Progression Plychrome (1971).afdesign Yvaral (Jean-Pierre) Structure Cubique B (1973).afdesign Yvaral (Jean-Pierre) Structure Cubique B (1974) Wallpaper.afdesign Yvaral (Jean-Pierre) Structure Cubique B (1974).afdesign
-
- 7
-

-
-
- affinity photo
- color
- (and 3 more)
-
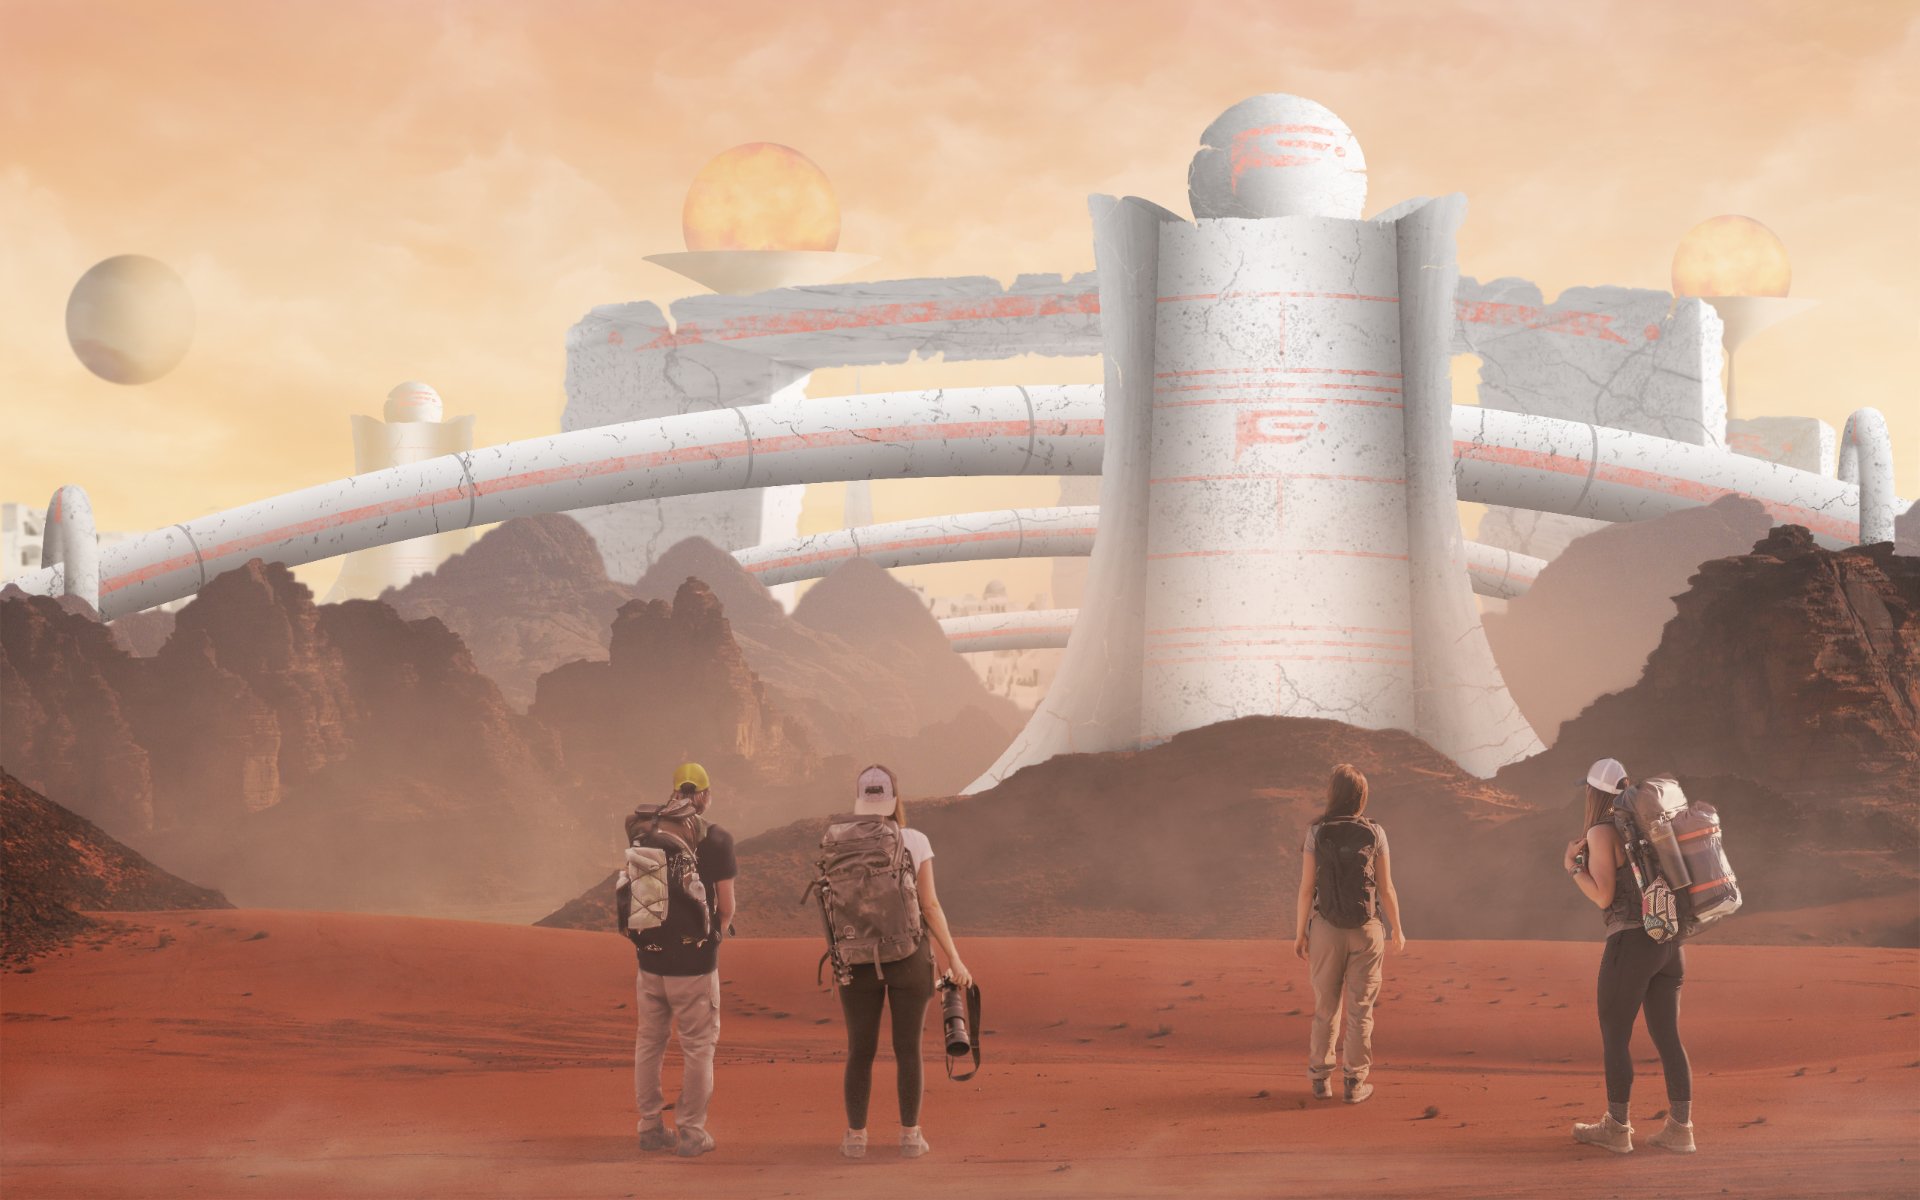
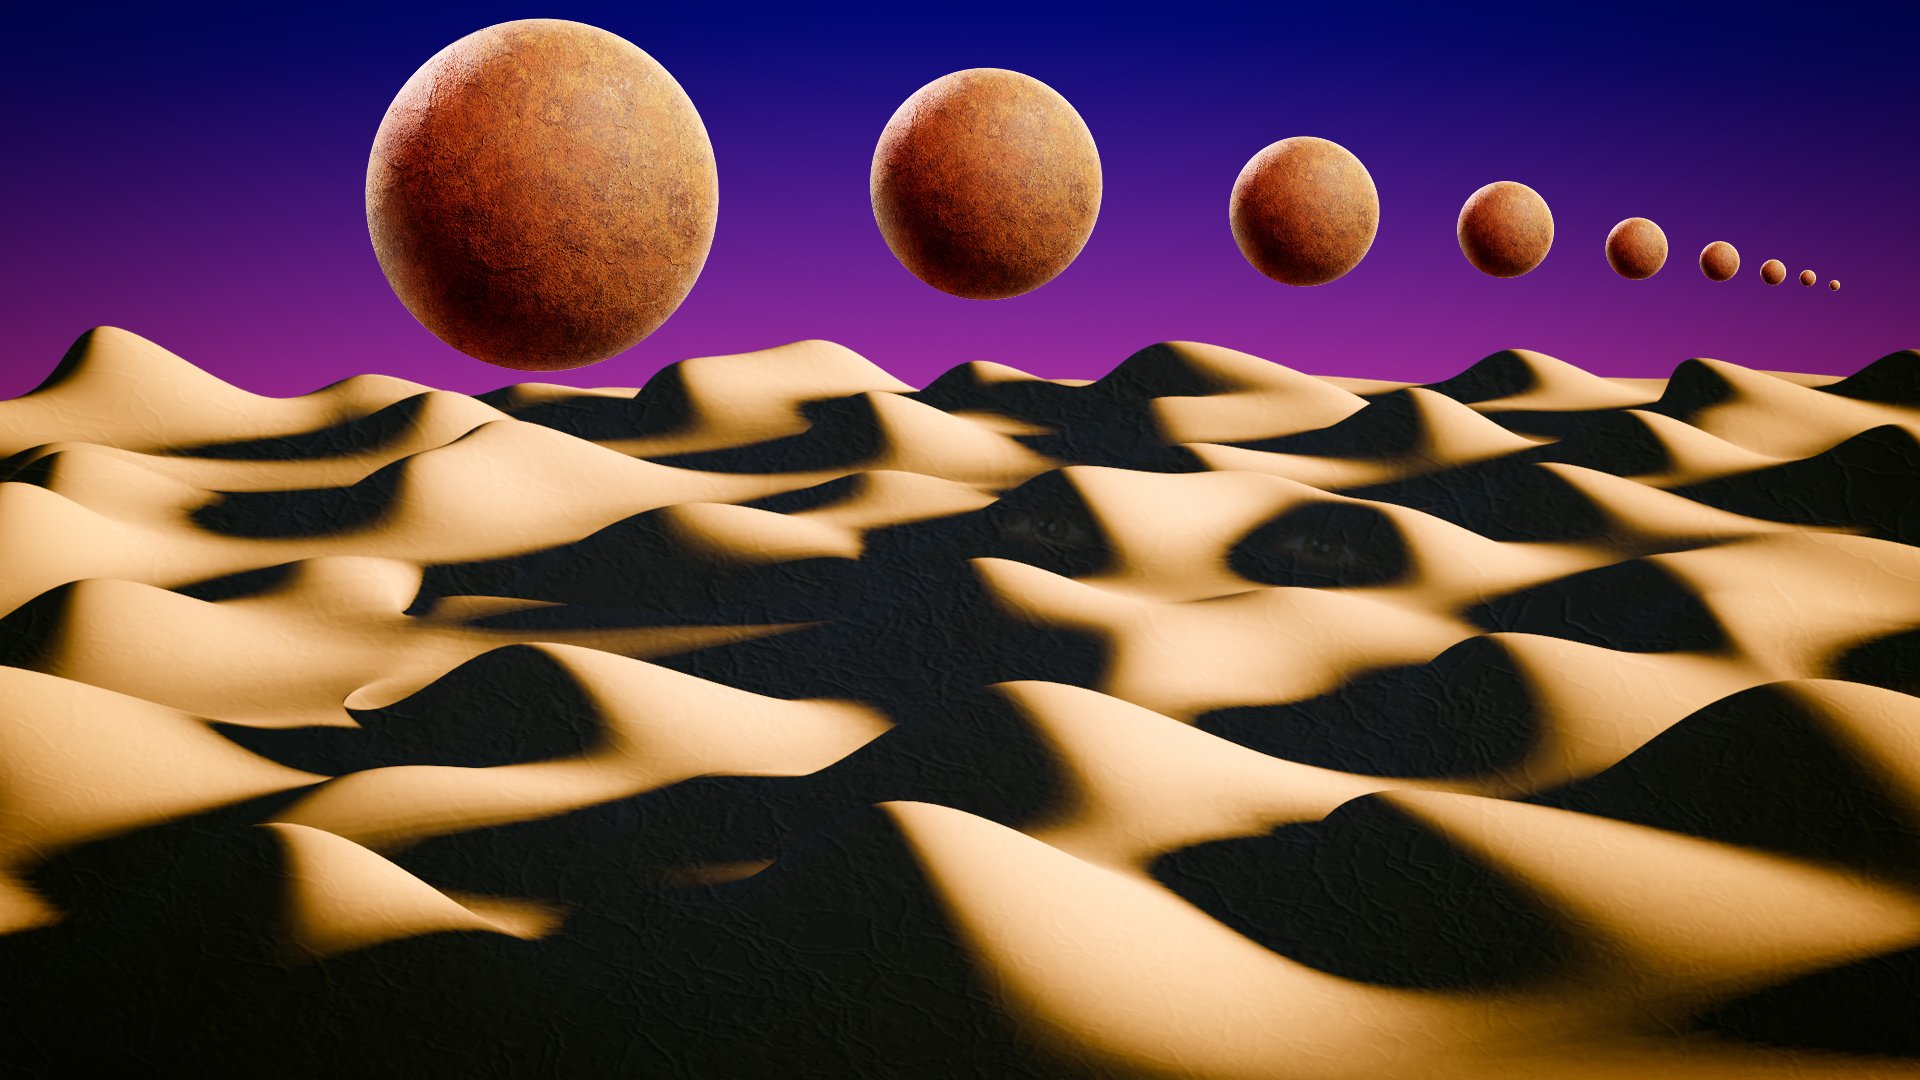
 ....Swirling sands, driven by gentle winds slowly clear to reveal a Metropolis. The research team stop to take a moment and absorb the magnificent sight ahead of them.
-
Collage of a moon in a rose, created with Affinity Photo.
-
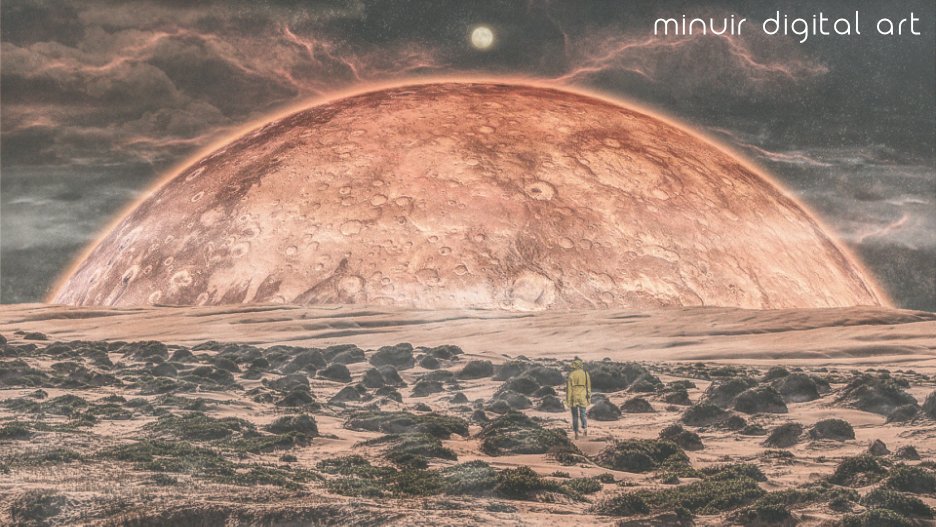
This photo manipulation artwork is "Mars Rising". I saw a video of Mars Rising with the moon and it was very impressive. So I made an image by changing the order of the moon and Mars. "Mars Rising" speed art : https://www.youtube.com/watch?v=rfo9R5yz-7E
- 1 reply
-
- 6
-
-
- minuir
- digital art
- (and 2 more)
-
Hi, how to do a simple crop on a layer? In Publisher it's easy. horst
-
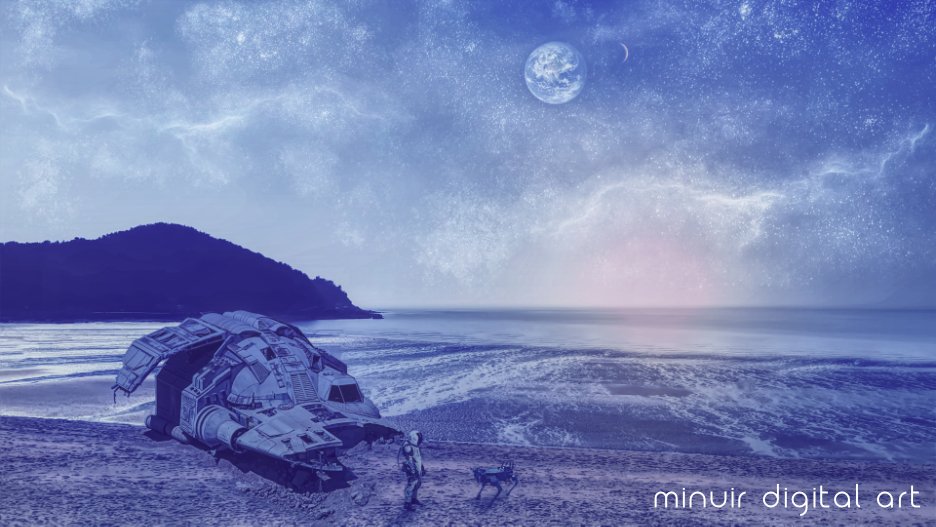
This photo manipulation artwork is "A Blue Sunset Planet". I found out that there was a blue sunset on Mars, so I try to make a planet with that. "A Blue Sunset Planet" speed art : https://youtu.be/7eLcUUaEXuk
-
- 1
-
-
- minuir
- digital art
- (and 2 more)
-
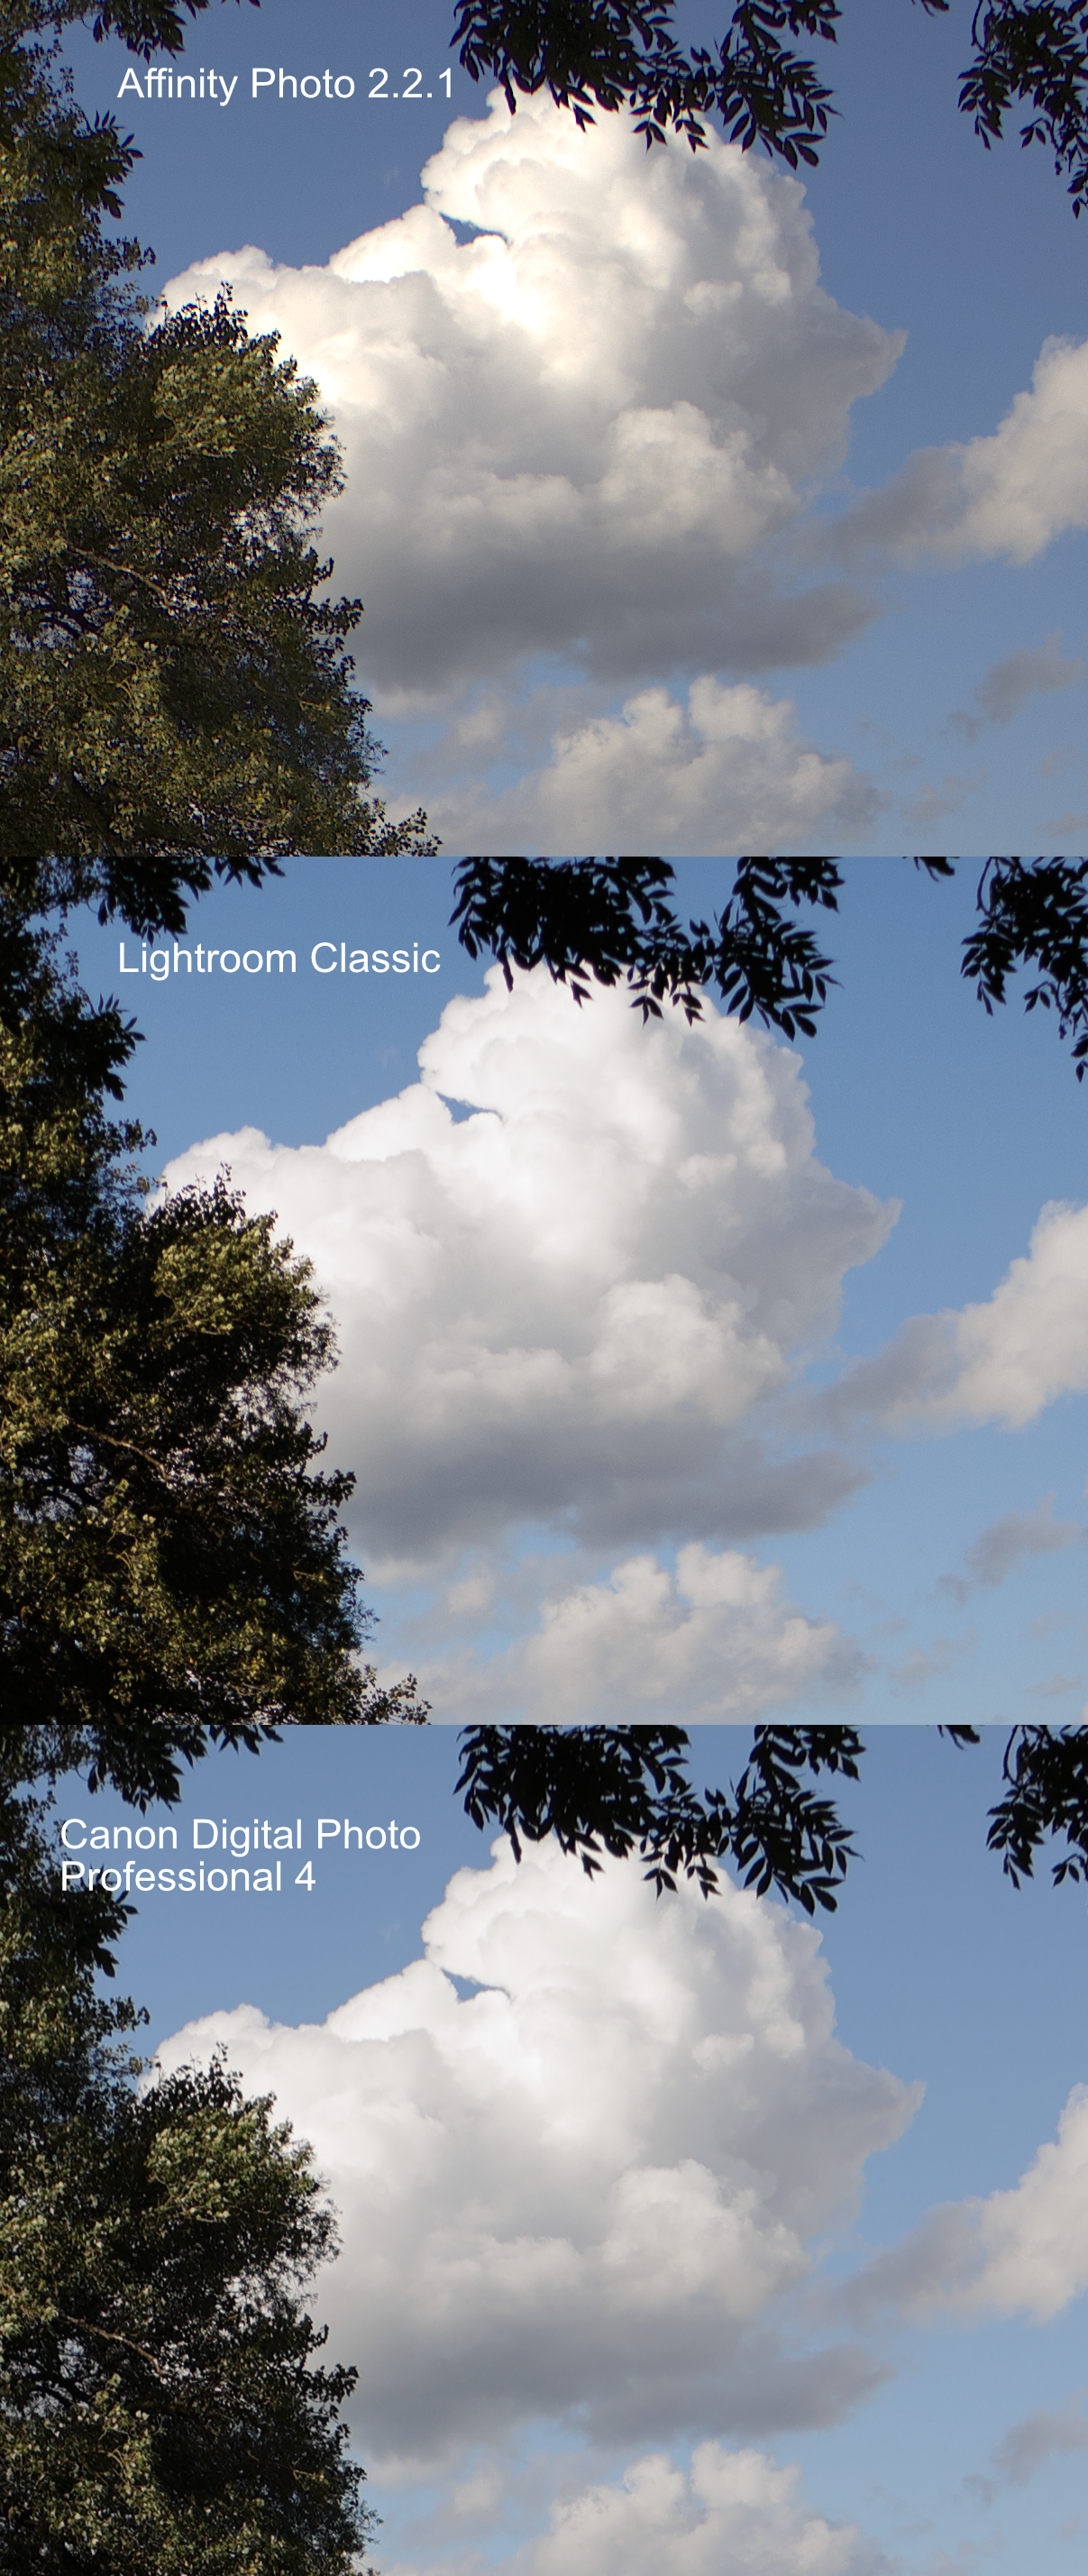
 Hi, I wanted to edit this raw photo (See attachement) in Affinity Photo, when i noticed that these clouds looked quite ugly. Their highlight falloff is steep and the colours shift towards orange. I tried various adjustments in the "Develop" persona (Exposure, highlights/shadows, tone curves), but i did not manage to get rid of it. Because i wanted to make sure it was not an issue with the raw file itself, i opened in two other tools, Lightroom Classic and Canon's free, in-house raw developer, Digital Photo professional 4. The two other tools handle this case visibly better. Why is that? And how can i get the same results in Affinity Photo? IMG_0426.CR3
-
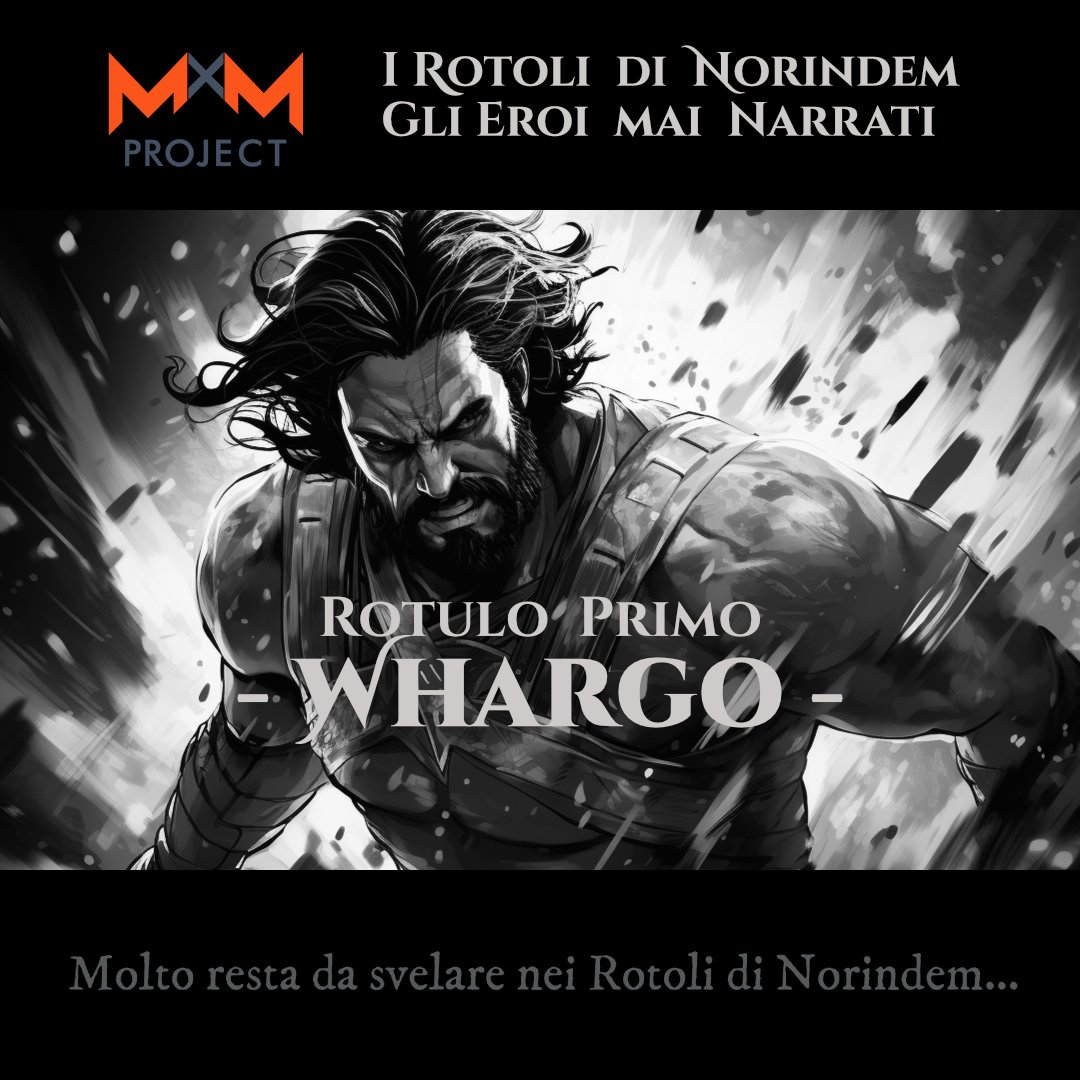
Hi everyone, I'm proud to share this dark fantasy novel made with AI images and reworked with Affinity Photo. I hope you enjoy the work. https://youtu.be/YUIBjkCj7HU?si=rugHqdLLfi7Xnnhz link to youtube from image too Let me know your impression!
- 1 reply
-
- 1
-

-
- norindem
- dark fantasy novel
- (and 1 more)
-
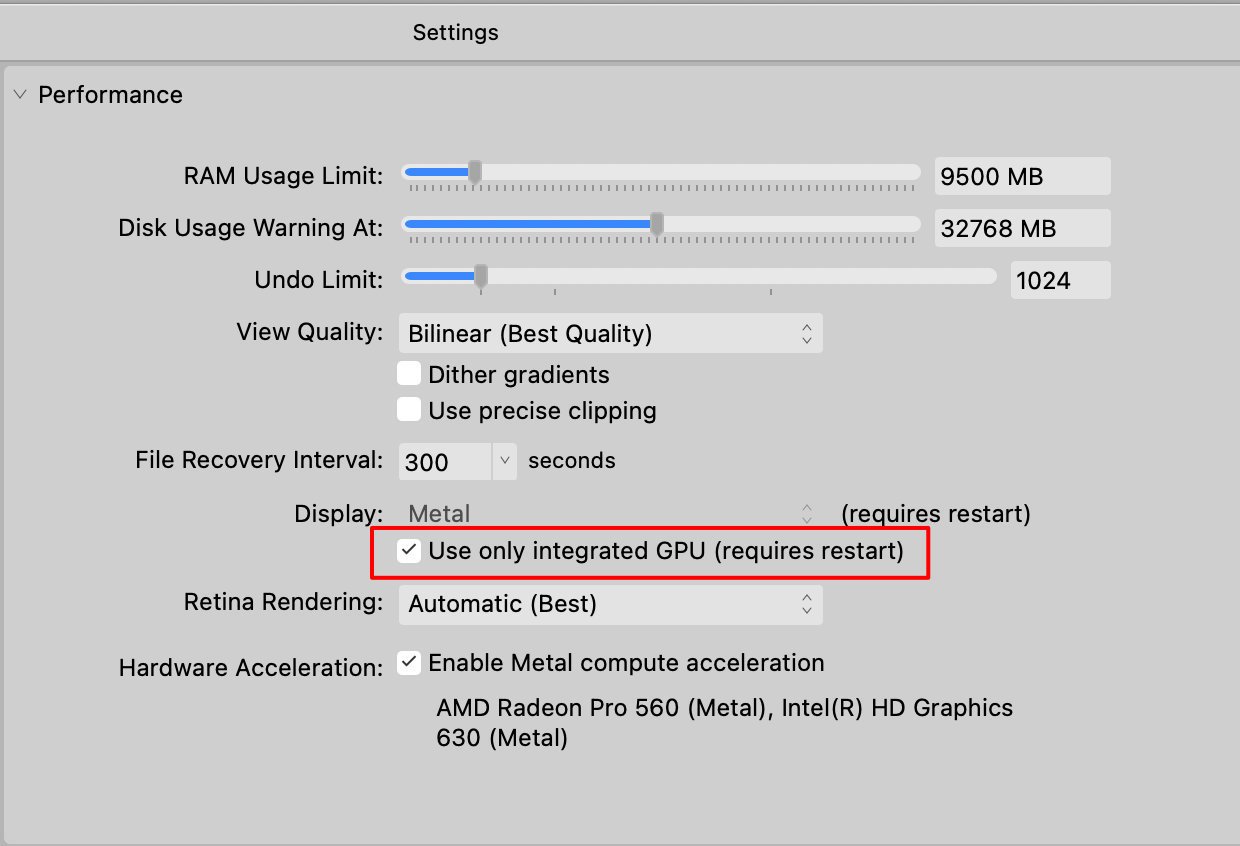
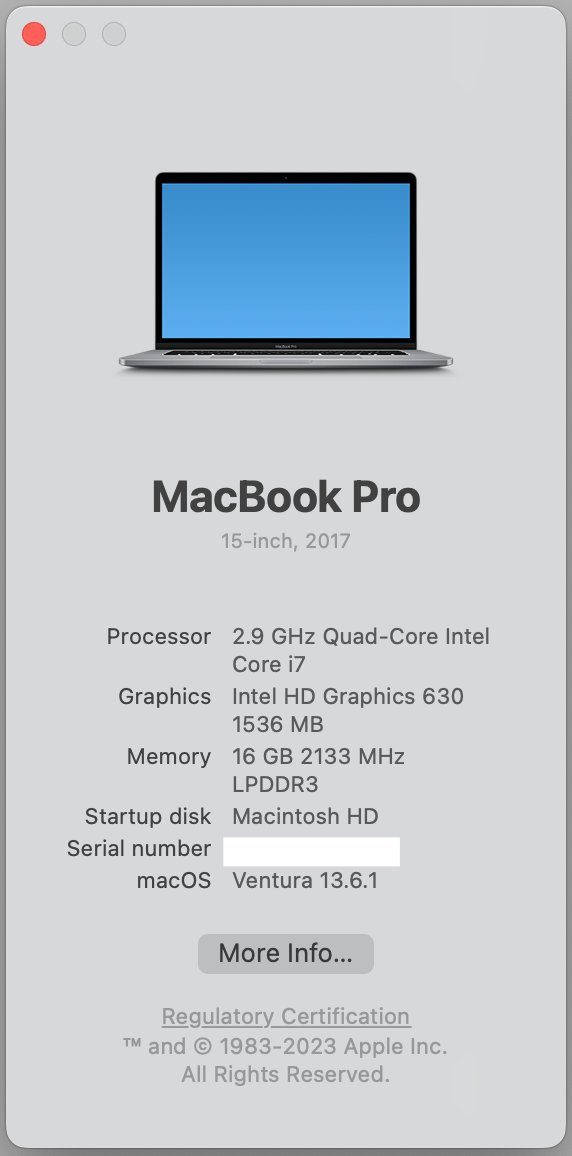
 I found some settings that have improved performance on my MacBook Pro, so I thought I'd share them in case it may be of help to someone else. I know computer configurations vary a lot, but it may be worth a try. This is with Affinity Photo v2.2.1. I have a 15 inch, 2017 MacBookPro, 16GB RAM, an Intel HD Graphics 630 with 1536 MB Metal 3, and an AMD Radeon Pro 560 with 4GB Metal 3, running Ventura 13.6.1. It is not a particularly fast or powerful machine, but it worked fine for quite a while. I'm not sure when I started having problems (sorry), but I think it may have started with v2.2. Performance has gradually gotten slower as the day progresses. Memory Pressure started out very low when the program first opened (single digits), but as I edited and closed more files during the day, Memory Pressure crept higher and performance began to suffer badly. Memory Pressure gradually climbed higher than 100% at times, and Memory Efficiency plummeted at the same time. Performance got so bad, I was forced to close the program and restart it multiple times per day if I wanted reasonable performance. At least on my computer, I found the setting that "seemed" to be causing much or all of the slowdown. The key on my system is to "Use Only Integrated GPU" for Display", as highlighted in Red in the attached screenshot. I'm still Enabling Metal Compute Acceleration, which uses both GPUs for computation. My RAM Usage Limit is set to 9500 MB, which is more than half of installed RAM of 16 GB, and higher than I've seen recommended in a few posts, but it seems to be working fine and performance is good now. As the day progresses, I no longer see slowdowns which cause me to restart Affinity Photo, and Memory Pressure stays well below 100%. Hope it helps somebody out there who has similar performance issues.
-
I have made 10 free tone mapping presets. I have not seen any tone mapping presets for affinity photo so I made some for anybody who might want them. Of course they will not all work with every photo like all presets but I hope someone finds them useful : ) To upload them just click on the zip. file, then in the tone mapping persona on the presets menu; click "Import Presets", Enjoy! Thanks! Hanan Edwards Presets.zip
- 68 replies
-
- 42
-
-
-
- free
- affinity photo
- (and 1 more)


.jpg.232f100a55e3166de3f330a42879e8b2.jpg)


.png.62ba827f996a5ebbf43799069c4c9256.png)


.png.ab52dfb24c1534b85a345e3d7a7018f9.png)


.png.b8dd39cf029168a38ea0cb2b5cfc46da.png)
.png.d6610b34b9b9b0458b6eaf1e355652ff.png)
.png.db856c8994f2bd34f14f99d753b6e6f7.png)
.png.0083b39c9620cc00925ce7b87a17db93.png)
ProgressionPlychrome(1971)Wallpaper.png.cba017084222a9a587fca300461a7329.png)
ProgressionPlychrome(1971).png.747fa08ba0e51da8937043ffaf15f824.png)
StructureCubiqueB(1973).png.35616df2668387e204192a08bd1cbcfc.png)
StructureCubiqueB(1974)Wallpaper.png.a9c6ce5815fa0ce3cc48c381d725b39c.png)
StructureCubiqueB(1974).png.8672a318a703b2bec7ab32afd3115040.png)