Search the Community
Showing results for tags 'Affinity photo'.
-
been playing around this afternoon with some different methods of creating custom brushes. Thought I'd share some of the results. this small group of 5 brushes will work in both affinity photo and Designer (Pixel Persona) There are a couple that might make interesting borders, and some that just make interesting grunge or painterly effects experimental Brushes.afbrushes

-
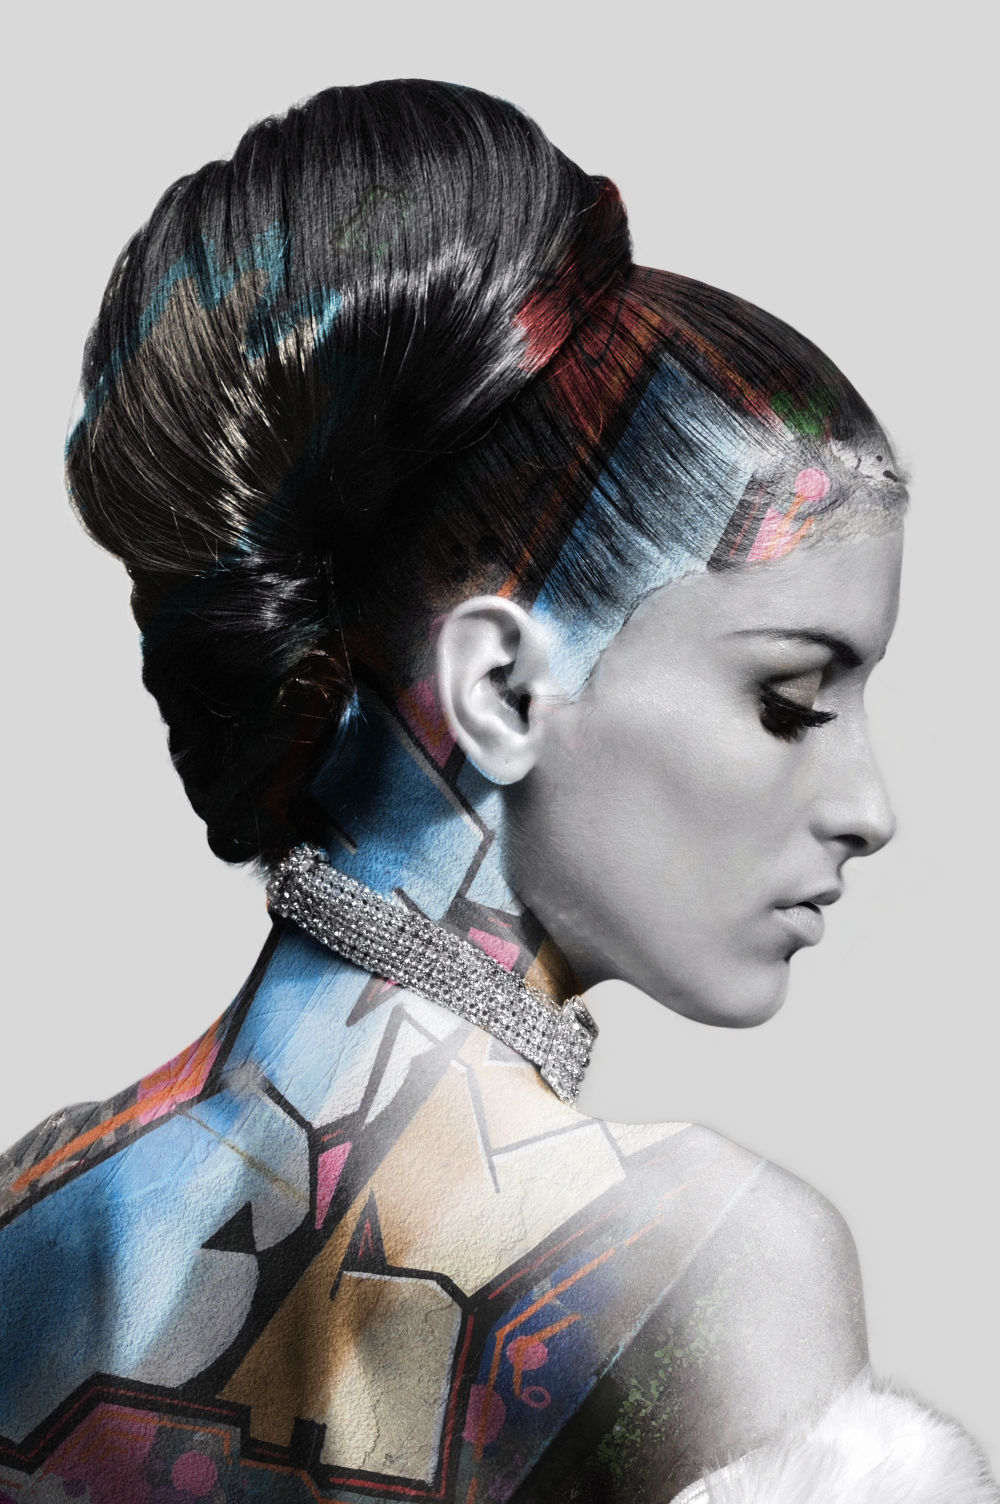
Thought i'd share my take on chapter 5 from the workbook, Snow Queen. Model photo is the stock image provided in the chapter. Graffiti photo is my own, not sure who sprayed it (local skate park and fully allowed area) but it seems to wrap around the model really well and there is a crack/chip in the surface of the wall which lines up with the hair line of the model so well. I did this version on my iMac but have also repeated the same process on the iPad version of Photo. I did try a full black and white version, but didn't think it suited the image. Attached for those who are interested is very low res version of the graffiti shot used, If anyone wants the full res version to play around with just ask and i'll upload it.
-
Hi Everyone, I'm not normally one to post in this section, mainly as the shots i take are just of painted walls (legal graffiti) so very little editing is done but thought i'd mix things up with some Affinity Photo stuff in this section. I made the most of the bank holiday weekend and went out and about early morning. Also tested out a new NDX filter, only knowing the basics of what they do, i was clicking, then moving a stop and clicking again. This ended up with a lot of very DARK images. Anyway i was able to still make use of them and have attached the results in JPG for the forum and also the original RAW file. Love how the mist has been captured in the background which is what i was hoping for, need to work on skies next as i always seem to blow them out. Feel free to use the RAW image and have a play. I'm sure the more experienced photographers will spot any mistakes i've made, but i'm just getting to know my camera better and shooting on manual as much as possible any tips are welcome. I have a Nikon d3200 with kit lens (18-55mm). Tools used: Inpainting Most of the sliders in the Develop Persona. Little brightness and clarity boost in Photo Persona _DSC0069.NEF
-
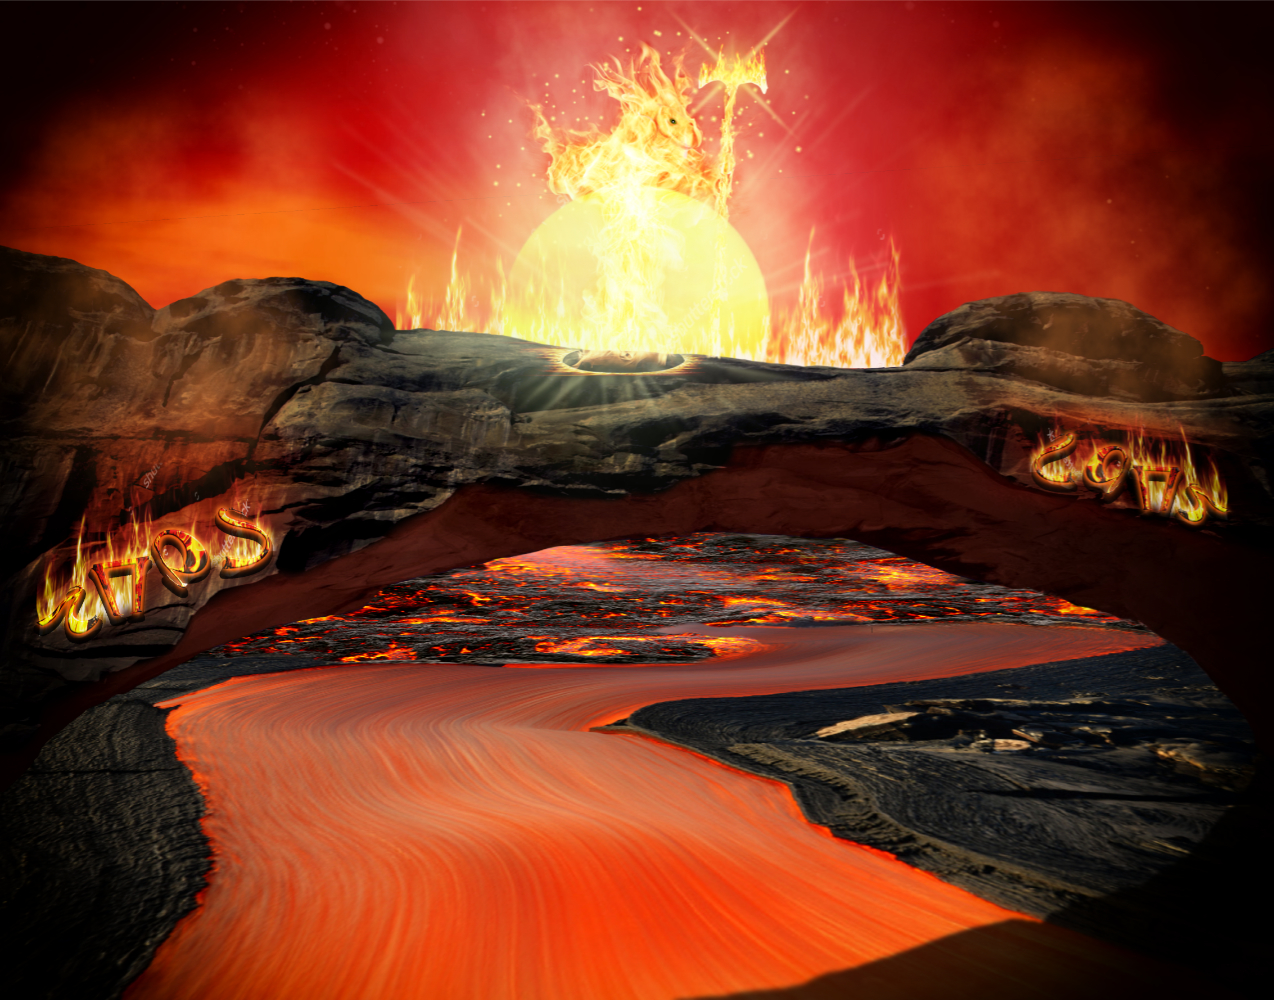
I've finally finished my latest composition. It was quite a challenge to create this mini planet along with all the elements on it. Lots of trial and error to see what fits and what not. However, I'm pleased with the final result. Welcome to the New World and enjoy your stay.
-
 Hi Guys, I was just wondering if there was an update as to when support for RAW files taken with the Nikon B700 camera will be available? I still cannot open the raw files without them going all weird, strange colour and distorted. Thanks! Billie
 -
 I have a very large image 5000px x 3500px and I need to make it 870px x 320px for a website banner. I know I have to crop the image first because the ratios are not the same, but I have tried many ways, even tried to edit the SVG code, and it's just impossible. The image doesn't look sharp enough. Is this impossible to do? am I wasting my time? or is someone actually able to resize this much a very large image and keep at least moderate quality? Thanks!
 -
An example of something coming from nothing. I began this picture with an entirely different intent for its outcome, but when inspiration comes along - you just have to run with it.
-
- 3
-

-
- fantasy
- computer art
- (and 1 more)
-
 Hey all! This is my new video about painting in Affinity Photo @AffinitybySerif Share please and thanks for watching!
 -
 Bought Affinity Photo last year, but took a long break from it because of the lack of a stabilizer at the time. Decided to go back to the program yesterday just to see if I could replicate my workflow from Photoshop, which I got decent results from. Still need to figure out some kinks in the system before I feel like my work in Affinity Photo is up to par with my Photoshop work. Might finish these two if I feel like it.
- 37 replies
-
- 6
-
-
- black and white
- painting
- (and 1 more)
-
Started this painting in Corel PhotoPain(t) until it began crashing beyond repair. Continued in Affinity Photo (that has much better dynamic brushes). Inspired by a painting made by Howard Terpning. The bloke sitting second from the right is preparing a huge joint.
- 3 replies
-
- 5
-
-
- native american
- pixel painting
- (and 1 more)
-

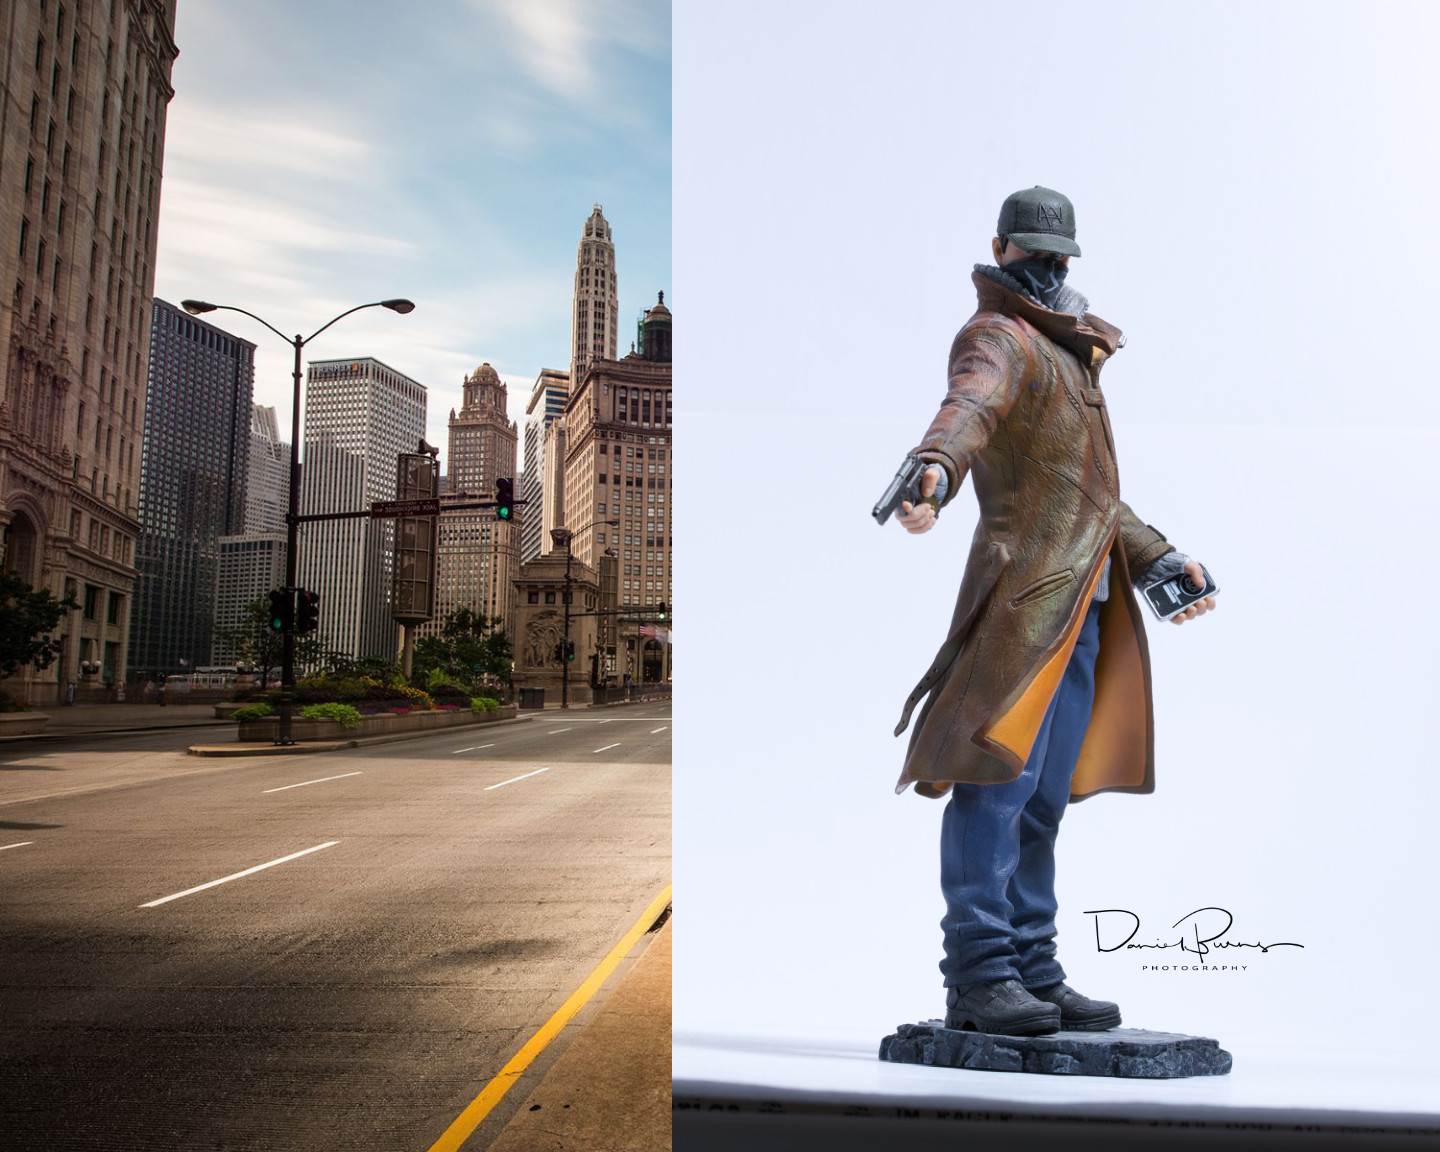
affinity photo Action Figure Photography (iPad Pro)
DannyBCreative posted a topic in Share your work
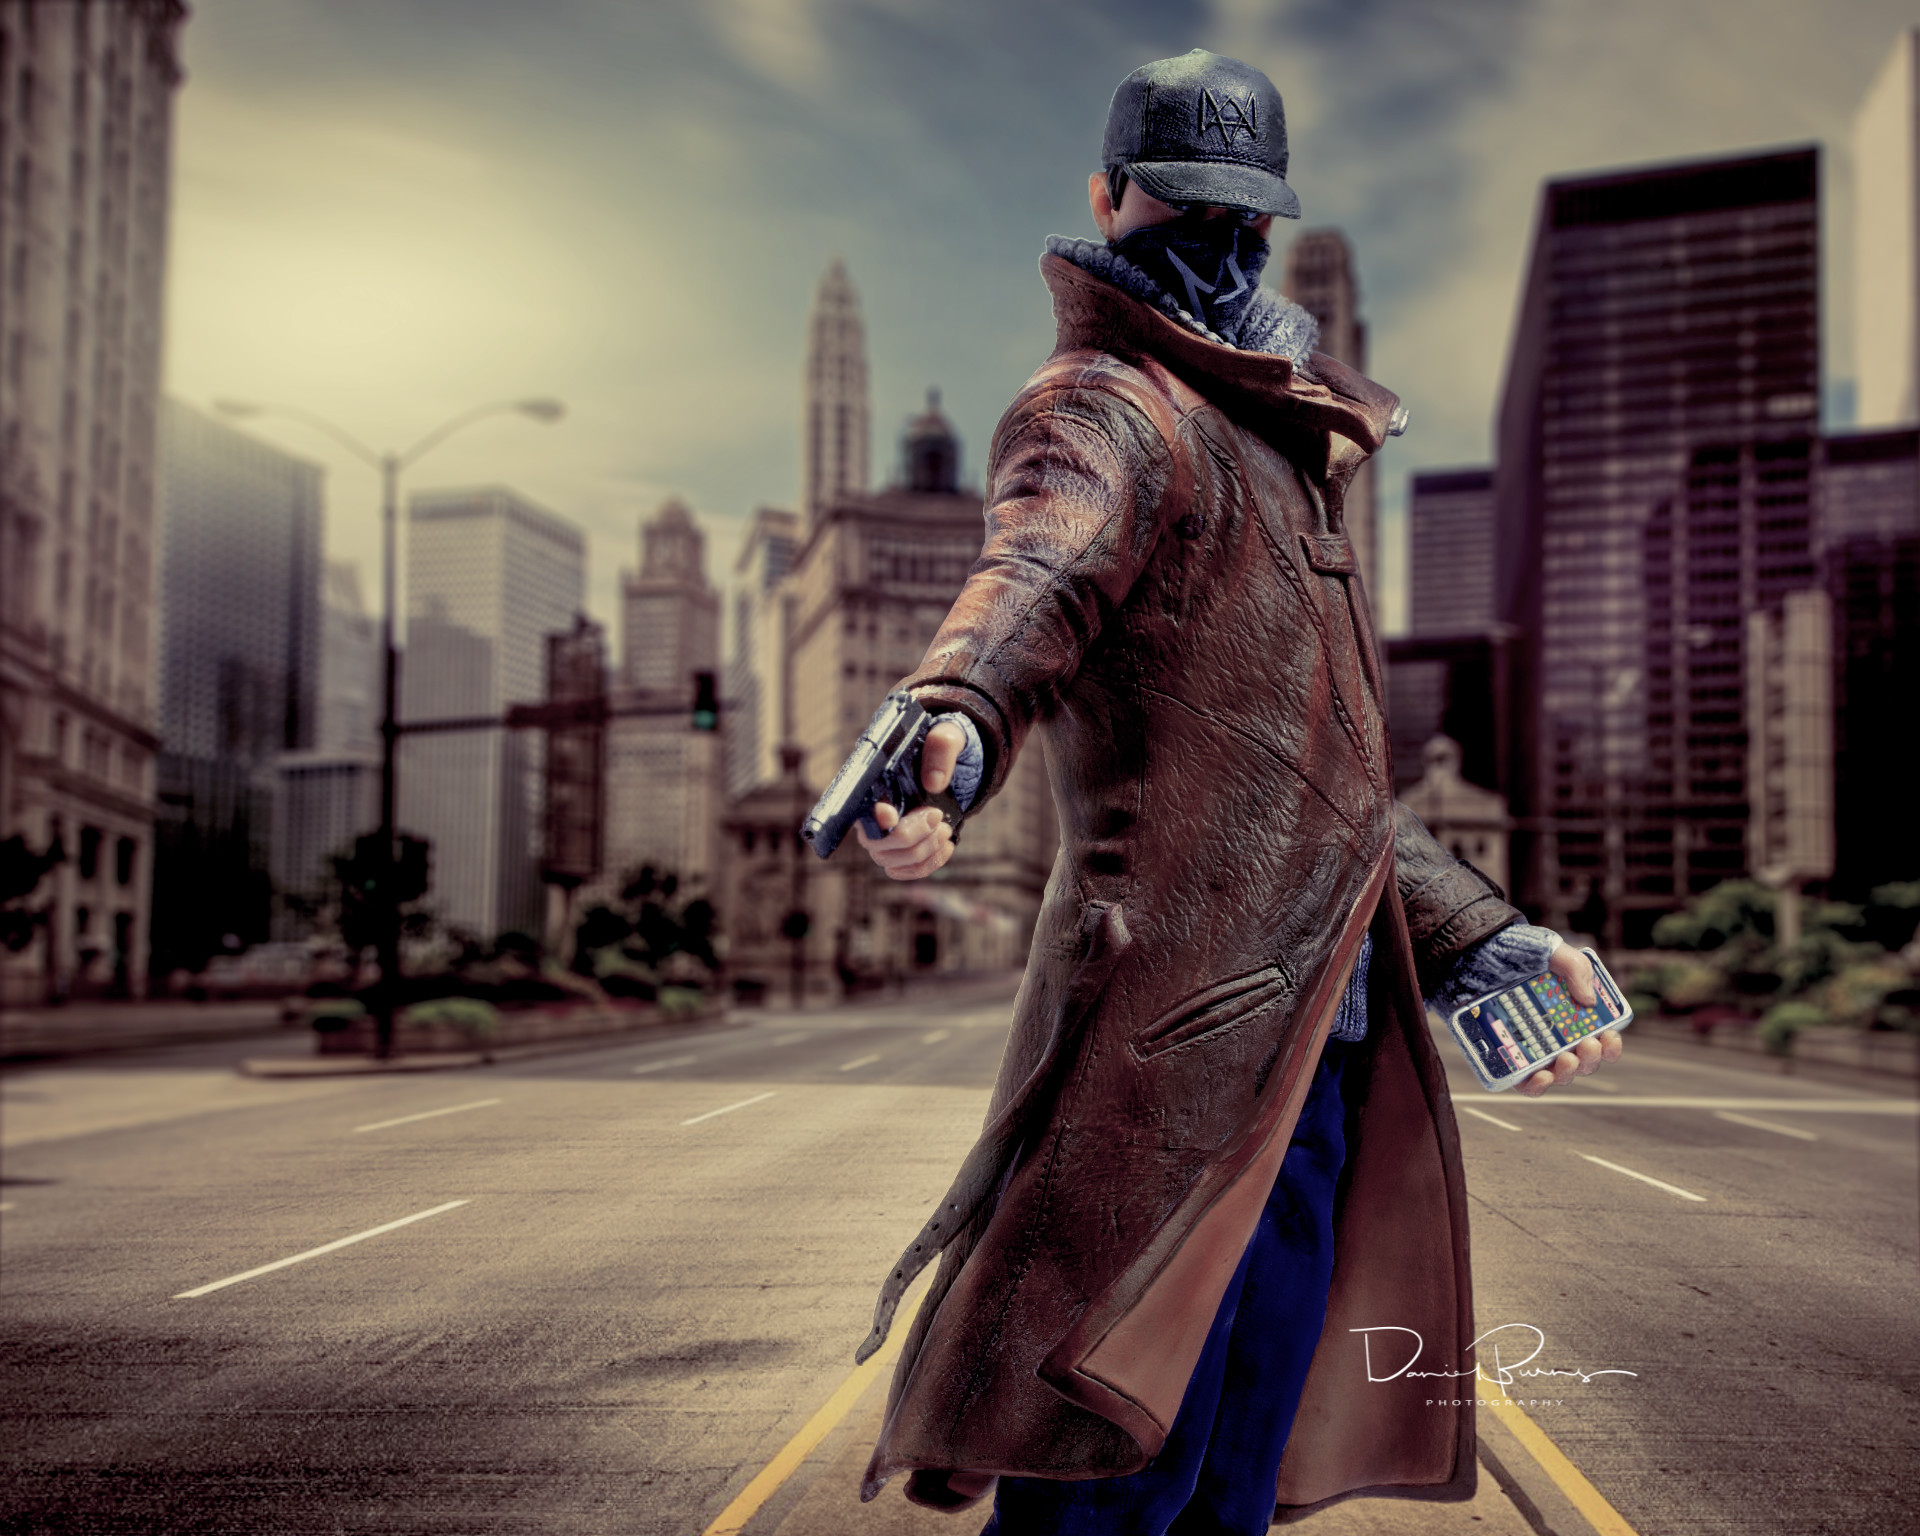
Produced my first action figure photo shoot So much easier than working with real people! Action figure was photographed by me on a miniature photo studio I built, and lit with speed lights fired remotely using radio triggers. The background is stock. All elements were composited in Affinity Photo on my 10.5" iPad Pro.
-
 Go to my Youtube Channel, where you can find 35 Tutorials, with a new Tutorial coming out every 3 Days. Today we are going to have a look at 4 different applications of Perspective Tools in Affinity Photo. You can use them in a wide variety of ways, not just for perspective correction, but also to create new compositions or put new things into your photos. Make photos more dramatic or bring back the zen of a easy situation. So many possibilities. Support me on PATREON and get my Affinity Photo File with all layers as a Thank You: https://www.patreon.com/sarikas Find me on Steemit: https://steemit.com/@multi4g Photos used: https://unsplash.com/photos/Zkb2HcxTZXM https://unsplash.com/photos/V9keLsAtxyA #perspective #room #architecture #correction #adjustment #retusche #photo #design #art #colorful #fun #dtube #artistic #creative #steemit #easy #tutorial #education #handson #learning #free #affinity #editing #episode #series #making #DIY #minute #quick #pictures #howto #designer #cover #elearning #video #online
 -
After watching some cyberpunk-themed stuff (speed arts etc.), I thought it would be a great idea to give it a try.
-
- 4 replies
-
- 2
-
-
- car
- compisition
- (and 2 more)
-
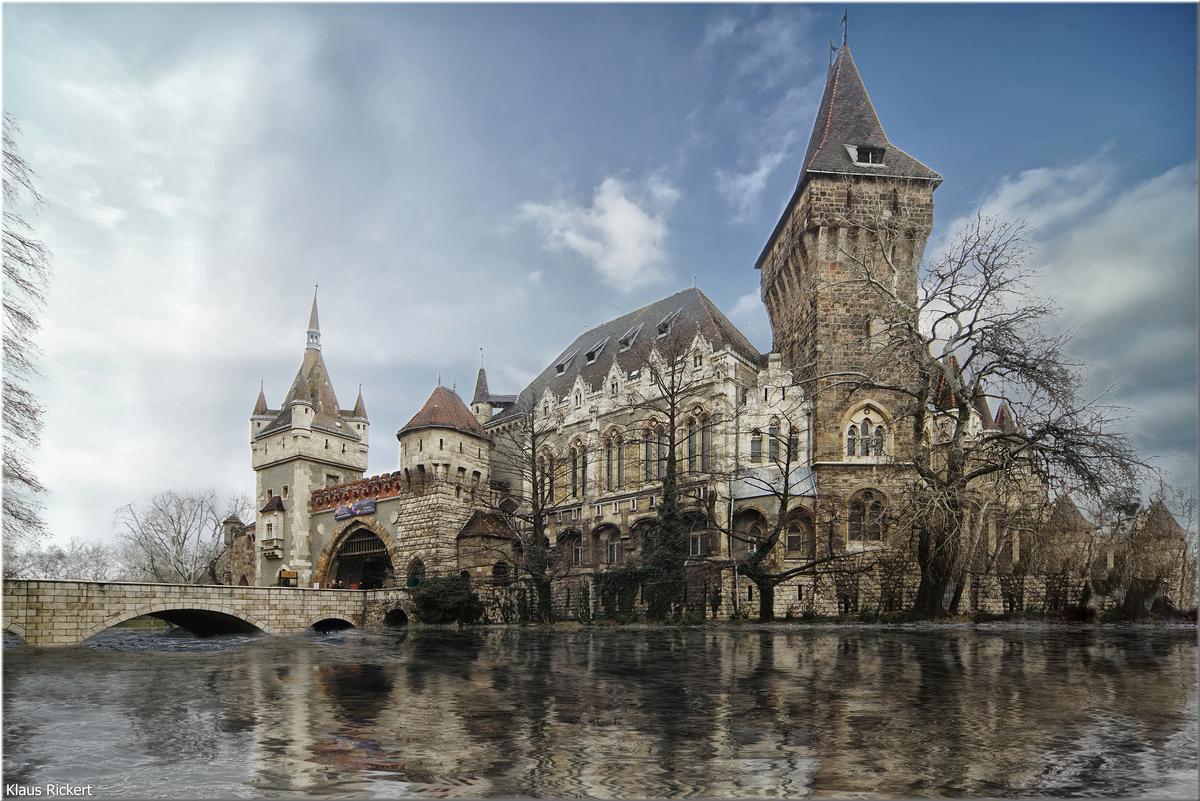
Hi All, after all, I really consider Affinity a really good piece of software. Some polishing up: See you with nice photos Klaus
- 6 replies
-
- 12
-
-
 Hello, In AP, is it possible to script an “action” like new layer creation or loading a 3d lut to a new layer? Photoshop allows this and can be used as a way to integrate with other applications. If this allowed, is there any documentation on this? Regards, Frank
 -
 A couple of days ago I finally received my copy of the Affinity Photo Workbook. Having read the first 240 pages I must admit that I am mostly disappointed. By purchasing the book published by the developers of Affinity Photo I hoped to gain some in depth insight into how Affinity Photo works and how I could apply the different techniques demonstrated in the book to my own projects. Sadly though this is exactly where the book fails. Because I know that simply telling you that the book "sucks" is not enough and certainly wont help you improving it I am going to give you a few examples why exactly it has been such a disappointing experience to me. My biggest issue: From page 120 onward you explain in depth how to move, nest, rename and otherwise manipulate layers. While I admit that this might be useful to some beginners I think anyone who is not a complete computer illiterate will figure this out within minutes. In fact when I started editing images it was immediately clear to me how to perform such basic layer actions that do not differ much from the basic concept of manipulating files and folders in any file explorer. On the other hand any information on how the different blend modes work is completely missing. I ask you, if we talk about the average person who want's to get into image editing, what would such a person typically need help with? Creating or renaming a layer or comprehending what a multiply, hard light or reflect blend mode does? Why are there layouts with keyboard short cuts but no explanatory chapter on blend modes? Again the question, what would I probably want to read a book for? To learn the keyboard short cut to invoke a certain command or to gain a better understanding of the concept of blend modes? If I read a book like this I expect to learn new techniques and I generally want to gain deeper insight on how a program like Affinity Photo works and how I can use the software for my personal work flow. But in the case of your book it has repeatedly left me with more questions than answers. Here is a list of examples where the book has left me with unanswered questions: On page 144 you explain how to control certain colour tones using a black & white adjustment layer and the blend mode overlay. Now maybe I'm the only person on earth who finds it confusing to use a black and white adjustment layer to change colour tones in a coloured photograph but fact is, I don't understand this technique and thus I'm not able to use this trick for my own photos. Unless of course I had exactly the same photo as in the book in which case I'd certainly be able to replicate the steps described. But in order to apply this trick to my images I would need someone to explain me what a black and white adjustment in combination with the overlay blend mode does and why it does this. The next example would be page 160 (Laying the tonal ground work) and following. Here you explain how to control tones with brush strokes, an empty pixel layer and the overlay blend mode. And again you fail to explain why it does what you describe. But at least this one is not as bad as the case mentioned above because here I can actually use the technique for my projects (with the slight inconvenience that I use a technique I don't really understand). In other words, if someone watched over my shoulder while I am applying this technique and asked me why I had chosen the overlay blend mode I would not be able to answer the question because frankly I don't know, I just copied the steps from the book without knowing better. Another one: On page 228 you show a way to eliminate or at least reduce a colour cast in the sky by using a black and white adjustment layer (again in a coloured photograph) and the multiply blend mode. Once more you fail to provide any background information on why and how this combination works. Without this information the process remains a mystery to me and I'm probably never going to be able to use this technique for my own photos. I just don't feel comfortable to work with tools I don't understand. I could mention further examples but I suppose by now you are getting the point. Now one could always ask why I didn't search the web for more information. And while this is of course true and I also do this on a regular basis I have been asking myself why on earth I'd read a book that makes me search the web for basic knowledge about the described techniques. Didn't I buy the book exactly because I wanted to gain more in depth knowledge about image editing with Affinity Photo? Wouldn't I be better off not buying the book at all and simply asking the search engine of my choice (which is completely free by the way)? But enough criticism for now. Let's also mention a few positive aspects. Apart from the missing information as described above the texts are very understandable (even for non native English speakers like me) and the book looks generally very professional. I've also found the selection of images and projects to be well chosen, the projects are interesting and the photographs are of high quality. While reading the book one immediately notices that the authors not only know what they are writing about but it's also clear that the persons involved in the creation of the book are passionate for photography and Affinity Photo in particular. In other words: If you added the missing background information on how and why certain techniques work as well as a comprehensive explanation on the various blend modes available this could become one of the best books about image editing in general and Affinity Photo in particular on today's market. Oh and one last thought: If you don't want to clutter the book with too much information and avoid overtaxing some readers why not provide an appendix with additional background information (be it in the book or as downloadable resource) for those who desire to better understand how and why certain techniques work? And if you plan to improve the book and add the requested information it would be a very nice gesture of you to make this additional information available to the buyers of the initial issue as well (as a download for example). P.S. I opened this thread here because I couldn't find any other, more suitable place. Please feel free to move the thread if necessary. And sorry for having created such a lengthy post
 -
I think it'd be great for the perspective tool to work on the iPad in the same way it works on the desktop version. For example, on the DT version, I can grab each corner of a rectangle and place those corners wherever I need to. On the iPad ver. I can only move the entire shape into a perspective as a single unit.
-
When exporting (Ctrl+Alt+Shift+S) PNG from Affinity Photo , there are options to export the area as 1: whole document, 2:Selection with background 3:Selection without background. I make video game art and export selections of layers frequently as i work on them. So I'm glad i can export a selection of layers as PNG without a background, but i have to manually set the area to "selection without background" each time. Does anyone know if there is a way to change the default area of export PNG from "whole document" to one of the other options? Thanks inf advance!
-
 I just purchased Affinity Photo and can't wait to ditch my subscription to Adobe CC2018. However, I mostly work with text and am having trouble finding tutorials to answer my questions. First up: how do I create a stroke around text to make the font fatter? Thanks
 -
Two best companions set out on a journey full of twists and turns. Their next stop - mysterious Motel. I've had a lot of fun doing that manipulation. I hope you enjoy it.
-
Here is the final image that I was having the crashing issue with a couple days ago. 100% iPad Pro with Affinity Photo. Hope ya like.
-
Portait of the German writer Thomas Mann, created with afphoto (various brushes). In exile (USA) he fought against the Nazi state, and there he said: Where I am is Germany. Thomas Mann was born in my hometown Lübeck, where there are also many facilities and memories of him (Buddenbrookhaus). http://b-bertuleit.de/portrait-watercolors/
- 7 replies
-
- 9
-
-
- portrait
- watercolors
- (and 1 more)
-

affinity photo Can you find Granny? Can you find Grandad?
EYEGREEN posted a topic in Share your work
Where's Granny? Made with Affinity Photo and other 3D software. Just a sample from my new book which is in the making.
- 7 replies
-
- 9
-
-
- wheres wally
- seek and find
- (and 1 more)
-
 Hi, Our company purchased licenses for Affinity Photo, and we'd like to be able to silently push out software using either Quest KACE or SCCM. Is it possible for us to do that for Affinity Photo? Regards,


-E.jpg.b0bc419d32a82af1f36a105c47e95fa0.jpg)

-09D.jpg.5f6fbf08d96ecb990548df6a5186dc14.jpg)
-21.png.244953d43a540f086449dae71355e952.png)