Search the Community
Showing results for tags 'Affinity photo'.
-
 Just a bit of fun while I try to learn how to do things the Affinity Photo way. This is a recreation of something I did a long time ago with GIMP. I wanted to know how easy it would be to retouch a very low-res image. It’s not perfect but I’m learning a little bit at a time. Still have a very long way to go though. A better resolution version of the image I was playing around with can be found here: https://www.tampabay.com/nation-world/sailor-in-iconic-world-war-ii-kiss-photo-in-times-square-dies-at-95-20190218/
-
The photo was taken in Ebeltoft, Denmark, in an old dyeing factory from the 18th century. The camera was a Nikon D750 and the processing was done exclusively with Affinity Photo.
-
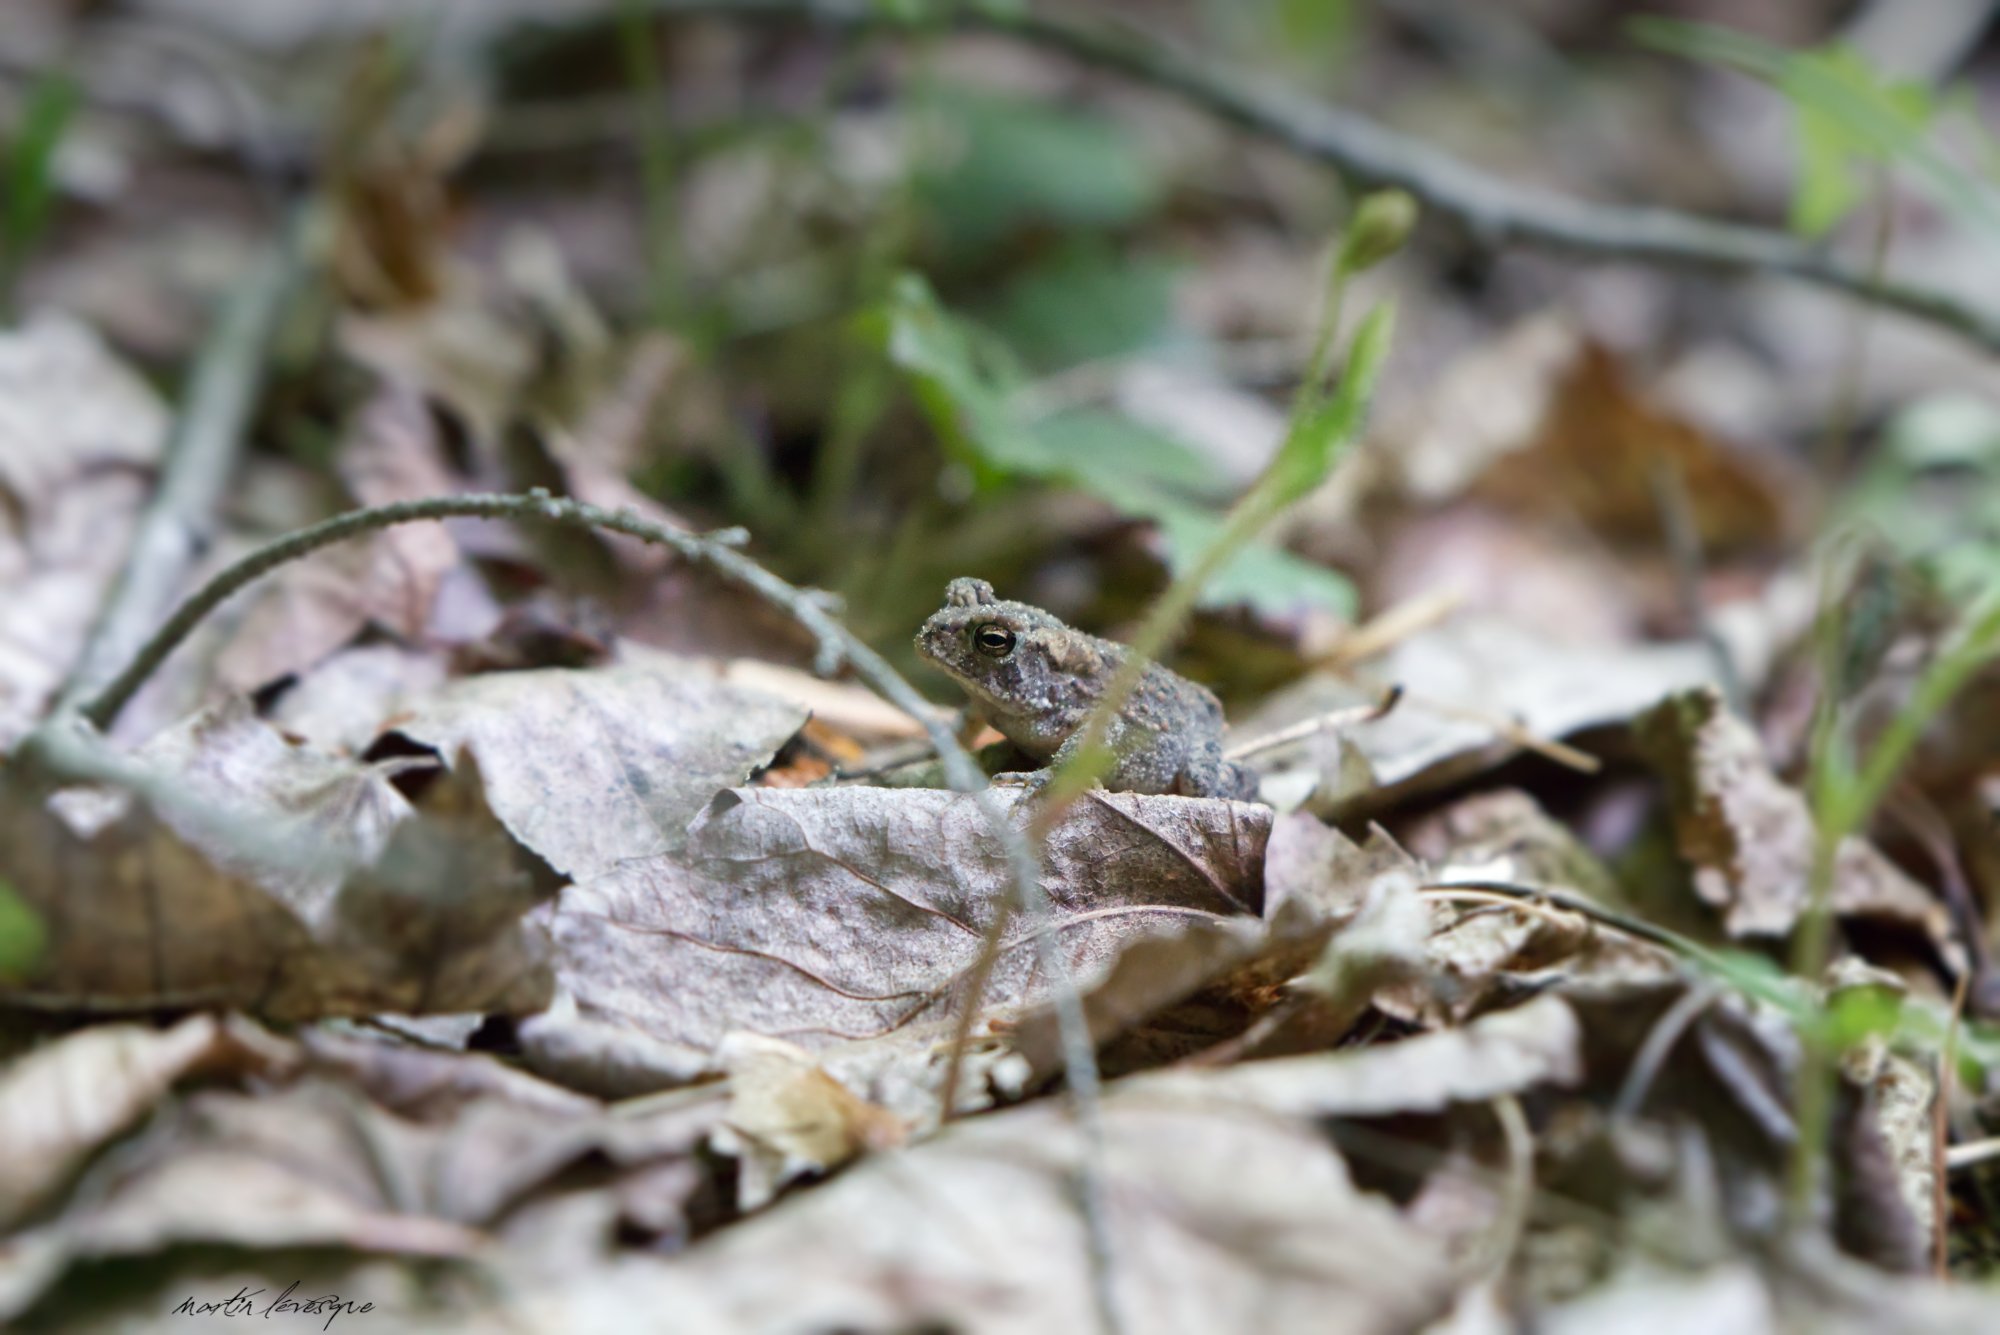
Hi everyone. I haven't been very active photographically wise but I'll try to change that. I went in the woods a few days ago and I wanted to try my new Tamron 70-200mm G2 lens. So I found this small toad (I love landscape and wildlife photography) and tried to photograph it (I used my 70-200mm Tamron lens). It's not the best photo of a toad but I'm still satified with it. Let me know what you think because I still like getting advices from better photographers. Here's what I did on this photo. I played with the basic settings in the develop persona (exposure, noise reduction, clarity, etc). Because some elements were in focus and disturbing the eye away from the toad, I used a dept of field blur tool and I made sure to put the center of the tool on the eye of the toad. I changed the exposure of the background with the help of a gradiant tool. Added signature.
-
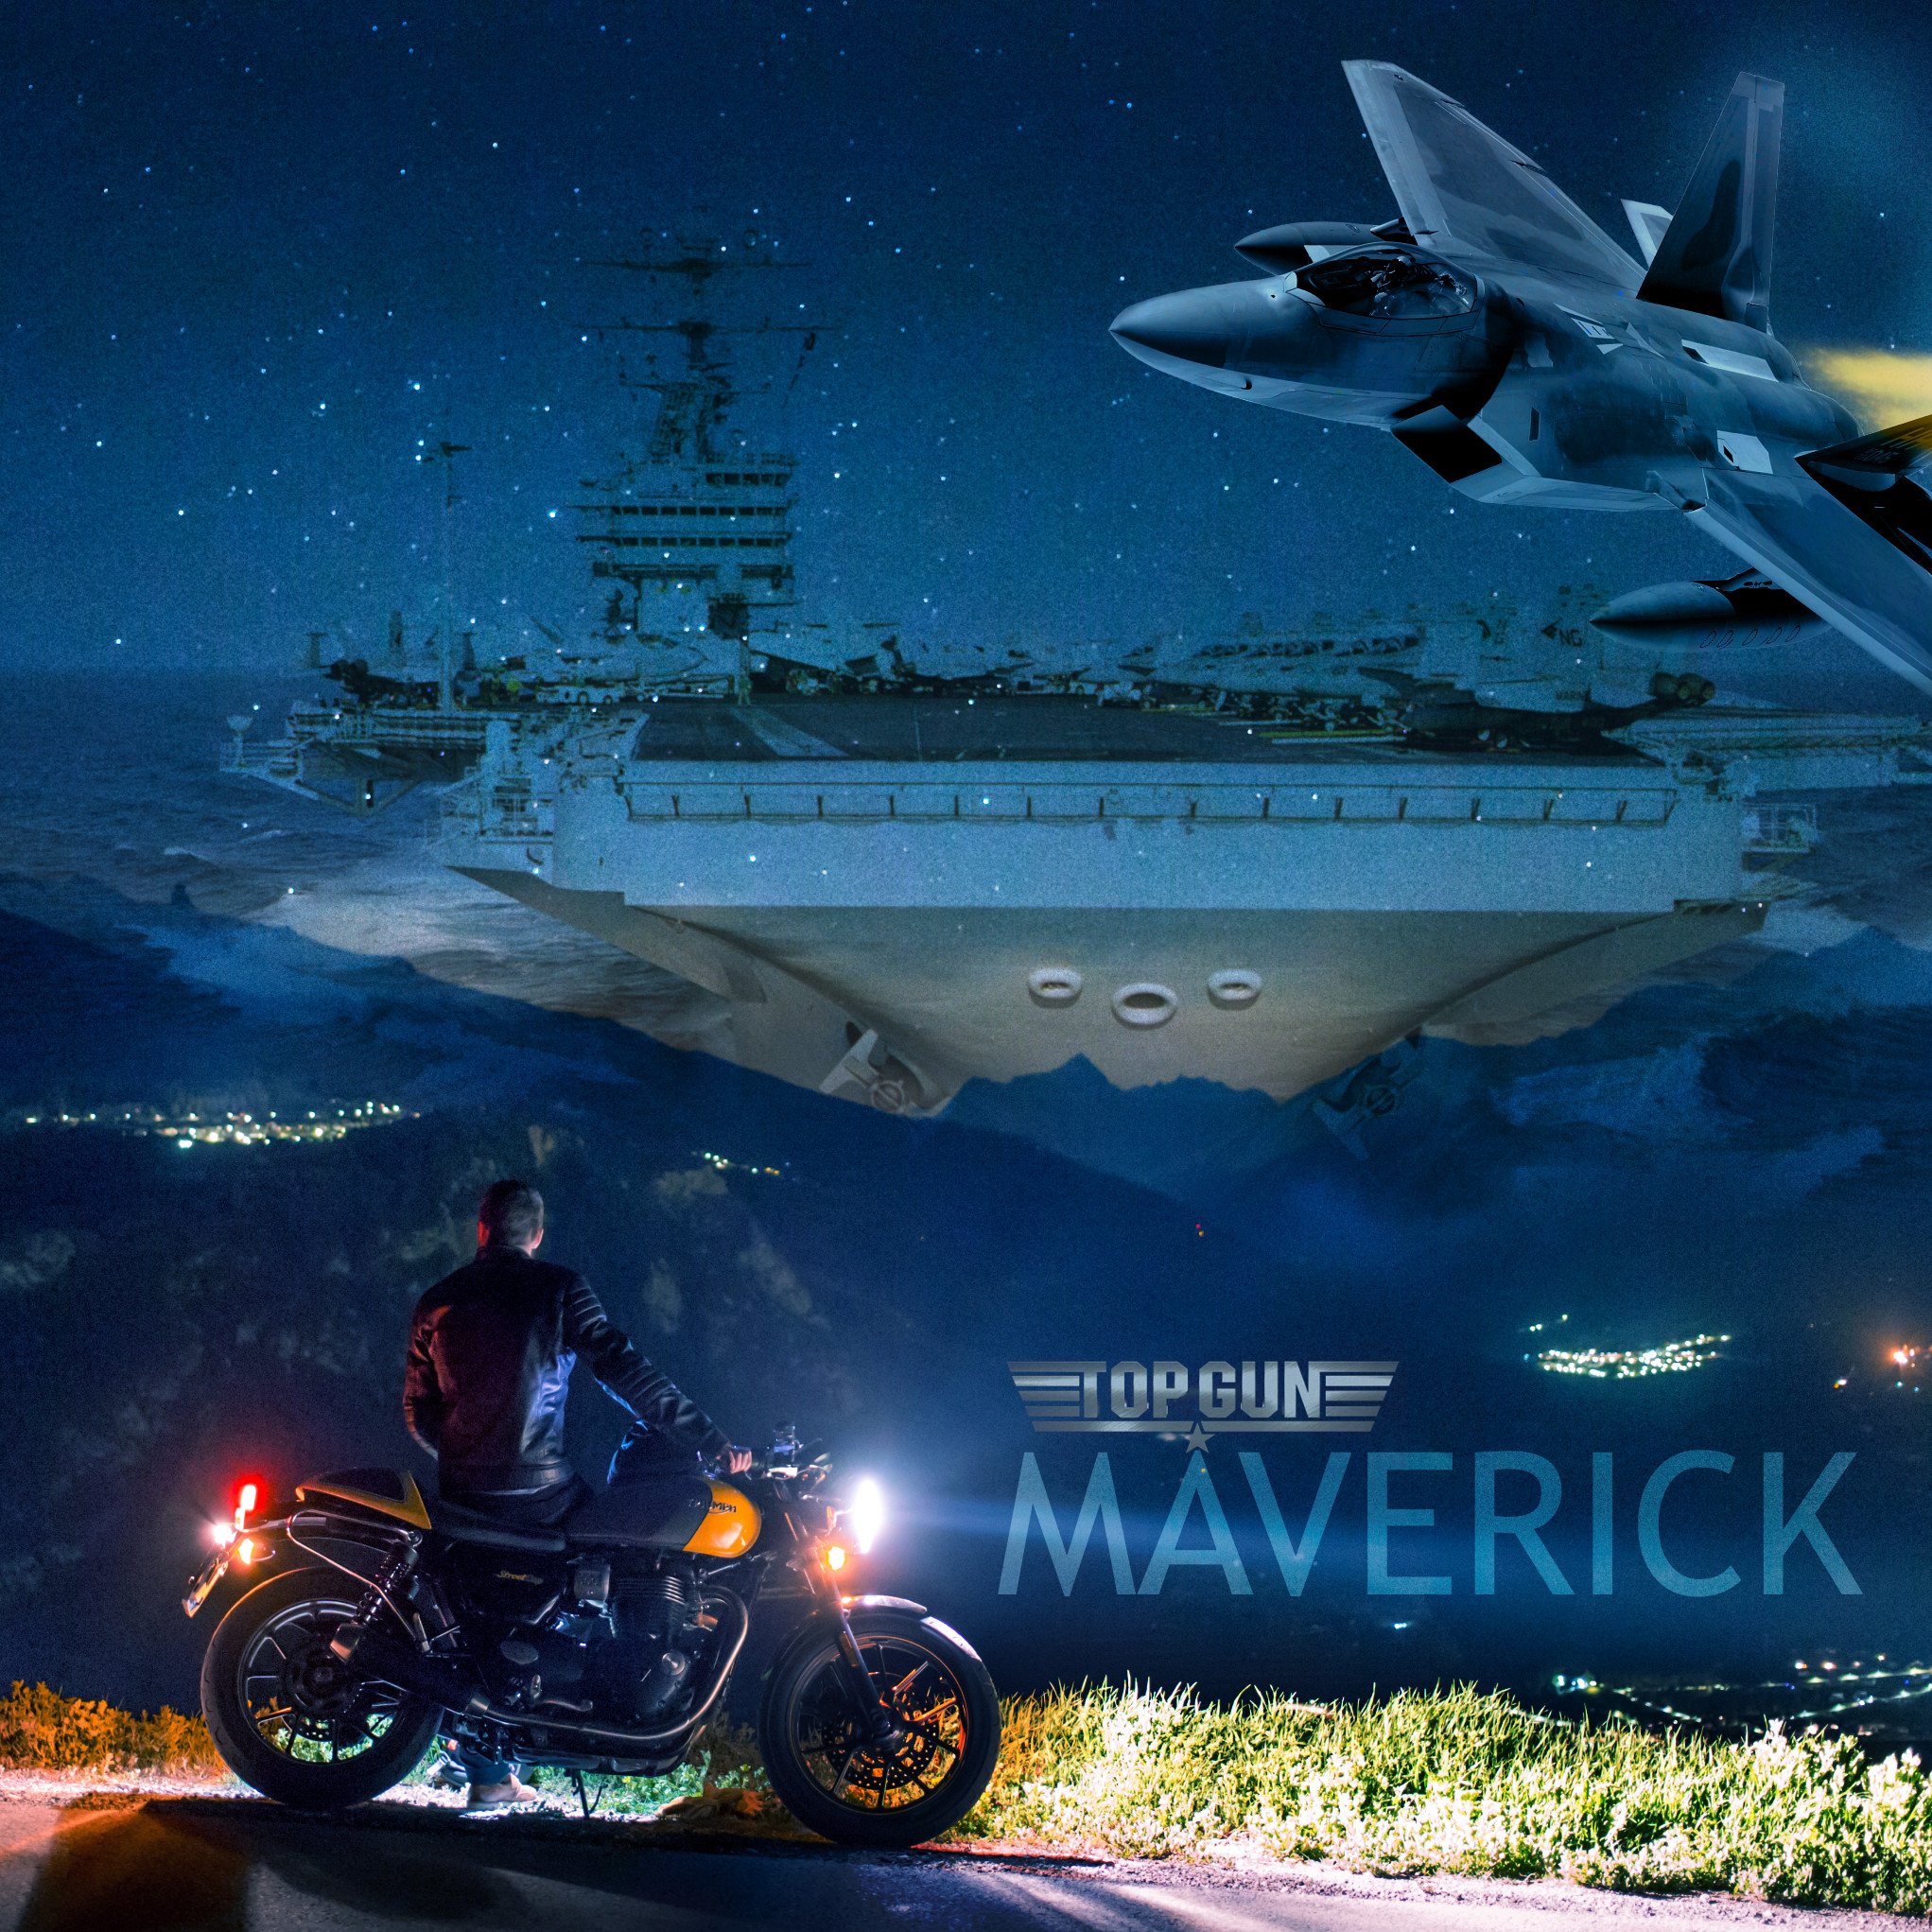
In the spirit of the upcoming Top Gun Maverick movie. I had to find some royalty free stock images in AP 1.7 and make my own poster. Used royalty free images from AP 1.7 stock tab. AP brush pack to make afterburners and some wind break on the plane.
-
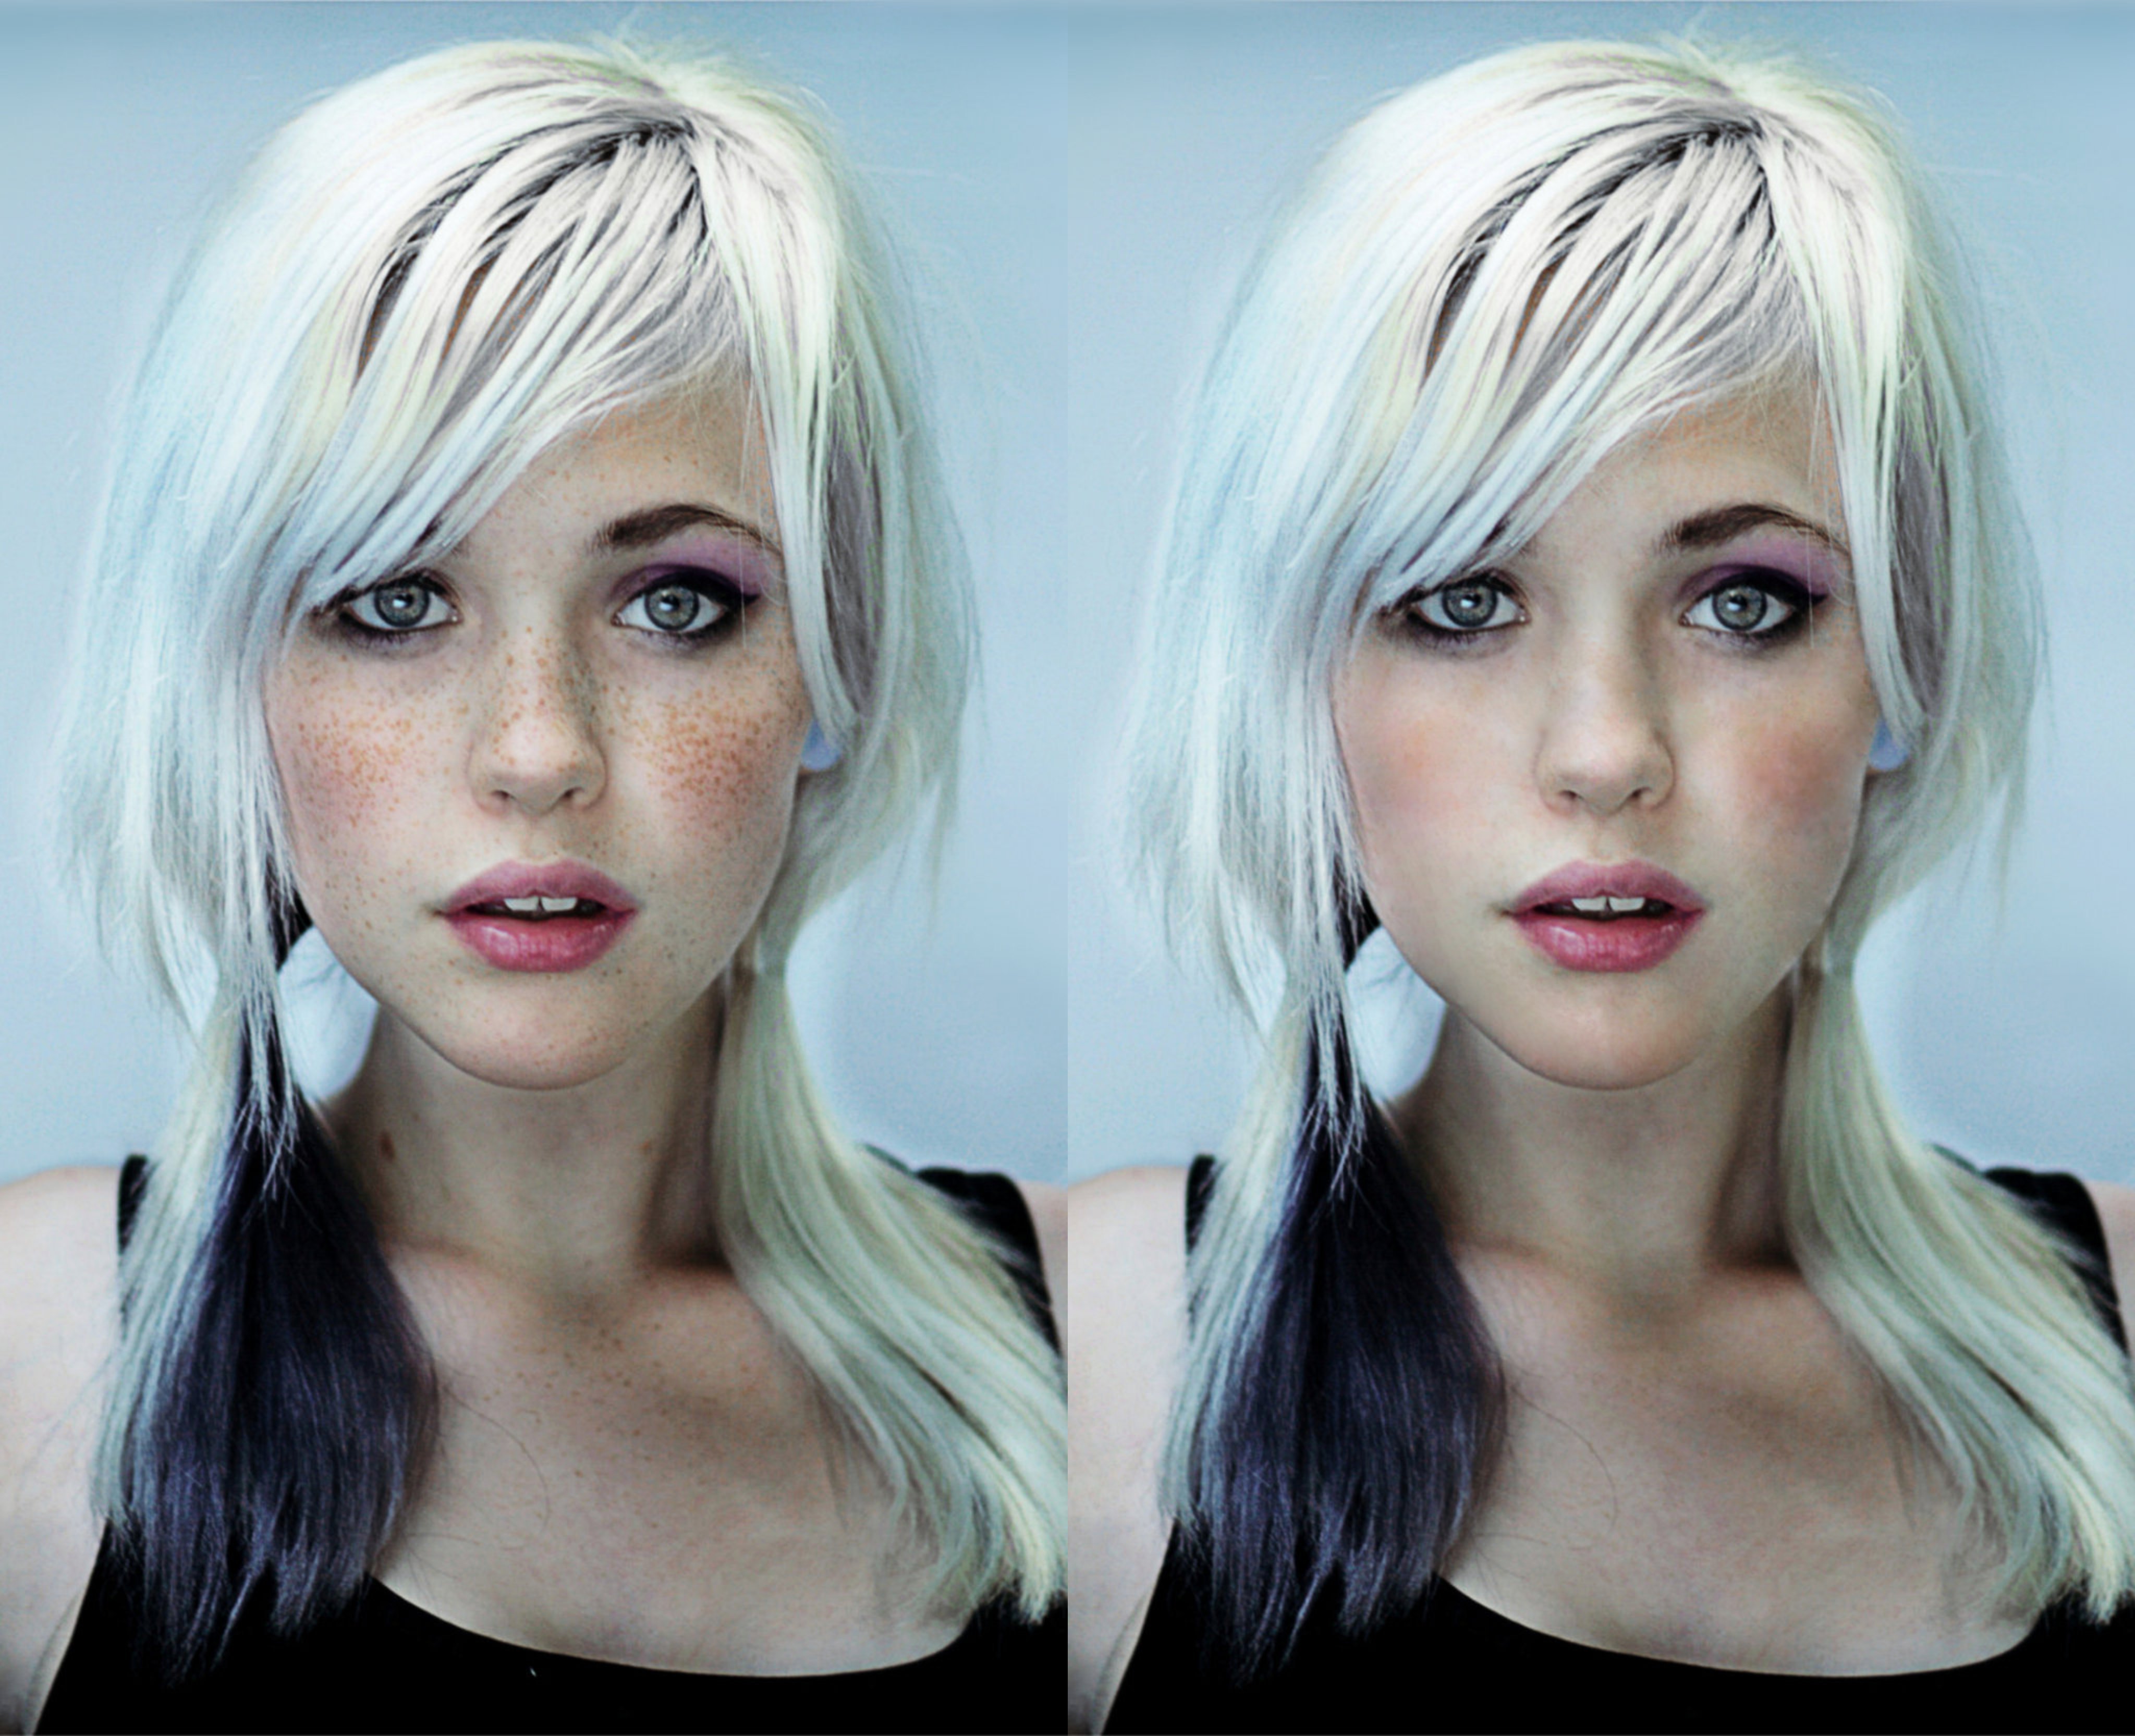
I recently bought Photo – almost seemed rude not to at the discounted price – and I’m amazed/daunted at the amount of tools that are in there. It will probably take me a very long time just to get under the surface of what’s possible but I thought I’d give myself a little challenge. I wanted to see if I could do some basic editing and decided to try and de-freckle a photo. I’ve attached the original and result side by side. I didn’t want to totally expunge every single ‘blemish’ and leave the young lady looking like a shop dummy so I tried to leave her skin as I think it could be without the freckles while still having some of the other things that skin naturally has. It’s not perfect by any means but I was very pleased with what I could do in around an hour with just the Blemish Removal Tool (and Undo). I haven’t posted this as any kind of “Look at this great thing I’ve done”, rather I’ve posted it in the hope that people thinking about buying Photo might ask themselves: “If this bloke can do this with no training or artistic talent, just think what could be possible if I got my hands on this.” Note: I have absolutely nothing against freckles. I just chose the photo as it looked like a difficult one to experiment on, which, in the end, it wasn’t because of the tools in Photo.
- 3 replies
-
- 7
-

-
- de-freckle
- experiment
- (and 1 more)
-
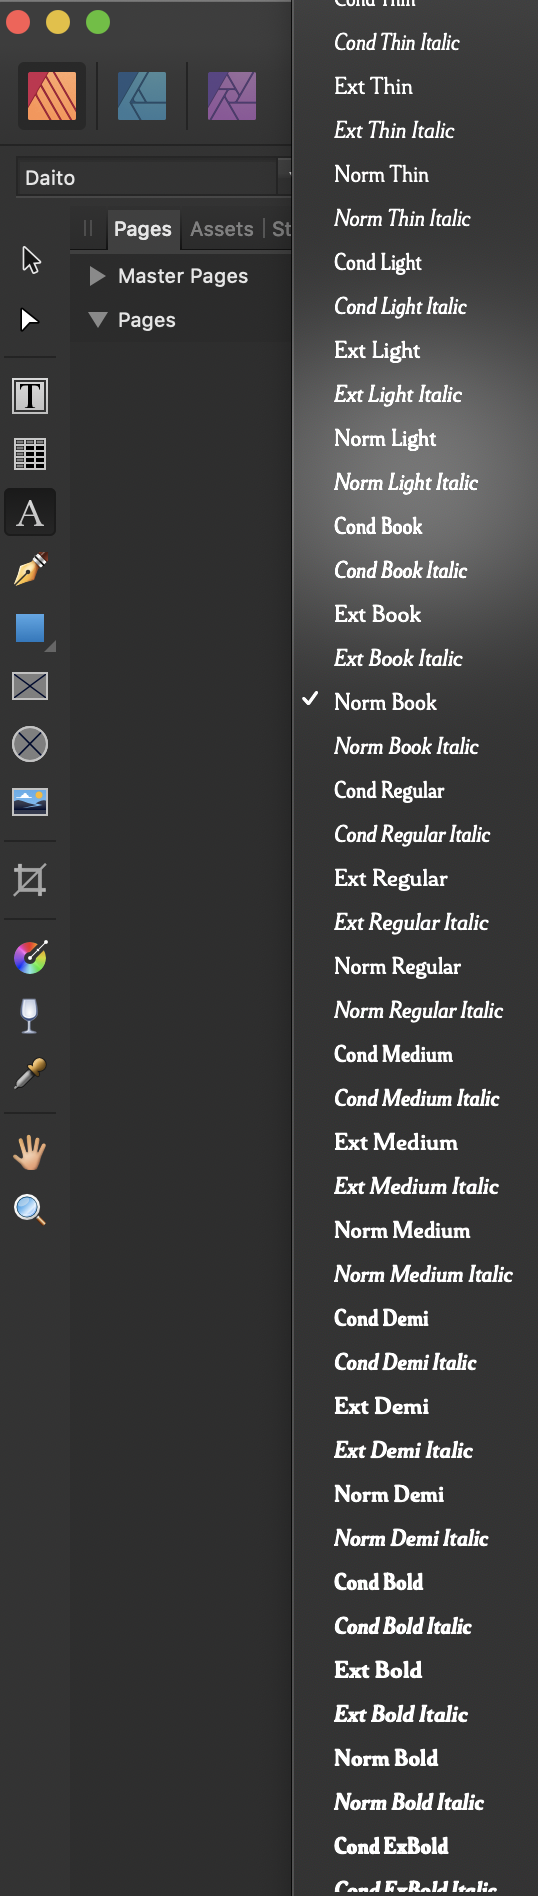
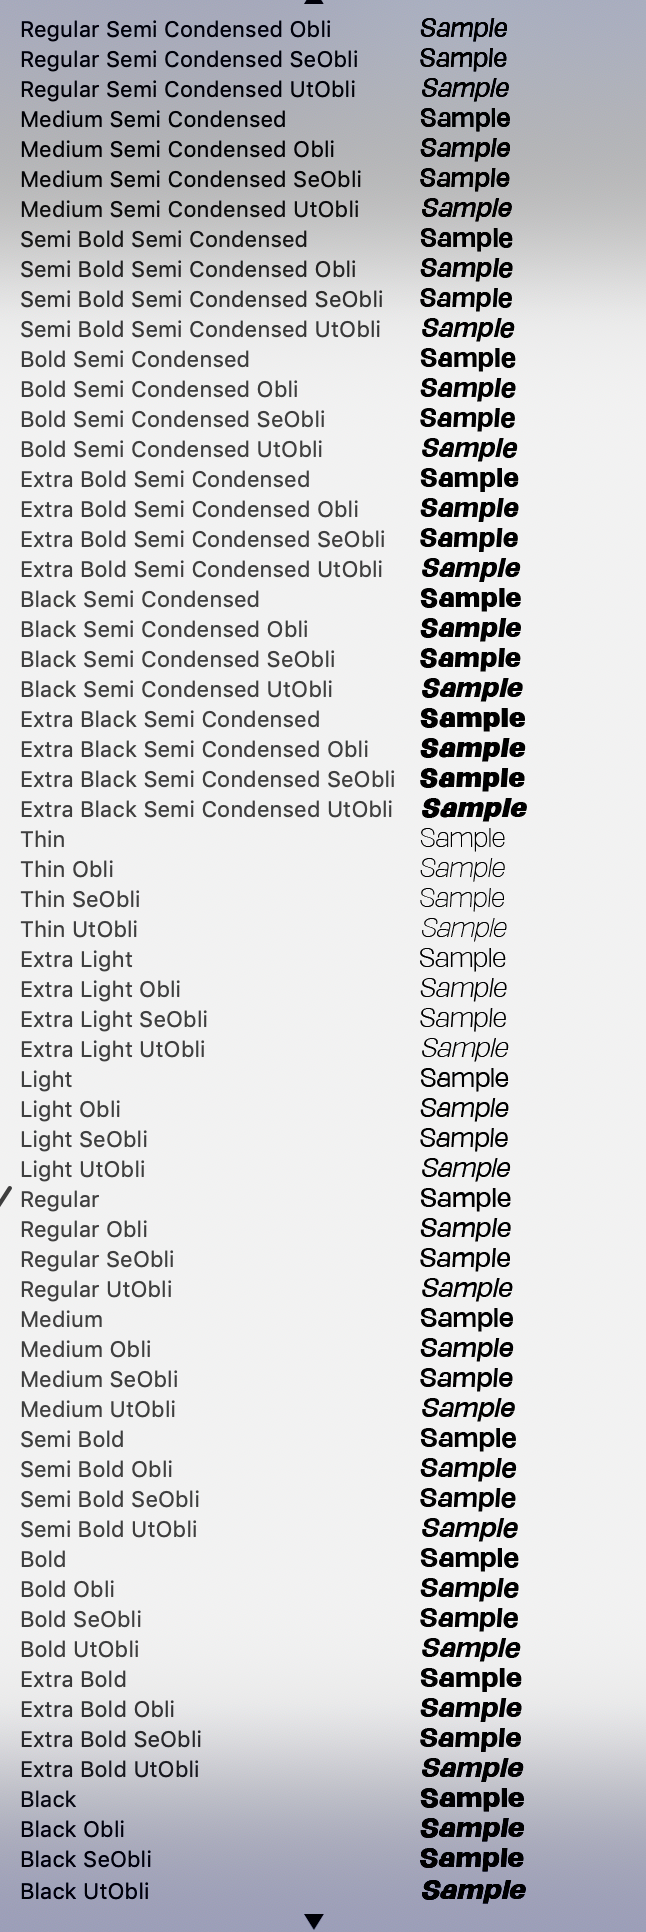
 Hi Affinity, While I love the way OpenType features are handled much better than in Adobe, I really cannot navigate font superfamilies. If you have any family that has different weight groups then navigating through the font list is very difficult. Can you guys please fix the font organization. It really slows down my work otherwise. I am showing screenshots for one particular font family. I have licensed countless superfamilies and I really don't like working with them in Affinity products for this reason.
-

affinity photo Photo manipulation Jurassic Park with Baby Groot
iamdak posted a topic in Share your work
I'm still learning to use AP but so far with all the tutorials available it's been easy to learn most of the tools. I've added a whale fin, 2 dinosaurs, 2 signs and of course baby Groot layered on the actual image.Hopefully Affinity is ok with me using their logo to support their software. -
Hi Affinity, As a member of the Affinity converted with Designer and Publisher, I have used Affinity software for my digital agency and there are presentations of mine in the exec offices of some global automakers. This work used to be done with InDesign but I switched over to Designer two years ago and used multipage artboards to work on my projects. When Publisher Beta came out I was on cloud nine, and then when StudioLink came out I really needed psychotherapy to cure my OCD with Publisher. Such an amazing, groundbreaking workflow. I also took a very deep dive on Photo, the latest store version and also the beta. I have a collection of thousands of Photoshop files and many of them opened up flawlessly. I also love the refined UI. And now rotating brushes are amazing! I seriously don’t know why Photoshop hasn’t done that yet, but consider that it took them many years to enable CMD-Z. You guys had live preview first but they soon adopted that, so it is clear they are watching what you are doing. I would like to come over 100% to Affinity but I have several issues that prevent me from doing so. Also, I do realize that this is a monumental task - Photoshop really is Adobe’s flagship, more so than any of their products. It was easy to switch over to Designer from Illustrator, really easy even with features missing (perspective warp please! - although doing that in StudioLink). Right now I am adept enough at Photo as and use it within a StudioLink context but not standalone and here’s what’s preventing me: Smart Objects. Before I begin, I know Adobe is never going to let you in on Smart Objects. PSD documents that include them will open up with these layers rasterized. But let’s consider that your embedded documents are pretty much there. I can add a Photo or Designer file to Photo or Designer or Publisher and I can edit the document just as I would a smart object, and see live updating on the master document - which is ahead of Photoshop in that regard. Also if it’s a Designer file in Photo I can edit in Designer without leaving Publisher or Photo.) In Photoshop you can only edit a vector with Illustrator). Then with the embedded document I can add a few live filters such as Distort>Perspective - which is a favorite in working in a mockup scenario. As a live filter I can go back and change the settings. I can also add some live blurs and a few other things. Sadly, the other Distort live filters don’t work as they have no effect on the embedded object. If you apply a non-live filter then the embedded document rasterizes, and then this gets destructive especially when placing a vector in a Photo document. I don’t mind converting my Photoshop PSB files (smart object files) to PSD then placing as embedded documents. This way I can have my entire core design and logo files standardized as Affinity vector and raster files, but the inability to do pinching and liquifying and other types of warping and shading stops me from doing this. Also there is no way to take a group of layers in Photo and convert easily to an embedded document. I really love how this works in Photoshop. It’s essential to my work, and this is the main thing keeps me on Photoshop. Hopefully Affinity can continue development here. Brushes. While I was praising brushes in Photo there is one simply itsy bitsy thing that is absolutely essential to my work. I need the brushes labeled with their actual names, as they are done in Photoshop. Photoshop has brush flyout panels - if you extend the panels. I have over two thousand brushes and it’s just too difficult to know what’s what in Photo. Even if there are groups, I can’t tell what the individual brushes are if there are two many. I can hover over the brush and then see if I’ve selected the correct one - this works well if you have a few brushes but not if you have so so many. LUTs. I love the live presets on LUTs. But honestly it is a chore to import them as presets. Also it takes too long to load the adjust layer presets. Photoshop allows you to add all the LUT files to the programs preset folder. Restart photoshop and they are all there. Pattern fills. Oh pattern fills. I keep reading in the forum that this is a badly needed feature and so I am throwing myself into this group. Yes I can work around this and have done so… but why? It’s so easy in Photoshop and I have a library of so many .pat files that I would love to use in Photo, just as I have converted my brushes, color files (with online converters) and gradients. Blend Options. I love your layer blend options UI - really easier to use than Photoshop. But shouldn’t it be part of Layer Effects? I want to add color fills for instance and select the blend options right then and there, so I can see what I’m doing as I can in Photoshop. Feathered masks. If I want to feather a mask in Photoshop I simply go to the mask properties and then adjust the feathering. In Photo I can’t feather a mask that’s been applied to an adjustment effect directly. I have to move the mask to a layer above, then apply a live filter, and then move the mask and its filter under the adjustment effect. I have to do these things all the time and this seems oddly cumbersome.
- 25 replies
-
- 7
-
-
- affinity photo
- photo
- (and 2 more)
-
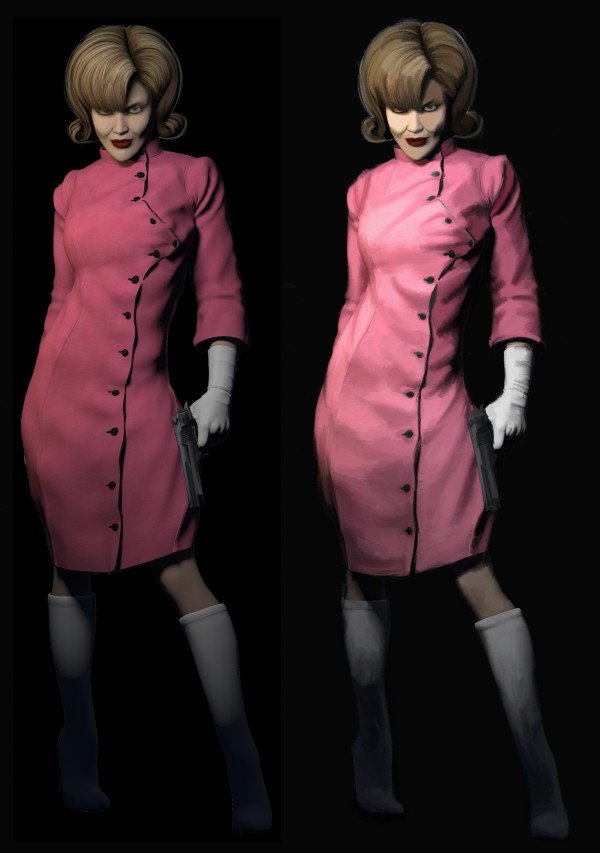
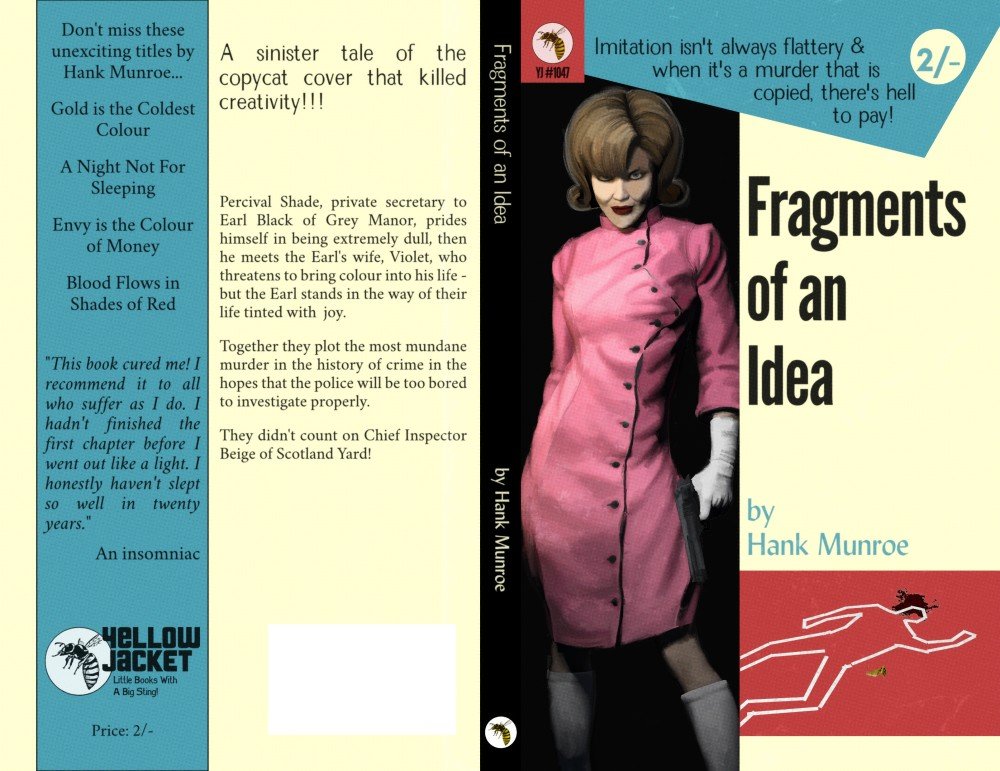
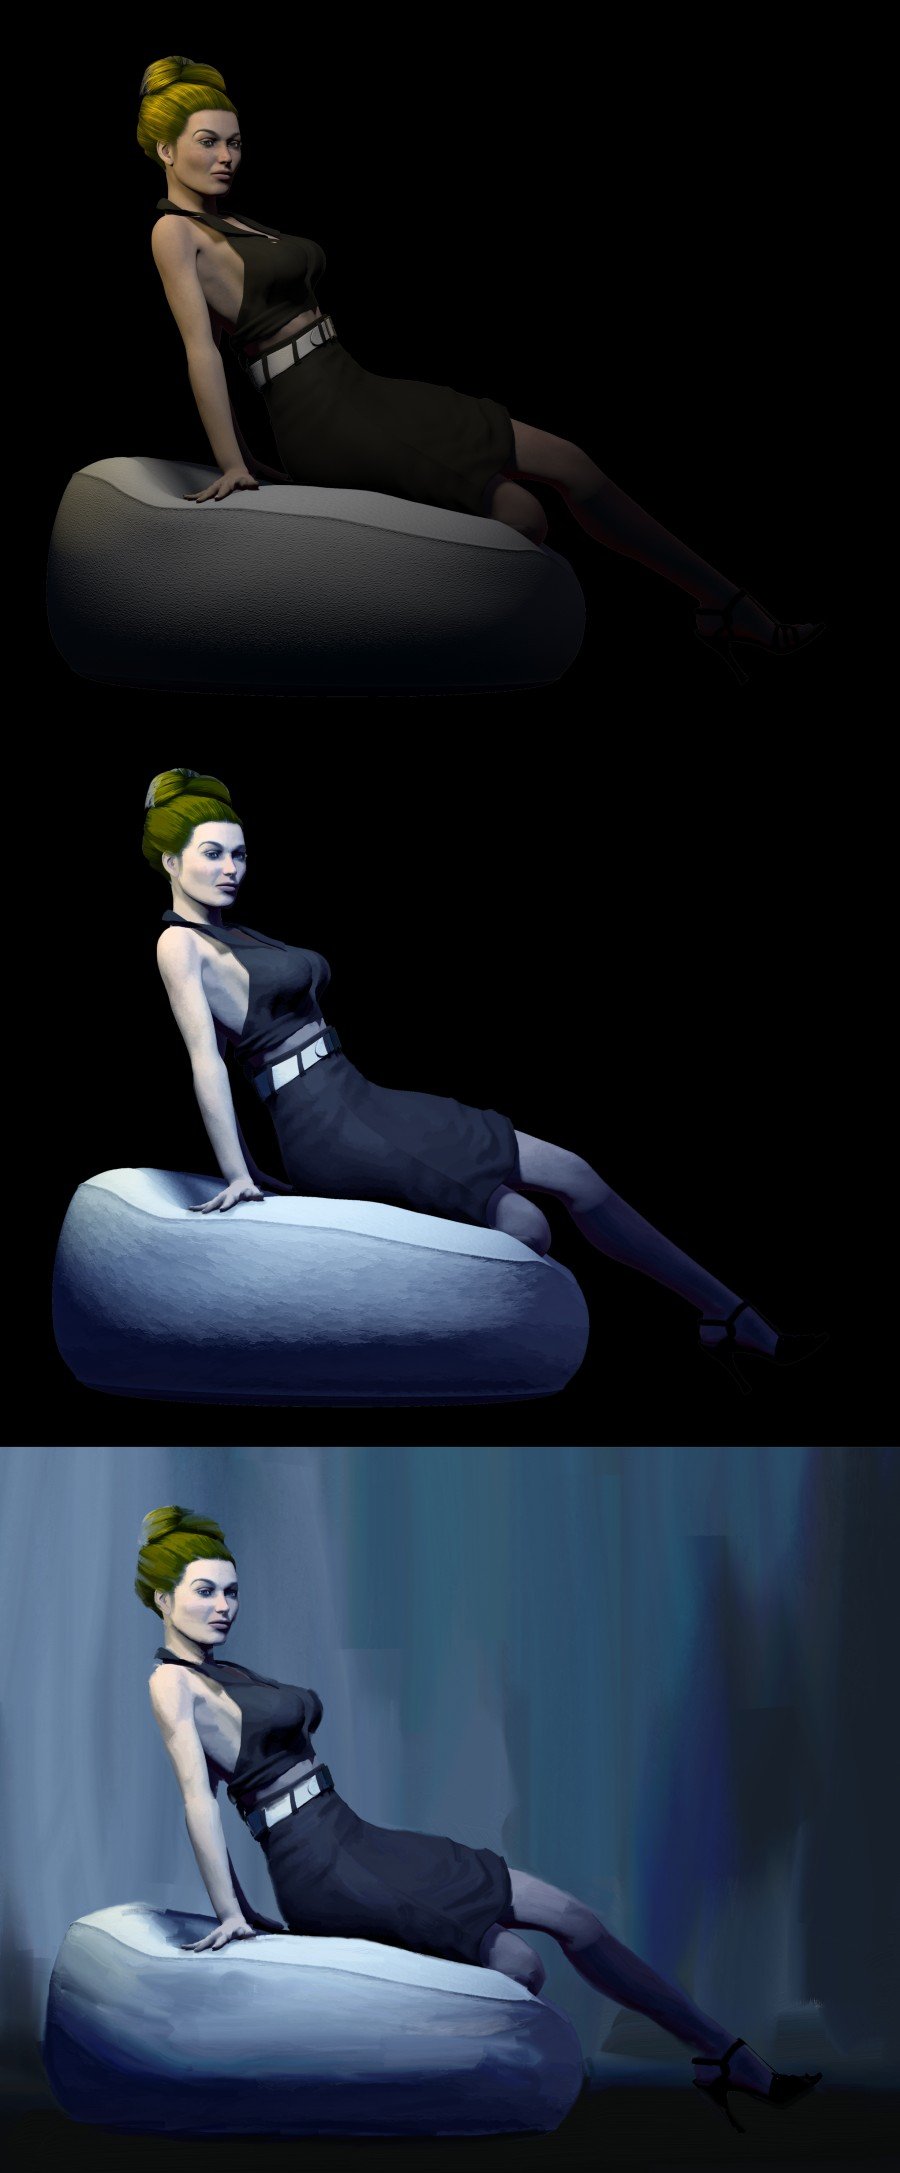
I've been working on how to create book covers that imitate those of the pulpy paperbacks of years past. The idea was to work on a method that others could use as a viable - and so necessarily cheap - option for the self and Indie publishing market. I had been making do with an old version of Photoshop Elements that came with my Bamboo Fun & Touch tablet but decided to take the plunge and try Affinity Photo when I got a new computer, and that turned out to be a very good decision. So... I start off in a program nobody likes to mention - Poser. I'm not too fussy about render settings as so much is changed in post, what matters is the figure, the posing, and the lighting. The result is then opened in Affinity Photo, where I start with some adjustment layers (highlights/shadows, brightness/contrast, colour balance), along with a plug-in from Topaz called Simplicity. This result is then saved out and opened up in a paint program called Art Rage and then attacked with an oil brush and knife to leave me with a faux painting. In Affinity Photo, I've been building some book cover templates and the faux painting is introduced there, with some wear and tear added for a display version. The two designs I've posted here were both based on Mike Shayne covers (the first is one I've seen copied by other publishers, the second is a bit of a classic - enough for someone to have created a font based on it). For very simple designs like this - ie a single figure with one or two props, and also assuming a cover design template is used, then the production time can be between 2-3hrs. I believe that someone more skilled than myself can probably do both a better job of it and at a faster time but even at my speed, I think this could mean a low enough cost for the target market. I don't think I'm ever going to be sufficiently happy with my own efforts to enter that market myself (or, to be honest, with enough free time), so I would like to encourage others to have a go themselves.
- 15 replies
-
- 18
-
-
 Hello people. I've noticed I can't import int Affinity Designer more than 15 libraries (*.afbrushes) : the sofware displays the message "X brushes were succesfully imported" but I can't see them anywhere. I've tried some stuff like undock brushes's window, etc I'm disapointed because : I've paid thoses brushes (DAUB) Affinity Photo can import more than 15 brushes like a charm. Keep it up, you're doing a fabulous work.
 -
 DEPRECATED THREAD The Photo tutorials listed below have been refreshed and moved. Please see this new thread or use the Affinity site Photo Desktop tutorials webpage In support of our fantastic photo editing app, please use this comprehensive and structured set of videos for accelerated learning! The video tutorials are available on Vimeo and YouTube via these links: Vimeo - http://affin.co/PhotoVids YouTube - http://affin.co/photoyt We now have a specific Beginners Series of videos tailored to absolute beginners, with a more manageable pacing and focus on concepts and straightforward procedures. They all include subtitles to aid understanding. The tutorial set includes: Beginners Series Opening & Saving - YouTube / Vimeo Layers - YouTube / Vimeo Adjustments - YouTube / Vimeo Filters - YouTube / Vimeo Exporting - YouTube / Vimeo Introduction Discover Affinity Photo Getting Started Technical Benefits Basics Document Setup Layer Concepts Layers Overview Live Filter Layers Scaling and Transforming Cutting Out Understanding DPI Accessing Help Transforming Document/Image Resizing Canvas Resizing Cropping: Practical Cropping: Aesthetic Straightening Images Cropping: Golden Spiral Cropping: Options Aligning Images Selections and Masking Making Selections Refining Selections Pixel Selections from Layers Quick Masks Mask Layers Exposure Merging Clipping vs Masking Vector Masking Using Adjustment Layers on Masks - YouTube / Vimeo Correction Adjustment Layers Levels Curves Shadows/Highlights Split Toning and Selective Colour LAB Colour Mode Defringing and Chromatic Aberration Live Perspective Haze Removal FFT Denoise Removing Lens Flares Changing Eye Colour Graduated ND Filter Effect Salvaging Underexposed Images Dual Perspective Correction Perspective Skew Correction - YouTube / Vimeo (New: 20th April) Retouching Cloning Inpainting Frequency Separation Liquify: Retouching Vector-Based Retouching Enhancing Landscapes/Architecture Vector Architecture: Worked Example Enhancing Camera Phone Photography Making Images Pop Revealing Sky Detail Bringing Out Water Detail Quick Inpainting Crooked Horizons - YouTube / Vimeo RAW Development Raw: Discover Develop Raw: Developing Images Raw: Overlays Raw: Redeveloping Images Raw: Noise Reduction Maximising Raw Latitude Custom Tone Curve Raw Development Quality 32-bit Raw Development - YouTube / Vimeo Raw Colour Quality Automatic Lens Corrections Raw: Recovering Overexposed Highlights Raw: Exposure Bias Getting Creative Lighting Creative Gradients Creative Black & White Sepia Images Brushes Blend Modes Blend Ranges Liquify Persona Sky Replacement Adding Borders Text: Branding/Watermarking Diffuse Glow Displacement Circular Bokeh Swirling Bokeh Simulating Ambient Occlusion Texturing with Blend Modes Creating Atmosphere Creating Light Beams Vector Lighting Simple Gradients Technicolor Emulation - YouTube / Vimeo Creative Painting Colour toning with shapes Infrared Emulation Radial Blur Regular Tone Mapping Compositing Landscapes Adding Extended Borders Creating Photo Collages Abstract Ideas #01 Abstract Ideas #02 Enhancing Low Light Trails Light Painting Compositing Tone Mapping Portraits HSL Tonal Separation - YouTube / Vimeo Orton Effect - YouTube / Vimeo Design Aids Snapshots Modifiers Designer/Photo Interworking Pixel Accurate Design Placing Documents Useful Keyboard Shortcuts Non Destructive Inpainting and Cloning Layer Creation Behaviour Layer Nesting Exporting 3D LUTs LUTs for Tonal Adjustments View Points Global Cloning Subtle Toning Multiple Colour Formats Scopes Curves Picker Non-Destructive Dodge & Burn Flexible Defringing Edge Detection for Masking Split & Mirror View Batch Processing Clone Sources Pixel Art Resize Direct PSD write-back (round tripping) Freehand Selection Tool Undo History Importing .abr Brushes Undo Brush with Snapshots Quick Toggling Panels - YouTube / Vimeo Light UI - YouTube / Vimeo Brush Stabilisation - YouTube / Vimeo Channels Channels Channels for Alpha Masking Channels: Creating/Storing Selections Editing Single Channels Channels: Greyscale Blending Channel Packing Filters Live Filter Layers (Also in Basics) Apply Image Apply Image: Equations Equations Filter Dust & Scratches Filter Halftone Scanlines Effect Mirror filter Diffuse Glow Filter Defeating Filter Limits Panoramas Panoramas Tricky Panoramas Panorama Distortion Correction HDR (High Dynamic Range) HDR: Merging & Tone Mapping HDR from one exposure - YouTube / Vimeo HDR: Tone Map Presets HDR: Panoramas HDR: Preprocessing HDR: Advanced Editing HDR: Ghosts Removal HDR: 32-bit Editing Focus Merging (Focus Stacking) Focus Merging Focus Merge Retouching Focus Merging Bracketed Exposures Live Stacking Maximum Stacking Big Stopper Effect Light Painting Blending Stacking: Long Exposure Simulation Stacking: Noise Reduction Stacking: Object Removal Stacking: Exposure Merging Stacking: Star Trail Effect Live Projections (360 editing, perspective projection) 360 Live Editing - YouTube / Vimeo 360 Advanced Editing 360 Retouching 360 Multiple Views 360 Roll Correction - YouTube / Vimeo Live Perspective Projection OpenEXR/32-bit OpenEXR Multichannel Import/Export OpenEXR Import Options Editing 32-bit 3D Renders OpenEXR: Using Alpha Channels & Association 3D Render/Texture Work Seamless Textures Clone Sources: Texture Creation Enhancing 3D Renders #01 Enhancing 3D Renders #02 Tone Mapping 3D Renders 3D Relighting with Normal Map Passes - YouTube / Vimeo Colour Management OpenColorIO Setup OpenColorIO Adjustment Soft Proofing Printing on Mac Printing on Windows Wide Colour Profiles vs sRGB - YouTube / Vimeo Macros Macros Macros: Equations Macros: Layer Behaviour Batch Processing with Macros Finishing Off Sharpening Selective Sharpening Exporting Export Compression Efficiency Plugins Installing Nik Plugins (macOS) Installing Nik Plugins (Windows) Installing & Using Nik Dfine Projects Nature Portrait Supermoon Product Shot Retouching #01 Nighttime Architecture Workflow - YouTube / Vimeo Portrait Retouching Workflow - YouTube / Vimeo Bonus Content Uplift Epic Skies (1.6 Bonus Content) - YouTube / Vimeo Windows Workflow videos In addition to the regular tutorials, we've also got some workflow videos shot on the Windows version of Photo that cover using a variety of features to edit an image to completion. These tend to be released on a more informal basis. Hadrian's Wall Tiled Building Portrait Retouching Monochromatic Architecture Canary Wharf Banded Demoiselle Please let us know about areas you think need covering, have problems with, don’t understand, or just tell us if we’re on the right or wrong track. Simply reply to this pinned topic. Have fun with Affinity Photo! Best wishes from the Affinity Documentation Team!
 -
.thumb.jpg.6800ee623273eed4cf93a311483f65f9.jpg) Are these already on the list to be added (I didn't see them in the roadmap)? If not, please consider this a request. The use case for the file proxy is pretty narrow (such as when I'm working directly on a source image and not on the afphoto encapsulation of it) but the cmd-click path menu I find myself missing on a daily basis since I'm using the filesystem as my DAM right now and jumping around from folder to folder is painful or requires keeping multiple finder windows open for context (per open tab) rather than being able to directly jump to the location in question. Thank you!
Are these already on the list to be added (I didn't see them in the roadmap)? If not, please consider this a request. The use case for the file proxy is pretty narrow (such as when I'm working directly on a source image and not on the afphoto encapsulation of it) but the cmd-click path menu I find myself missing on a daily basis since I'm using the filesystem as my DAM right now and jumping around from folder to folder is painful or requires keeping multiple finder windows open for context (per open tab) rather than being able to directly jump to the location in question. Thank you! -

affinity photo Elegance & Intelligence Captured RAW
ClarityDynamic posted a topic in Share your work
The best of Chicago’s south side. This is showcasing the tried & true Sony A6000 with kit lens. I take this puppy into battle everyday & it hasn’t let me down yet. Shot 100% RAW and all post processing done on iPad using affinity. A quick snap & tons of fun refining - no longer do I spend hours in my armored Cadillac editing photos on a computer - the iPad is always on my person and I edit as I move. I earn my title of “The Chicago Architect” thanks to affinity & the iPad Pro.
-
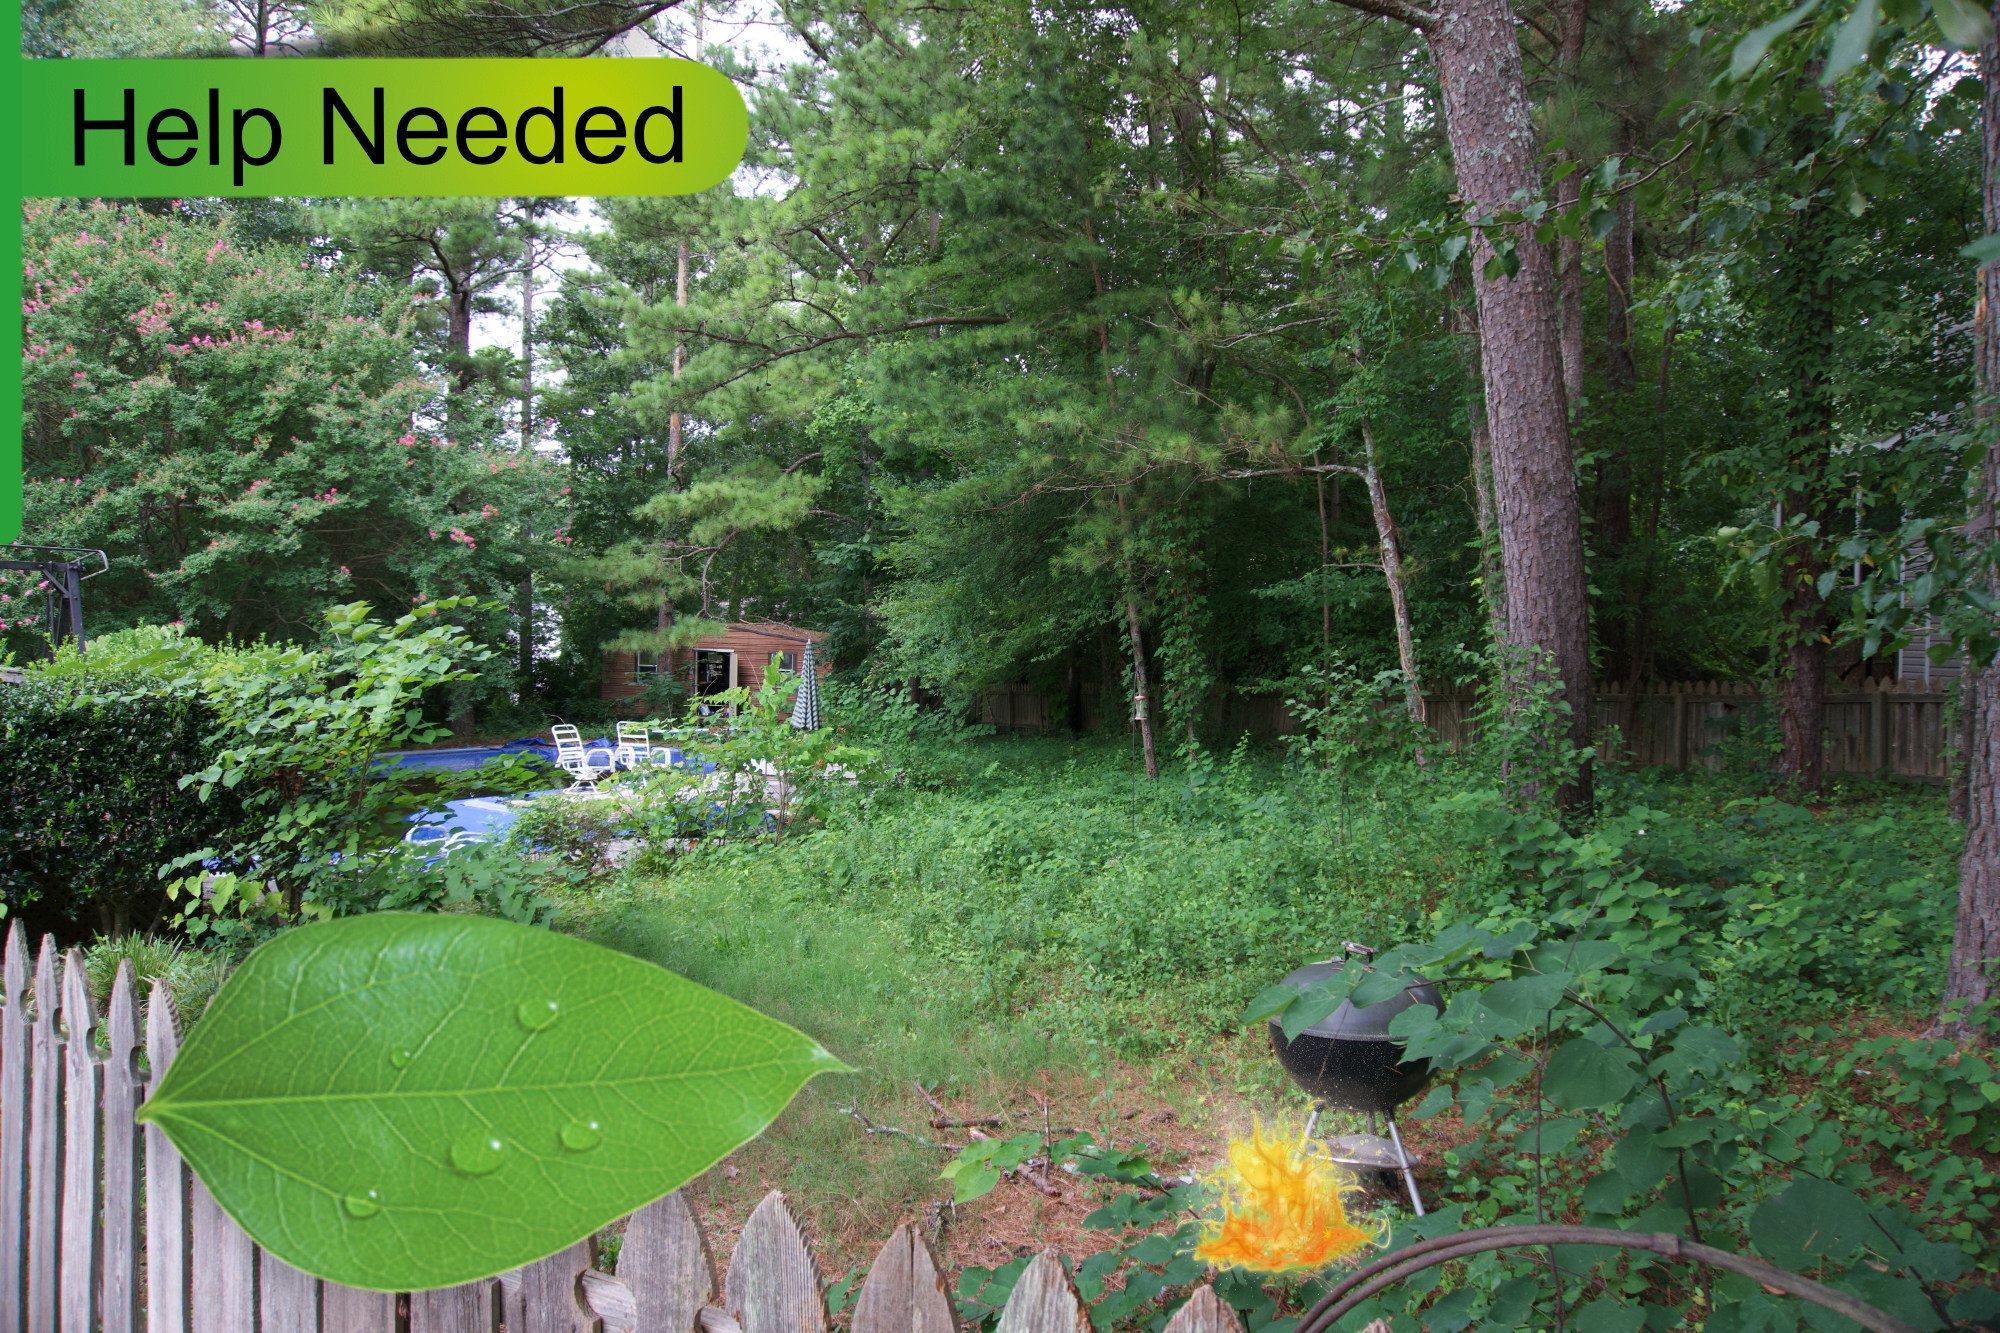
I am trying to make a visually appealing call for help with this yard. I have so many ideas how do I focus them and create a unique design out of this? Basically the end goal is for it to be a photo classified ad asking for landscapers or anyone to help get it under control. Going to use different graphical elements like vectors to design this But I can’t seem to be able to visualize anything that seems good. On the leaf for example I was going to include my contact information I thought it would be cool to have the flame in the grill but I couldn’t quite remember how to get a selection of the flame behind the grill and less I made a selection from the Grill a I thought it would be cool to have the flame in the grill but I couldn’t quite remember how to get a selection of the flame behind the grill unless I made a selection from the grill, maybe? Any ideas? I think if I knew everything affinity photo is able to do I wouldn’t be at a loss for creative ideas or many I need to expand my creative side I’m just not sure where to get ideas. Hopefully someone will have great advice to guide me on this journey. This was a RAW image taken with my Sony mirrorless A6000 kit lens - I love it the camera so far. Small and light I NEED MY CREATIVE JUICES FLOWING
-
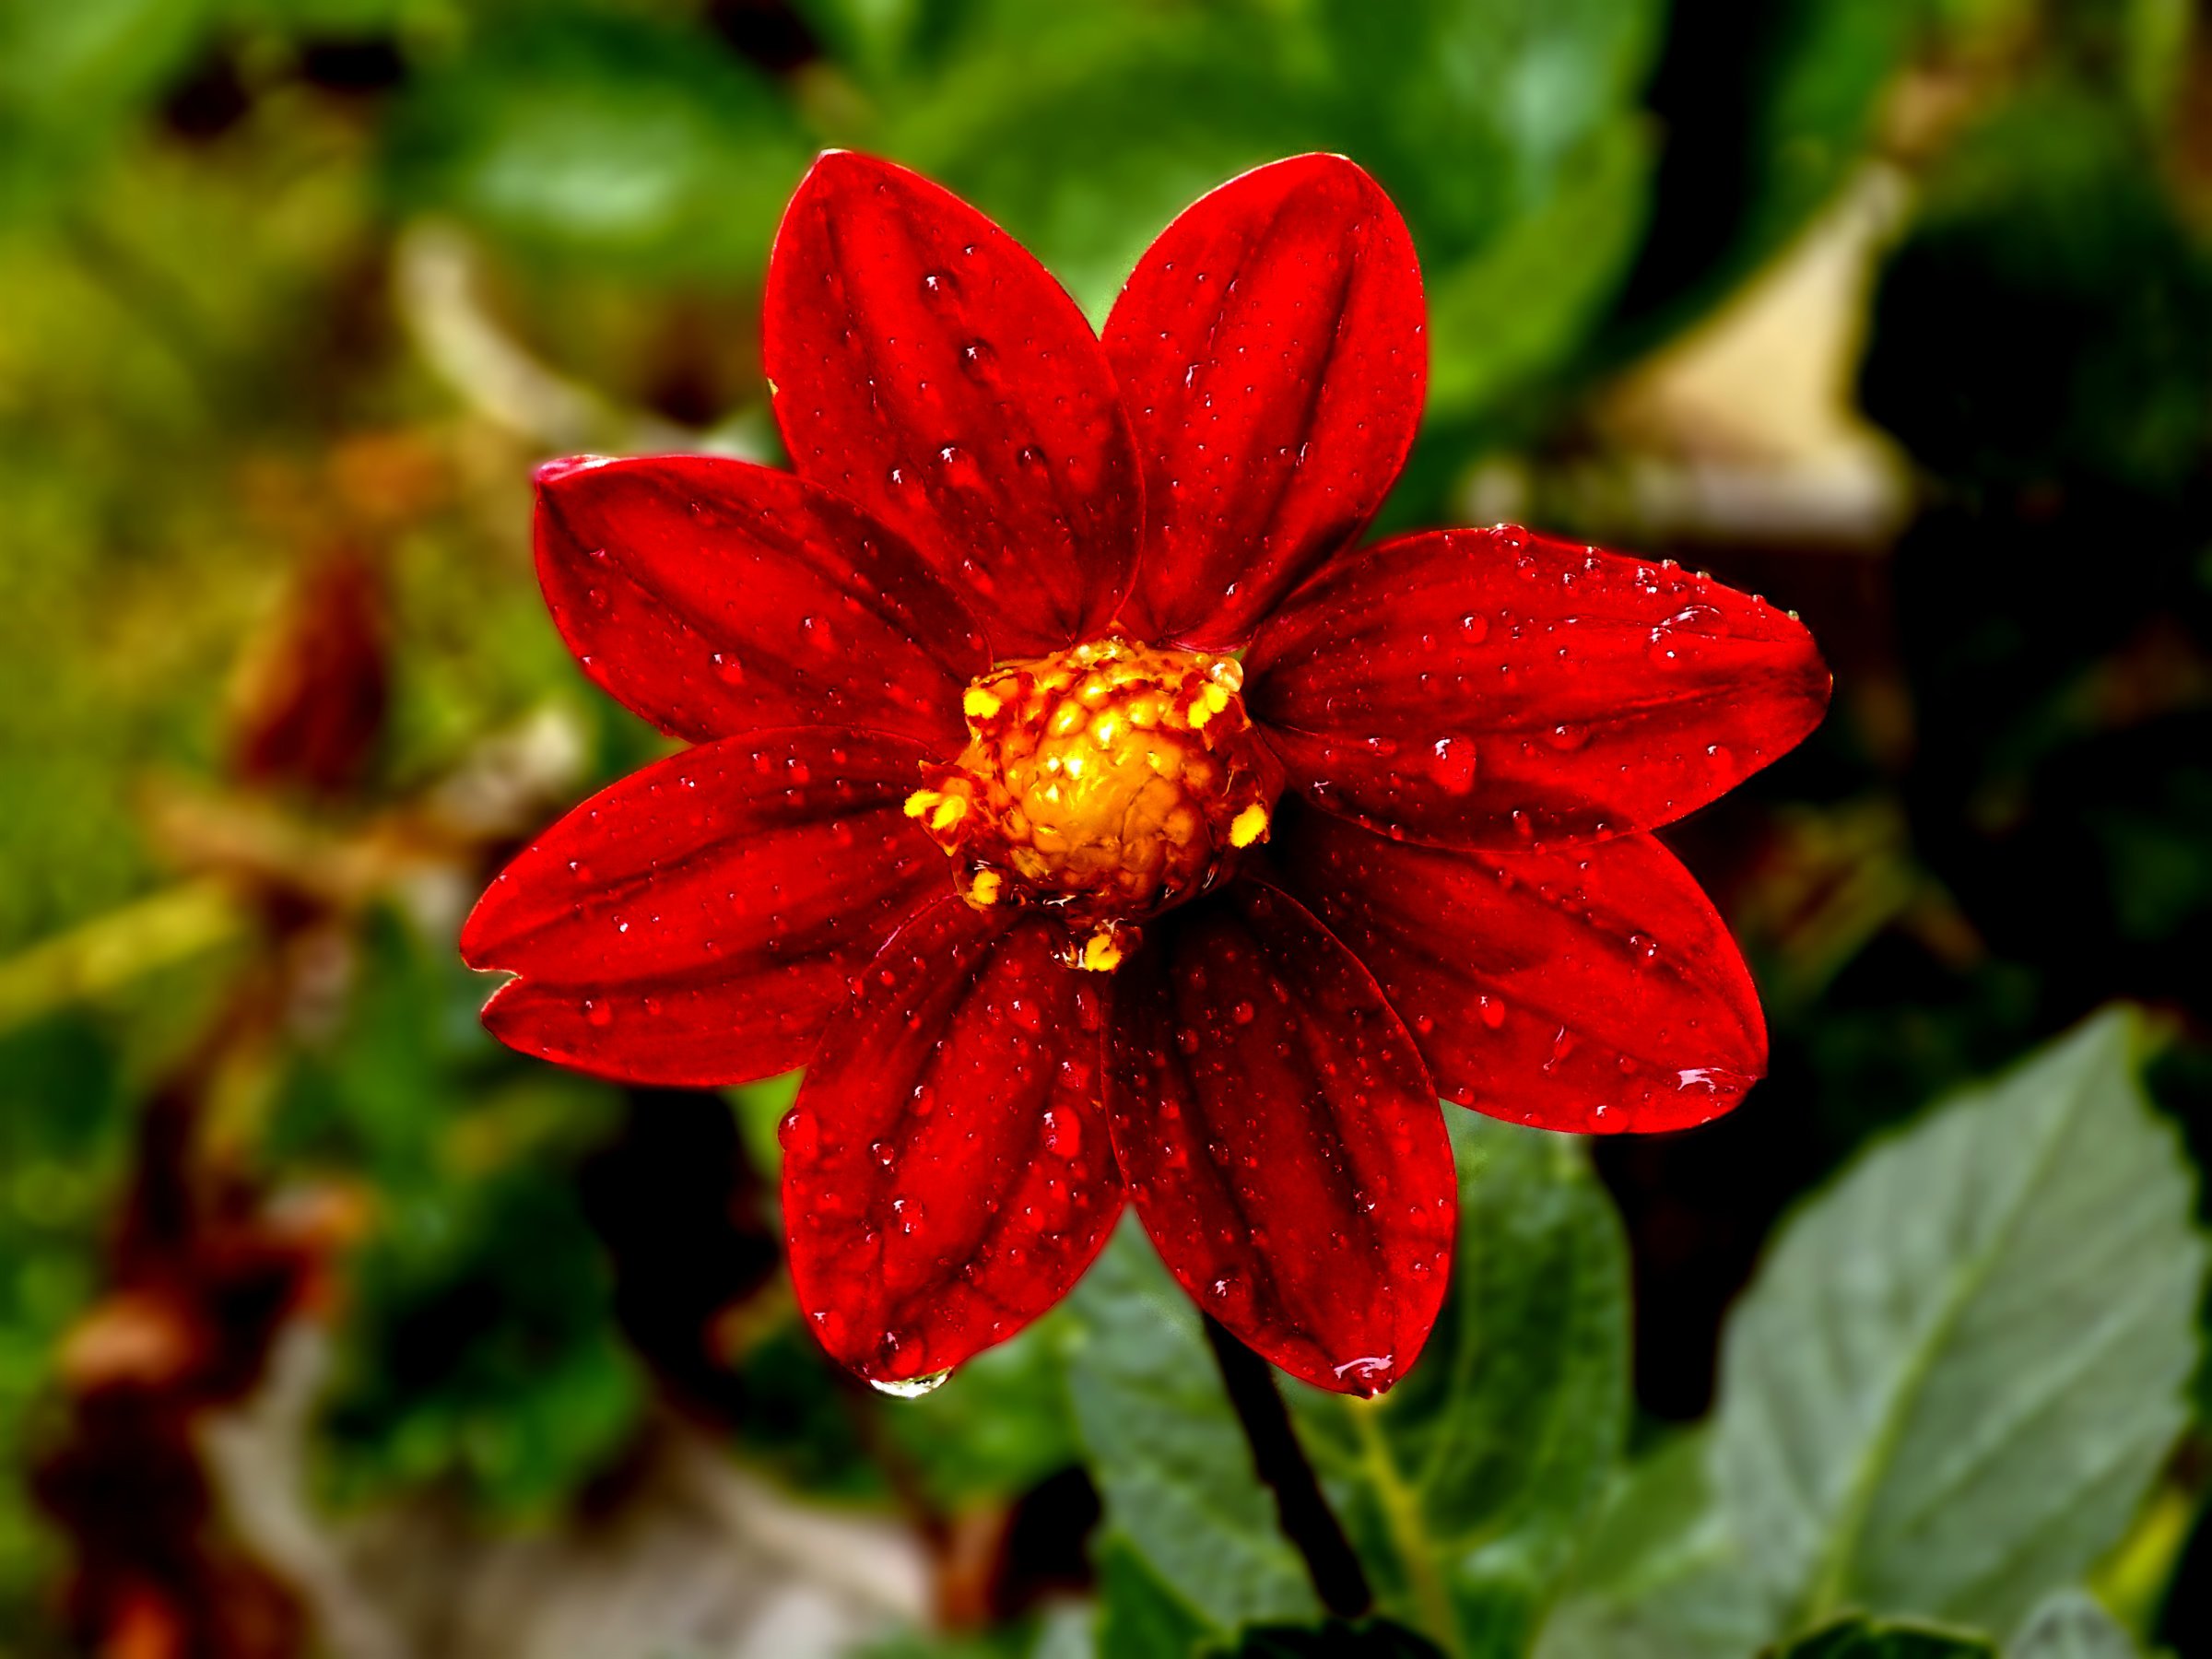
Probably a bit "overcooked" for most tastes, but I liked the way it came out.
-
 Is Affinity Photo better than Photoshop? Which should you buy? Which should you use? Can Affinity Photo dethrone Adobe Photoshop? Here is my take on this. Let's talk about it Support me on Patreon: https://www.patreon.com/sarikas Follow me on: https://www.facebook.com/sarikastutorials https://www.instagram.com/sarikasat/ Join us on Reddit: https://www.reddit.com/r/AffinityPhotoTuts/ Images Used: https://en.wikipedia.org/wiki/Adobe_Photoshop#/media/File:Adobe_Photoshop_CC_icon.svg https://www.freepik.com/free-vector/king-queen-golden-crowns_4393665.htm https://unsplash.com/photos/h8sl-oNcat0 Pages shown: https://photoshoptrainingchannel.com/ https://originalmockups.com/
 -
A photo-manipulation with my granddaughter Hailey
-
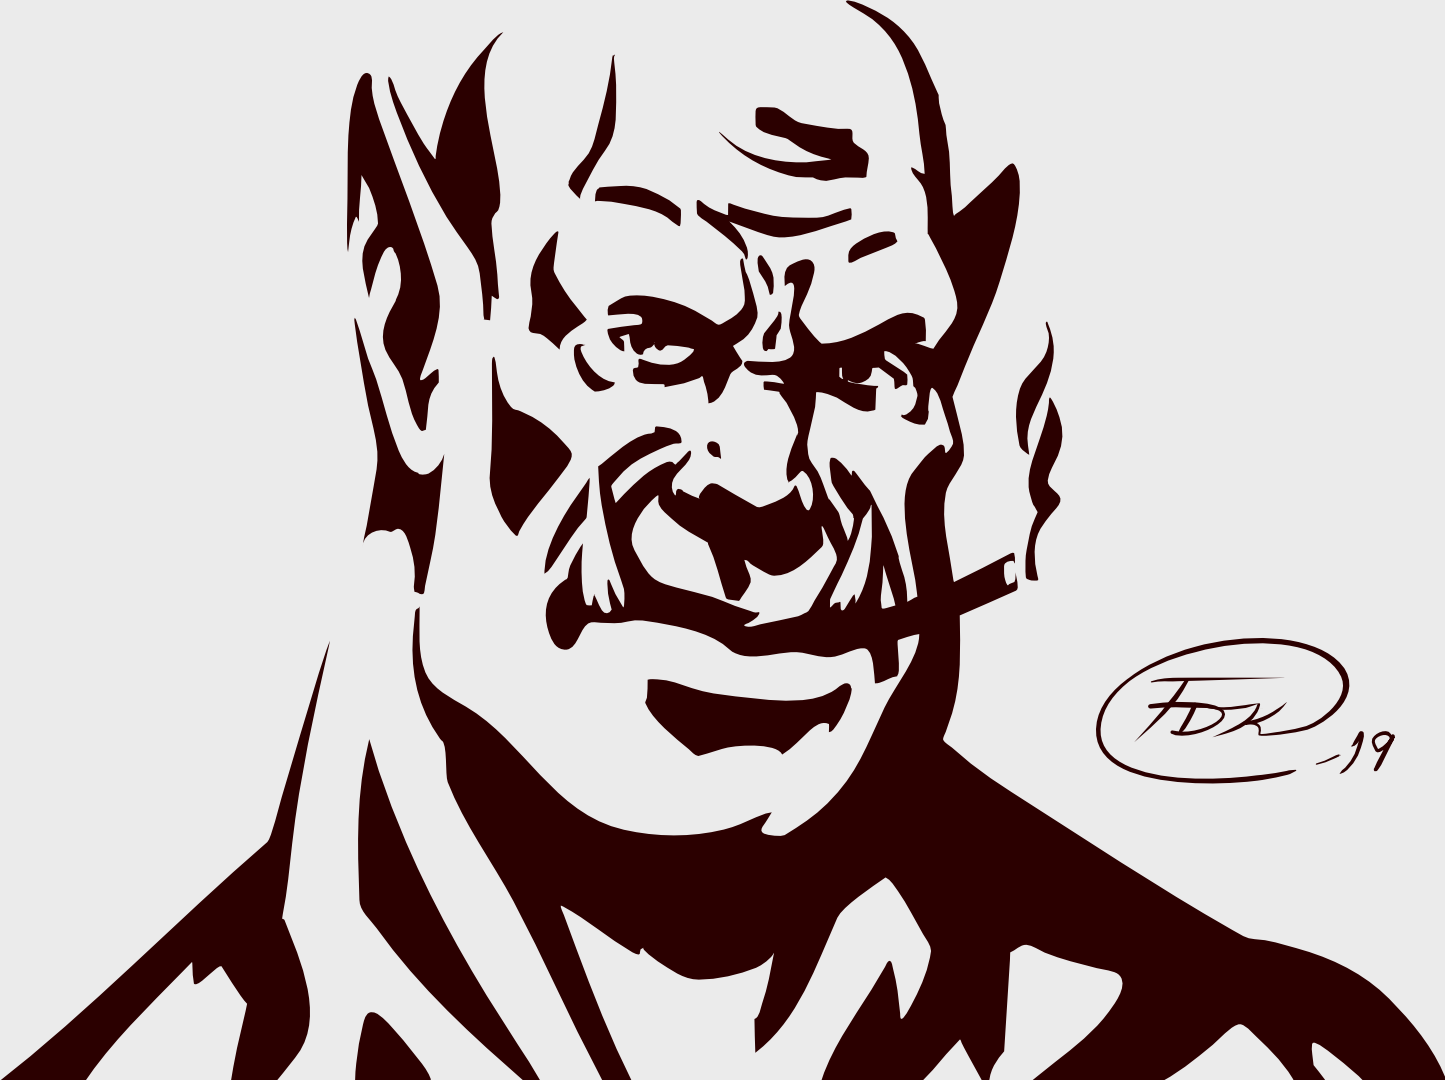
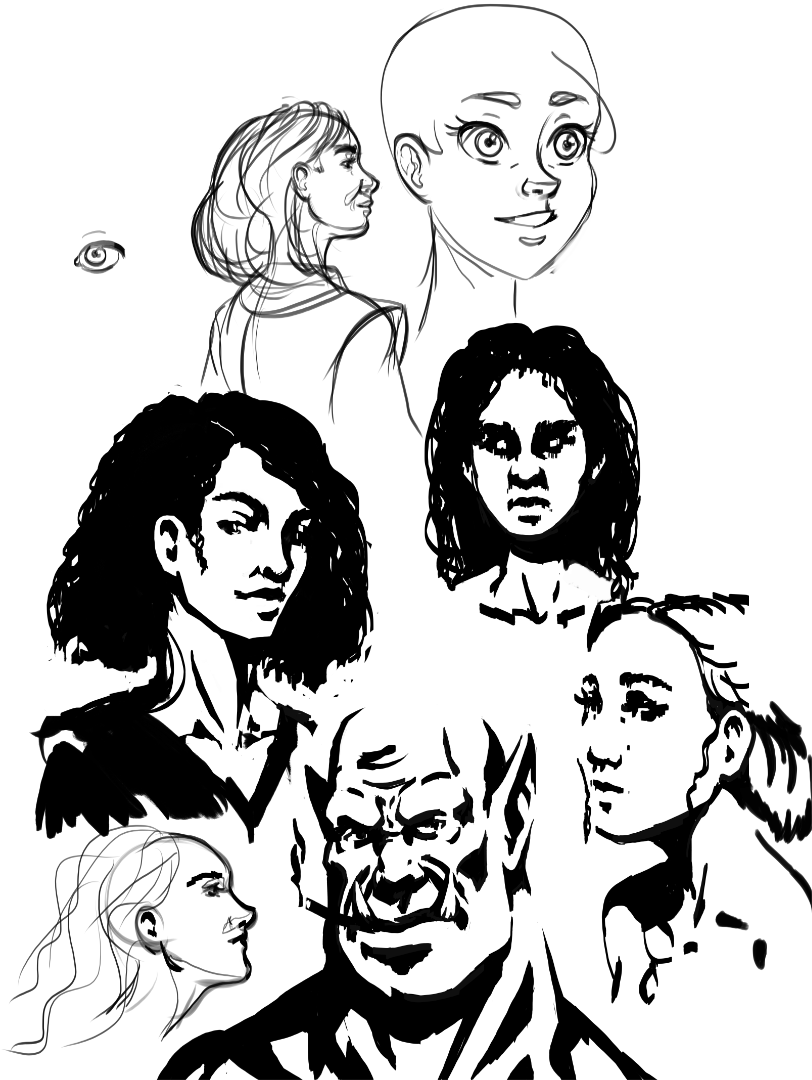
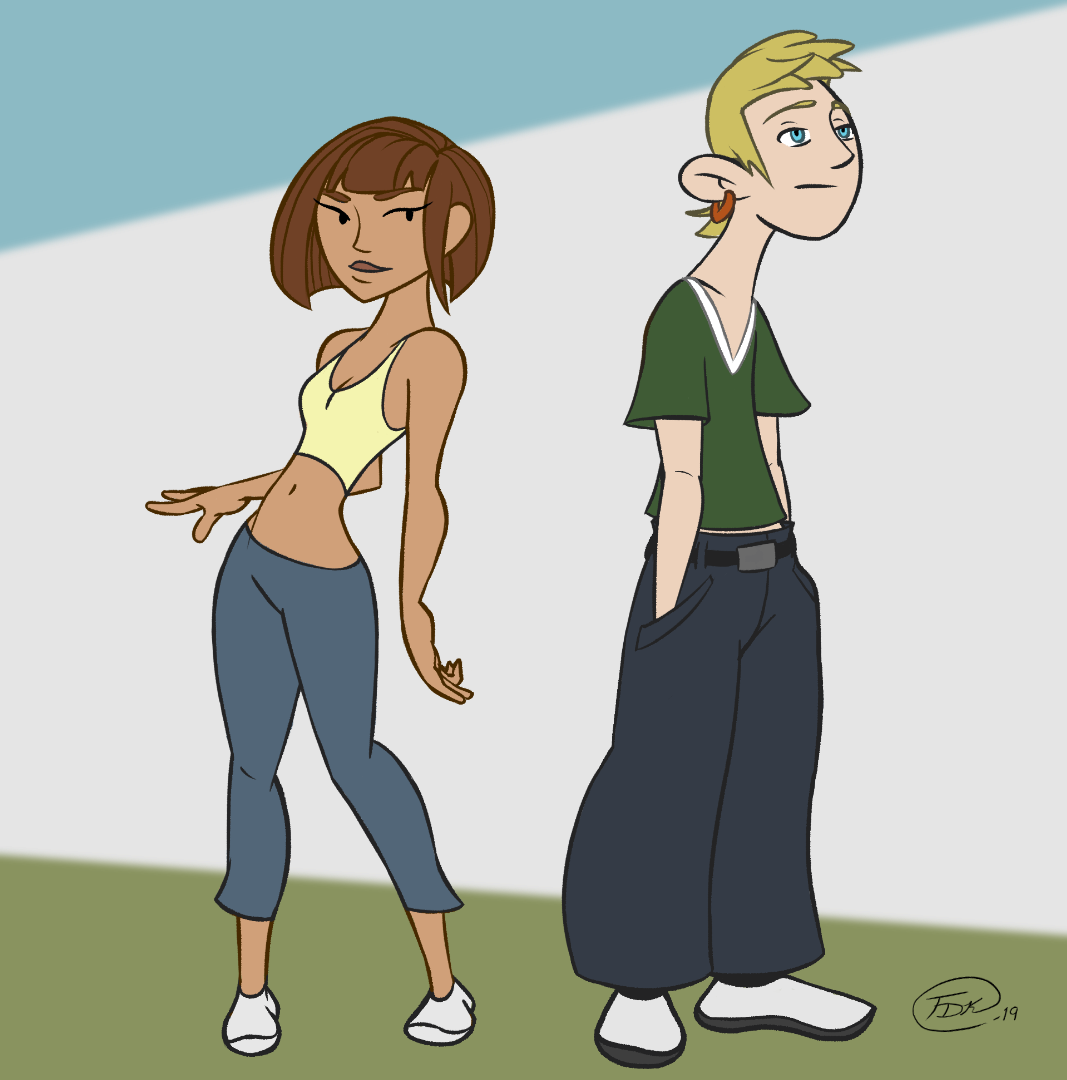
Been experimenting a bit with some brushes in Photo and wanted to share. For my vector piece that I cleaned up I used Inkscape and Designer to clean up the raster sketch I originally made in Photo. Really digging the new sculpt mode for the Pencil tool. It was really useful for removing unnecessary nodes and adjusting shapes. The Kim Possible inspired characters are an old Photoshop file I decided to clean up and finalize in Photo.
-
 Hi All, **For some reason the forum won't let me add a second image, I will clear cookies etc and try again** Currently testing Affinity Photo (Mac) via a ten day trial, just posting some queries on these forums before the trial expires, thanks for any help offered. Not sure if the screenshot shows it, but you can see little defects (like dark smudges) where Affinity has stitched images together. And when converting to black and white, the image looks very muddy, like there is no detail in the shadows of the mountain. When I do it in Lightroom, I have none of these issues and, while the image does require editing, out of the box it looks better and requires less work. I also disabled the option to auto apply changes in Lightroom, so that it would not auto adjust the image exposure settings. I hope the attached images shows what I have stated above. Am I doing something wrong? Thanks Iain
-
 Hi, I am currently trying to learn Affinity Photo and where everything is etc. for university and I have a logo which is bad quality as you can see from the first image and I am basically wanting to smooth the edges. The second image is to emphasise the jaggedness. What is the best tool to use in Affinity Photo to make it have smooth edges? Thanks so much. Help is much appreciated.
-
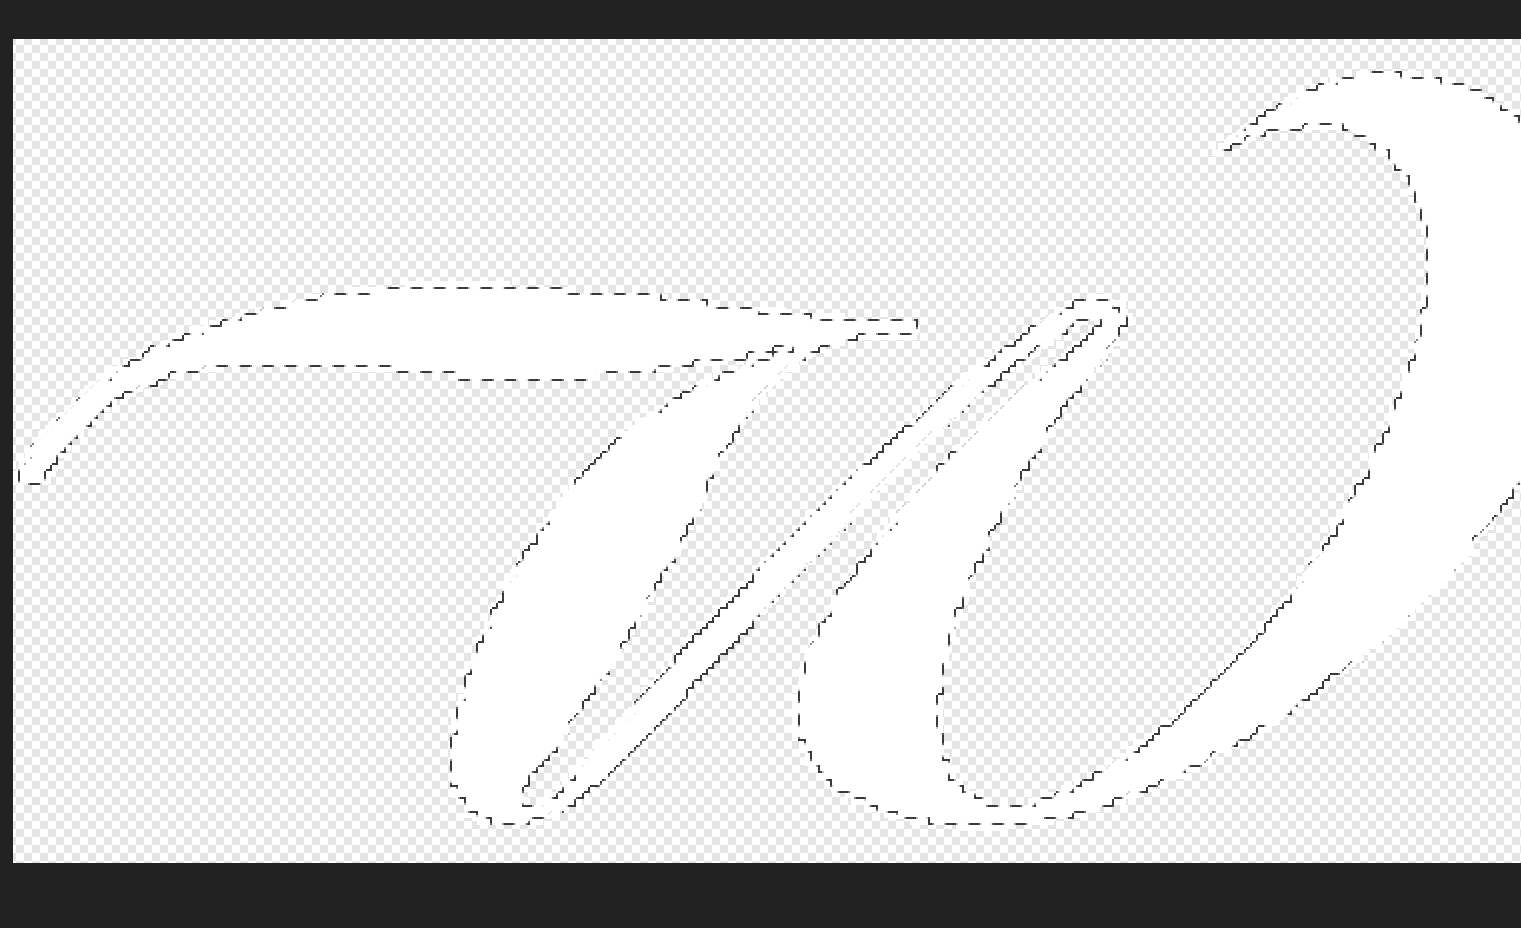
 It was very easy to preserve the transparency of a layer in PSD. But in Affinity Photo, I cannot figure it out. I have a semi transparent layer with black art in it in varying degrees of transparency. I want to fill the layer but preserve the transparency in oder to change the colour of the art. Cannot figure that out. Thought it would be very simple. Thanks for your help. Rob
- 9 replies
-
- 1
-
-
- transparency
- fill
- (and 1 more)
-
 Hi, I'd like to make a request to link the file rather than embedding the file when we use the Place Image tool in Affinity Photo. The function exists in Publisher and it'd be great if this could be implemented in Affinity Photo too. When working with composites, there are times when some originals still need to be editable. When we embed the original, it makes the filesize very bloated. A smaller file size would make it more efficient to work with composites so it'd be much appreciated please Thanks
 -
A cartoony monster face, because monsters deserve attention too. Concept by Joey Ellis. Sculpting and rendering done in Blender 3D. Post-processing and fine-adjustment performed using Affinity Photo. More images: metinseven.nl
-
As a longtime Photoshop user coming into Affinity Photo for pro work I wanted to suggest improvement for Photo's curve adjustment tool. Curves works great but I think the picker tool needs to be able to instantly pick on the curves graph as I click on areas in the picture. Right now I can add points but I have to wiggle left or right in order for the point to be added, and then I might accidentally pull the curve up or down slightly when all I wanted to do was to select a point. Use case for this is that I might want to select all the color areas in a face and protect those ranges. Or select a few area in a landscape and pull all those areas up and down. I mention this because I can easily and quickly do this in Photoshop but this is one of those things where I really struggle with in Photo. However I have an idea for making curves better in Photo than Photoshop. What if I could lasso or shift-select a given range of points I have made in curves? How amazing would that be. Then I can pull a select group of points up or down and this becomes quite powerful. Think of this like the ability to move a selected group of vector points in Designer. You can't do this in Photoshop. Perhaps you can just pull up the points or stretch the selection - I'm referring to all that you can do in Designer with selected vector points.
-
- 1
-
-
- affinity photo
- feature request
- (and 3 more)
-
-