Search the Community
Showing results for tags 'Affinity photo'.
-
 Are there any plans in the works to have updated Affinity reference manuals printed. I purchased one of the Photo reference/tutorial books when Affinity first published one, but there have since been LOTS of features added to all of the programs and a handy desktop reference guide at hand, without having to Google every little question I may be foggy on, would be WONDEROUS!!!! Thanks, -DON-
 -
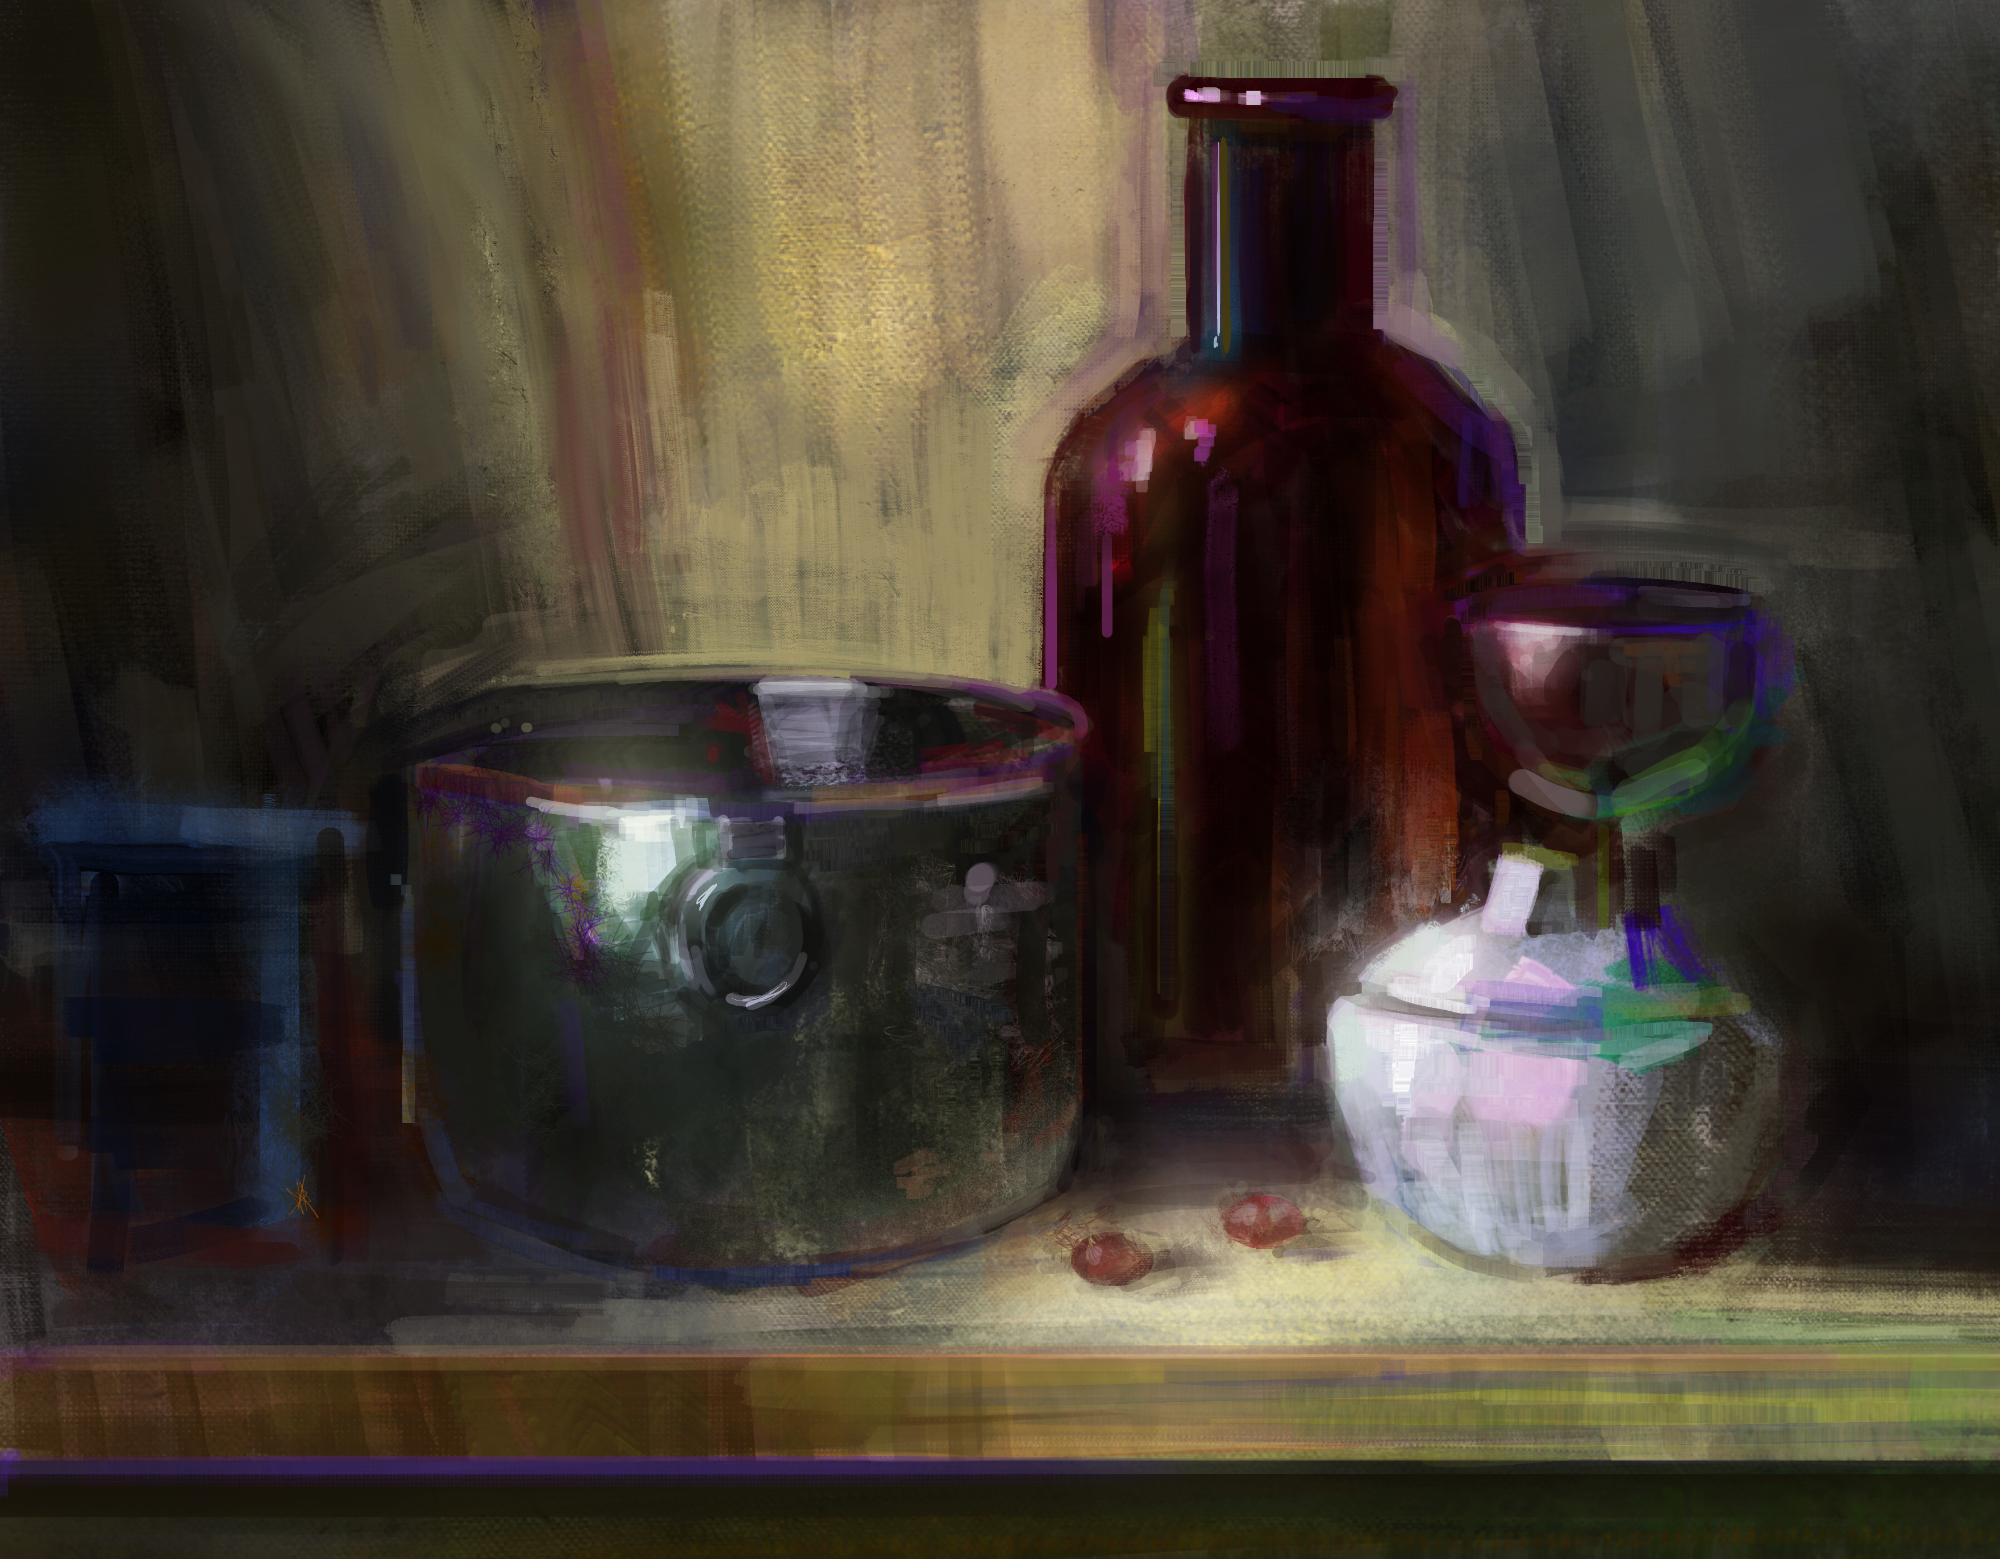
Pretty pleased with this one. I really like photos that incorporate vector shapes / line work, so wanted to have a stab at my own. The space / window section was done in Designer, than that file was placed into the larger picture in Photo with some further work done. I used a lot of tricks I learned from the lockdown Affinity sessions (isometric grids, using textures as overlays, various colour adjustments, etc.), so many thanks for those! 🙂
-
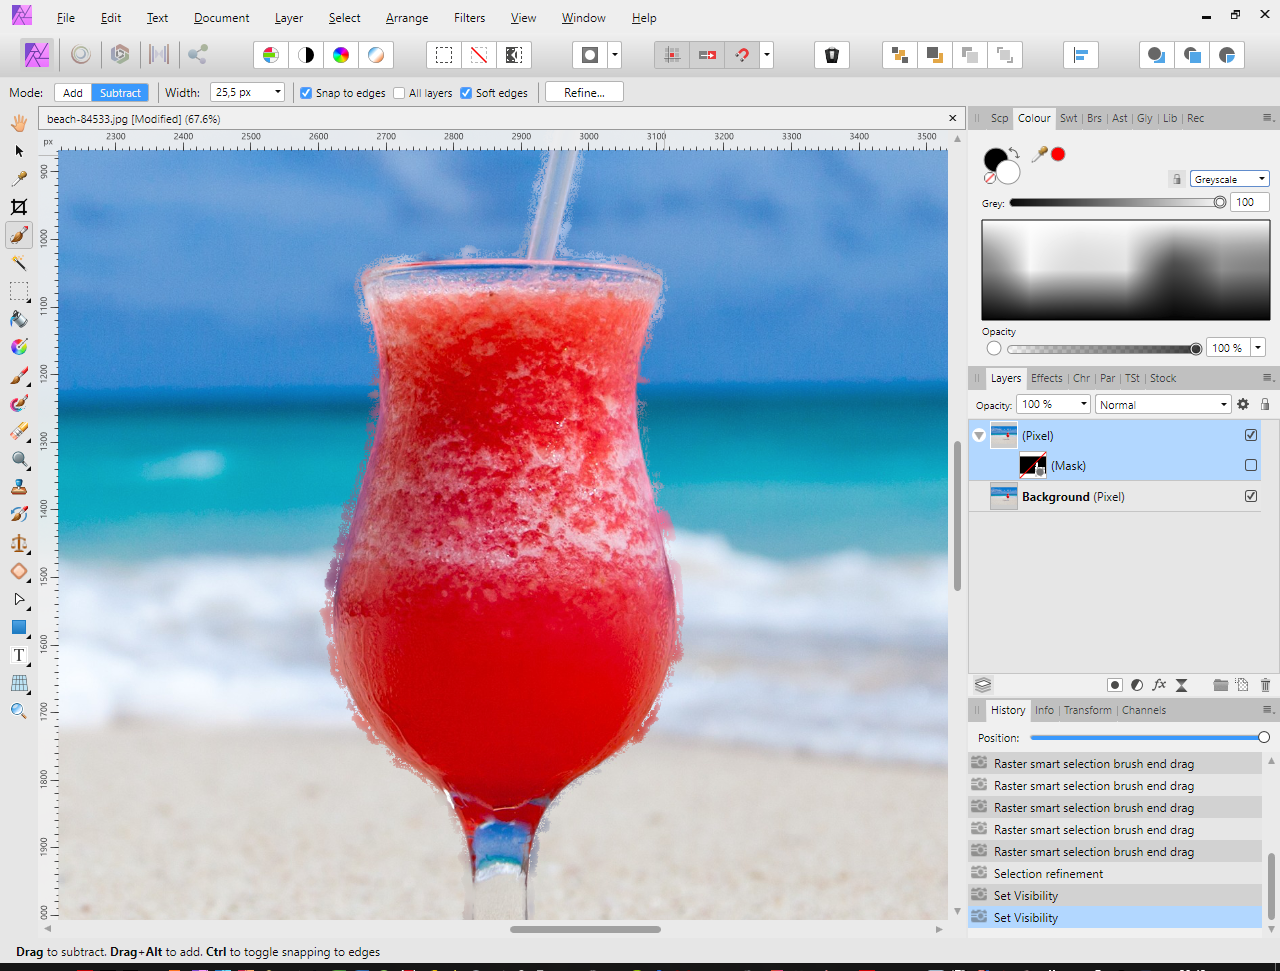
 I found a bug in AP, just follow next steps: open a picture select an item with Selection Brush Tool click to Refine in window change Output to New layer with mask, click OK turn on Background, and turn off mask see the results: you get a border (?) around selected area on image. If selected New Layer with mask the duplicated image will not same as Background! Need delete second image, duplicate background, and move mask under this third layer. Please fix this! I attached my screenshot from this "border".
-
 Affinity Photo filling areas for example paint brush made area. i seen their demostartion video where there is docuemnt where is shapes are made with geotric tools (i dont even know how) they filled areas with flood fill tool with bitmap. i dont understanded it tired many times and is possible but how area what i made paint brush tool i can fill this kind areas single colour but bitmap and gradient fill no luck. please give docuemntation stills and words not in video. single reason i can print pages but noi videos and keeping focus to video is harder and i understand better what i read than what i hear.
 -
New CD Package for Ricky Byrd's latest release, "Sobering Times." Went through a thousand or so iterations of the cover (seems like it) which ended up being the BACK cover as Ricky liked a more recent photo (the one on the FRONT cover) as it has more attitude. I've worked with musicians all my life and this is part of the process. It's that odd sensibility of knowing what they want but only when they finally see physically what they have going on their heads. As a designer, it's my job to extract that vision and make it a reality.
-
 I am right handed and have a 21 inch screen and I have to reach all the way across to the left side of the screen when I need to select tools. Is there anyway to move the Tools Bar so that it locks to the right side of the art board? Like the mock GUI pictured . . . thanks
-
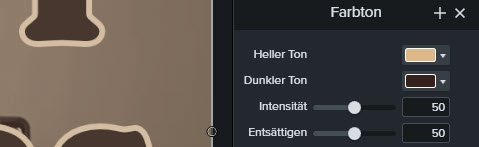
 Hi there, I have 3 branding colors (1 main accent, one near white and one near black). In my video editor I found an option to set a different color for the light and the dark tone independently. So I set 2 of my colors, set the saturation and the intensity each to 50% - voila, loved the result. Now I want to do the same to my photos for branding reasons. So I tried all the options I could find (including the colorize function with the 2 sepia presets) but didn't get really close. How can I do this in Affinity Photo? Thanky ou for your help, Andi PS: My exact colors are vintage white: #FCF9F2 / 252 249 242 (instead of plain white) beige: #DEB887 / 222 184 135 dark brown (instead of plain black): #35211D / 53 33 29.
-
Fill layers how use two or more in same time way here i can edit their shapes as well? for different areas in picture. but keep them editable way. my first test at least i cannot do this. i can change patterns/of colorus of fill but i cannot edit anymore i feel these fill areas shapes. have reason but not at least now words tell why i think is not possible. shape means here area here filling is made.
-
Pretty new user here, and have a question: Can I save a crop/rotate and apply that on other images? I have some identical product images, bust some lit, not lit etc. I want to apply the same crop & rotate at all of them. I didn't see any save crop function, so i ask.
-
most easy way get cat from picture and put it another picture? is there any tools what makes selecting such complex things easier. i need do such things and one my friend even want see it becosue she also want do such things.
-

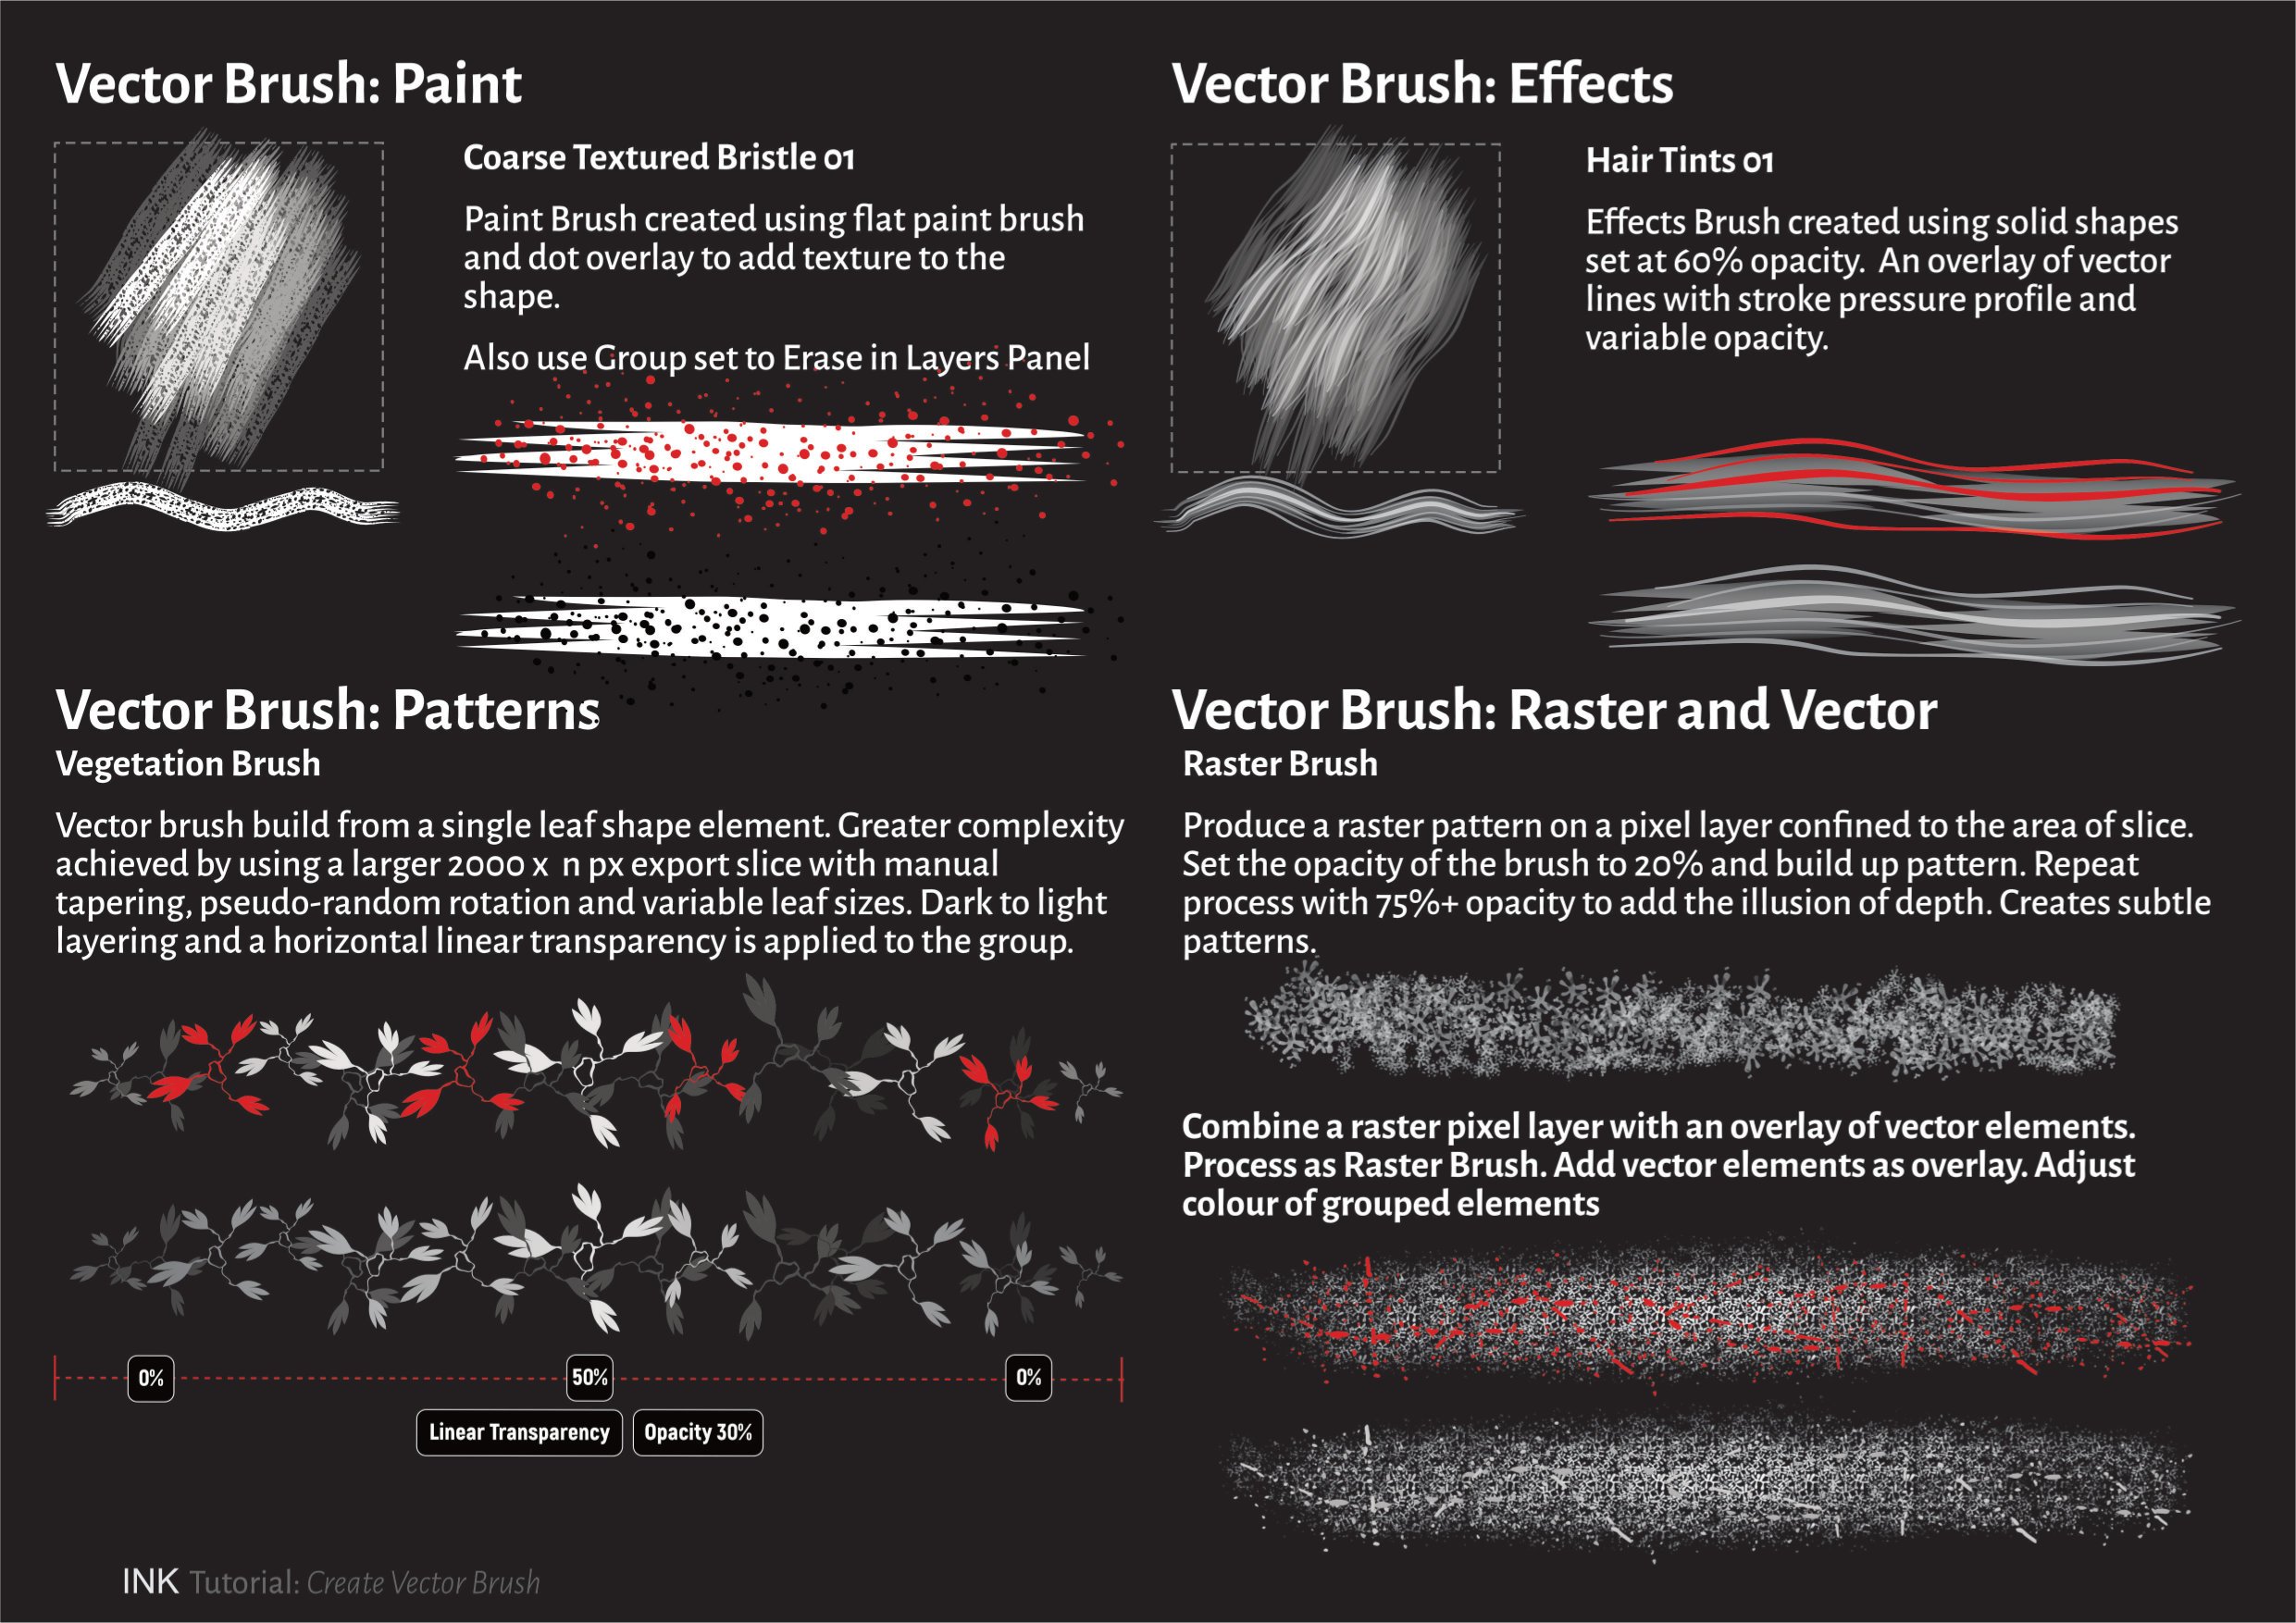
multi Creating Vector Brushes
StuartRc posted a topic in Tutorials (Staff and Customer Created Tutorials)
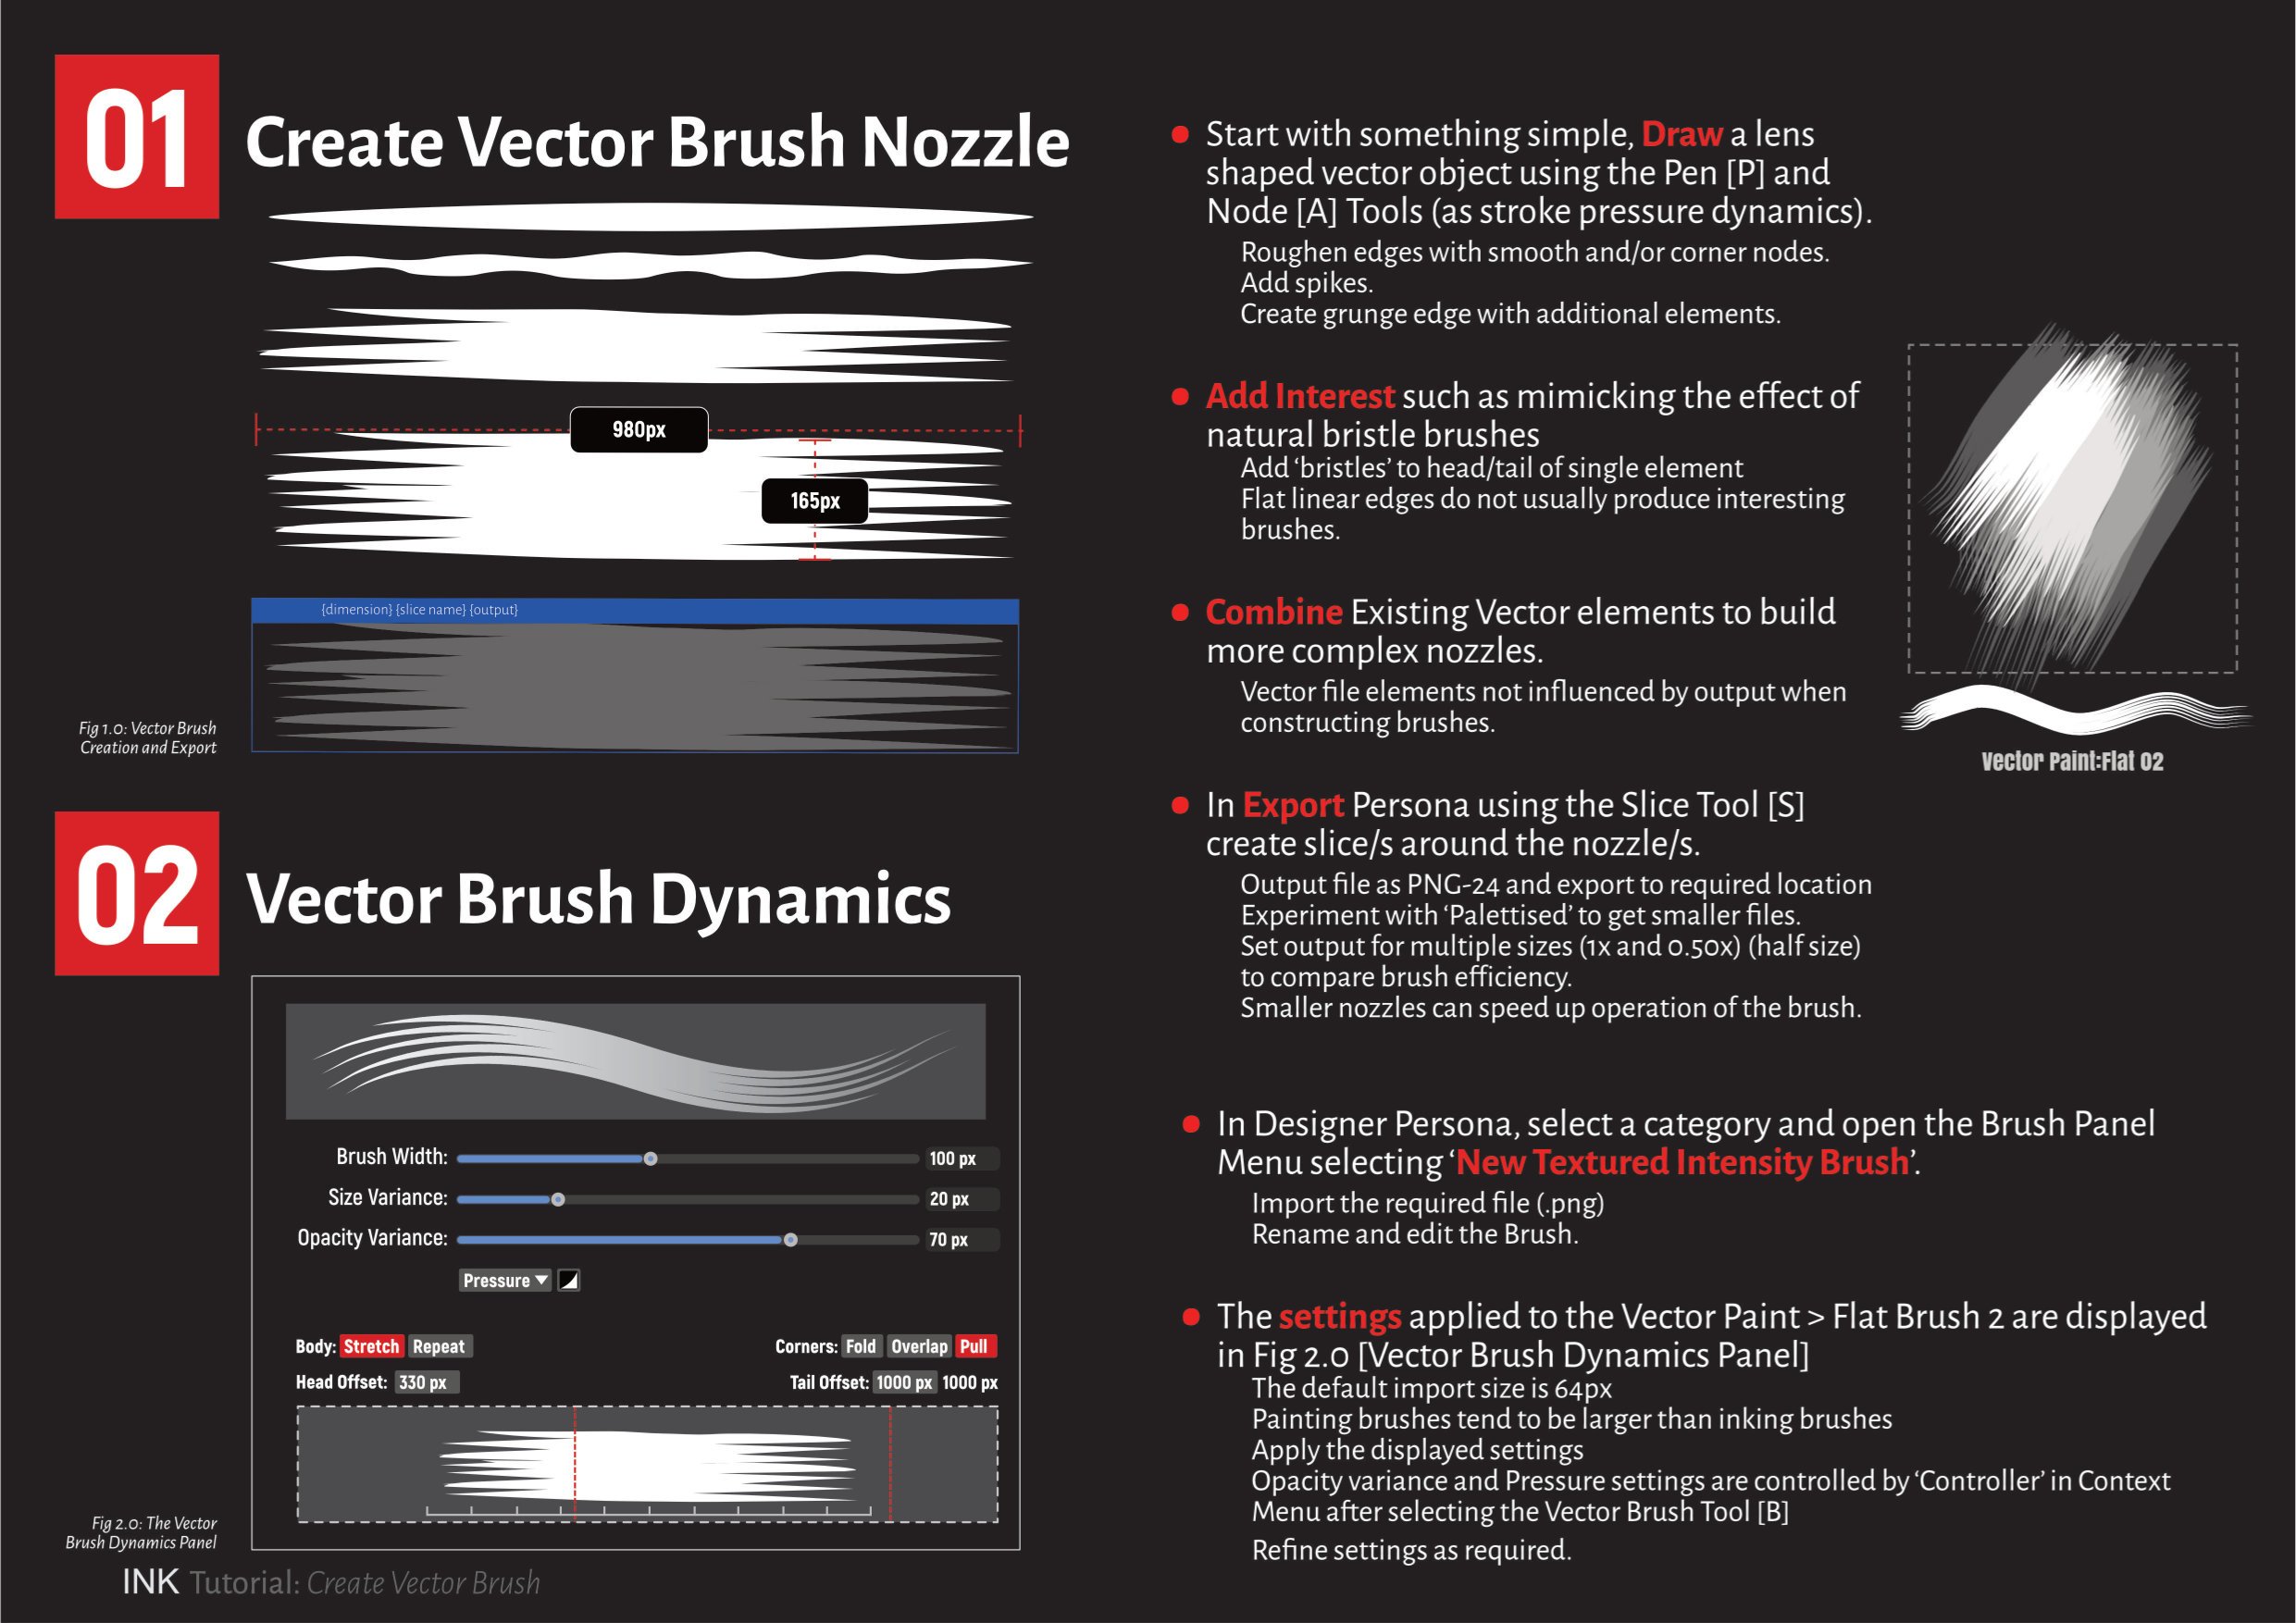
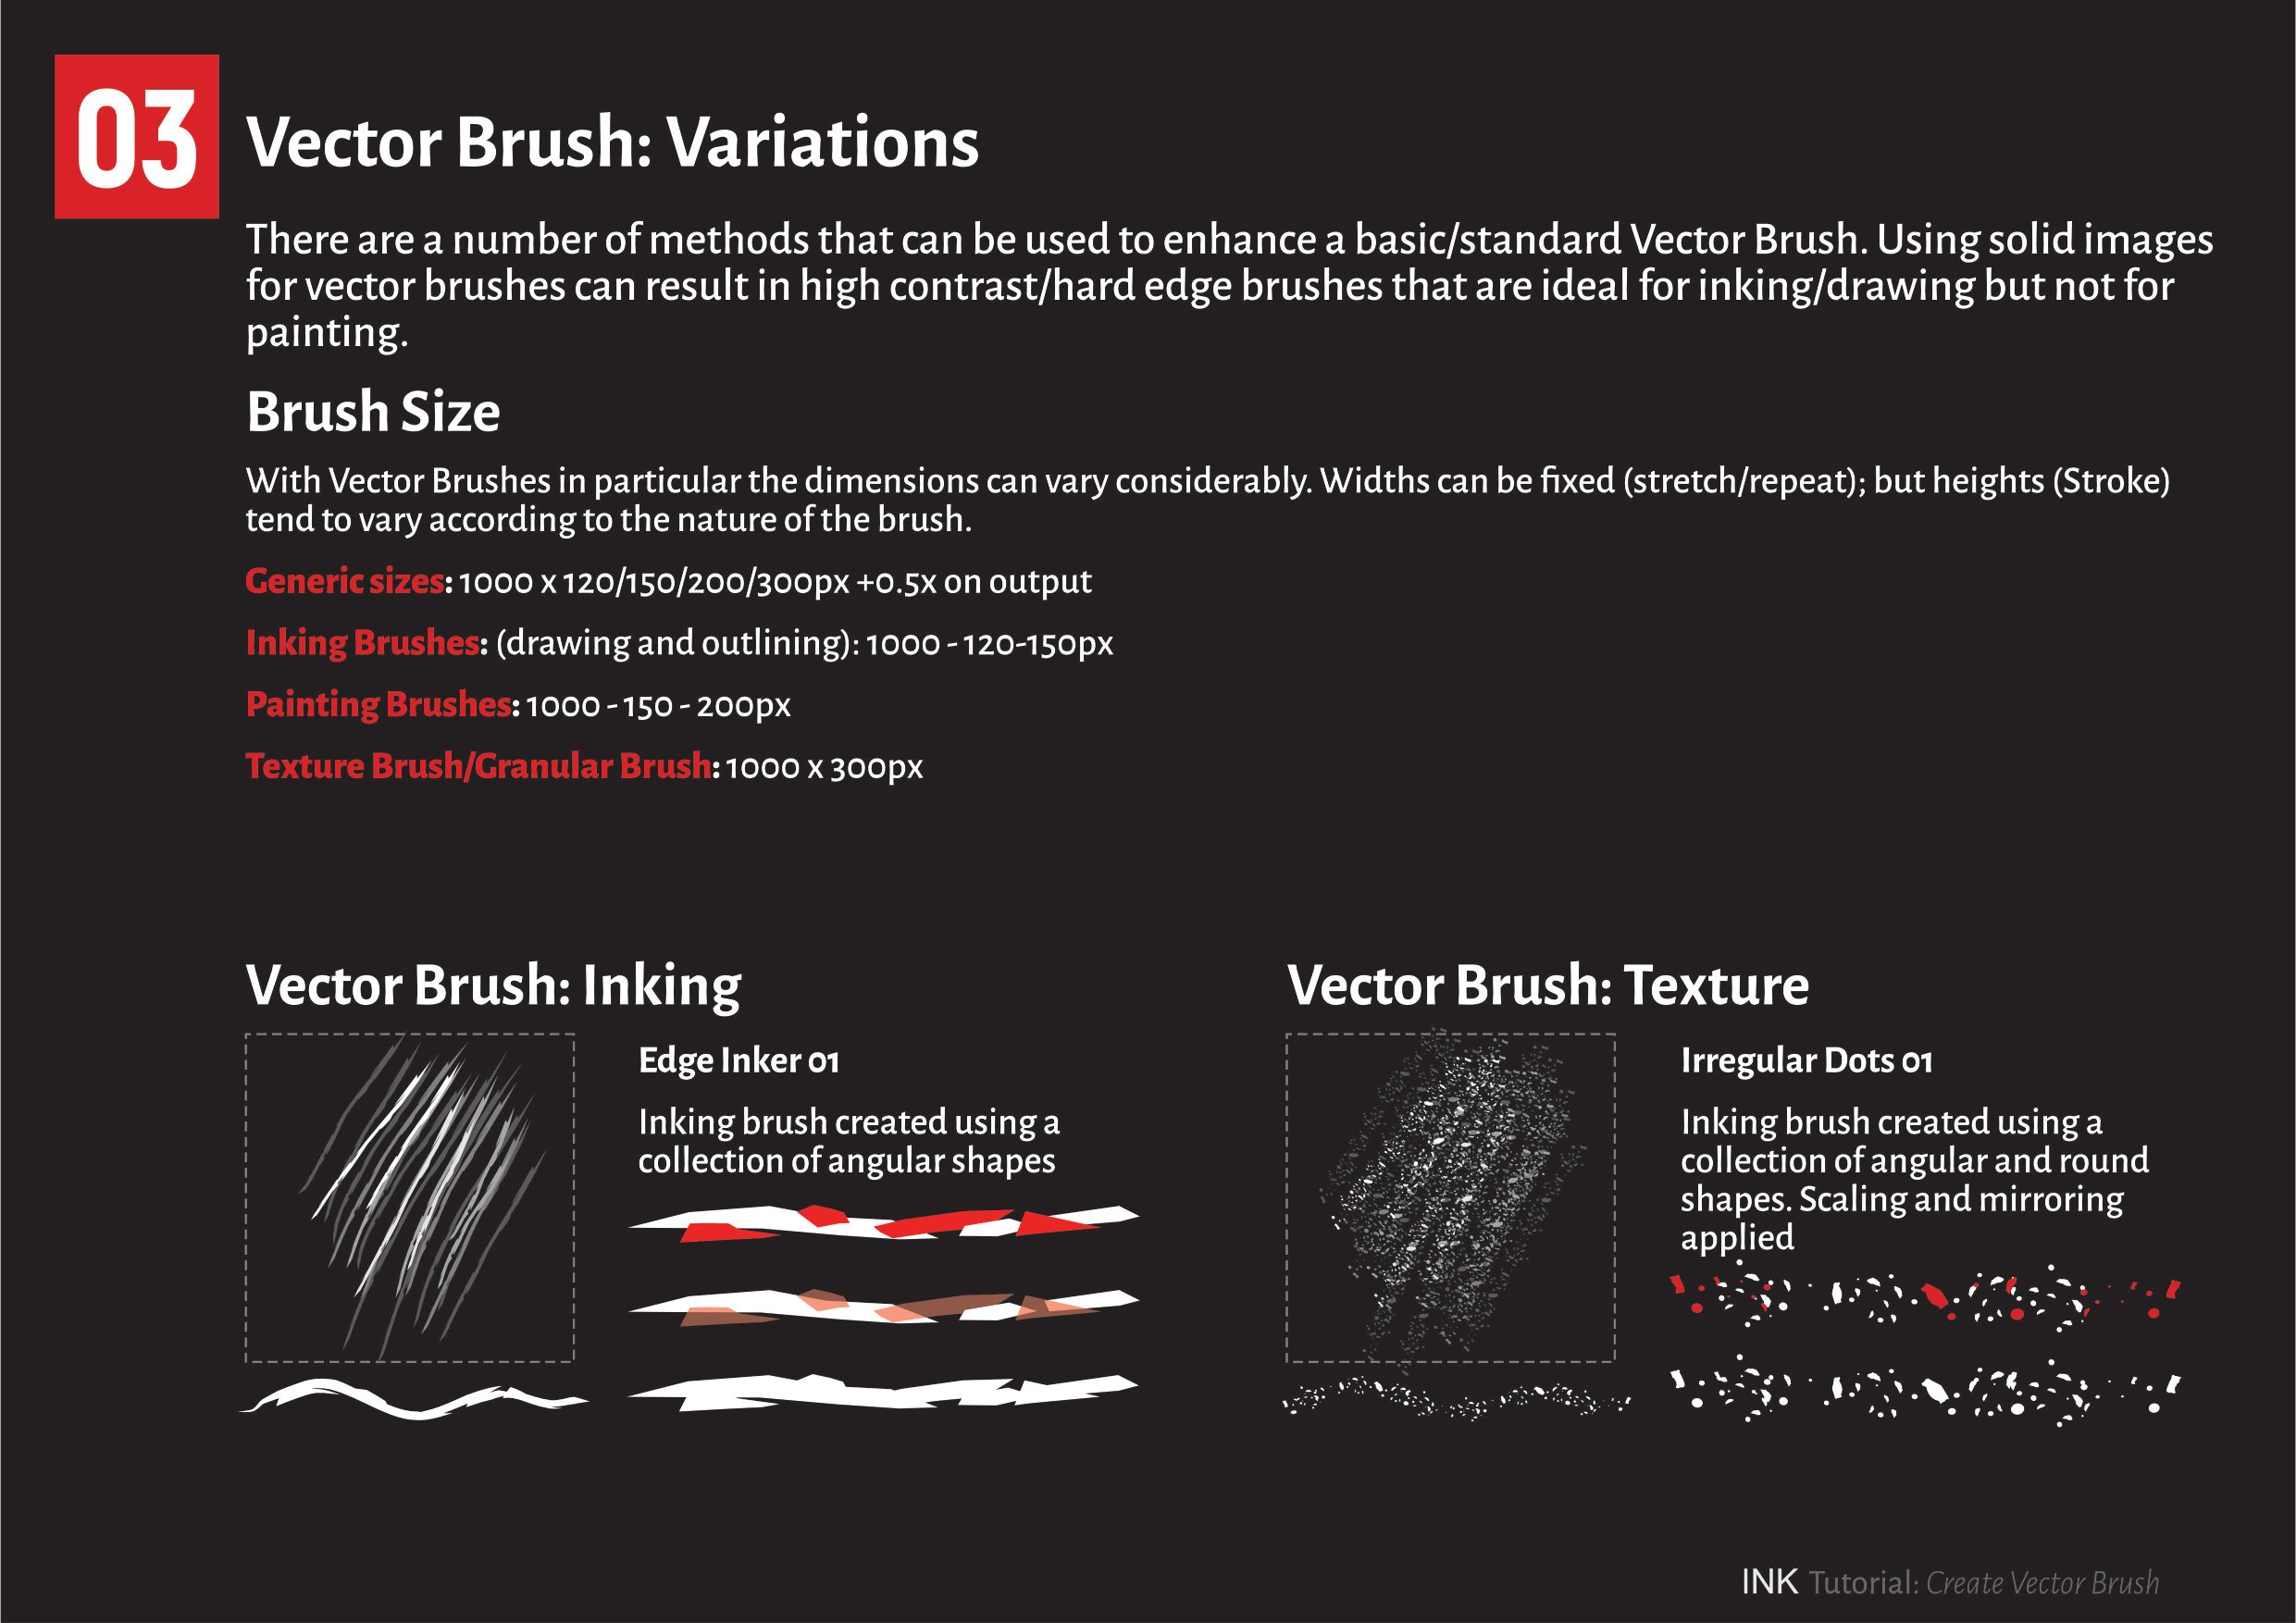
Added a PDF tutorial describing some of the methods to create vector brushes from a personal perspective. Some of the techniques are a bit unconventional.. but I hope you find it useful! Created using AD and APu (1.7 beta) Sample pages as below: Create Vector Brush_06.pdf
- 9 replies
-
- 16
-

-

-
- brushes
- affinity designer
- (and 1 more)
-
Affinity Photo i drawed stuff wrong postion how i can move stuff what i selected with freehand selection tool? i imagined i cut remove old one and paste with correct location but no luck.
-
 I have enable psd smart object and import the psd mockup. However the quality of the photo is lose and turn dim a little bit. What’s wrong with that? I have seen layout and smart object work. Just the quality different.
 -
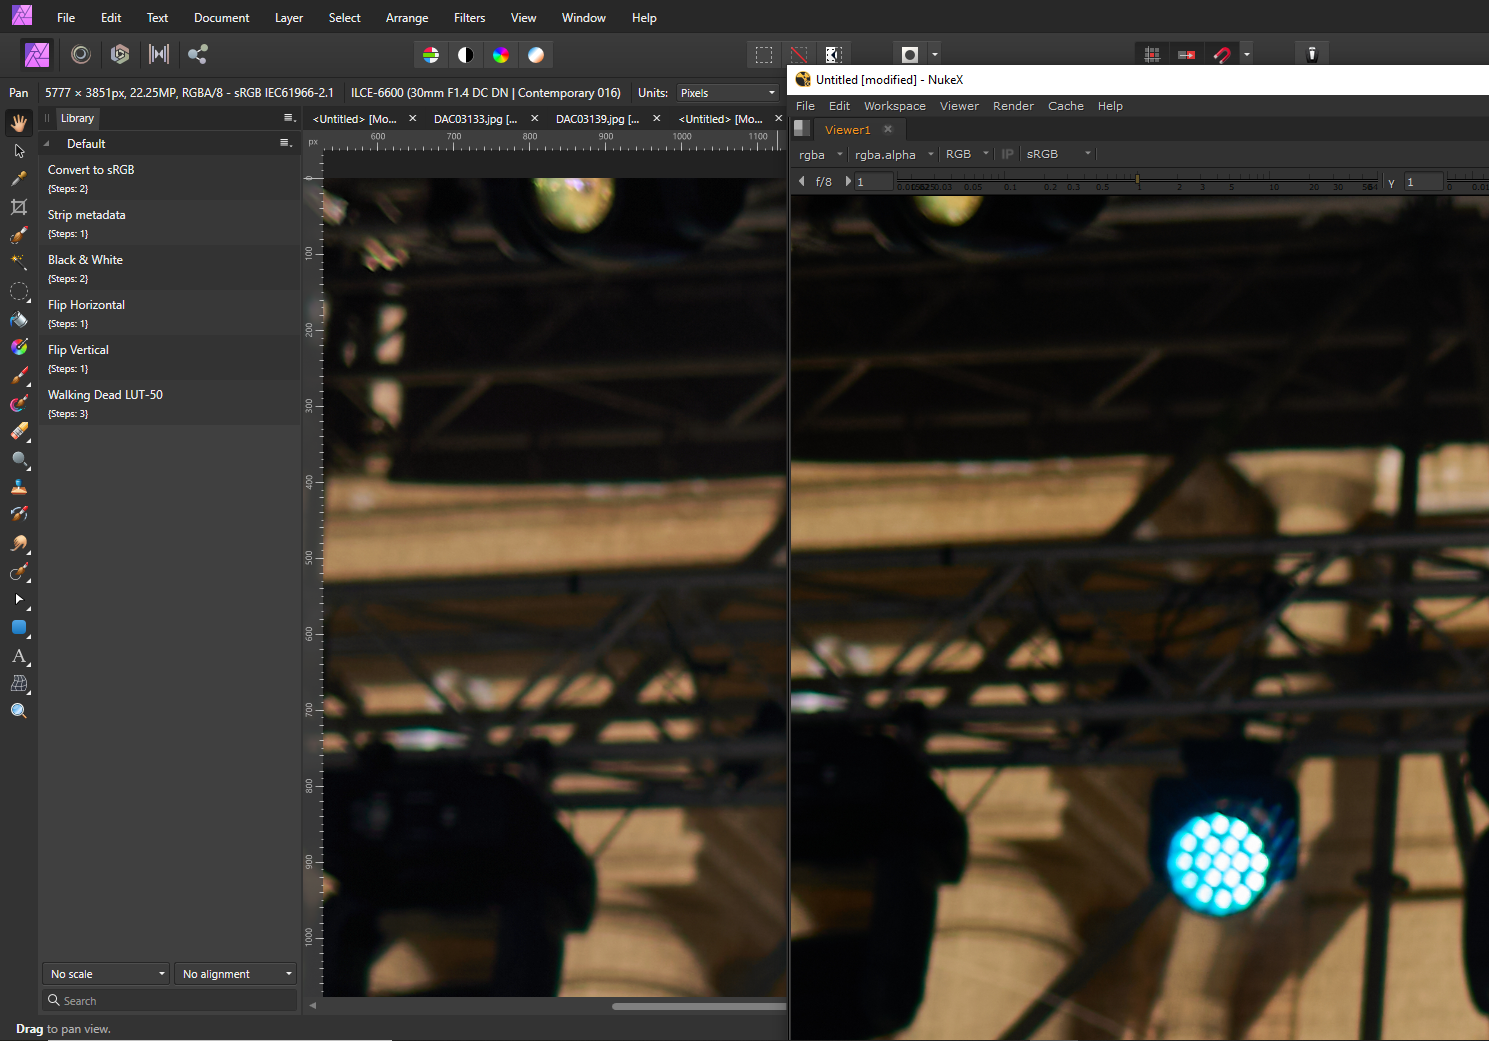
 Hi there, I am confused why just a straight plain jpg file with a default sRGB profile looks different in the shadows with a slight difference in colors too - whether you look at it in the Affinity Photo Viewport or any other app: I tried Windows Photo, Google Chrome, Foundry Nuke, Davinci Resolve. And it's not about a particular file, I see the difference in any file. The only app which also shows the same image as Affinity Photo is CaptureOne but their support couldn't explain that to me. Here is what I have: - Windows 10 PC with Nvidia GTX1060 3GB videocard and the latest drivers - two calibrated AOC 24B1W1 monitors with their respective .icm profiles set as defaults in the Windows Color Management Settings - standard JPG files with sRGB IEC61966-2.1 profile look brighter in Affinity Photo (and Capture One) than in many other professional apps. I originally took Sony RAW photos, developed them in CaptureOne and exported as JPGs with all defaults. The exported images look darker loosing shadow details when viewed anywhere else, except Affinity Photo which also shows the JPG as I see it in Capture One. - any random jpg from the internet also looks brighter in the shadows in Affiity Photo - I generally like what I see in Affintiy more but I must be sure which colors are true when I edit the photos to deliver them to a client Sometimes, I hear that app is not color managed, and that app IS color managed. So can anyone please explain to me in which case I see a true picture - in the viewport of Affinity Photo or in other apps? I can only add that if I go to Document -> Assign ICC Profile and chose the profile for my monitor than an image gets slightly darker, exactly like what I see in the Windows Photo Viewer, Google Chrome, Nuke or Davinci. Does it mean that in order to see a true image I need to do that operation, or what I see in Affinity Photo as is - is the true image and all other app lie to me, despite their being much more 'professional'? I've added a screenshot as an example of what I see on the same monitor in different apps, I hope you can see the difference too. It's subtle but quite noticable when you see the whole image which lacks details in the shadows when you look at the exported image.
-
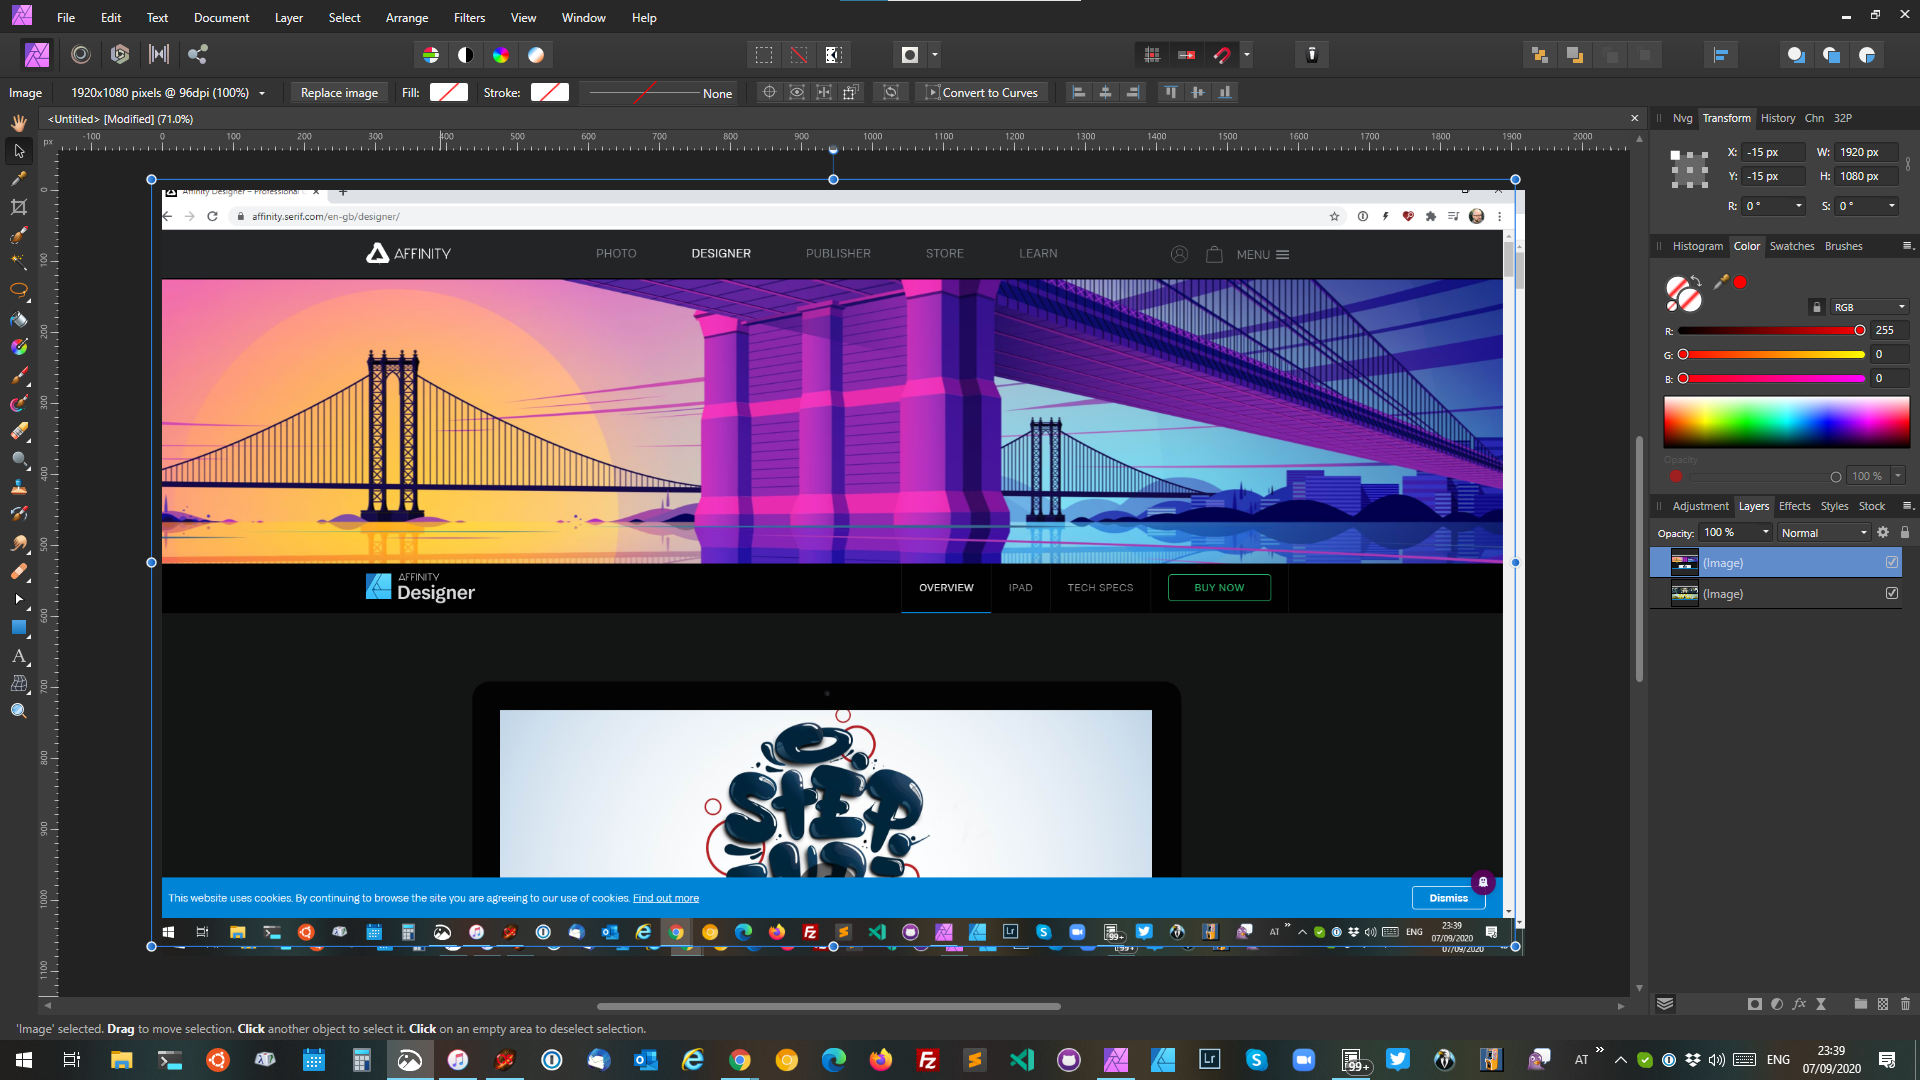
 Steps to reproduce: 1. Have a document of a particular size (in my case, I often work with making composite screenshots, so PrintScreen the whole screen, CTRL+SHIFT+ALT+N to create a new document and paste in the clipboard) 2. Copy some pixel data of exactly the same size (PrintScreen something else, so clipboard contains another image exactly the same size as the document) 3. Paste as a new layer Result: The new layer is added, but it is always shifted with X: -15px and Y: -15px. Expected result: As the clipboard is exactly the same size as the document, I'd expect it to be positioned exactly at X: 0 and Y: 0. Even if Affinity Photo was trying to paste to the center of the document or whatever, it should still be aligned perfectly with the first layer, no?
-
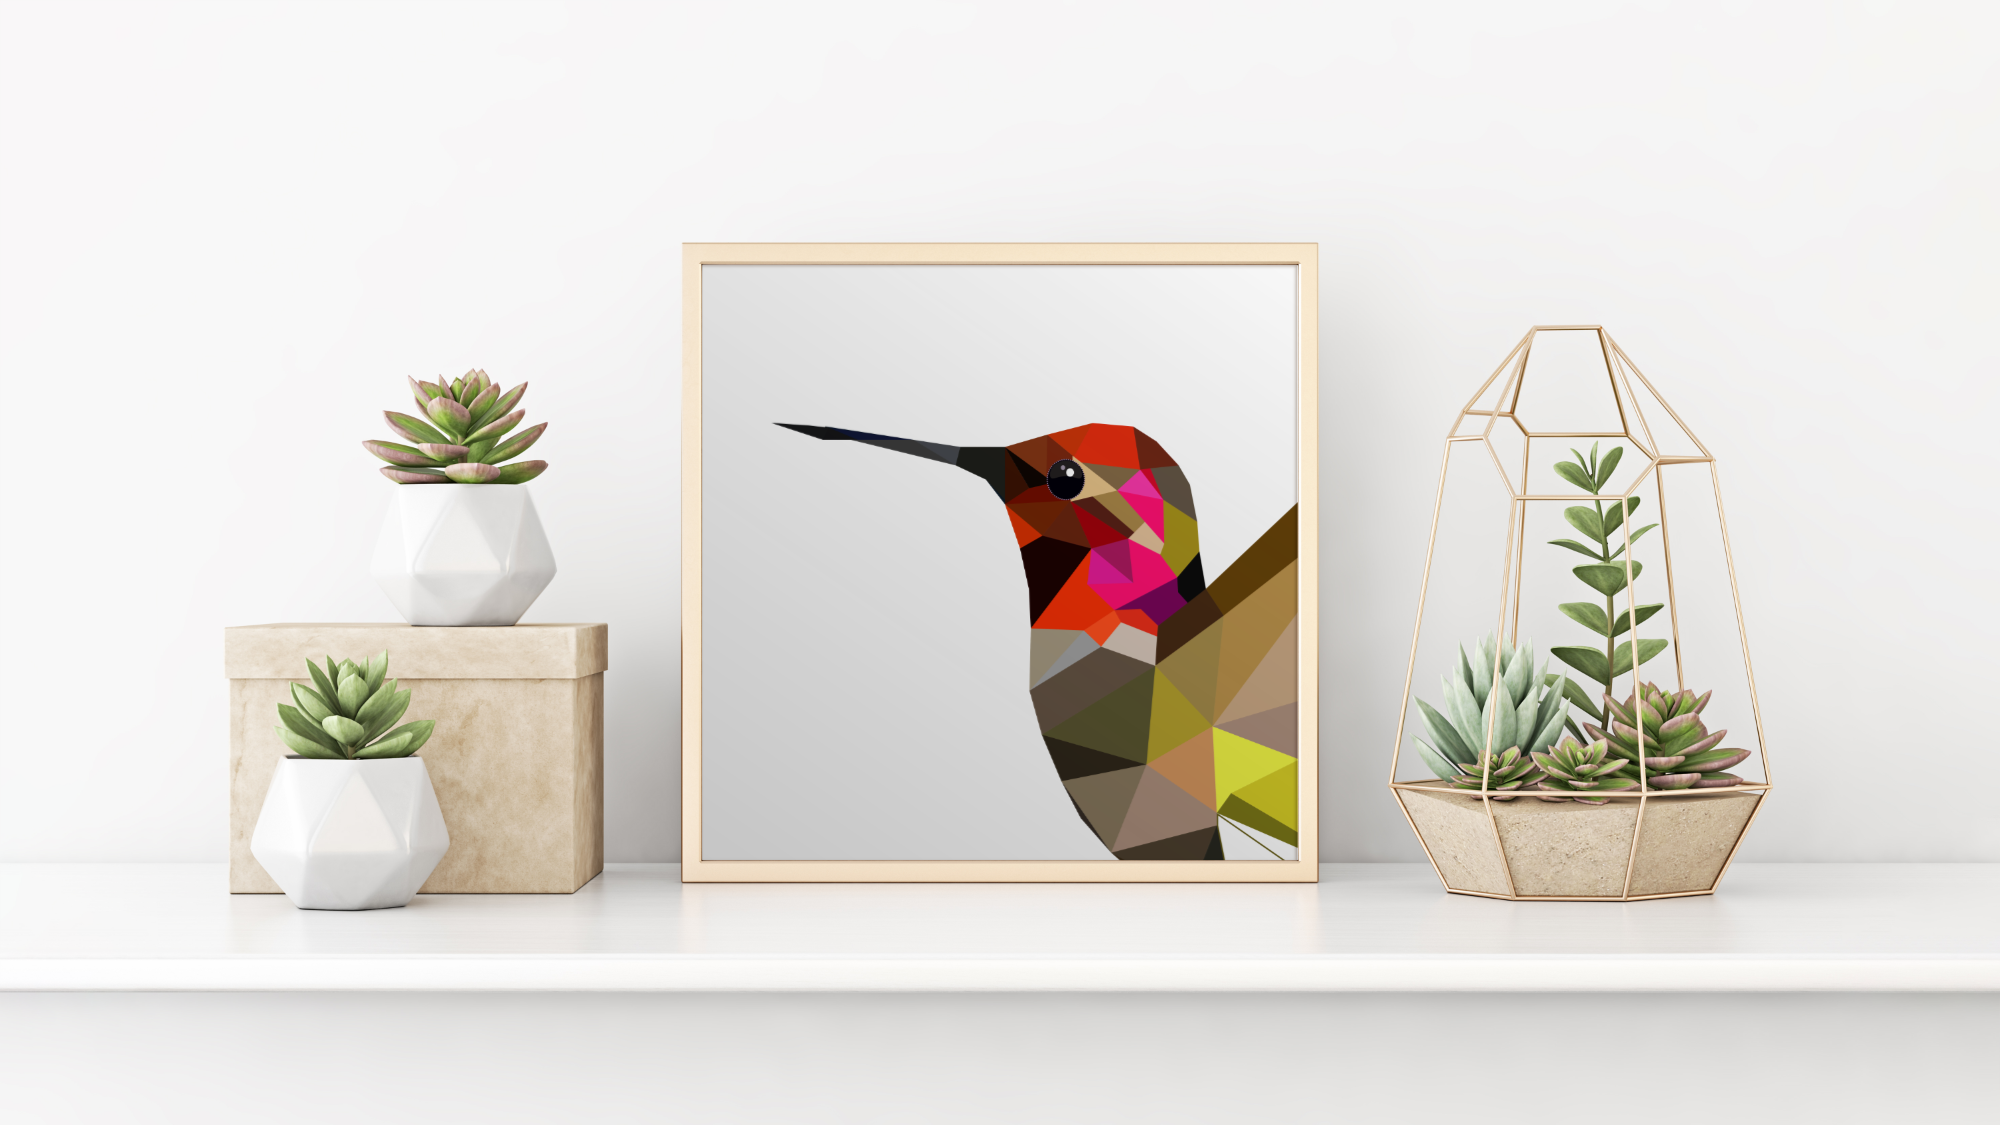
hello, here is my "Serie about Geometric Birds". They are for sale - just in case - just let me know. Thanks
-
Found in the archive: Old drawing "Ludwig van Beethoven - Unrest in Music" (approx. 1992), watercolor & sepia ink. https://www.bodobe.de/ludwig/
-
-
 Hi guys, here's the 2nd part of how to make your own brushes in Affinity. I add 2 more things about how to make brushes that I forgot to tell you in the first video. I hope you enjoy and found this video helpful. Thank You!
-
- 2
-
-
- affinity photo
- tips & tricks
- (and 3 more)
-
Digital painting brush work testing link https://gumroad.com/l/nsCEh
-

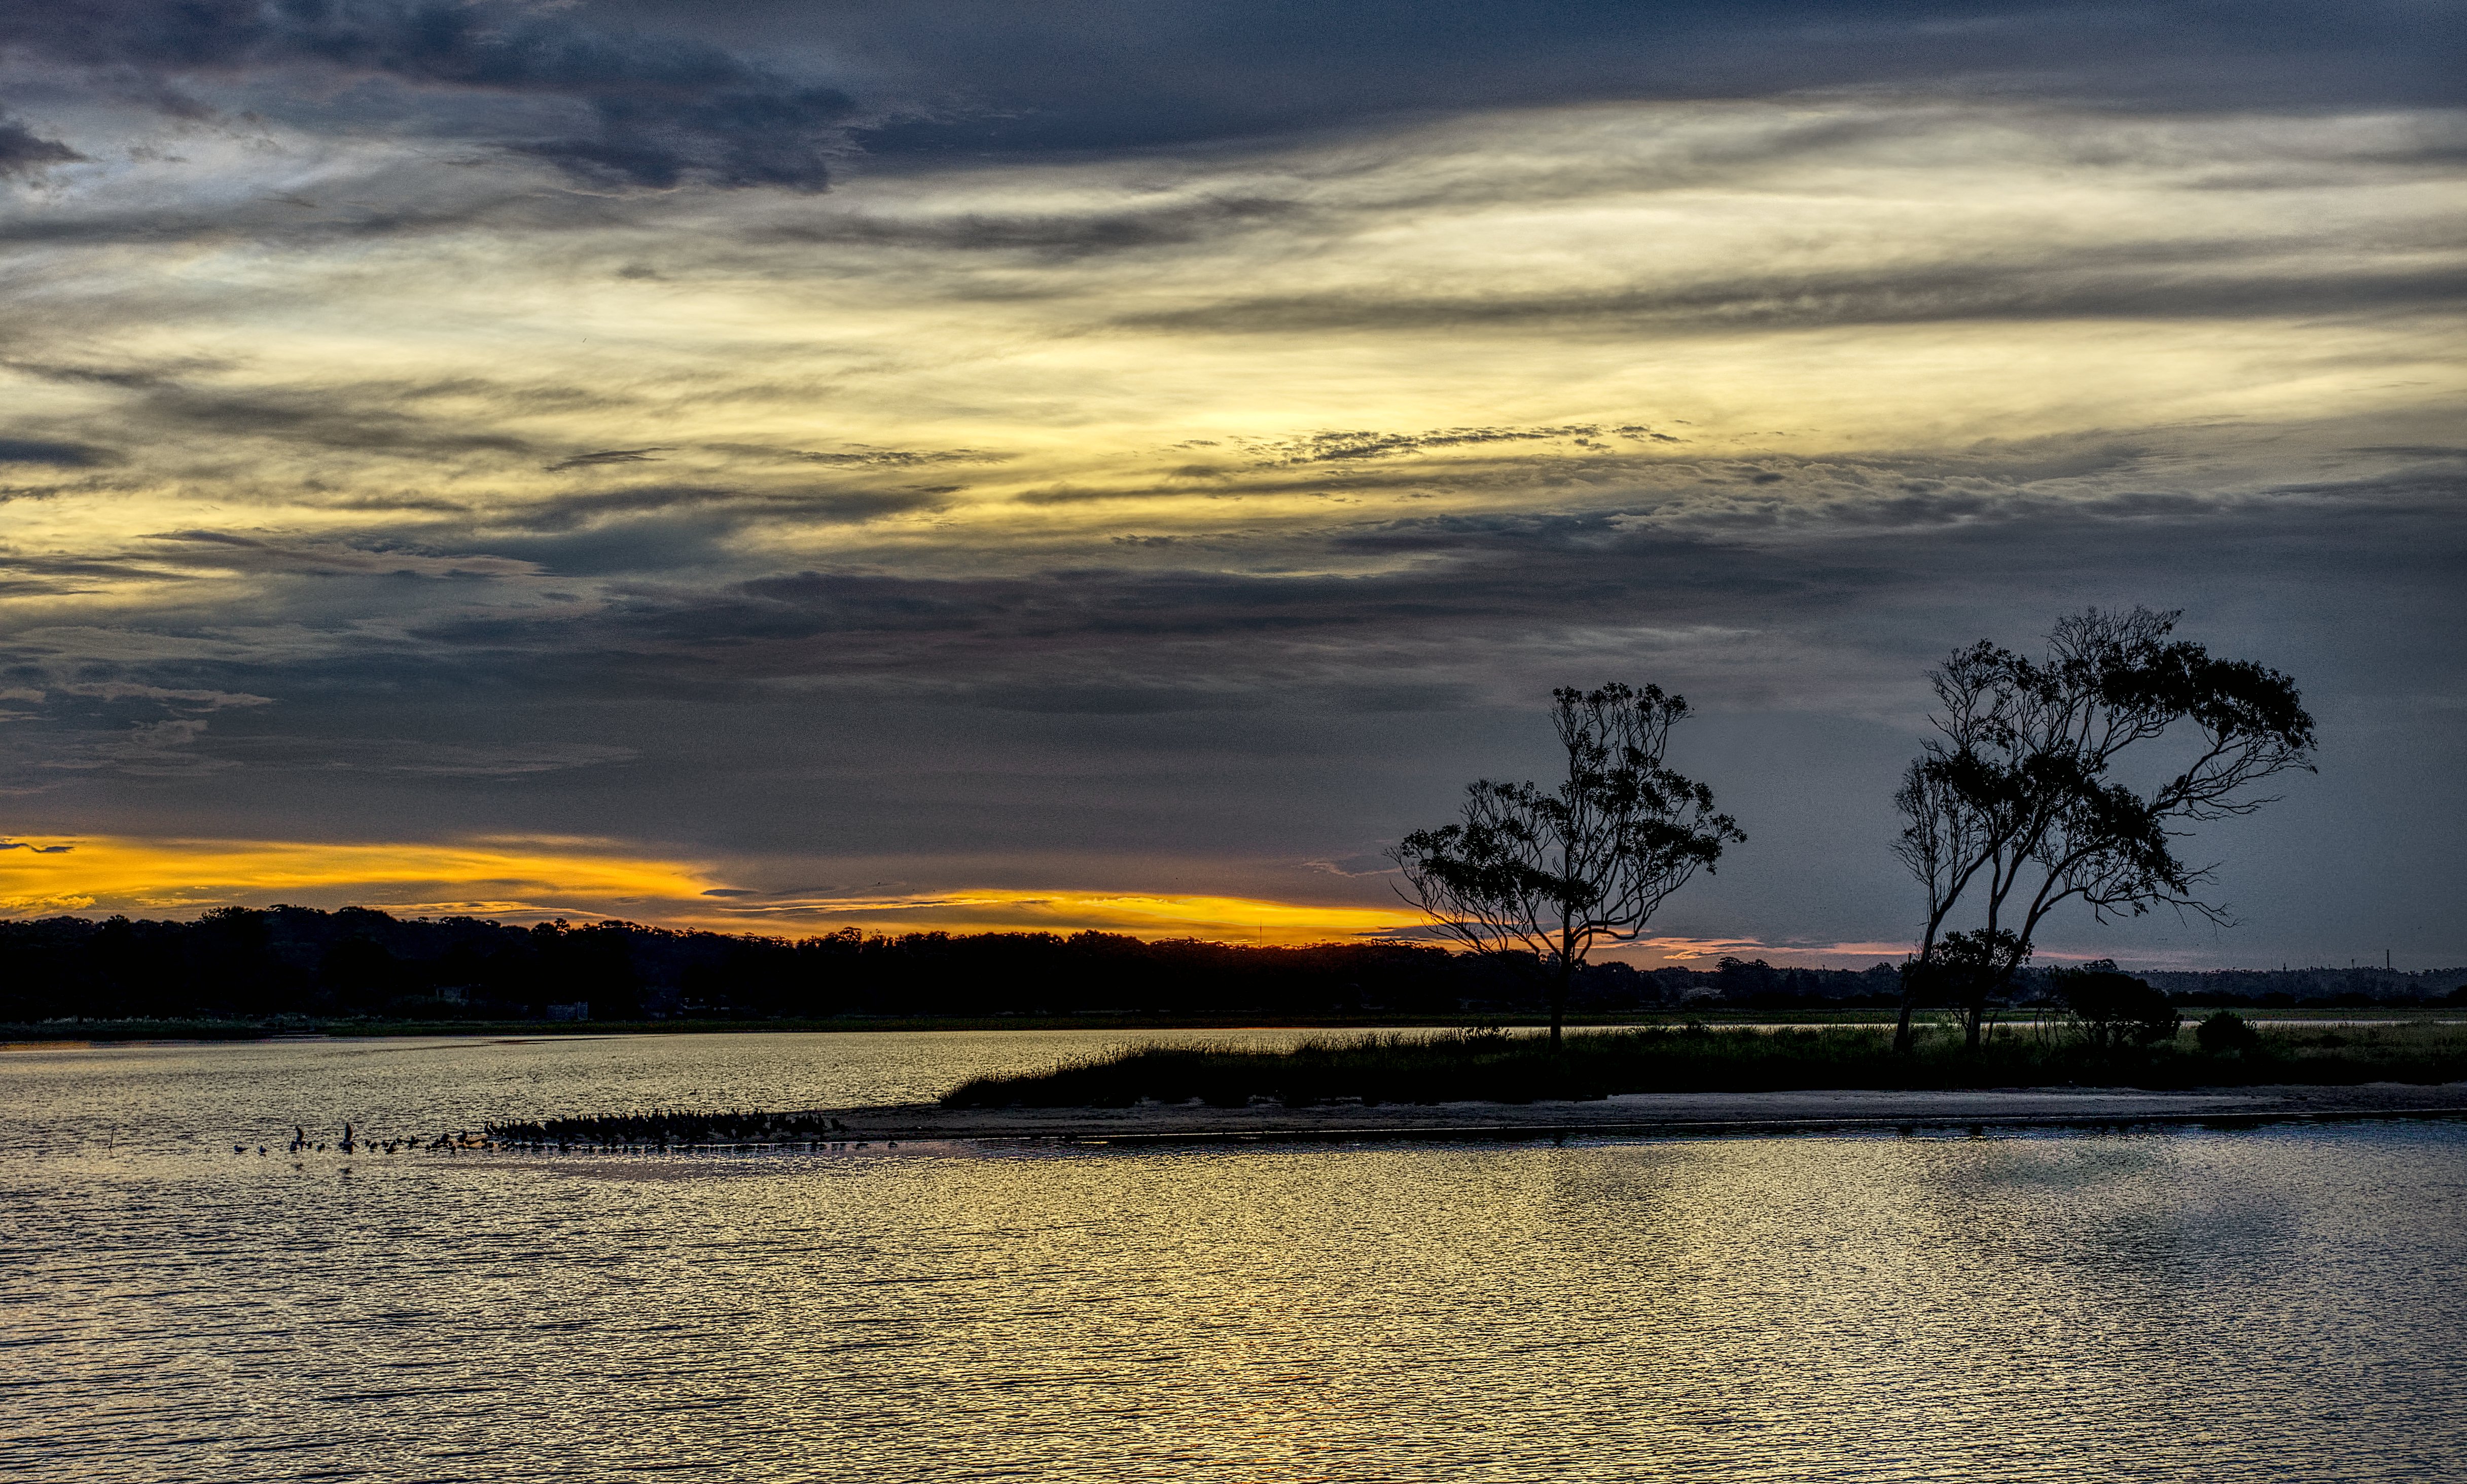
affinity photo A simple HDR photo done with Affinity Photo
AlejandroJ posted a topic in Share your work
Just a simple photo but this one I developed and edited with Affinity Photo. I normally process my raw files with DxO and are now (since I bought it) editing the resulting tiff files with Affinity Photo, but for this HDR I used Affinity Photo to automatically process and combine the original raw files from five takes (which I did with different shutter speeds covering a range of about just 2,5 stops difference between the first and last take). After that, in Persona Photo I erased (cloned out) a small motorboat that I didn’t like to be in the picture, I shrank the sky a bit downwards (using the rectangle selection tool and the move tool) because there was too much sky in the photo, I moved a bit the exposition, changed a bit the white balance, I boosted some colours and de-saturated or darkened others using the HSL tool and also masks, and I sharpened the image using the “mascara de enfoque” (focusing mask?) setting a low “factor” (amount) and a high radius (it works for me). Not much of a photo, but I am very satisfied with the performance of Affinity Photo, it has become my main photo editing tool. I use ASDSee to manage my photo files though, I hope Serif doesn’t mind 🙂
-
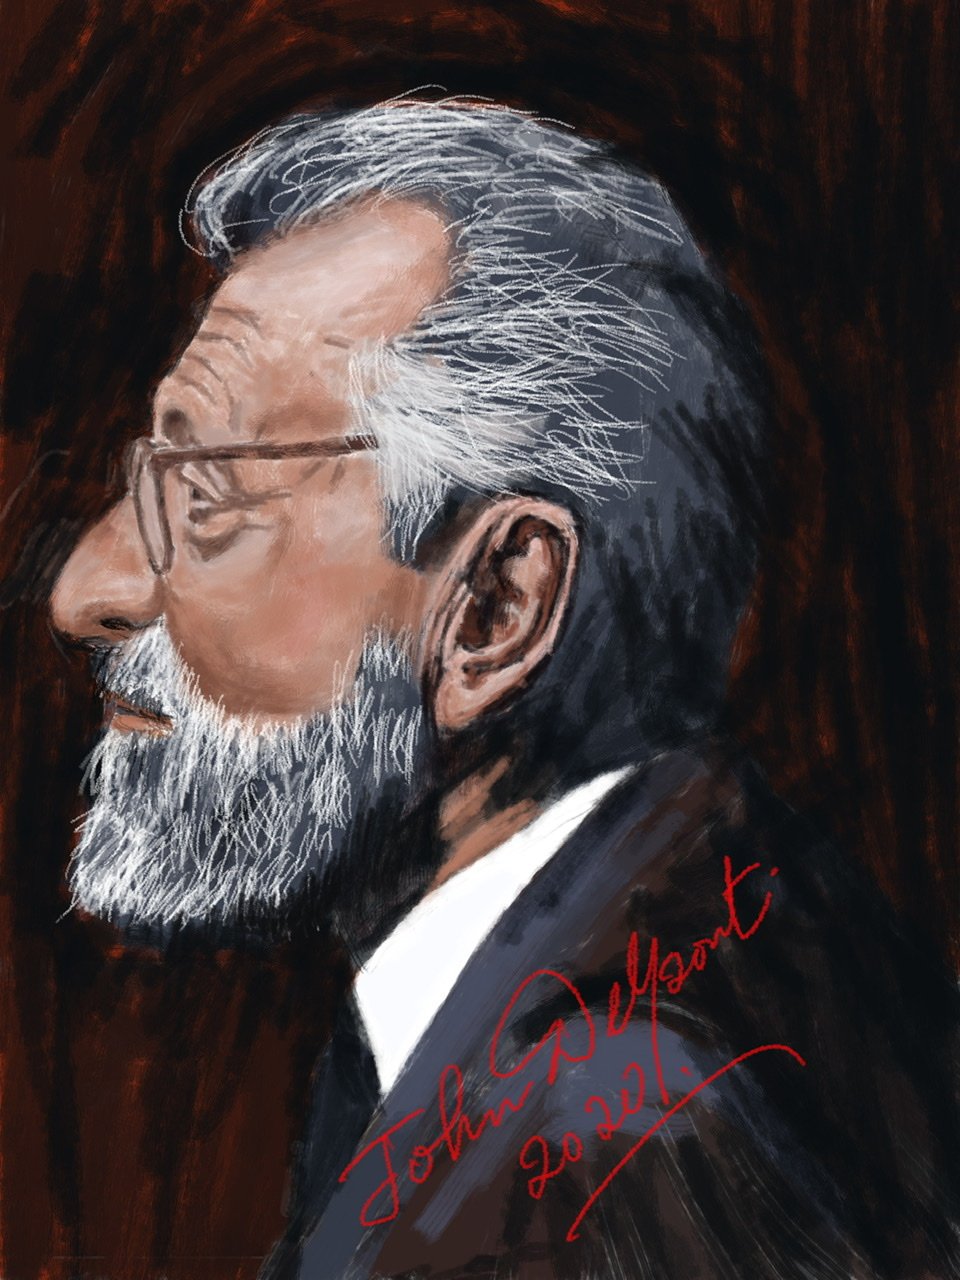
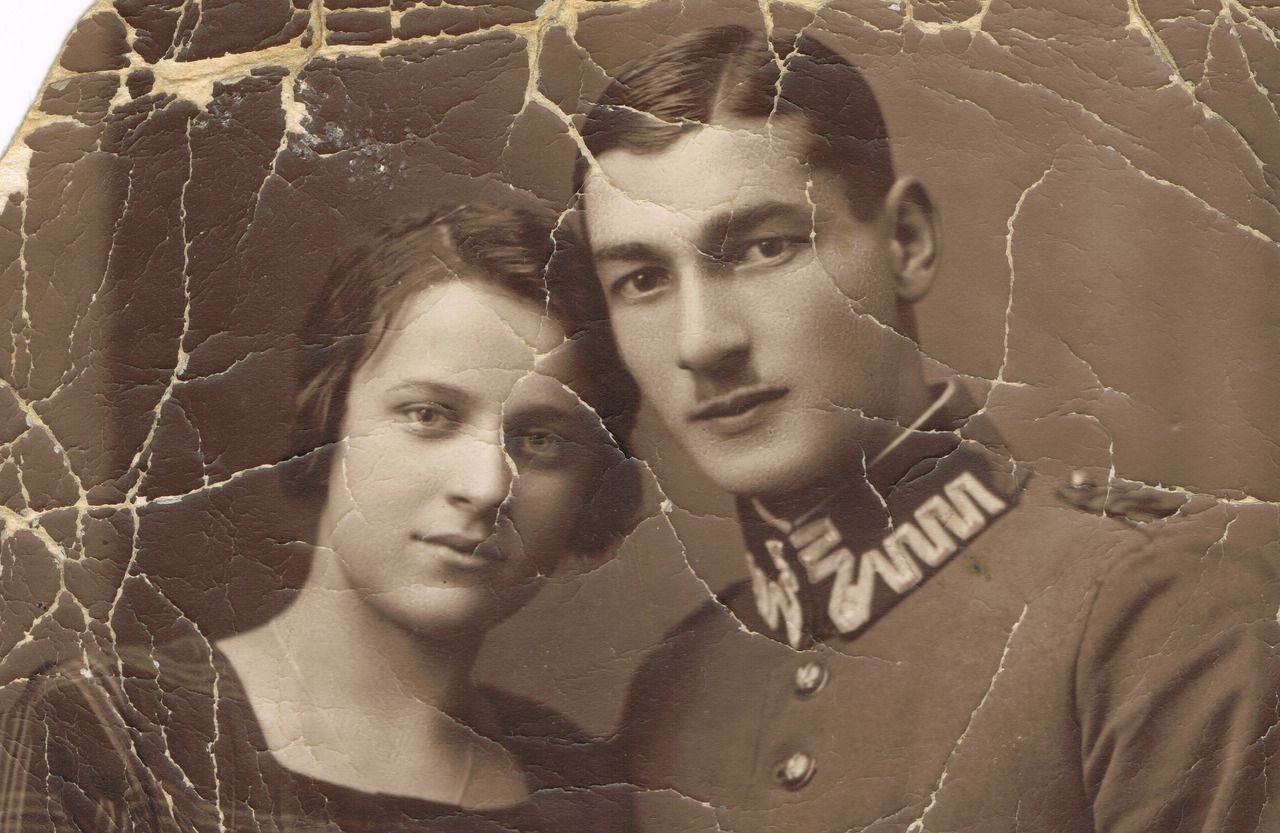
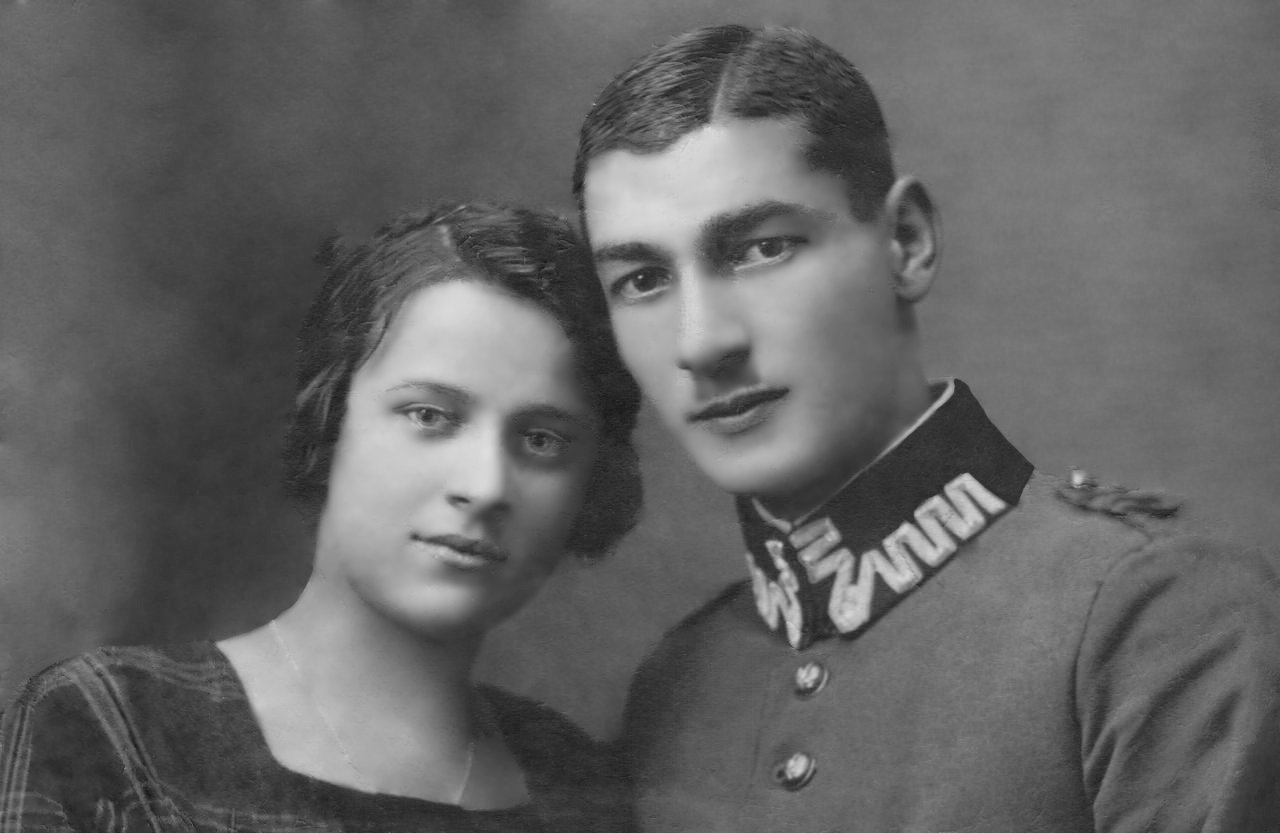
Ran across a youtube video using the attached photo in a photo restoration video (watched about 30 seconds and had to try it myself). I found a copy of the photo and downloaded it. The after pic took a few hours spread out over a few days (I'm back working at the furniture store 😣) so it's a little each day.. Any constructive criticism welcomed, It was a lot of fun and I learned. Preferred the Black and White to the Sepia of the original, so converted it after I felt I was done. There was more I could do, but decided this was a good stopping point.
-
 I'm trying to make a tutorial video and got stopped when I tried to subtract rectangles from a circle. I'm making the vintage sun you see on a lot of t-shirts. I've already made the video for Deisgner and didn't have any issues. This issue does pop up in Designer sometimes, but I've always been able to work around it. Not so in photo. So I make my rectangles and line them up. Then I subtract them and the edges of the circle disappear too. I made a short video to show what I mean:
 -
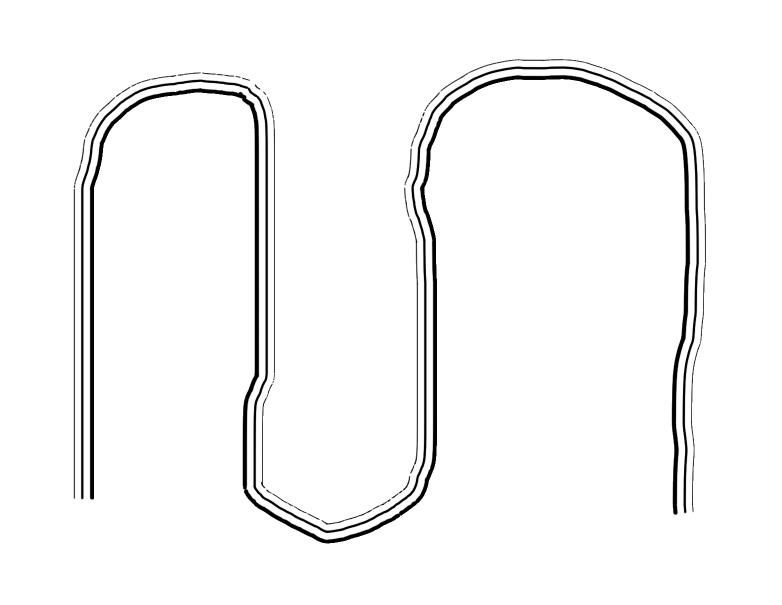
 I'm working with a set of Photoshop brushes and experiencing a bit of an issue with the shape of the brush. It's a cartographic coastline brush, so it's meant to hold the distance between its three points as you move and drag it in different directions. Is there a setting to make the brush function correctly in Affinity Photo? I've included examples of how the brush looks in both APhoto and Photoshop.