Search the Community
Showing results for tags 'Affinity photo'.
-
 When selecting "JPEG" in the export persona, the slice doesn't display correctly the format:
-
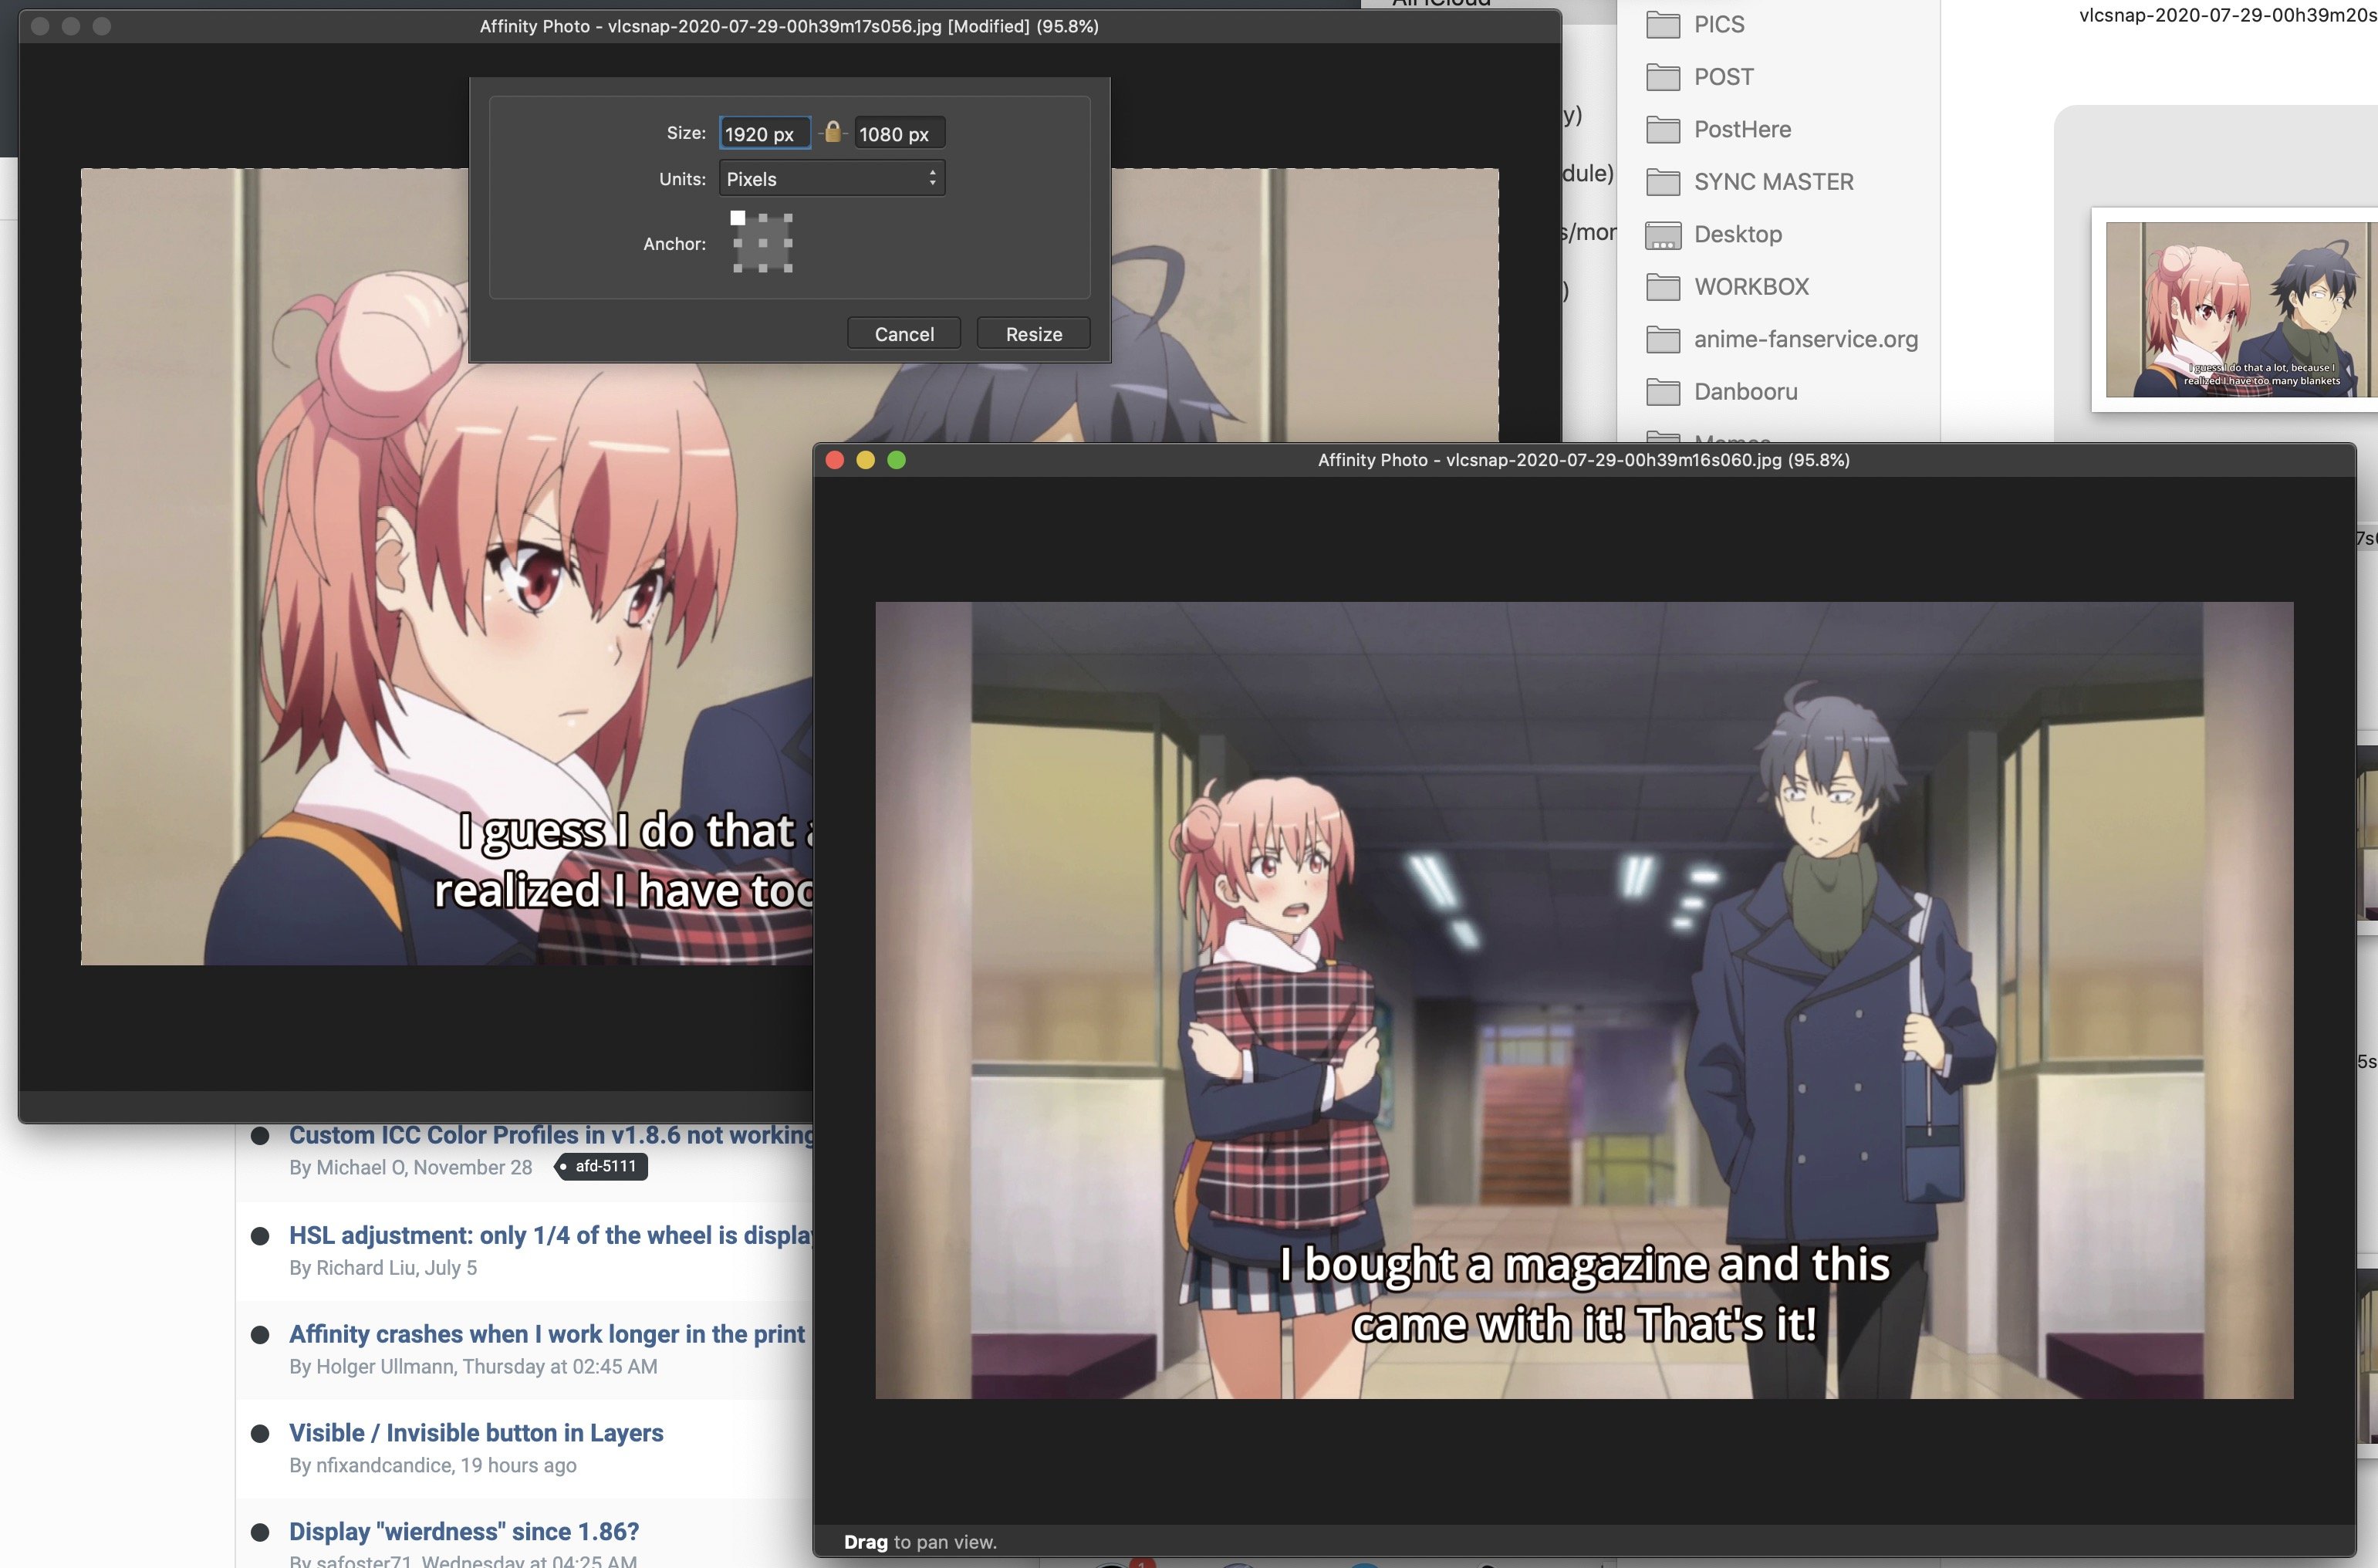
 Using Affinity Photo 1.8.6 on a fully updated Intel iMac running Mac OS 10.15.7 (19H15), I have the following extremely frustrating feature: One thing I do a lot is join multiple images together, so I'm frequently using the Resize Document or Resize Canvas options. Unlike Photoshop, where you can easily change the height of your 720 px high image to be 1440 so you can add the 2nd graphic, Affinity Photo *always* has the "constrain" lock set to on, so making any change to the Y axis is reflected it the X axis. I have to manually turn this off, which means I can't automate anything or work quickly. (I am a big fan of Keyboard Maestro, a tool for automating pretty much anything, an hacking things with UI scripting if there's no other option. I see a user who is similiarly obsessive as me has made a 'hack' to fix this frustrating feature of AP, here https://infinitediaries.net/fixing-affinity-photoss-resize-canvas-with-keyboard-maestro/ .) Please fix this frustrating aspect of AP! Either allow the "lock" to remember its last position (if unlocked, remain unlocked) or give us a preference to set the default we need.
-
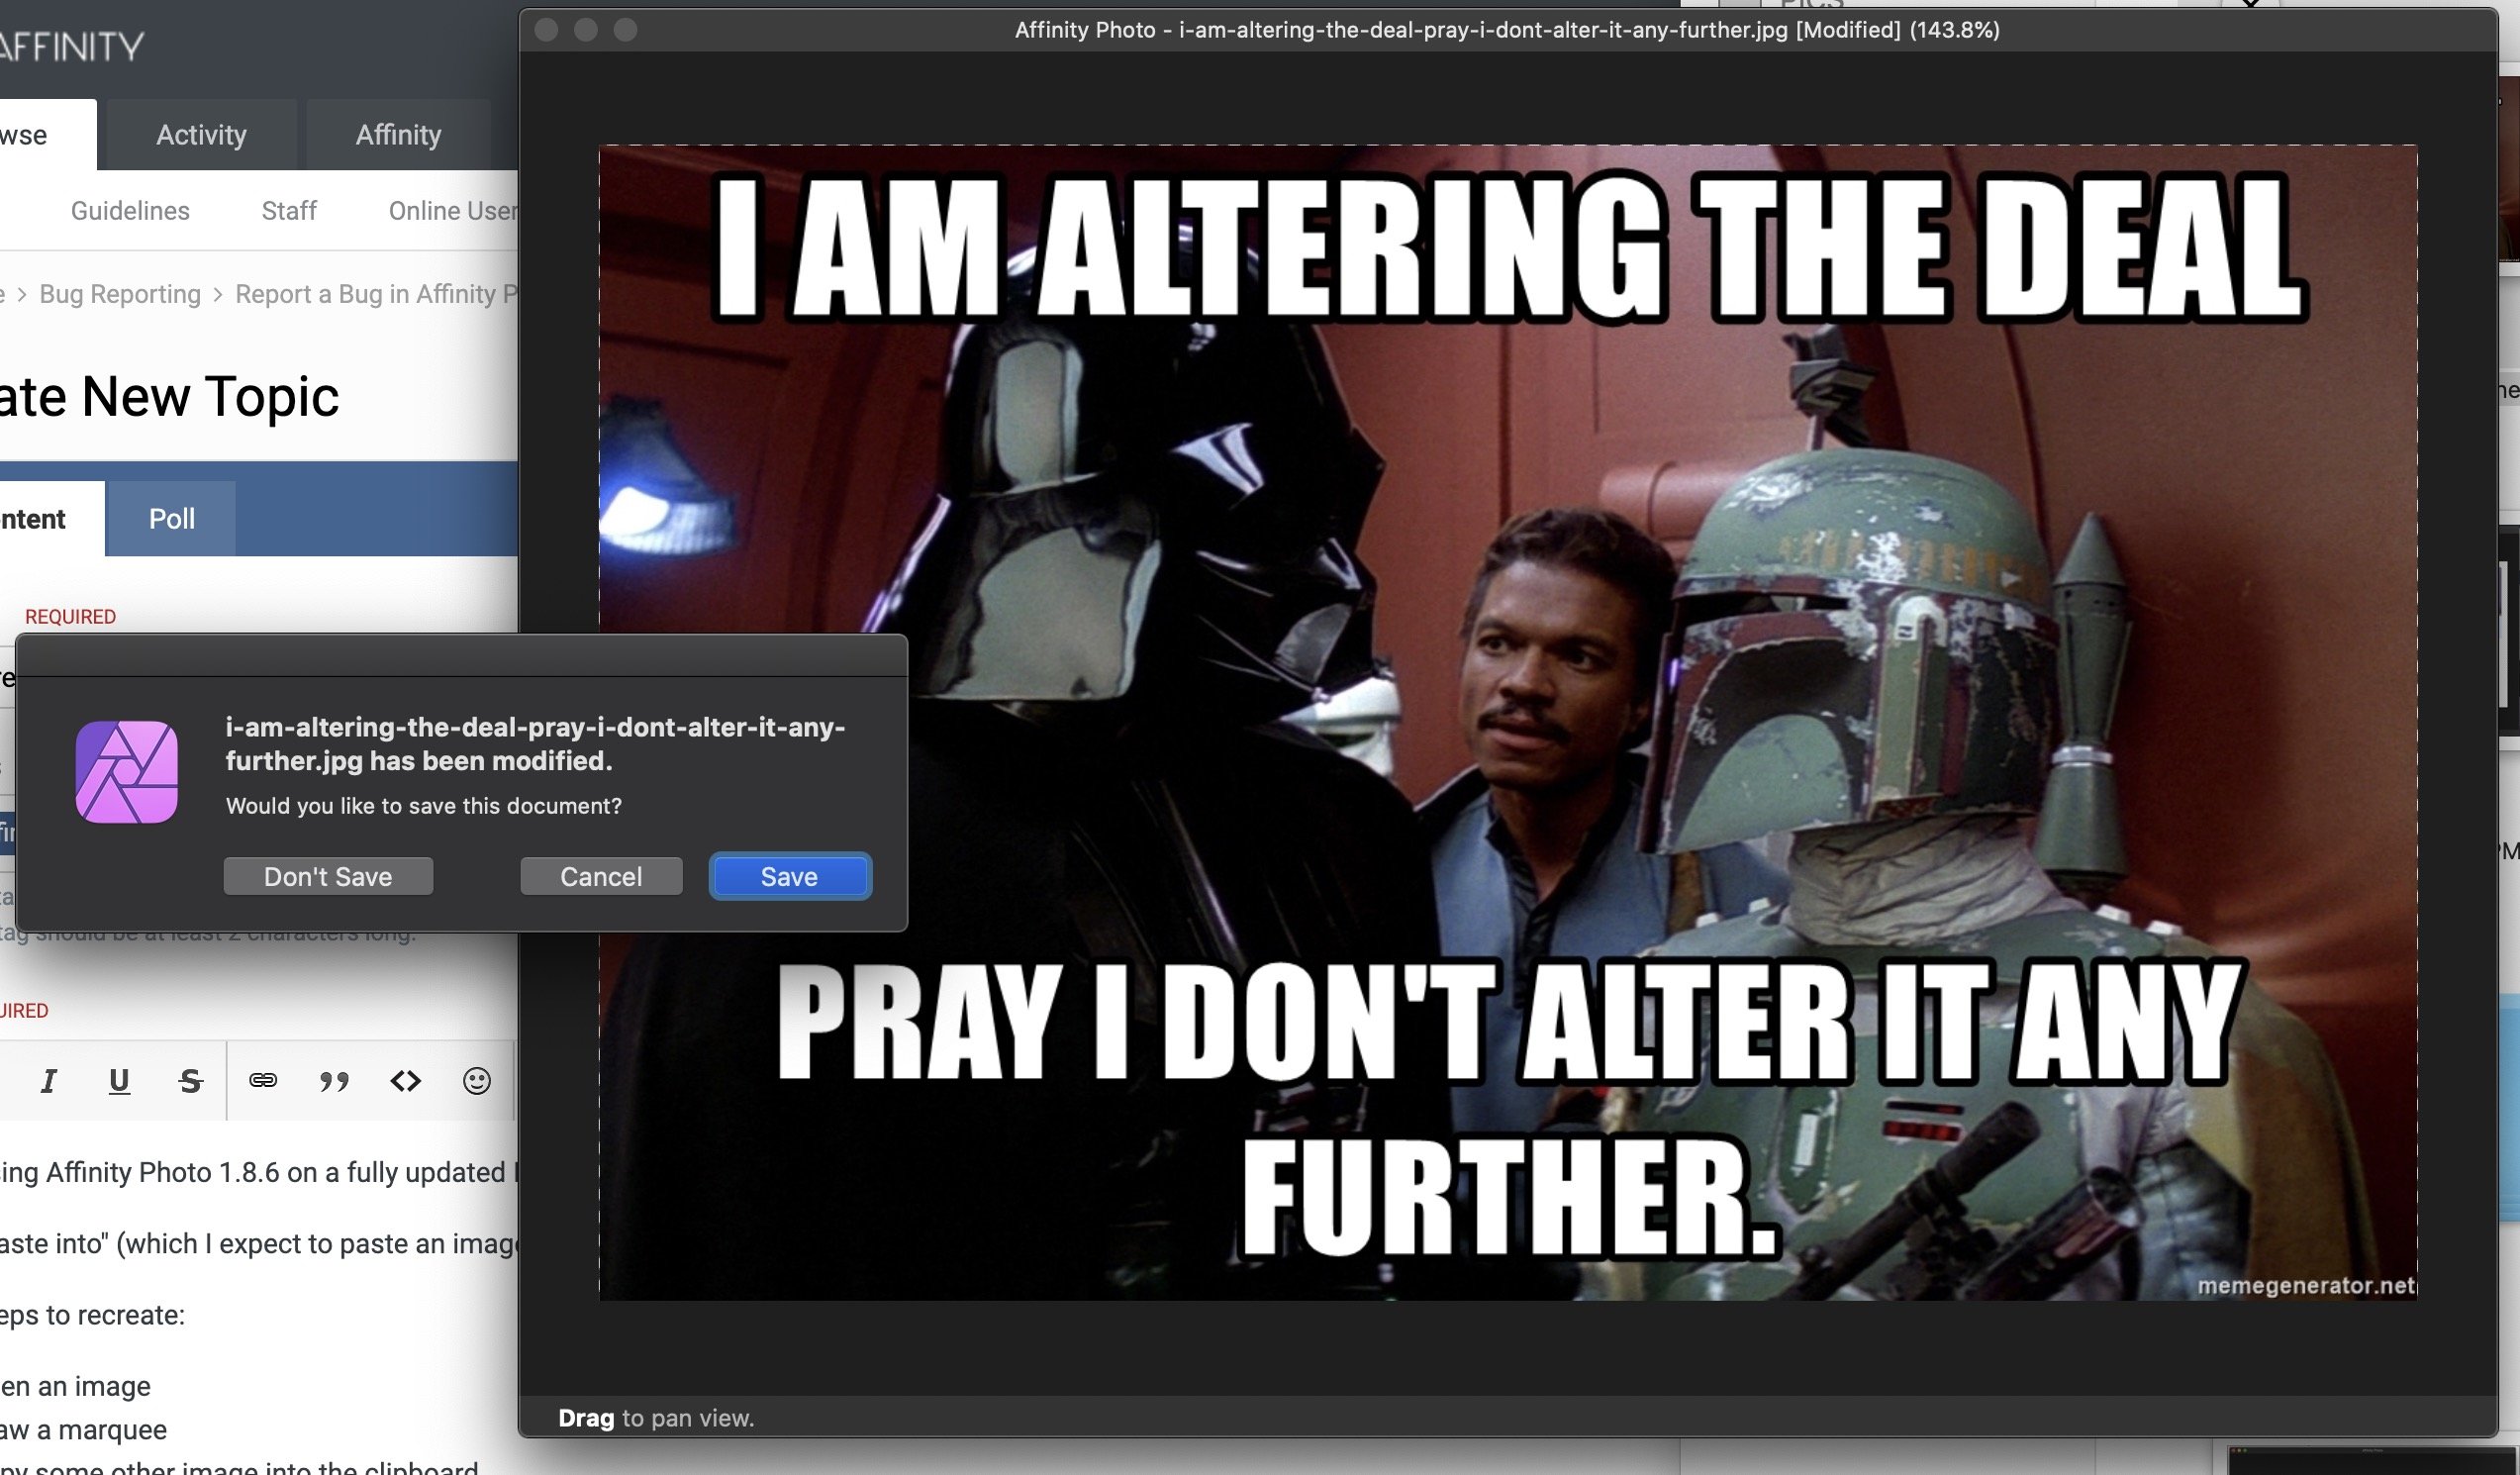
Using Affinity Photo 1.8.6 on a fully updated Intel iMac running Mac OS 10.15.7 (19H15), I have the following repeatable bug: If I've altered an image, it's expected that AP ask me if I want to save the altered image. However, merely making a selection, such as select all then copying the image to paste elsewhere, causes the app to ask me if I want to save my "altered" image. This is not correct behavior as far as Mac or PC software goes, so the bug should be fixed. To replicate, open any JPEG, select all, then close with command + W. The program asks if I want to save the "altered" image even though it hasn't been touched. I hope you like my choice of example image
-
Using Affinity Photo 1.8.6 on a fully updated Intel iMac running Mac OS 10.15.7 (19H15), I have the following frustrating feature: At first, I was horrified at the way keypresses automatically "toggled" through multiple tools, such as hitting M four times for four different kinds of marquee selectors. I've got 30+ years of Photoshop muscle memory, and when I hit the M key, I want a rectangle marquee selector, and nothing else. Happily I saw this that you can turn this off in this post: However, while turning on "use shift key to toggle tools" and de-selecting the tools I don't want to use in the Keyboard Shortcuts preferences, the program makes an annoying "error sound" (system beep) if I hit M while the rectangle marquee is already selected, or V if the move tool is already selected. Having the program no longer turn on/turn off the tool I'm using if I am barbaric enough to select a tool that's already selected is greatly appreciated, but the goal is to just use the tool (M for square marquee, T for text, V for moving layers) without hearing a lot of error beeps in my ears. It's caused me to turn the volume down, which means I can't listen to music while I work. The desired behaivior is that the tool just be selected if I press that key, and if it's already selected, then the program should not react at all (not beep an error sound). Please address this seemingly small frustration!
-
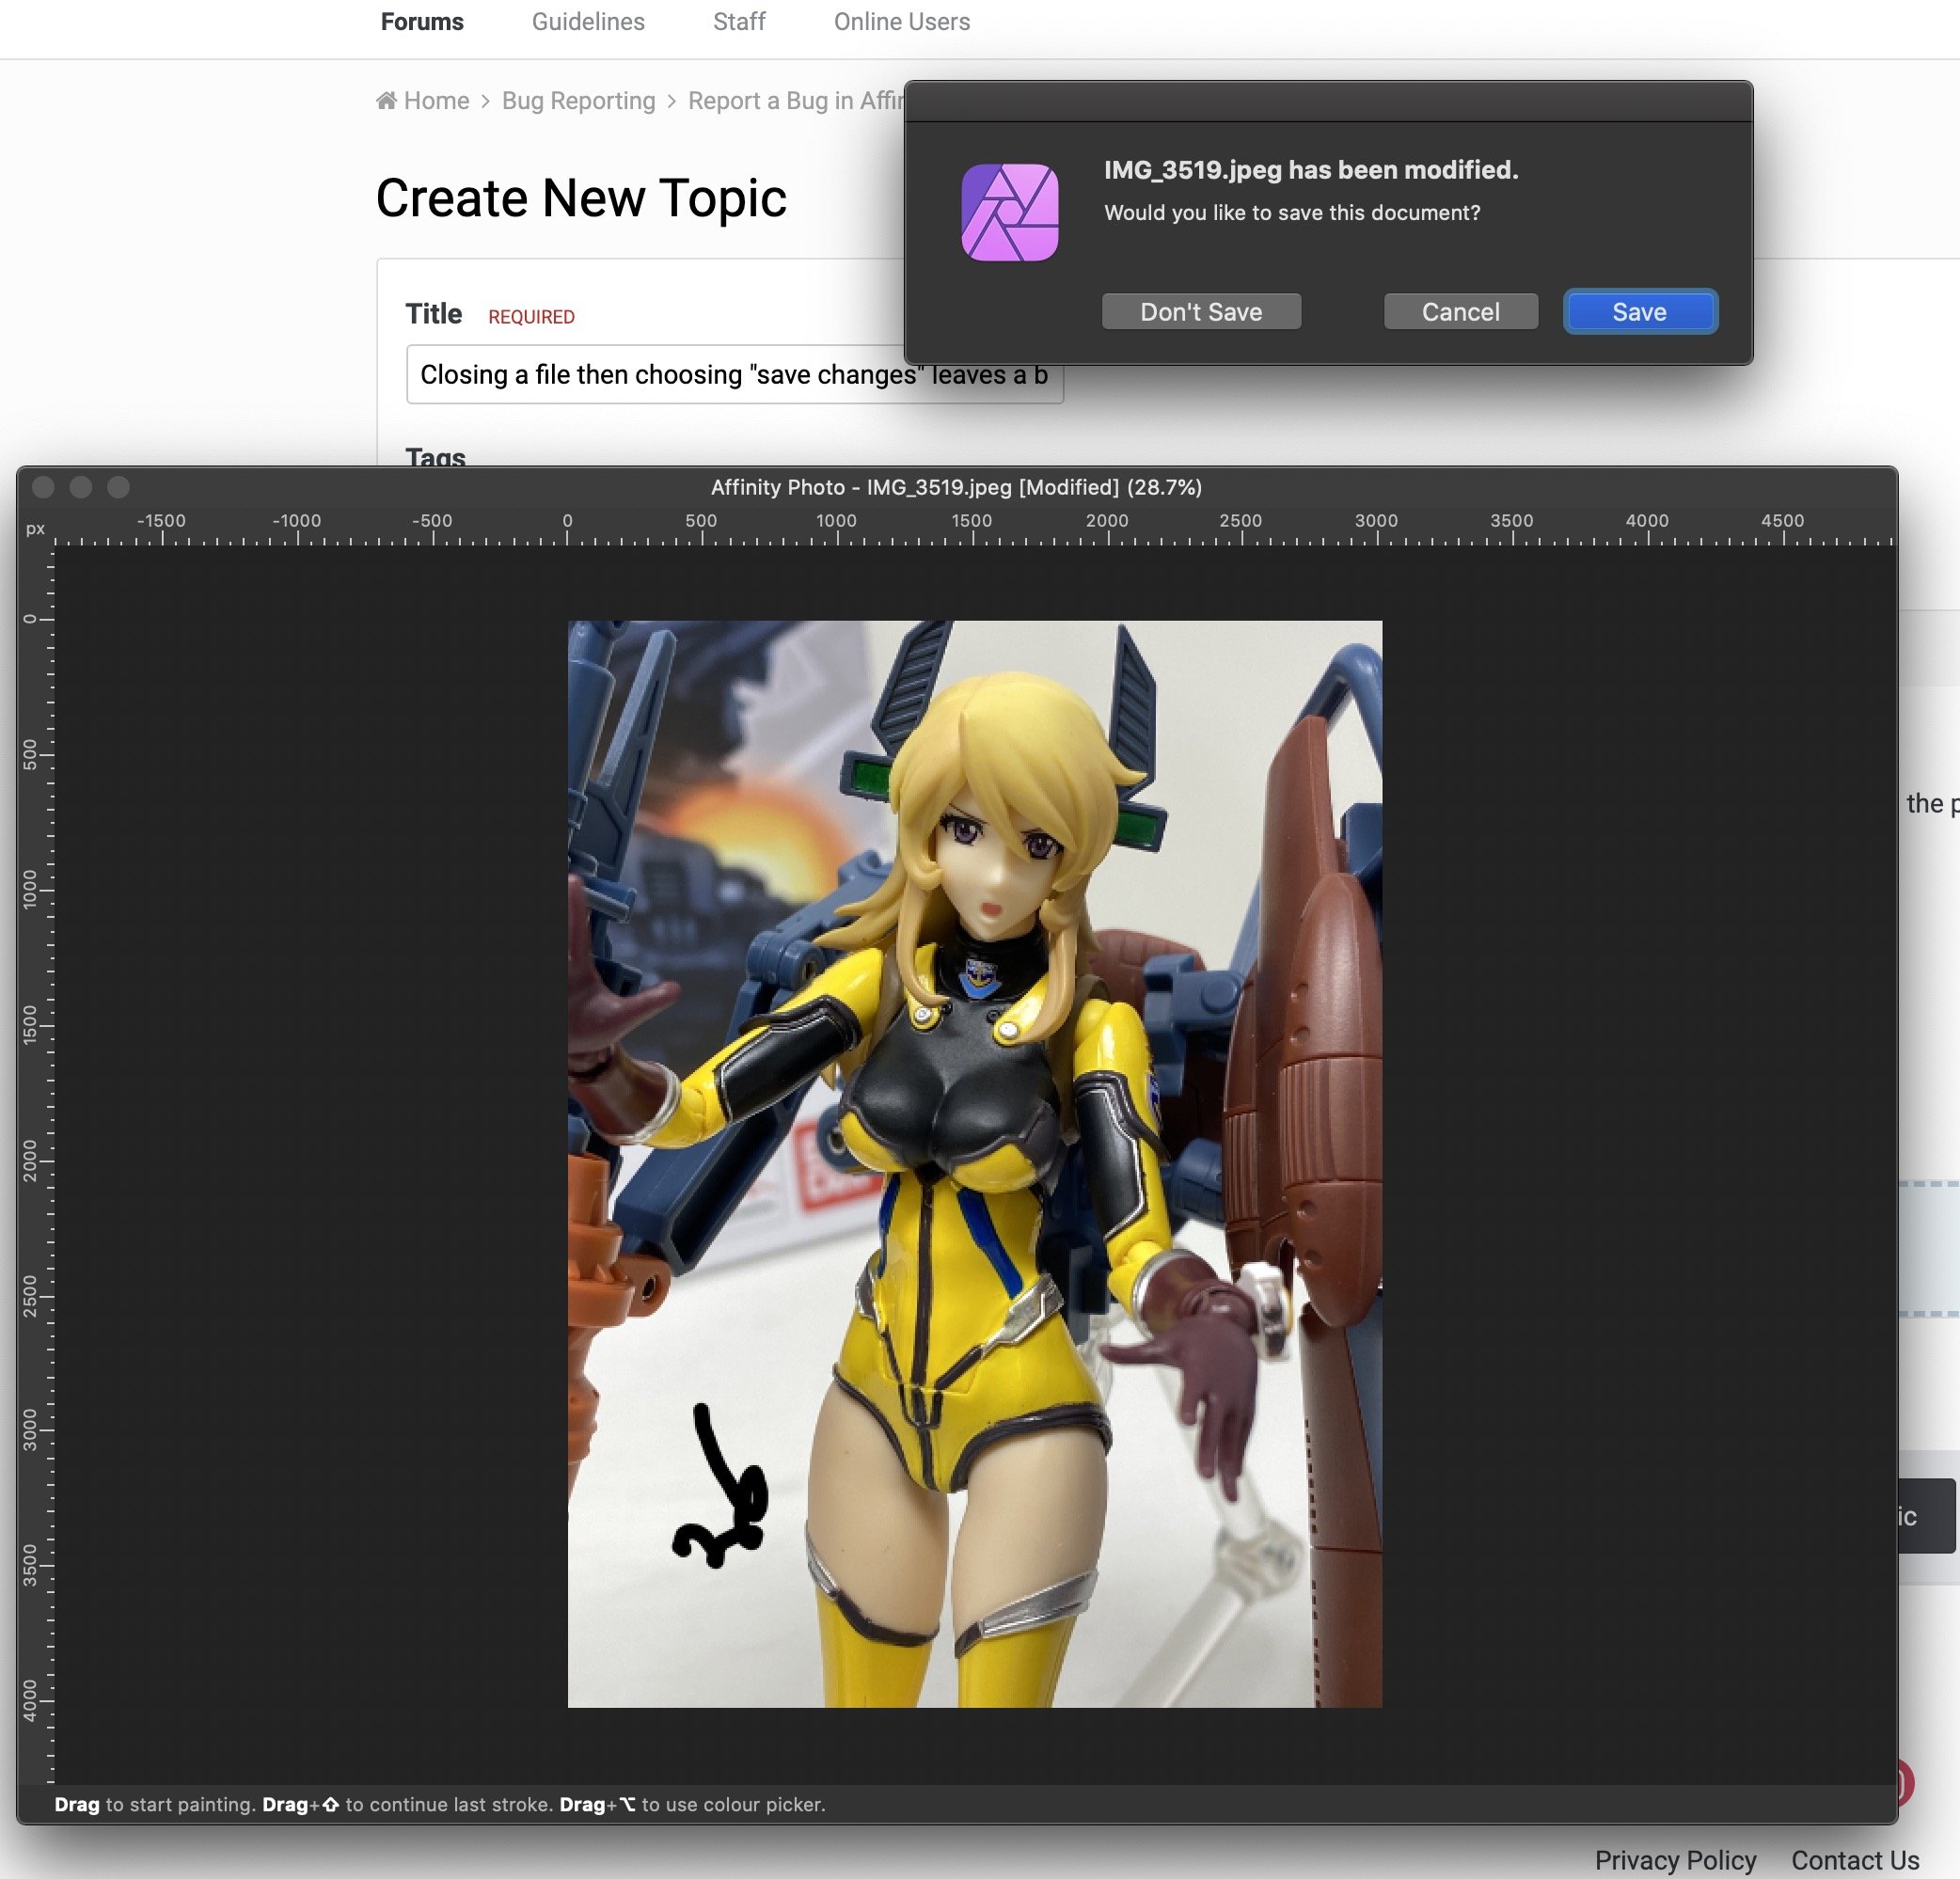
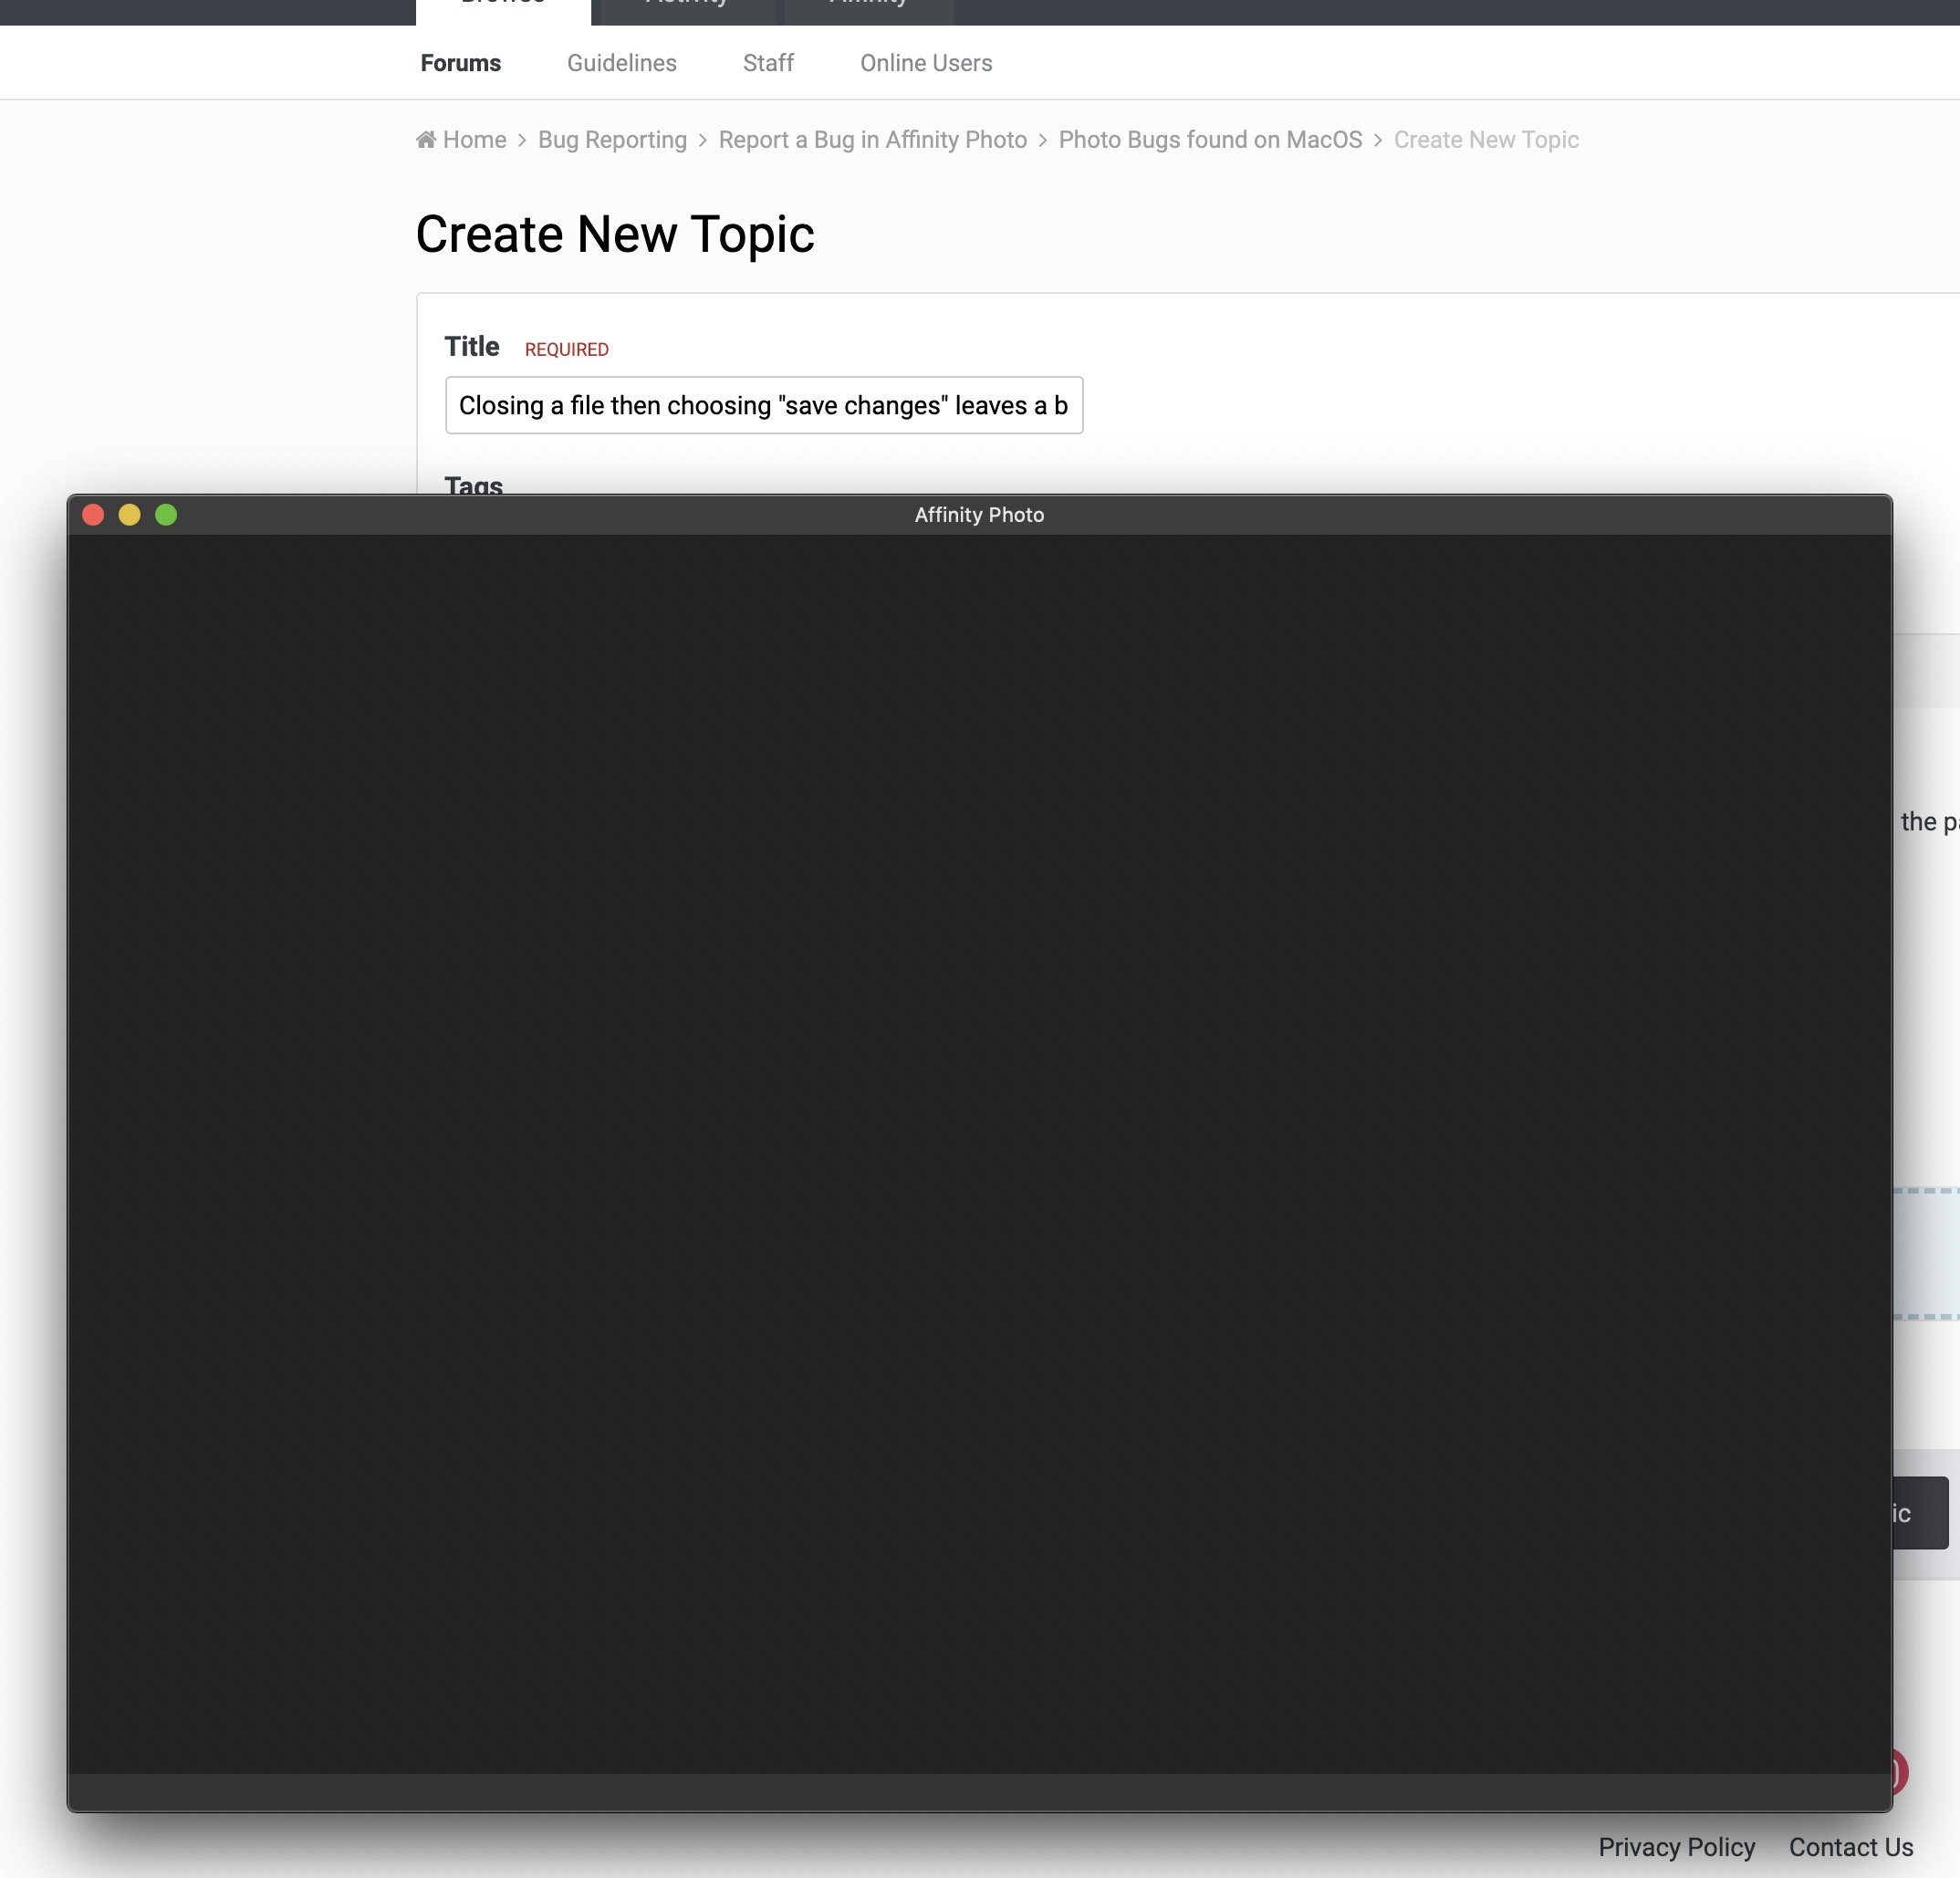
Using Affinity Photo 1.8.6 on a fully updated Intel iMac running Mac OS 10.15.7 (19H15), I have the following repeatable bug: Closing an image that has changes that need to be saved causes the program to ask me if I want to save (which is normal), but after it saves and closes the image, I end up with a blank functionaless window where my open file used to be. Since the blank window is a bug, I can't even close it with command + W and must use the mouse to click the close box (frustrating). Steps to recreate: Open an image Draw some random lines somewhere Type command W to close The app asks if I want to save (which is expected) If I click Save, it saves and closes the document...but leaves the dead window behind. If I save the file first, then close with command W, everything works fine. This is a frustrating visual bug that I would love to have fixed. Incidentally, closing a changed with the close box instead of command W also leaves the dead window behind. So it's not just the keyboard shortcut.
-
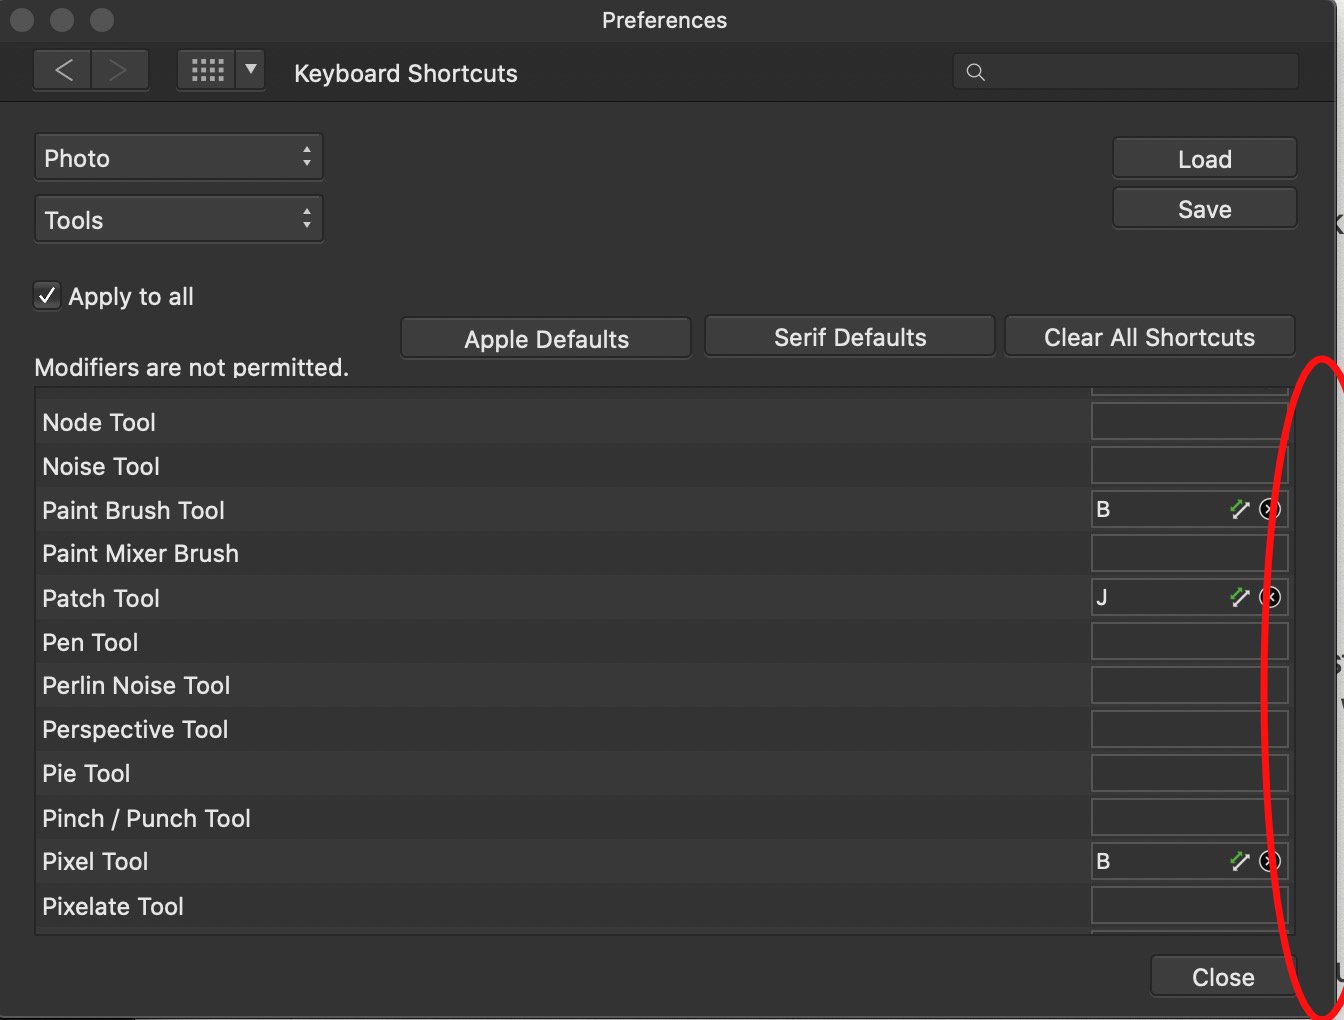
Using Affinity Photo 1.8.6 on a fully updated Intel iMac running Mac OS 10.15.7 (19H15), I have the following repeatable bug: It's great that we can exercise such control over things like keyboard shortcuts for our tools. I noticed that there's a bug that results in the "slider" (the visible UI element you pill up and down when scrolling up and down manually) is "active" even though it's not visible (because it disappears after a few seconds). So when I clicked the X box to remove some shortcuts, it caused the keyboard shortcuts to scroll up and down as if I'd scrolled. I have to click on the left side if the X circle to get it to register removal, rather than scroll my options up or down. A very small bug but one I thought 'd bring to your attention.
-
And here is a lazy version... 😏
-
 Do any of the current Affinity products provide a mechanism for extracting metadata from tiff/jpeg files that can then be used to generate captions or other text objects? The old Lightroom, for example, had some support for extracting metadata from images and using that data to format captions ... this was useful for creating slideshows and generating captions for books. Perhaps this feature is available in some other Affinity Product (Designer)? Thanks
 -
 Hi, We are going to edit a photo from the ‘Botanical theatre’ series I took and posted on Instagram. This walk-through is created in Affinity photo for iPad but if you have a desktop version please give it a try. I think it shouldn’t differ so much. flower in Vysehrad by miresk -Original (download here) As I was reviewing the photos I got an idea to create something saturnine :) According to Merriam-Webster dictionary there are a few meanings. One of them is the following: Here is a result after a few edits that we are going to make together. By the way, did you know that Saturn’s rings are made mostly of chunks of ice? Brrr..I think that definition above could work for this image. Result 1. Perspective A photo we work with has a grid on the wall. As a first step let’s change the perspective of this photo to create a bending wall effect. Something that looks like if we were inside a well. Click the three dots to expand the menu and select Projections -> Equirectangular Projection. Move around the photo until you are happy with a perspective. We want one flower to stand out in the final composition so keep that in mind. 2. Tracing with pen tool Now after we applied the projection we can use the pen tool to select a few tiles on a wall. We will later use them as windows that we can look through. Select Pen tool and click from one corner of a tile to another creating the lines until you close the first point. TIP: Select Edit Mode (1st icon from left at the bottom of the screen) to quickly adjust the nodes and curves. After you trace the lines Use fill (for example white) to see what you have already traced. 3. Download space images There is a cool feature called Stock where you can browse images available to download and use them in your work. I wrote ‘saturn’ in the search bar and found a photo of space I liked. Then I switched to Pixabay service and downloaded an image of Saturn planet. Stock images 4. Rasterise the layers We can hide the downloaded images for now as we are going to rasterise the vector layers created with pen tool from step 2. Select a layer, click on the 2nd icon from left top in Layers panel and select Rasterise. Do this step for each vector layer (white squares). If you know how to rasterise several selected layers at once let me know please 5. Merge selected layers and mask In this step we are going to select all pixel layers we rasterised. On iPad version of Affinity Photo you can do it by swiping a layer for example from left to right. When they are all selected, go to menu options as in previous step and click Merge Selected. We will get 1 layer from the objects we traced with the pen tool. Grab this layer and drag it onto a thumbnail of the space photo as displayed below. This will effectively create a mask, and we can look through the windows to universe. 6. Clean up the scene with the erase brush tool Bring the opacity of the universe background down and zoom in to parts where the flowers intervene. Erase these parts of the mask so the leaves can shine in the moonlight 7. Making it more saturnine We are almost done. It’s looking pretty good but Saturn is still missing so let’s make it visible and move it to top in the layers panel. I placed it at the top so it’s nicely aligned with the grid, rotated it slightly and erased the black parts of the image so only the planet itself is visible. Then I applied the Darker Colour layer mode which made some segments of the image noisy. 8. Final tweaks in Develop mode Select the background photo (wall) and go to Develop mode (lens icon at the top). There we can adjust many things like curves, brightness, colors etc. but I adjusted only Vignette effect to make the corners darker so the flower stands out a bit more in our final composition. And that’s it. I would like to see your version so please feel free to share it. Many thanks for reading!
 -
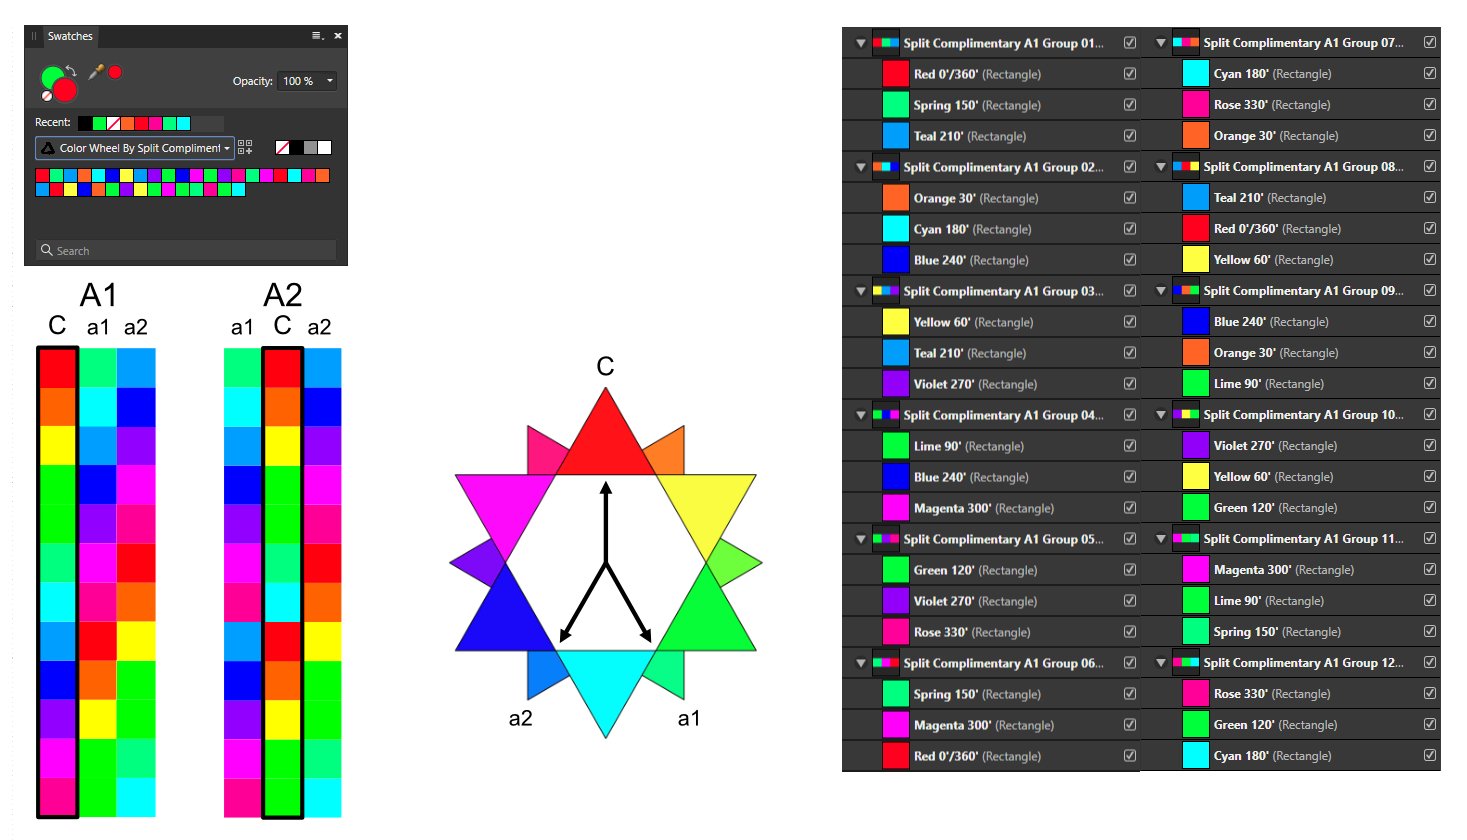
Color Wheel By Split Complimentary A1 & A2.afpalette...Enjoy, T V Color Wheel By Split Complimentary Color A1.afpalette Color Wheel By Split Compimentary Color A2.afpalette
-
- 1
-

-
- affinity photo
- affinity designer
- (and 3 more)
-
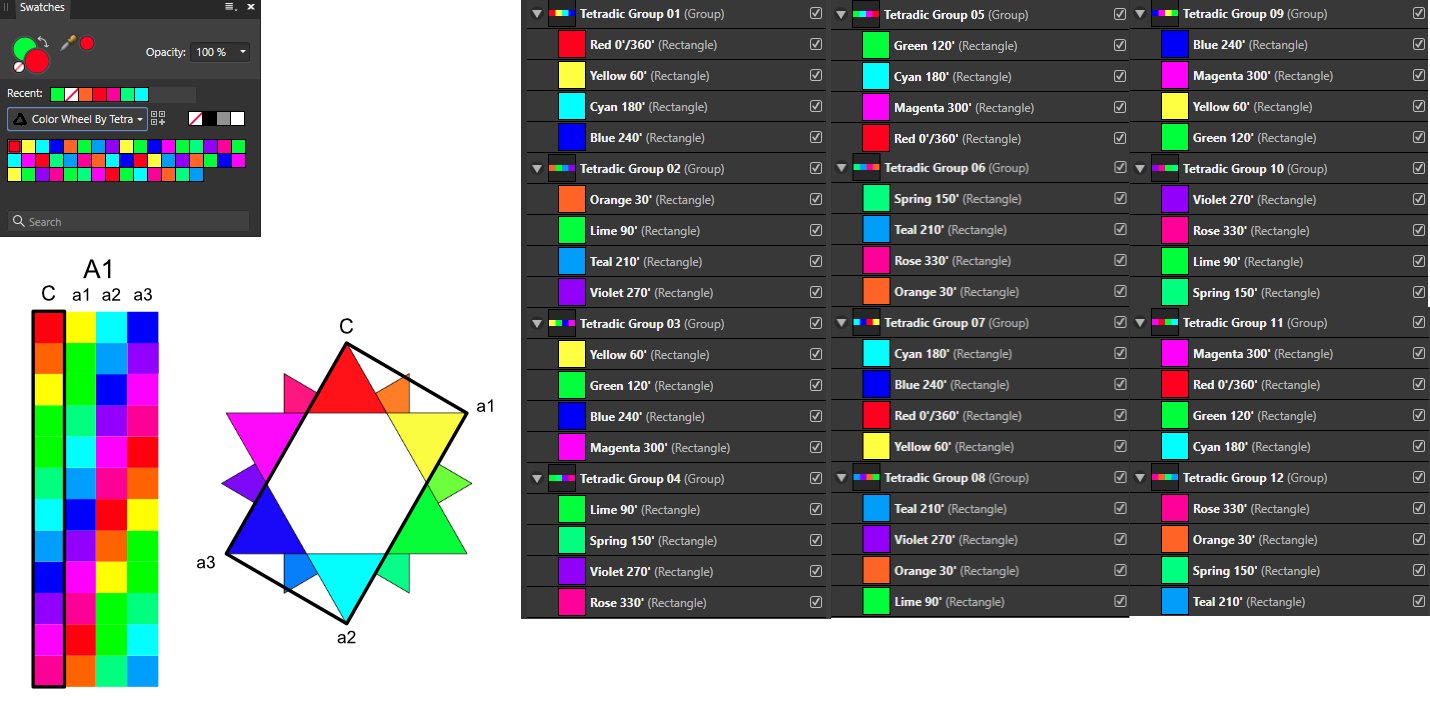
Color Wheel By Tetradic Color.afpalette...Enjoy! - T V Color Wheel By Tetradic Color.afpalette
-
- 1
-
-
- affinity photo
- affinity designer
- (and 3 more)
-
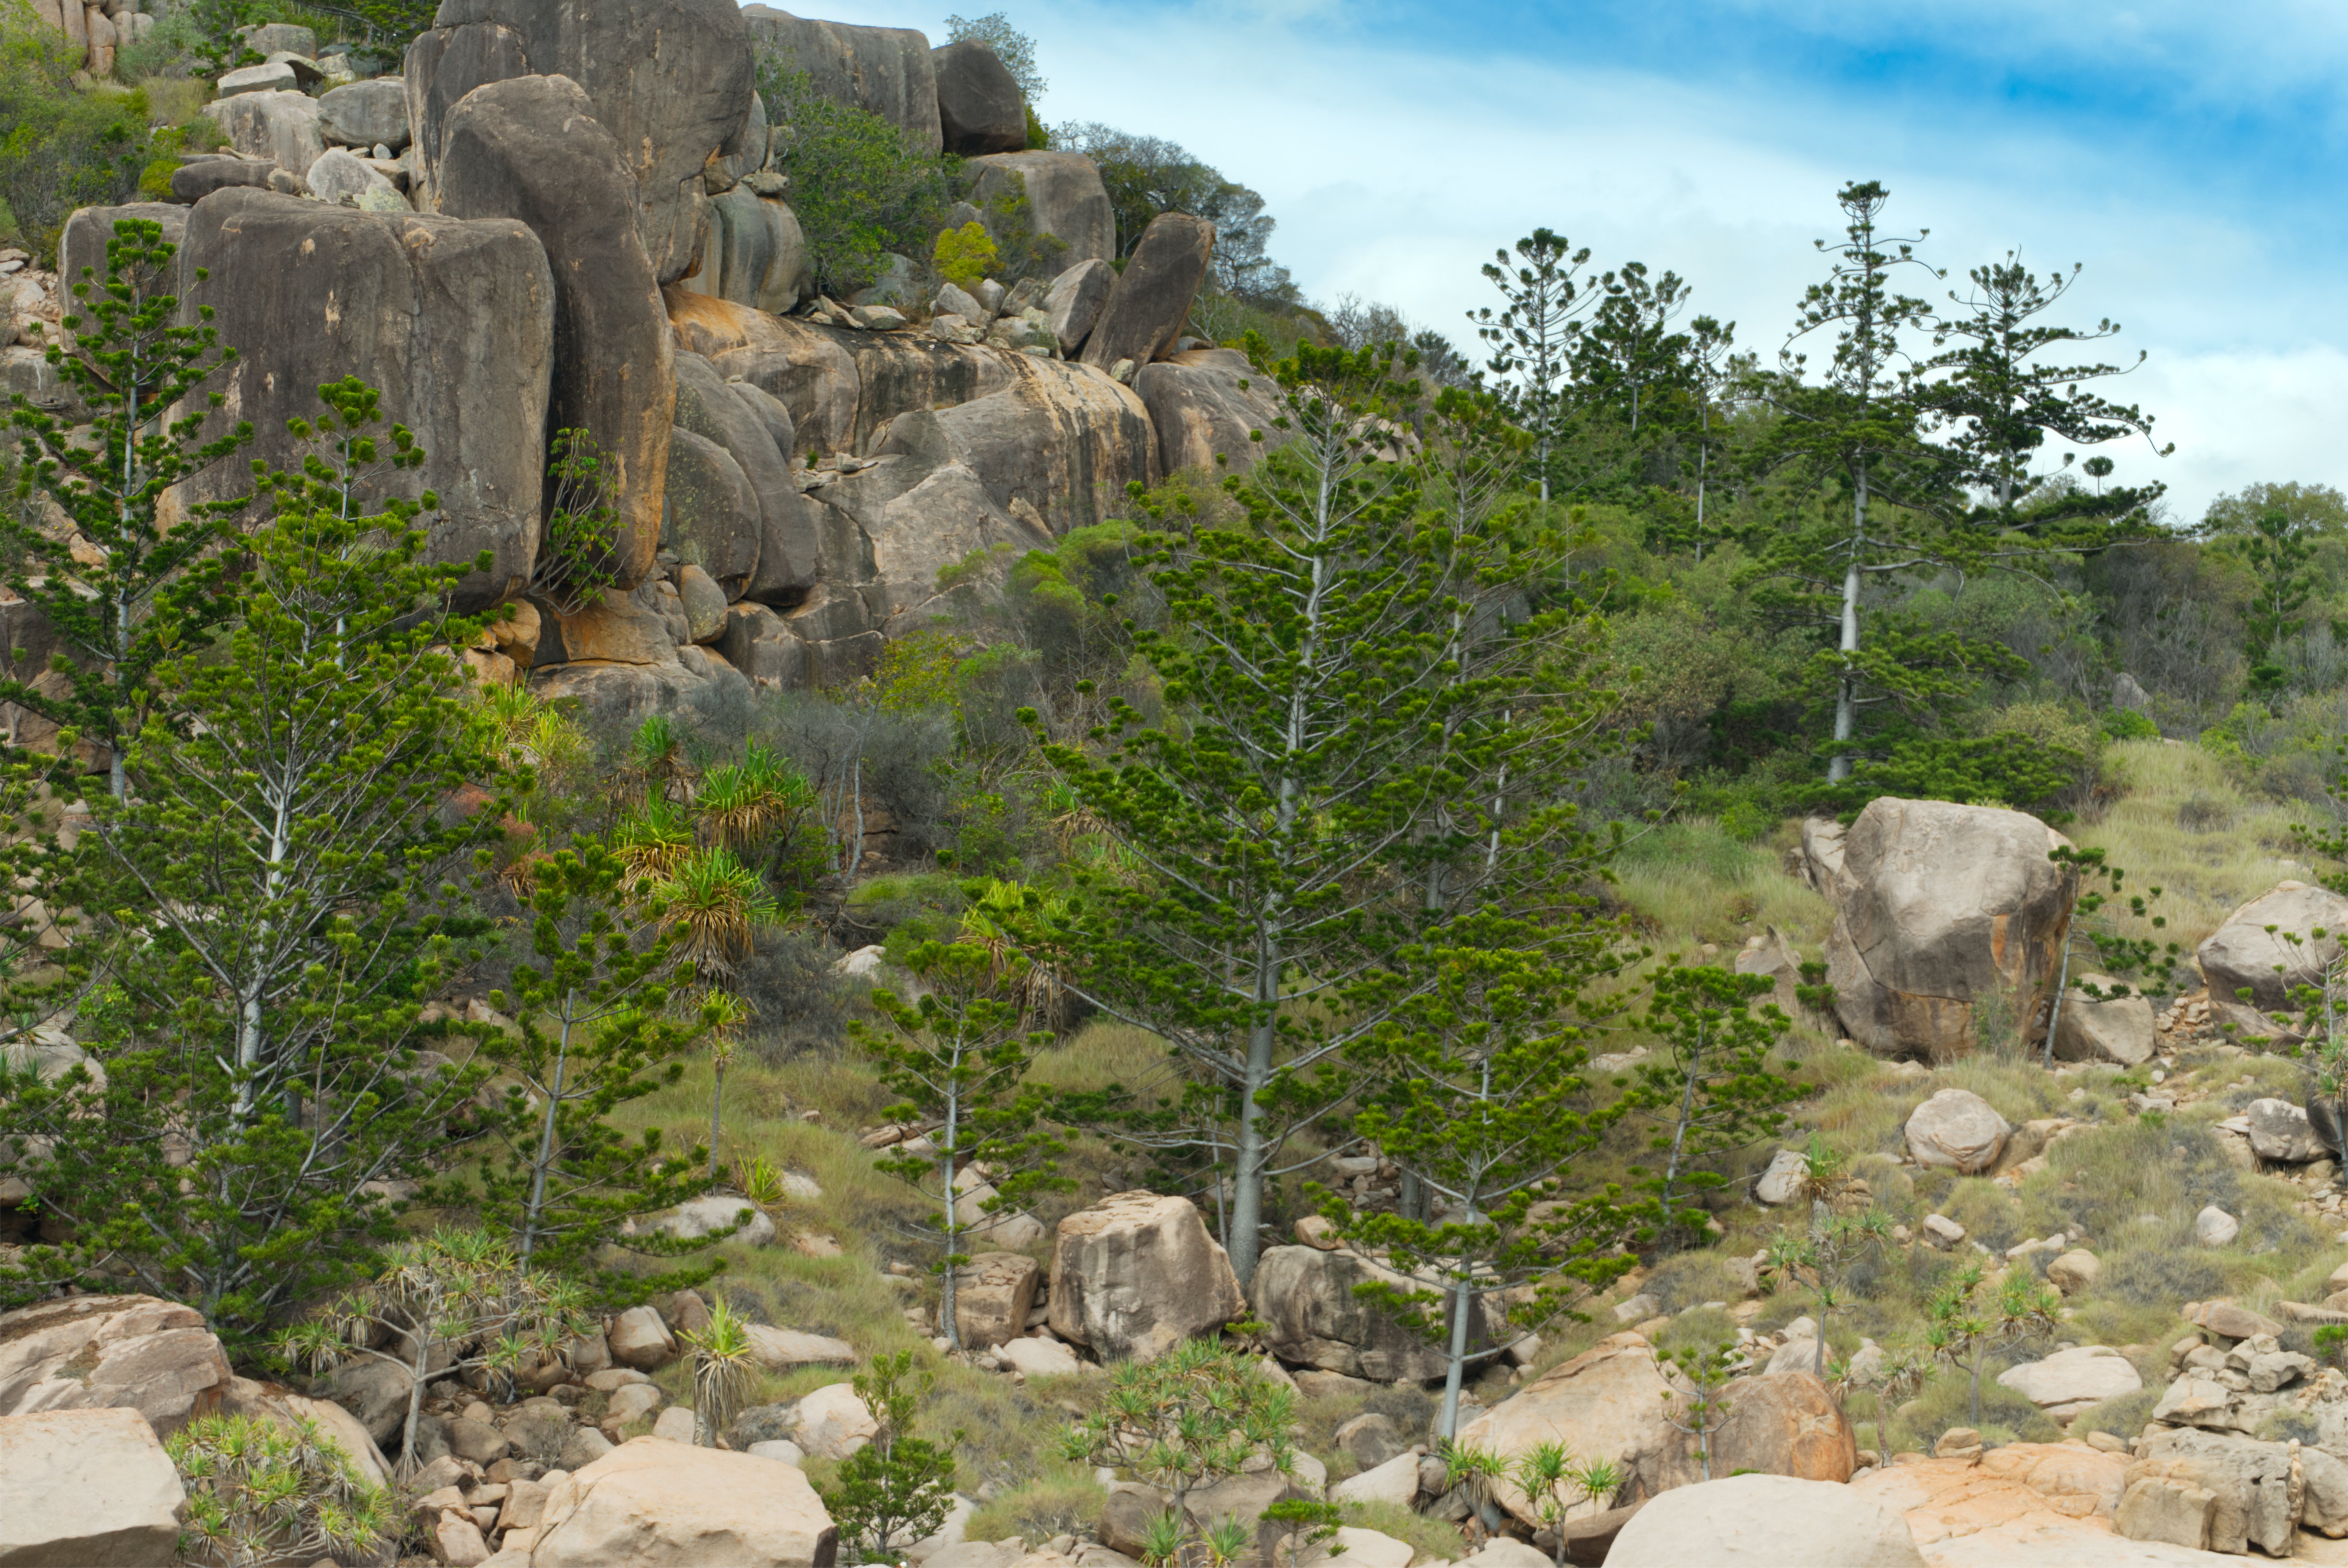
As a recent convert to Affinity I've been going through my difficult images folder. The best I've done with this one so far. It was taken from a boat so I was a bit restricted for time and what I could do with the composition.
-
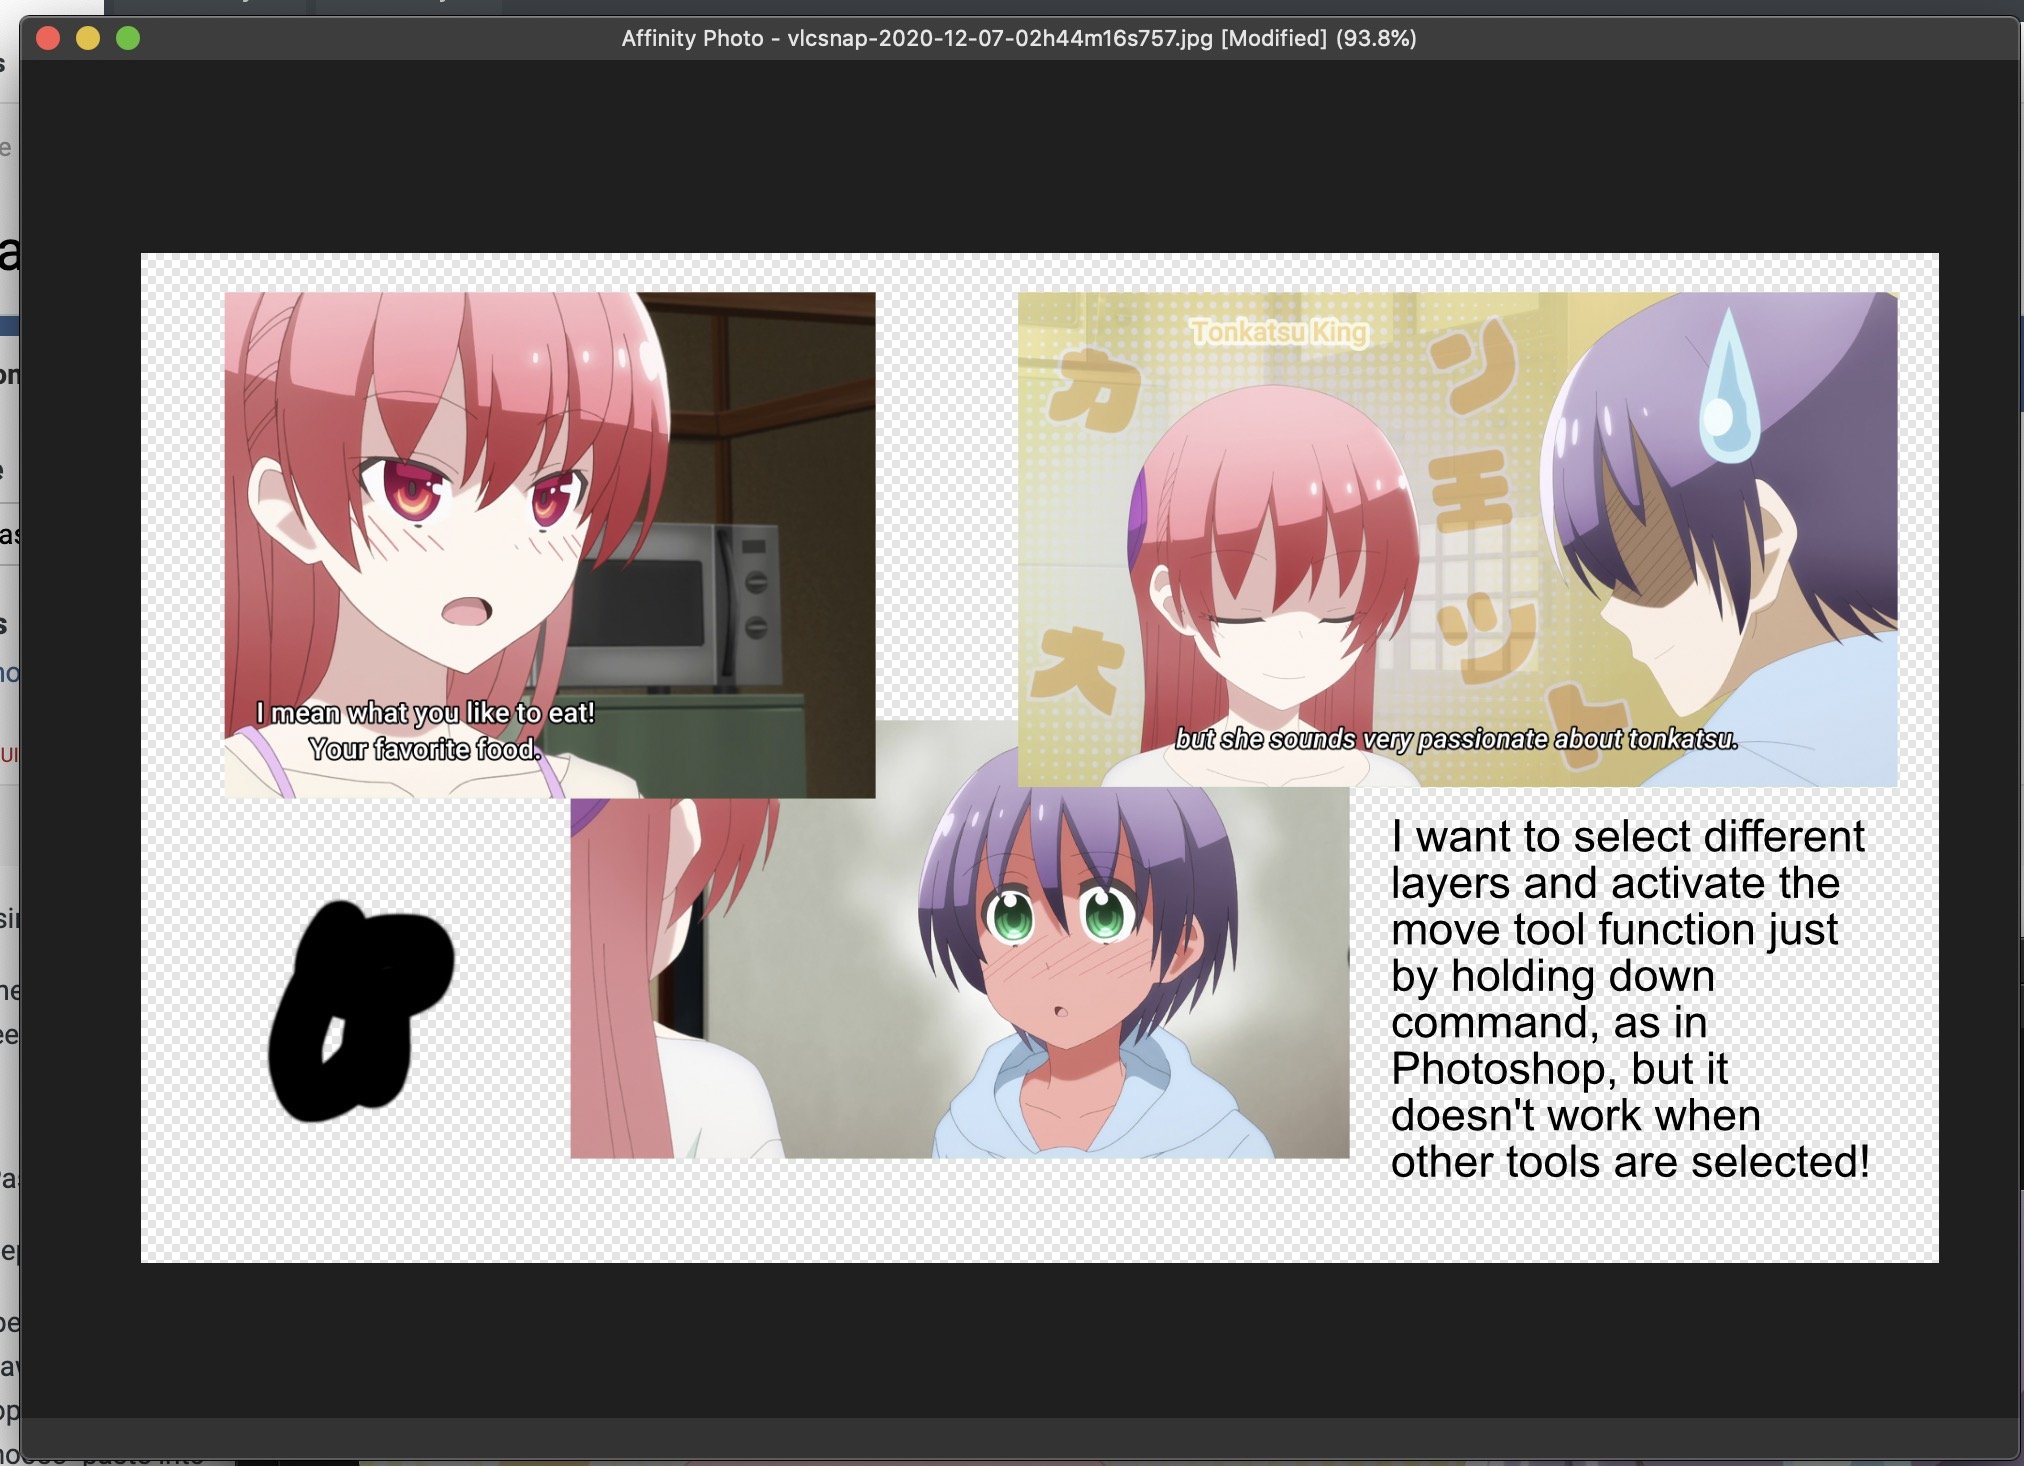
Using Affinity Photo 1.8.6 on a fully updated Intel iMac running Mac OS 10.15.7 (19H15), I have the following major frustration, when coming from Photoshop: One of the "holy grails" of using Photoshop is that you can switch to "move mode" allowing you to select layers and move stuff around freely just by holding the command key on a Mac (control key on a PC). Sadly this doesn't seem to work on Affinity Photo, or work reliably, and I am forced to hit V or select the Move tool manually. Considering the move tool is mostly used as a "click to select other layers" tool, and considering that I do this perhaps more than any other thing when working with an image, we'd really like to get "command + click = select layer and move always" to become a thing in AP. In. my example, I have various layers and am moving them around, organizing them into whatever final layout I need. I need to easily select the layer without de-selecting the tool I'm using (brush, eraser, whatever). But I have to type V and move into Move mode before I can do these selections. This is one of the biggest frustrations coming from Photoshop. (Yes, I know AP is not Photoshop and I shouldn't want it to be, but I've got 30+ years of muscle memory using Photoshop and it will be to the benefit of Affinity Photo if more users can easily move over and work in the way they're accustomed.)
-
- 1
-
-
- move tool
- affinity photo
- (and 1 more)
-
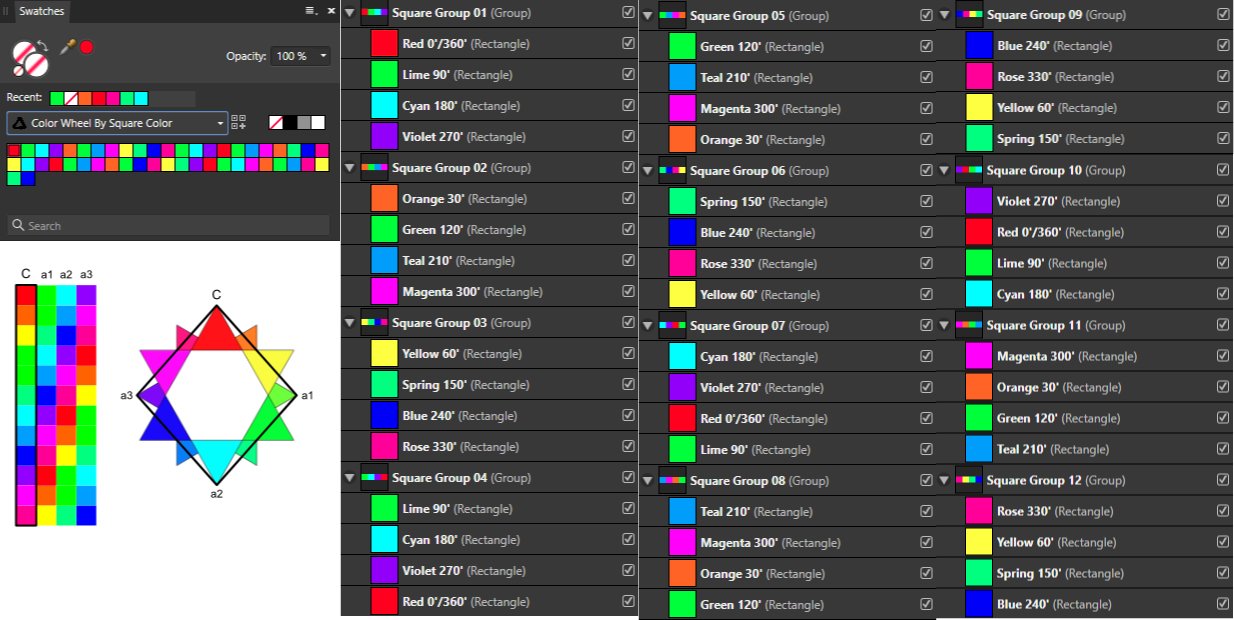
Color Wheel By Square Color.afpalette...Enjoy, - T V Color Wheel By Square Color.afpalette
-
Color Wheel By Triadic Color A1 & A2 .afpalette...Enjoy, T V Color Wheel By Triadic Color A1.afpalette Color Wheel By Triadic Color A2.afpalette
-
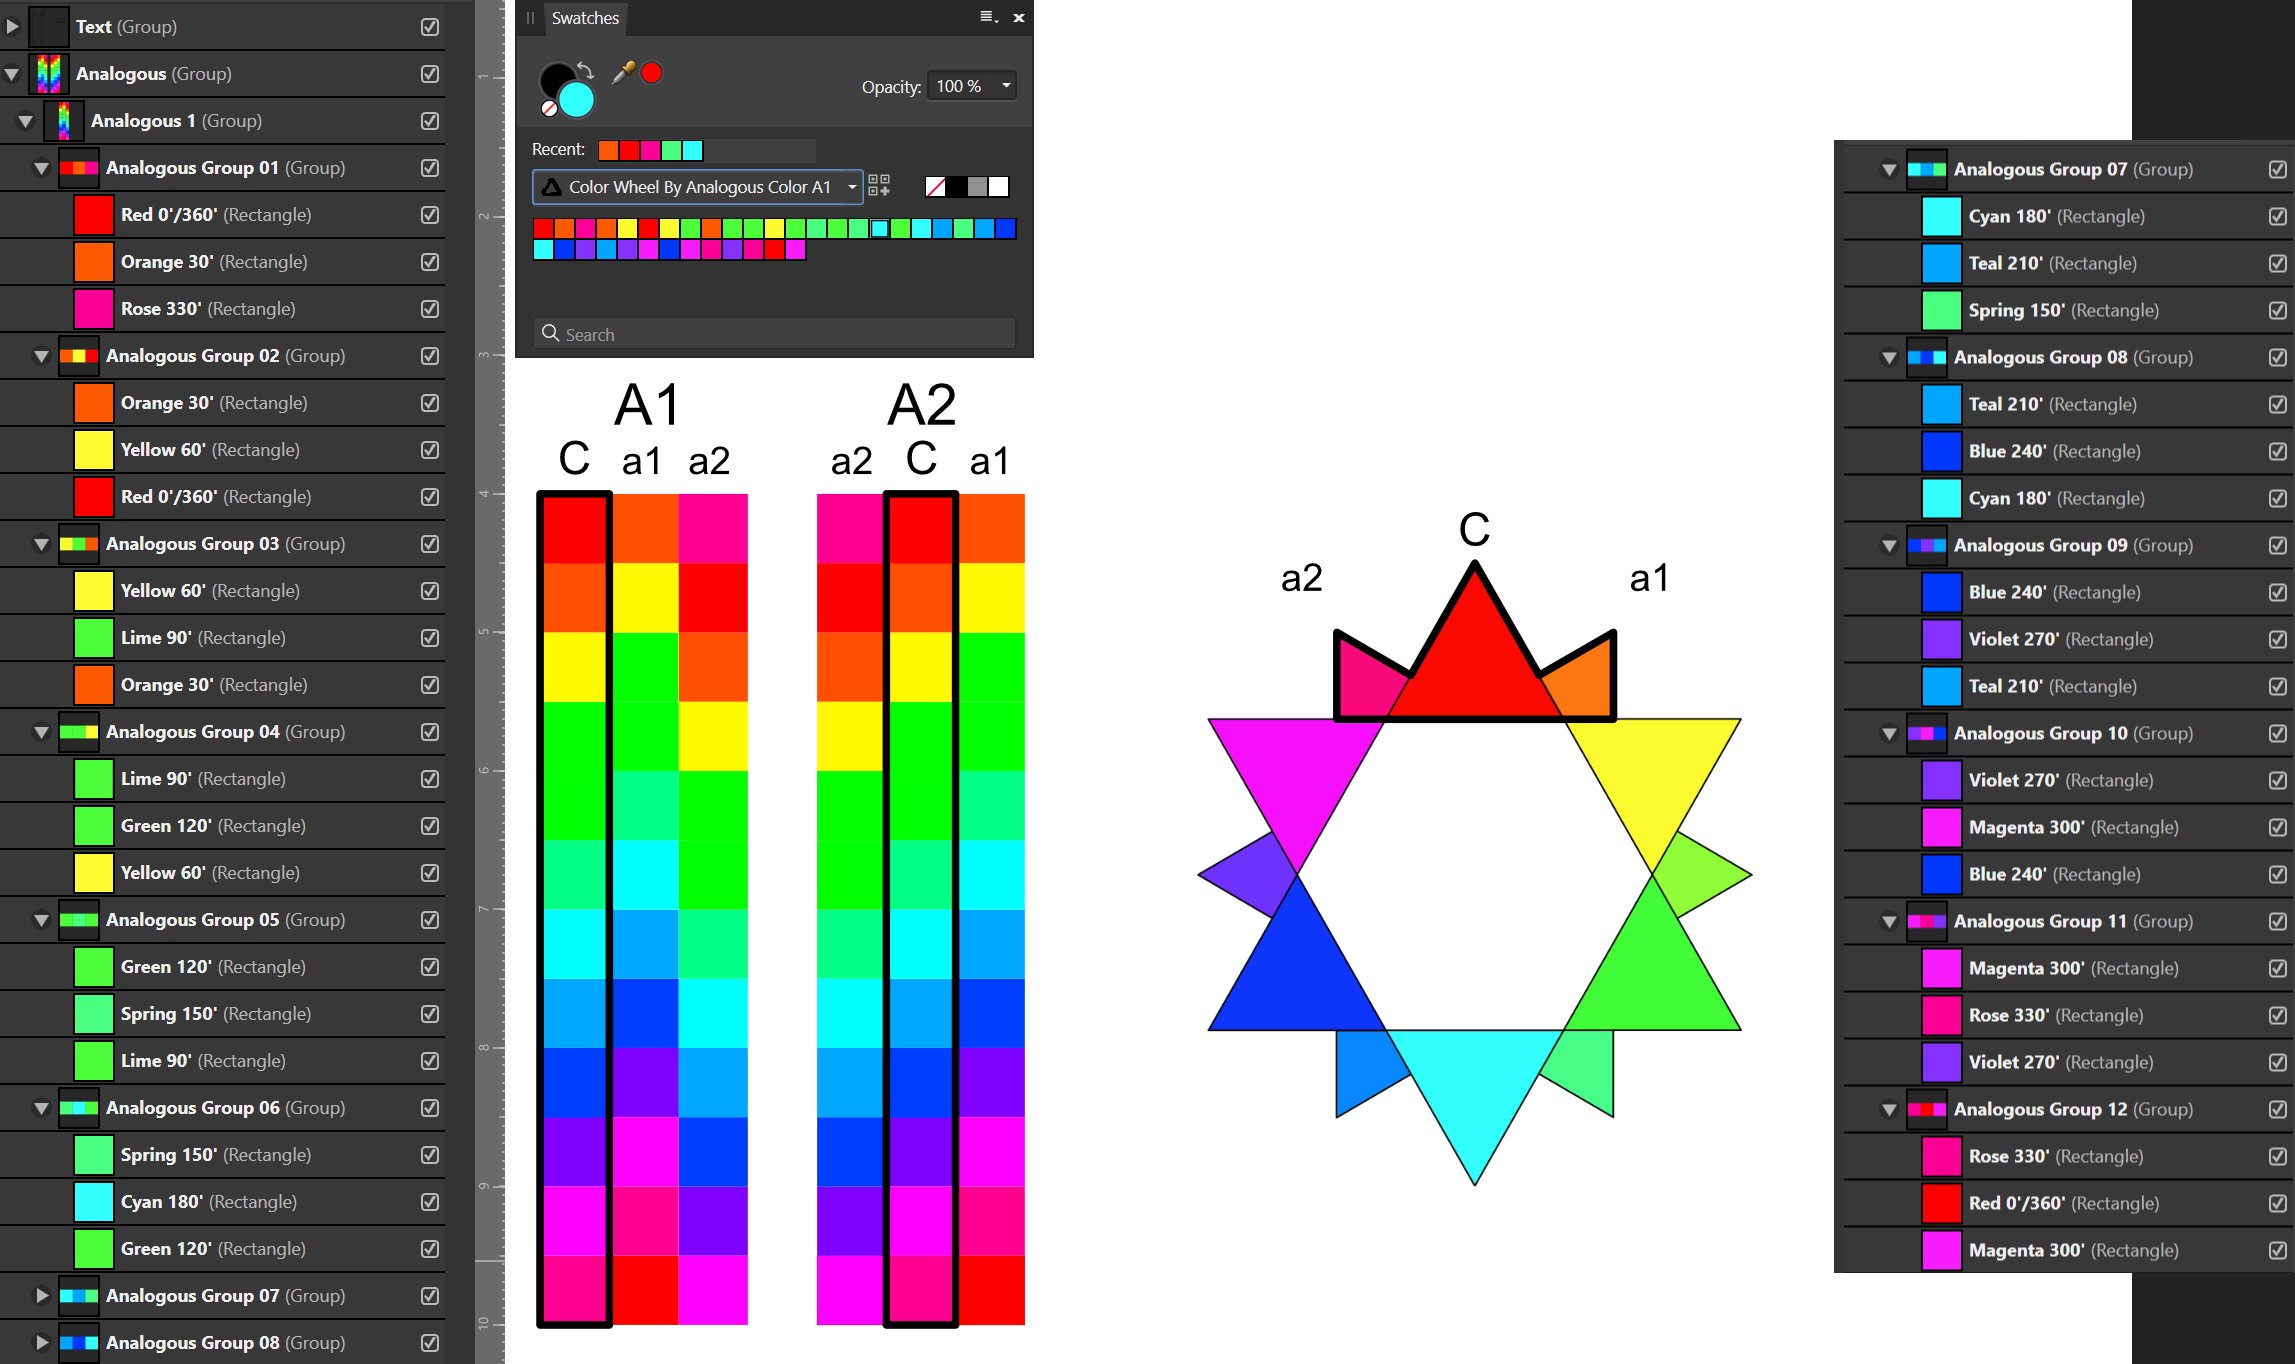
Color Wheel By Analogous Color A1 & A2 ...Enjoy, - T V Color Wheel By Analogous Color A1.afpalette Color Wheel By Analogous Color A2.afpalette
-
- 1
-

-
- affinity photo
- affinity designer
- (and 3 more)
-
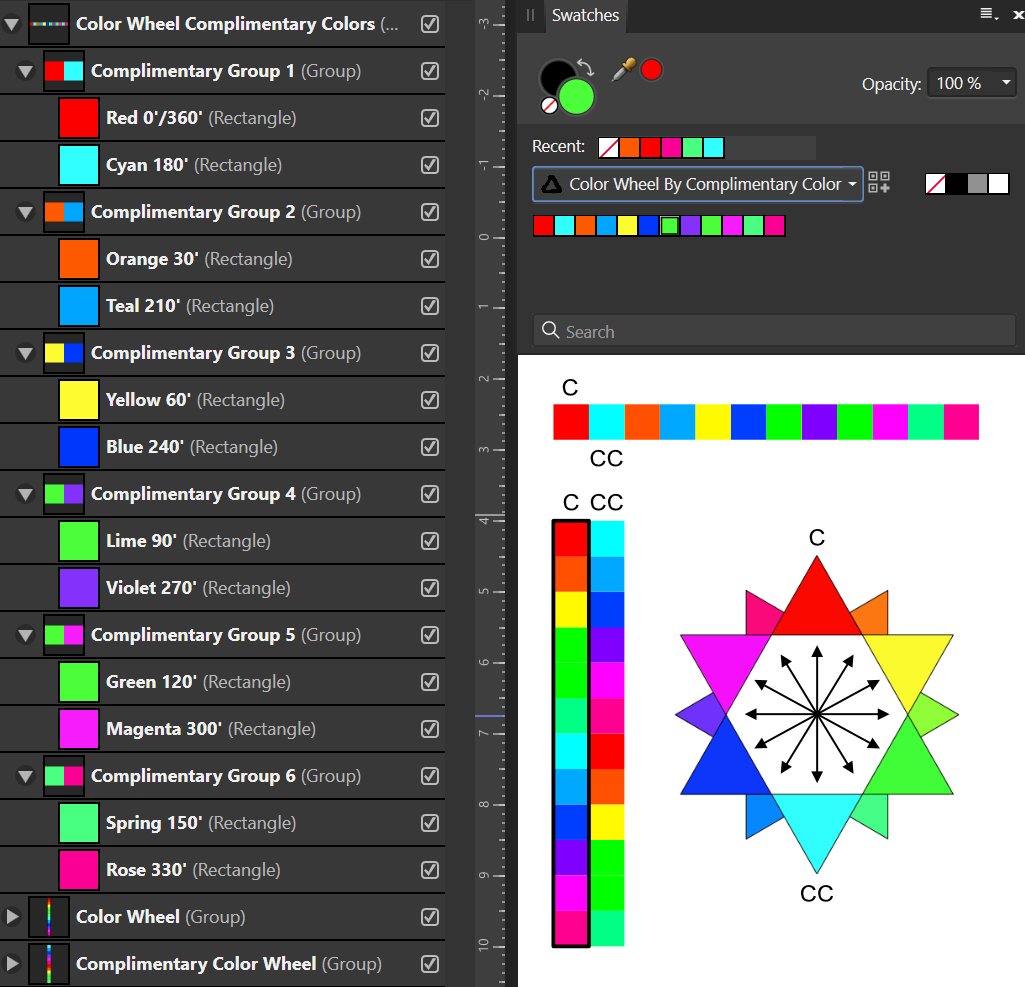
Color Wheel By Complimentary Color...Enjoy, T V Color Wheel By Complimentary Color.afpalette
-
- 1
-
-
- affinity photo
- affinity designer
- (and 3 more)
-
-
 Hello, what would be the best way to remove alpha channel pixels from a layer or make them fully opaque? In case I'm not making sense, here's an example: I add some red background and make a stroke with the brush over it with a green color, there's going to be red pixels of the background, green pixels of the brush and pixels that are green with alpha channel - how could I remove those with alpha channel or make them fully opaque? Both GIMP and Photoshop have ways of doing this for whole document, layer or selection, I'm curious how one would do this in Affinity Photo, or even Affinity Designer. I could provide an example if needed. Thanks!
 -
 Hello Affinity, When I first extricated myself from Adobe Photoshop, I purchased Affinity Photo from the App Store on my iMac. Photo has been working well and updating appropriately. Both Publisher and Designer were purchased directly from Affinity. Not long ago, Publisher and Designer asked if I wanted to update upon opening and both now reside at v1.8.6. I realize that my purchase from the App Store for Photo requires getting my updates from them. However, Photo will only update to 1.8.4. I've even tried downloading the app again, but only installs 1.8.4. Call me anal, but I like to follow both Apple's advice, as well as Affinity's advice. 1.8.6 across the board should be easy. Any advice? Wolf
 -
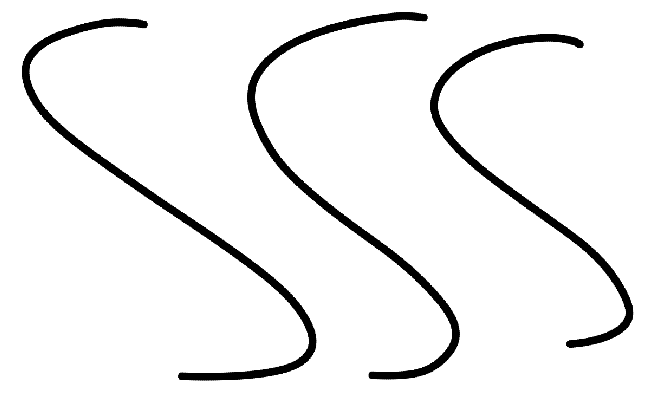
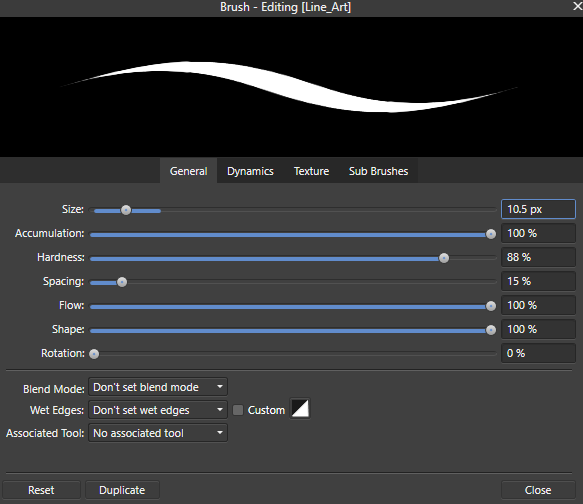
 Hi there!, Could somebody help me please, I've tried messing around with the settings on the brush tool to get tappered lines. I use a mouse to draw and when I do in affinity photo I get this; but When I draw in "Fire Alpaca" I get this; In fire alpaca I have, stablizer set to 38 and have "Force pressure on both ends" checked. What do I have to change to get the tapered effect in photo? I've changed the settings to this but still no luck; Please could someone help
-
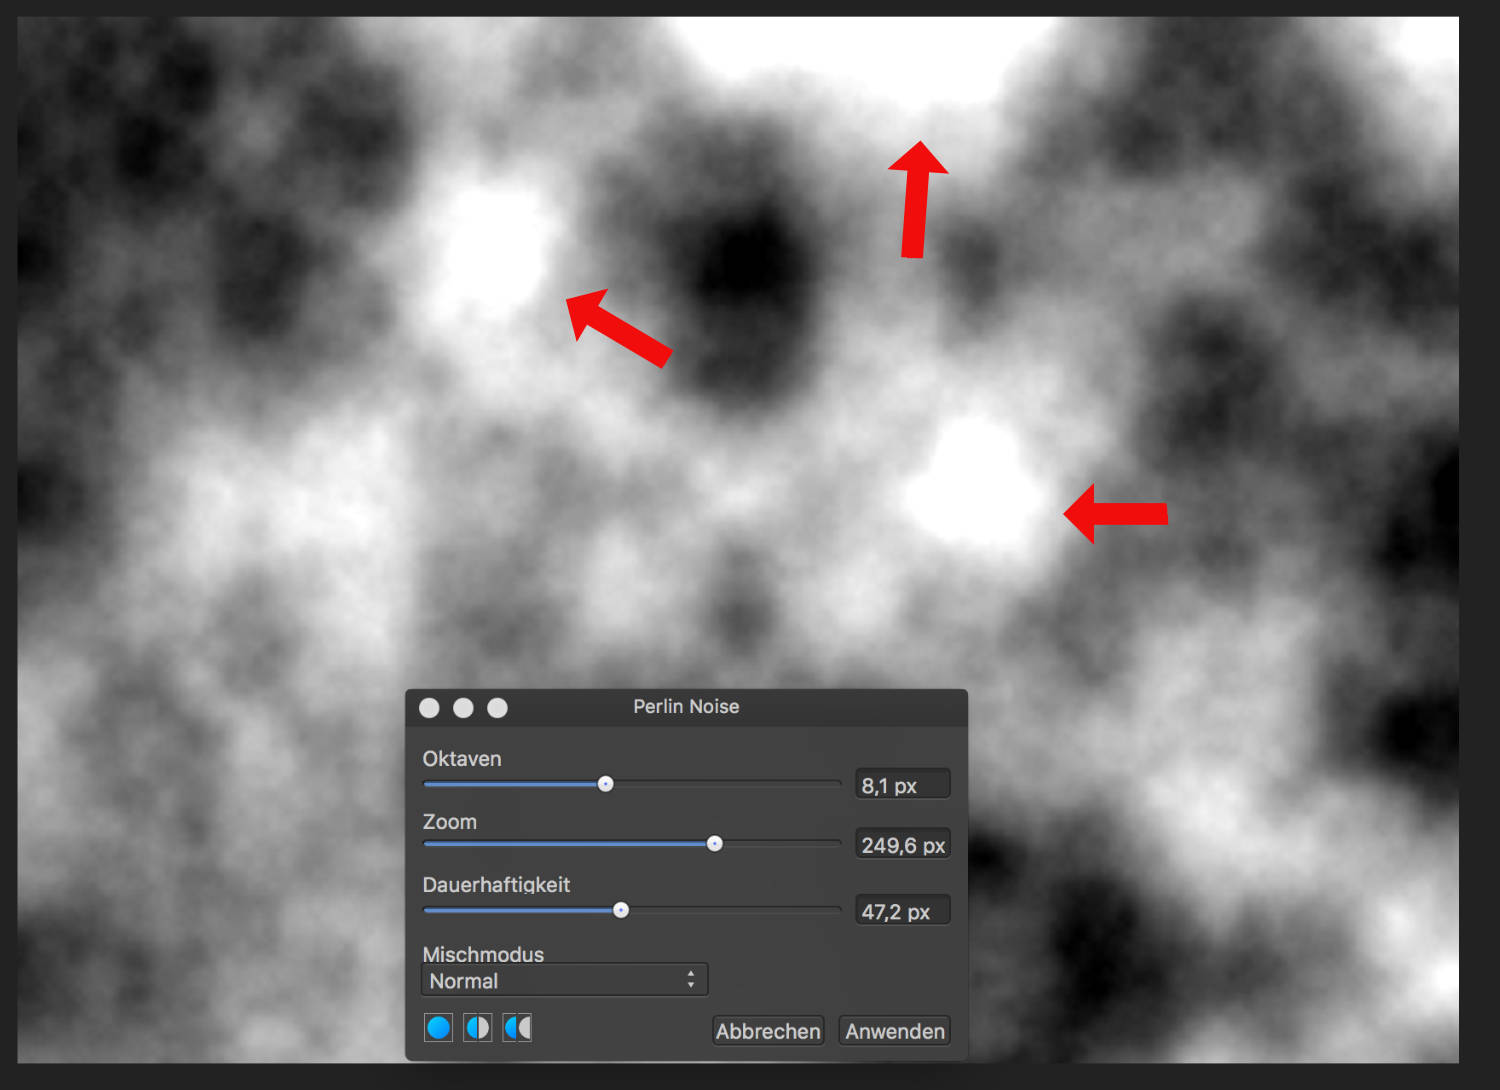
 Hi, I like the Perlin Noise Filter very much! Compliment!
- 5 replies
-
- 1
-
-
- Perlin Noise
- render
- (and 2 more)
-
 I am color blind, green blindness. Therefore, it is sometimes a guess if the color in a photo is accurate. Does anyone know if Affinity photo has a method of checking color? If a leaf is green I would like ensure the photo shows a green leaf. I hope you understand what I am asking. Thanks,
 -
 Hello! I am still new to affinity photo on the pc. I haven't had any problems with it at all until now. As I am drawing an illustration for a client my brush opacity is dropping to 0% without me doing anything but drawing. I have changed brushes, I have checked the setting for those brushes it even does it with the erase brush. It just randomly drops to 0%. I am using a huion kamvas 22 plus to draw with as well as a razer tartarus chroma for shortcut keys. The pen driver has no issues and nothing has changed with my razer keypad. I am at a loss on how to fix this. I have to change the opacity back up to 100% every few minutes and I am unable to work. Is anyone else having this problem or knows how to fix it?
 -
 Hello, recently I was extracting a logo from a white background in Affinity Photo 1.8.6 and imported it into the latest version of Final Cut Pro and noticed some noise around the edges. I thought at first I just didn't look close enough when I masked it, but when I exported with black in the background it looked clean. I attached an image that was blowup so the overall quality is not great, however I placed the keyed version on top and cropped it so you can see a side by comparison of what I'm talking about. The left side has the image with the background included in the PNG, the right side is keyed over the left image. As you can see, there is noise all around on the right side. I created the same masking in photoshop and it was clean. Has anyone had this issue?